Cart
Your shopping cart is empty!
It's never too late to make things right :)
As a vintage camera repair specialist, each piece that comes into my workshop tells its own unique story. In the world of Soviet optics, the path often begins with Leica. Just as the ancient texts start with "In the beginning was the Word," the story of 35mm film photography begins with Leica - a camera that transcended borders and inspired countless iterations worldwide.
Through various transformations, this design reached the Soviet Union where, under Makarenko's guidance, it evolved into the FED camera. Yes, there were simplifications and modifications, but this began an era of widespread camera production across the country.
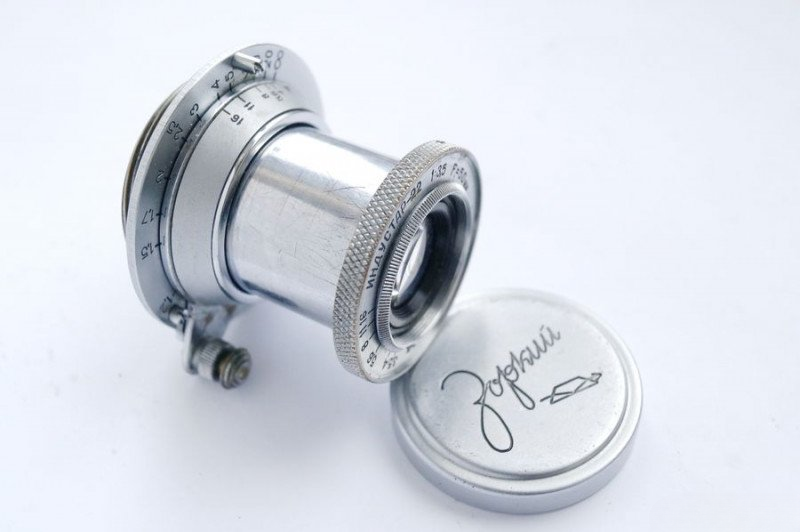
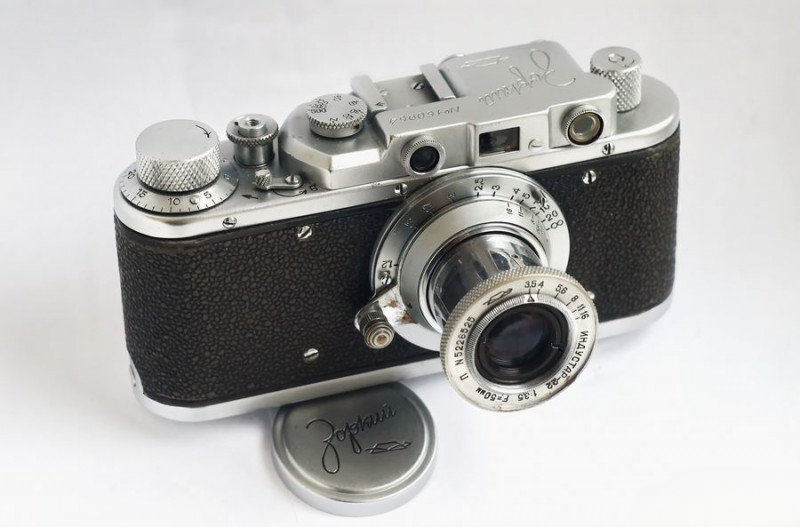
What the early FED cameras needed was precision optics. Thus, with advancing technology, the FED camera was refined, gaining new capabilities and eventually becoming the "Zorki" (meaning "sharp-sighted"). Yet, Zorki remained fundamentally a Leica copy, one of whose magnificent features was the Leitz Elmar lens, designed with a collapsible tube that made the camera truly pocket-sized.
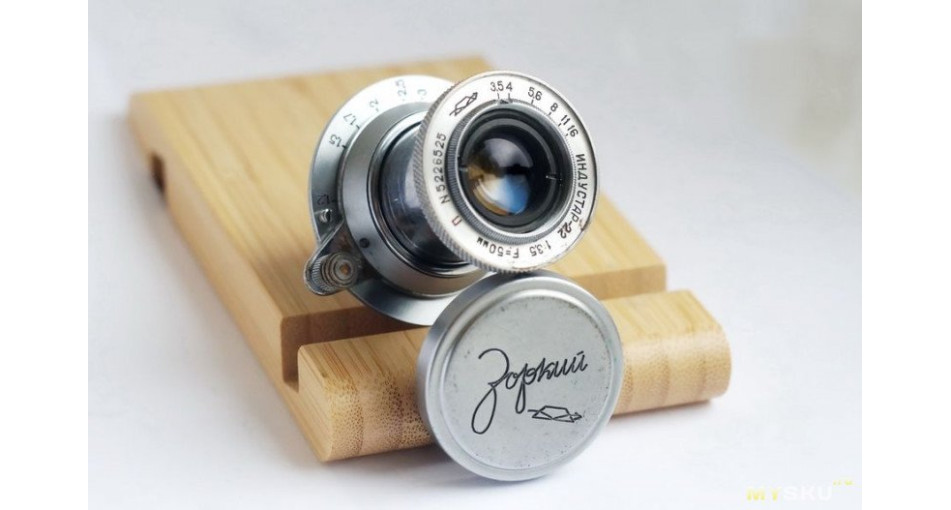
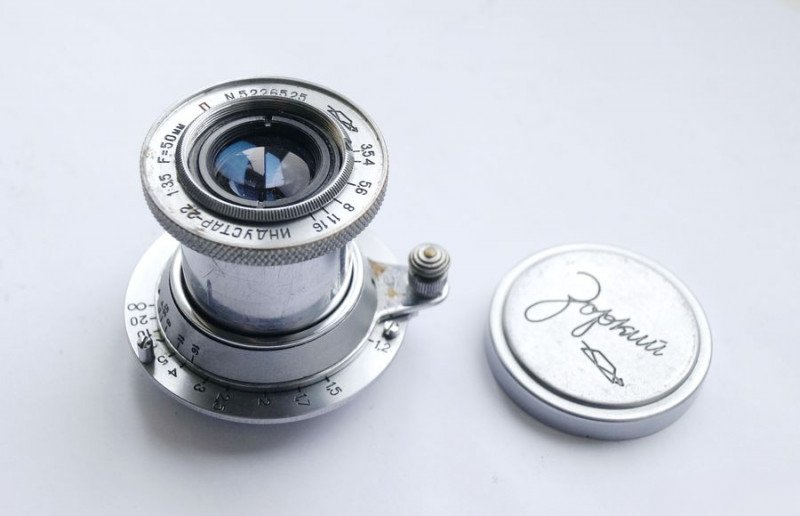
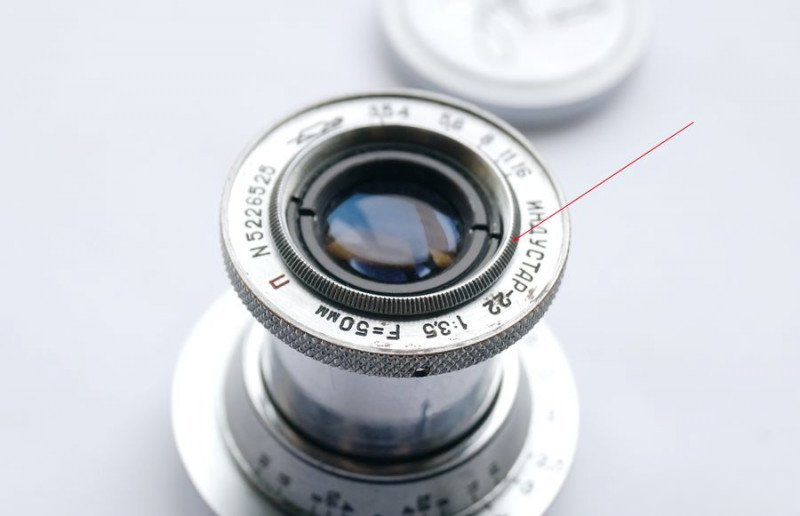
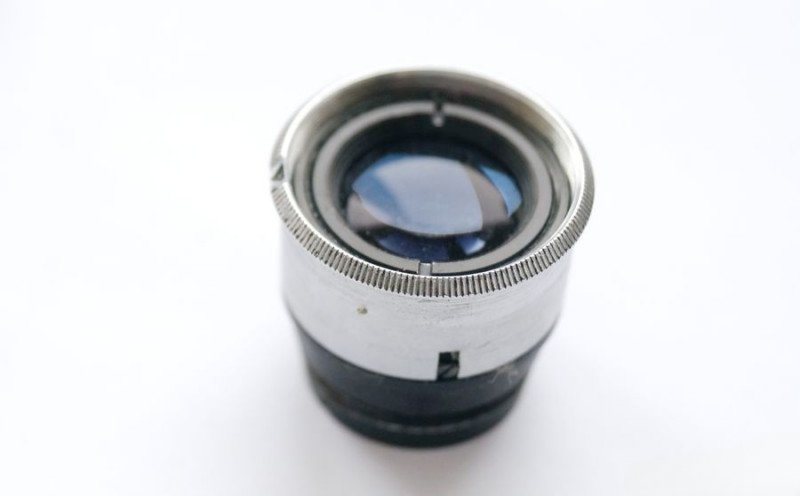
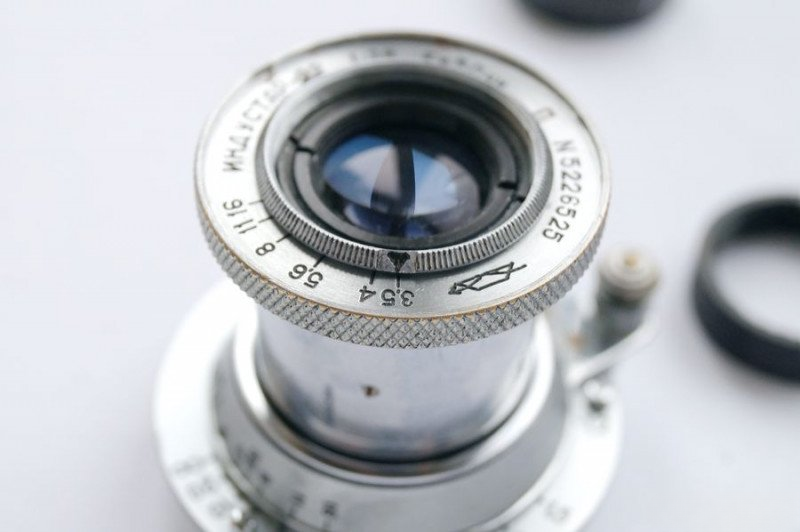
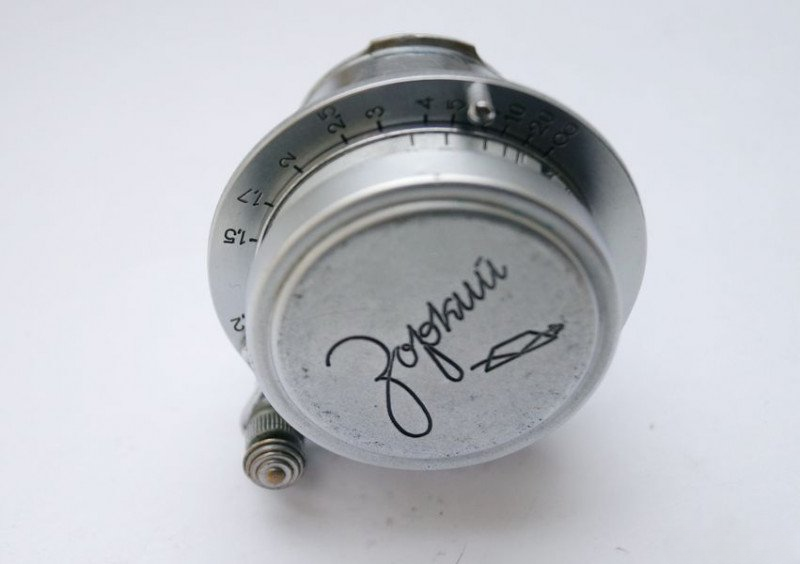
The specimen before us is a 1952 Industar-22 P, manufactured at KMZ (Krasnogorsk Mechanical Factory), as evidenced by the factory logo on the lens barrel. The optics are coated, indicated by the red "П" (P) marking. The lens's optical elements and coating have survived remarkably well, though the collapsible mechanism shows signs of regular use. The original metal front cap, a collector's item in its own right, accompanies this piece.
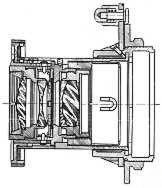
Looking at the basic design, we can see how closely it follows its German predecessor. The resemblance isn't just superficial - the optical formula and mechanical design principles are nearly identical.
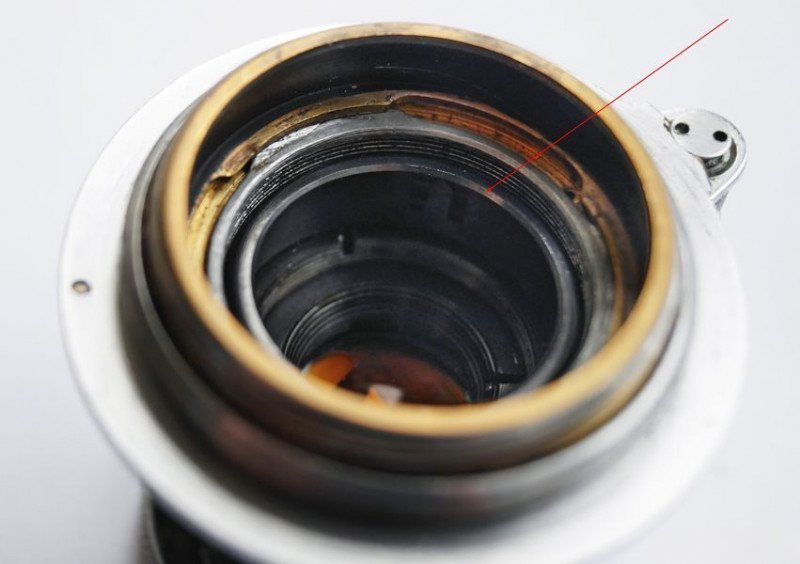
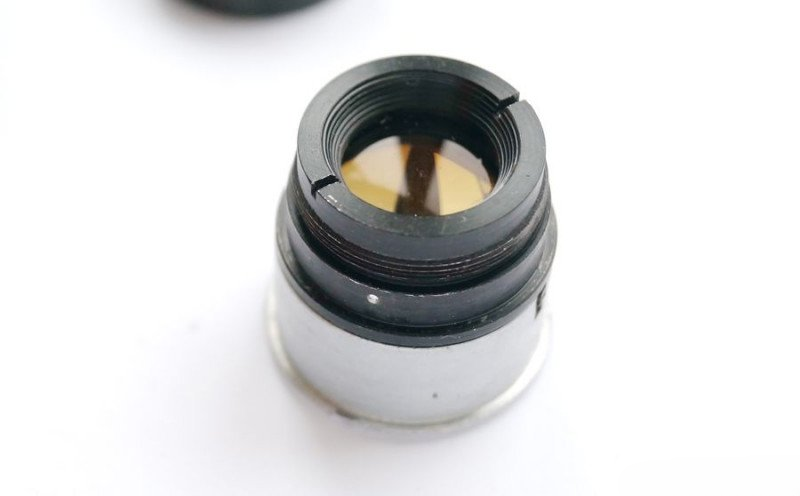
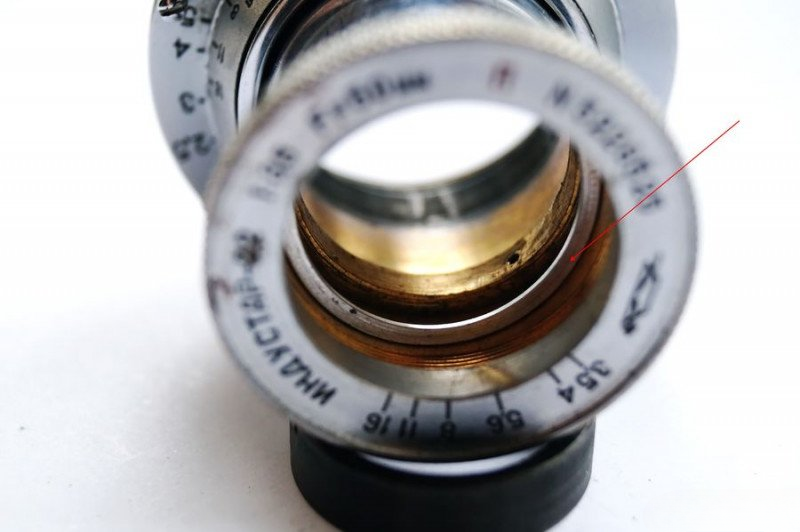
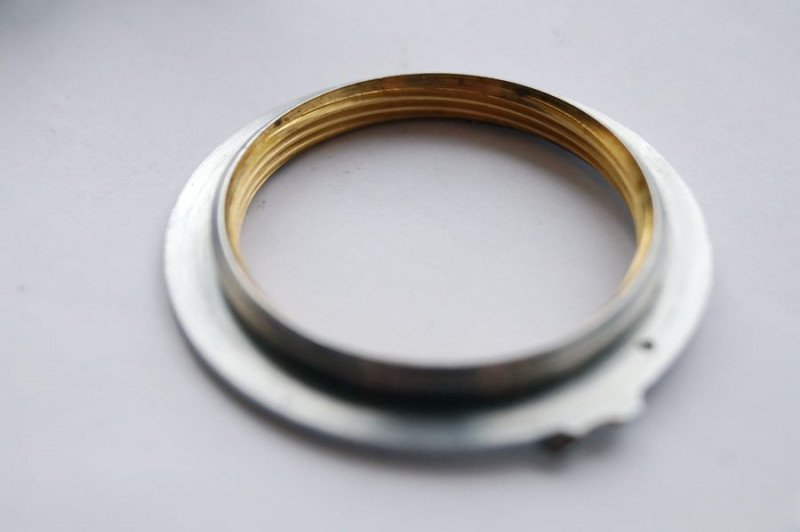
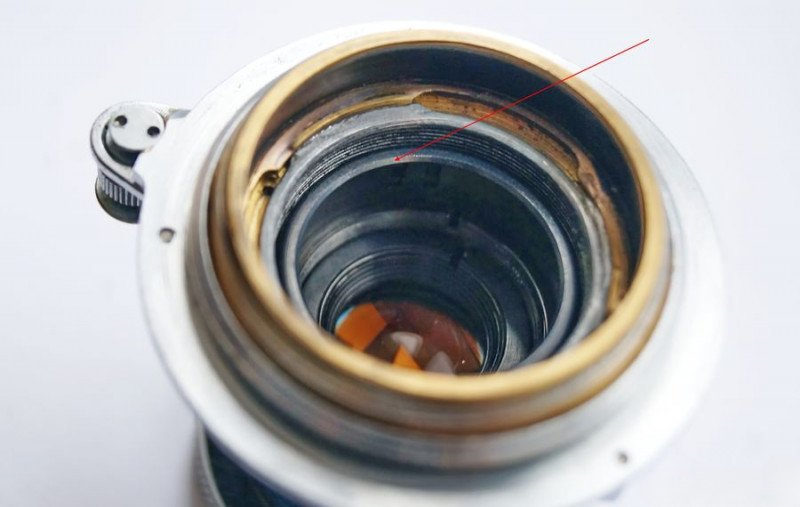
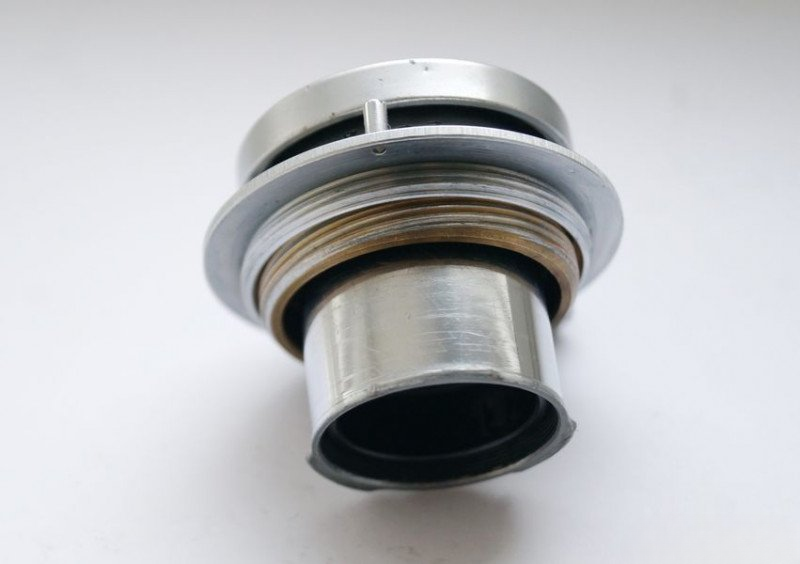
The rear mount view reveals the precision engineering of the bayonet mechanism. Here we can see the rangefinder coupling system, a critical component for accurate focusing.
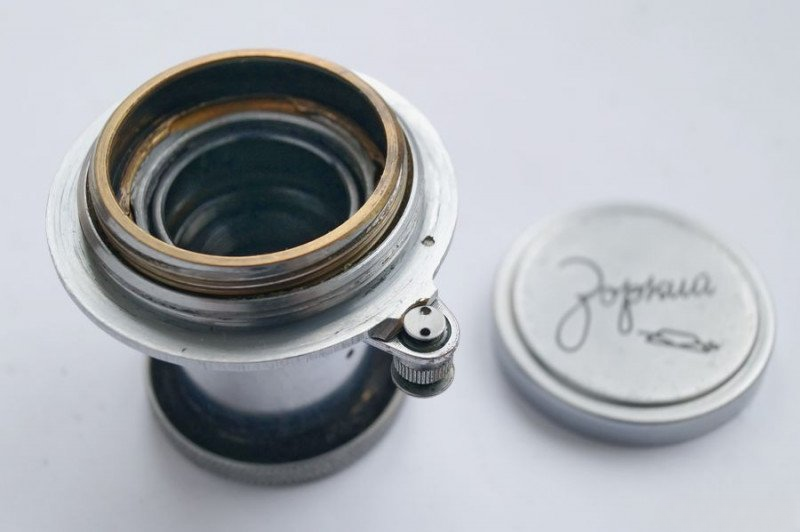
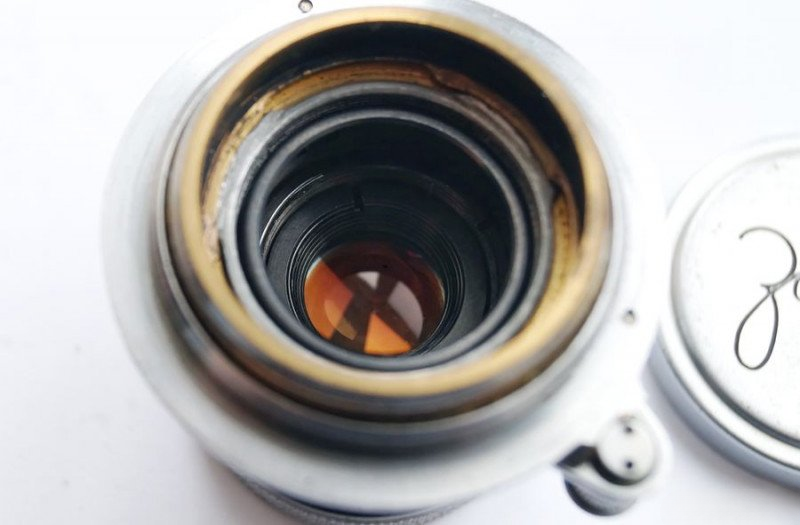
The golden coating on the rear lens group is particularly well preserved, a testament to the quality of the original manufacturing process.
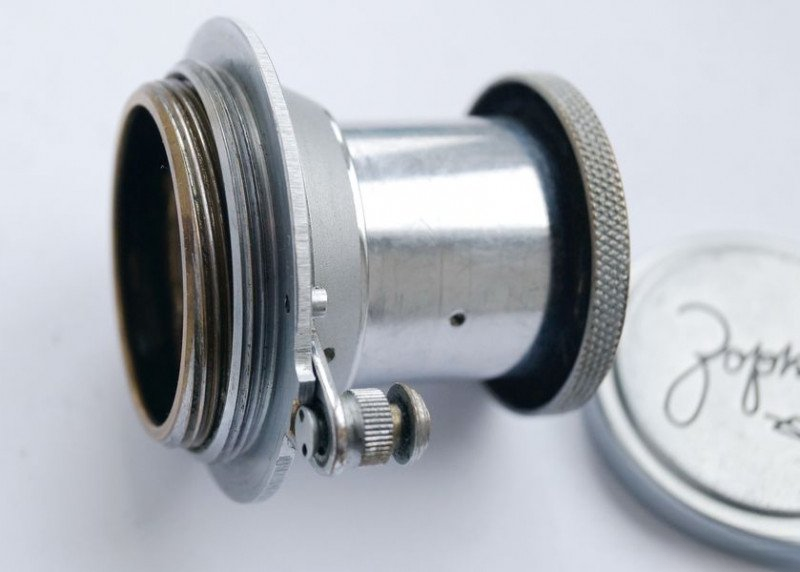
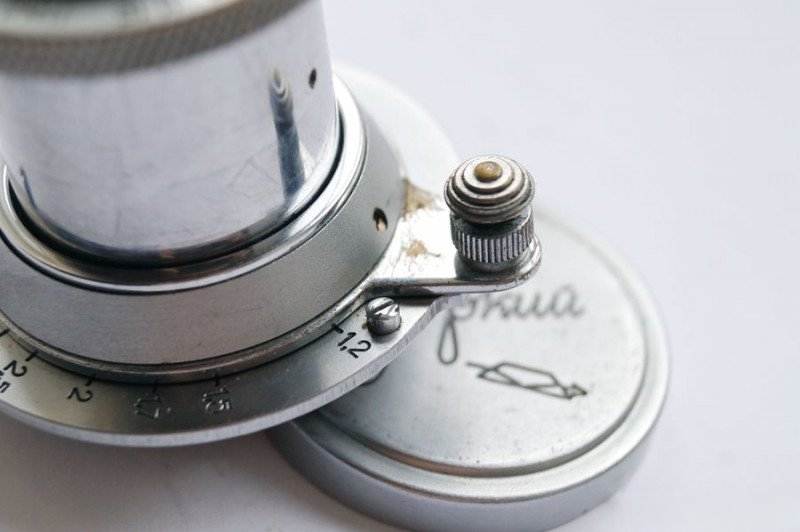
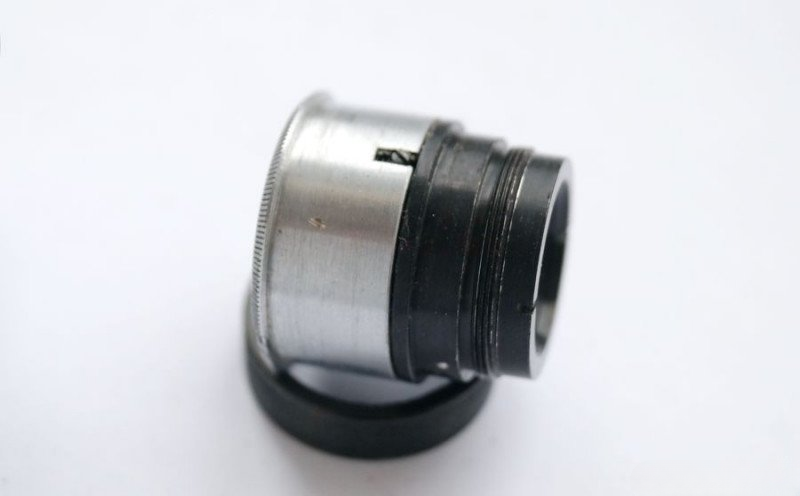
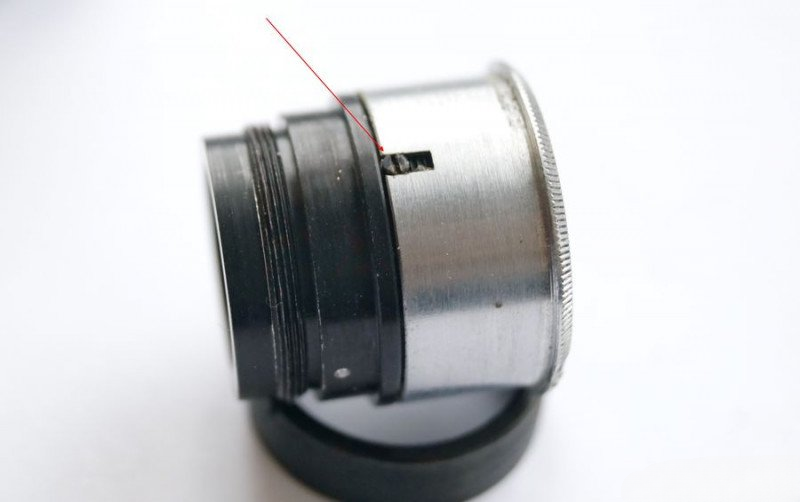
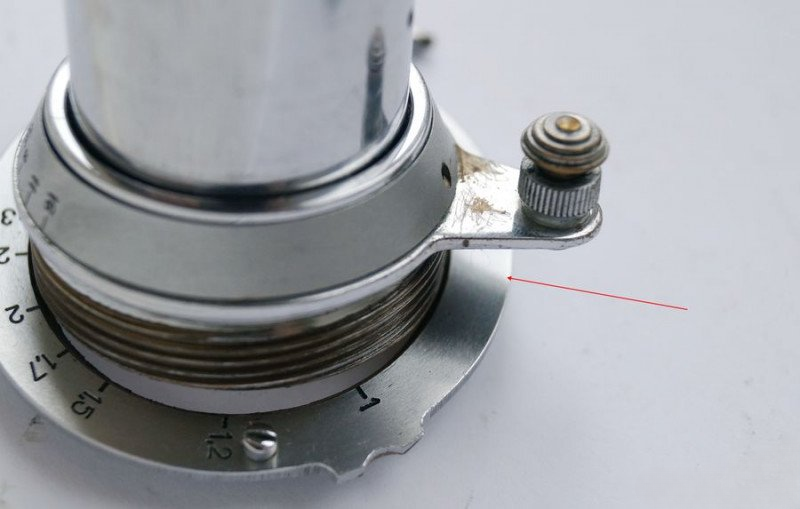
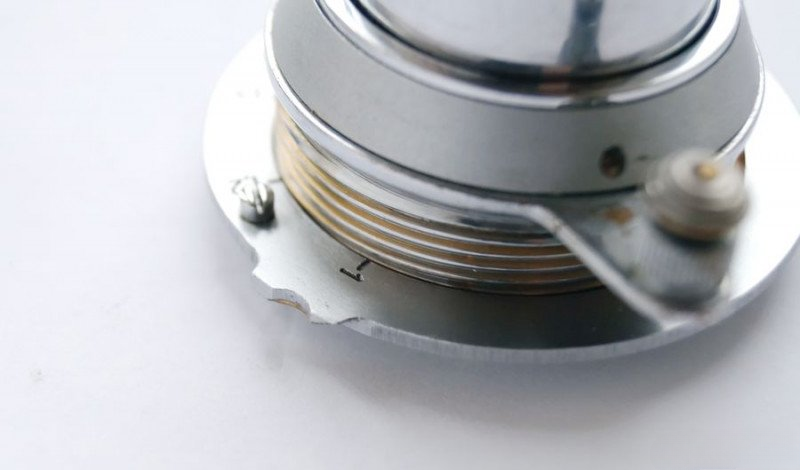
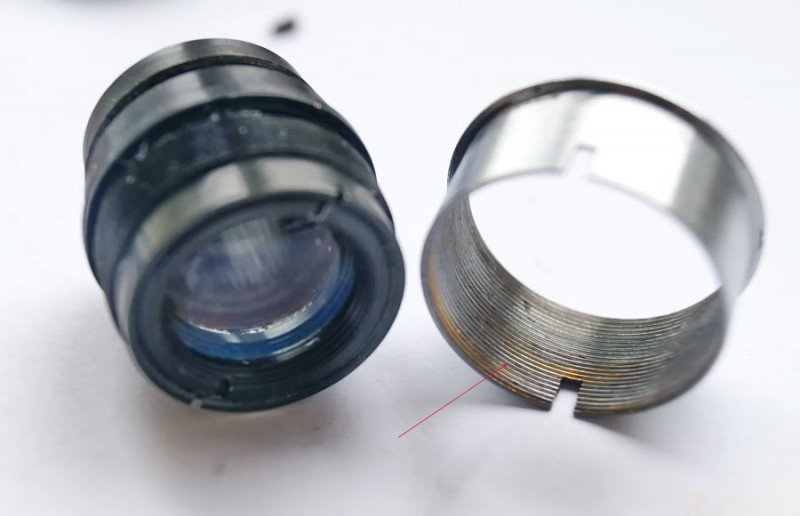
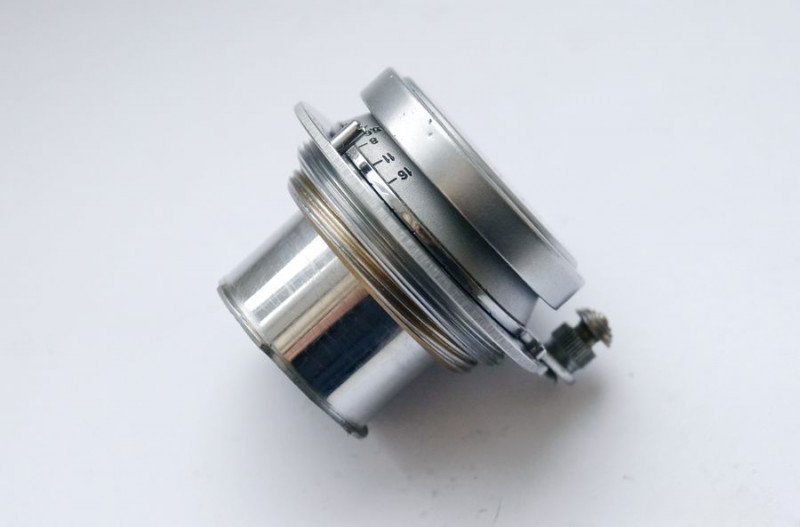
Before beginning the restoration, let's examine the locking mechanism that secures the lens in its collapsed position. This ingenious design feature is crucial for both protecting the lens and ensuring proper extension for use.
This lens arrived with two primary issues: an extremely stiff aperture ring and irregular focusing helicoid movement. These are common problems in lenses of this vintage, typically resulting from decades of hardened lubricant accumulation. A thorough restoration will address both issues while preserving the lens's historical integrity.
Before proceeding with disassembly, let's document the complete technical specifications of the Industar-22 P:
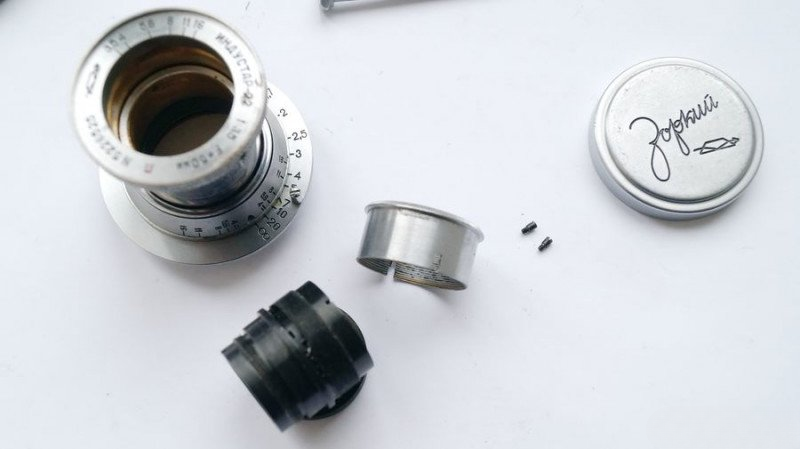
The first step in our restoration involves removing the internal hood from the rear element side. This component plays a crucial role in controlling internal reflections and maintaining image contrast.

Here's the hood component. Its design and construction demonstrate the attention to detail in controlling stray light - a critical factor in lens performance.
My immediate task is to restore movement to this aperture ring, which has completely seized due to decades-old lubricant. The restoration requires precision and patience to avoid damage to the delicate mechanism.
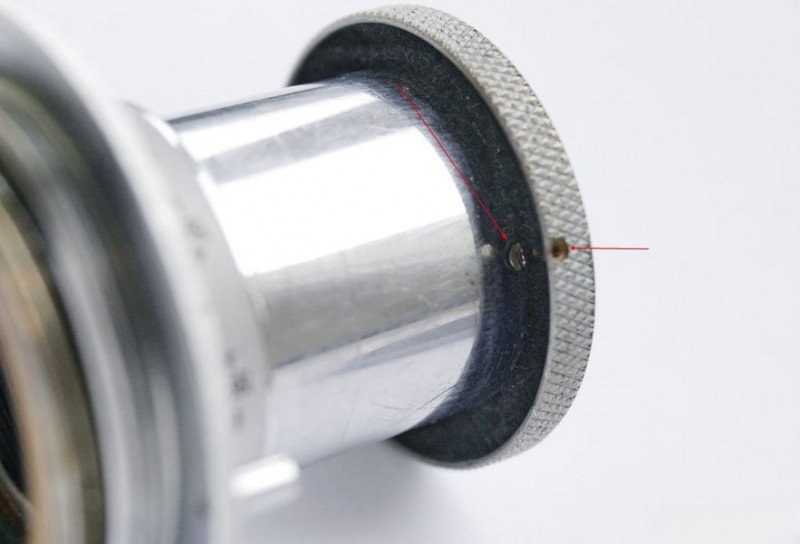
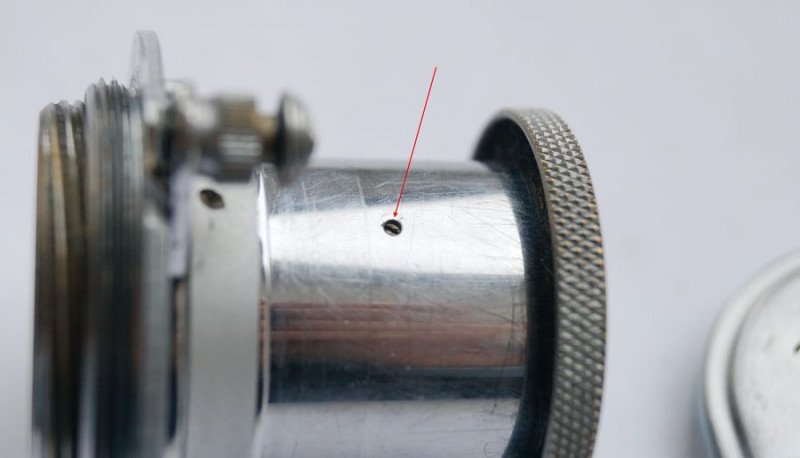
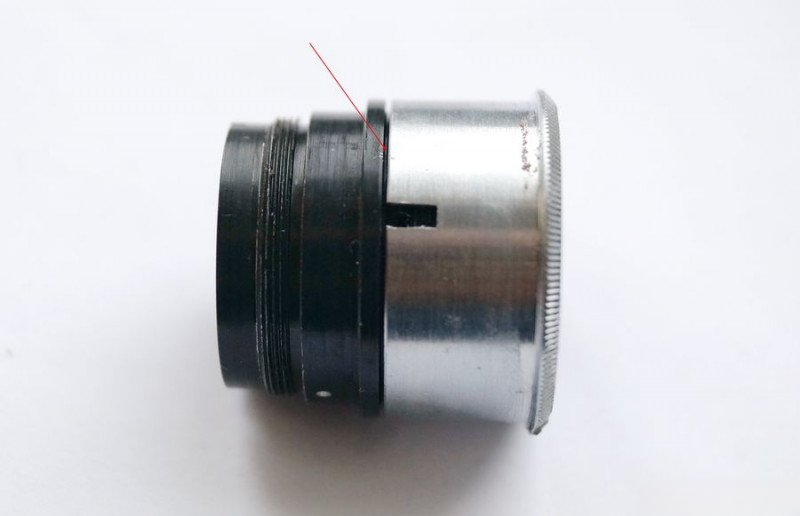
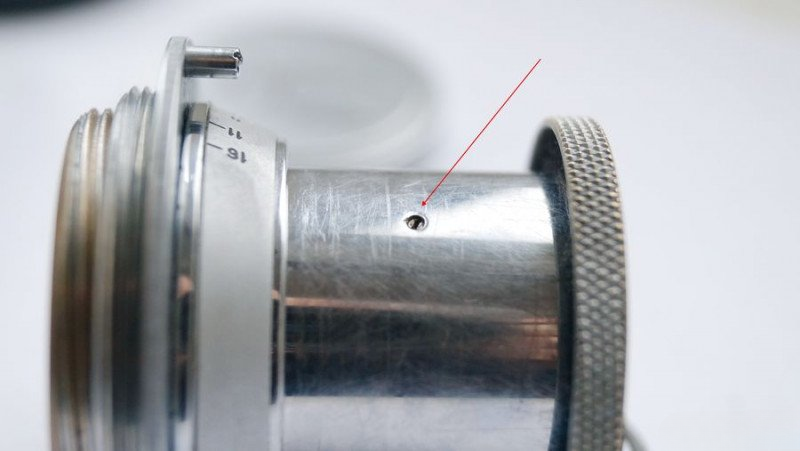
A crucial note for those attempting this repair: Do not disturb the visible screw and technical hole in the lens barrel. These secure the decorative ring with aperture markings. Their disturbance will unnecessarily complicate the reassembly process.
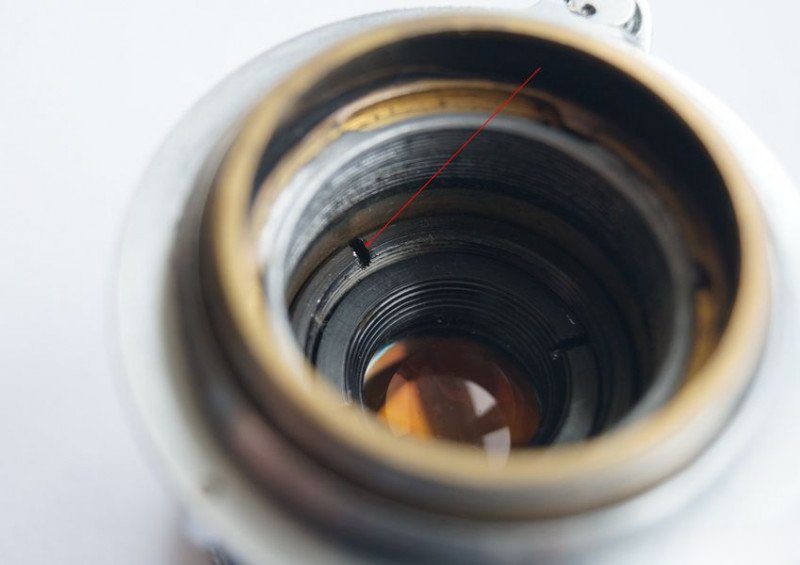
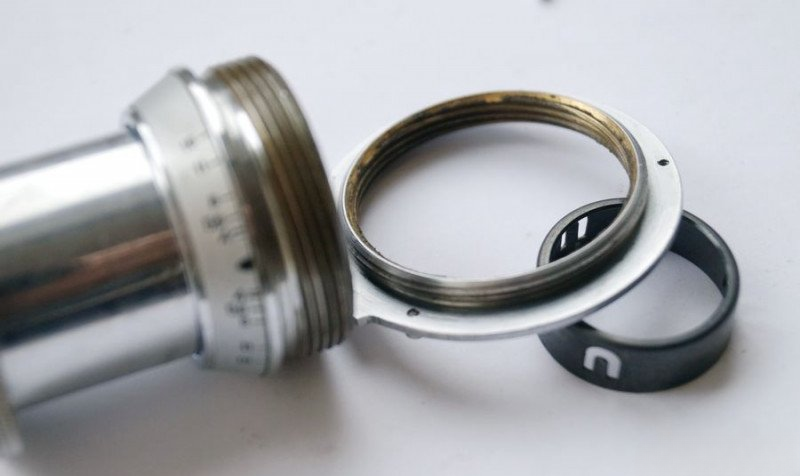
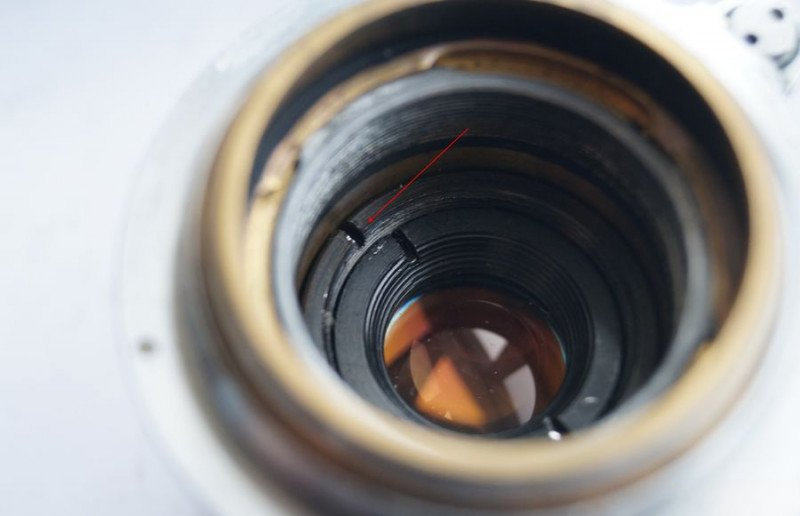
Using precision tools or carefully modified tweezers, we begin by removing the larger retaining ring. Exercise extreme caution here - there's a smaller ring that must remain untouched. Confusing these could result in the rear optical block becoming dislodged.
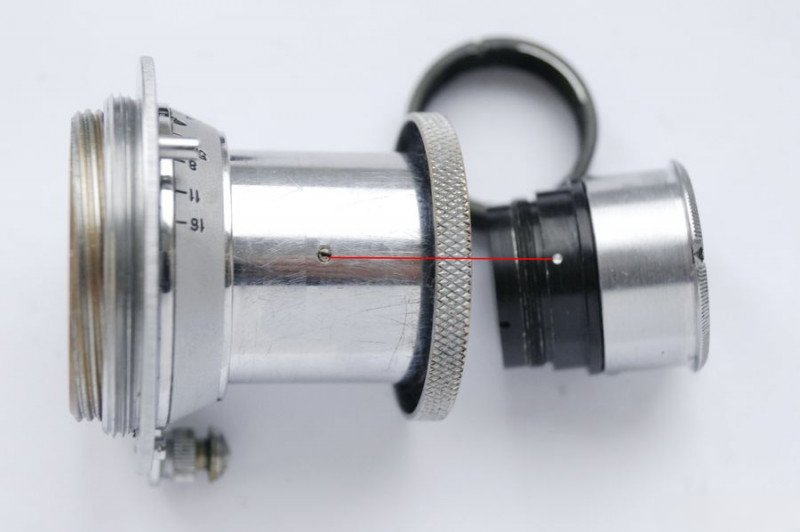
Next, we remove this securing screw. It prevents the optical block from rotating within the barrel - its position must be carefully documented for precise reassembly.
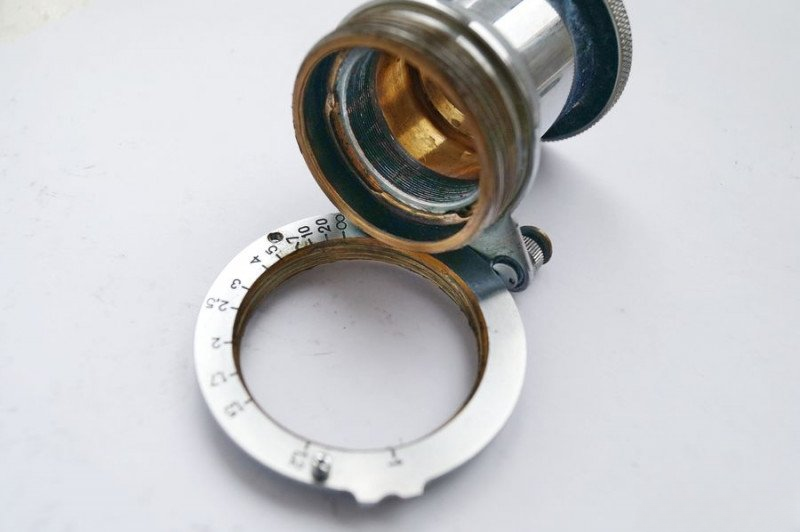
The optical block now becomes accessible. Note the precision brass construction - a hallmark of quality optical manufacturing from this era. The internal surfaces show minimal wear, suggesting careful assembly and quality control during original manufacture.
The brass housing reveals the elegant interior design. Notice the adjustment ring - a testament to the precision engineering that went into these lenses. Our cleaning here will be minimal and careful to preserve the original blackening.
The aperture control ring interfaces with the mechanism through two screws positioned at 180 degrees. For optimal reassembly, I always set the aperture to its fully open position before disassembly. This provides a reliable reference point and simplifies realignment during reassembly.
For dealing with the seized mechanism, I employ a methodical approach:
While some might attempt to clean the helicoid without complete disassembly, my 30 years of experience has shown that full disassembly provides superior long-term results. This allows for complete removal of old lubricant and proper relubrication of all bearing surfaces.
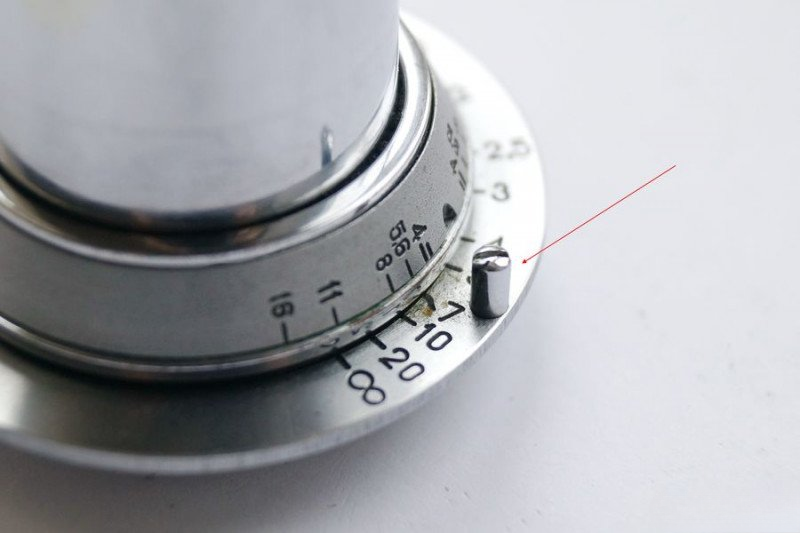
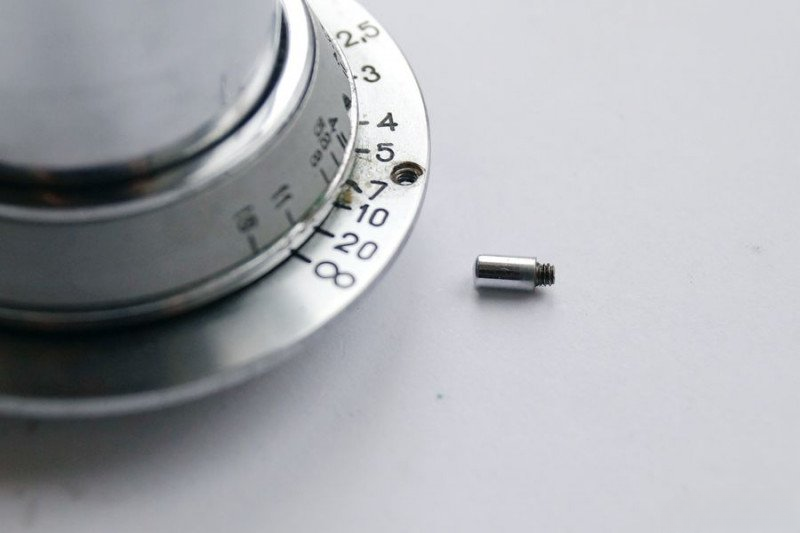
The decorative stop screw that limits focusing range to one meter must be carefully removed and its position documented. This is crucial for maintaining proper focus scale calibration during reassembly.
The helicoid threads show evidence of previous cleaning attempts, but significant old lubricant remains. I use a systematic cleaning approach:
The integrity of the internal matte black coating must be preserved during cleaning. Compressed air is used to remove debris rather than aggressive mechanical cleaning.
All components are meticulously cleaned and prepared for reassembly. The brass surfaces show their original quality after cleaning - this level of material quality is rarely seen in modern lenses.

With all components thoroughly cleaned, we begin the precise reassembly process. The ЦИАТИМ-221 grease is specifically chosen for these vintage mechanisms due to its stability and appropriate viscosity.
A precisely measured amount of lubricant is applied to the helicoid threads. The key is achieving even distribution while avoiding excess that could migrate to optical surfaces.
The helicoid components must be reassembled at exactly the same angular position as originally documented. This ensures proper rangefinder coupling and focus scale accuracy.
During this stage, each component's movement is tested before proceeding to the next step. This methodical approach prevents issues that would be difficult to correct after final assembly.
A precise amount of fresh lubricant is applied to the aperture ring threads. This is a critical step - excessive lubrication here could eventually migrate to the aperture blades, compromising their operation.
The aperture control ring is carefully threaded onto the lens block, aligning with the previously established reference marks. This ensures proper coordination between the aperture scale and the actual iris opening.
Multiple function tests are performed to verify smooth aperture operation throughout its range. The movement should be consistent and precise at all settings.

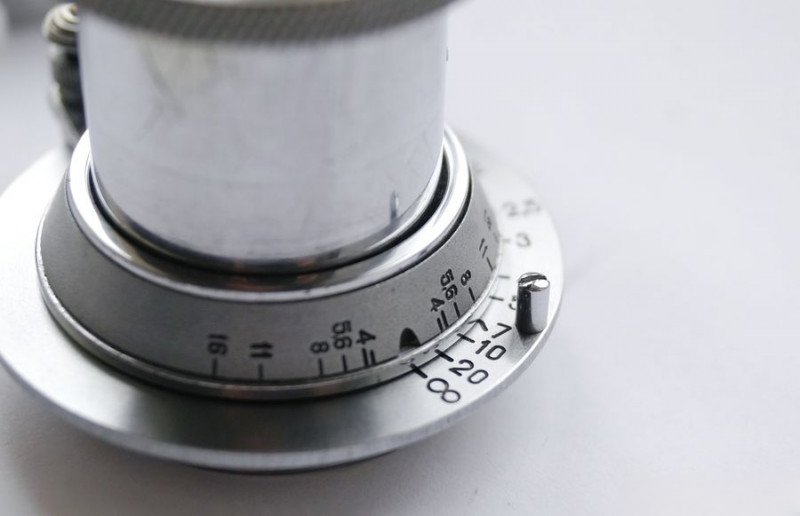
When mounting the optical block into the lens barrel, precise alignment is crucial. The "3.5" marking on the barrel must align perfectly with the fully-open aperture position.
For convenience, I align the screw hole for the retention screw with its corresponding socket, ensuring proper orientation during final assembly.
The optical block is carefully inserted, ensuring the "3.5" mark on the barrel aligns perfectly with the fully open aperture position on the iris scale.
The optical block is secured with the retaining ring, constantly monitoring the aperture scale alignment to prevent any shift during tightening.
The retention screw is installed, locking the optical block in its precise position within the barrel.
The internal hood is reinstalled, completing the optical assembly. This component is crucial for controlling internal reflections and maintaining image contrast.

The fully assembled lens is now ready for testing. All mechanical movements should be smooth and precise.
Testing begins with verification in the native rangefinder mount configuration.
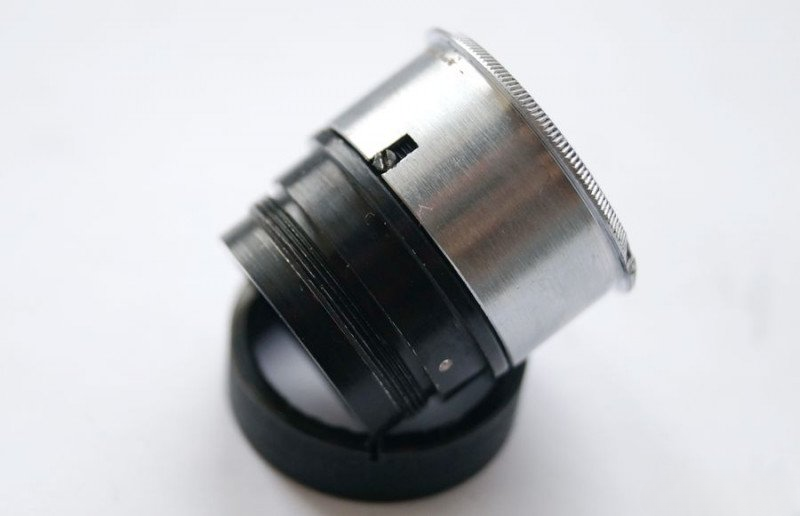
The collapsing mechanism is tested for smooth operation and proper locking engagement.
The compact nature of the collapsed lens demonstrates the elegant engineering of this design.
For modern usage testing, the lens is mounted on a digital camera. Note that when adapting to digital systems, the rear element position requires careful consideration to prevent sensor contact.
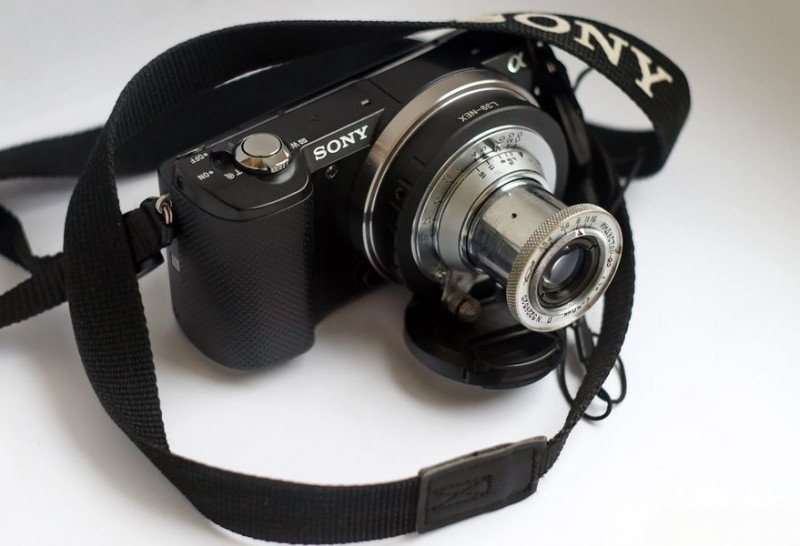
Mounted on a Sony camera body for comprehensive optical testing.

Reference shot taken with Sony E 3.5-5.6/PZ 16-50 OSS at 50mm, f/5.6.
Comparative test shot with our restored Industar-22 P at f/3.5, demonstrating excellent optical performance and characteristic rendering.
After extensive experience with the Industar-22 P and similar vintage optics, I've developed these essential guidelines for maintaining these historical pieces:
For collectors and archivists, consider these preservation points:
Understanding the unique characteristics of this lens helps in achieving optimal results:
The Industar-22 P represents a significant chapter in photographic history. Its design, derived from the Leitz Elmar, demonstrates the evolution of optical technology across political and geographical boundaries. The quality of its construction has allowed many examples to survive and remain functional after seven decades - a testament to the engineering and manufacturing standards of its era.
For contemporary photographers interested in using this lens:
After restoration, the lens should exhibit these characteristics:
With proper care and maintenance, the Industar-22 P can continue to serve photographers for many more decades, whether as a functional photographic tool or as a preserved example of mid-20th century optical engineering.