Poljot Caliber 2609: Inside the Early 17-Jewel Movement from the First Moscow Watch Factory

Inside the Early Poljot 2609: The Forgotten Engineering of the First Moscow Watch Factory

Inside the Early Poljot 2609: The Forgotten Engineering of the First Moscow Watch Factory

Inside the Early Poljot 2609: The Forgotten Engineering of the First Moscow Watch Factory

"A movement reveals its maker on the train side. Whatever the dial may promise, the bridges and pivots are where the engineer's intentions are written in steel and ruby."
— Workshop maxim

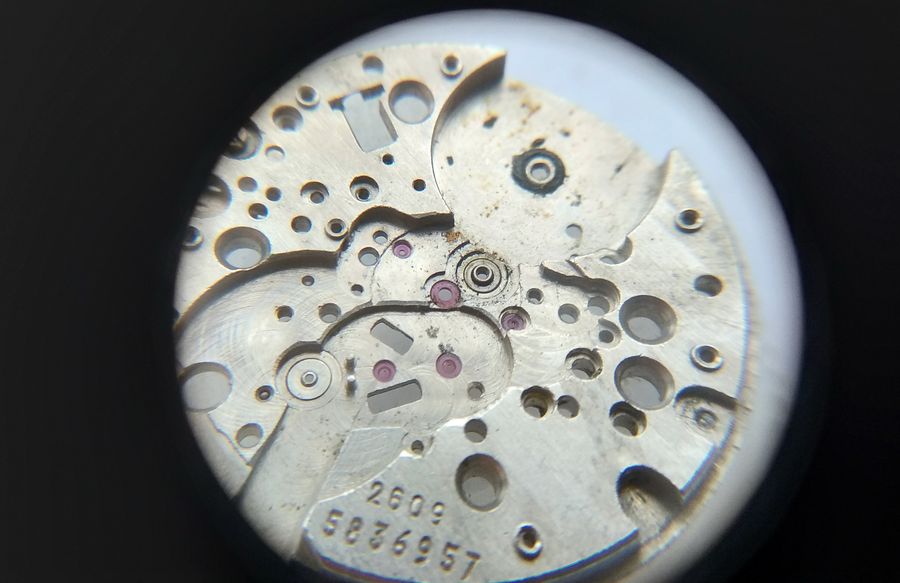
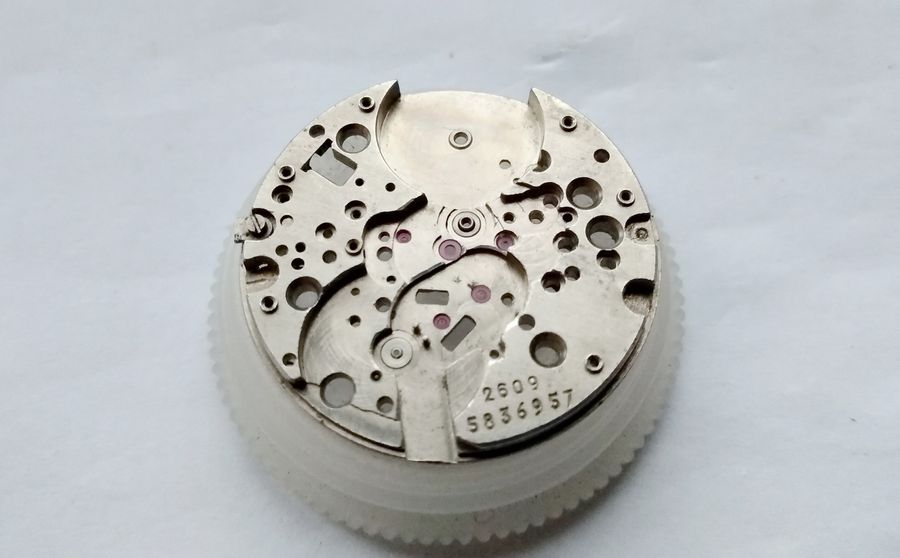
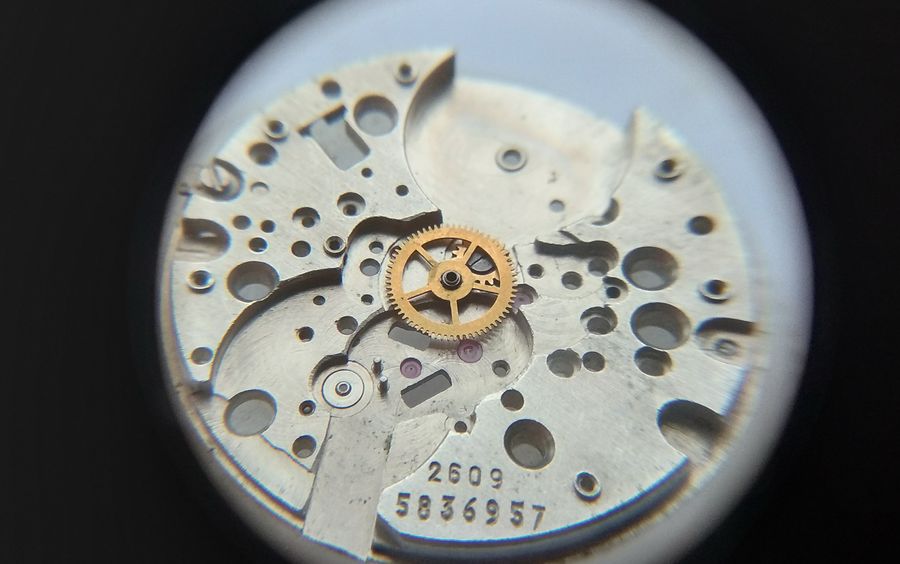
Few Soviet calibres have settled more comfortably into collector folklore than the Poljot 2609. It is the workhorse most likely to be encountered at a flea-market, the movement most often pulled from a relative's dresser drawer, and — in its mature 2609Н form — the engine that powered millions of First Moscow Watch Factory dress watches and military issues. The reputation for ruggedness and the casual prestige of the script "Полёт" on the dial belong, for the most part, to that late and simplified variant. The early 2609 is a different animal, and the differences are not cosmetic. They are structural, deliberate, and — once seen — impossible to mistake for anything that came after.

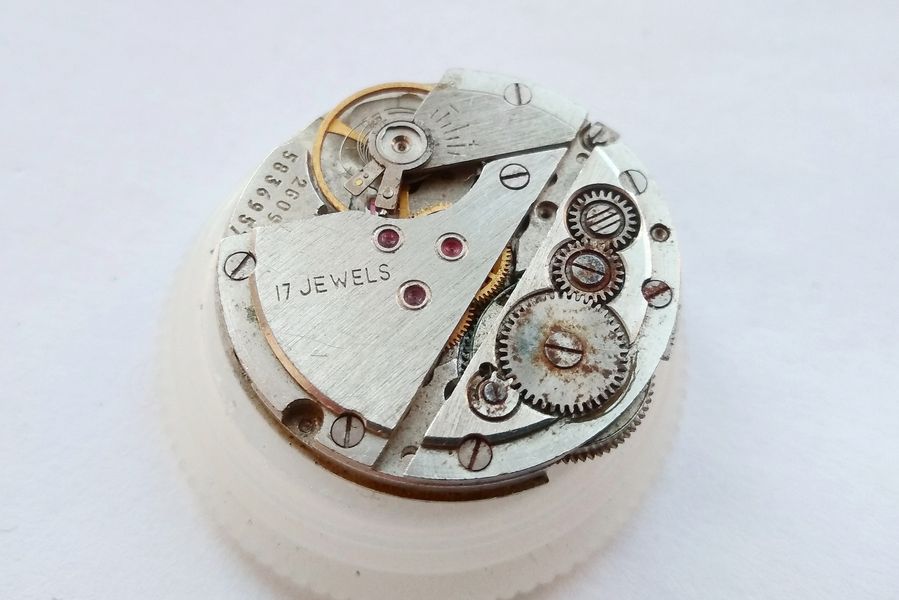
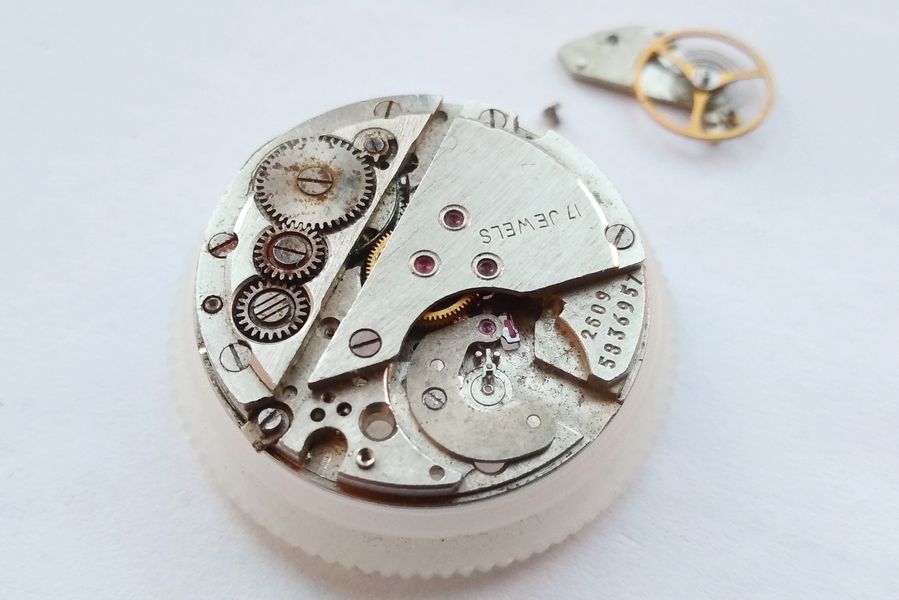
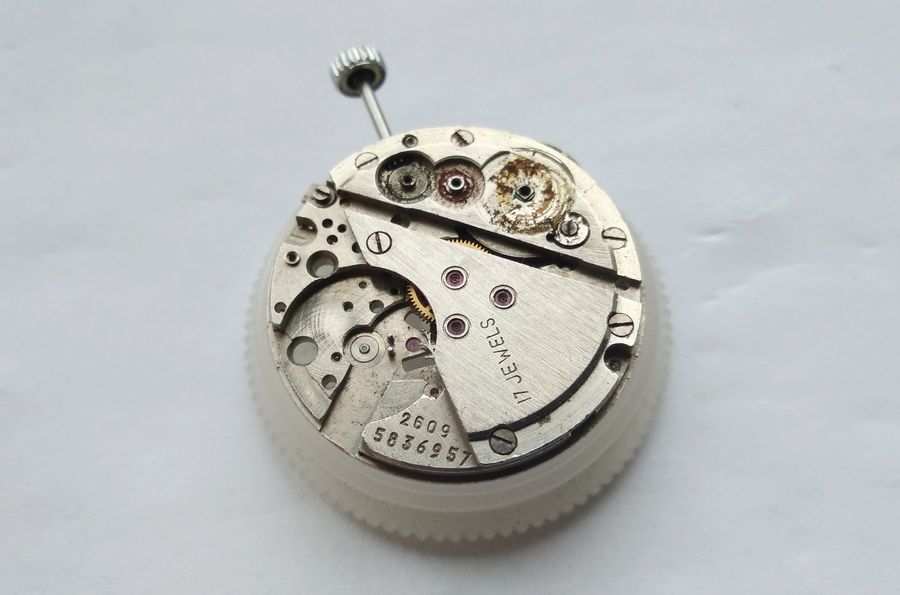
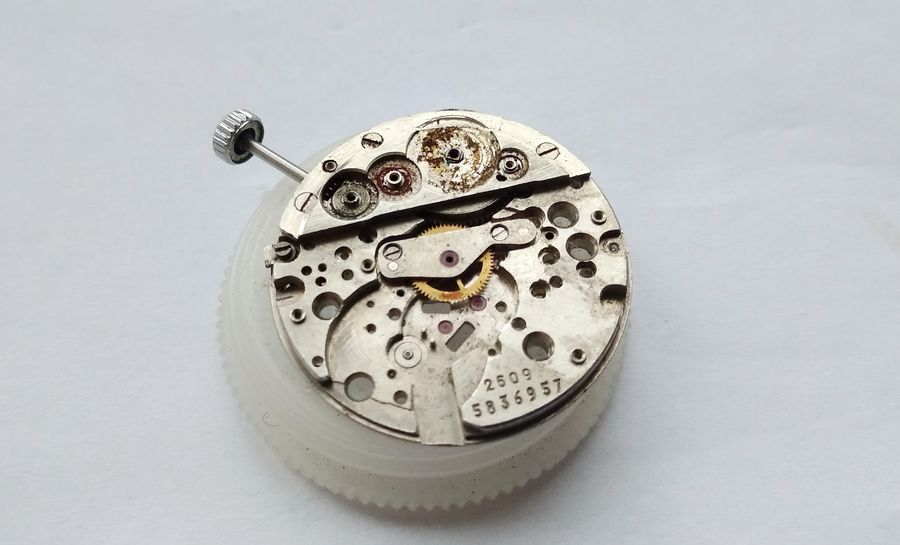
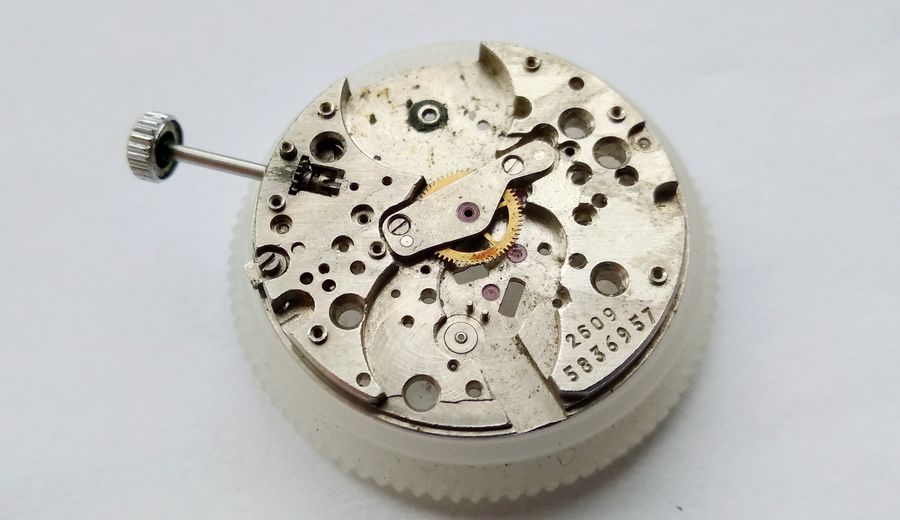
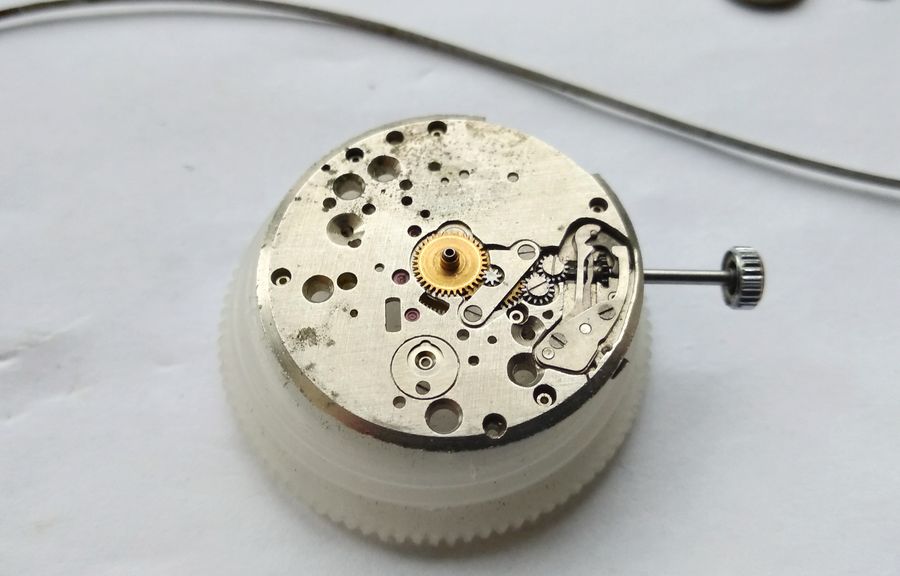
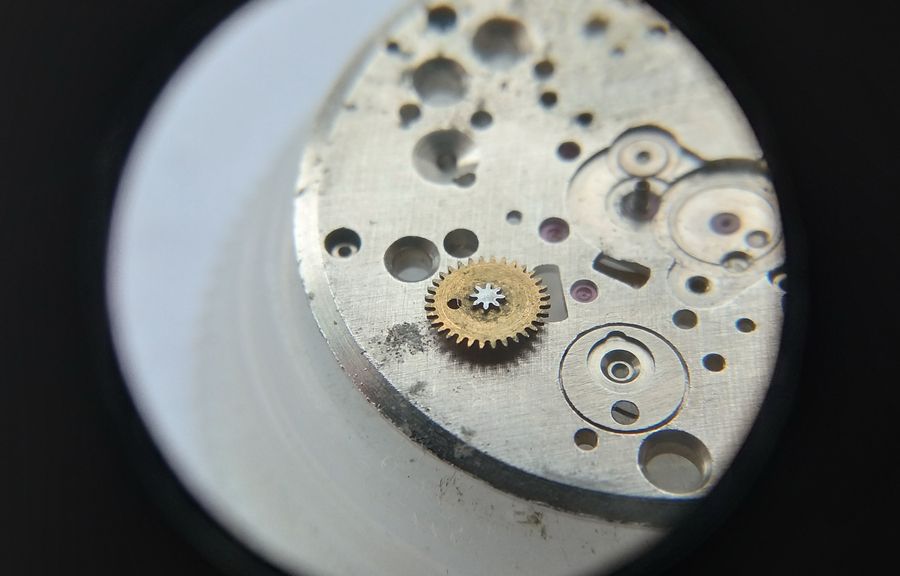
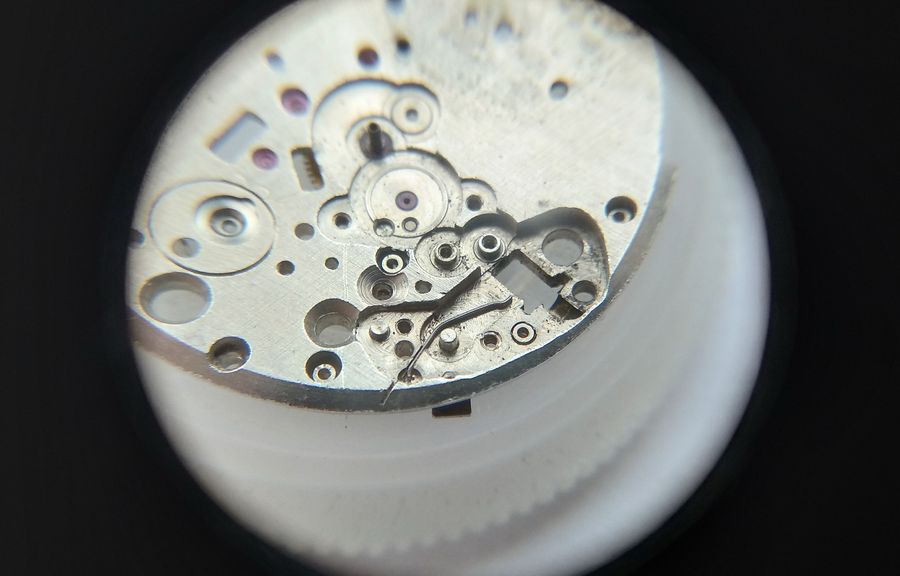
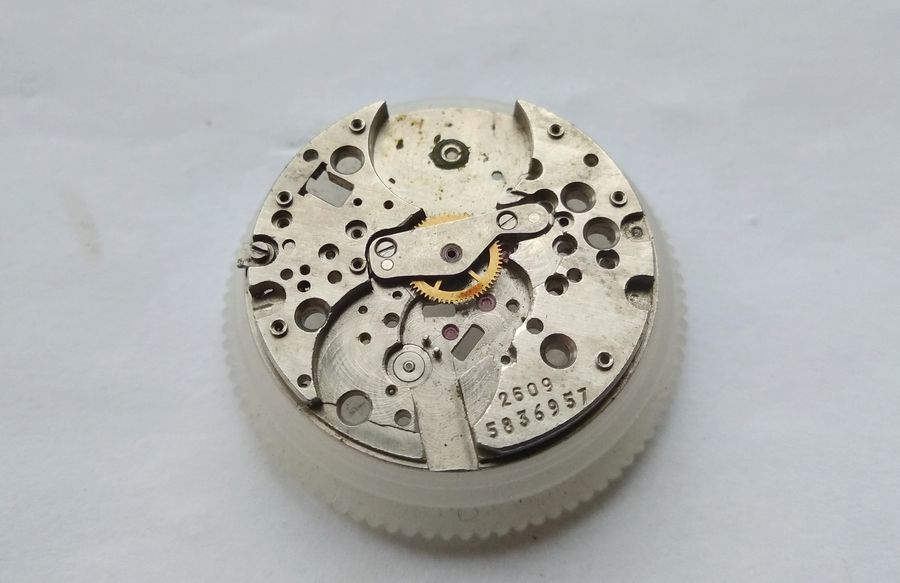
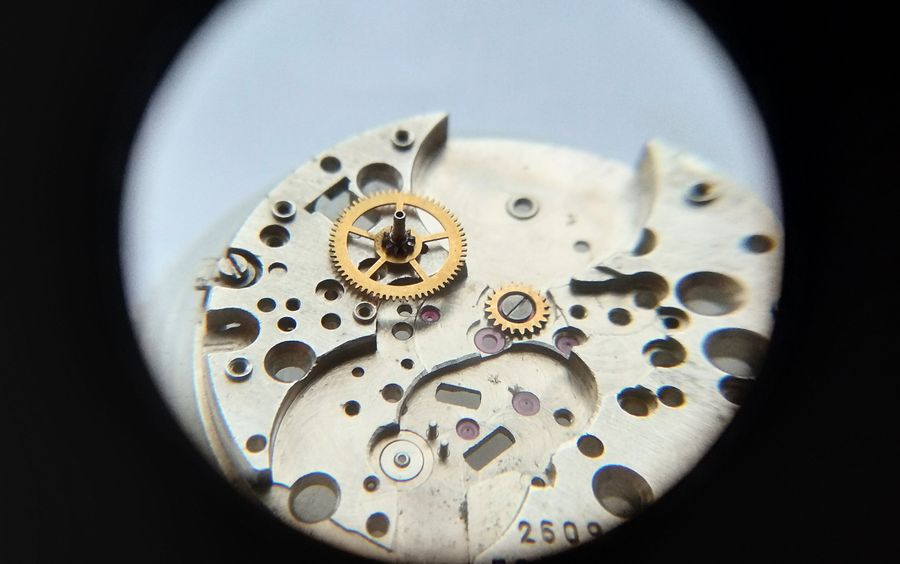
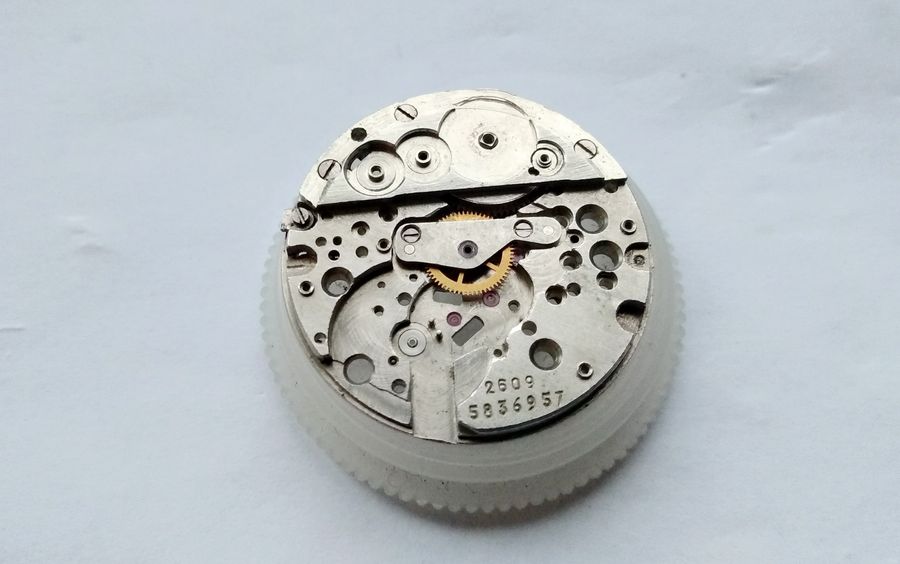
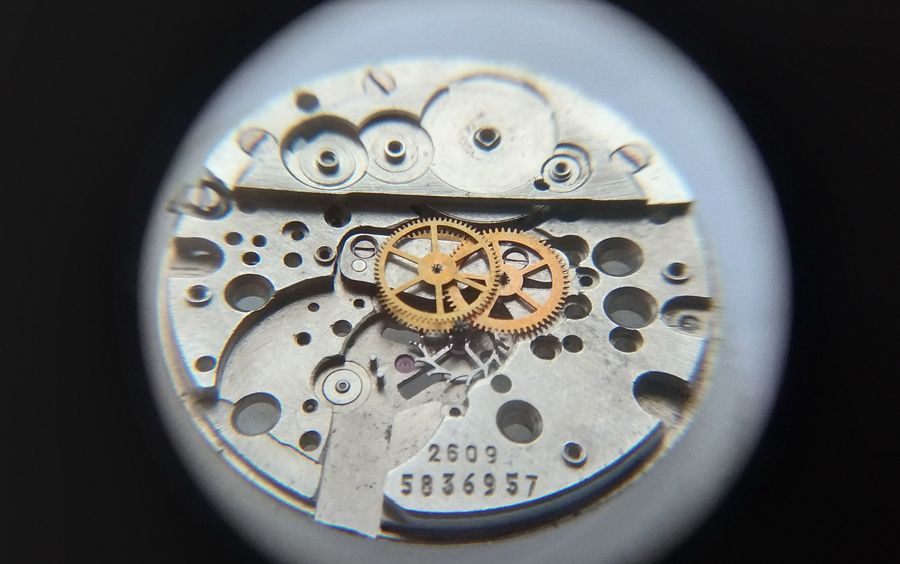
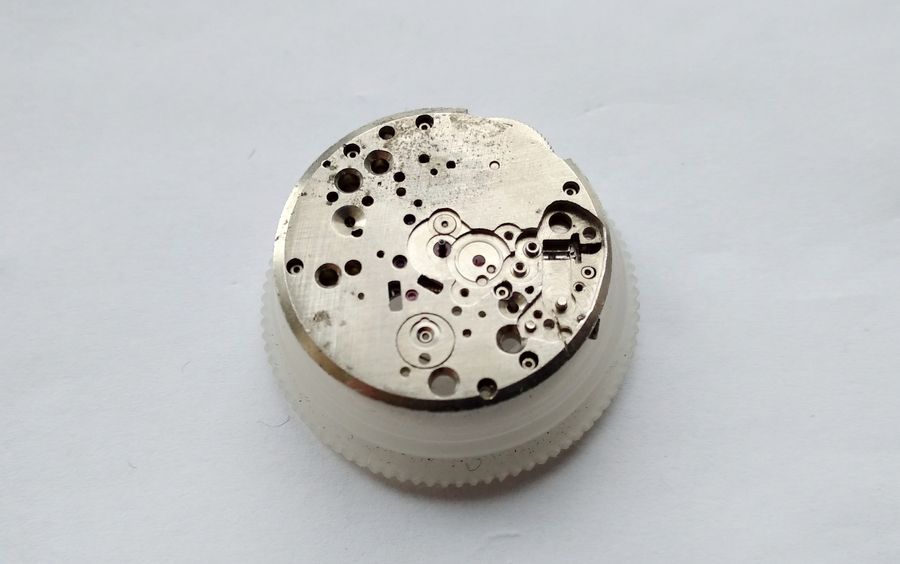
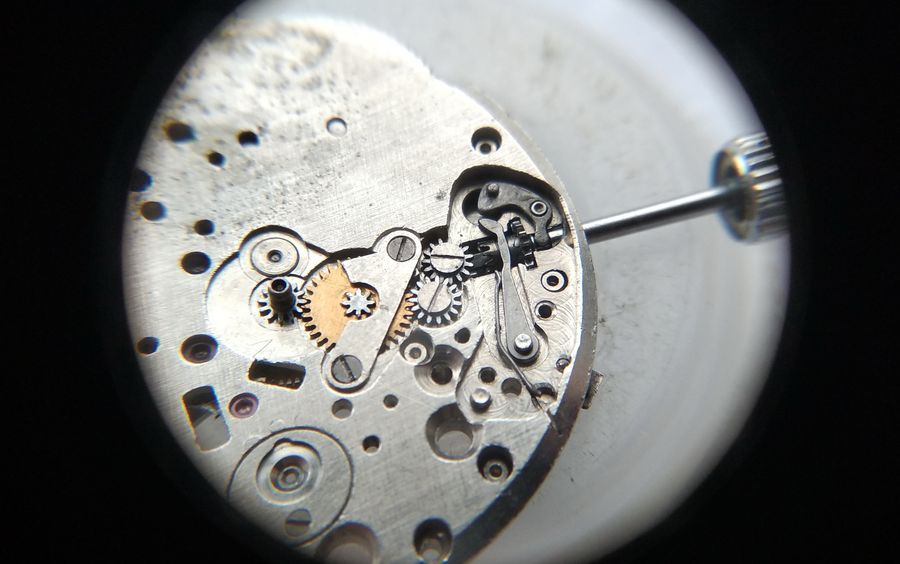
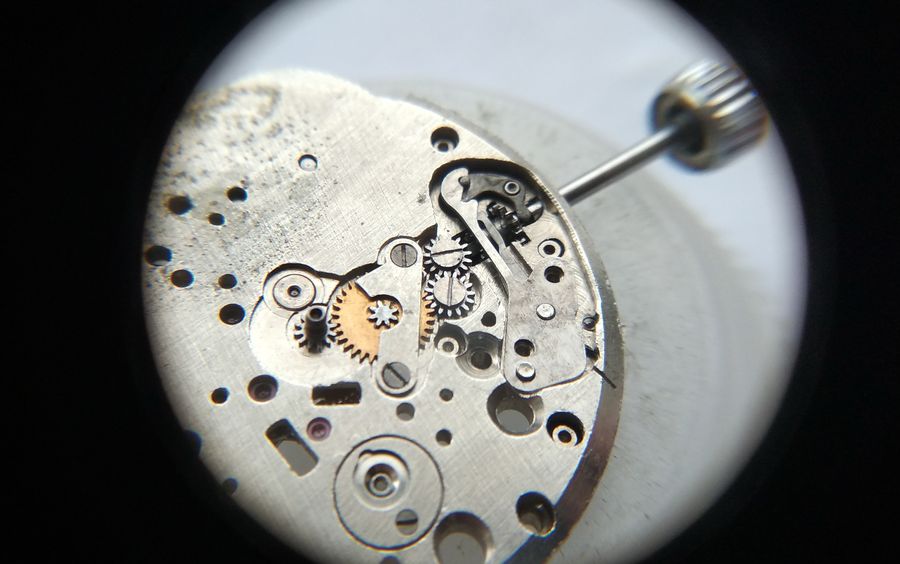
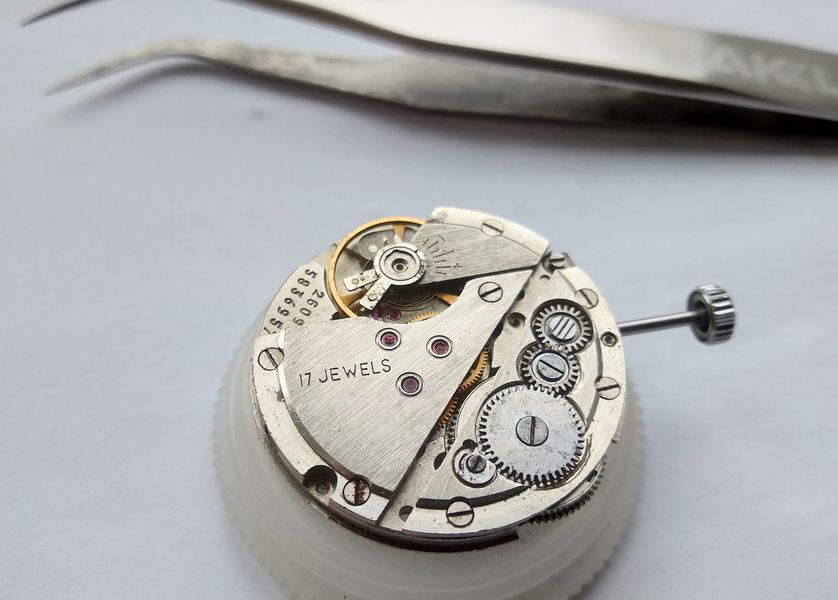
This essay follows a full service of an early seventeen-jewel 2609, the version built before the suffix "Н" rationalised the design for high-volume manufacture. We will take the movement apart in the order its maker intended, clean it, and put it back together — and along the way meet a handful of engineering decisions that simply do not exist on the calibre's more famous successor. The first of them is visible before a single screw is touched. Viewed from the train side, the winding chain runs through three wheels rather than the classic two.

Poljot 2609 movement seen from the train side with three winding wheels grouped on the barrel bridge
The patient, train side up. The eye goes straight to the cluster of three winding wheels on the barrel bridge — already a departure from the two-wheel crown-and-ratchet arrangement that almost every calibre of this size uses.

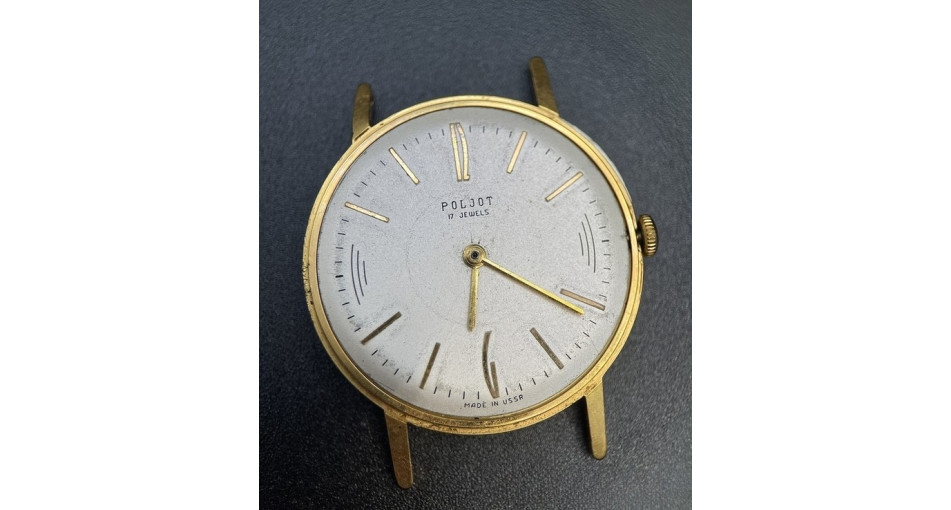
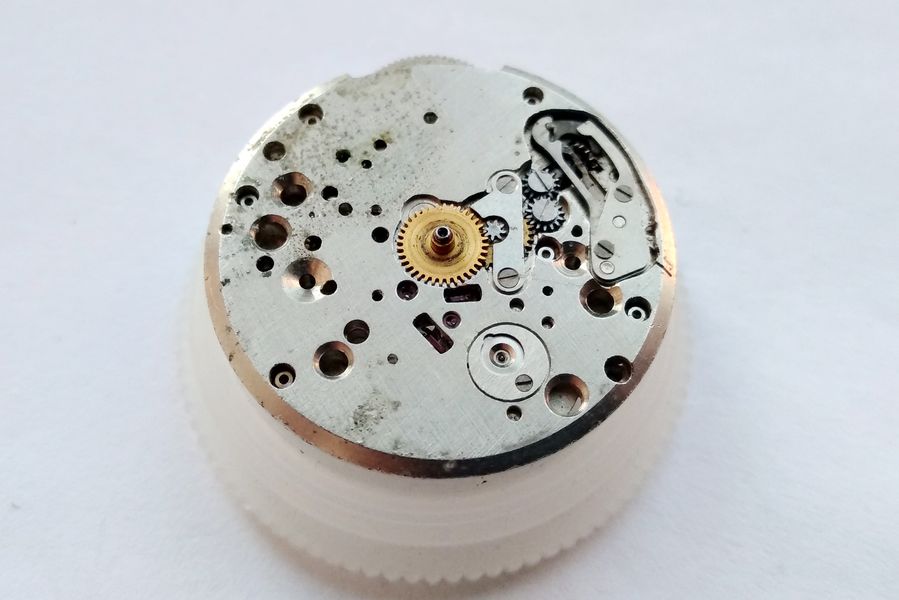
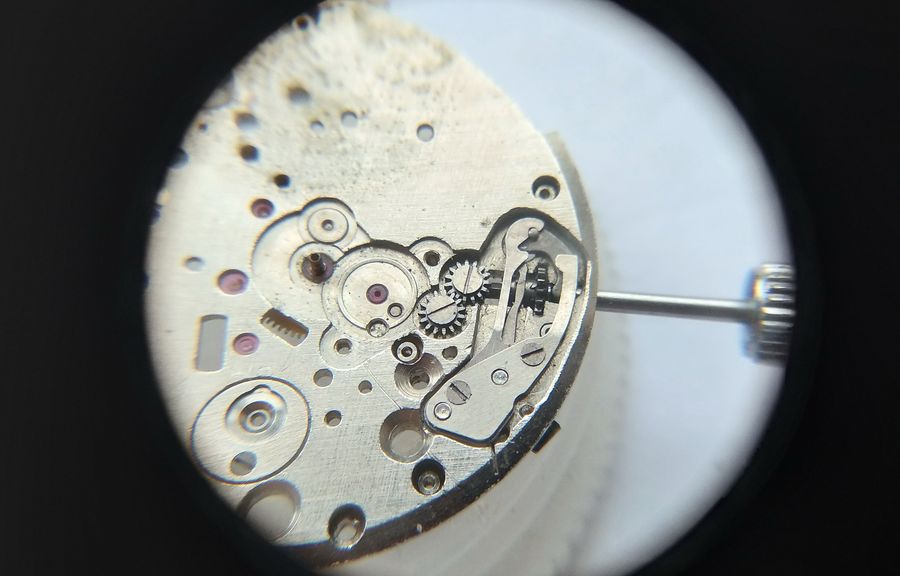
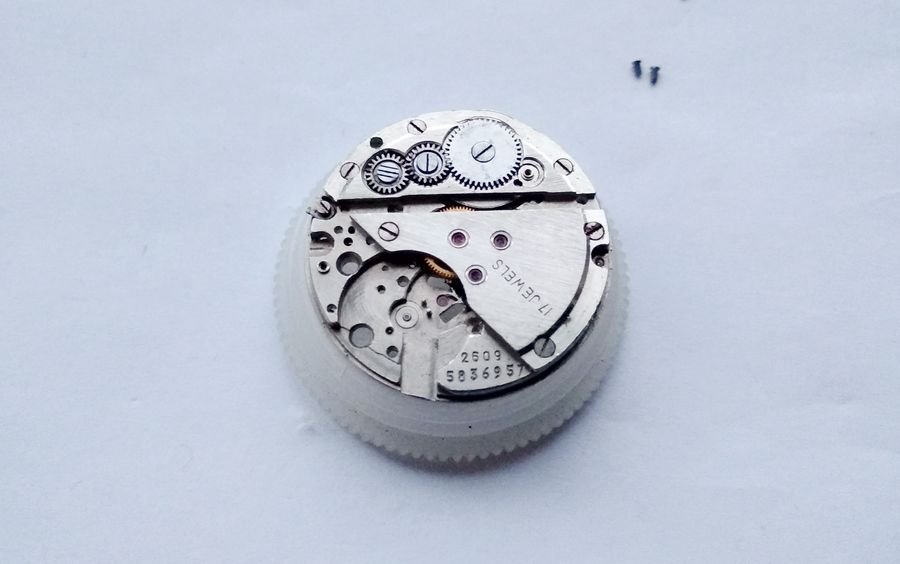
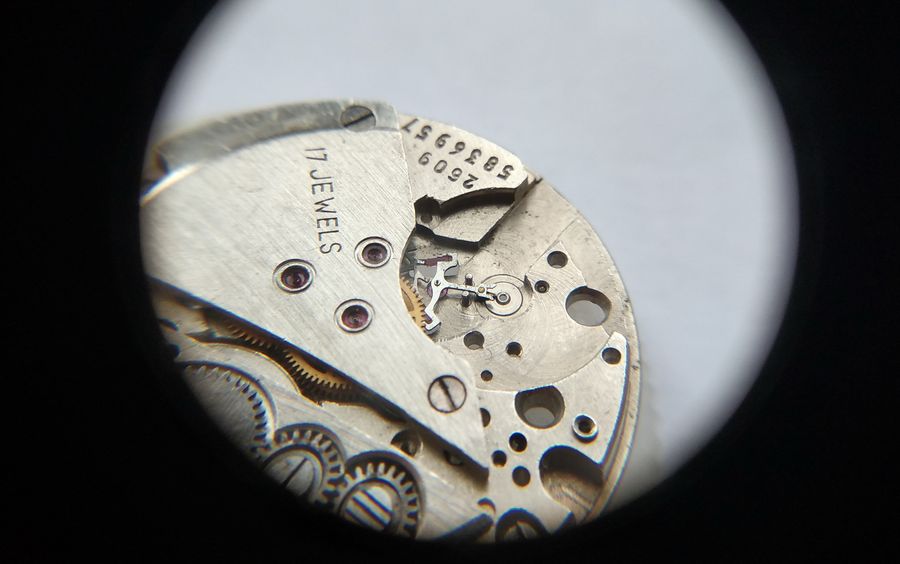
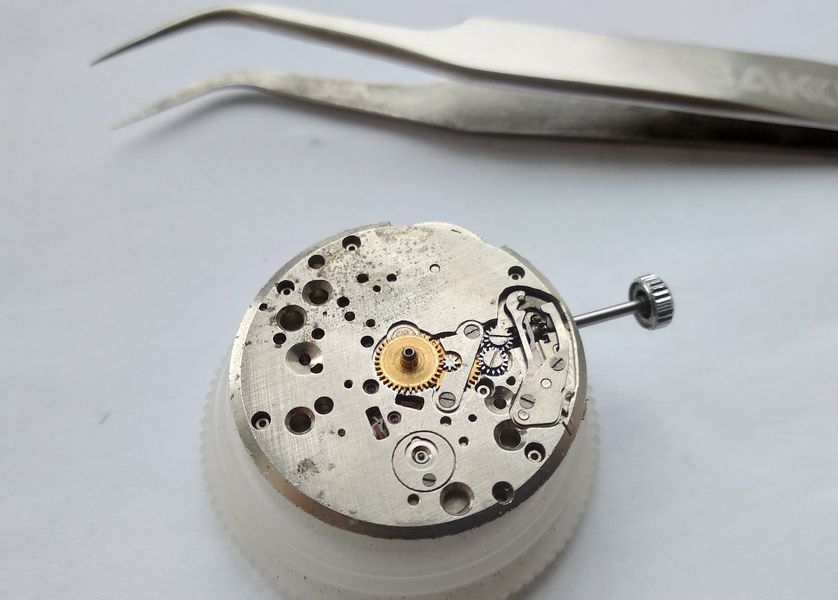
Turn the movement over and the dial side offers nothing to raise an eyebrow: a conventional layout, conventionally laid out. The surprises on this calibre are all underneath, and they reveal themselves only as the bridges come away.

Dial side of the Poljot 2609 movement showing a conventional motion-works layout before disassembly
The dial side looks entirely ordinary — and stays that way right up to the moment we begin lifting components clear of the main plate.

A Movement Seized Solid

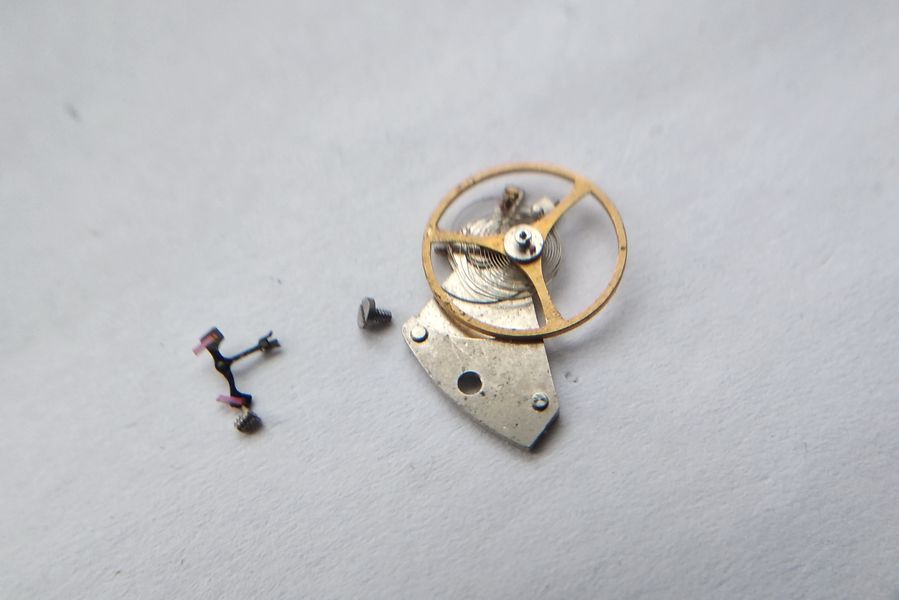
The honest first verdict was that this one should not have been worth saving. The wheels were locked dead — not stiff, but immobile, welded in place by a lubricant that had degraded into something closer to road tar than to oil. A movement in this state cannot simply be unscrewed; dried varnish on the threads will shear a screw slot or snap a pivot before it lets go. The correct move is patience. Strip off only the parts that must never sit in solvent — the balance and the pallet fork, both of which carry shellac — and commit the rest of the assembled movement to a benzine bath for a full day, until the tar softens enough that screws will turn without risk.

Top view of the dirty Poljot movement with a uniform film of degraded oil and grime across the bridges
As received: a uniform black film over the bridges and the characteristic crust that vegetable-based oils leave once they have polymerised. Nothing here will move until the contamination is softened.

So the balance and pallet fork come off first and are set aside — they will be rinsed separately later, during reassembly, never left to soak.

Balance cock and pallet fork removed and set to one side on the bench mat
The two shellac-bearing assemblies — balance and pallet fork — withdrawn and quarantined from the solvent bath that the rest of the movement is about to enter.

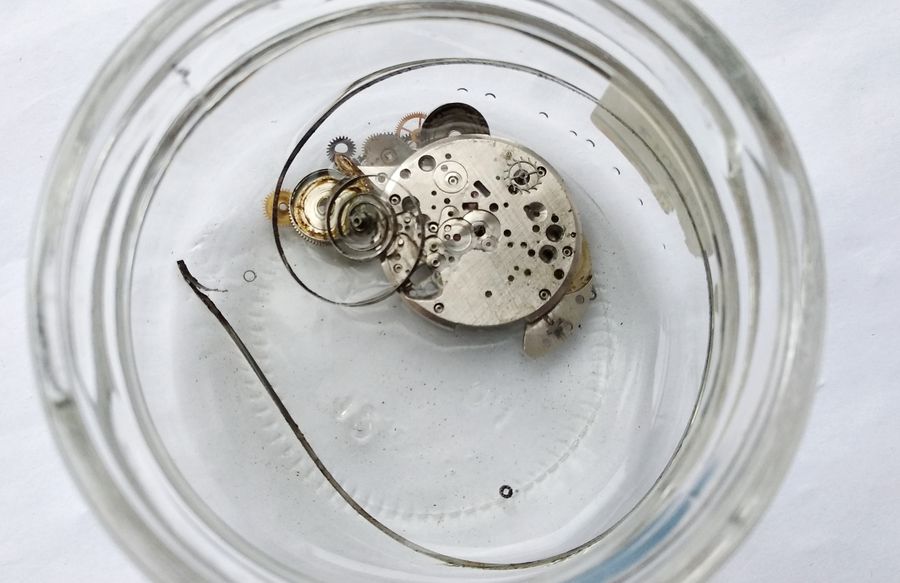
The plate, still carrying everything else, goes into the benzine. It shares the dish with a pair of Slava barrels already soaking — one job does not interfere with the other — and the bench is left overnight in the hope that the grime will yield.

The assembled main plate submerged in a benzine bath alongside other parts
The whole assembled plate committed to the bath. With a contamination this severe, a long soak does more useful work than any amount of force at the bench.

Starting the Teardown: The Winding Wheels

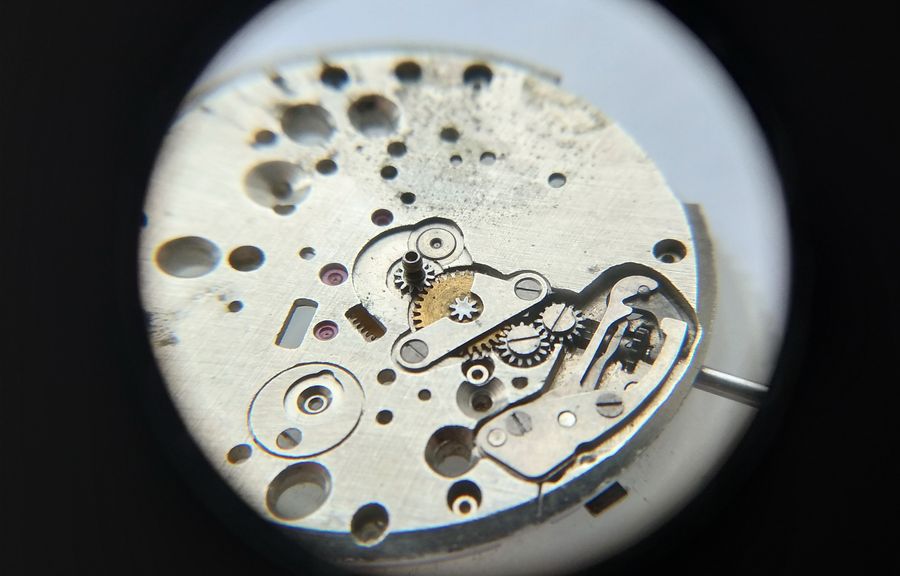
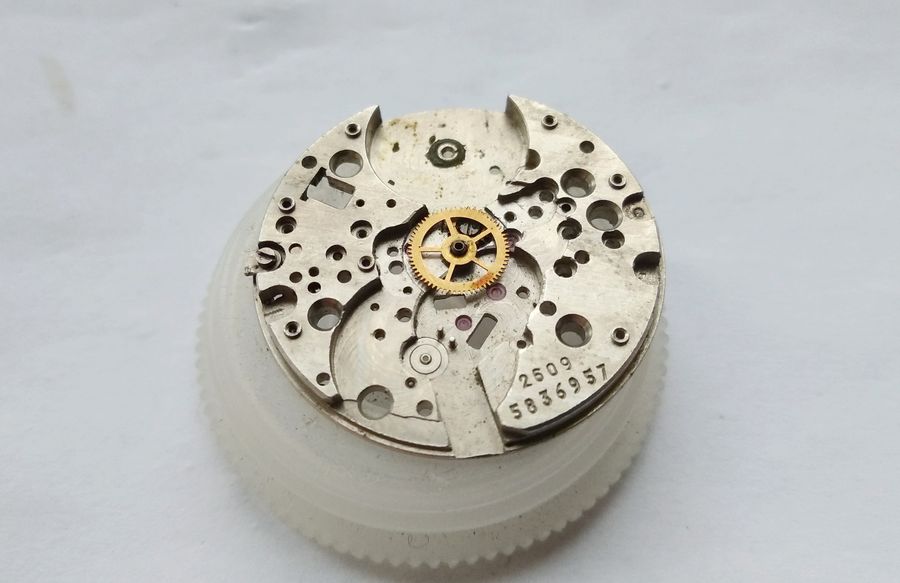
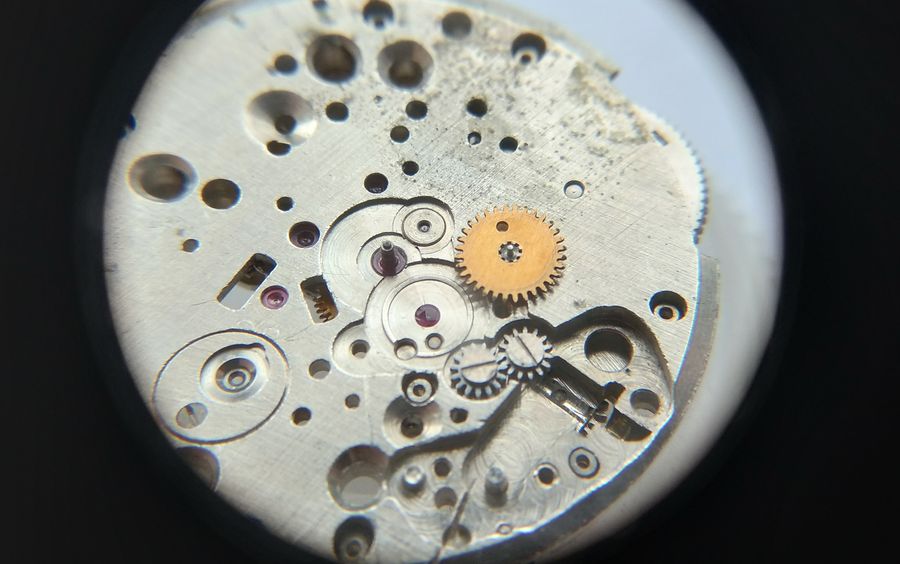
Time, with an alcohol-and-benzine mixture for an assistant, turns out to be a good watchmaker. After the soak the movement has regained a degree of mechanical cooperation and a passably decent appearance — enough to begin dismantling. And the thing that most demands attention is exactly what caught the eye at the start: those three wheels on the barrel bridge. We begin there.

Close view of the three winding wheels grouped on the barrel bridge after soaking
The starting point of the teardown: the three-wheel winding train sitting on the barrel bridge. The crown wheel drives an intermediate wheel, which in turn drives the ratchet — one more transfer than the usual layout.

The screws back out cleanly. I will spare the cliché about laying parts "on a clean sheet of paper" — you do not put something this filthy on anything clean. The state of the wheels speaks for itself.

The winding wheels lifted away revealing heavy black contamination on the bridge below
Wheels off. The fouling beneath them needs no commentary — but it does need removing, and that is the job we have taken on.

It is no better under the wheels than on top of them. Everything here will have to be washed, and washed thoroughly.

The area beneath the winding wheels showing the same dried, darkened lubricant
The seats under the winding wheels carry the same dark residue. There is no shortcut past this; it all comes apart and it all gets cleaned.

Next, off comes the click — the small sprung detent that lets the ratchet turn one way and holds it against the mainspring's pull. Soviet children of a certain generation will hear the cartoon jingle about the music-box dog whose broken spring silences the whole works; the click does, in its quiet way, exactly that job.

The ratchet click and its spring removed from the barrel bridge
The click removed. Small, easily lost, and absolutely essential: without it the mainspring cannot be held wound.

One almost wonders why the grime is so varied in colour — but the colour matters far less than the quantity, and there is plenty of it. Another day of soaking is clearly in order for some of these parts.

Heavily contaminated components showing grime in several different colours
Contamination in several shades. The variety is curious; the volume is the real problem, and it argues for a second soak before anything else comes apart.

The Going Train and Its Bridge

More washing is a foregone conclusion. For now, we move on to the going train — the gear train that carries power from the barrel to the escapement.

The movement positioned to begin removal of the going-train bridge
Turning attention to the going train. With the winding wheels clear, the train bridge is the next structure to lift.

The going-train bridge comes away.

The going-train bridge being lifted off the main plate
The train bridge off the plate, exposing the wheels it covers. Its outline is idiosyncratic — shaped by where the pivots had to sit rather than by any wish for symmetry.

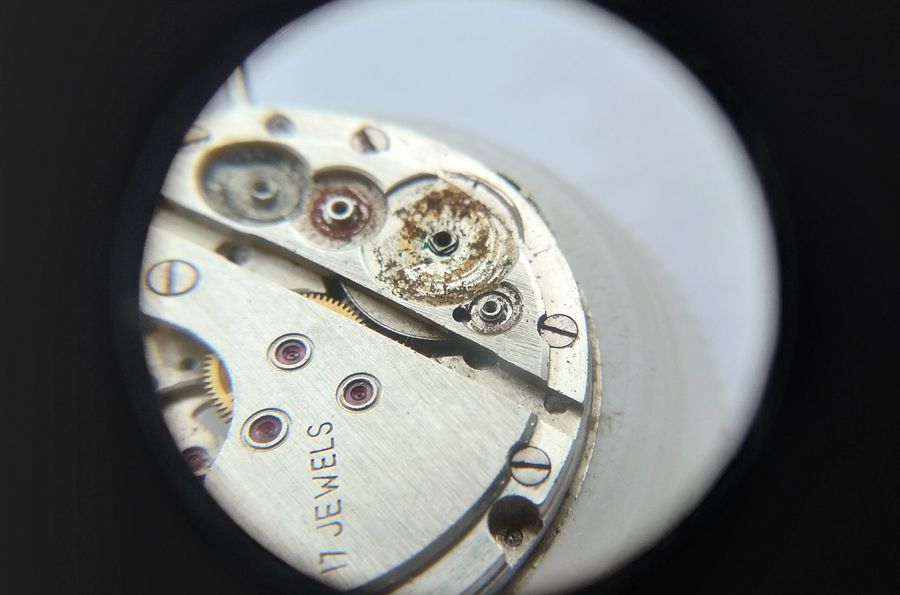
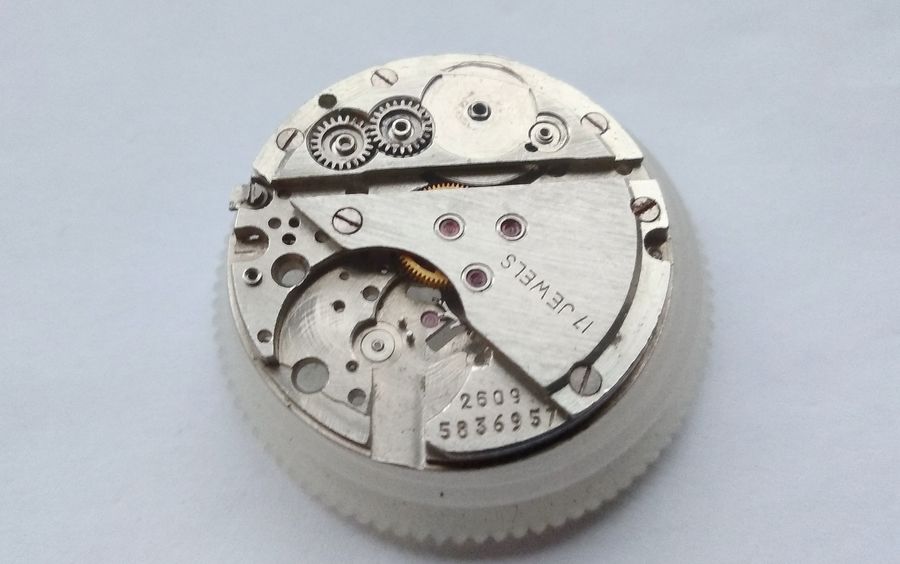
There is nothing exotic about the bridge as a casting, but two details deserve credit. The jewels are large, and each is surrounded by a turned groove that holds the oil and keeps it from creeping away across the metal — an oil sink in everything but name. A plus mark, then, for the designers, engineers, and toolmakers. The markings, oddly, are in Latin script rather than Cyrillic; but the fact that the calibre runs on seventeen jewels is legible in any language.

The going-train bridge showing large jewels each ringed by an oil-retaining groove and Latin-script markings
The detail that earns the praise: generous jewels, each ringed by a machined groove that retains the lubricant. Note the Latin-script marking and the seventeen-jewel designation.

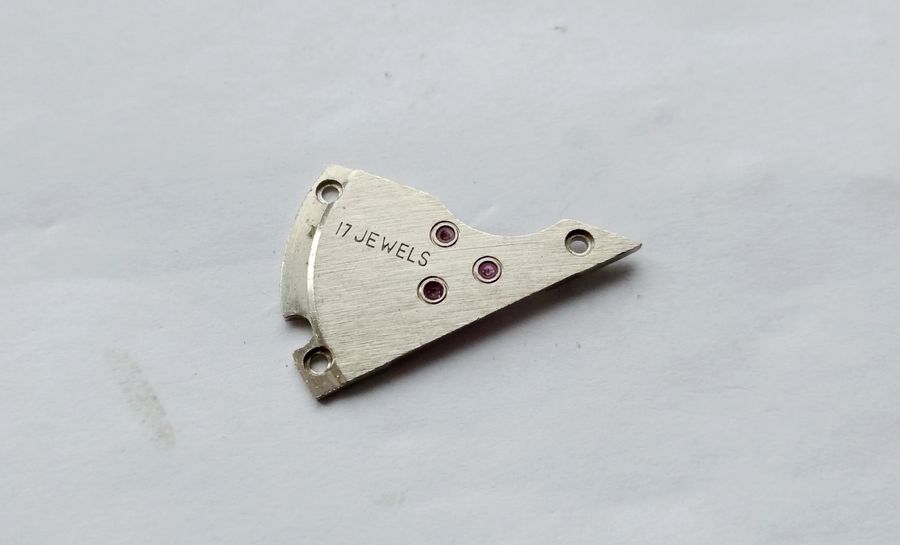
Technologically the part is simply made — a modest amount of milling, none of it complicated. Good engineering here is a matter of intelligent layout, not of expensive machining.

Underside of the going-train bridge showing the simple machining and bearing surfaces
The same bridge from below. The work is straightforward — few operations, none elaborate — which kept the part cheap to produce without compromising its function.

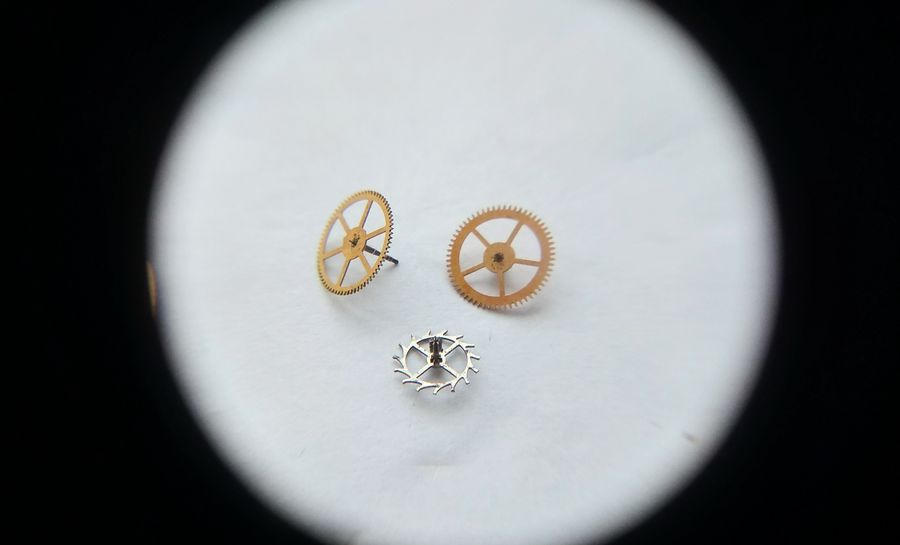
The train wheels lift out next: the seconds wheel, the escape wheel, and the intermediate wheel. Everything here is expected and familiar; if the early 2609 differs from its peers at all in this region, it is only in a slightly tighter packing of the wheels.

The going-train wheels removed and laid out: seconds, escape and intermediate wheels
The going train out of the movement. Conventional in every respect except for how closely the wheels are nested together.

The Barrel Assembly: Reinforcement Where Others Use a Jewel

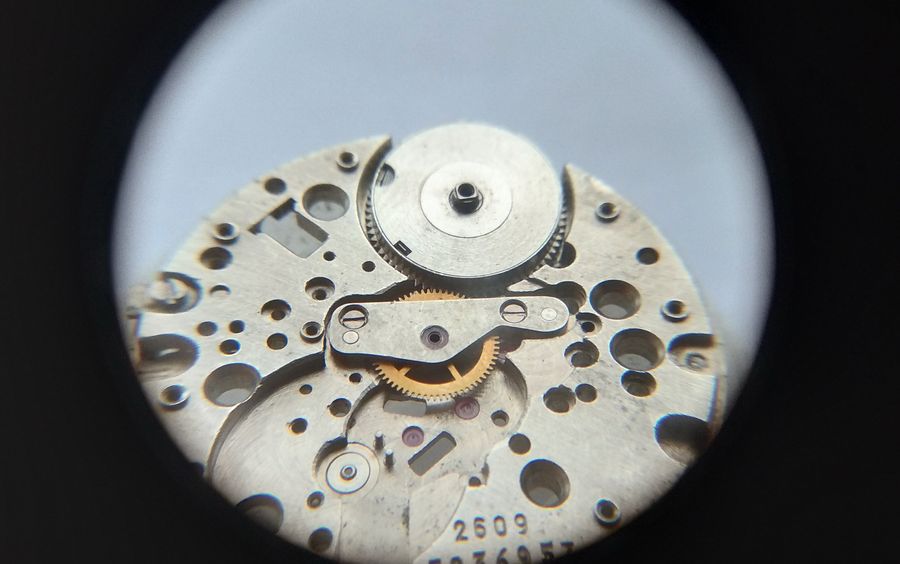
With the train clear, the centre wheel is accessible — but it will not turn. It is seized solid on the same tarry residue, so we leave it for the moment and address the motor instead: off comes the barrel bridge and everything around and beneath it.

The centre wheel still in place while the barrel bridge is addressed
The centre wheel sits exposed but locked solid by contamination. Rather than force it, we set it aside and turn to the barrel and its bridge.

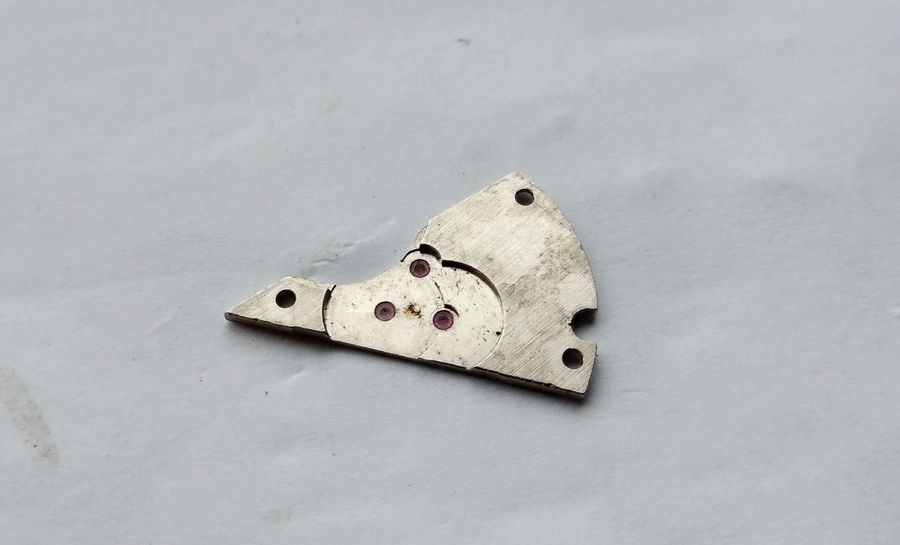
Here is something this bench has not shown in a review before. First, the barrel bridge seen from above.

The barrel bridge viewed from above showing the area around the barrel-arbor pivot
The barrel bridge from the top. The interest is on the other face — but even from here the bridge looks more substantial around the barrel-arbor bearing than the thin casting one expects.

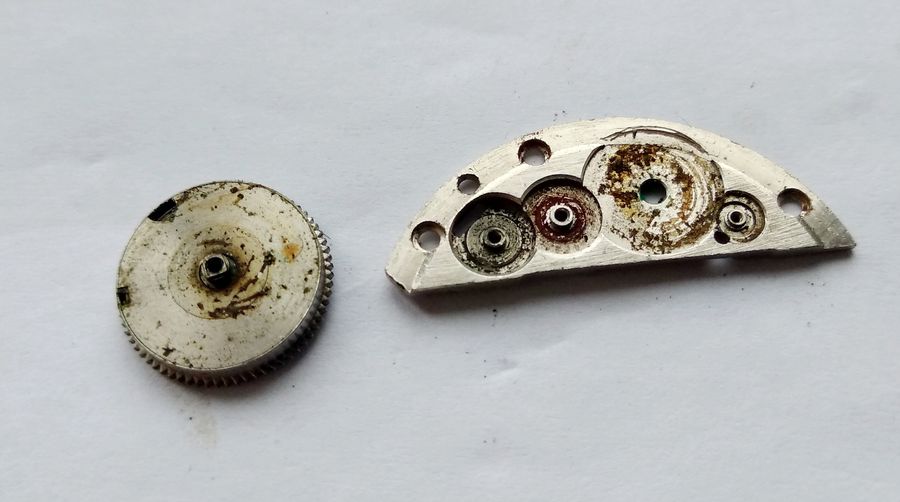
And now from below. There is no jewel here, and no hard-metal insert of the kind Raketa fitted to carry the barrel arbor. Instead the 2609 designers thickened the bridge itself — a raised boss of solid brass exactly where the arbor turns. As the photograph shows, there is not even the beginning of wear at that point. A matching reinforcing boss is machined into the main plate beneath the barrel. The barrel bearing, in other words, is treated as a deliberately oversized plain bearing rather than a jewelled one, and on this evidence the arrangement can be judged thoroughly reliable.

Underside of the barrel bridge showing a raised brass boss around the barrel-arbor hole instead of a jewel
The solution from below: no jewel, no hard-metal bushing as on a Raketa, but a thick brass boss reinforcing the bridge exactly where the barrel arbor runs — and no measurable wear after decades of service.

What was happening inside the barrel itself is a small horror story. I would dearly like to know the brand of oil used to kill this calibre: when the barrel was opened, strings of a sticky substance literally pulled away from behind the cap like icicles. Let it stand as a warning — be extremely careful about what you put inside a watch.

The opened mainspring barrel showing thick, stringy degraded lubricant inside
Inside the barrel: a degraded lubricant so far gone that it drew out in sticky strands when the cap was lifted. This is what the wrong oil becomes after a few decades.

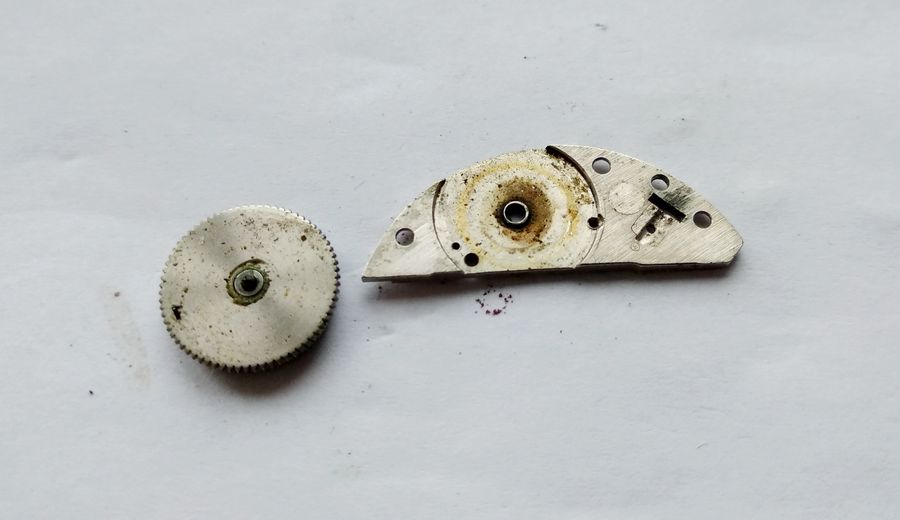
The fouling is not confined to the barrel. The barrel seat on the main plate carries the same tar. There is plainly no avoiding mechanical cleaning here; for now it is left as found, to be dealt with once the plate is bare.

The barrel seat area on the main plate covered in the same dried, tarry residue
The plate around the barrel seat, equally fouled. No solvent alone will lift this; it will need peg-wood and patience once the movement is stripped.

Crossing to the Dial Side: A Minute Wheel on a Jewel

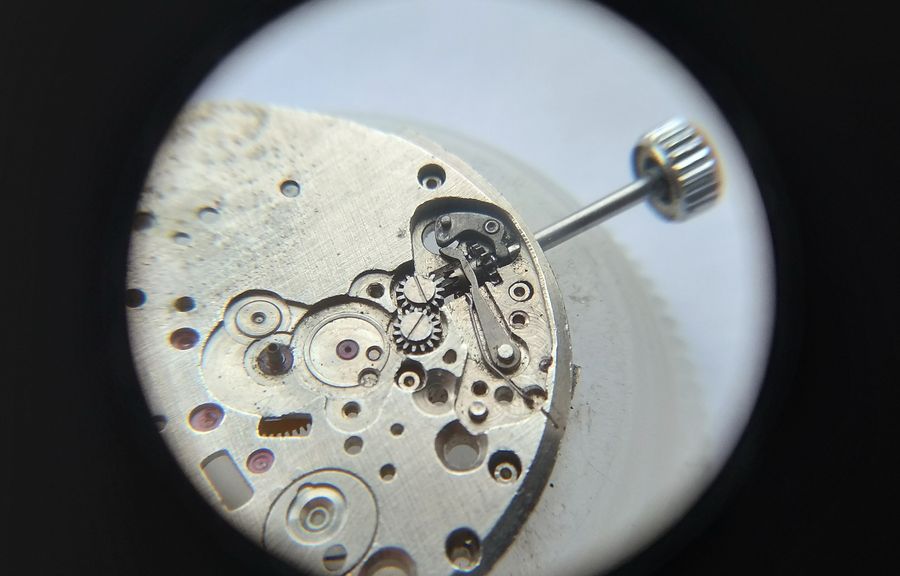
…and we cross to the slow side of the movement — the motion works and keyless works on the dial side.

The dial side of the movement at the start of motion-works disassembly
The slow side, ready for disassembly. The motion works and the keyless works live here, and one of them is about to provide the highlight of the service.

First the cannon pinion, friction-fit onto the centre arbor in the classic manner; it lifts off with the usual bent-beak tweezers. Then we go for the minute-wheel bridge.

The friction-fit cannon pinion on the centre arbor before removal of the minute-wheel bridge
The cannon pinion — a conventional friction fit on the centre arbor — comes off first, clearing the way to lift the minute-wheel bridge.

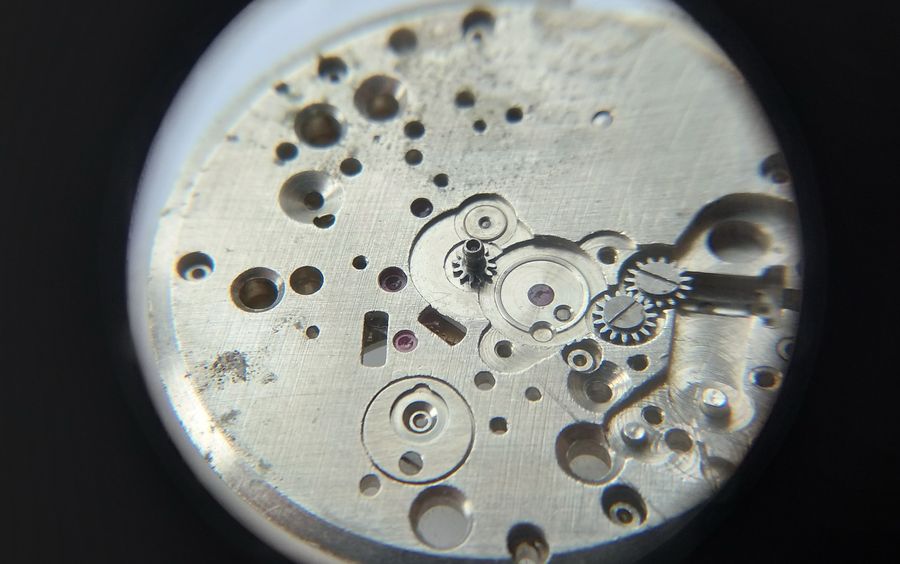
And then comes the moment. Lift the minute wheel and — extraordinary. This is a minute wheel of original design: it runs on a jewel. Ordinarily a minute wheel has no arbor of its own; in the classic layout it carries a hole and turns on a post planted in the plate. Here the arrangement is inverted — the arbor is pressed into the wheel, and the plate is fitted with a jewel to receive it. The result should be a beautifully free-running movement, with the lightest possible action through the motion works. Remarkable.

The minute wheel lifted to reveal it pivots on a jewel set into the main plate
The highlight of the calibre: a minute wheel that pivots on a jewel. Its arbor is pressed into the wheel and the plate carries a pierced ruby to receive it — the reverse of the usual post-and-hole arrangement, and a real rarity at this level.

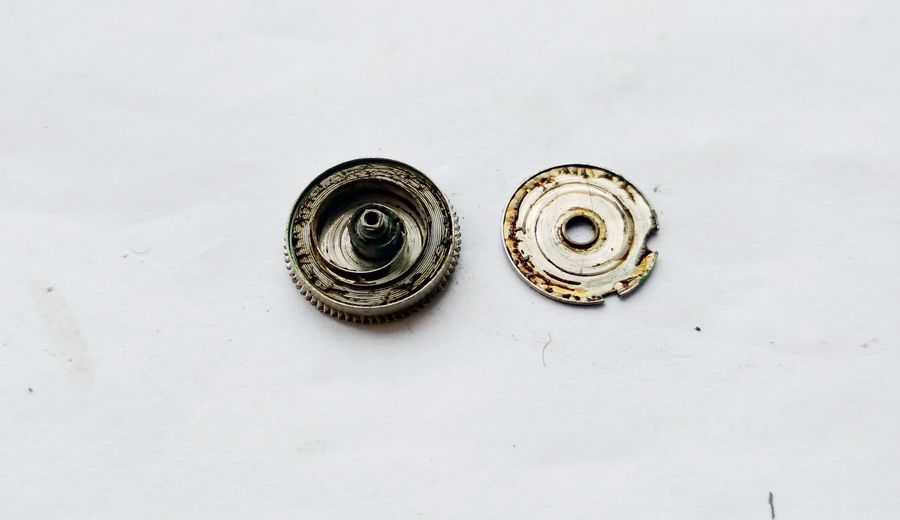
It is worth pausing to admire the engineering. Here is the minute wheel seen from the arbor side.

The minute wheel shown from the arbor side with its pressed-in pivot
The minute wheel from the arbor side, showing the integral pivot pressed into the wheel body — the feature that lets it run in a jewel rather than on a bare steel post.

And from the pinion side.

The minute wheel shown from the pinion side
The same wheel from the pinion side. A part that, on the later 2609Н, would be reduced to an ordinary minute wheel turning on a post.

The Keyless Works and a Spring That Stays Put

Now we begin on the keyless works — the winding-and-setting mechanism.

The keyless works on the dial side before disassembly, with the double spring cover in place
The keyless works as found. The cover plate here is a Poljot signature, and it carries not one spring but two.

A characteristic feature of Poljot movements is this double spring cover. The first spring is responsible for fixing and switching the intermediate setting lever; the second supports the stem-release lever. We lift the spring covers away.

The double spring cover removed, showing its two separate springs
The double spring cover, removed. One spring indexes and holds the intermediate setting lever; the other bears on the stem-release lever — two distinct jobs from one stamped assembly.

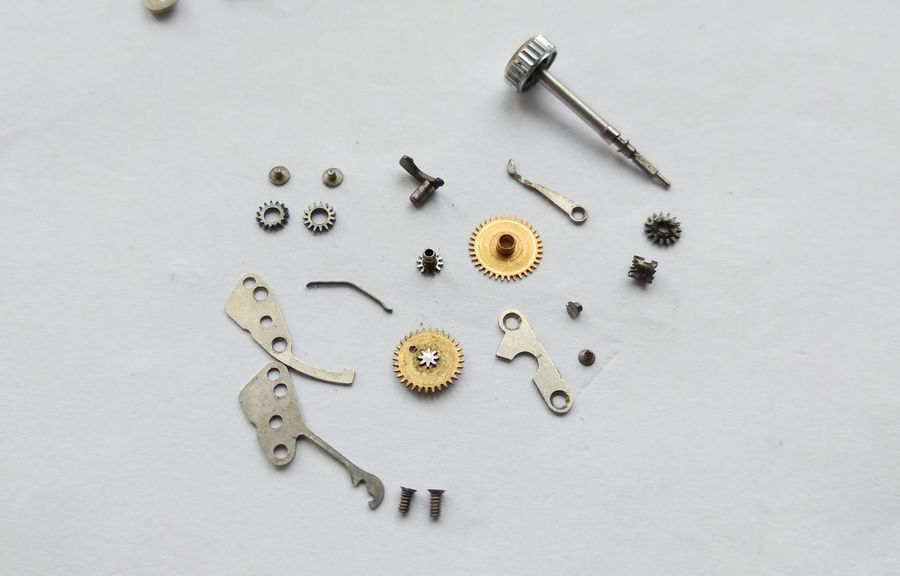
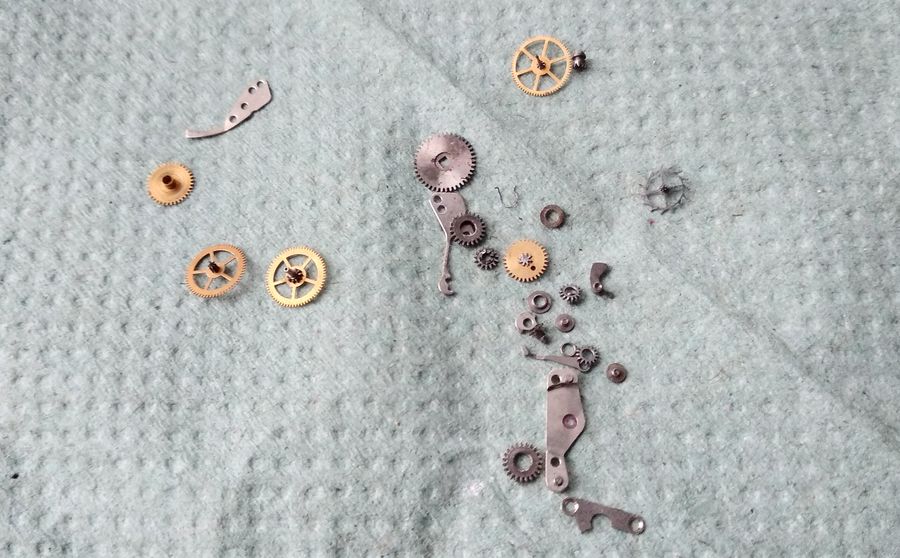
Now the keyless parts themselves. Off come the setting wheels — two of them, identical in construction — followed by the setting lever and the intermediate lever. Last out are the winding stem, the sliding clutch, and the winding pinion.

The keyless components being dismantled from the dial side of the plate
Dismantling the keyless works: two identical setting wheels first, then the levers, and finally the stem, clutch and winding pinion.

The keyless parts, laid out before us.

The removed keyless-works components arranged on the bench
The keyless works spread out — or very nearly all of it. One spring is still hiding on the plate.

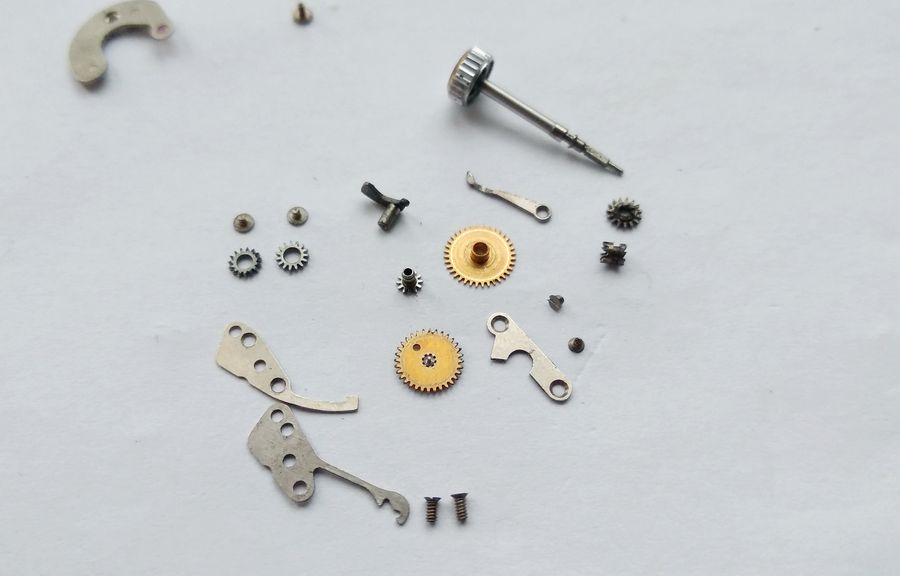
Not quite everything, in fact: the setting-lever spring is still in place. And here the calibre's designers shine again. In place of the classic R-shaped spring — forever threatening to fly off across the room during disassembly — they fitted a single spring seated firmly in a slot. It will not go anywhere. The calendar springs in Poljot movements use the very same principle. It is so convenient that one could leave the spring in place during a routine service if feeling lazy — but here it has to come out, or the dirt cannot be cleaned away.

The single setting-lever spring seated in its slot in the main plate
The setting-lever spring: not a flighty R-spring but a single leaf captured in a slot. The same idea recurs in Poljot calendar work — secure, serviceable, and hard to lose.

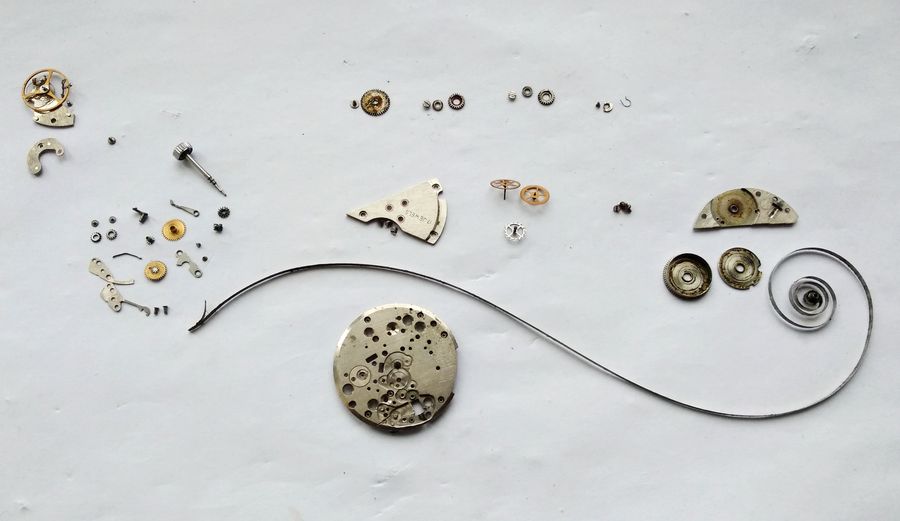
Now the whole company is assembled on the bench.

All keyless-works components including the setting-lever spring laid out together
The complete keyless works, spring and all, ready for cleaning. Nothing left on the dial side now but the seized centre wheel.

The Last Surprise: A Hidden Wheel Beneath the Centre Wheel

The movement is now all but dismantled. The only thing left is to deal with that seized centre wheel.

The nearly stripped main plate with only the seized centre wheel remaining
Practically stripped. One stubborn component remains: the centre wheel, still locked solid in its bearing.

So those parts go back into the benzine and are left to soak for another day.

The remaining components returned to the benzine bath for a further soak
A second soak. The seized centre-wheel area gets the time it needs rather than the force it does not.

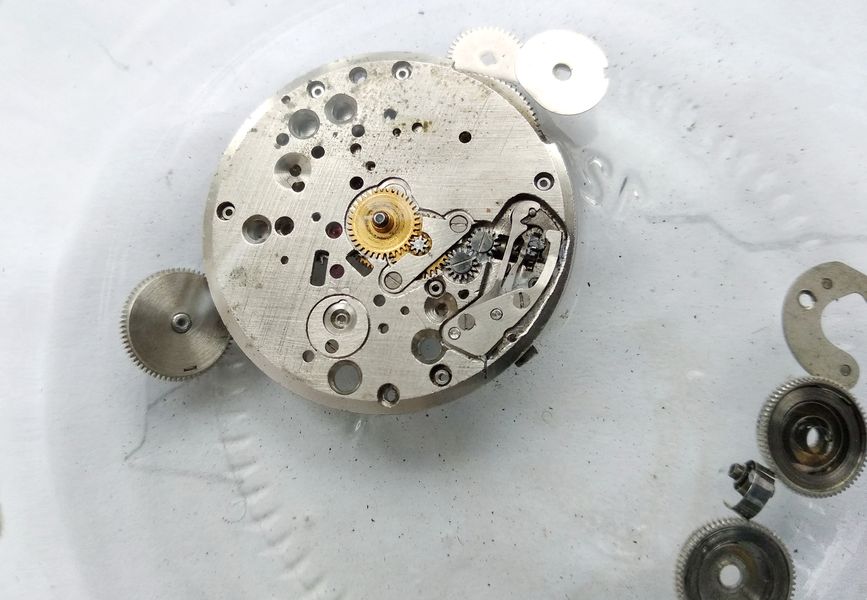
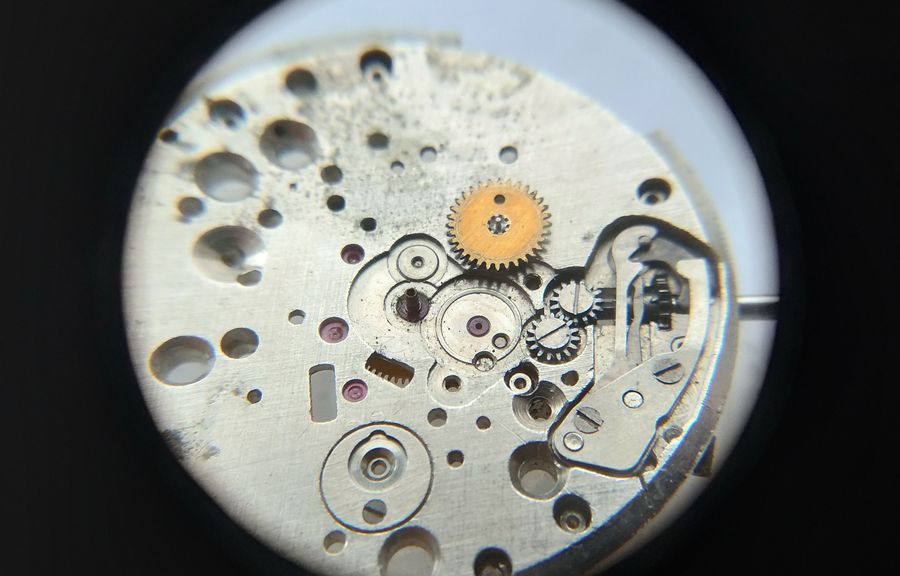
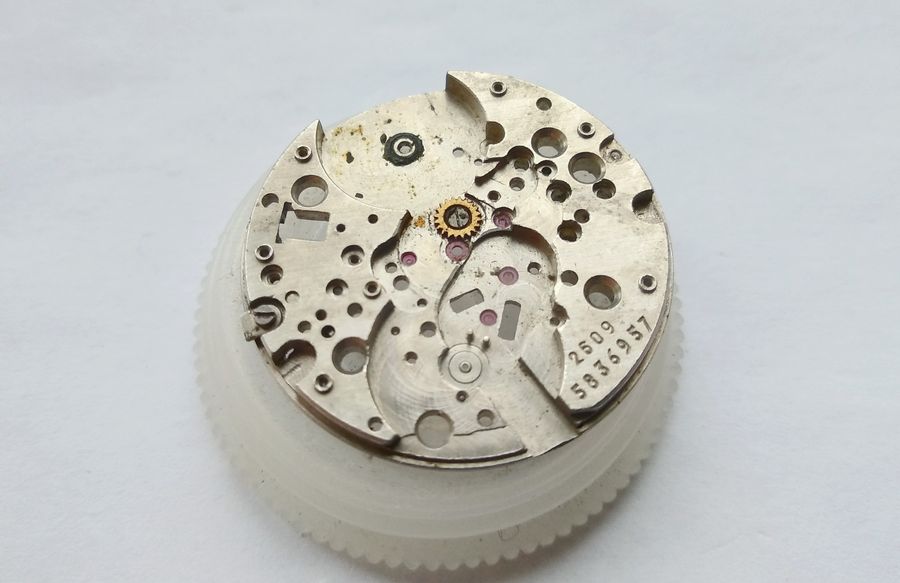
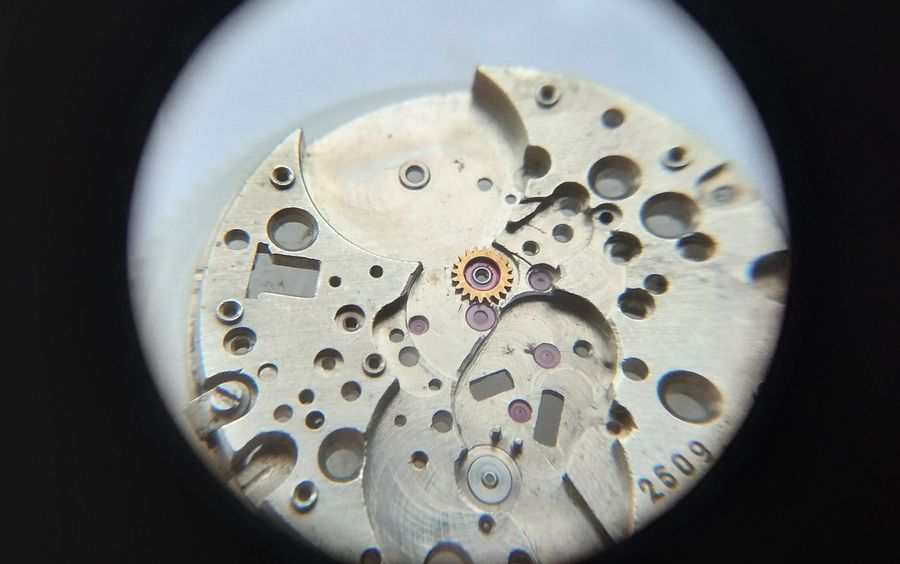
A new working day, and back to disassembly and cleaning. To begin, we finally take out the centre wheel: two screws out, and the centre-wheel bridge lifts away.

The centre-wheel bridge removed after unscrewing its two screws
The centre-wheel bridge off at last. Two screws were all that held it, once the contamination had finally let go.

Beneath it, as expected, sits the centre wheel.

The centre wheel revealed beneath its bridge
The centre wheel, exactly where it should be. The surprise is what lies under it.

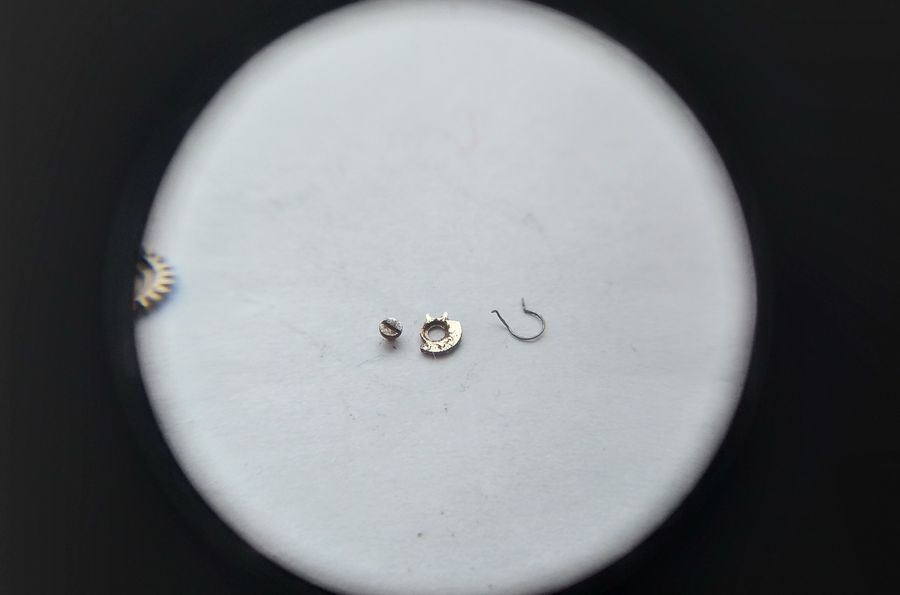
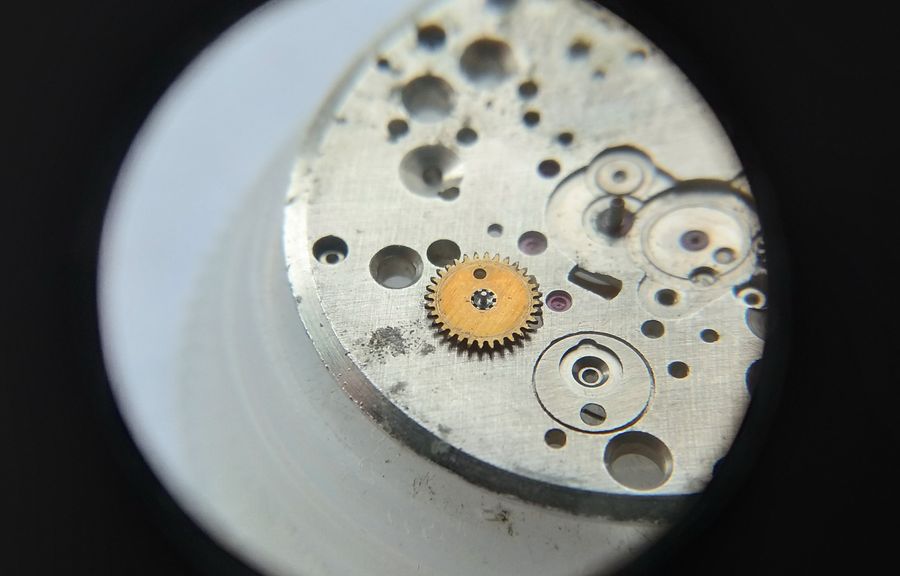
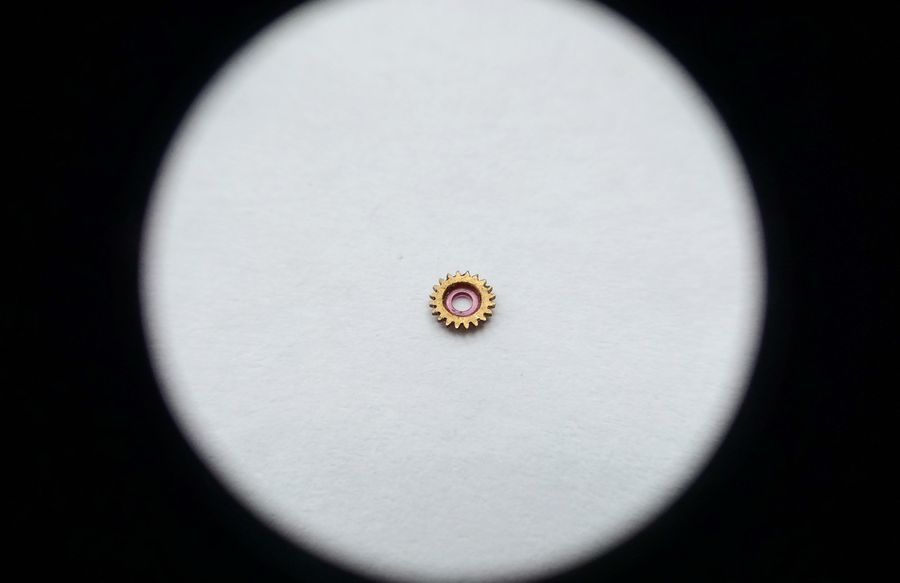
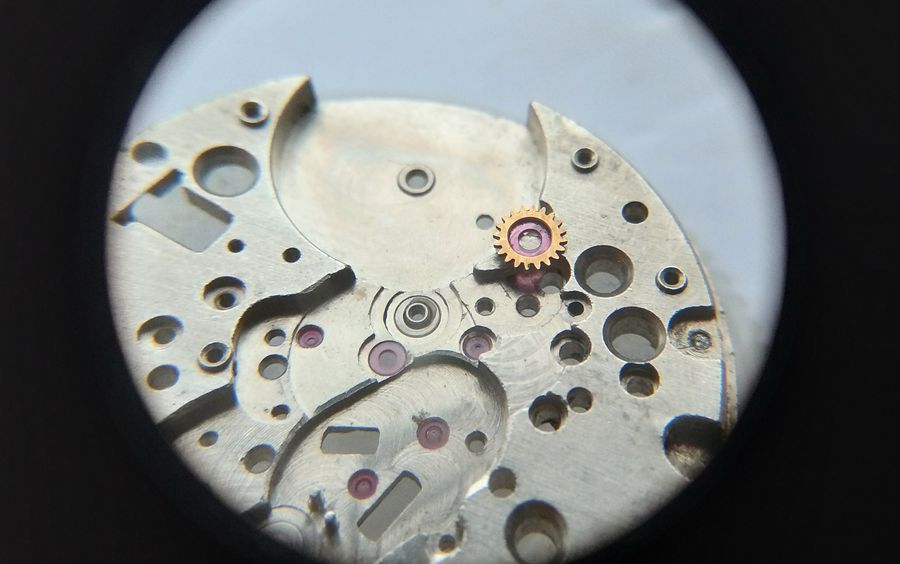
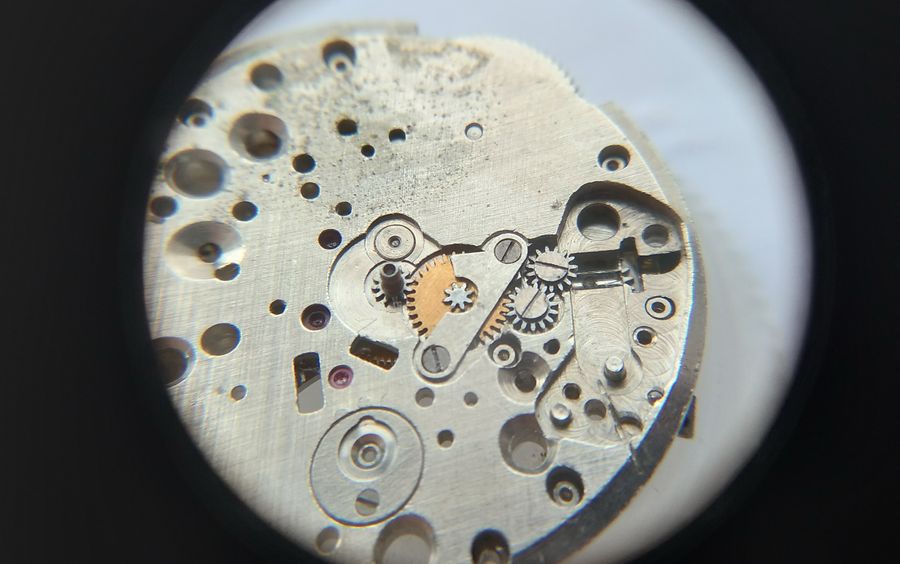
Lift the centre wheel and — there is a small intermediate wheel underneath it. Another unexpected and genuinely interesting feature of the design.

A small intermediate wheel discovered seated beneath the centre wheel
The hidden intermediate wheel beneath the centre wheel — where most comparable calibres show nothing but bare plate. A second structural surprise after the jewelled minute wheel.

Remove that wheel and the surprise compounds: a jewel is mounted into the wheel itself. Friction in the joint, in other words, has been reduced as far as the design will physically allow. The jewel is fairly large, and the rim of the wheel is bevelled — which further reduces the contact and therefore the friction.

The intermediate wheel removed showing a large jewel set into its body and a bevelled rim
The wheel out, and the reason for it: a sizeable jewel set directly into the wheel, with a bevelled rim to pare contact down further. Friction here is engineered toward the minimum the structure allows.

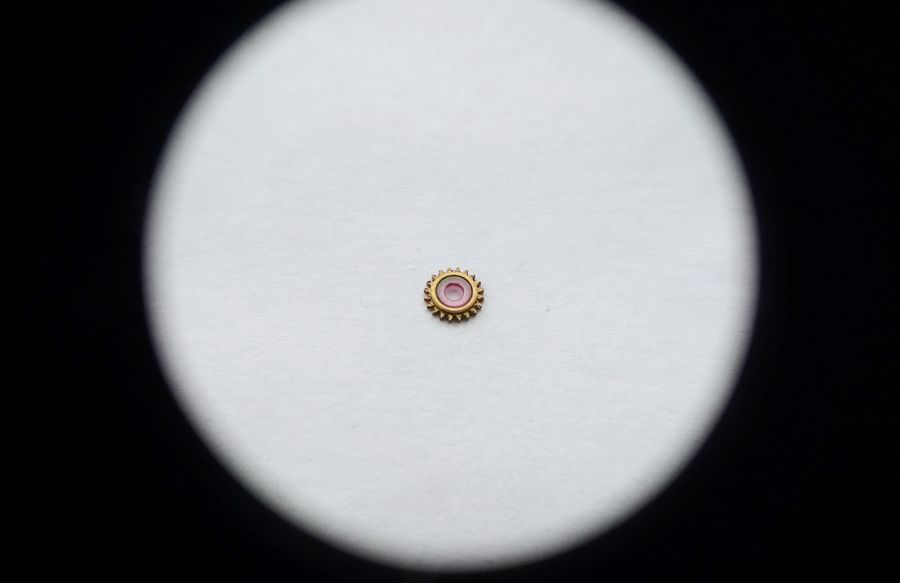
And here is that intermediate wheel seen from the side where its screw secures it.

The jewelled intermediate wheel viewed from its screw-fixing side
The same wheel from the screw side. Like the jewelled minute wheel, this assembly would be quietly deleted from the later, simplified 2609Н.

Cleaning

The plate is now free of parts — but not of dirt. So it begins. The arsenal on the bench runs to benzine, kerosene, acetone, and alcohol; something in that lineup will certainly do the job, whether used in turn or together.

The bare but still dirty main plate beside bottles of benzine, kerosene, acetone and alcohol
Bare plate, full dirt. With contamination this stubborn, the solvent rack — benzine, kerosene, acetone, alcohol — earns its keep.

Out come the brushes, the cotton swabs, and the peg-wood, and the tedious work begins. The result does not keep us waiting — if half a day spent cleaning parts can be called "not waiting." Everything ends up gleaming and tidy.

Cleaning tools — brushes, cotton swabs and peg-wood — beside the brightly cleaned components
The hand tools that do the real work: brushes, swabs and peg-wood. Half a day later the parts are bright and clean, ready for inspection and oiling.

Reassembly: The Barrel First

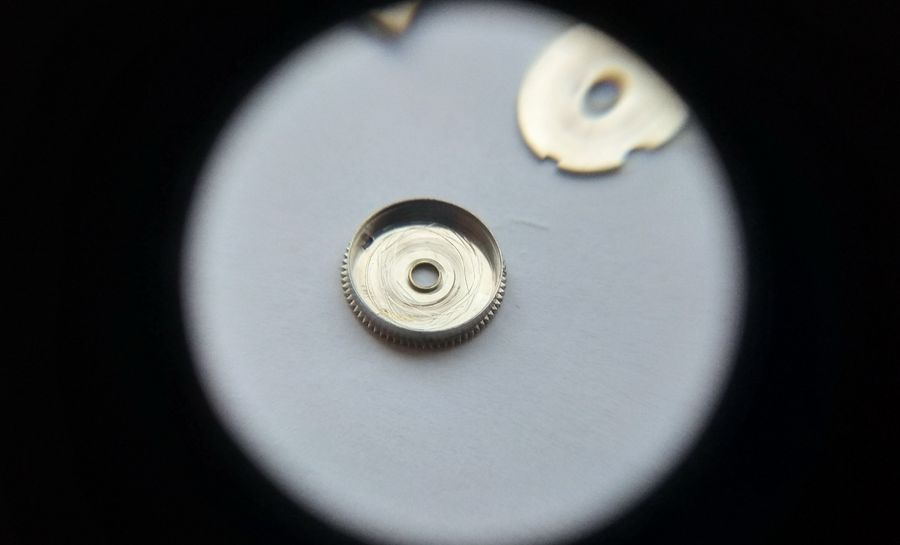
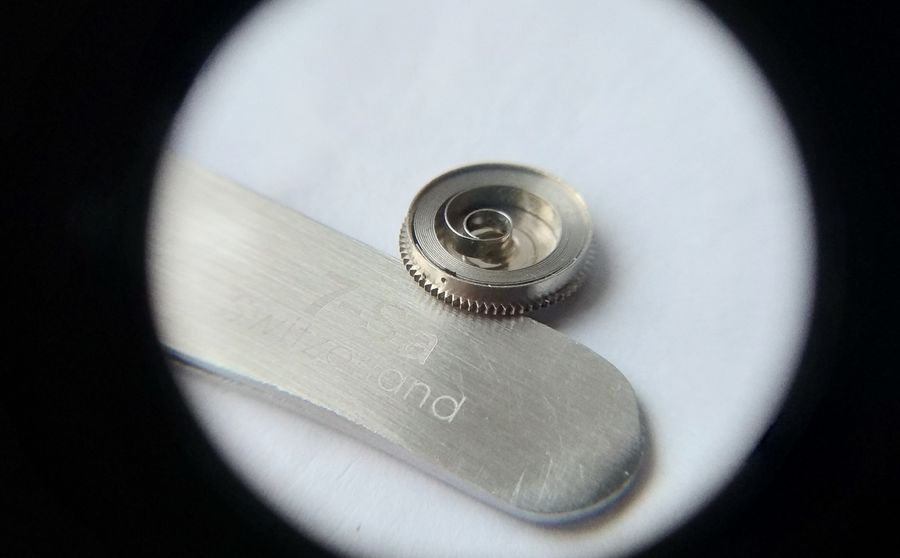
Assembly begins. The first job is the barrel. Here it is, gleaming.

The cleaned mainspring barrel ready for reassembly
The barrel after cleaning — a different object entirely from the tar-filled drum of an hour ago.

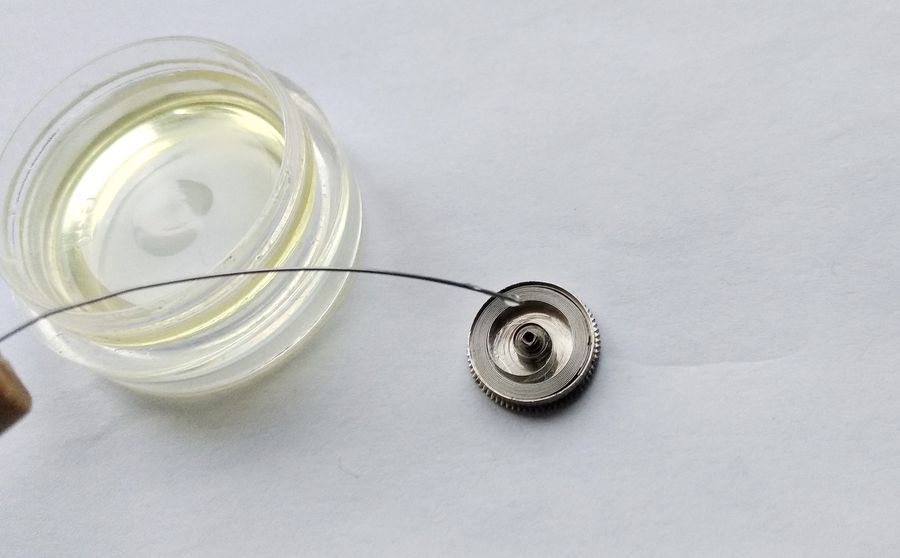
And the mainspring is no worse. As you can see, the spring here is S-shaped.

The cleaned S-shaped mainspring uncoiled on the bench
The mainspring, cleaned. The gentle S-form is the type used across this generation of Poljot — and it has survived the contamination intact.

The spring goes back into the barrel.

The mainspring being seated back into the barrel
Coiling the spring home. Done by hand here, with care to keep the coils flat and the bridle correctly oriented.

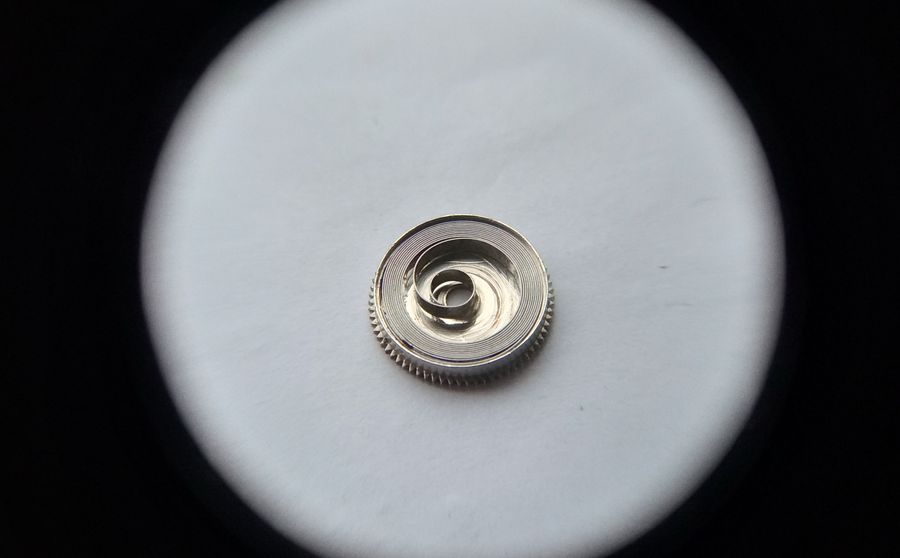
Note the small marker on the end face of the barrel — a single punched dot. It marks the centre of the slot that receives the sword-shaped tang of the spring's outer end. Line up the spring's tang with that dot and the two mate easily. In the photograph the protruding sword-shaped tang of the spring is clearly visible.

The barrel rim showing a punched dot marker aligned with the protruding sword-shaped spring tang
A detail worth knowing: the punched dot on the barrel rim marks the slot for the spring's sword-shaped outer tang. Align tang to dot and seating the bridle takes seconds rather than minutes.

The spring is lubricated with Б-1 oil.

Applying Б-1 lubricant to the mainspring inside the barrel
Lubrication of the mainspring with Б-1, the braking grease appropriate to a barrel of this type — applied sparingly along the coils.

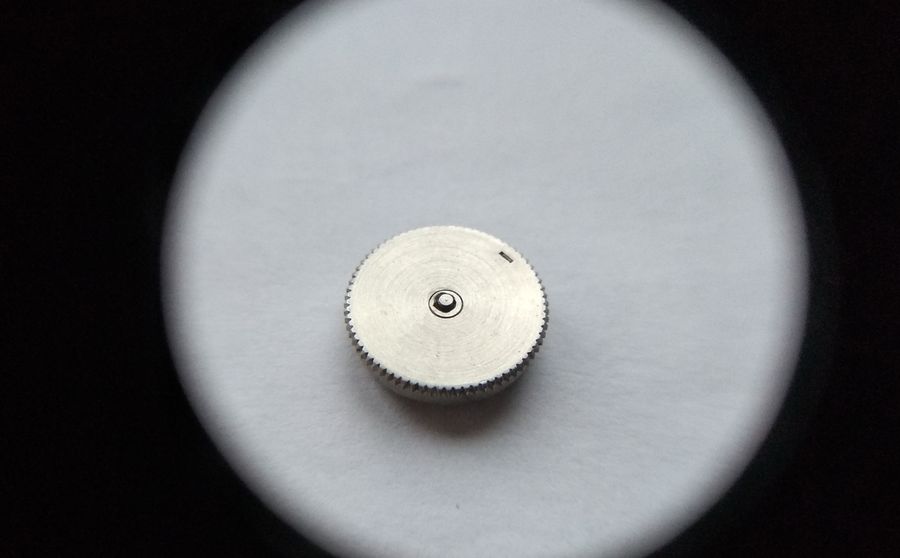
Then the barrel is closed with its cap, again using the dot marker described above to orient it.

Closing the barrel with its cap, aligned to the marker
Capping the barrel, orientation set by the same punched mark. With the tang correctly located, the cap seats square and flat.

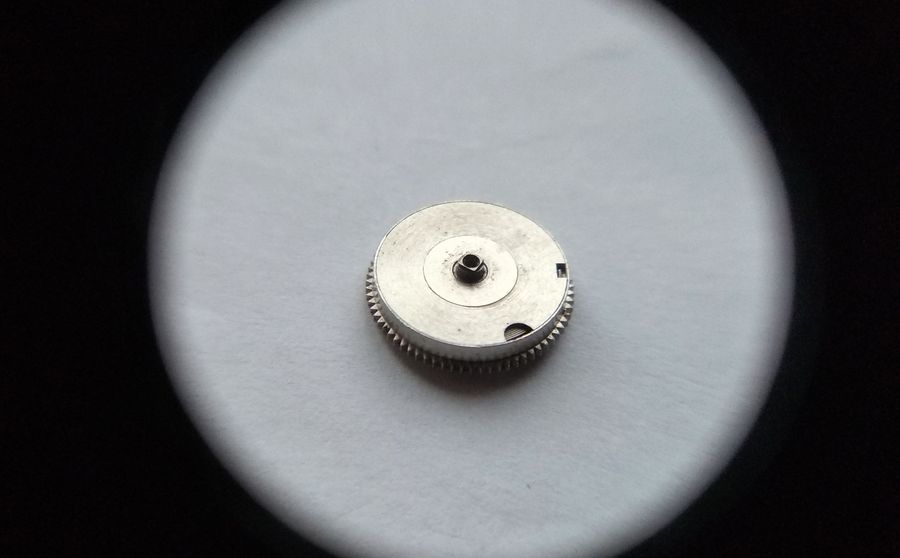
That is the barrel finished. The black you can see on the barrel core is not dirt — it is oil; the camera simply renders some details with a certain bias.

The completed mainspring barrel, assembled and lubricated
The barrel, complete. The dark sheen on the core is fresh oil, not residue — a trick of the lens rather than a lapse in cleaning.

Reassembly: Building From the Centre-Wheel Stack

Now the plate. How does it look? Spotless. The labour paid off — wiped down with alcohol and acetone. It was sunflower oil in there, beyond any doubt. The scoundrels.

The fully cleaned main plate, bright and free of residue
The main plate after cleaning with alcohol and acetone. The contaminant, now confirmed, was an ordinary edible oil — a guaranteed way to varnish a movement solid.

Now the small matter of moving all of this onto the plate and setting it in its place. To work.

The cleaned components gathered, ready to be reinstalled on the main plate
Every part cleaned, inspected and arranged. From here the movement goes back together — but not quite in the usual order.

Assembly of this movement, it turns out, has to depart a little from the customary sequence. The first thing to build is the centre-wheel assembly — because of the jewelled intermediate wheel that lives beneath it.

Beginning reassembly with the centre-wheel assembly rather than the usual order
Reassembly starts where this calibre demands it: the centre-wheel stack, whose hidden jewelled wheel must go in before anything above it.

We oil the arbor of the intermediate wheel and set the jewelled intermediate wheel onto its arbor.

Installing the jewelled intermediate wheel onto its lubricated arbor
The jewelled intermediate wheel going onto its freshly oiled arbor — the first component down, and the one most easily forgotten by anyone working from habit.

The wheel is secured with its screw. Everything here is done carefully and gently — the jewel is fragile, and one careless move and… well, the rest is obvious.

Securing the intermediate wheel with its retaining screw
Fixing the wheel with its screw. The jewel set into the wheel is brittle; the screwdriver is kept under full control to avoid a slip.

The centre wheel's turn.

The centre wheel ready to be installed over the jewelled intermediate wheel
With the intermediate wheel secured, the centre wheel can go back over it — the second element of the stack.

We oil the jewel and set the wheel in place. The lubricant is МБП-12.

Lubricating the jewel with МБП-12 and seating the centre wheel
The centre wheel seated, its jewel charged with МБП-12 — the light oil appropriate to a fast-turning train pivot of this kind.

The centre-wheel bridge goes on.

Installing the centre-wheel bridge over the assembled stack
The centre-wheel bridge installed, closing the stack that had to be built first.

Now the barrel with its spring.

Placing the assembled barrel and mainspring onto the plate
The finished barrel dropped into place, its arbor entering the reinforced plate boss rather than a jewel.

And the barrel bridge — clean now, unlike at the start.

Installing the cleaned barrel bridge over the barrel
The barrel bridge back on, its reinforcing boss seated over the arbor. A very different sight from the tar-covered casting we removed.

Now the going train: in go the escape wheel, the intermediate wheel, and after it the seconds wheel.

Reinstalling the going-train wheels: escape, intermediate and seconds
The going train going back: escape, intermediate, then seconds wheel, each dropped into its jewel in turn.

We cover the going train with its bridge. The bridge, by the way, seated with surprising ease. A successful design.

Fitting the going-train bridge over the reinstalled wheels
The train bridge home. It dropped over all the pivots with unusually little coaxing — a quiet testament to how well the layout was thought out.

Now we fit the winding train, which — as noted at the very beginning — consists of three wheels. That finishes the fast side of the movement for now, and we cross to the slow side, where the keyless works, the setting train, and the minute wheel are waiting.

Reinstalling the three-wheel winding train on the barrel bridge
The three winding wheels reinstalled, the feature that opened this teardown now closing the fast side of the reassembly.

The Slow Side Goes Back Together

This side is clean too. The corrosion will not really come off — and there is no need to chase it.

The cleaned dial side of the plate showing some residual corrosion
The slow side, cleaned. A little corrosion remains in the steel; it is cosmetic and harmless, so it is left alone.

So we install and secure the setting wheels.

Installing and securing the two setting wheels on the dial side
The two identical setting wheels back in place and secured — the first of the slow-side components to return.

Now the minute wheel… no — getting ahead of myself.

The dial side mid-assembly, pausing before the minute wheel is fitted
A deliberate pause. The jewelled minute wheel is tempting to fit next, but the sequence has to be respected to keep it safe.

First we install the cannon pinion. Done in this order, there is less chance of damaging the minute wheel — easy to get carried away otherwise.

Installing the cannon pinion onto the centre arbor before the minute wheel
The cannon pinion goes on first. With it seated on the centre arbor, the delicate jewelled minute wheel can be fitted without risk of knocking it.

There — the cannon pinion is on the centre-wheel arbor. Now the minute wheel can safely go in, its jewel lubricated first, of course. My thanks once again to the designers for an assembly as elegant as this one.

Fitting the jewelled minute wheel after the cannon pinion is in place
The minute wheel installed on its jewel, the jewel oiled beforehand. This is the part that makes the early 2609 worth the extra care it demands.

Nor do we forget the minute-wheel bridge.

Installing the minute-wheel bridge over the jewelled minute wheel
The minute-wheel bridge fitted, capping the jewelled pivot that distinguishes this calibre.

We install the keyless parts. Here everything is as usual.

Reinstalling the keyless-works components on the dial side
The keyless works reassembled — stem, clutch, winding pinion and levers back in their familiar relationship.

Then we cover the keyless works with the two springs — the feature described back during disassembly.

Refitting the double spring cover over the keyless works
The double spring cover refitted: one spring indexing the intermediate setting lever, the other holding the stem-release lever, exactly as before.

Train Run, Escapement, and Balance

We check the run of the gear train. As expected, it proved excellent — the movement has a very light, free action. After that, the pallet fork goes in, the working faces of its pallet stones lightly lubricated.

Checking the free run of the train before fitting the pallet fork
Testing the train's freedom before the escapement goes in — and it runs beautifully. The pallet fork follows, its stones lightly oiled on the working faces.

We fix the pallet fork with its bridge.

Securing the pallet fork with its bridge
The pallet bridge installed, locating the fork between its banking and holding it to the correct endshake.

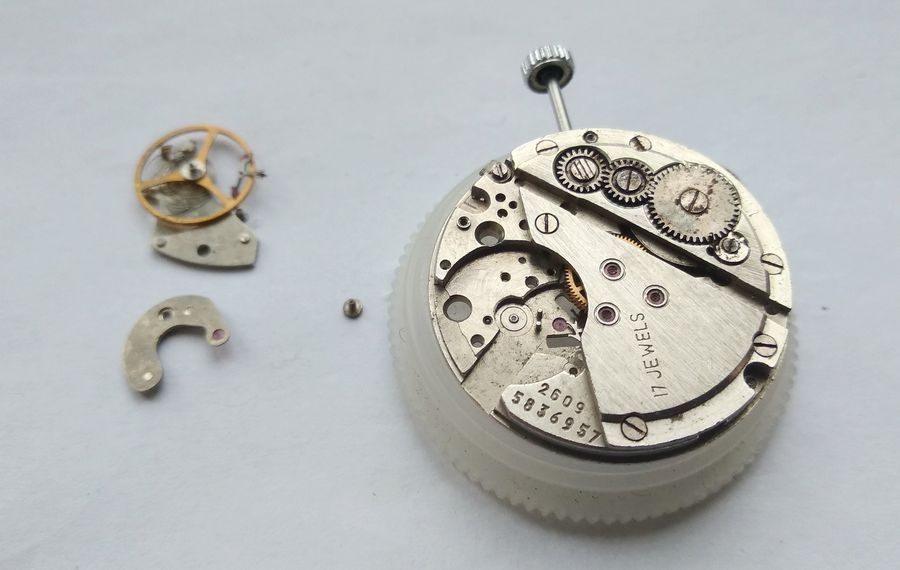
We install the balance. The bouchons are still in the benzine for now; we will fetch them, lubricate them, and set them into their seats.

Installing the balance assembly, with the bouchons still to be fitted
The balance back in place. The bouchons — the cap-jewel settings — are still soaking; they will be oiled and seated to finish the shock bearings.

The movement is ready to take up its beat — and we have made the acquaintance of one more superb watch calibre: the Poljot 2609, seventeen jewels.

The fully reassembled Poljot 2609 movement, ready to run
The completed movement, ready to run. Every quirk that came apart at the start is back in place — the jewelled minute wheel, the hidden intermediate wheel, the three-wheel winding train.

Among Its Descendants

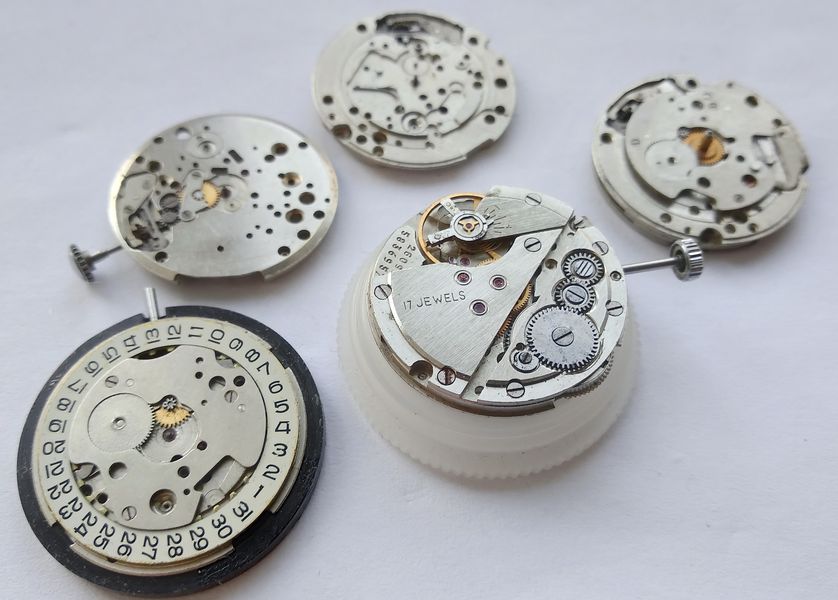
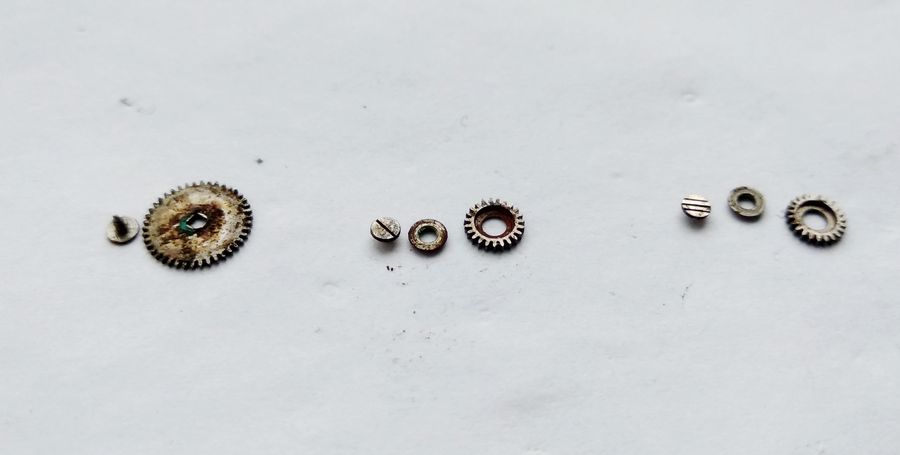
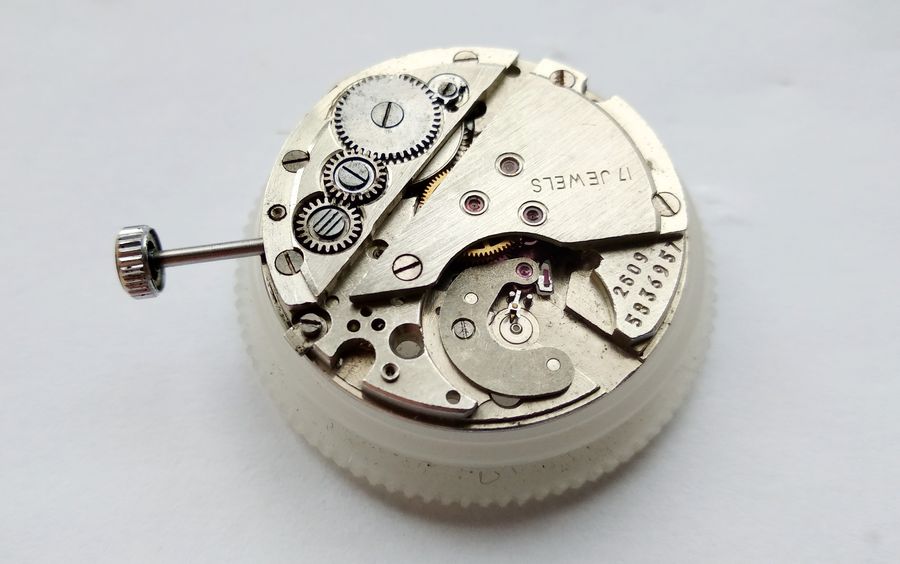
Done. Here is the Poljot 2609 in the company of its later relatives — movements built on the 2609.Н base.

The early Poljot 2609 movement displayed alongside later 2609.Н-based movements
The early 2609 surrounded by its descendants on the 2609.Н platform — visually similar, internally far simpler.

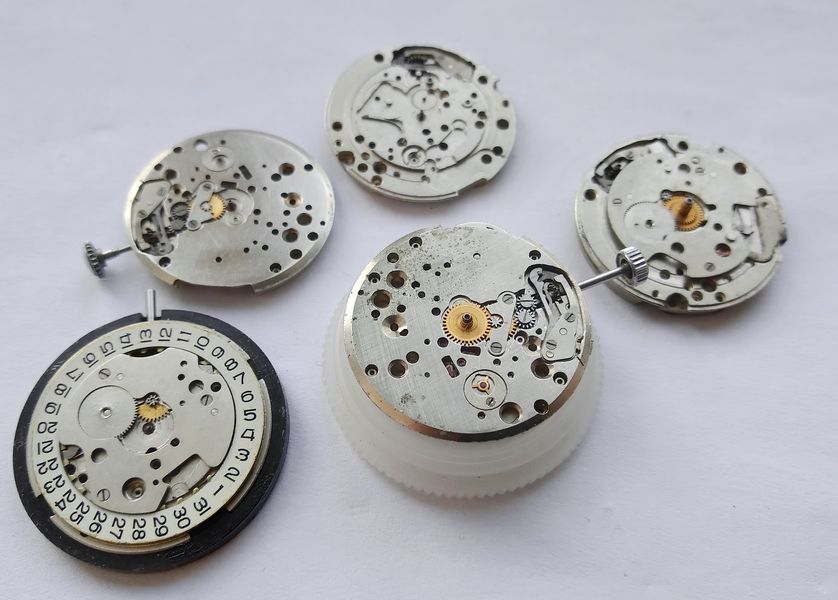
A brief verdict. A wonderful movement with its own genuine quirks. Honestly, it is a pity it was replaced by the more manufacturable, simplified 2609Н. But the ways of designers are inscrutable: very likely the new development made the movement more versatile, eased production, made room for a calendar, and brought the finished product's cost down. What was lost, though, was the minute wheel on its jewel — and that wonderfully original jewelled intermediate wheel under the barrel side of the train. And precisely because those features were lost, restoring these early examples is all the more interesting and rewarding.

Closing portrait of the restored early Poljot 2609 caliber
A closing portrait. The early 2609 is not the most valuable Soviet calibre on the bench, but it may be one of the most quietly inventive — and that is reason enough to keep them running.
0
58
29 May, 2026
Comments0

Write a review

Note: HTML is not translated!
icon_whatsapp icon_mes icon_teleg icon_email icon_viber icon_callback