Cart
Your shopping cart is empty!
It's never too late to make things right :)
Looking to restore a vintage Soviet Zvezda watch? Our detailed tutorial walks through each step of the process, from case opening to movement servicing and final assembly. Includes high-quality photos and historical context of this remarkable timepiece.
There's something magical about vintage timepieces that modern watches simply can't replicate. When I acquired this Soviet-era Zvezda ("Star" in Russian) watch from the 1950s, it was in deplorable condition - corroded, tarnished, and completely non-functional. However, I recognized its historical significance and decided to document the complete restoration process. This particular model represents an important chapter in Soviet watchmaking history, and bringing it back to operational condition became a personal quest.
The Zvezda watch line began production in 1935 when the Soviet government established a watch factory in Penza. Using technology acquired from the French LIP company, specifically their T-18 movement (where "T" stands for "Tonneau" or barrel-shaped), Soviet watchmakers created these distinctive timepieces. Initially branded as "ZiF" watches in 1938, they were later renamed "Zvezda" in 1940.
The T-18 movement featured fifteen ruby jewels in a unique barrel-shaped design measuring 18×28.5mm. These watches were produced in both women's and men's versions, though the women's barrel-shaped models became more iconic. Some horological historians believe the Zvezda mechanism eventually evolved into the famous K-26 (R-26) movement used in Pobeda watches, though this remains somewhat speculative.
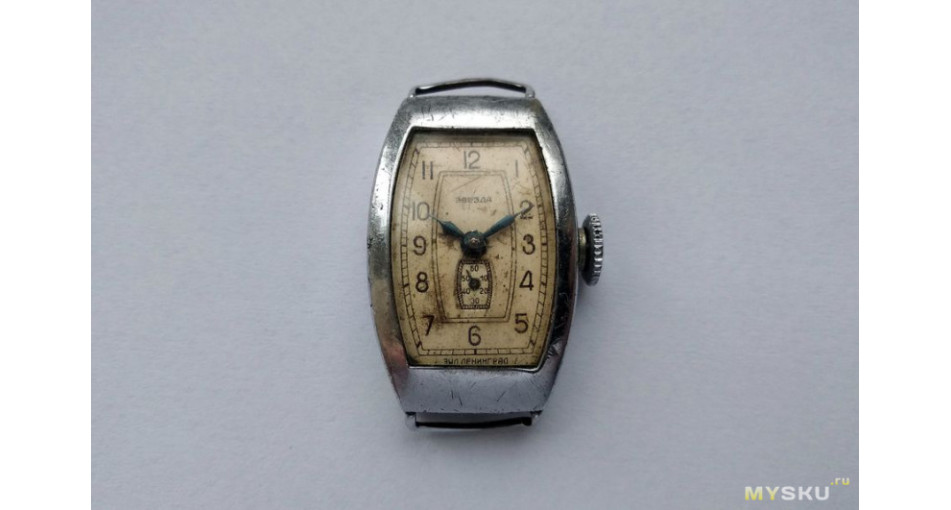
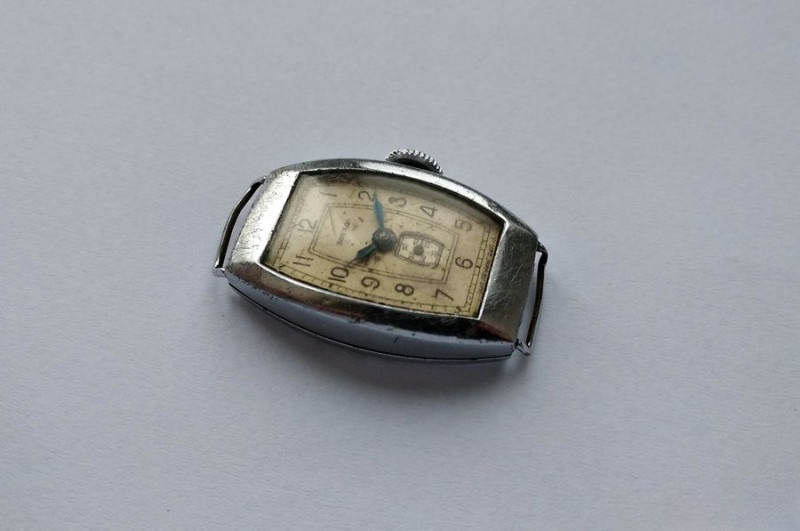
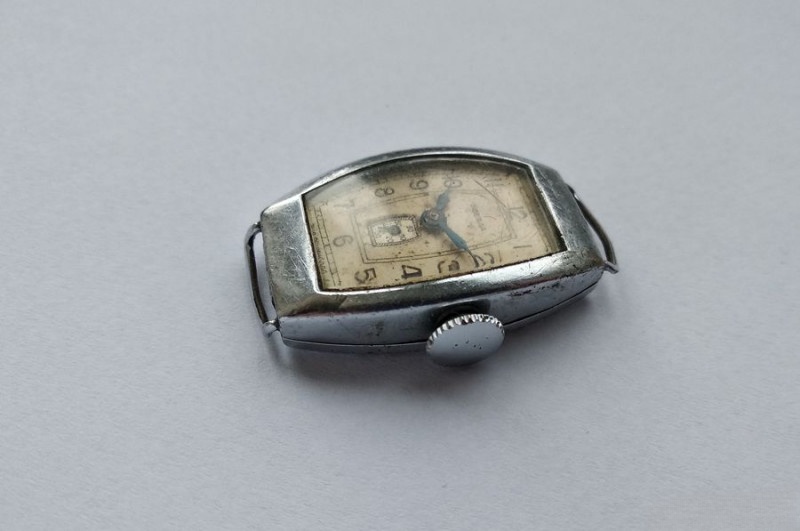
The watch that came into my possession was manufactured in the fourth quarter of 1956 - making it almost 70 years old at the time of restoration. Despite its advanced age and poor external condition, I was confident that with proper disassembly, cleaning, and reassembly, this mechanical marvel could be revived.
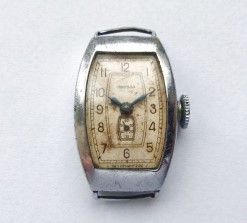
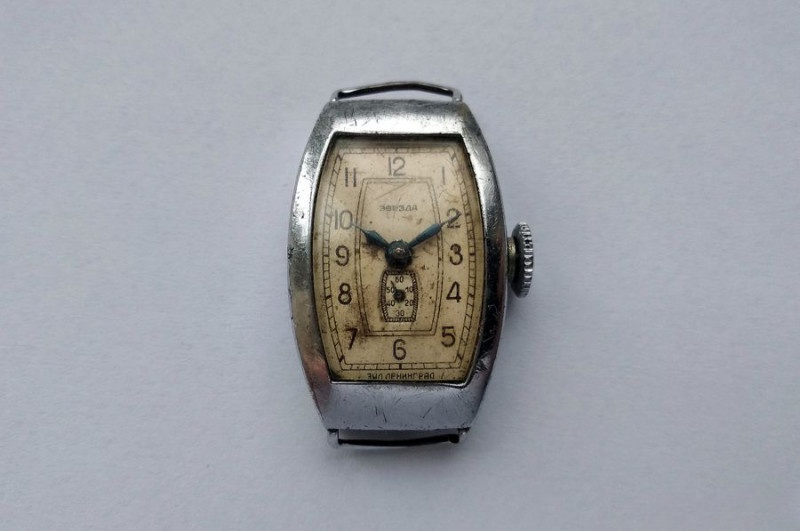
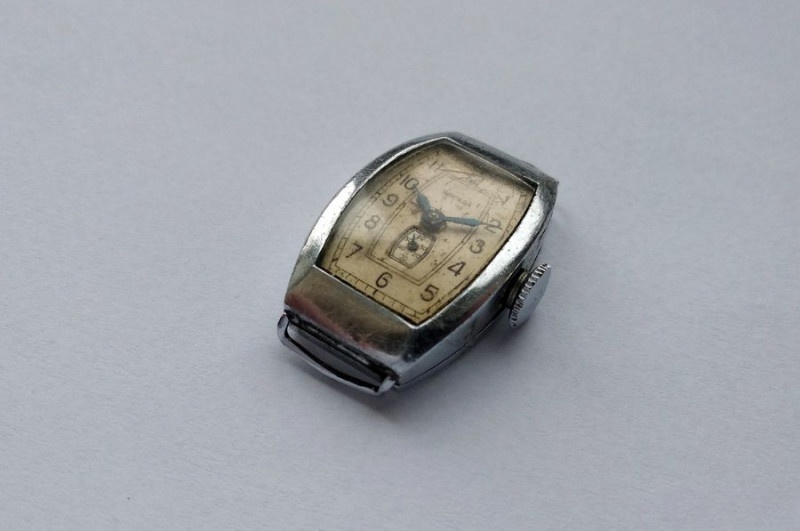
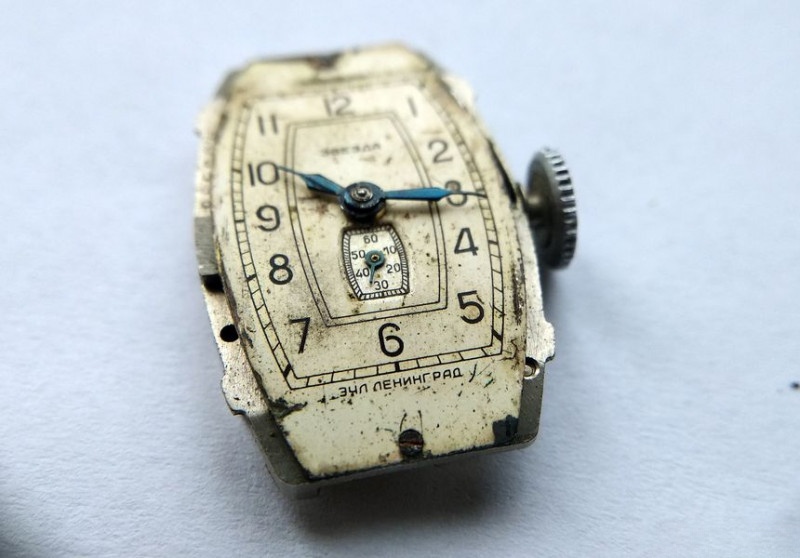
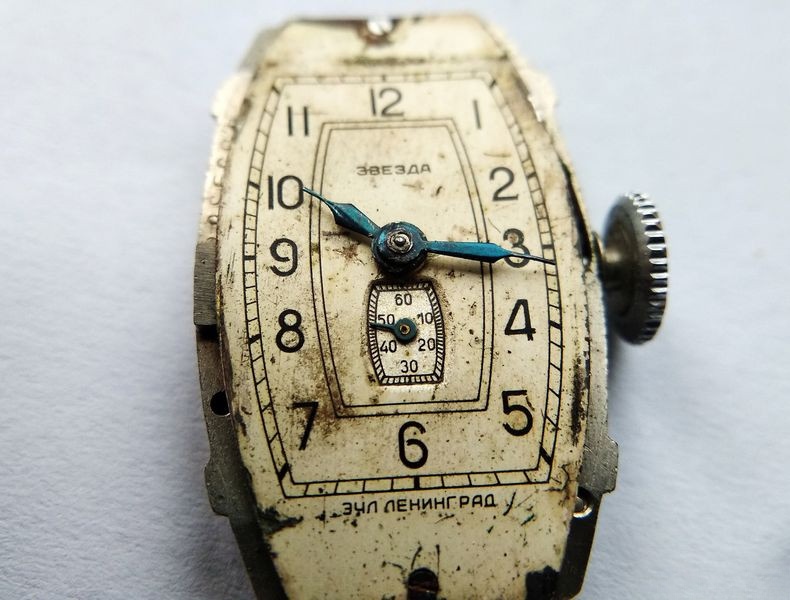
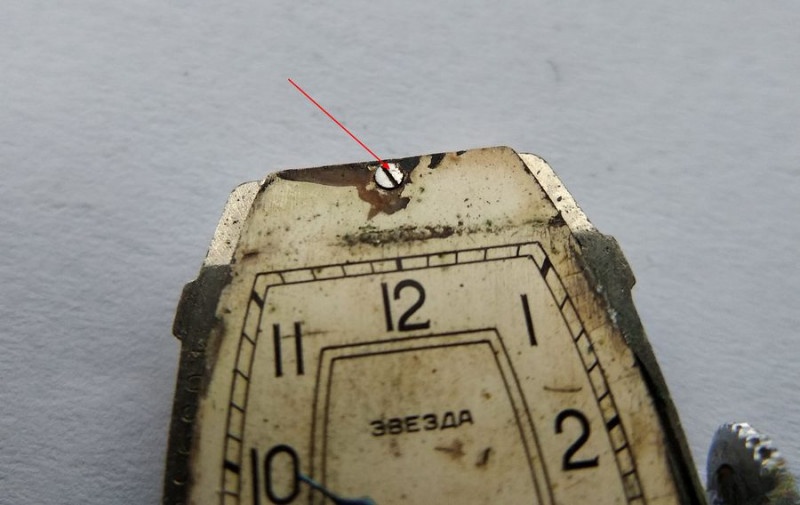
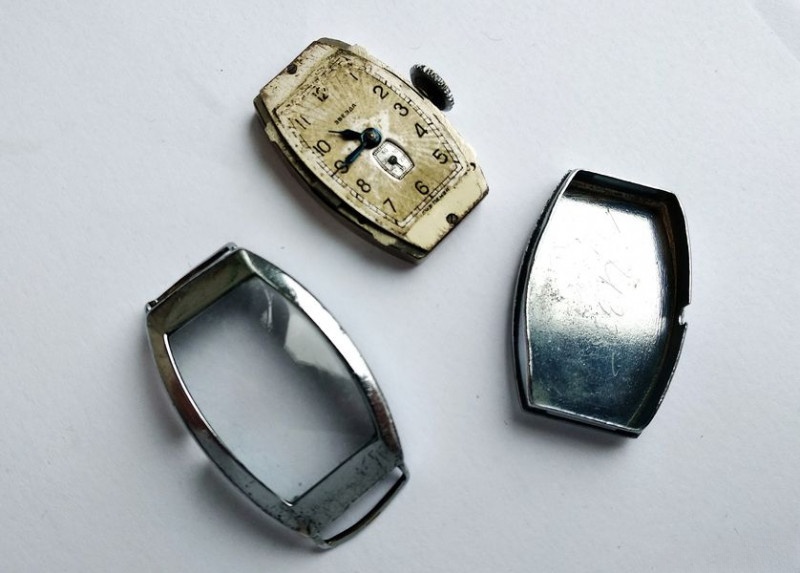
The Zvezda watch in my workshop features the classic tonneau-shaped case typical of this model. Made of chrome-plated brass (though silver and gold versions were also produced), the case shows extensive corrosion damage and numerous scratches from decades of use. Fortunately, the plastic crystal, while scratched, remains intact and can be polished. The following images show the watch in its pre-restoration state:

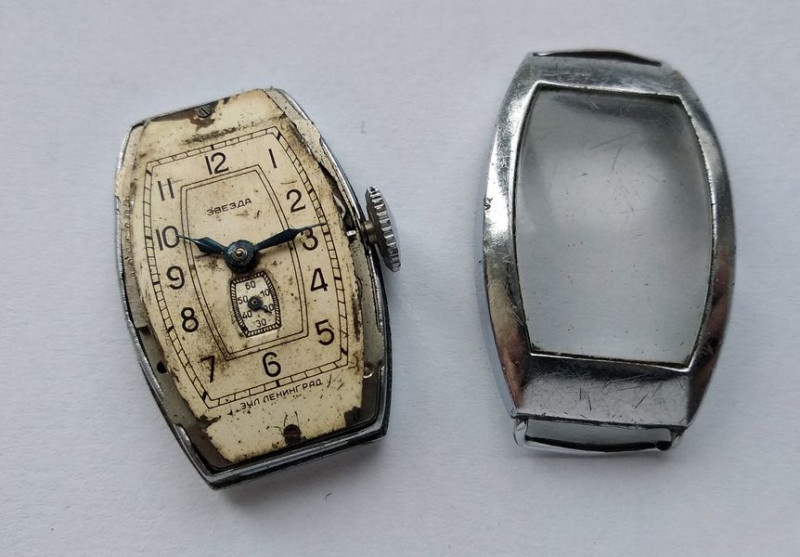
One notable feature of this case design is that it splits into two halves, eliminating the need to remove the winding stem during disassembly - a clever engineering solution that simplifies maintenance. Using a case knife, I carefully pried the two halves apart:

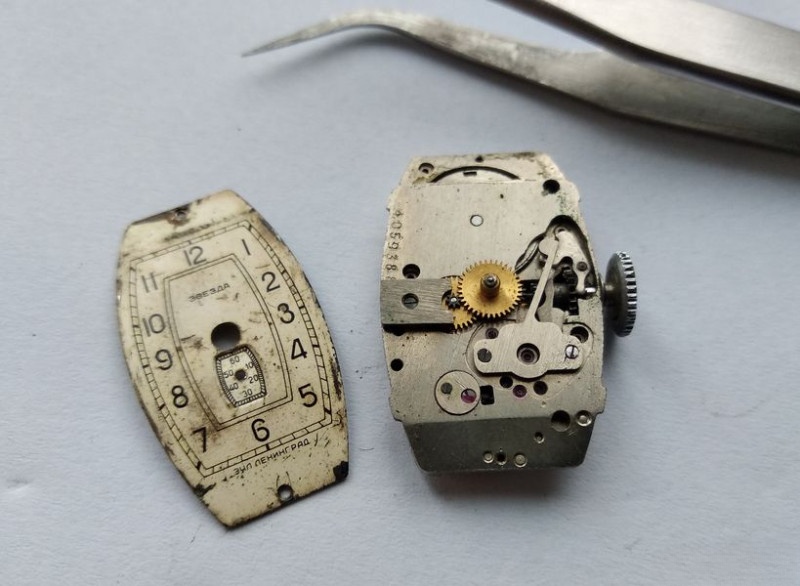
With the case opened, we can immediately see the unique dial design. It features a curved profile along an arc with a special recessed channel for the seconds hand. The dial pattern shows delicate detailing that requires extremely careful handling during restoration.
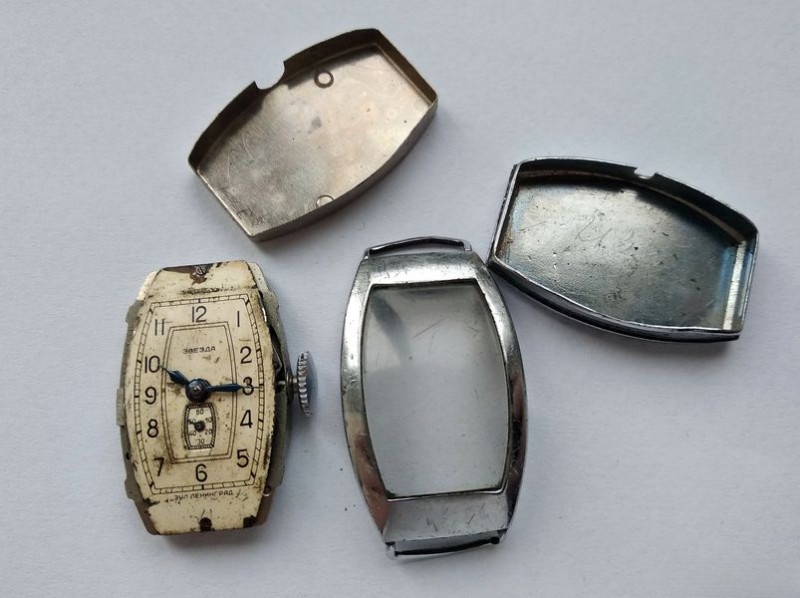
Further disassembly reveals an additional dust cover protecting the movement - another testament to the thoughtful engineering behind these watches. The lower case section follows the same arc-shaped design as the dial, allowing the watch to sit comfortably on the wrist. This ergonomic consideration was applied to both women's and men's models.
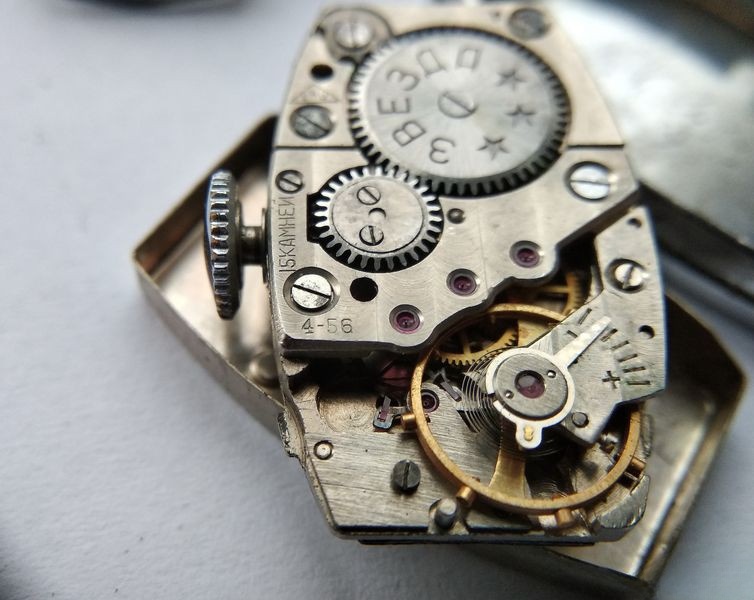
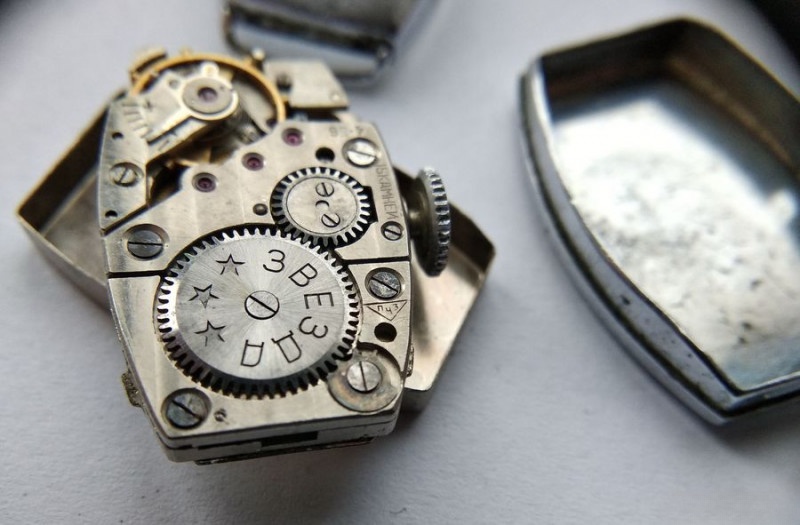
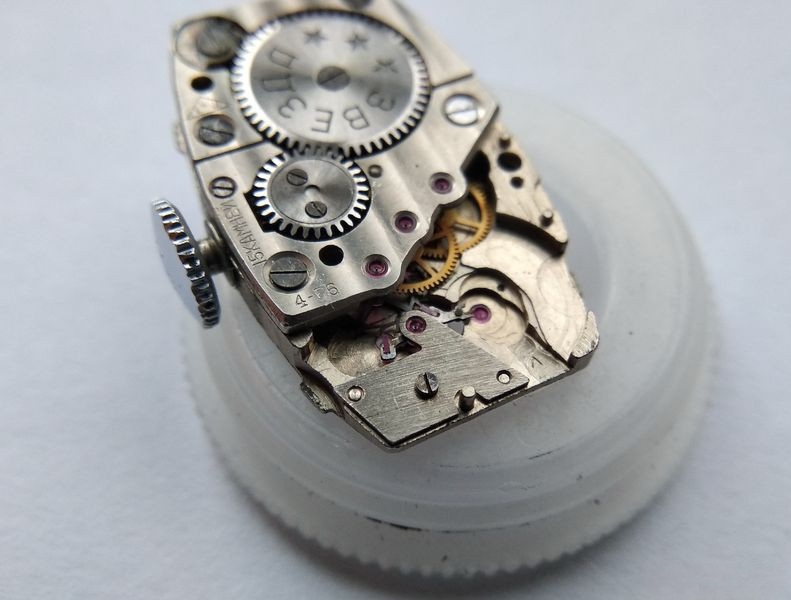
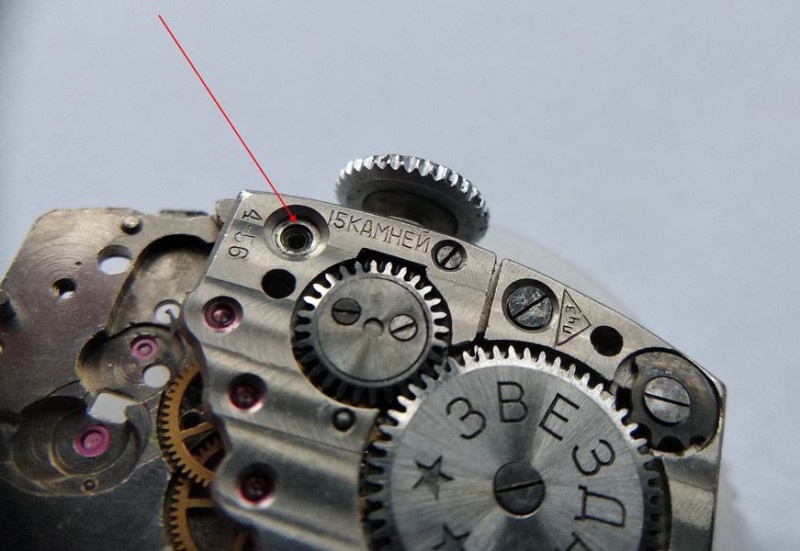
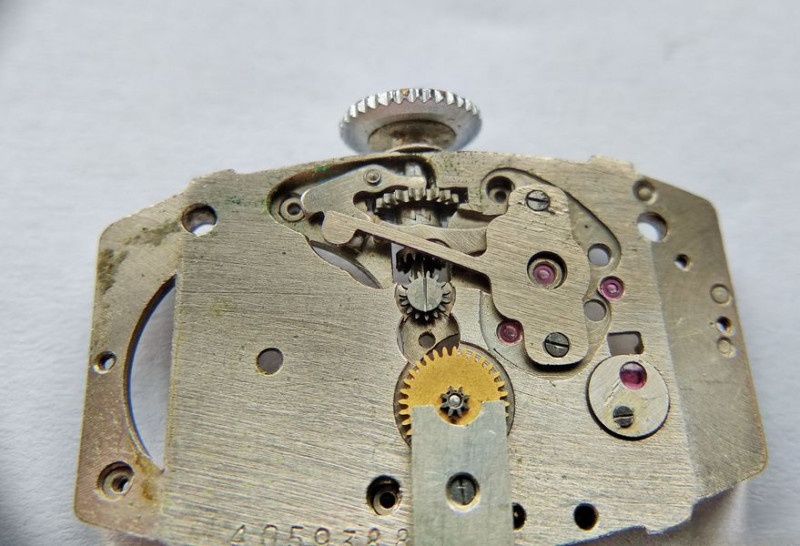
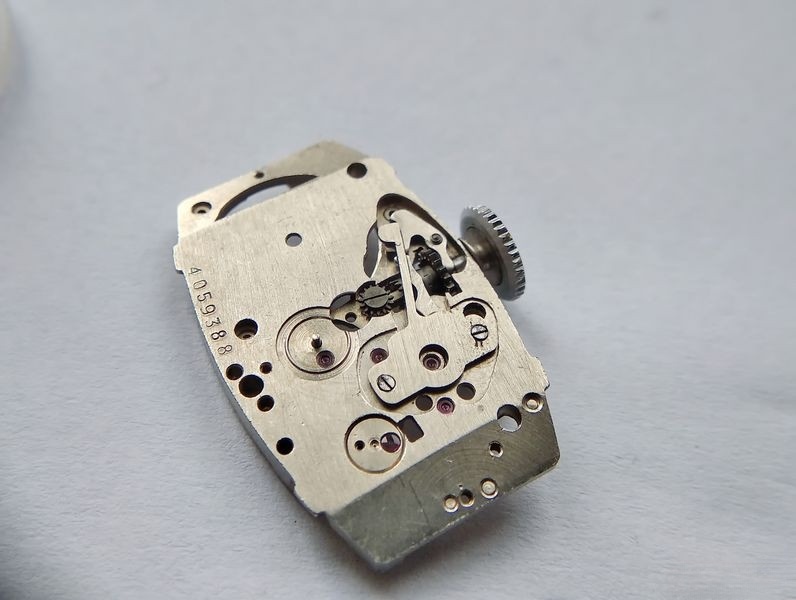
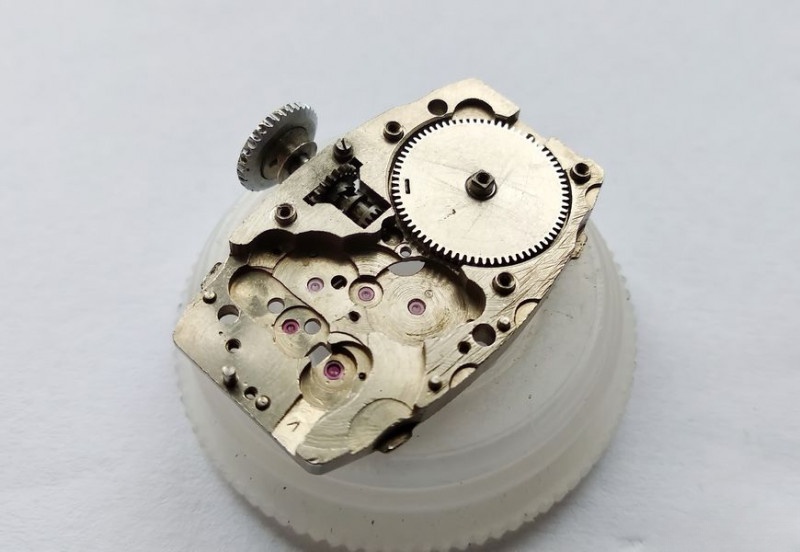
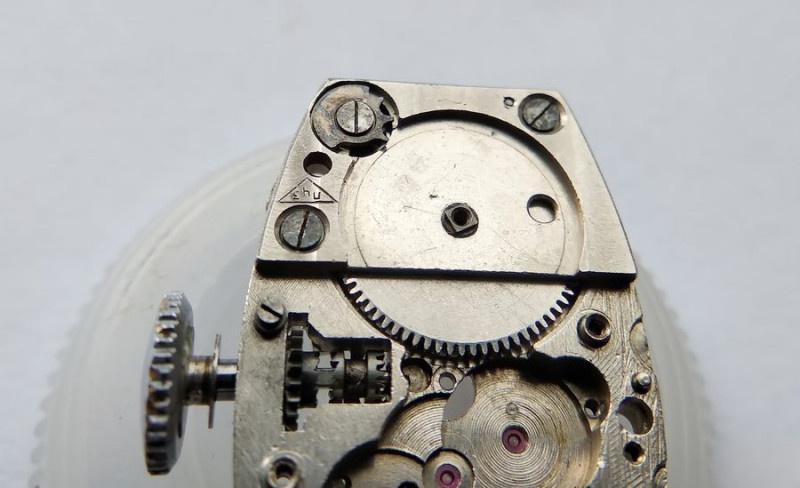
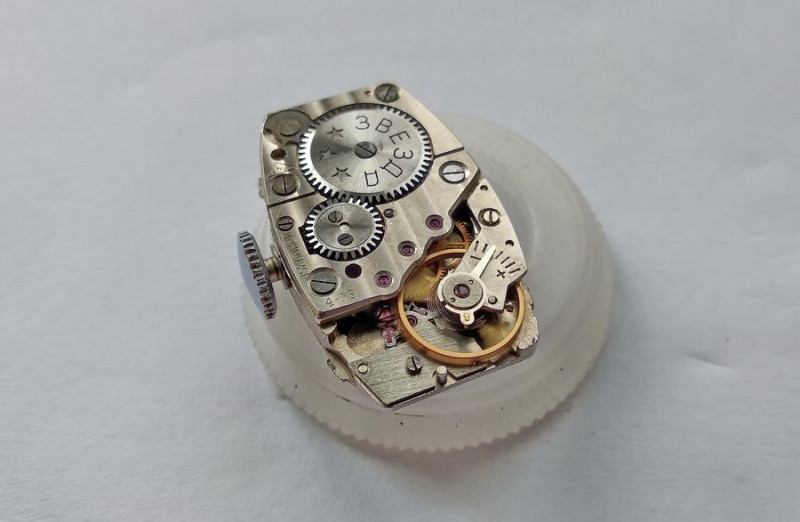
The heart of this timepiece is the distinctive Zvezda 18mm barrel-shaped movement. Unlike conventional round movements of the era, it features a unique layout necessary to fit the tonneau case. The bridges display decorative "Geneva waves" finishing - an unexpected refinement in a utilitarian Soviet timepiece. The barrel wheel bears the "Zvezda" marking alongside three stars, with additional markings indicating manufacture in Q4 1956.
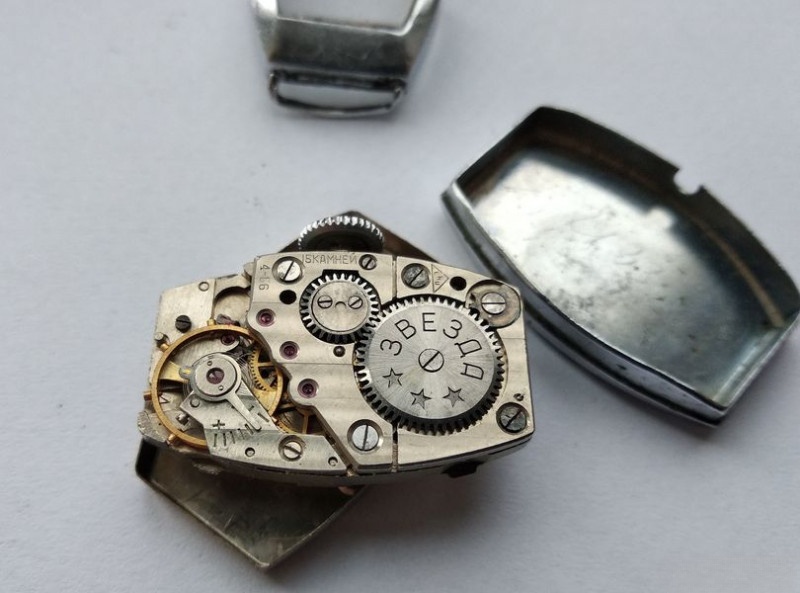
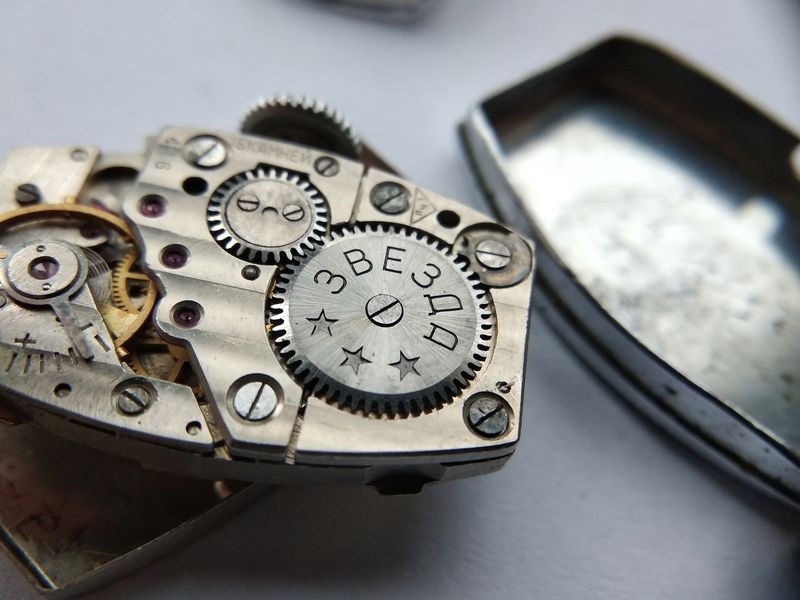
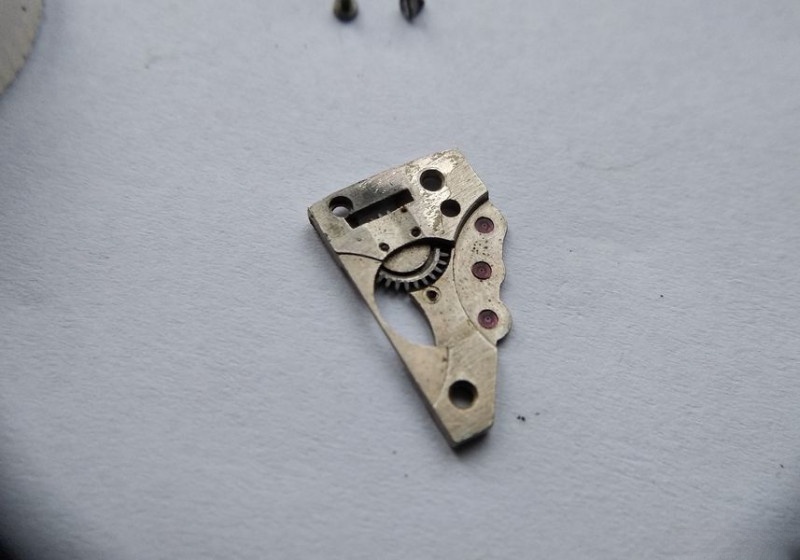
Several unusual design choices are immediately apparent. The train bridge secures four wheel pivots, though interestingly, there is no jewel for the center wheel pivot. The winding wheel is mounted on the train bridge rather than the barrel bridge (the more common arrangement in round movements). The barrel and train bridges each use two securing screws, while the balance bridge uses just one.
The barrel click mechanism features an unusual spring design that would be simplified in later Soviet watch designs. However, this more complex engineering has one advantage - it's nearly impossible to lose the spring during service.
The curved dial lacks conventional feet, instead mounting directly to the plate with two through-screws. It exhibits slight spring tension when installed, creating a secure fit without additional components.
Here's a clear view of the seconds hand channel - a distinctive feature that required additional manufacturing complexity:
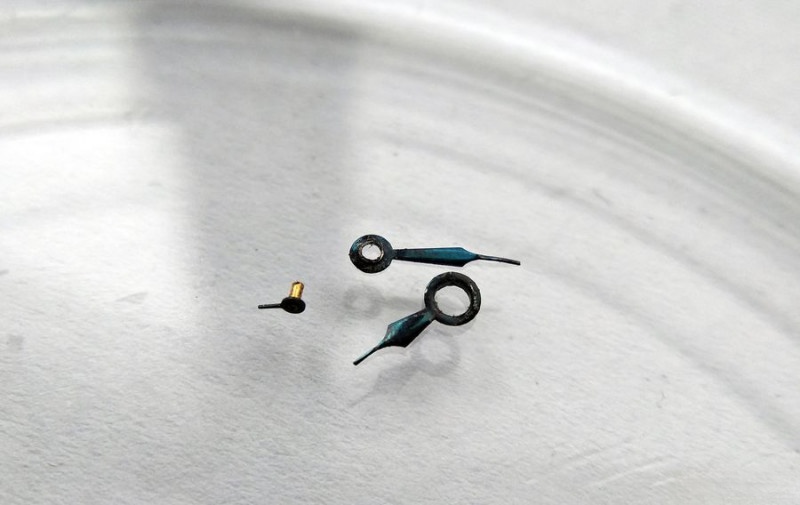
With the preliminary examination complete, I began the methodical disassembly process. First, I removed the hands using proper tooling and a protective pad to prevent dial damage:
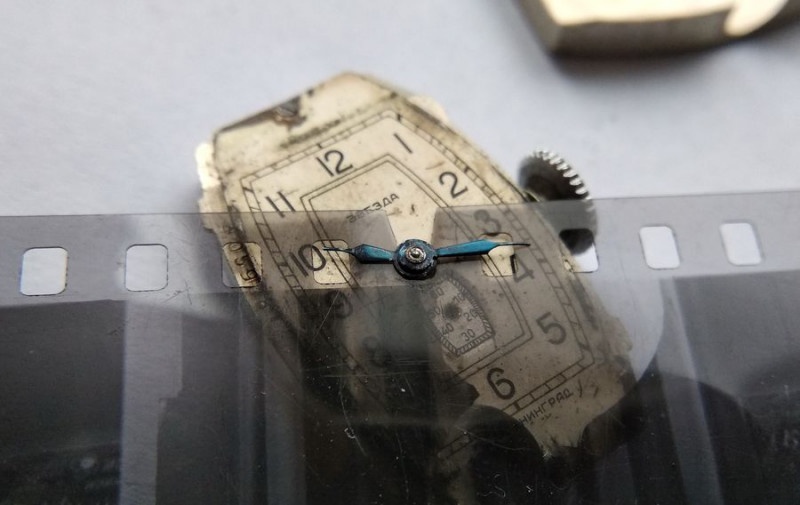
The hour, minute, and seconds hands showed significant corrosion but remained intact. I stored them carefully in a sealed container to prevent loss, as replacement parts for these watches are extremely rare.
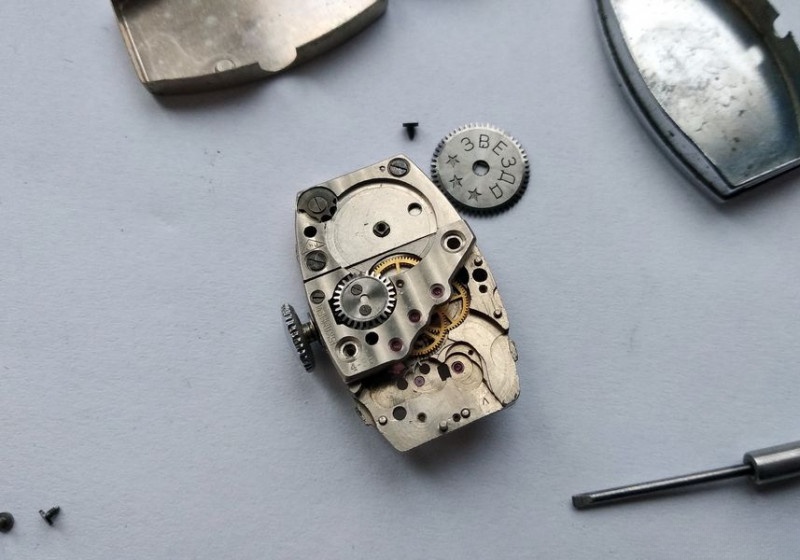
Next came dial removal, beginning with the two mounting screws:
An interesting engineering detail: there's no spring washer on the hour wheel. Instead, the curved dial itself creates tension against the wheel, preventing vertical movement - an elegant simplification.
After removing the hour wheel, I noticed the substantial cannon pinion bridge. Its large dimensions likely serve a dual purpose, providing additional support for the dial.
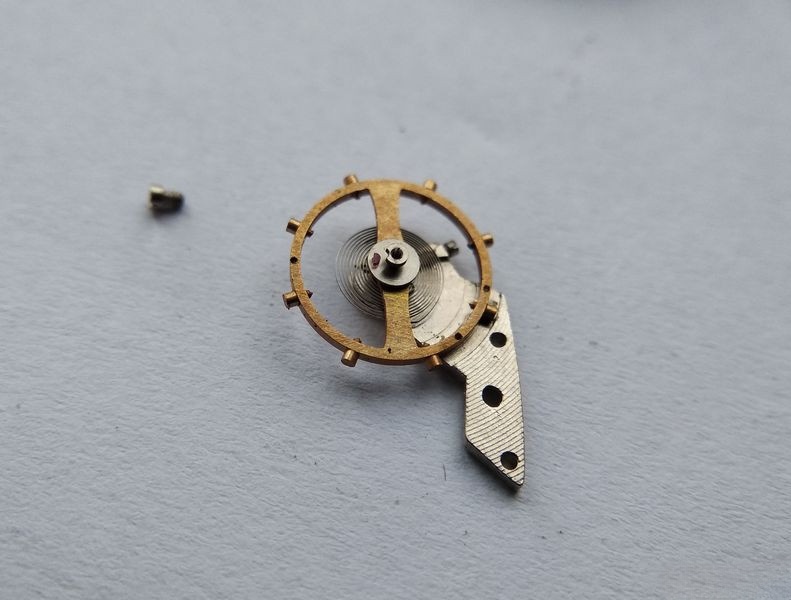
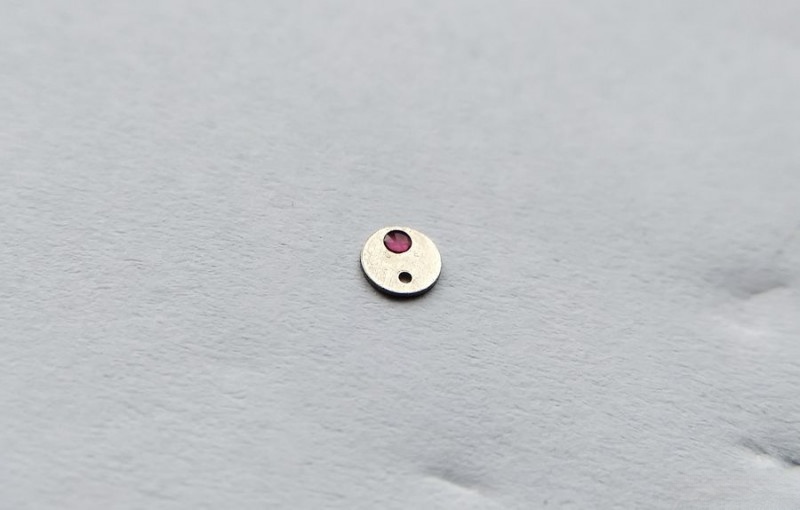
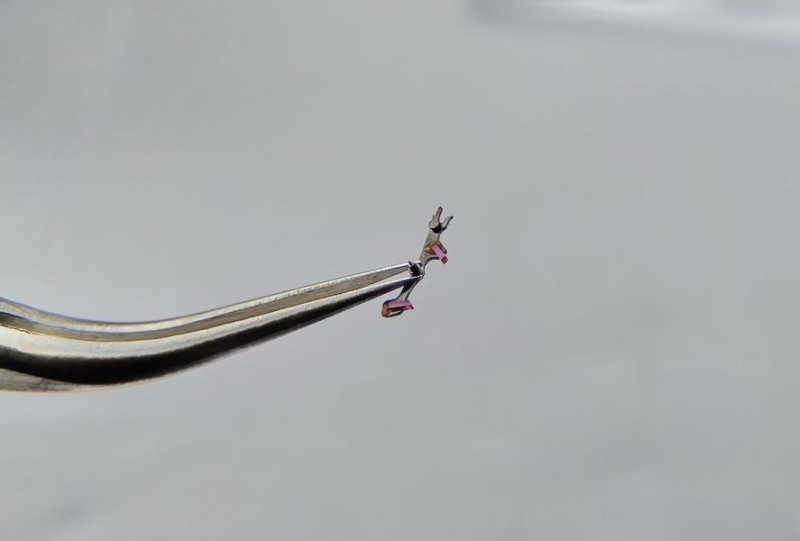
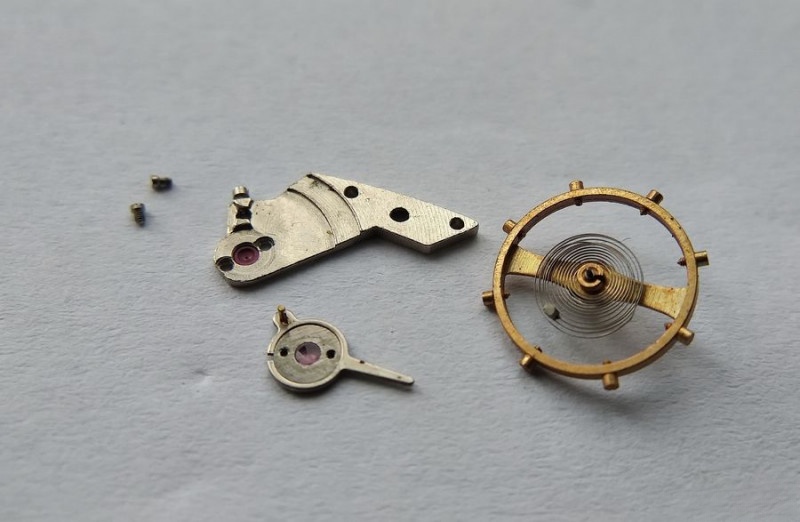
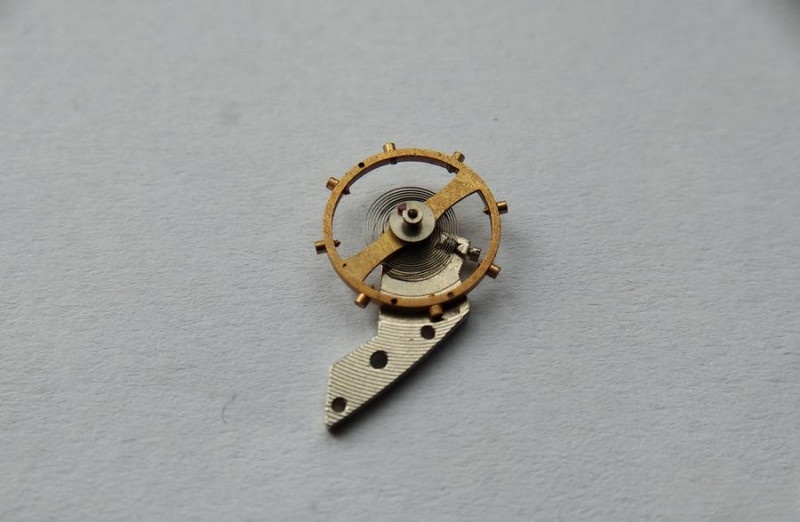
The balance assembly came next. This is a traditional screwed balance design without shock protection - typical for its era but requiring careful handling.
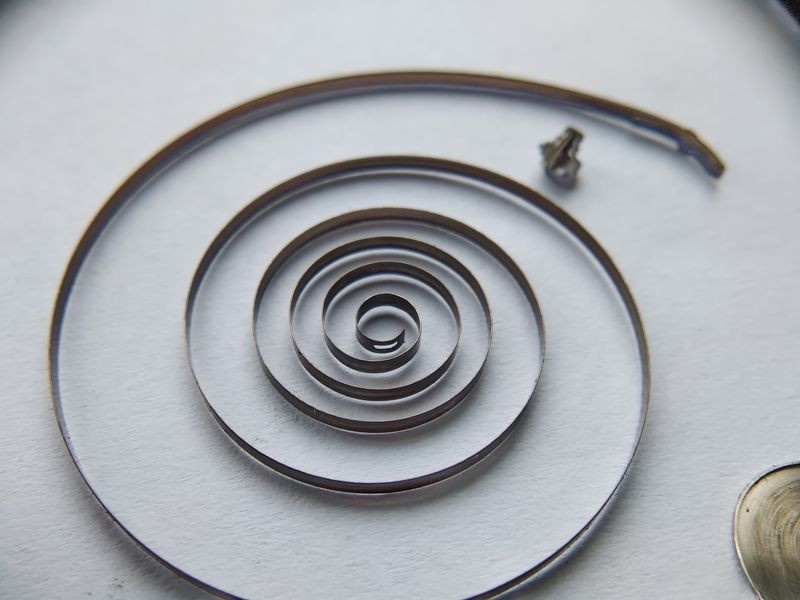
A notable feature is the Breguet overcoil hairspring - a high-quality detail surprising to find in an 18mm caliber from this period. While this overcoil design increases the movement height, it improves timekeeping performance. The balance uses a double roller configuration with a ruby impulse jewel.
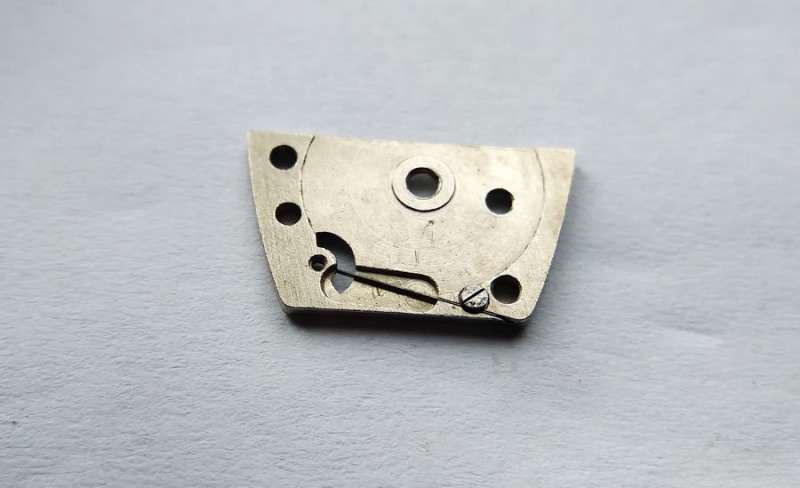
The regulator mechanism follows conventional design principles:
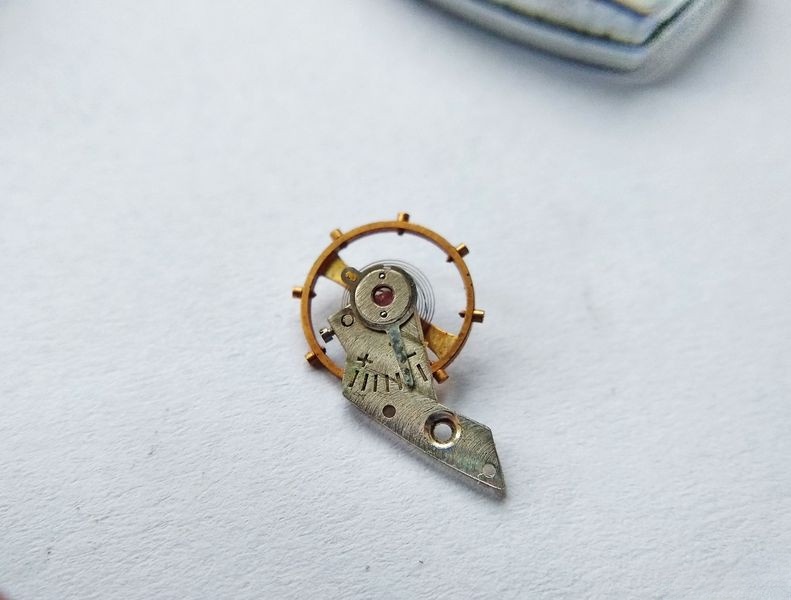
Removing the pallet fork required first unscrewing its bridge:
The pallet fork design is unconventional. The horns and pallet jewels are oriented rightward, similar to the arrangement found in later Slava 2409 movements. This orientation complicates service but was necessary given the movement's compact dimensions.
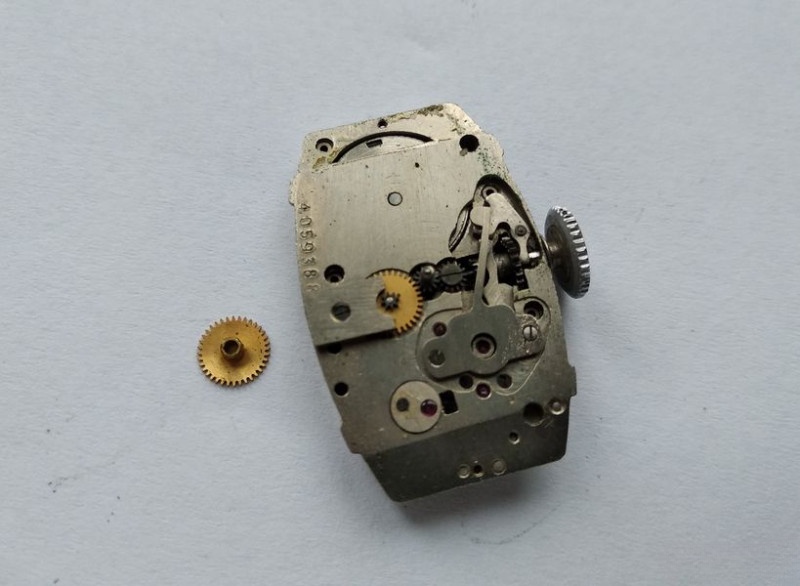
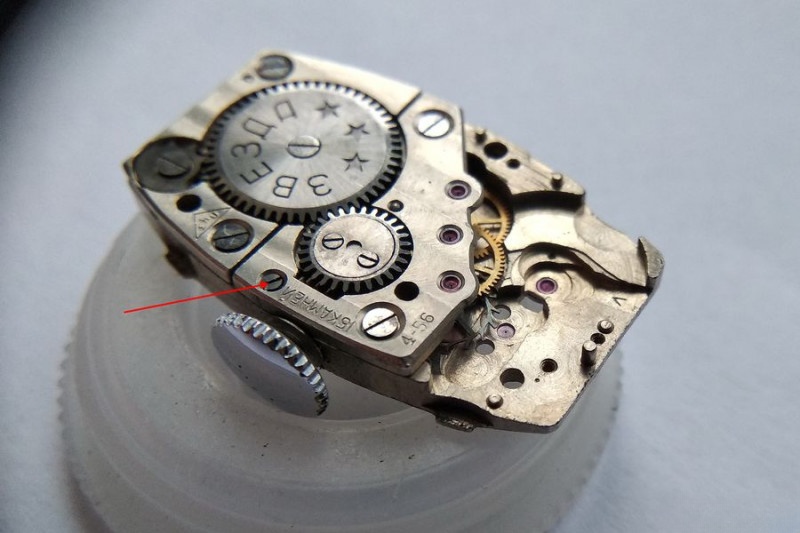
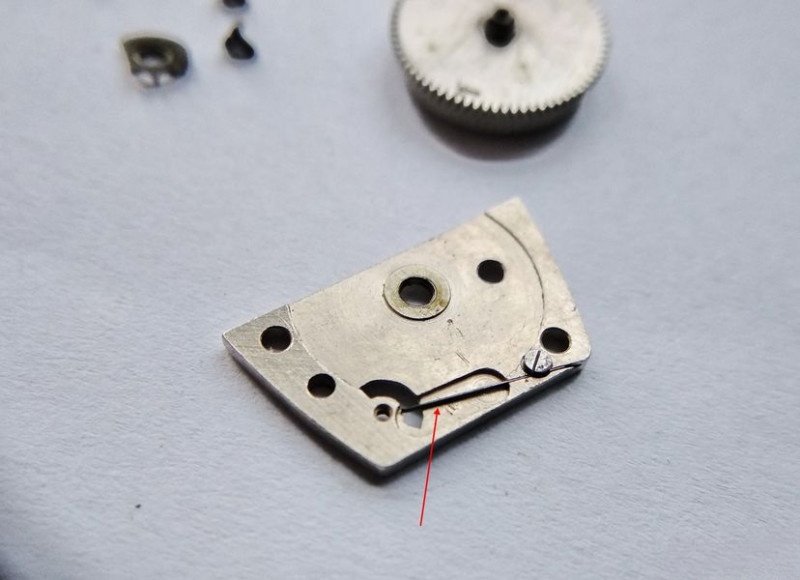
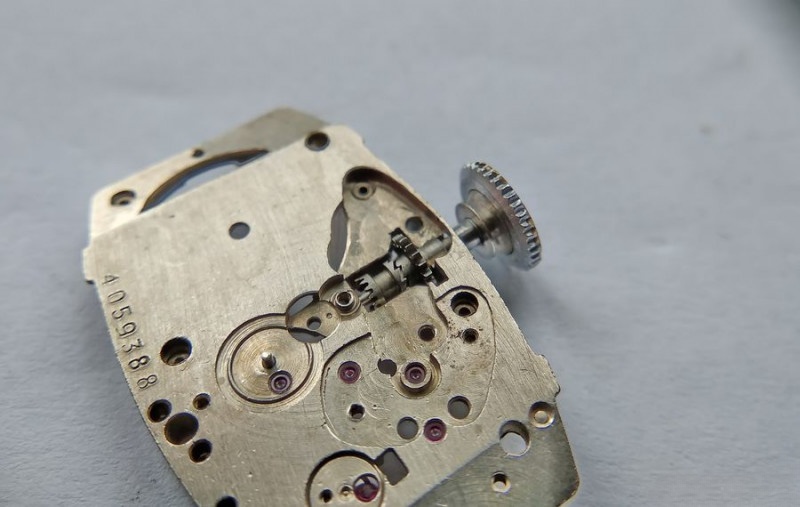
Moving to the train bridge, I noticed its two primary mounting screws and the setting lever screw (indicated by the arrow), which serves as a disconnector for the keyless works:
After removing these screws, I proceeded with train bridge removal:
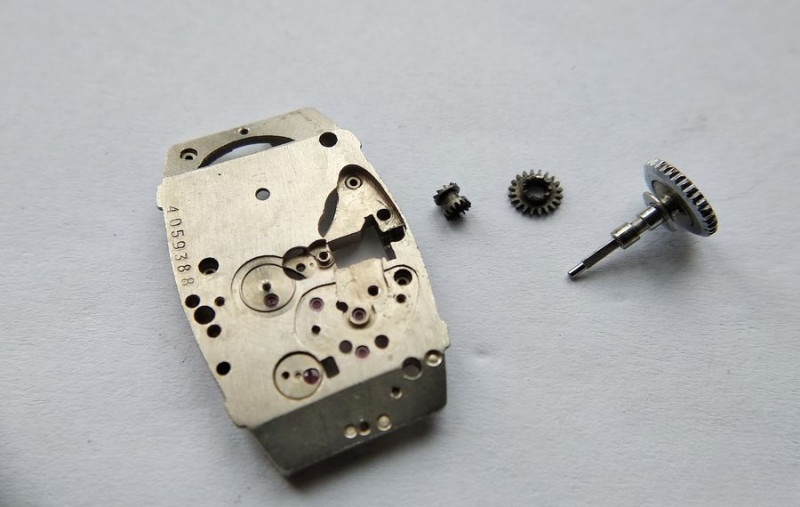
I needed to remove the barrel winding wheel before the train bridge could be fully lifted away - a sequence I initially overlooked but quickly corrected:
With the winding wheel removed, I could safely lift the train bridge. I decided to service the winding wheel assembly later, finding it more convenient to work with it separately rather than while still mounted.
The reverse side of the train bridge shows the bearing surfaces and jewels:
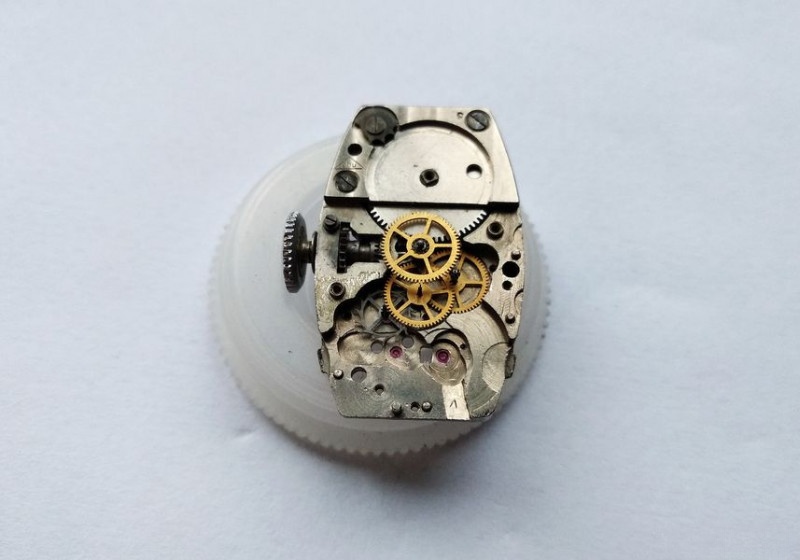
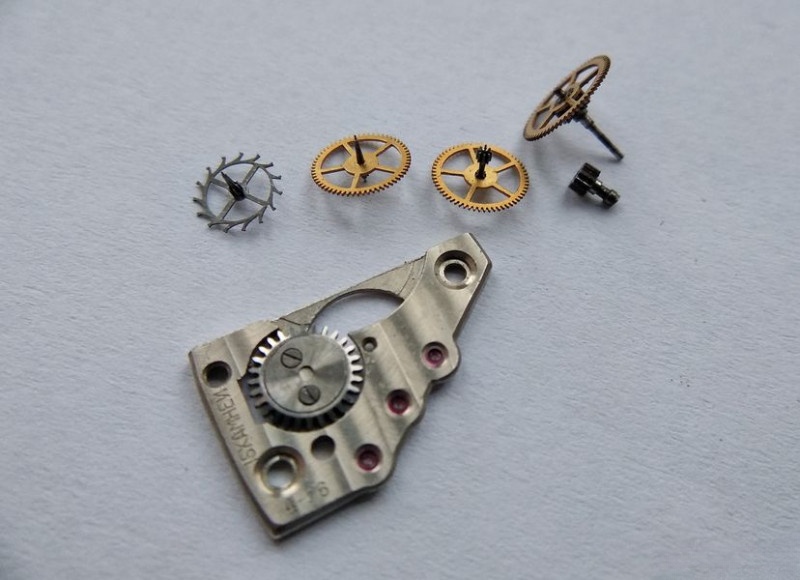
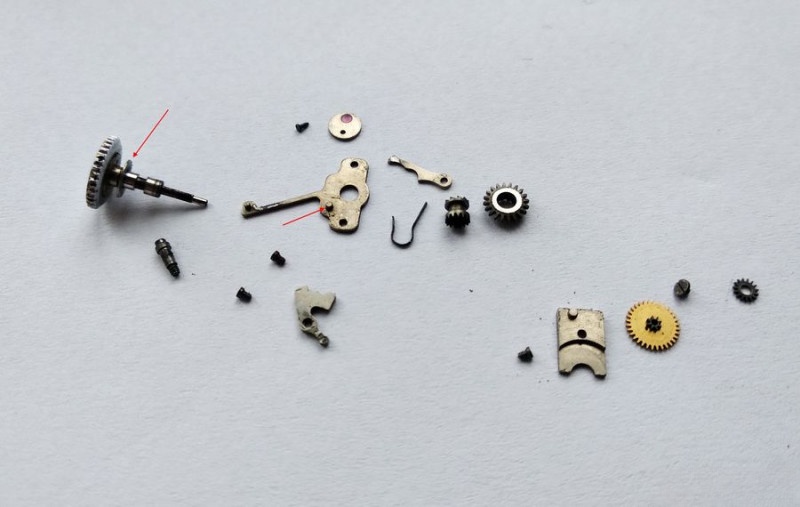
With the bridge removed, the complete wheel train became visible: escape wheel, fourth wheel, third wheel, center wheel, and minute wheel - the standard wheel arrangement plus escapement:
I temporarily reinstalled the bridge to secure the minute wheel while addressing an oversight - I should have removed the cannon pinion first. This protected the minute wheel staff from potential damage:
The cannon pinion required firm upward pressure to remove. Its design incorporates a friction-fit clutch mechanism:
Here's the complete train assembly with all components:
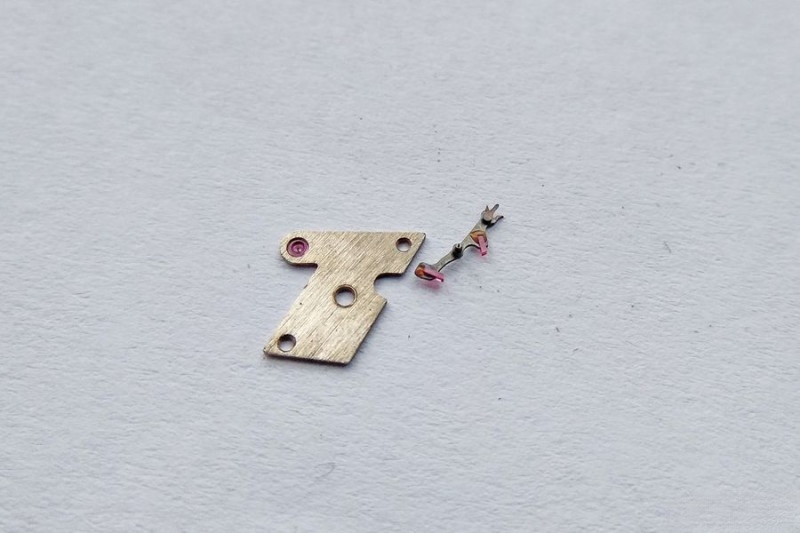
Next came removal of the barrel click:
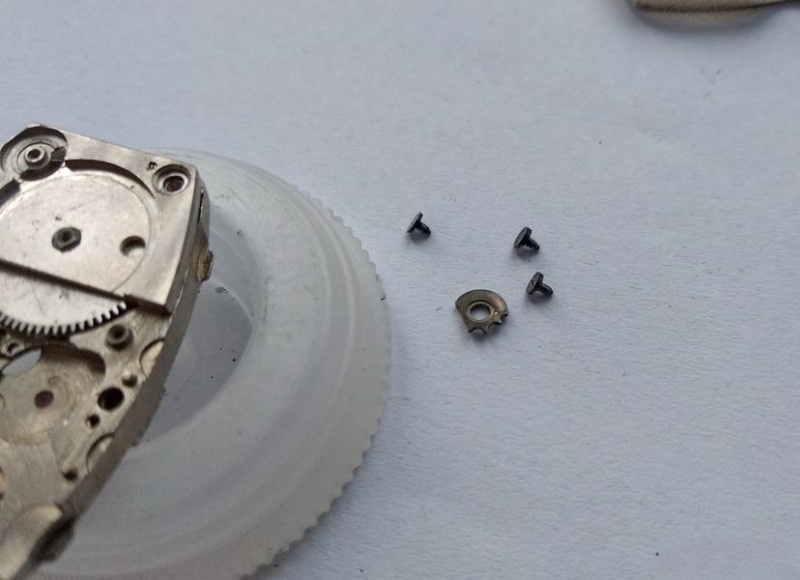
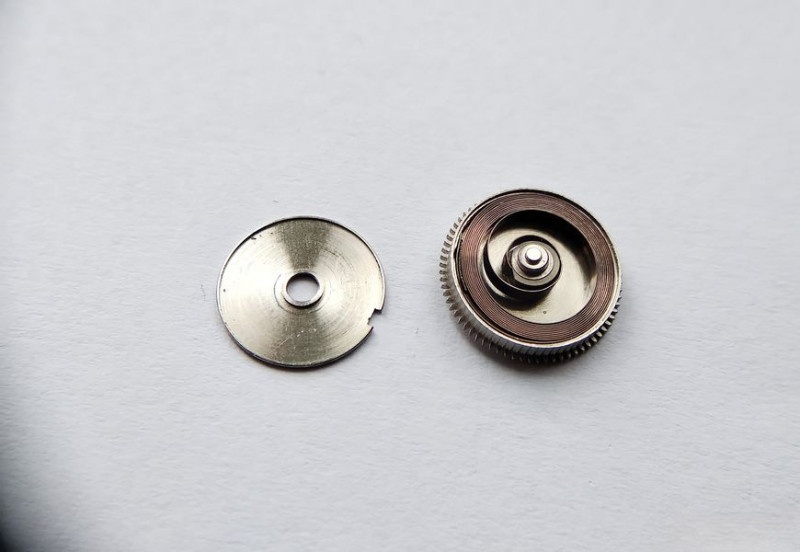
Followed by disassembly of the mainspring barrel:
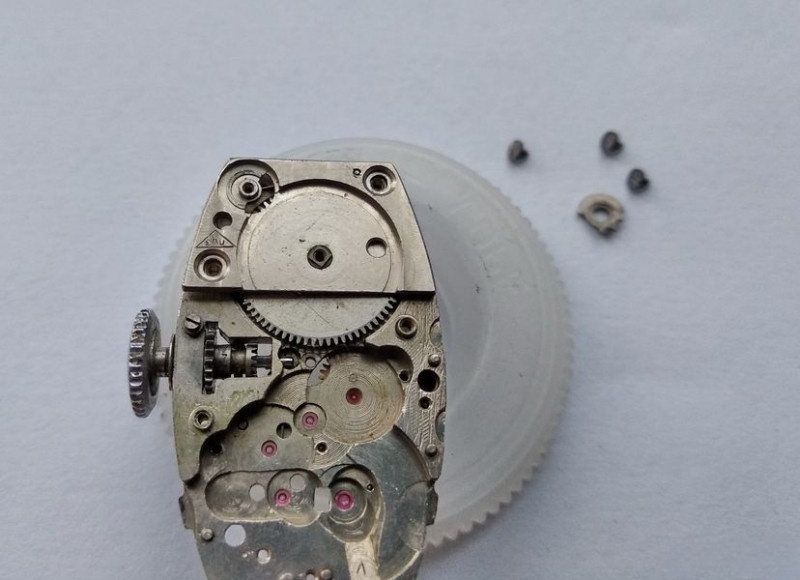
The barrel bridge and barrel have now been completely removed:
A fascinating design element of this movement is the barrel click spring construction. Unlike the simpler ring-shaped springs used in later Soviet watches like the Pobeda, this earlier design features a separate assembly with a milled section on the bridge and a dedicated screw for securing the spring. Though more complex to manufacture, this approach virtually eliminates the risk of losing the spring during maintenance - a practical consideration for field repairs.
Opening the barrel revealed the mainspring in good condition despite its age. I set it aside for cleaning and lubrication before reassembly.

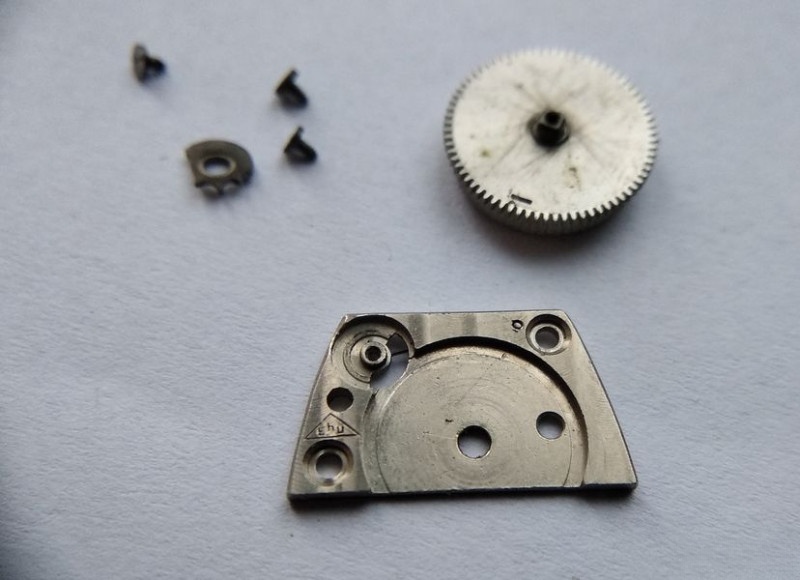
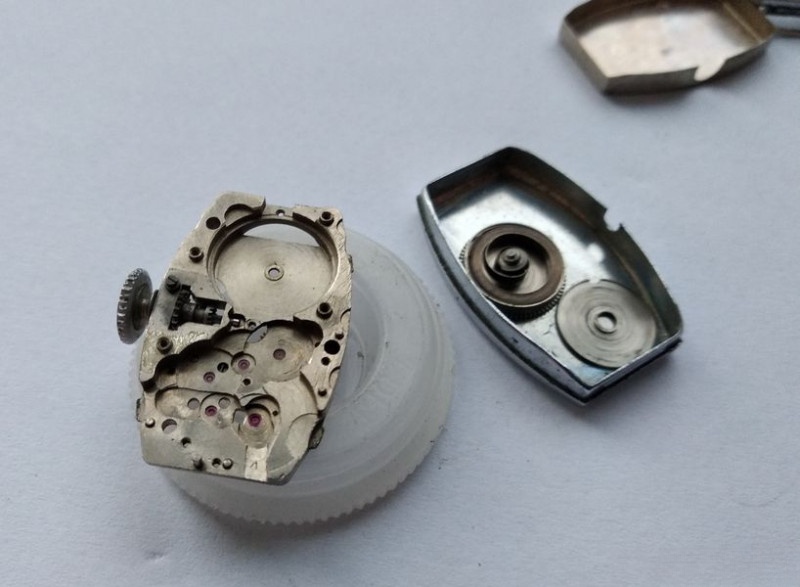
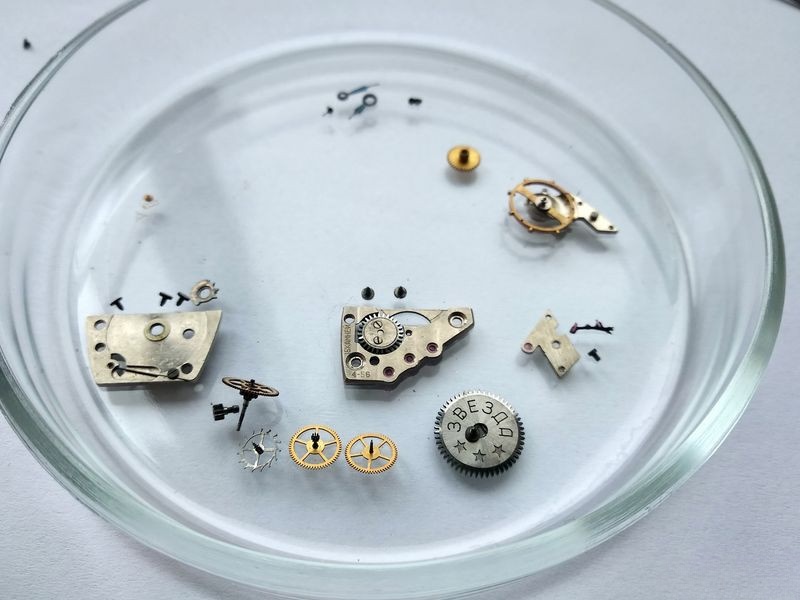
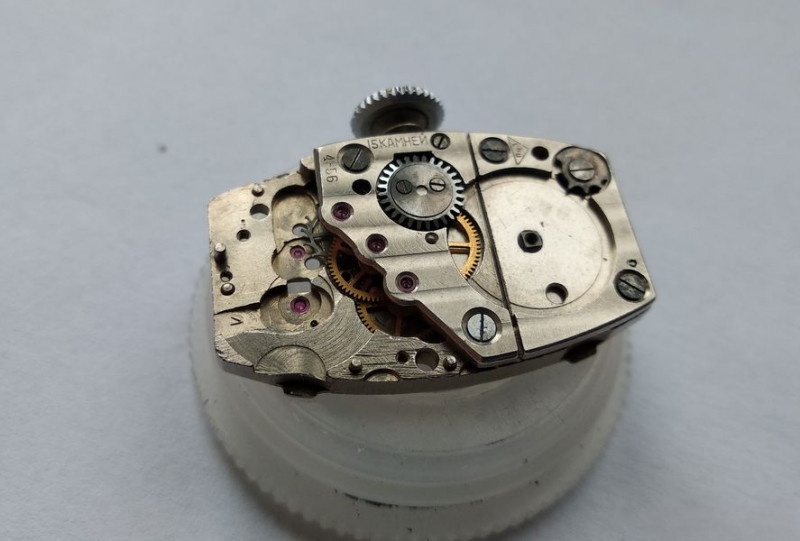
With the barrel disassembled, the movement side of the plate was now completely accessible:
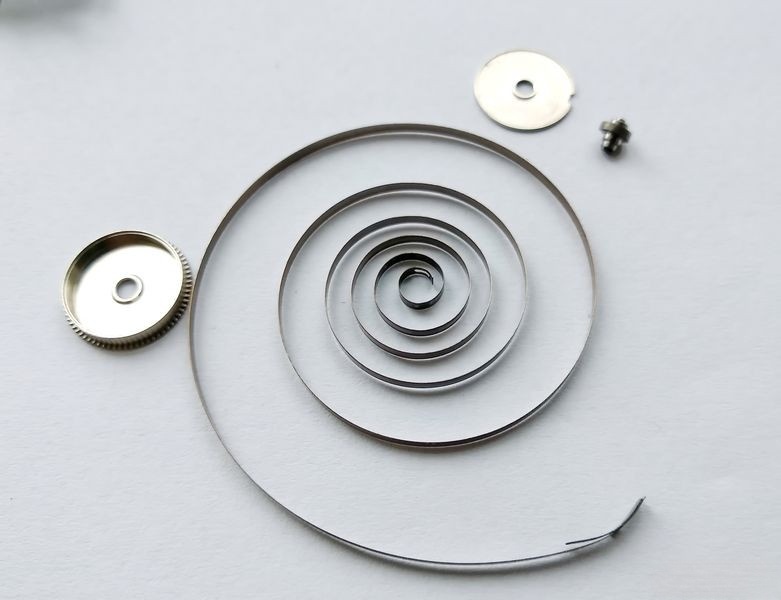
The mainspring itself is a standard spiral design. The image below shows the complete barrel components: mainspring, barrel cups, and the barrel arbor:
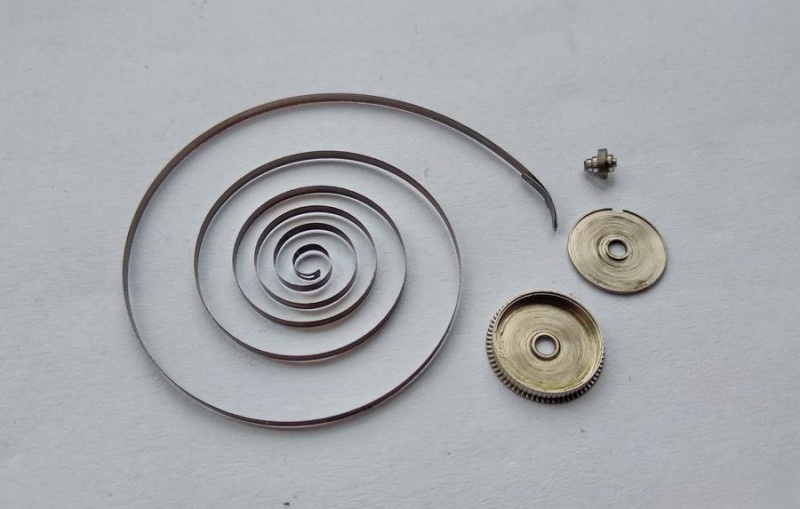
A closer examination reveals the sword-shaped outer spring attachment and barrel arbor:
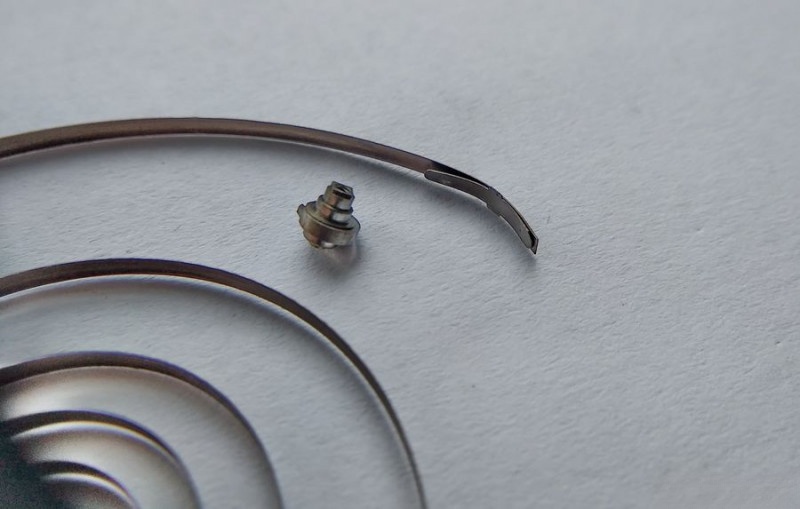
The inner coil of the spring features a loop designed to engage with a tooth on the arbor - the standard attachment method for this era:
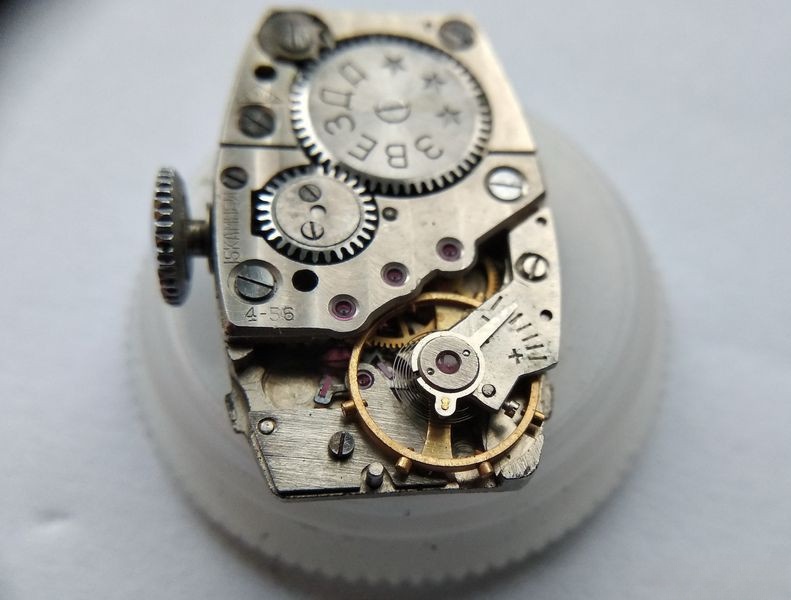
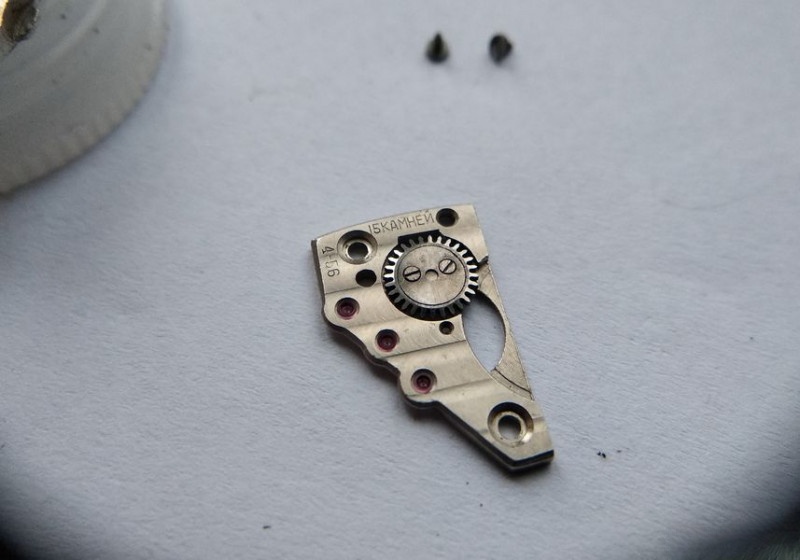
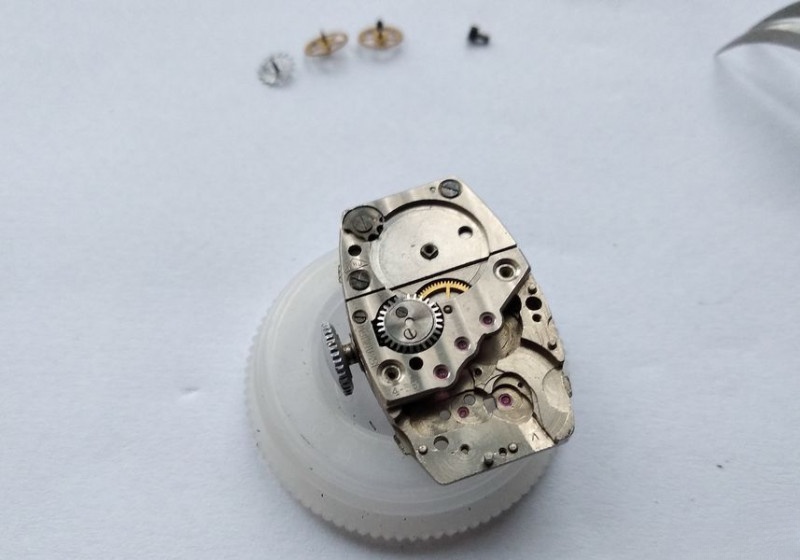
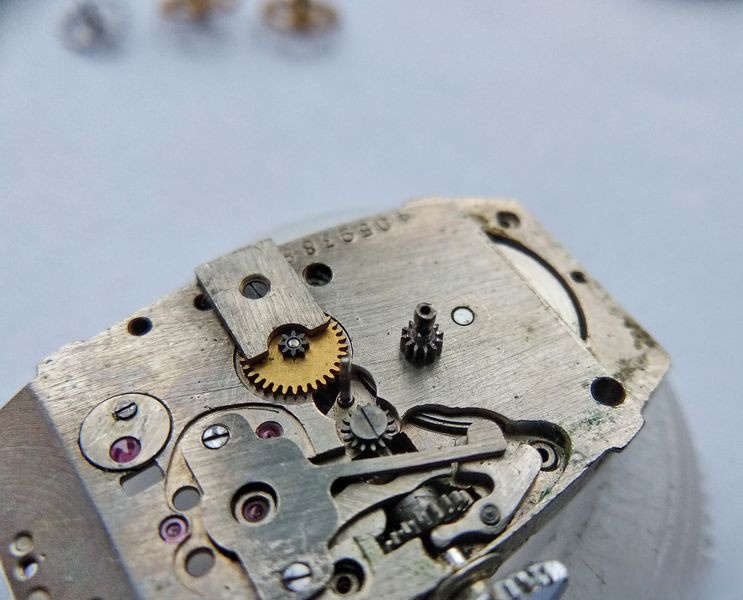
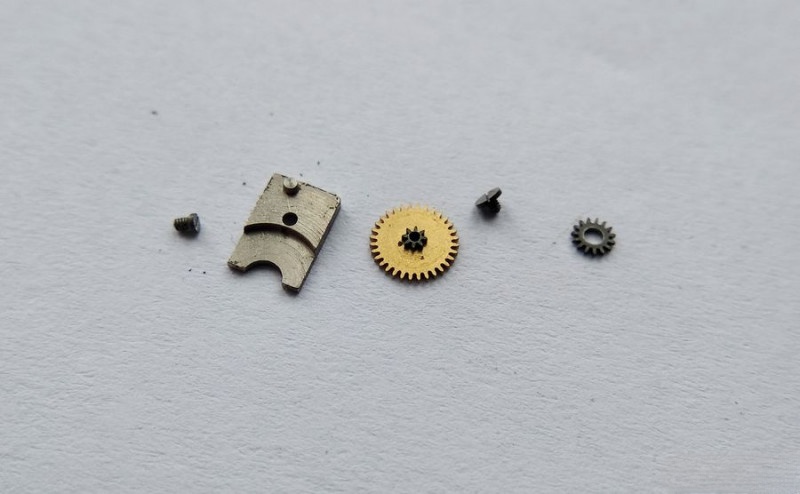
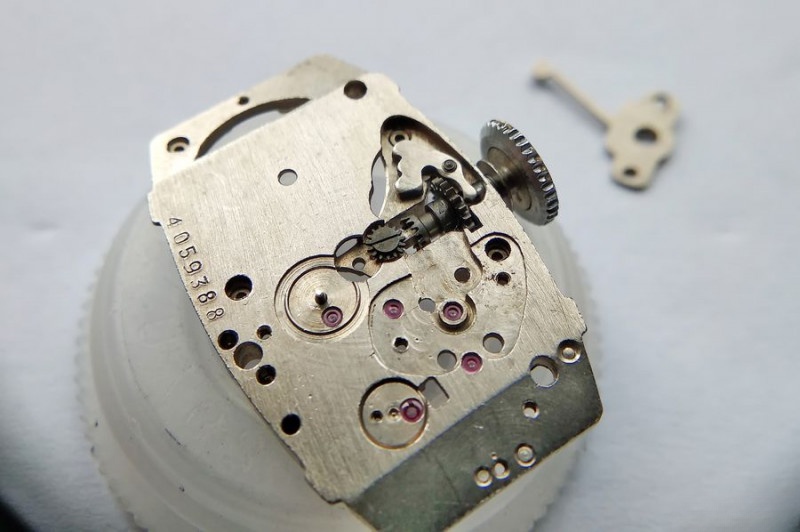
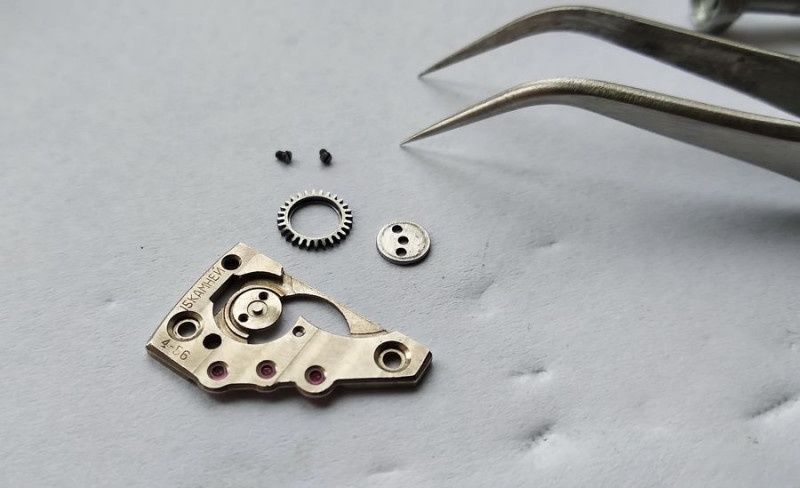
Next, I turned my attention to the dial side components, beginning with the setting wheel assembly:
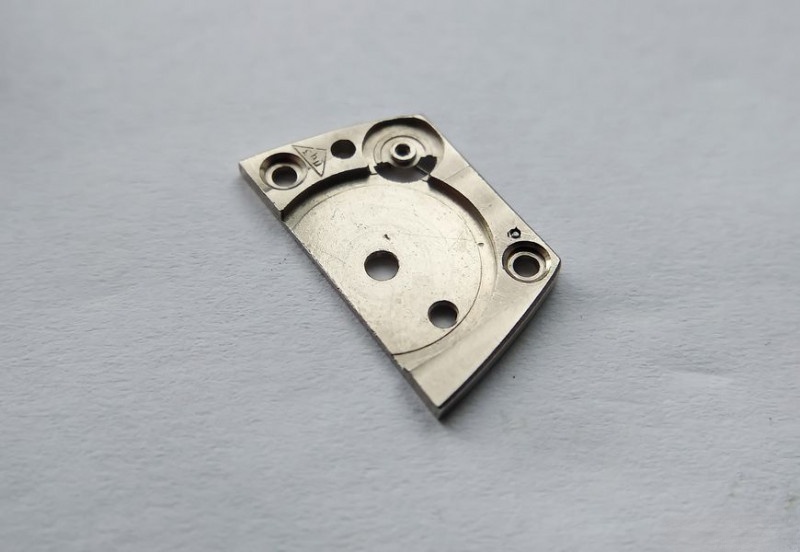
The setting wheel bridge serves the dual purpose of supporting both the dial and the setting wheel. Here it is being removed:
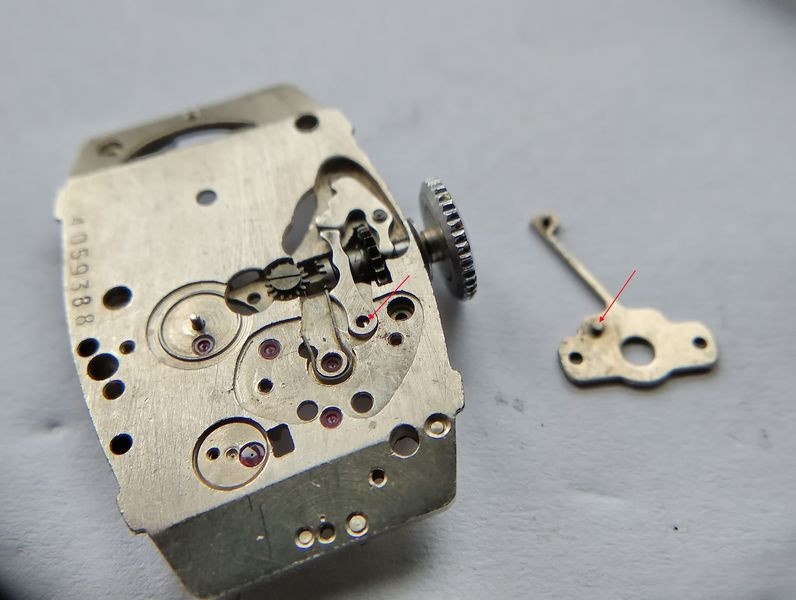
Disassembling the keyless works required careful attention, as it contains several small components that could easily be lost. I removed the two mounting screws from the keyless works spring-bridge and unscrewed the setting lever screw (disconnector). Particular caution was needed with the R-shaped spring, which has a tendency to launch unexpectedly during disassembly:
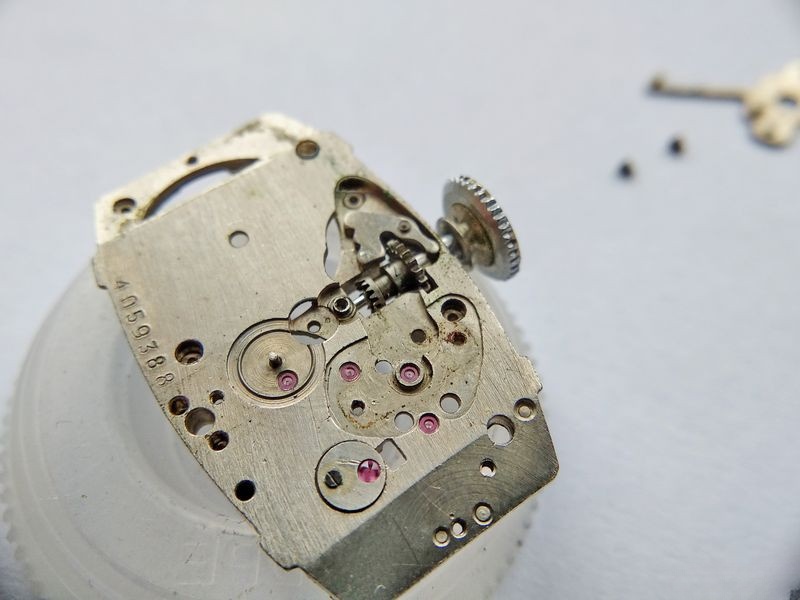
With the keyless works disassembled, I could observe two important design features: the shoulder on the winding stem (indicated by arrow) and a corresponding protrusion on the keyless works bridge. These elements would become important during reassembly:
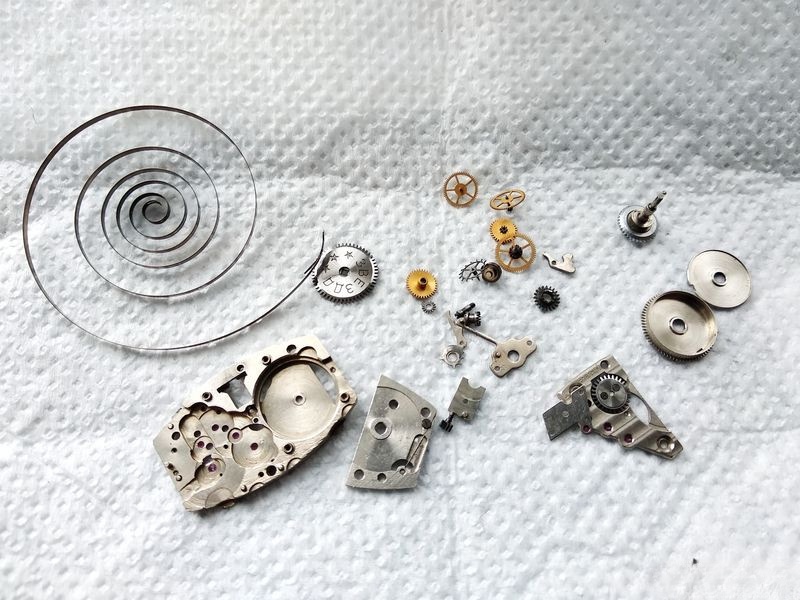
With disassembly complete, all components were thoroughly cleaned using an appropriate watch cleaning solution. This removes all old lubricants, debris, and oxidation while preserving the delicate metal surfaces:
After cleaning and drying, the transformation was remarkable - components regained their proper appearance and surface finish:
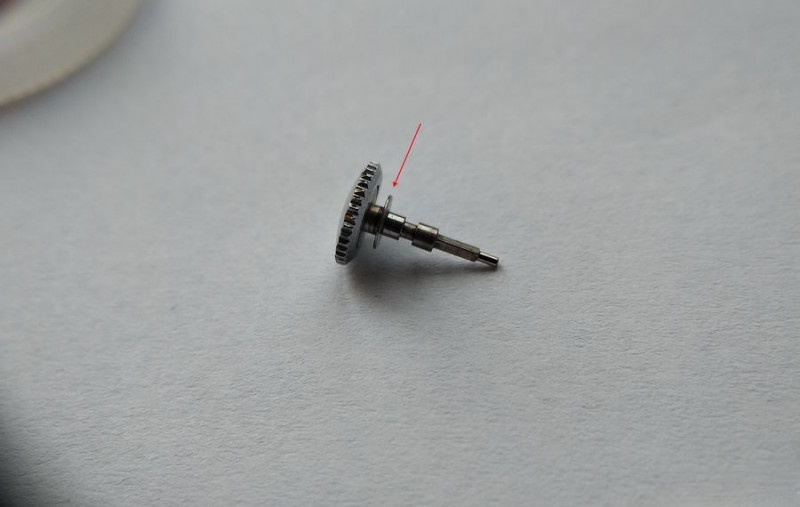
Before beginning reassembly, I examined the winding stem design more closely. Note the shoulder indicated by the arrow - this fits into a specialized groove between the plate and case, while the dust cover includes a corresponding seat. This ingenious design provides excellent protection against dust and even limited moisture - explaining why this 64-year-old movement remained relatively clean internally despite its external condition:
With all components cleaned and inspected, I began the methodical reassembly process, starting with the keyless works - typically the most challenging assembly in any watch movement:
First, I reconstructed the clutch mechanism on the winding stem - sometimes referred to as "the shish kebab" due to its appearance of components stacked on a central shaft:
Next came installation of the setting wheel, secured with its screw. Each component received appropriate lubrication with B-1 oil, the correct viscosity for these larger motion works:
A particularly challenging aspect of this design becomes apparent during keyless works assembly. The keyless works bridge contains a pin that serves as the axis for the setting lever. This requires simultaneously holding the lever and spring in position on the plate while aligning the bridge and ensuring the pin engages the socket on both the lever and plate. This unintuitive design creates a frustrating assembly experience - the components tend to shift position as the bridge approaches, necessitating multiple attempts. This explains why watchmakers historically avoided disassembling this section unless absolutely necessary.
This design quirk also explains why removing the winding stem (by loosening the disconnector screw) is inadvisable - the setting lever can shift position, requiring dial and hand removal to realign it before stem reinsertion:
Through persistence and patience, I eventually secured the bridge in position with all components properly aligned:
Moving to the balance assembly, I applied appropriate lubrication to the balance cap jewel:
And installed it in its correct position:

For the mainspring barrel, I first cleaned the spring using lightly oiled cloth to remove any remaining residue:
Then reinstalled the spring in the barrel, applying B-1 oil for proper lubrication:
With the barrel closed, the mainspring assembly was ready for installation:
I applied lubricant to the barrel arbor and installed the barrel on the main plate:
Next came examination and preparation of the barrel bridge:
I lubricated the click spring mechanism to ensure smooth operation:
And completed assembly of the mainspring assembly, ensuring proper click engagement:
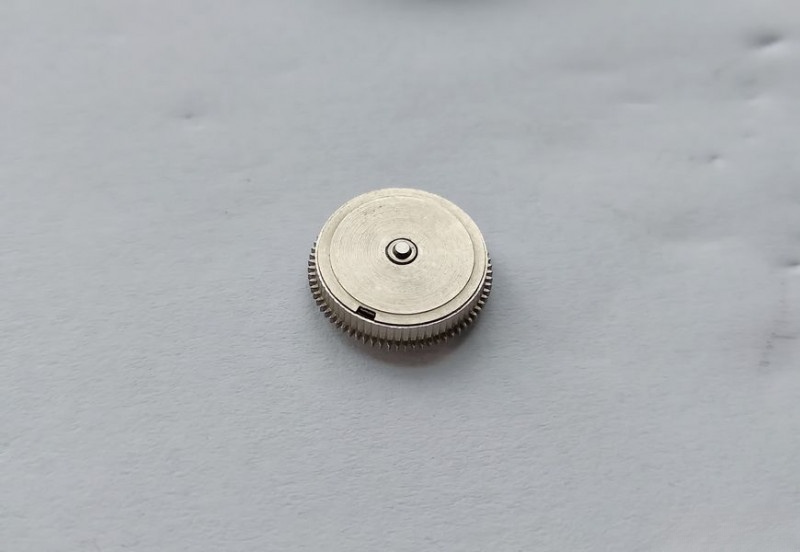
The winding wheel mechanism required servicing before reinstallation. I removed its two mounting screws, disassembled the assembly, cleaned away debris and old lubricant, then reassembled with fresh lubrication:
Next came reassembly of the wheel train in its proper sequence, followed by bridge installation. Each jewel and pivot received appropriate lubrication with MBP-12 oil, a finer viscosity appropriate for these high-speed components:
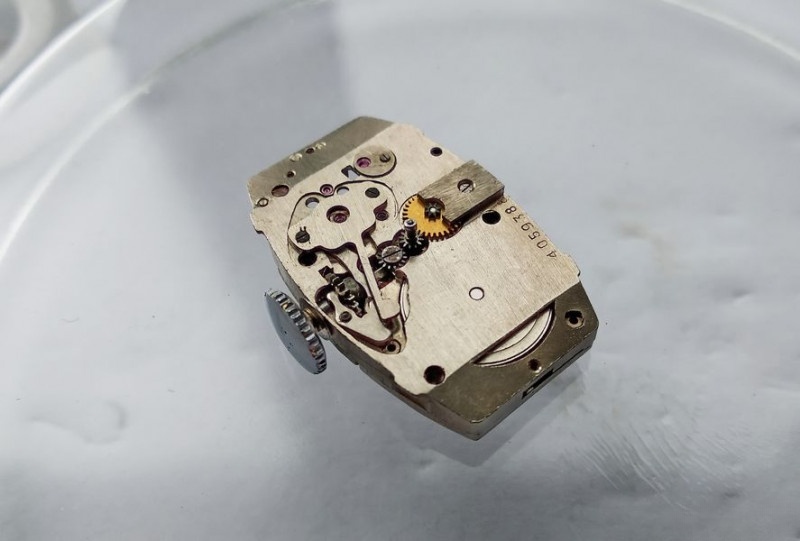
Moving back to the dial side, I installed the setting wheel and its bridge, along with the cannon pinion - completing this phase of reassembly:
The escapement components required special attention. I thoroughly cleaned the pallet fork and applied MBP-12 oil to the working faces of the pallet jewels. After verifying proper wheel train drop, I installed the pallet fork and secured it with its bridge:
The balance assembly received a complete service. I disassembled it by loosening the screw securing the balance staff, separating the balance wheel with its Breguet hairspring, removing the cap jewel screws, and disassembling the jewel setting. Each component was cleaned in fresh cleaning solution:

After drying, I lubricated the cap jewel with MBP-12 oil:
And reassembled the balance with proper jewel alignment:
With the movement nearly complete, I wound the mainspring, checked the pallet fork for proper impulse delivery, and installed the balance. The movement immediately began running - always a satisfying moment in any restoration project:
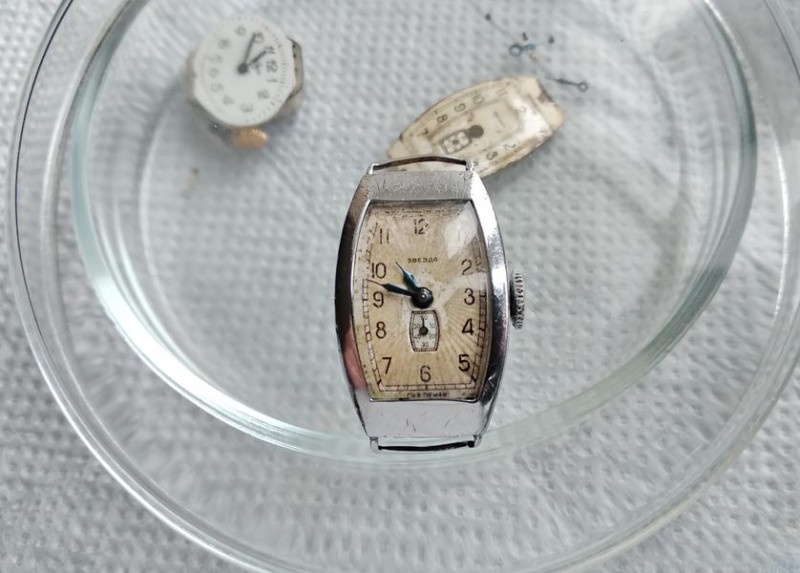
I reinstalled the dial and hands, ensuring proper alignment. The distinctive star-marked dial is characteristic of the Penza factory Zvezda watches. After reinstalling the dust cover, I reassembled the polished crystal and case components:
The completed watch was placed in my collection. Though not returned to pristine condition externally, the movement now operates correctly - preserving this piece of Soviet horological history and allowing it to continue its mechanical journey:
To evaluate the success of the restoration, I tested the watch's timing using professional equipment. The results exceeded expectations for a movement of this vintage:
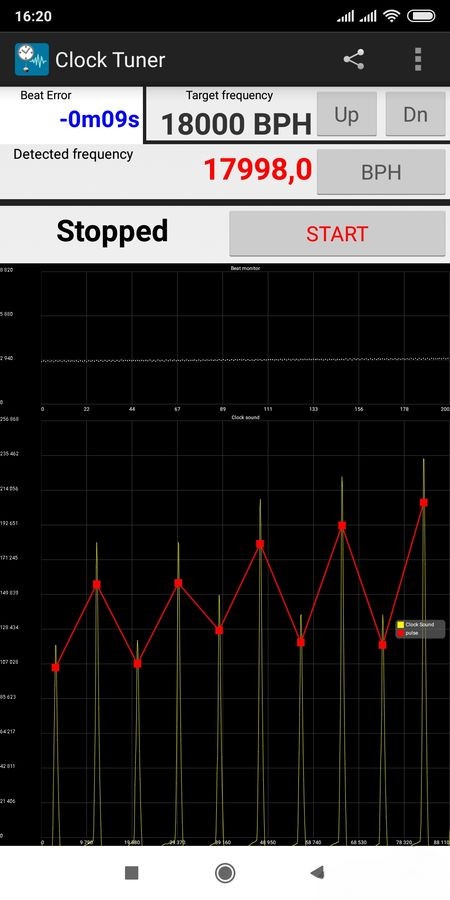
The timing graph shows remarkably consistent amplitude and rate, with only a 9-second daily variation - approximately one minute per week. This exceptional performance demonstrates both the quality of the original LIP-derived design and the effectiveness of proper restoration techniques.
This restoration project offered fascinating insights into early Soviet watchmaking. The Zvezda watches represent an important transition period when the USSR was developing its domestic watch industry using acquired Western technology. These tonneau-shaped women's watches became particularly significant, serving multiple generations of Soviet citizens during a formative period of industrial development.
Several technical elements stand out as especially noteworthy:
While the Zvezda watches were eventually superseded by other Soviet models, they remain important historical artifacts representing the foundation of the Soviet watch industry. Preserving these timepieces through careful restoration ensures this chapter in horological history isn't lost.
For collectors interested in vintage Soviet watches, the Zvezda represents an excellent entry point - these watches remain relatively accessible despite their age and historical significance. Their elegant tonneau shape, distinctive dial design, and quality movement make them increasingly desirable as appreciation for Soviet-era watchmaking continues to grow among collectors worldwide.
The satisfaction of bringing this silent timepiece back to life, hearing its steady tick after decades of stillness, provides a tangible connection to both horological craftsmanship and the people who once relied on these watches in their daily lives. Each restoration not only preserves mechanical heritage but also honors the engineers and craftspeople who created these remarkable timepieces under challenging historical circumstances.