Cart
Your shopping cart is empty!
It's never too late to make things right :)
As a professional watchmaker with over 30 years of experience, I've had the pleasure of working with many remarkable timepieces. Today, I want to share the restoration process of one particularly interesting watch - the Vostok 2209 caliber. This ultra-thin mechanical movement was a true achievement of Soviet watchmaking industry.

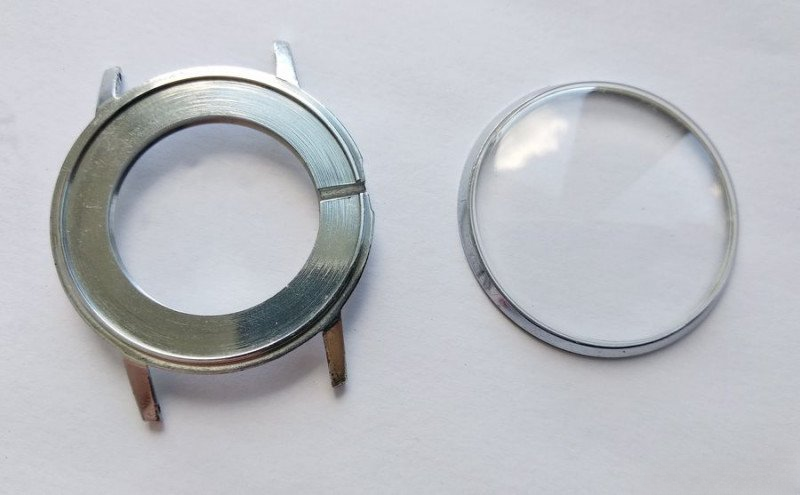
This particular example came to my workshop in quite poor condition. While the case shows significant wear and the crystal is missing, the movement inside remains a marvel of engineering. Let's begin our restoration journey with a detailed examination of this remarkable timepiece.

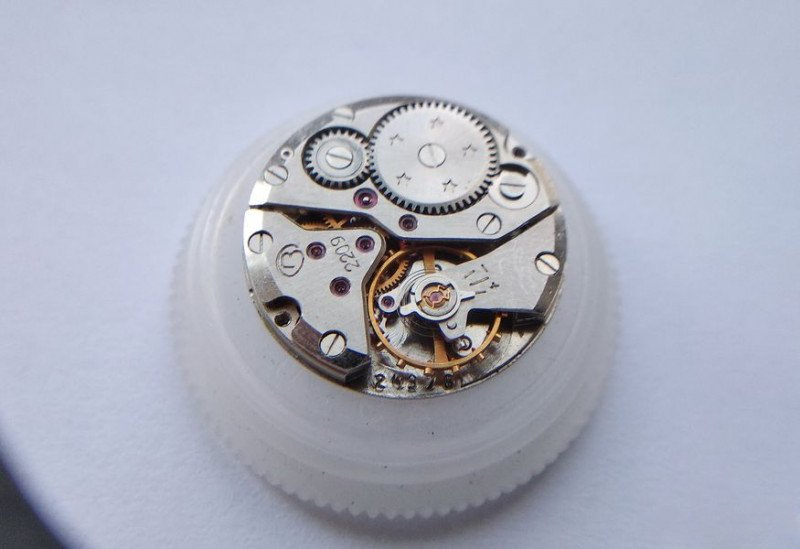
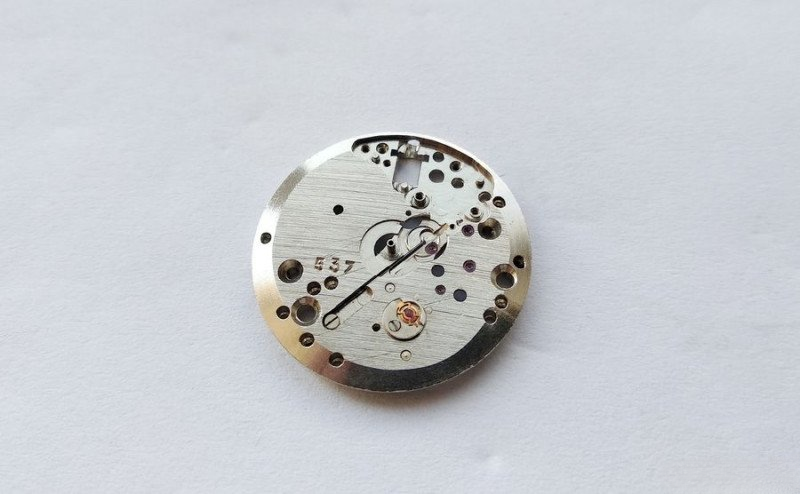
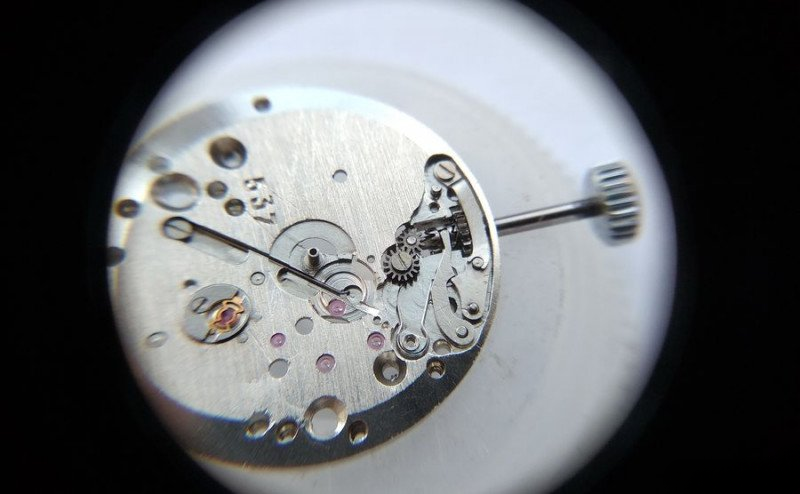
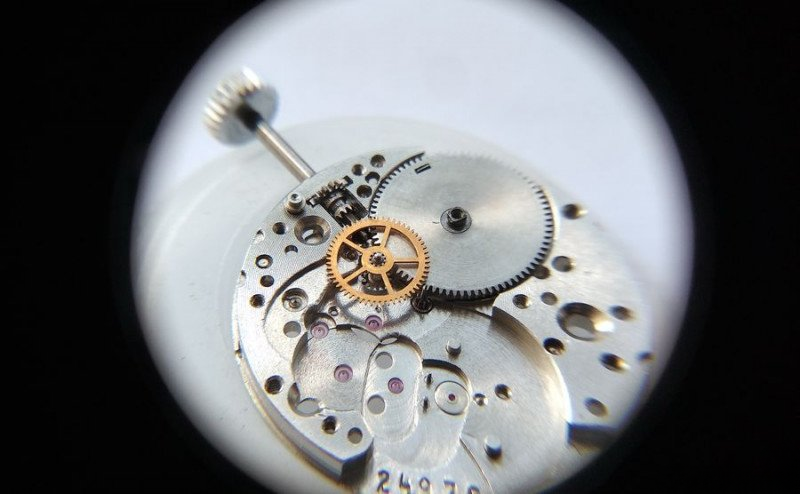
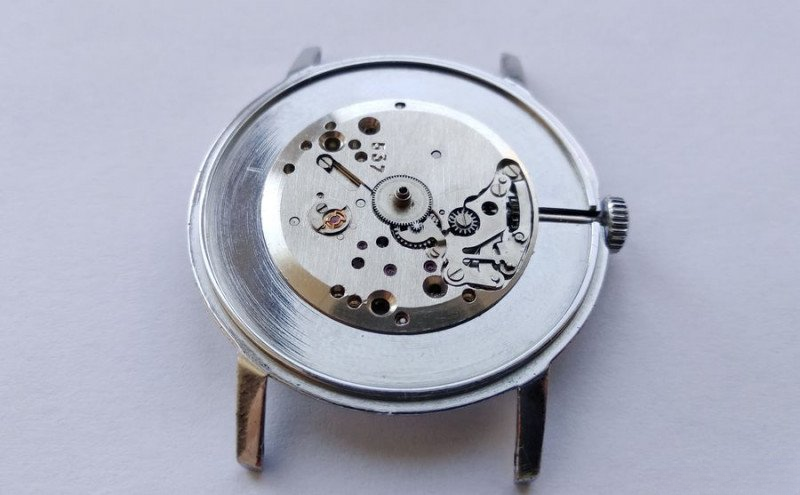
Looking at the movement, I'm pleased to see it's in relatively good condition. The balance is intact and there's no visible corrosion on the parts. This is an early production movement, manufactured before 1980, as evidenced by the absence of the "SU" marking that appeared later. The bridges feature beautiful chamfered edges - a detail that was eliminated in later models to facilitate automated assembly.
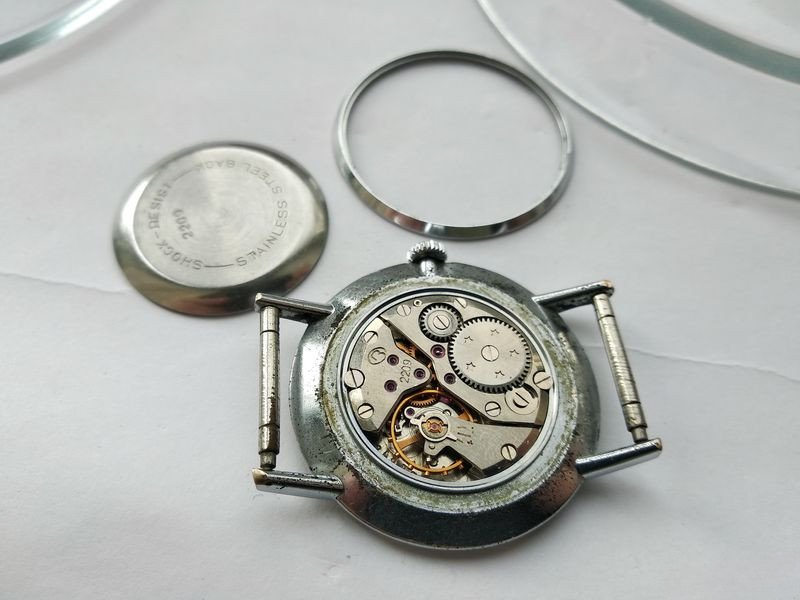
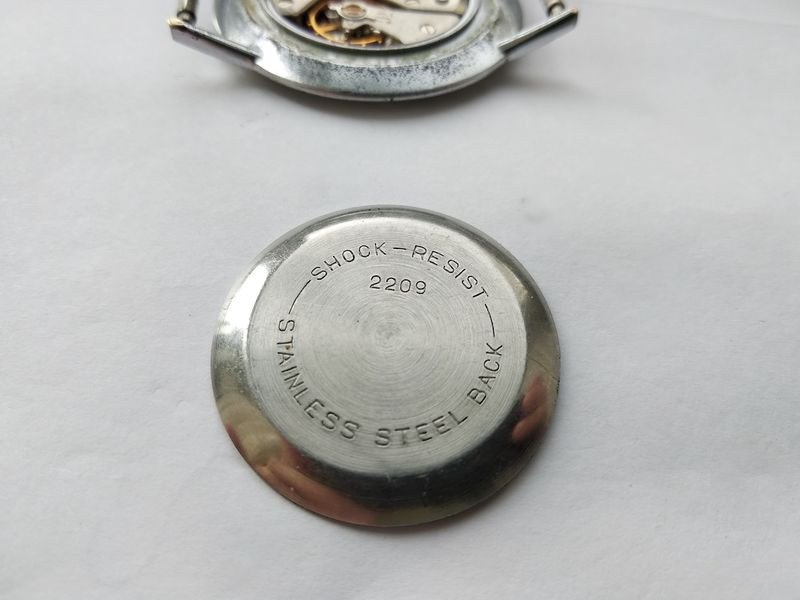
While the case back is made of stainless steel, the case itself is chrome-plated brass. The design cleverly hides most of the case, showing only the bezel, which remains in excellent condition despite its age.
To begin the disassembly process, we need to remove the movement from the case. First, press the disconnect button on the winding mechanism. This raises the intermediate lever, releasing it from the winding stem groove. Then carefully pull the crown and stem outward.
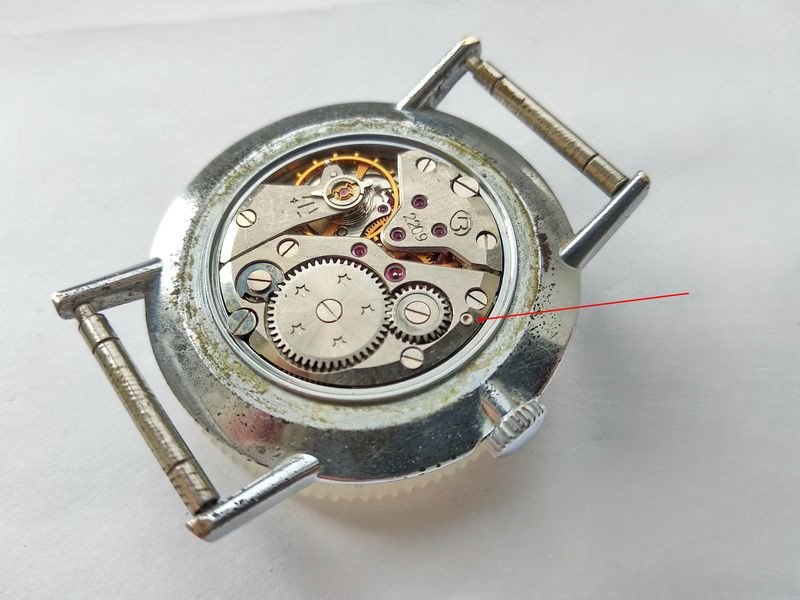
With the winding stem removed, we can now unscrew the two case screws that secure the movement.
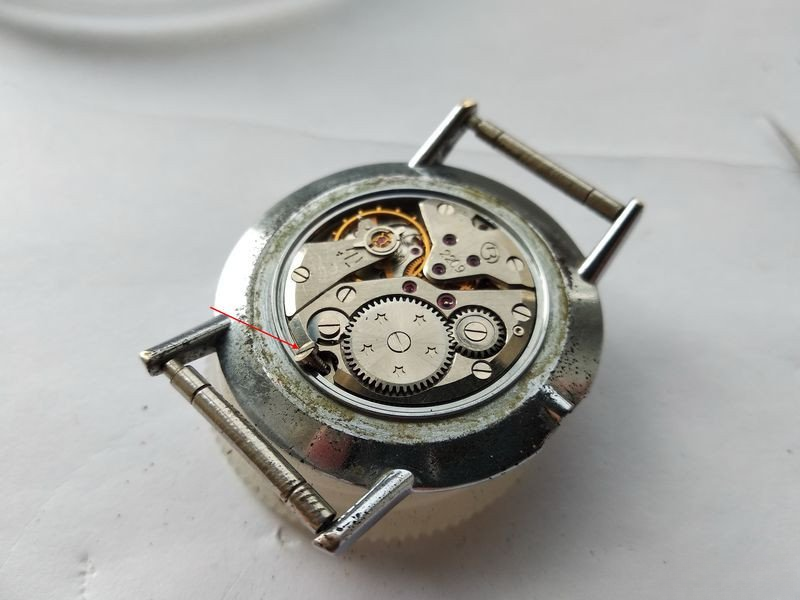
An interesting design feature of this particular model is that the winding stem sits in an open channel rather than a closed tunnel. This actually means we could have skipped removing the stem before taking out the movement, but since we're doing a complete service, removal was necessary anyway.
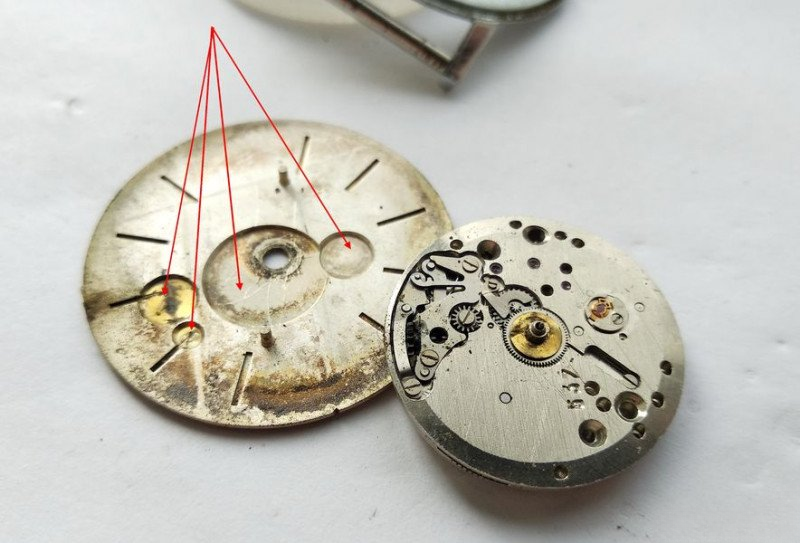
Next step is removing the dial. There are two screws that need to be loosened - not completely removed - just enough to release the dial feet. After removing the dial, we'll tighten these screws back to prevent losing them during cleaning.
Here we encounter an interesting technical peculiarity of the 2209 caliber. The dial has four recesses on its reverse side, necessitated by the height of certain wheels in the calendar mechanism. This means that only specifically designed dials can be used with this movement - a unique feature that makes the 2209 quite special, though it does complicate replacement options.
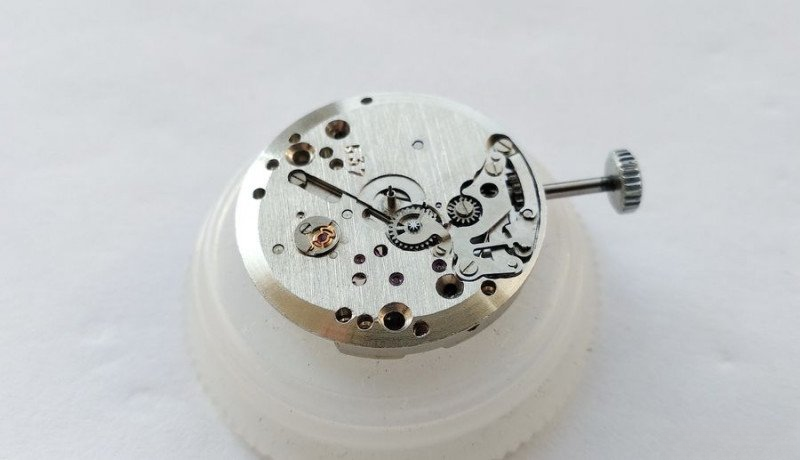
With the dial removed, we can appreciate the elegant design of the motion work. Note the individual mounting piece for the cannon pinion and the secure screw fixing of the setting wheel. This level of detail in construction speaks to the movement's quality.
Let's remove the hour wheel next. Notice the sophisticated construction here - it features two washers: one metal and one brass spring washer. The cannon pinion is free-floating, which means the movement incorporates a separate friction clutch, eliminating the need for tension adjustment on the axis. This is quite an elegant engineering solution.
Moving on to the cannon pinion wheel. To remove it, we first need to take out the cannon pinion bridge by removing its securing screw.
The 2209 caliber features a unique cannon pinion wheel design that differs from other movements. Typically, cannon pinion wheels are mounted on a fixed axis attached to the plate. Here, however, the wheel has its own axis that fits into a socket in the plate. The tribbing is exquisitely polished - a detail that suggests this might have been a military-spec version.
Another interesting feature is the dedicated spring that maintains tension on the cannon pinion wheel. This eliminates any play in the hand-setting mechanism, resulting in extremely precise time setting with zero backlash under all conditions.

Next, we remove the setting lever retainer. Note the complex shape and precisely machined holes - this is a testament to the high manufacturing standards of the era.

The keyless works are also assembled with great attention to detail. The large setting wheel is secured with a screw, and the levers are positioned with excellent mechanical advantage. The intermediate lever has its own dedicated spring.
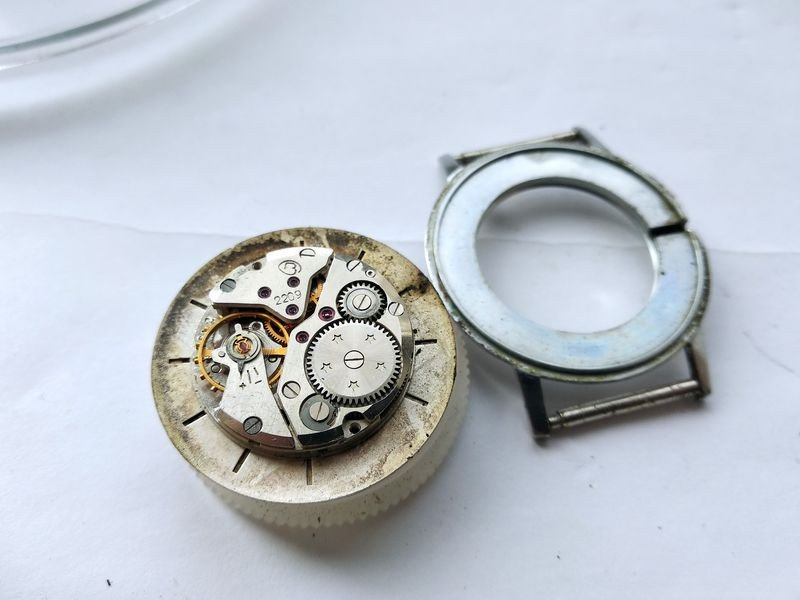
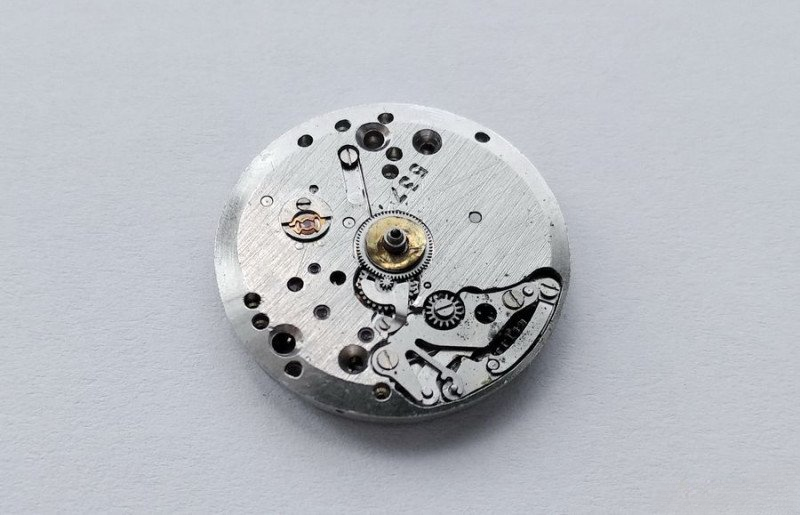
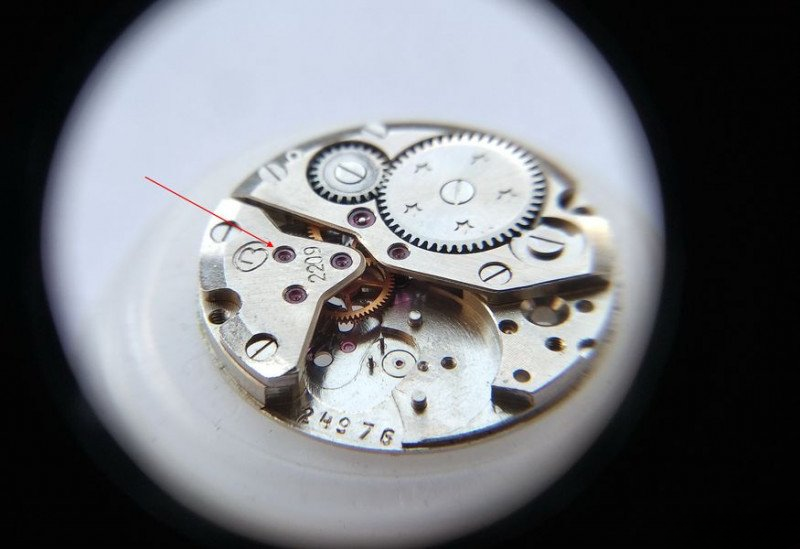
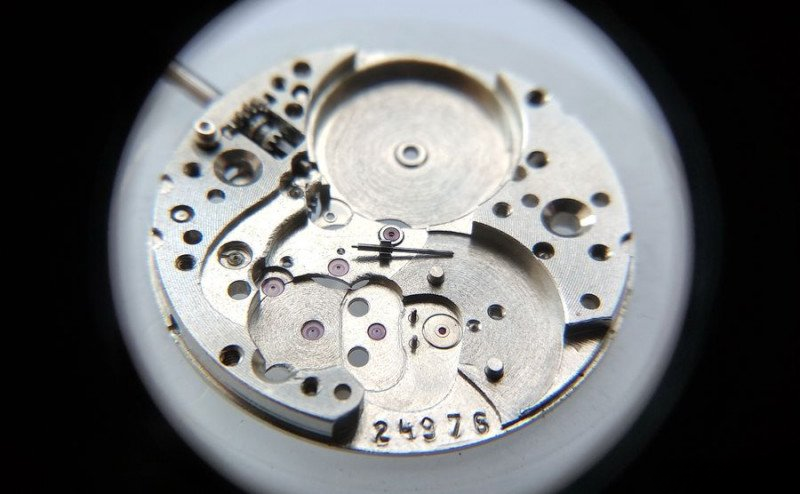
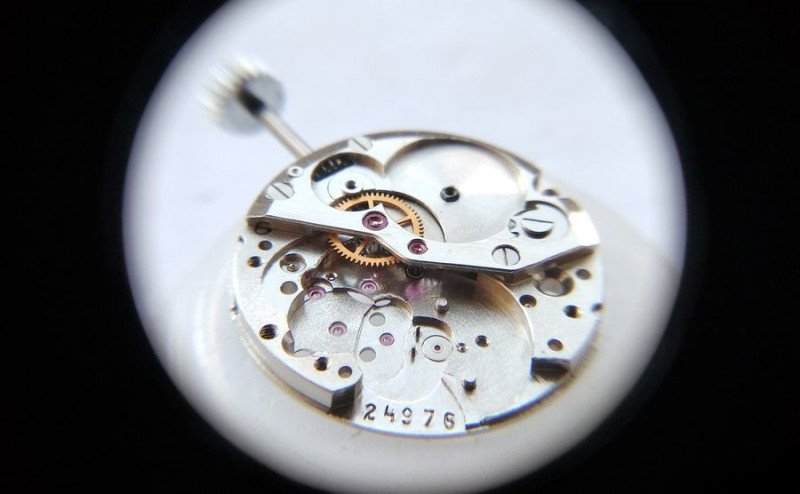
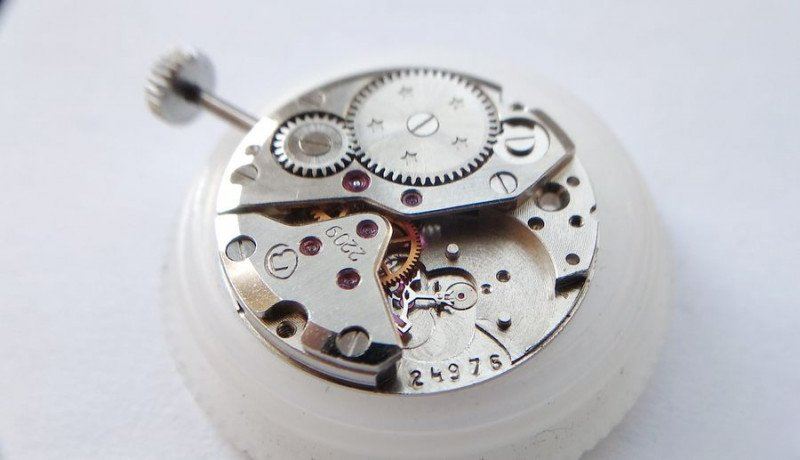
Moving to the gear train side of the movement, we can see the train bridge which holds three wheels. The barrel bridge, besides securing the mainspring barrel and crown wheel, also holds the intermediate wheel and seconds pinion. The train bridge is beautifully marked with the factory logo and caliber designation '2209'.
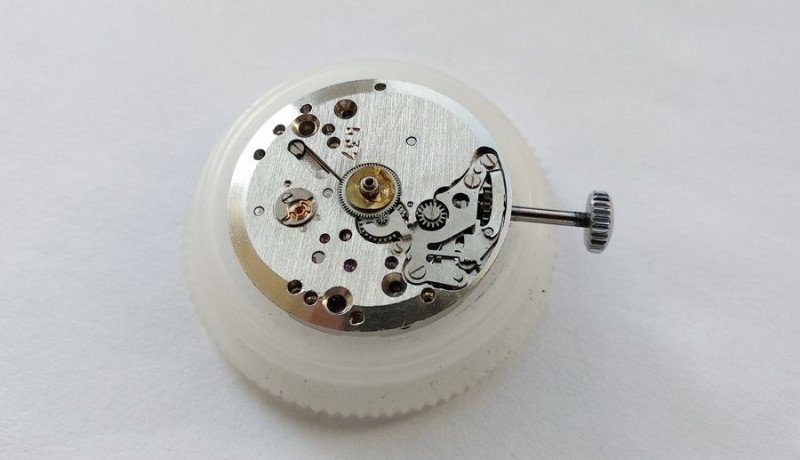
We'll now remove the balance cock screw. Take note of the Breguet overcoil hairspring - a sophisticated feature that improves isochronism. While the movement could have been made even thinner by using a flat hairspring, the designers clearly prioritized chronometric performance over absolute thinness.
As we remove the balance and pallet fork, we can observe the high-quality construction. The balance is a screwed balance with four larger timing screws at 90-degree intervals, featuring longer threads for precise adjustment. The hairspring stud is fixed, and the regulator pins are straight type. The shock protection system is well-designed, and the pallet fork bridge is secured by a single screw with two locating pins for perfect alignment.
Looking at the train bridge, we can observe the sophisticated design of the jewel settings. The oil sinks are deep with oval bottoms - an excellent design that ensures long-term oil retention without spreading. This kind of attention to detail significantly extends service intervals.
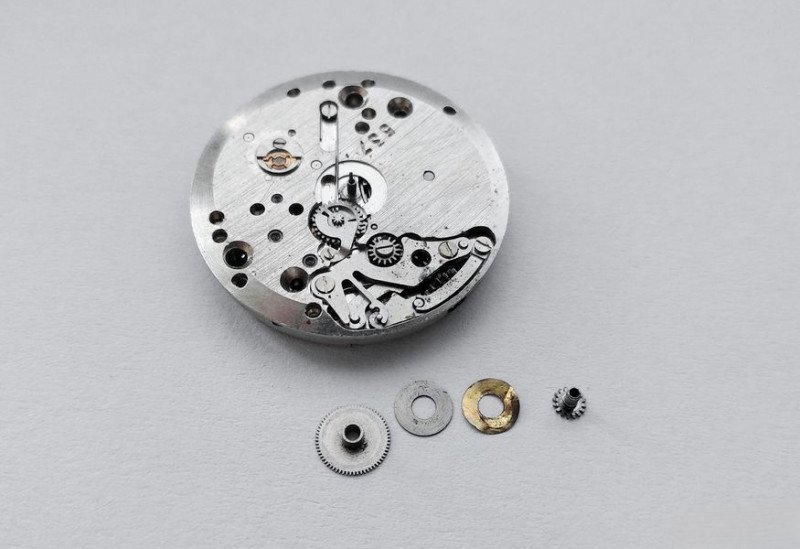
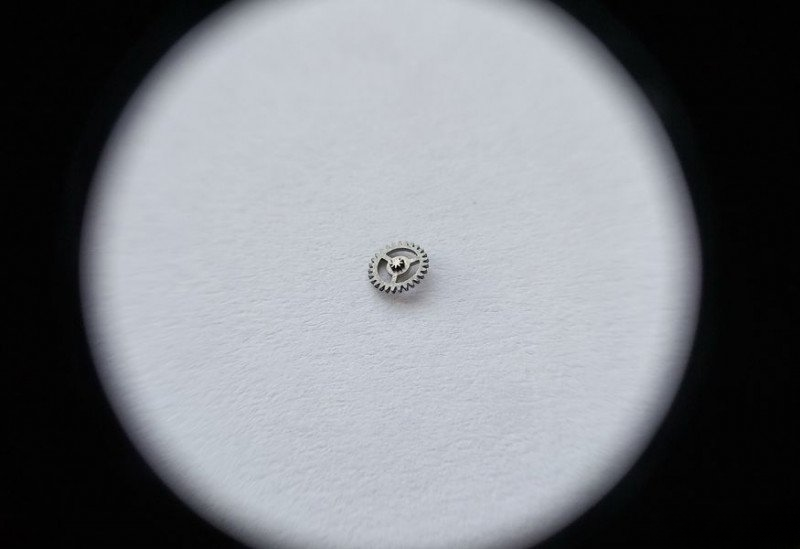
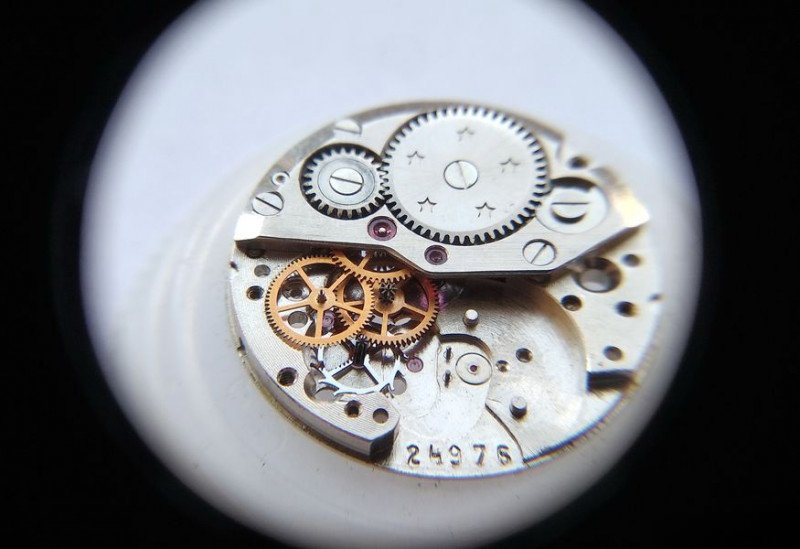
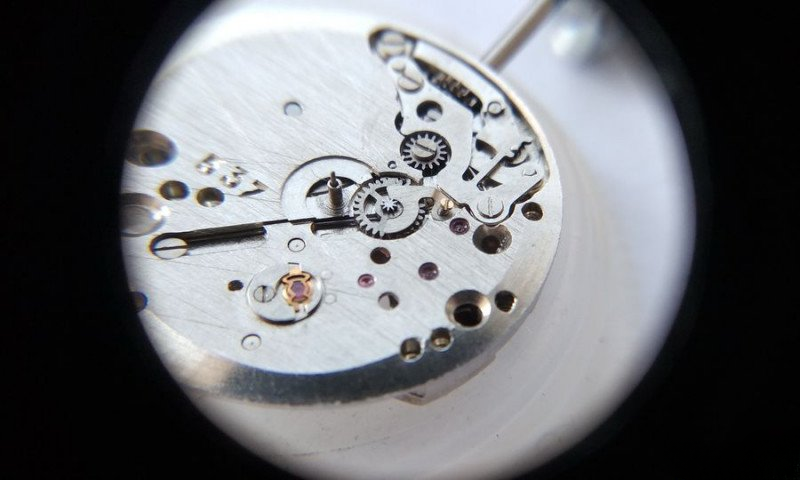
With the train bridge removed, we can access the three wheels beneath - the escape wheel, fourth wheel, and third wheel. The third wheel features a double-tooth design, necessitated by the indirect seconds drive system. Let's carefully remove these wheels.
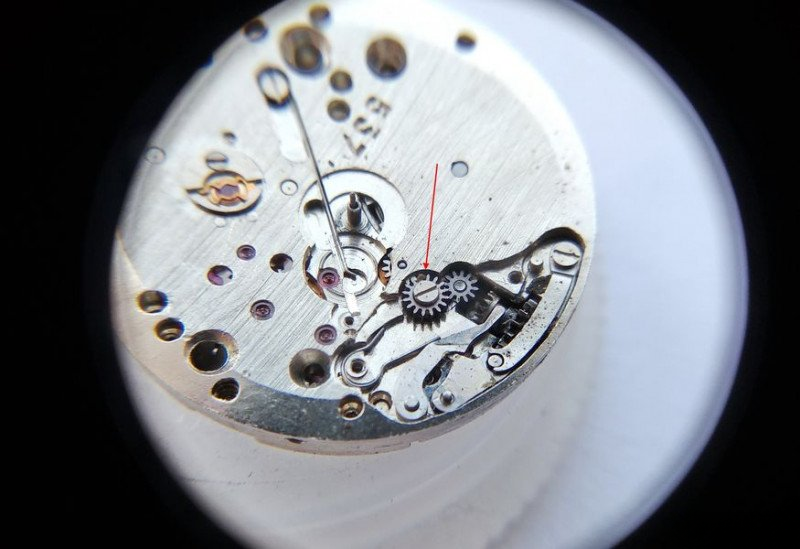
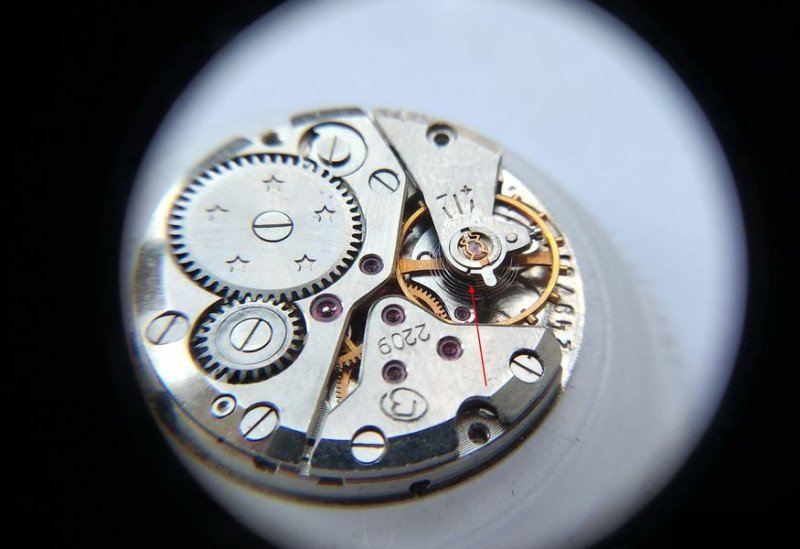
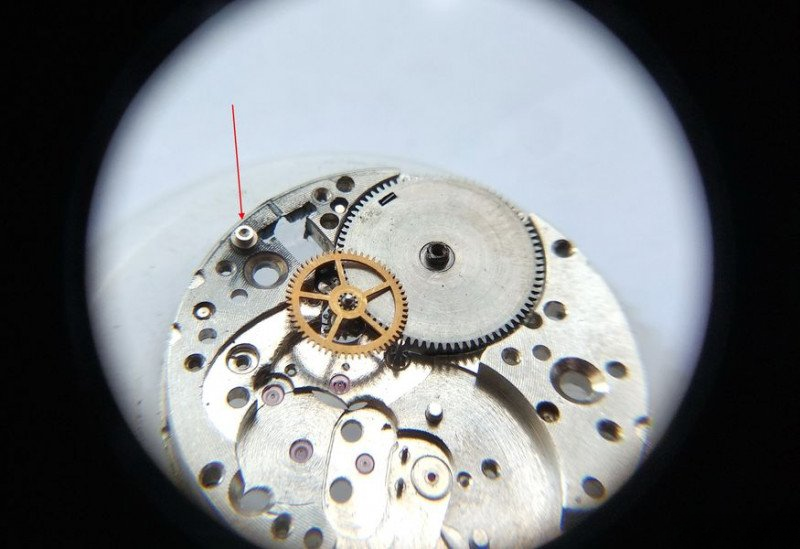
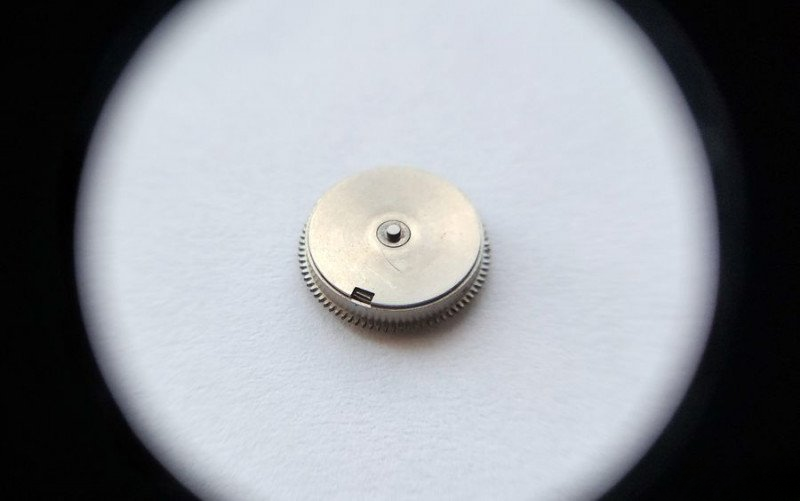
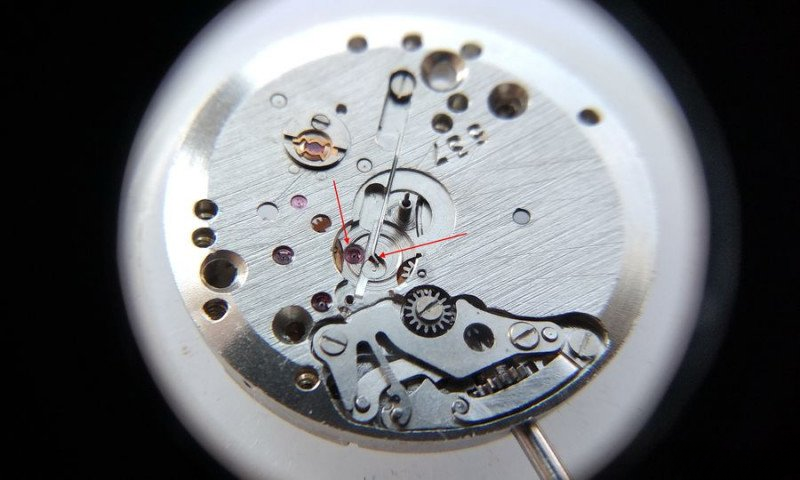
Now we'll disassemble the mainspring barrel assembly and remove the barrel bridge. Note the disconnector pin that's become stuck in its tunnel (indicated by the arrow).
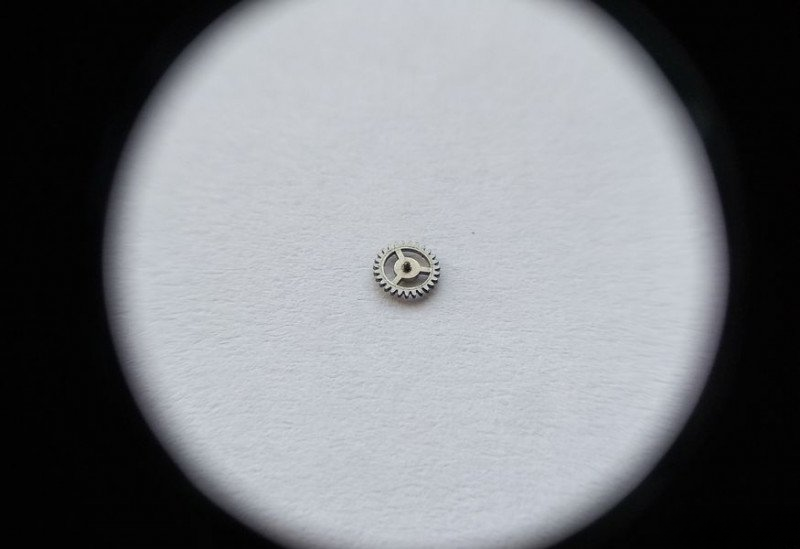
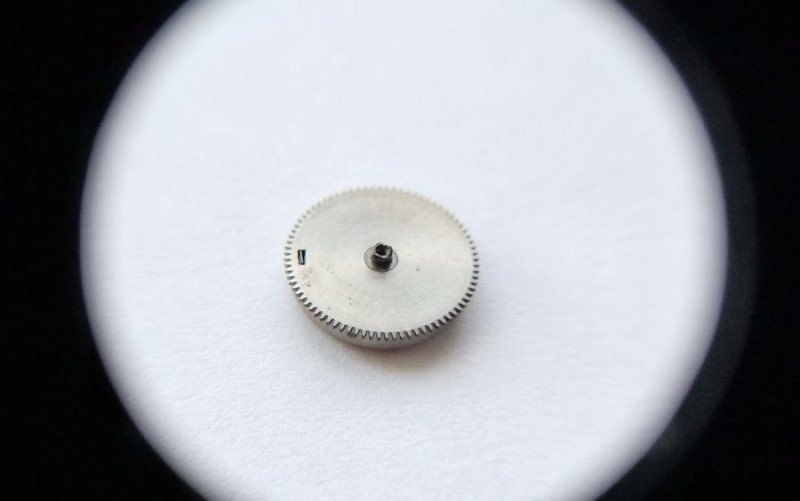
After removing the intermediate wheel with its clutch and the barrel, we're left with the last component - the seconds pinion. This part, which could be called either a seconds pinion with hand post or simply a seconds post, includes a pinion, pivot, and shoulder, along with its axis. The axis sits in a jewel and passes through a bushing that supports the cannon pinion and hour wheel.
Carefully extract the seconds pinion from its jewel.
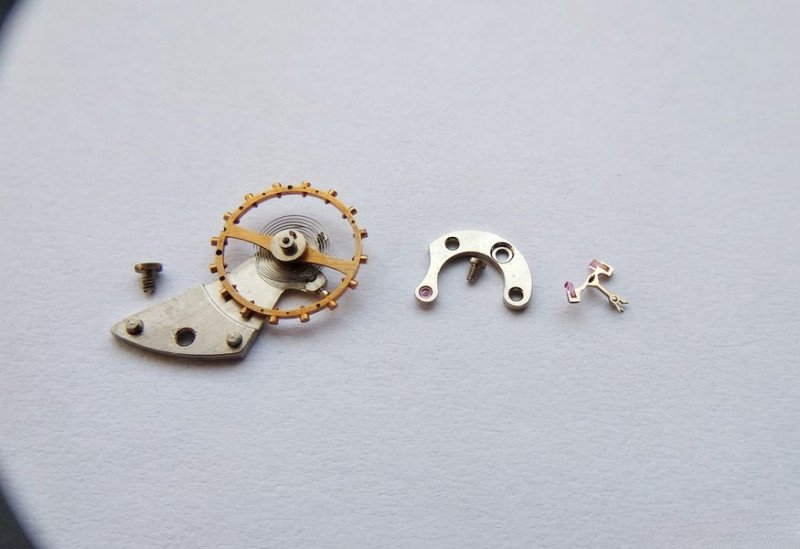
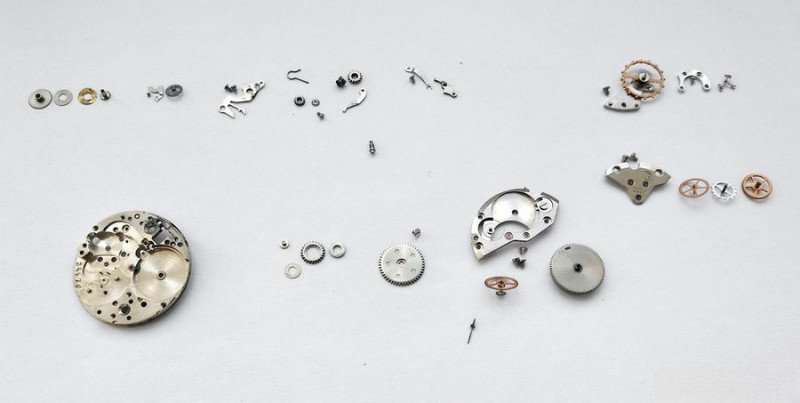
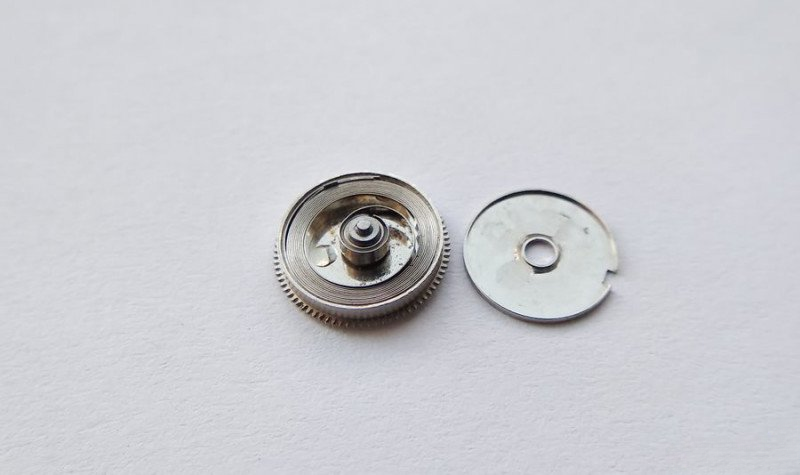
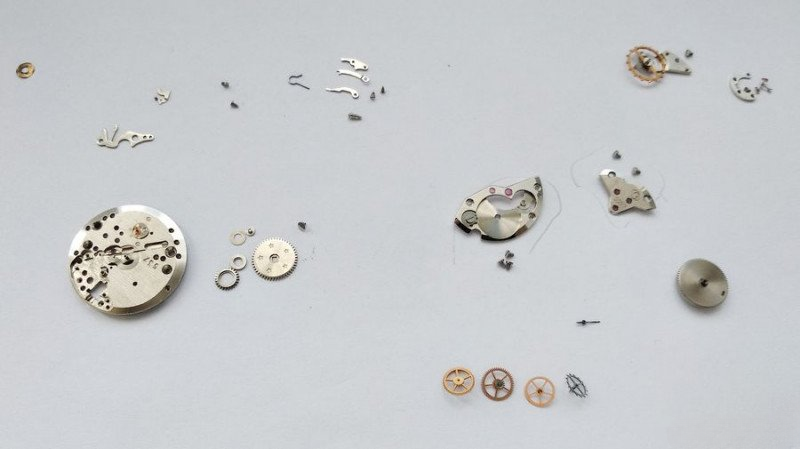
Now we have all components laid out on clean paper, ready for cleaning. But before we proceed with the general cleaning, we need to address Her Majesty - the mainspring.
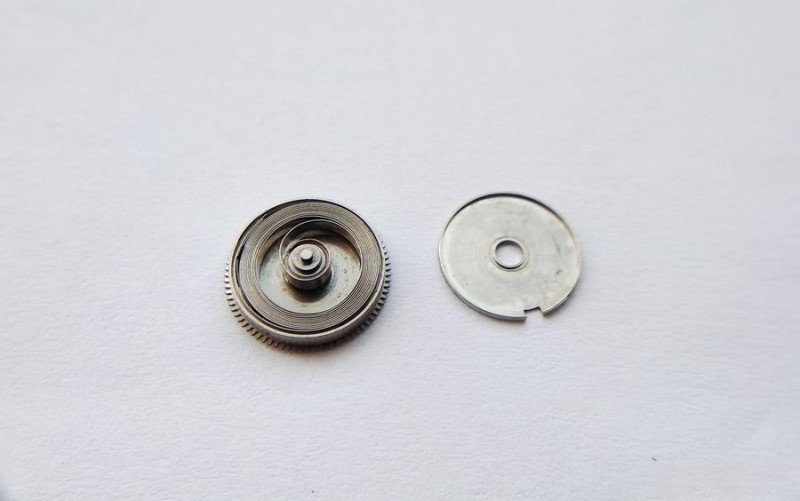
Here's the barrel housing - the mainspring's royal chamber, if you will. This view shows the plate side mounting.
And here's the bridge side view.
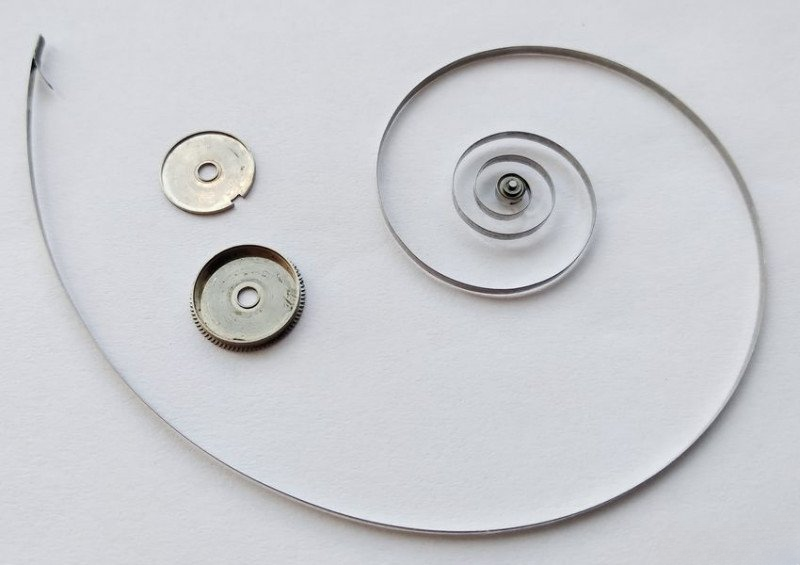
To open the barrel, we brace the arbor against a firm surface and press on the barrel wall. The cover pops off cleanly. Never attempt to pry open a barrel with a screwdriver - this will inevitably damage the component.
With the barrel disassembled, we can see a standard (non-S-shaped) mainspring. All components will be thoroughly cleaned in benzine.
The results are excellent - everything is gleaming clean.
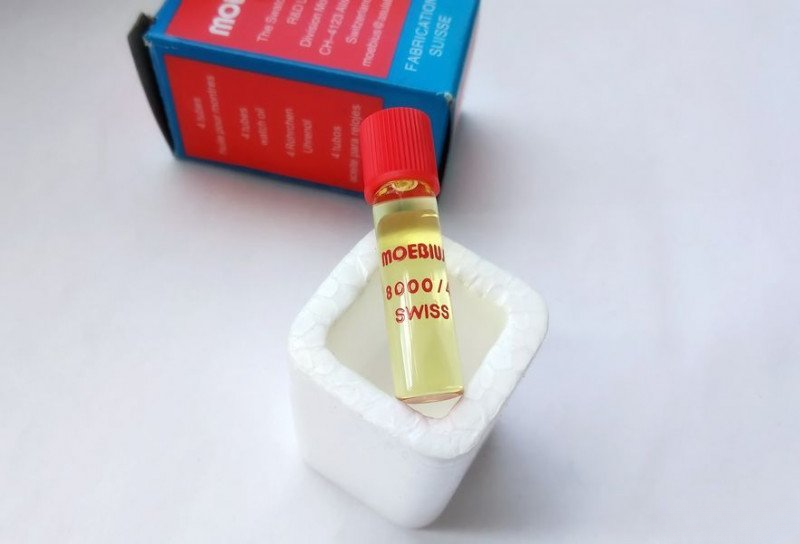
Now we can return Her Majesty to her rightful place. Apply a few drops of B-1 oil and close the cover. The barrel assembly is now complete.
With all parts thoroughly cleaned, we can begin the delicate process of reassembly. The plate is now pristine, with all jewels cleaned and ready for fresh lubrication.
First, let's assemble the clutch mechanism on the winding stem. We'll install the winding pinion, clutch, and slide these components onto the winding stem.
Now we can install the levers and springs, along with the setting wheels. The large setting wheel needs to be secured with its screw. All pivots and contact surfaces receive a careful application of B-1 oil. We'll cover the keyless works with their retaining plate.
We begin the wheel train assembly by installing the seconds pinion. For a movement of this quality, I've chosen to use Moebius 8000 lubricant.
After lubricating the seconds pinion axis, we can install it.
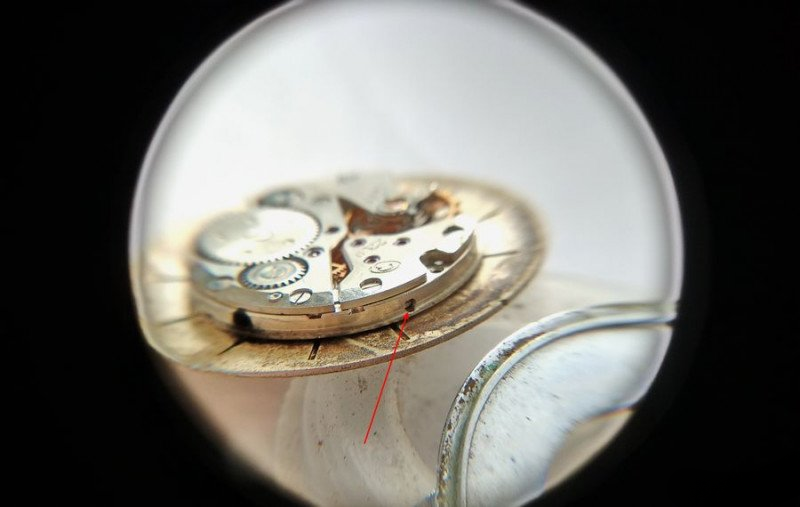
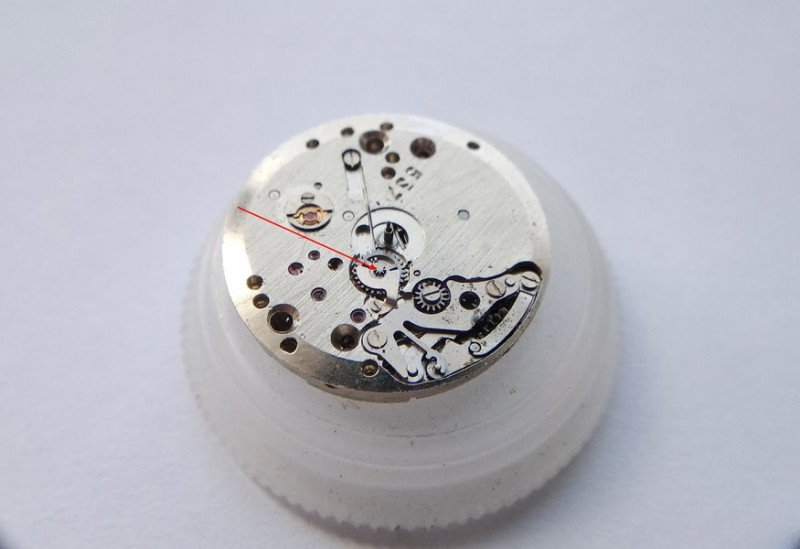
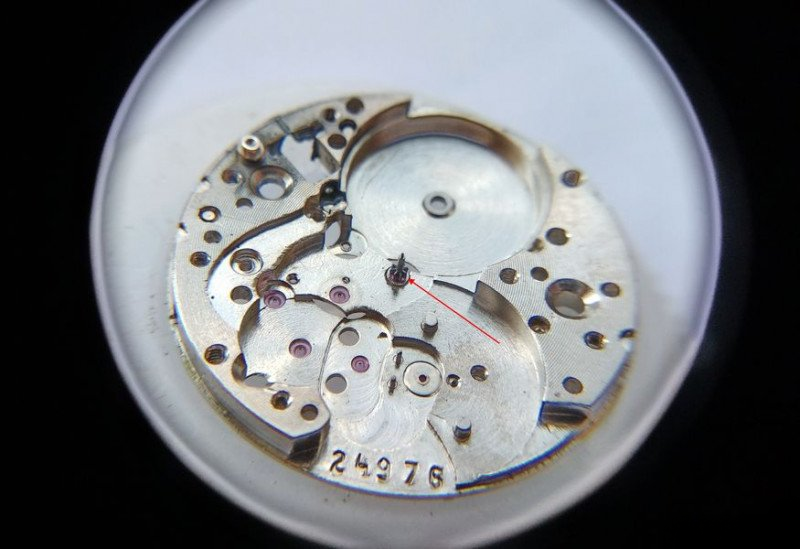
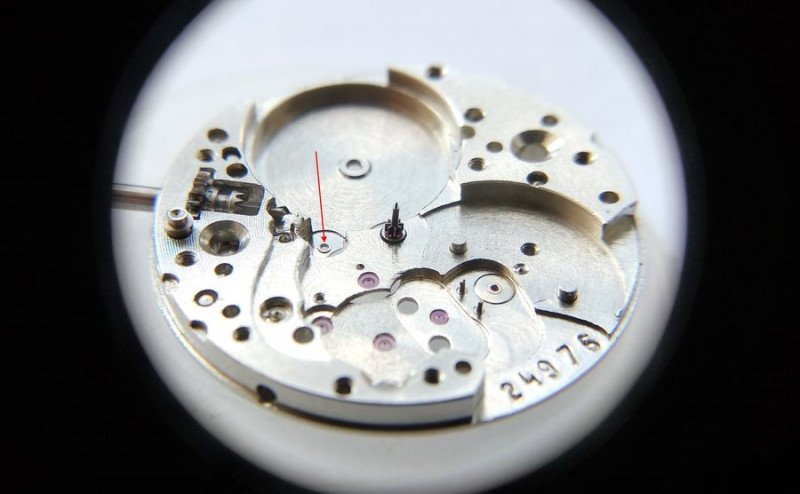
Here's an interesting technical observation: notice the area indicated by the arrow - this is where the intermediate wheel pivot sits. Surprisingly, there's no jewel here, just a hole in the plate. While there is reinforcement around the hole, the absence of a jewel in such a loaded position is quite unexpected for a movement of this caliber.
Nevertheless, we proceed with installing the barrel and intermediate wheel.
Cover these components with the barrel bridge.
Next, we assemble the gear train. The assembly process went remarkably smoothly - a testament to the excellent design and manufacturing tolerances. Install the winding and ratchet wheels, and carefully lubricate all jewels.

Remember the jewel under the cannon pinion wheel? Now's the time to lubricate it, along with the wheel pivot socket and contact portion of the cannon pinion spring, using Moebius 8000.
Gently pulling back the spring, we can install the cannon pinion wheel...

...and secure it with its bridge.
Now it's time for the pallet fork to take its place. We'll give it a quick rinse in benzine - just a quick dip, as prolonged exposure could affect the pallet stones' adhesive. Lubricate the working surfaces of the pallet stones.
Install the pallet fork in the movement and complete the escapement assembly by installing the balance.
Success! The movement springs to life.

Let's take a moment to admire this remarkable caliber one more time...
Now we can assemble the cannon pinion and hour wheel unit,
prepare our cleaned and refurbished case,
and finally return the movement to its home.
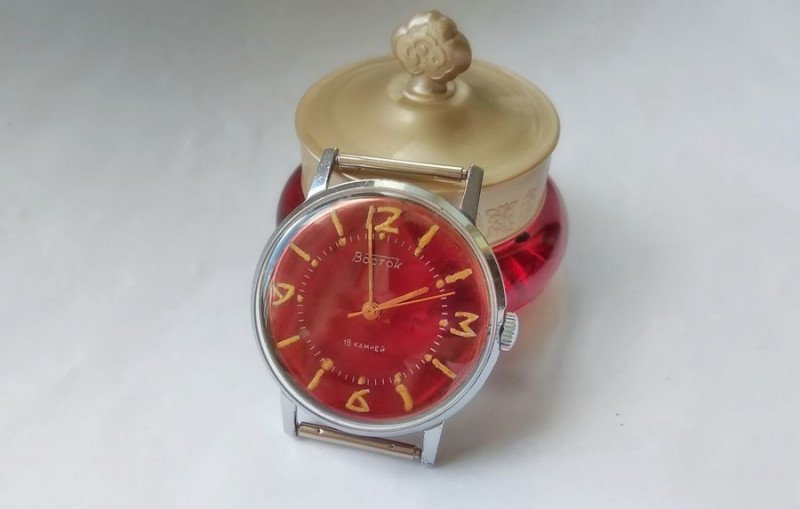
After careful consideration and searching through my vintage parts collection, I managed to find a suitable replacement dial. While not brand new, it's in significantly better condition than the original. Of course, we can always upgrade it later if a better option becomes available.
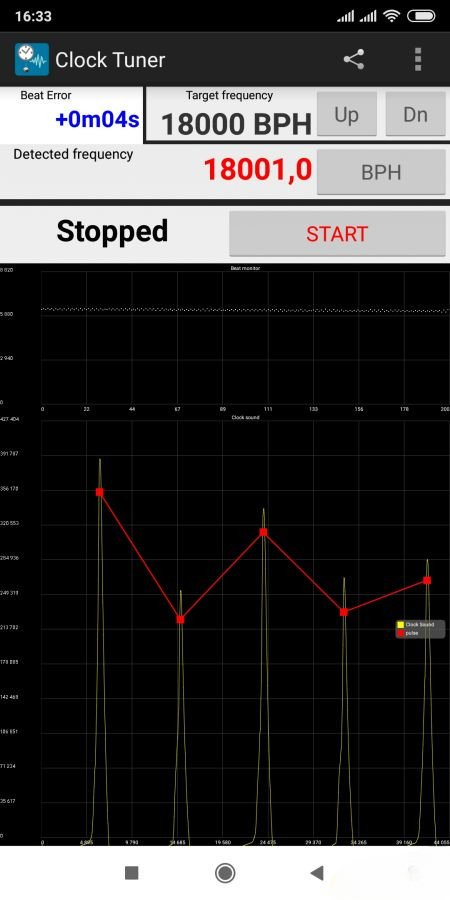
Let's look at the timing results. For a Grade II precision movement that's half a century old, gaining just four seconds per day is quite remarkable.
The Vostok caliber 2209 represents a high point in Soviet watchmaking technology. The movement demonstrates excellent engineering solutions and manufacturing quality that remains impressive even by today's standards. During this restoration, I noted several key points:
The only notable peculiarity is the dial mounting system requiring specific dial designs, but this is a minor consideration given the movement's overall excellence.
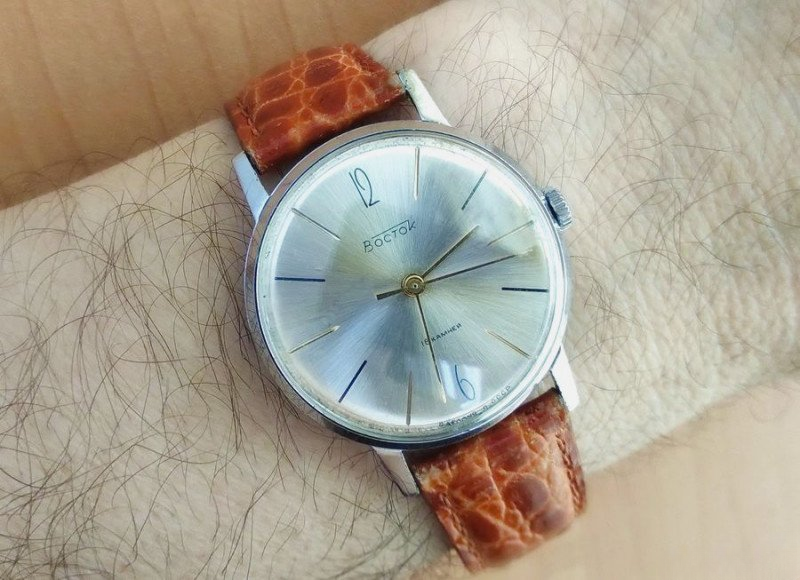
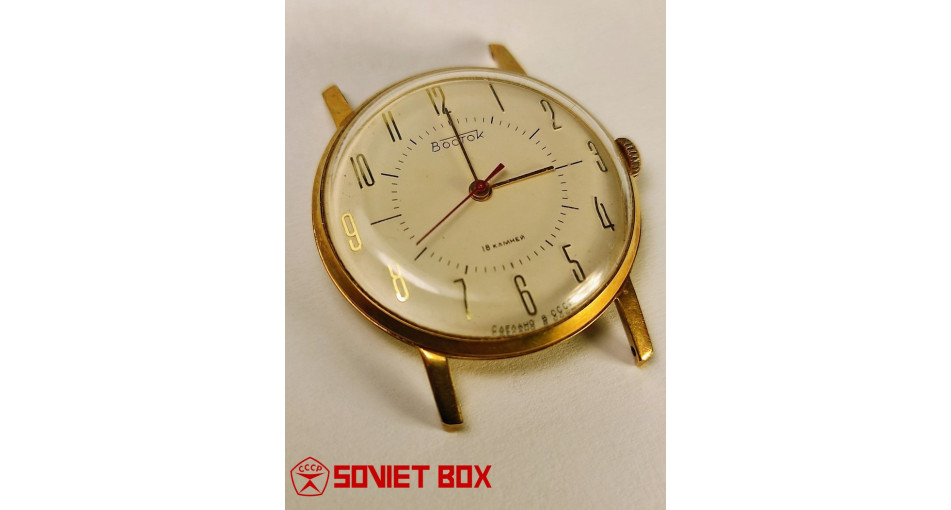
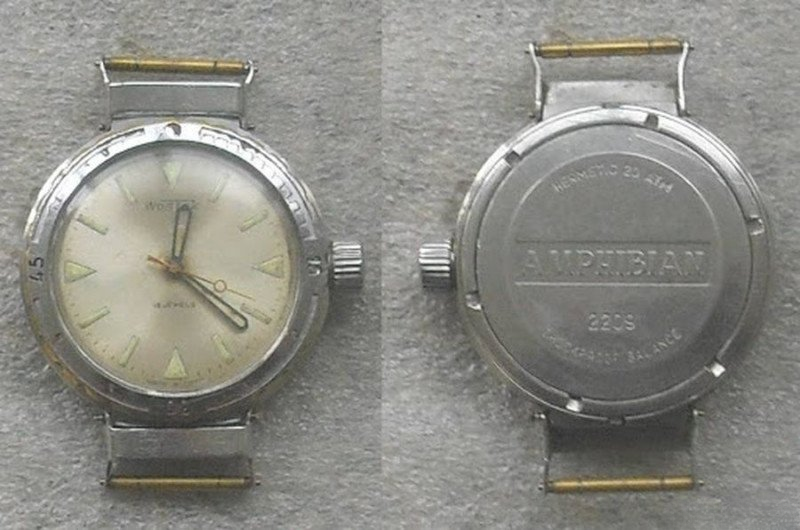
It's worth noting that this caliber 2209 was used in several significant watch models. The most famous were the 'Ears' Amphibia (rated for 20 ATM) and the early Komandirskie military watches. Here's how these models looked in their heyday:
Recently, I had the pleasure of restoring another excellent example of a Vostok watch. Its remarkable condition made it a joy to work on.