
Field report

Jupiter-8 50mm f/2: Regreasing the Helicoid of the Zorki-4 Lens

Reviewed

Jupiter-8 50mm f/2: Regreasing the Helicoid of the Zorki-4 Lens

Jupiter-8 50mm f/2: Regreasing the Helicoid of the Zorki-4 Lens

"The simplest focusing mounts are the ones that forgive the least carelessness: one dry thread or one greased screw, and the action is spoiled."
— Notes from the repair bench

Readers often ask in the discussions for a particular item to be covered. During the Helios-44 service one of them, fant_asia from Krasnodar, asked how the helicoid of the Jupiter-8 is lubricated. Here it is. It will be short and to the point, because the job is entirely uncomplicated: the lens sits in a very repair-friendly barrel.

On the bench is a Jupiter-8 from the Krasnogorsk Mechanical Works, the version fitted to the Zorki-4. The mount is M39×1 with a flange focal distance of 28.8 mm. The task is to replace the grease in the helicoid.
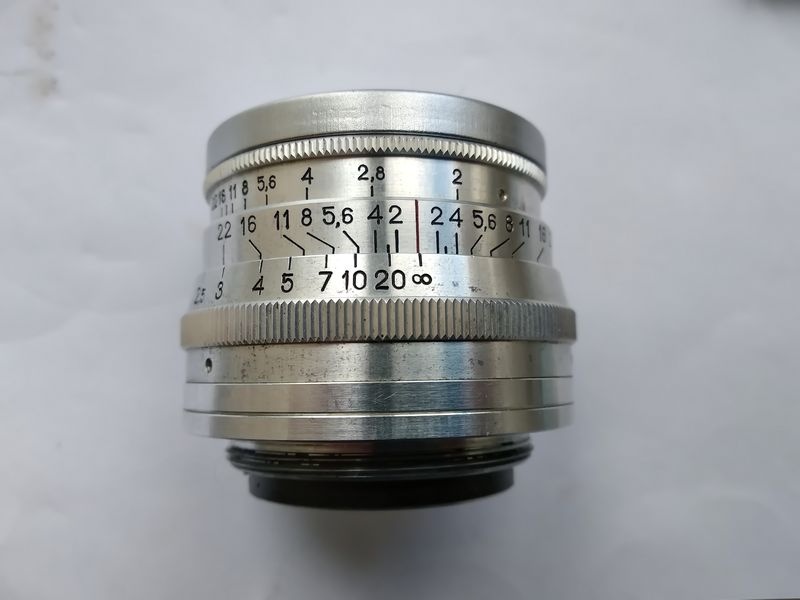
Silver Jupiter-8 50mm f/2 lens with depth-of-field and distance scales, as received
The Jupiter-8 before service: the later Zorki-4 barrel with its depth-of-field and distance scales.

Disassembly

From the tail end, the three screws of the slider's retaining ring are removed.
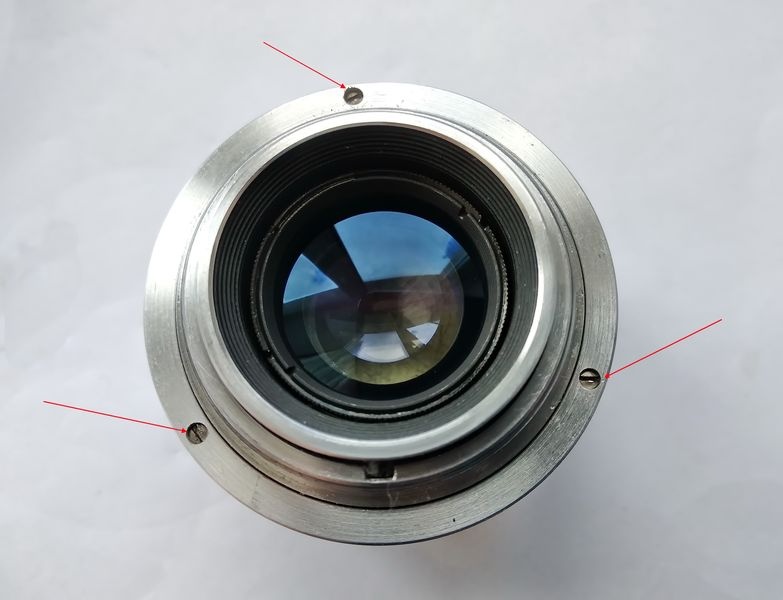
Rear of the Jupiter-8 with red arrows on the three screws of the slider retaining ring
The rear of the lens. The three arrows mark the screws that hold the slider's retaining ring.

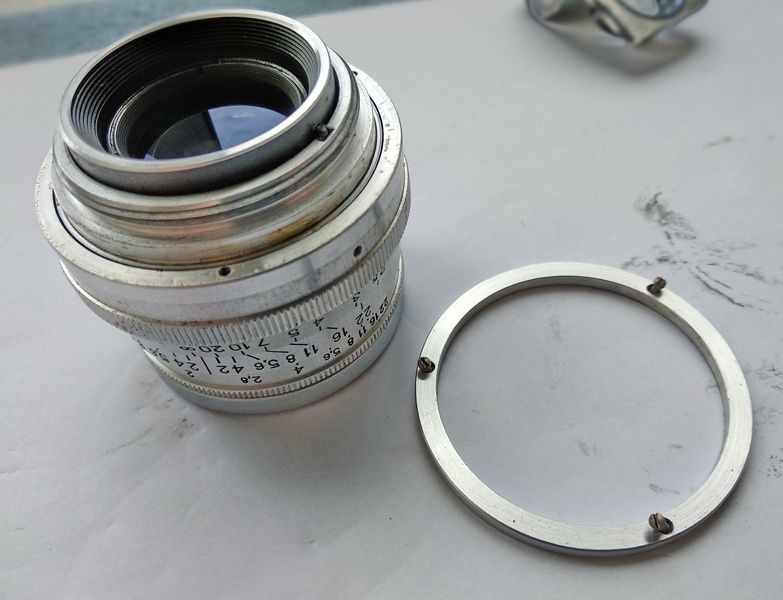
The retaining ring comes off.

Jupiter-8 with the thin retaining ring removed and set beside it, screws still in the ring
The thin retaining ring lifted off the tail.

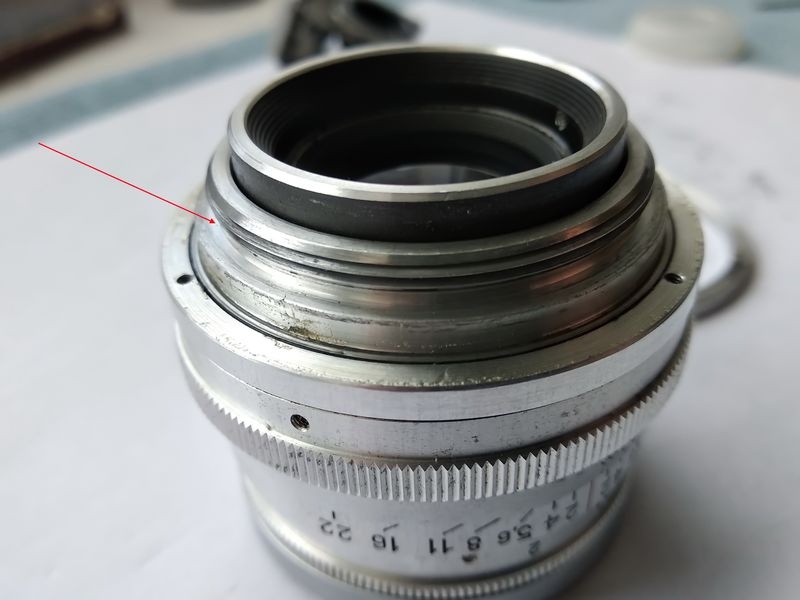
Here is the slider with its thread.

Arrow pointing to the threaded slider ring on the tail of the Jupiter-8
The slider, arrowed, the threaded ring that transmits focusing movement to the camera's rangefinder.

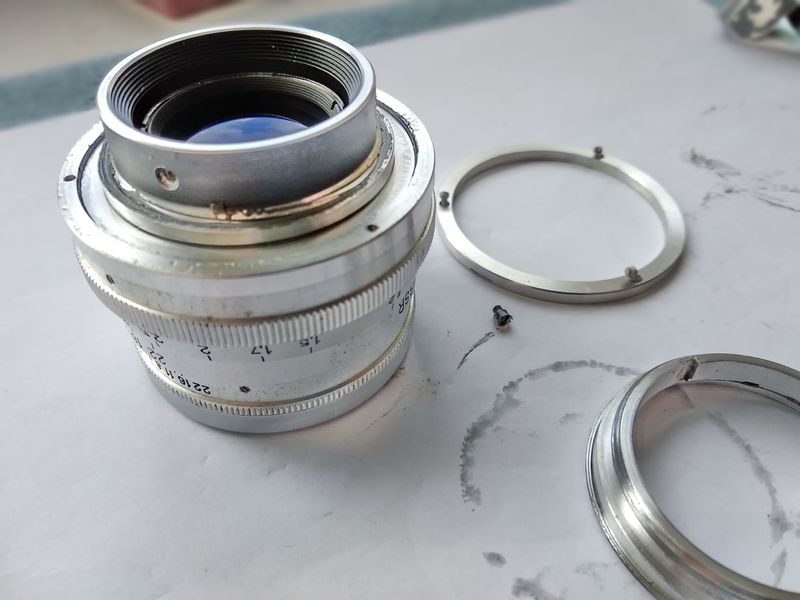
It simply lifts off. No marks are needed here: everything goes back together by the existing reference features.
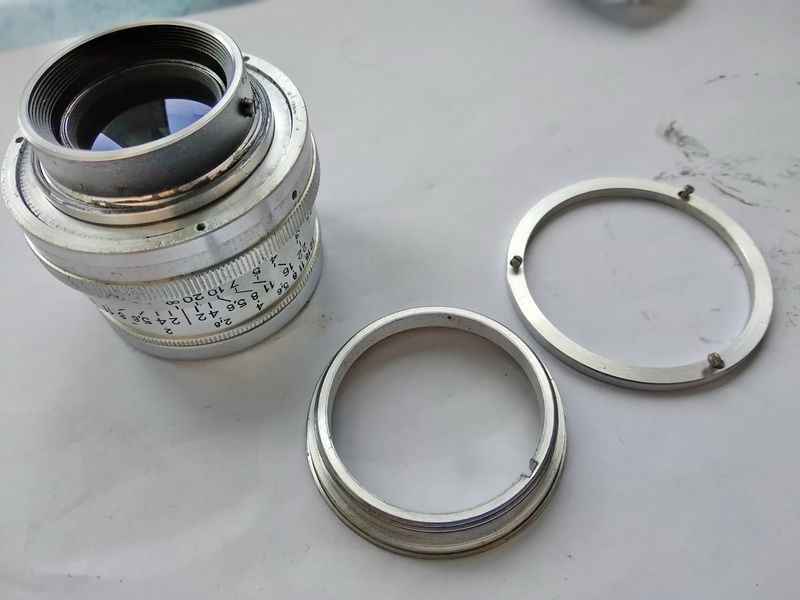
Jupiter-8 with the slider ring and retaining ring removed and laid on the paper
The slider and the retaining ring off the lens. Their own slot and screw locate them on reassembly.

This shows the slider and the slider's guide slot.
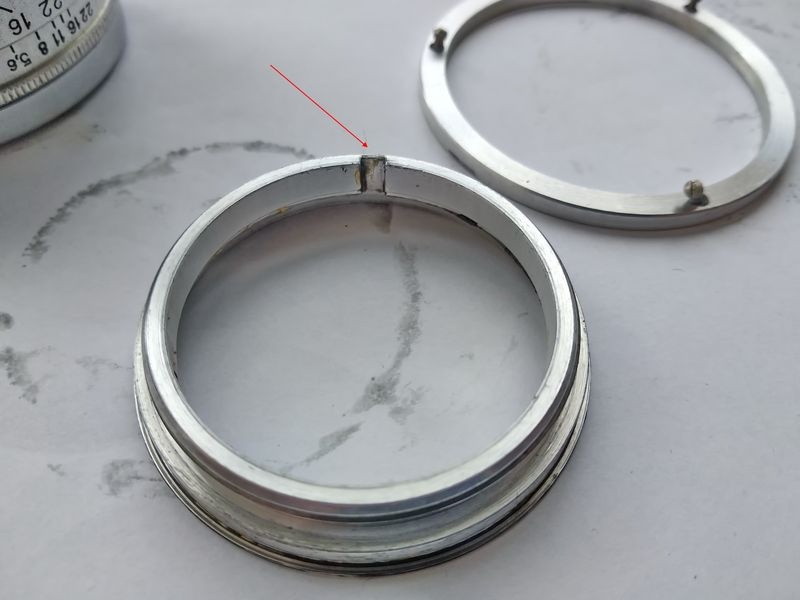
Slider ring of the Jupiter-8 with an arrow on its guide slot, retaining ring behind
The slider ring with its guide slot, arrowed. The slot rides on the screw head of the rangefinder pusher.

Now the combined stop and guide screw on the rangefinder pusher is unscrewed.
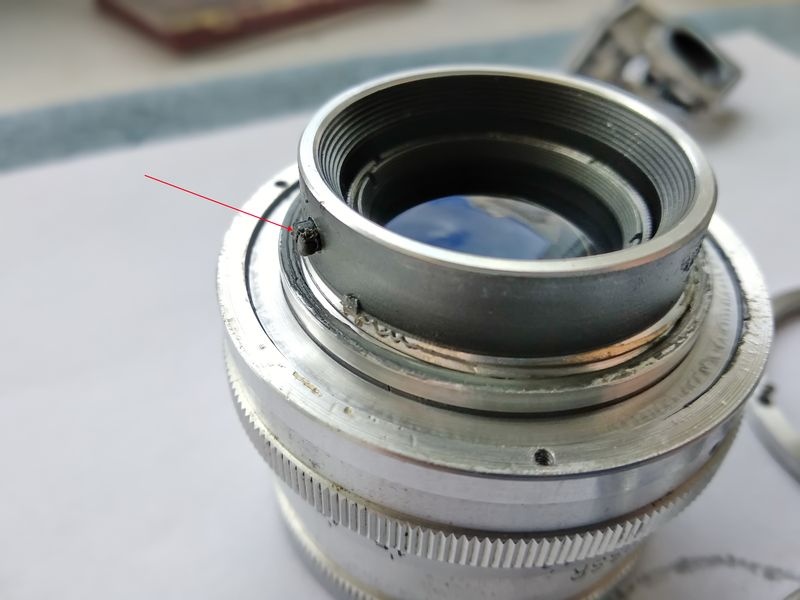
Arrow on the stop and guide screw on the rangefinder pusher of the Jupiter-8
The stop and guide screw on the rangefinder pusher, arrowed. It also limits the helicoid travel.

The screw is out.

Jupiter-8 with the guide screw removed and lying on the paper beside the rings
The screw removed and lying on the paper; its empty hole is visible on the pusher.

Turning it clockwise, the outer helicoid ring with its multi-start thread is unscrewed. The scale ring stays in place; there is no need to remove it.
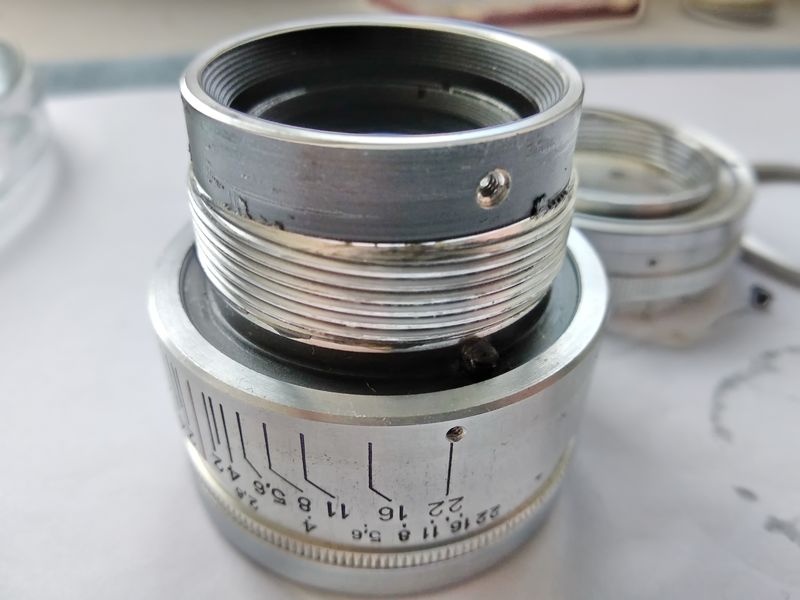
Jupiter-8 inner helicoid with its multi-start thread exposed after the outer ring is unscrewed
The inner helicoid with its multi-start thread exposed. The depth-of-field scale ring remains on the body.

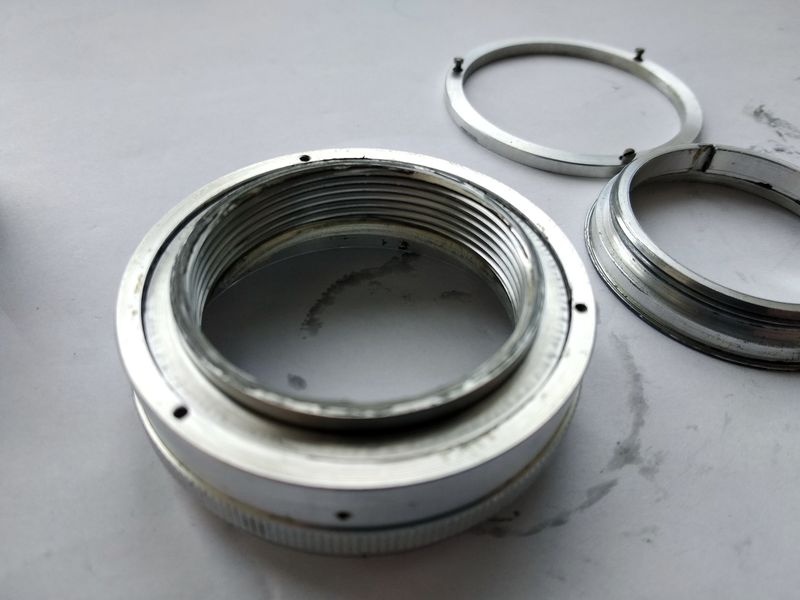
This is the outer helicoid ring.

Outer helicoid ring of the Jupiter-8 with its internal thread and old grease
The outer helicoid ring, its internal thread coated with old grease.
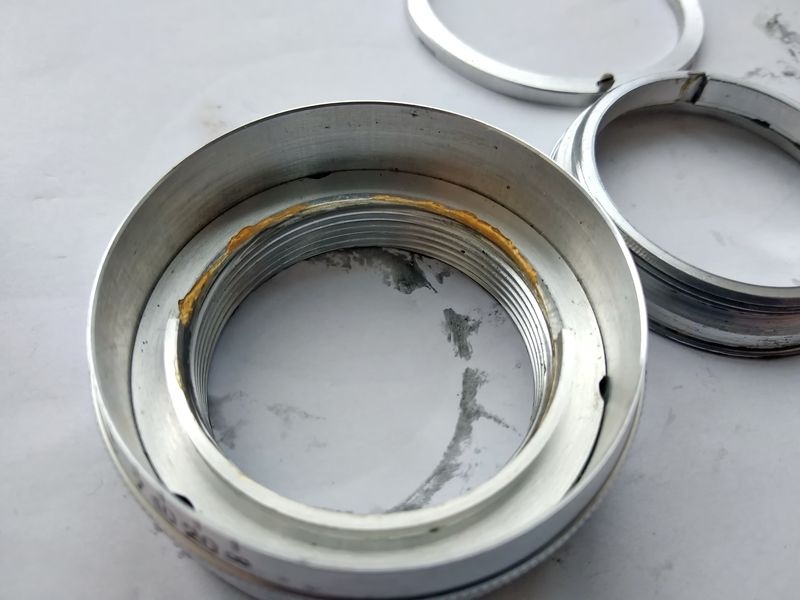
Close view inside the Jupiter-8 outer helicoid ring showing a band of reddish old grease
Inside the outer ring. The reddish band is thirteen-year-old grease, not corrosion: the part is duralumin.

Cleaning

The rear element is covered with a suitable cap. The cap of a Kodak film canister fits perfectly.
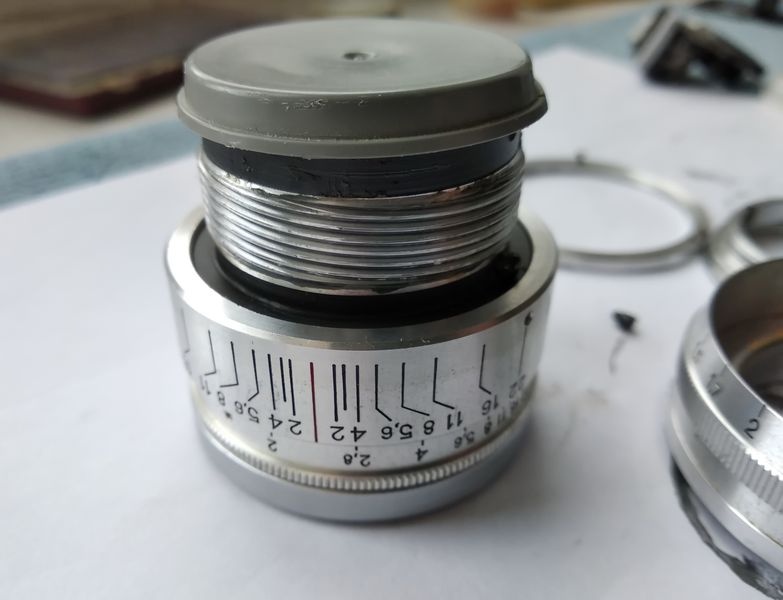
Grey Kodak film canister cap fitted over the rear of the Jupiter-8 to protect the rear element
A Kodak film canister cap protecting the rear element while the thread is cleaned.

A rag moistened with benzine is used to wipe the parts thoroughly free of old grease. The result looks like this.
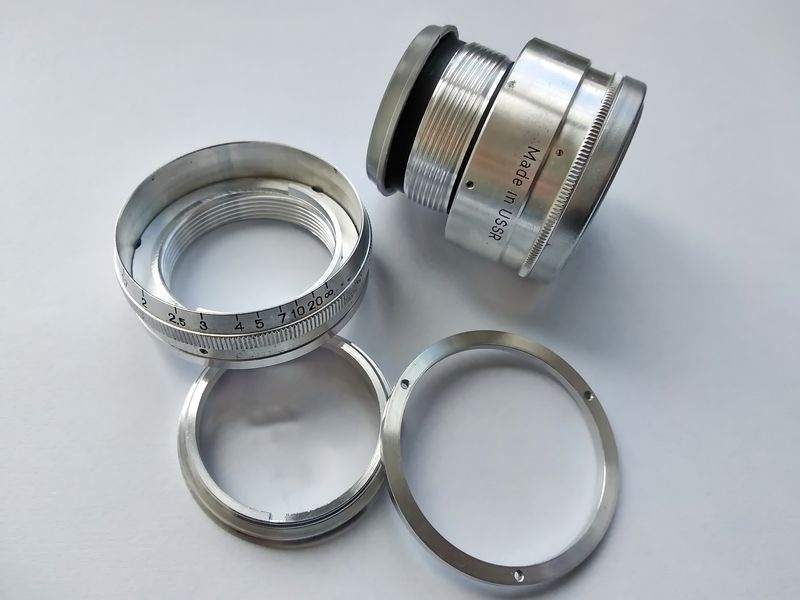
Cleaned Jupiter-8 parts: body with helicoid thread, outer ring, slider and retaining ring
The parts after wiping with benzine: the body, the outer helicoid ring, the slider and the retaining ring, all free of old grease.

Reassembly

The parts are laid on a clean sheet of paper and assembly begins. New grease is applied to the thread, sparingly; this is enough. The grease is semi-synthetic OKB-122-7.
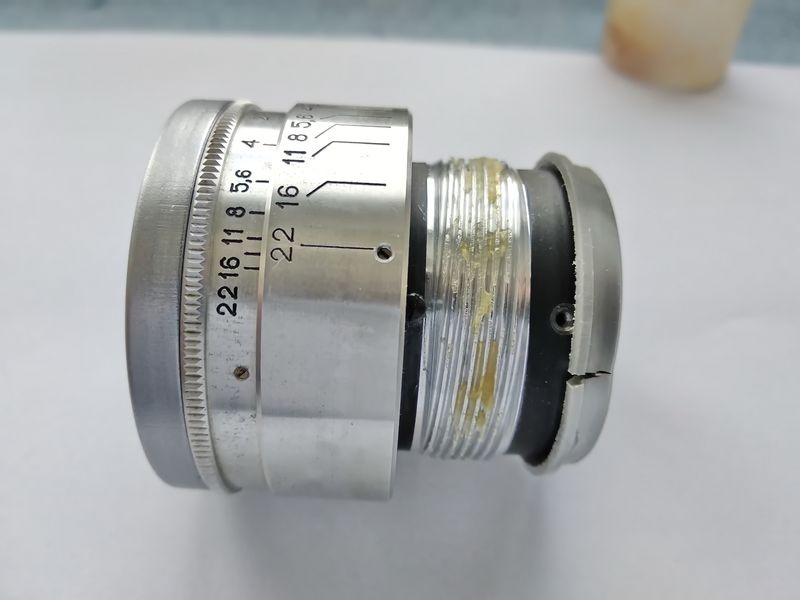
Small amount of OKB-122-7 grease applied along the Jupiter-8 helicoid thread
Fresh OKB-122-7 laid thinly along the multi-start thread.

Now, attention! The helicoid parts are brought together exactly as in the photograph: the 1.7 meter mark must stand opposite the red mark of the distance scale. Then the outer ring is screwed onto the body, turning it counterclockwise.
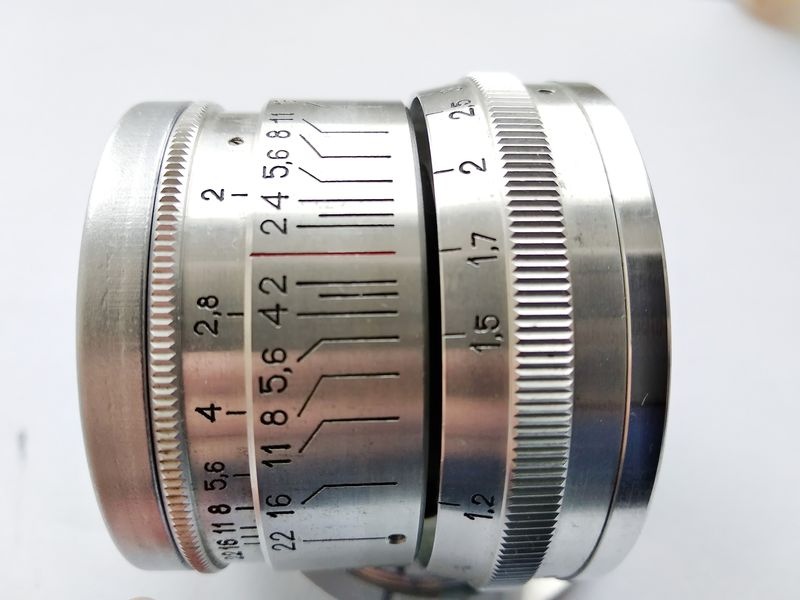
Jupiter-8 helicoid parts aligned with the 1.7 m distance mark opposite the red index
The starting position: 1.7 m on the distance scale opposite the red index. Engaging here catches the correct start of the multi-start thread.

With the thread fully screwed in, the infinity mark must fall exactly into its place. That is all.
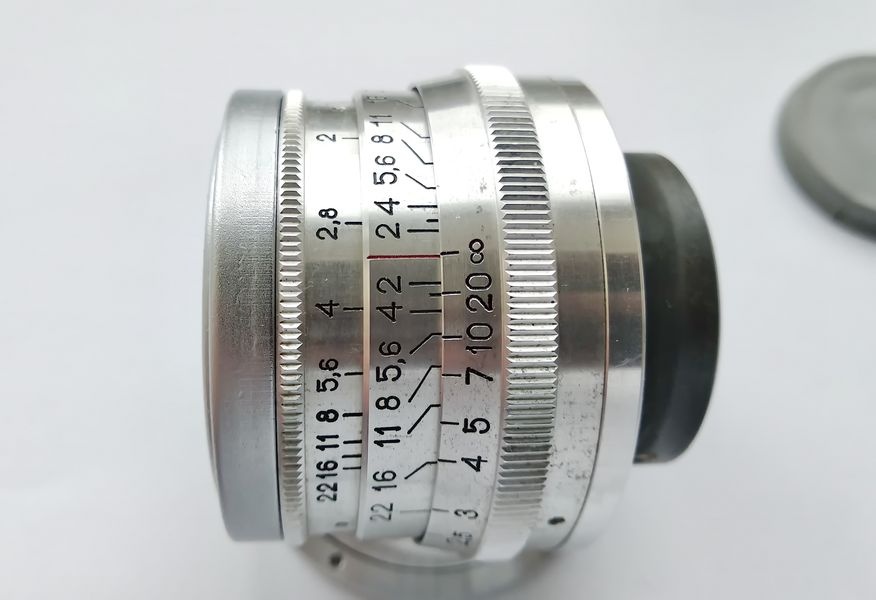
Jupiter-8 with the helicoid fully screwed in and infinity aligned on the distance scale
The helicoid screwed fully home, with infinity in its correct position on the scale.

The stop and guide screw goes back in place, and its head gets a light coat of grease. The thread of the screw is not greased when it is fitted.
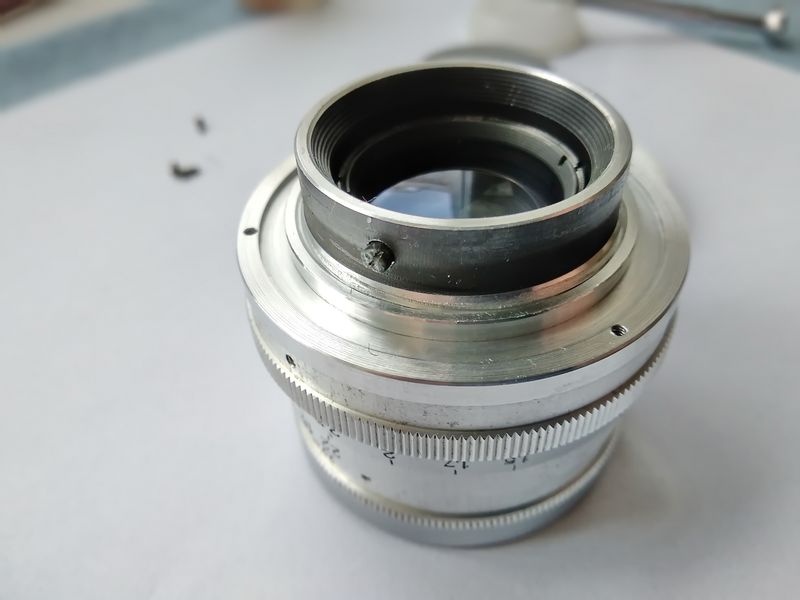
Guide screw refitted on the rangefinder pusher of the Jupiter-8 with grease on its head
The guide screw back on the pusher. Only its head is greased; a greased fastening thread could work loose or seize.

Grease now goes into the guide slot of the slider.
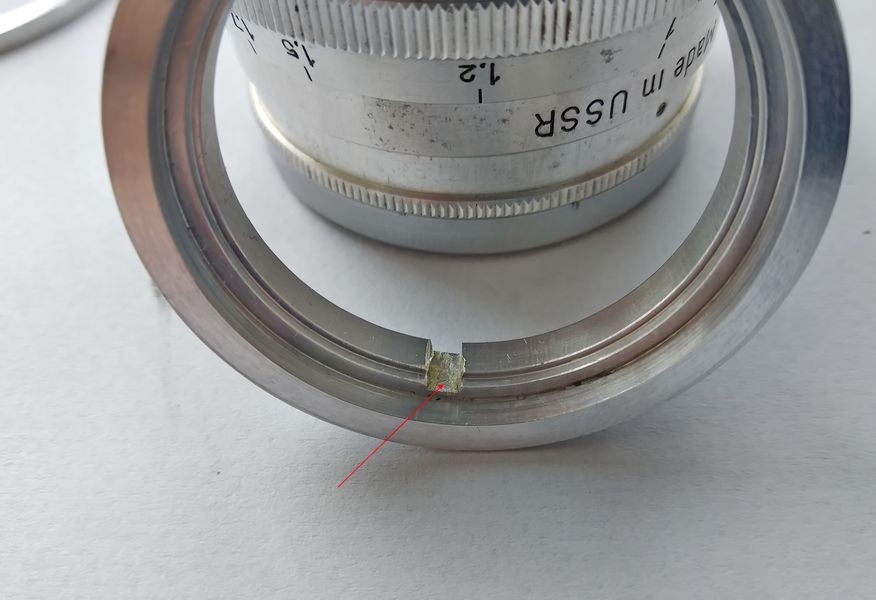
Grease applied to the guide slot of the Jupiter-8 slider ring, arrowed
A dab of grease in the slider's guide slot, arrowed.

And the contact surfaces of its ring are lubricated. Just a touch.
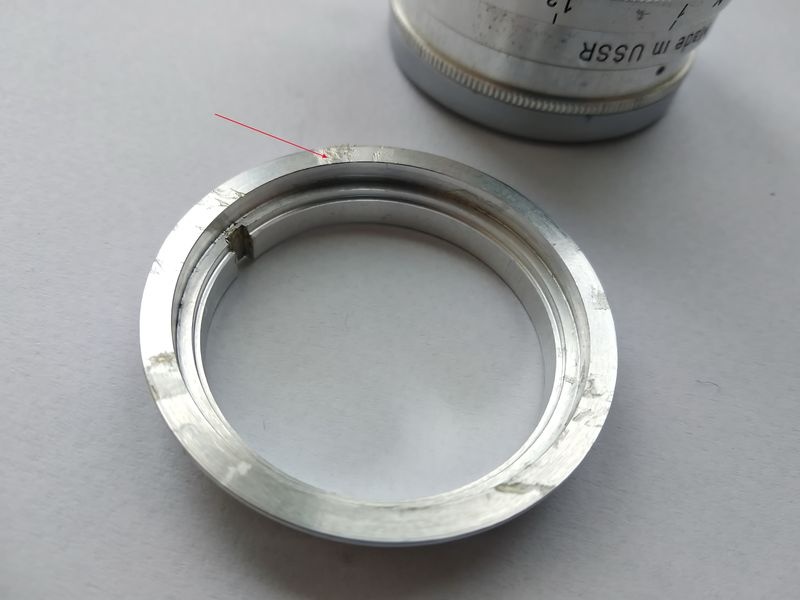
Jupiter-8 slider ring with an arrow on its lightly greased contact surface
The bearing face of the slider ring, arrowed, with a trace of grease.

The ring goes back in place, with its slot aligned to the screw on the pusher.
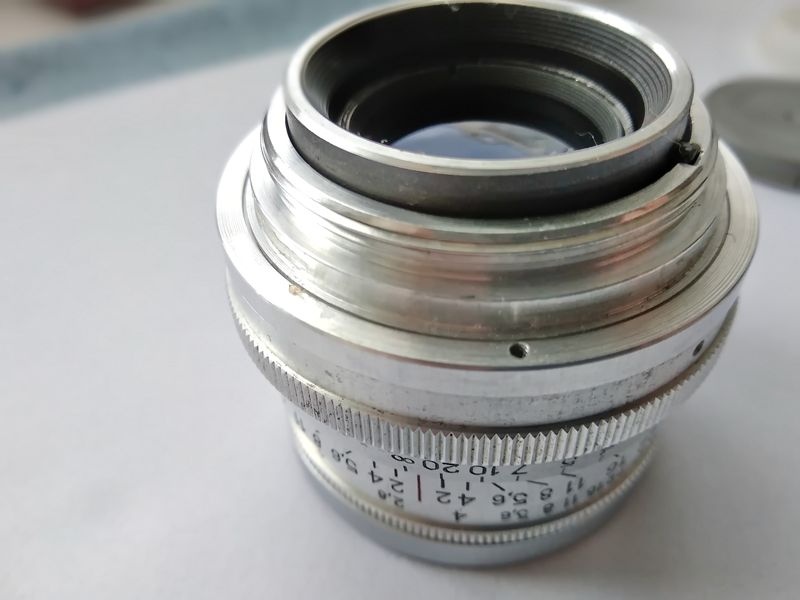
Slider ring refitted on the Jupiter-8 with its slot engaging the pusher screw
The slider refitted, its slot riding on the guide screw head.

Finally the retaining ring is fitted and secured with its three screws.
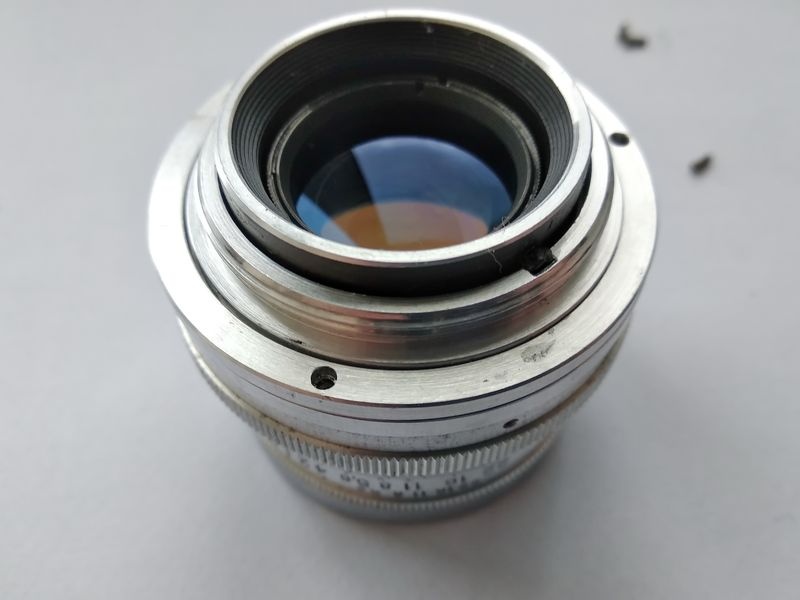
Rear of the Jupiter-8 with the retaining ring refitted and screwed down
The retaining ring back on and secured with three screws.

That is the whole job of lubricating the lens. Further disassembly at home is undesirable and, as a rule, unnecessary.
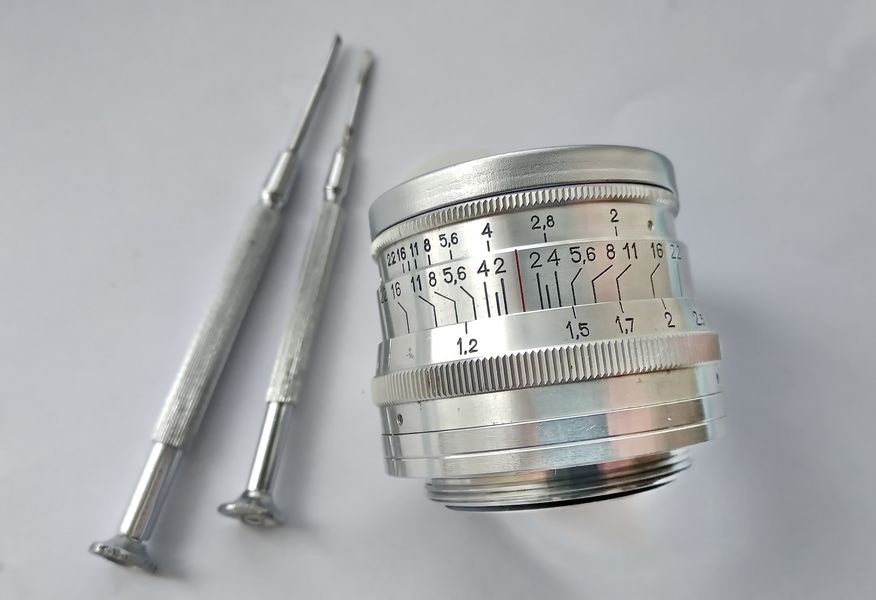
Reassembled Jupiter-8 lens beside two watchmaker's screwdrivers
The Jupiter-8 reassembled, with the two watchmaker's screwdrivers that did the work.

The lens is ready to be mounted on the camera.
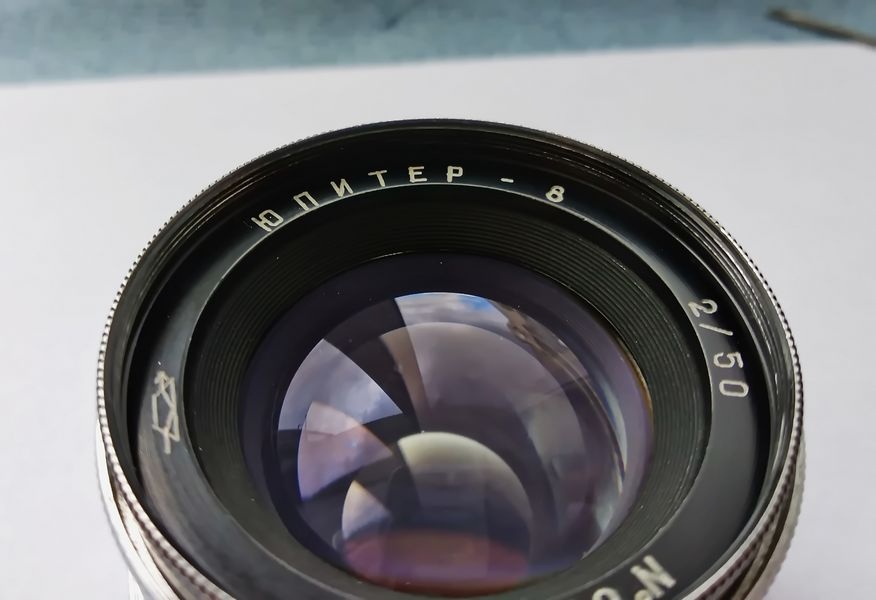
Front of the serviced Jupiter-8 showing the name ring and the 2/50 marking
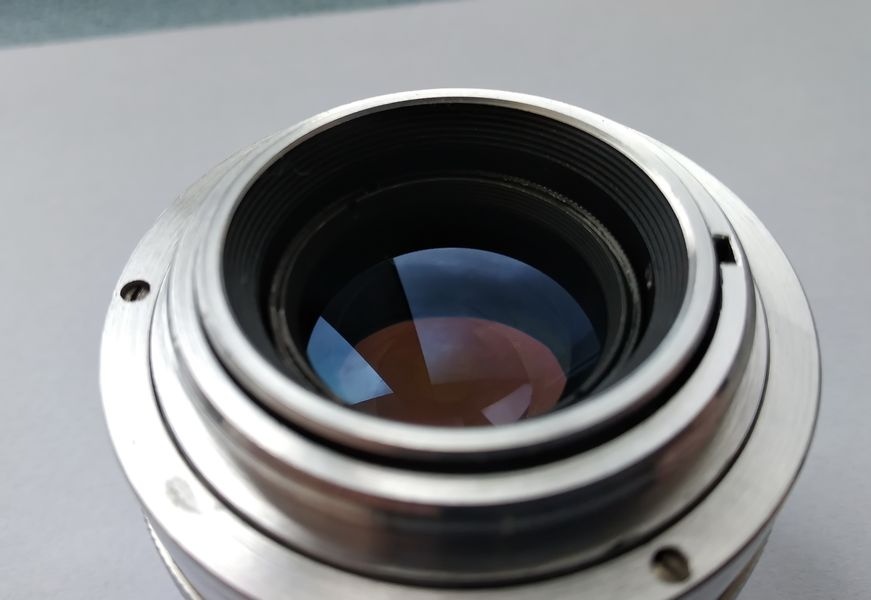
The front of the serviced lens: the name ring, the 2/50 designation and clean coated glass.
Rear of the serviced Jupiter-8 with the M39 mount and rear element
The rear of the lens with the M39 thread and the rear element, ready for the camera.

A Personal Note

One more thing should be said: this is one of the best Soviet lenses for cameras that accept optics with a 28.8 mm flange focal distance, and for me it is the best. That is all. Were the conversation about this favorite lens to continue, it would never end.

Political education department

The Study Continues

More restoration diaries and service guides in the reading room.

All Articles

Feedback from comrades

Was this article useful?

Comments

By Stress · 14/03/2020

Thank you. You should have said in the text which grease you used. People will find this article through search engines and read it.

By Soviet Box · 14/03/2020 in reply to Stress

You are welcome! Yes, I missed that. The grease is OKB-122-7. I have added it to the text.

By Stress · 14/03/2020 in reply to Soviet Box

Thank you.

By Soviet Box · 14/03/2020 in reply to Stress

No, thank you for being observant!

By Soviet Box · 14/03/2020 in reply to Soviet Box

By the way, the last time I changed the grease in this lens was in 2007. Also OKB-122-7. It could have gone longer without changing, but since I was asked to show it, I decided to refresh it at the same time. So, thirteen years and not the slightest problem. Actually, the grease would not have needed replacing were it not for the wear products in it. So it is better to clean a good item, and that does not depend on the grease.

By Cremator · 14/03/2020

Forgive me, of course, but "site regulars" would have been more correct
Photo attached by Cremator

By emdskar · 14/03/2020 in reply to Cremator

No more drinks for Jupiter!

By niyaz1986 · 14/03/2020

"Site-mates" :) Careful

By Soviet Box · 14/03/2020 in reply to niyaz1986

Cremator, niyaz1986, well… I beg your pardon, so to speak %) A common trouble: however hard you try, your speech gets more and more internet-like. It slips through.

By emdskar · 14/03/2020

Soviet watchmaker's screwdrivers! Not the Chinese guano for 5 rubles.

By Soviet Box · 14/03/2020 in reply to emdskar

You will not believe it, but these screwdrivers are about fifty years old! No problems at all :)

By tuz_83 · 14/03/2020 in reply to Soviet Box

"You will not believe it, but these screwdrivers are about fifty years old!"
50 years is normal! But will you believe that this thread, which metalworking gurus rack their brains over nowadays, we cut on Carl Auerbach machines of the 1900 pattern that were "privatized" as reparations from Carl Zeiss plants? And at 18 I also periodically made bronze "star" gears for them, because they wore out very quickly.

P.S. I hope the idea of this primitive, simple design is clear to you, so if, for example, while restoring a lens you hear from a guru that "there is simply no way" to do this without CNC, just laugh)))
Photo attached by tuz_83

By Soviet Box · 14/03/2020 in reply to tuz_83

My God! Super! Well, how to put it, I am also sort of… Thank you very much! Is that KMZ, by any chance? If I showed some little watchmaking machines… No, I will not. Those "gurus" would gasp too :)

By tuz_83 · 14/03/2020 in reply to Soviet Box

"Is that KMZ, by any chance?"
No, not KMZ. Although once we did play "on their field", at the request of the British and with the permission of our party and government. But few people know about that "castling" even now))) P.S. And the watchmaking ones [link to an auction lot, no longer reachable] are often sold on Directlot.
Photo attached by tuz_83

By emdskar · 14/03/2020 in reply to Soviet Box

Why would I not believe it? My father has the same ones. I recognized them and wrote.

By Soviet Box · 14/03/2020 in reply to emdskar

I would gladly buy another such set. But alas, the Chinese ones are made of nails now. These are hardened.

By karabas7650 · 14/03/2020

This one has survived better…

By Soviet Box · 14/03/2020 in reply to karabas7650

Perfect. Shop-window condition. I shot with it a great deal. Less often now, of course.

By Oleg17 · 14/03/2020

A colossal review! Lenses interest me only by the fact of their existence. Watches, much more! But the very style of presentation: nothing superfluous, strictly to the point, in normal, clear language… Bravo, author!

By Soviet Box · 14/03/2020 in reply to Oleg17

Thank you, Oleg! As for watches, next there will be something historically very interesting.

By Grey_P · 14/03/2020

A good review! I have a question for the respected author: has he dealt with a Pentax lens like the SMC Pentax DA 21mm f/3.2 AL Limited? The thing is, after long and fruitful use my copy, alas, has started to act up badly. The right half of the frame (usually) falls out of focus. More precisely, the focus goes somewhere else entirely. For example, I shot from a mountain top at infinity with a fairly small aperture, and on the right the nearby rocks came out in focus, but not the far distance, as on the left half. And sometimes, not often, a shot seems fine. In the end I had to stop using it. It lies there as dead weight… and how I liked it....! There seem to have been no knocks or other problems during use. What comes to mind is that the optical block has simply worked loose and is skewed? I have no experience repairing such lenses, but I would very much like to put it right…
Photo attached by Grey_P

By Soviet Box · 14/03/2020 in reply to Grey_P

Alas. Not with that one exactly. Perhaps the elements have shifted slightly in their cell. If you shake it, do you hear that characteristic glassy rattle? Nothing else comes to mind, if the mirror in the camera is OK.

By Grey_P · 14/03/2020 in reply to Soviet Box

Thanks for the answer! I shook it; no rattling inside seems to be audible. No problems with the camera: I have quite a large fleet of lenses, and the others behave. A pity, it is not a cheap lens, and a good one. I suppose I will have to gather my courage and try my luck :)

By Harwest · 15/03/2020 in reply to Grey_P

A skewed optical block can be checked with two shots of a test chart from the same spot, selecting the focus points manually: first the far left, then the far right. If it refocuses (visible on the distance scale), take it apart and look. Greetings from a K-5 owner ;)

By Lemmurov · 20/03/2020 in reply to Harwest

When shooting a chart at such distances, 95% of people have the sensor and the chart out of parallel, so the data for conclusions are unreliable. It is much simpler to take two shots at infinity from a balcony, rotating the camera 180° between them.

By Harwest · 20/03/2020 in reply to Lemmurov

It does not have to be aligned perfectly parallel.

By Lemmurov · 20/03/2020 in reply to Harwest

At that distance it has to be aligned almost perfectly, because the depth of field is too shallow.

By Grey_P · 20/03/2020 in reply to Harwest

Hello, colleague! ;) Something is definitely wrong with the focusing. And inconsistently. But I am afraid to take it apart :) Although there is probably no other way now. Here is another shot from the 21 while it was still fine:

And now I am on a K-5 myself. Strange that the 21's collapse coincided with my move to the K-5. Nevertheless, I ran tests on both the new K-5 and the old K-200. The lens glitched on both bodies.
Photo attached by Grey_P

By Harwest · 20/03/2020 in reply to Grey_P

And focusing by which points, how many? First of all I would tighten all the fastenings on the mount side. And then put foil under the cover, starting from 0.05, beneath the screw on the problem side

By Lemmurov · 20/03/2020 in reply to Harwest

There is no point in "skewing" the whole optical system because of one element or optical block; the consequences will be even worse. Only disassembly will help here.

By Grey_P · 21/03/2020 in reply to Lemmurov

"There is no point in "skewing" the whole optical system… Only disassembly will help here."
Agreed. If it were dented with a deformed barrel, then it would be clear. But if there was no obvious external impact on the barrel, then shimming it is not the way. Purely theoretically, I can already accept that the lens may have been dropped (it is in a small leather case) without my knowledge, so the optical block shifted and… came unglued, maybe (I do not know how it is held in there)? One way or another it needs disassembly. And I am afraid of doing it wrong :(

By virrao · 15/03/2020

As always, wonderful, to the point, excellent photos. Is the rust on the outer ring usual for this age?

By Soviet Box · 15/03/2020

Thank you! Rust? That is duralumin; there cannot be rust on it in principle. The reddish stripe is old grease; that is how it looks after thirteen years. And the grey specks on the parts, for some reason they stand out strongly in the photos. In reality they are practically invisible.

By mastak · 15/03/2020

Another article for the collection. Thank you very much.

By Soviet Box · 15/03/2020 in reply to mastak

Always welcome! I hope to show more interesting things.

By 50AC · 16/03/2020

Thank you. It was interesting to read and look at.

By Soviet Box · 16/03/2020 in reply to 50AC

Thank you! I will try not to lower the bar in future.

By d_averk · 18/03/2020

Not the best choice of grease. Fairly high oil separation (which may matter if people start using it in more modern lenses). And how is it semi-synthetic? The base is a mix of organosilicon and petroleum fractions. A semi-silicone. Those who use it in more modern lenses may be disappointed at -25/-30 (or perhaps earlier): a weak focusing drive will not overcome thickened grease

By Soviet Box · 18/03/2020 in reply to d_averk

My experience with this grease is about twenty years. It is intended (among other things) for lubricating precision-mechanics devices with a low shear force. Temperature stability from minus 60 to plus 120. Inert to rubber and plastic parts. Organosilicon compounds belong to the basic types of synthetic oils. For plastic autofocus lenses special types of grease are used, which, by the way, are poorly suited to metal barrels. This lens worked for more than thirteen years. There was no need to take it apart and replace the grease. I did it solely out of my own interest and at the request of a colleague on the site. As you see, the grease is more than suitable for this kind of use. It is recommended by photo equipment repairers with half a century of experience.

By d_averk · 18/03/2020 in reply to Soviet Box

And car mechanics with a century of experience recommend solidol. Some argument. Mentioning -60, you ignore the presence of a mineral hydrocarbon base in it. In fact, for low-force devices its performance ends at around -30. Speaking of inertness, you again forget that its base is mixed, so its tolerance of elastomers is also quite relative. In the comment you correctly noted the difference between types of lenses, but you did not do so in the article itself, and the crowd, unfortunately, will not draw such conclusions by itself but repeats like monkeys. In a manual lens, overcoming the resistance of the grease is less of a problem than in an autofocus one. For example, in Canon's 50 1.4 very little is enough for the focusing clutch to start slipping and the native motor to fail to turn it. Had you used a purely silicone base with its high viscosity index, there would be fewer questions. But you used a peculiar mutant. For the lens in question it will do, but most people do not have this lens. If you look at which greases Nikon and Canon recommend, the approach there is quite different

By uinner · 27/03/2020

It was nice to read about something I have already gone through myself. I had heard of OKB-122-7, but did not have it at hand after disassembly. I lubricated with C300 silicone grease. Got an amazingly smooth action; I have been using it for a year now, everything is excellent.

By Soviet Box · 27/03/2020 in reply to uinner

"Use what is at hand, and do not look for anything else!" Phileas Fogg :) In general, the enterprises of the Soviet optical industry followed an industry standard under which the greases specified by GOST for the optical industry were used. OKB-122-7 was among them. It was also issued to the enterprises' camera repair workshops. But time does not stand still; there is a lot that is new now. I lubricate all metal with this grease only. I even put it in the remontoires of some watch movements. A wonderful grease. And in the Jupiter-8 of this particular design it does not matter much. A very simple focusing device. In this barrel the helicoid cannot reach the optical surfaces. You could even put in CIATIM-201, but not for long. It is a little more complicated in early Jupiter-8s. There is a double helicoid, a complicated disassembly and assembly. Some day I will show a double helicoid from rangefinder lenses. There are tricky designs where the shift has to be recalculated to couple the focusing element to the rangefinder when the focal length differs from 50 mm.

By sov39 · 12/03/2021

Following your reviews I revived my Jupiter-8. Before:

After:

The lens had not been taken apart for over 50 years; the grease had all dried out. After removing the old grease together with metal shavings in the diaphragm lever in the optical block and in the helicoid unit, I lubricated only the helicoid unit.
Photo attached by sov39

By Soviet Box · 12/03/2021 in reply to sov39

Super! My congratulations! Glad this story helped you!

By sov39 · 12/03/2021 in reply to Soviet Box

Thank you!

By NLEst · 19/01/2022

It was my everyday lens for almost a year; I bought it in a second-hand shop for 15 euros, a pretty silver one. Mine is from 1959, with a finger tab on the focusing ring and a red letter "P". It is very easy to overhaul, by the way: the optical block unscrews from the helicoid with just a little hand force, and there are two shim rings in there. If it falls short of infinity, without any modification you can remove the thin ring and screw the optical block back in, though then the aperture scale reading is off, but no matter, you can write it on a slip of paper and stick it on. After buying modern manual Chinese optics, a 7Artisans 50mm f/1.2, there is no point even comparing; I put it away and will keep it just for portraits.

By Soviet Box · 04/03/2022 in reply to NLEst

In some examples the block is also locked by a screw. You have to be careful, otherwise you can easily break everything there. The aperture ring is easily reset as required after adjusting the shims. As for comparing… that is clear.

By Symphony · 06/04/2022

I took it apart, cleaned it, lubricated it (with Panasonic RFKXPG641 grease for plastic gears, though). Inside, the grease had dried and there were aluminum filings. After lubricating, the focusing works wonderfully, but is it possible to change the grease in the aperture ring as well (it feels "sandy")? Perhaps that is not what it is called. The question is how to remove that ring? [attached image no longer available]

By Soviet Box · 26/08/2022 in reply to Symphony

Of course you can. I have described it.