Raketa 2609.NA Caliber: Service Guide to the Flat Russia Movement

The Raketa 2609.NA: Servicing the Flat Russia, a Caliber Built to Outlast Its Owners

The Raketa 2609.NA: Servicing the Flat Russia, a Caliber Built to Outlast Its Owners

The Raketa 2609.NA: Servicing the Flat Russia, a Caliber Built to Outlast Its Owners

"You cannot help but say it out loud: they really knew how, and they really could."
— a bench verdict on the Petrodvorets 2609.NA

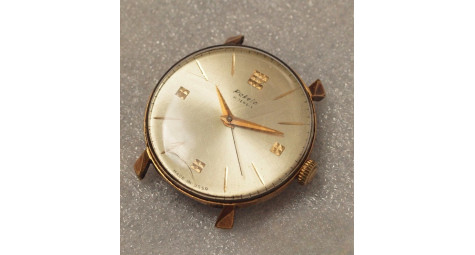
Every person who repairs or restores things for a living keeps one object that he approaches with affection rather than obligation — something that gives more pleasure at the bench than anything else on the rack. For me that object is the Raketa, and specifically the Raketa built on the 26xx.NA caliber. The movement carries an unofficial nickname among collectors: Ploskaya Rossiya, the "Flat Russia." Getting ahead of myself a little, I will say that this caliber, designed many decades ago, still serves His Majesty Time faithfully and well. It is, and I suspect many will agree, if not the finest then certainly one of the finest Soviet calibers ever made when judged on reliability, ease of service, and overall build quality. So whenever I catch sight of a tired, water-stained Raketa abandoned to its fate by a former owner, I simply cannot walk past it.

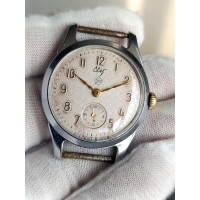
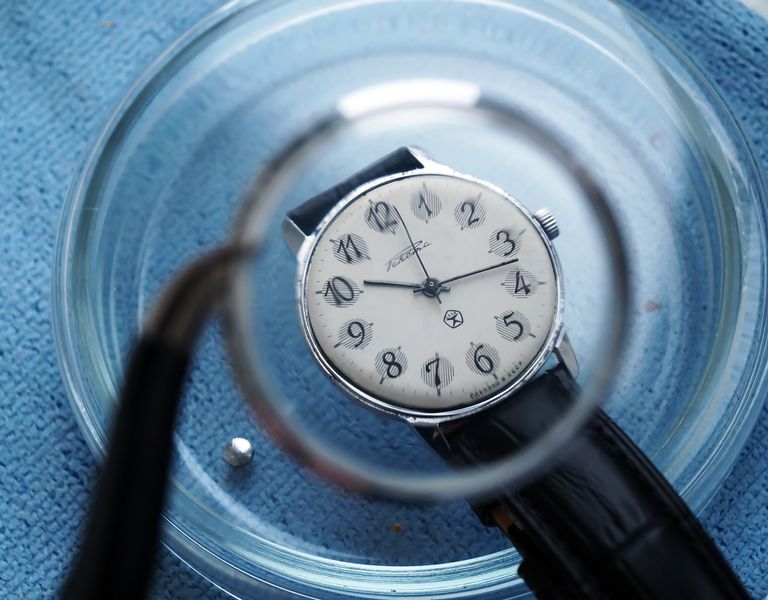
This particular watch came to me out of a box of odds and ends destined for the rubbish. You can judge its condition for yourself in a moment. Yet I turned the crown once, then twice — and it ran. By the time we have looked inside, I think your respect for the Quality Mark stamped on the dial will only grow.

The "Flat Russia": Where the Caliber Came From

Let us begin with a little history. The 2609.N was designed and put into production in 1972 at the Petrodvorets Watch Factory — the oldest watch enterprise in Russia — and it was built, as the saying goes, "to the very last," meaning right up to the collapse of the Soviet Union. Even after that collapse, numerous cooperatives kept assembling the movement from existing parts stocks. The most beautiful examples are those of the first production years: they are easy to recognise by the polished bevels along the bridges. Automated assembly came later and the number of operations was "optimised" — a pretty word — yet, surprisingly, quality scarcely fell, if it fell at all. Even so, the early movements are held in particular esteem.

Why "Russia," and why "Flat"? The caliber was engineered in Russia from beginning to end, the work of designers I. A. Starkov and M. A. Kiselyov — names that deserve to be remembered, even if they rarely are. And the movement is genuinely flat: 2.7 mm thick at the level of the main plate. Beyond its slimness, the 2609.NA incorporated several unusual engineering solutions that have let these watches run, in practical terms, almost wear-free to this day. With the lyrical preamble out of the way, we can turn to the business at hand: a thorough strip-down of the caliber, plus the rehabilitation of the dial, case, hands — and even the mainspring.

A Watch Bound for the Bin

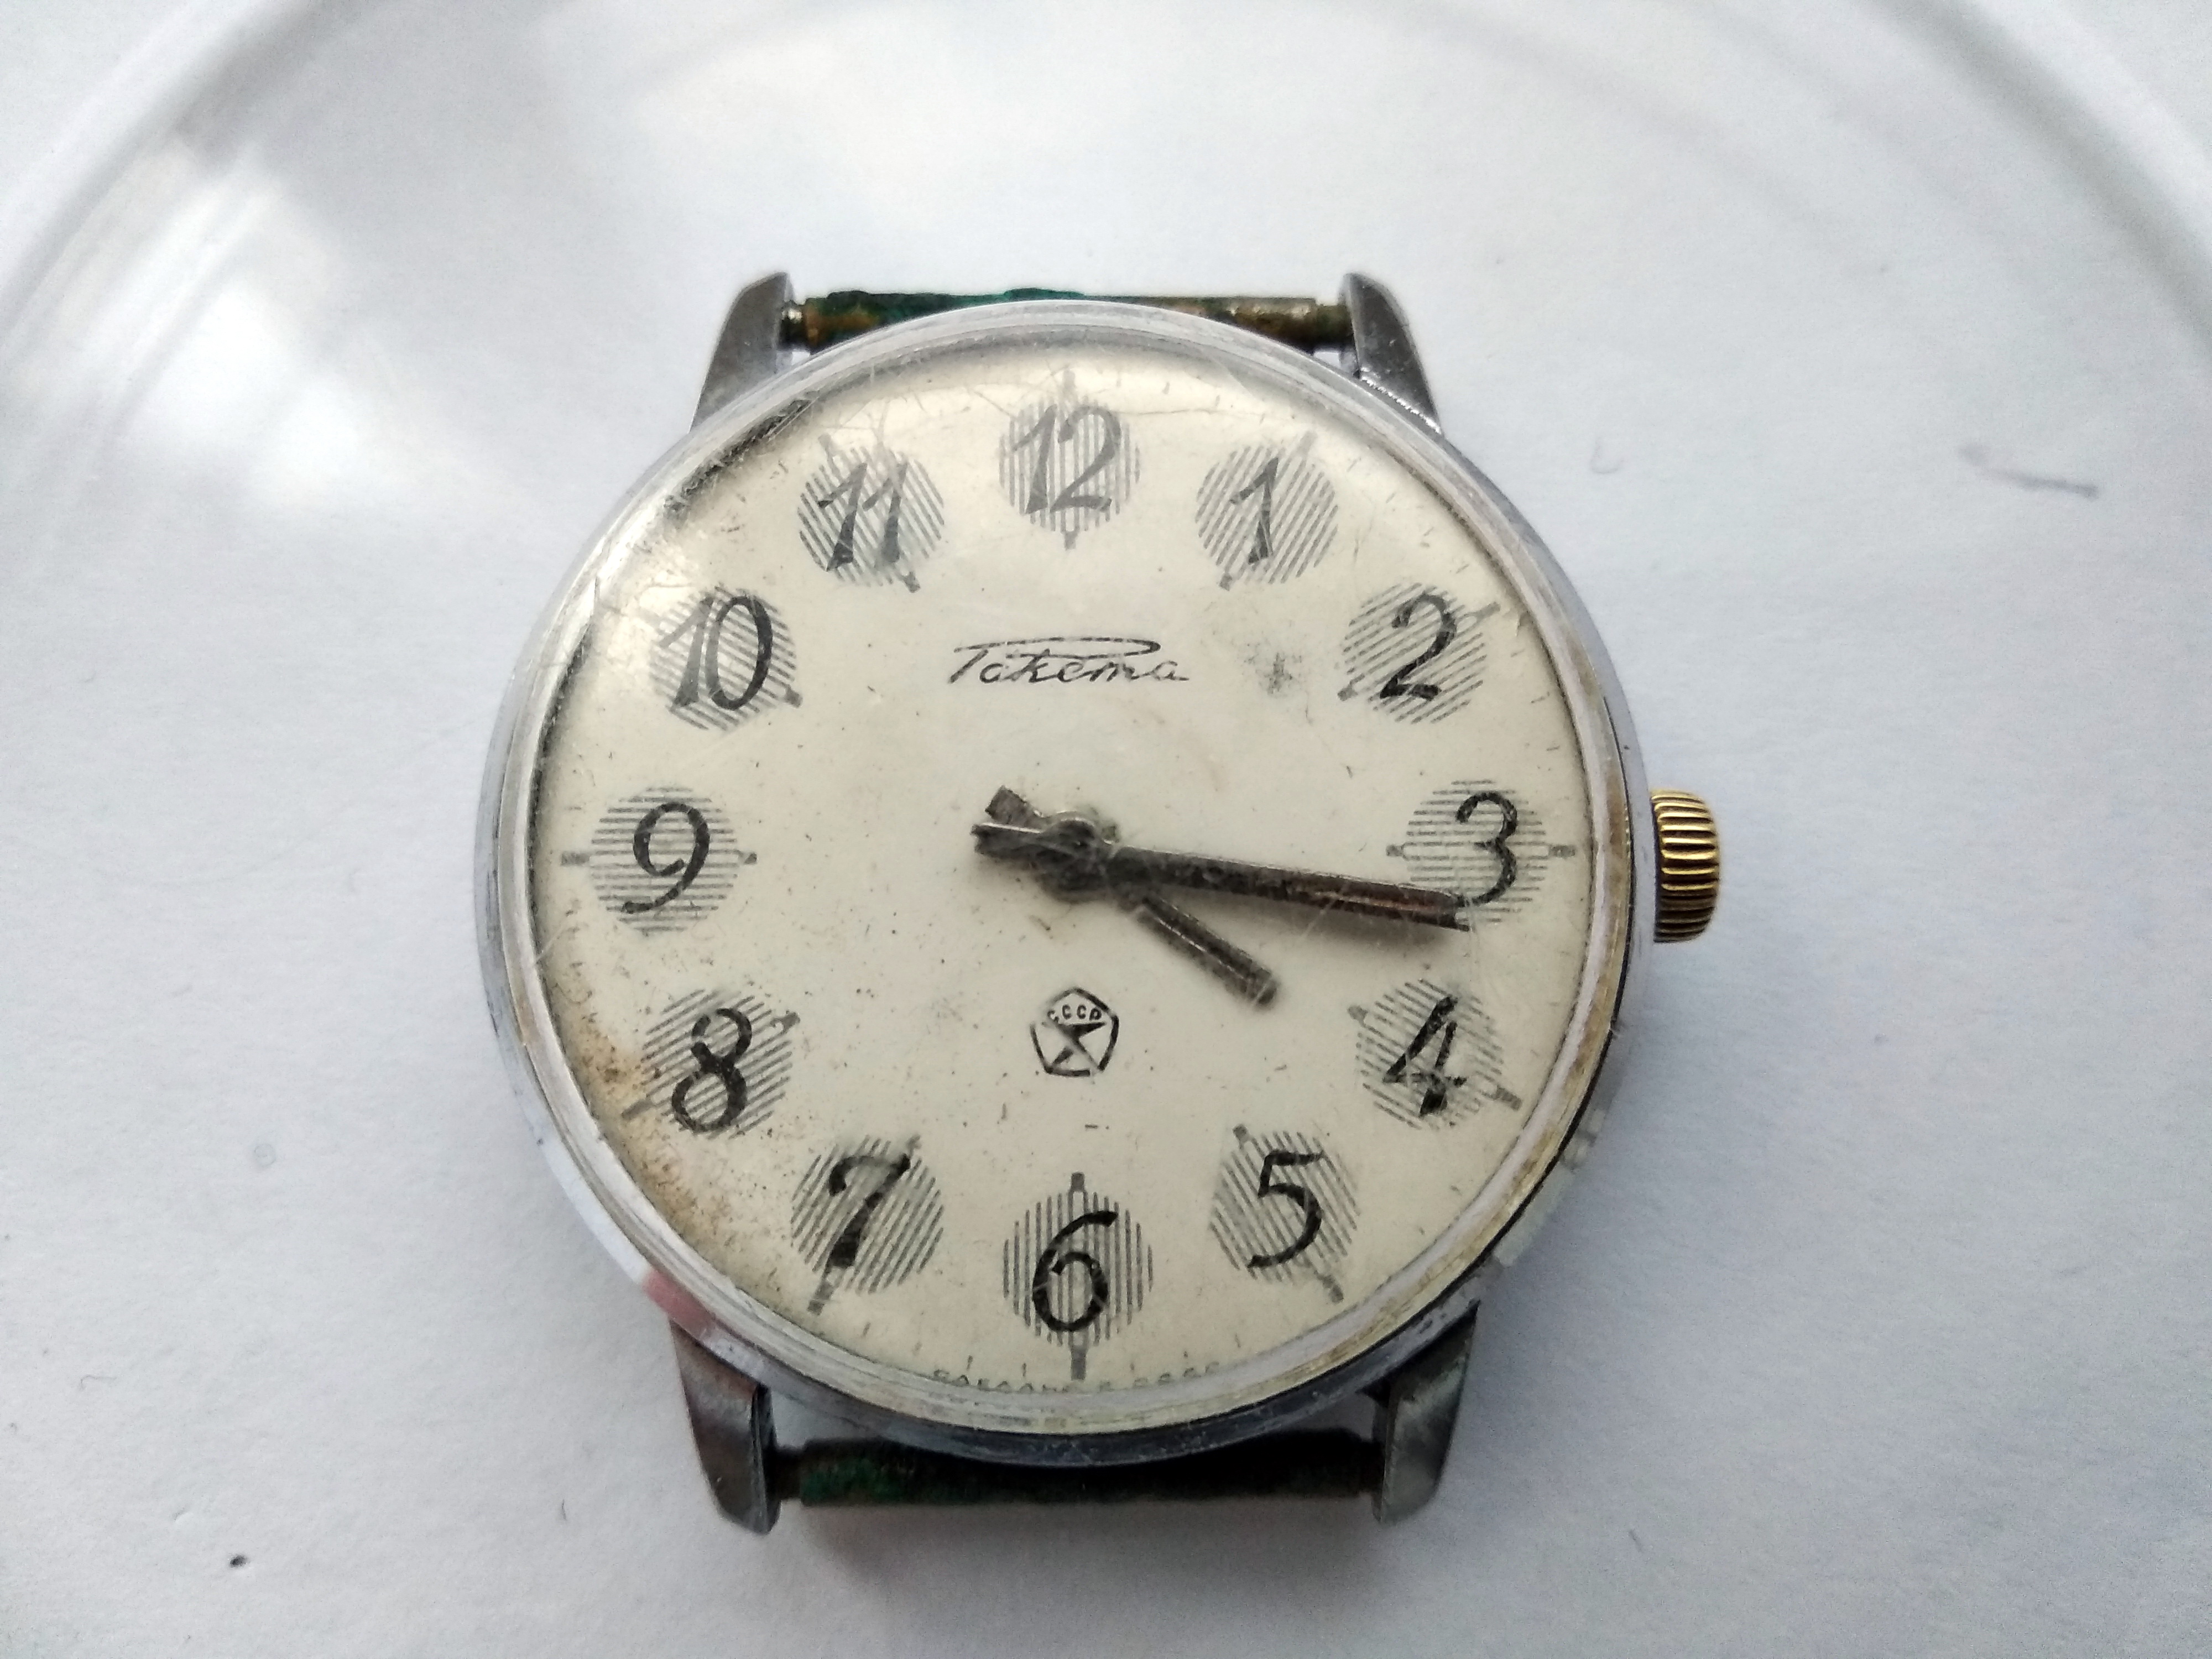
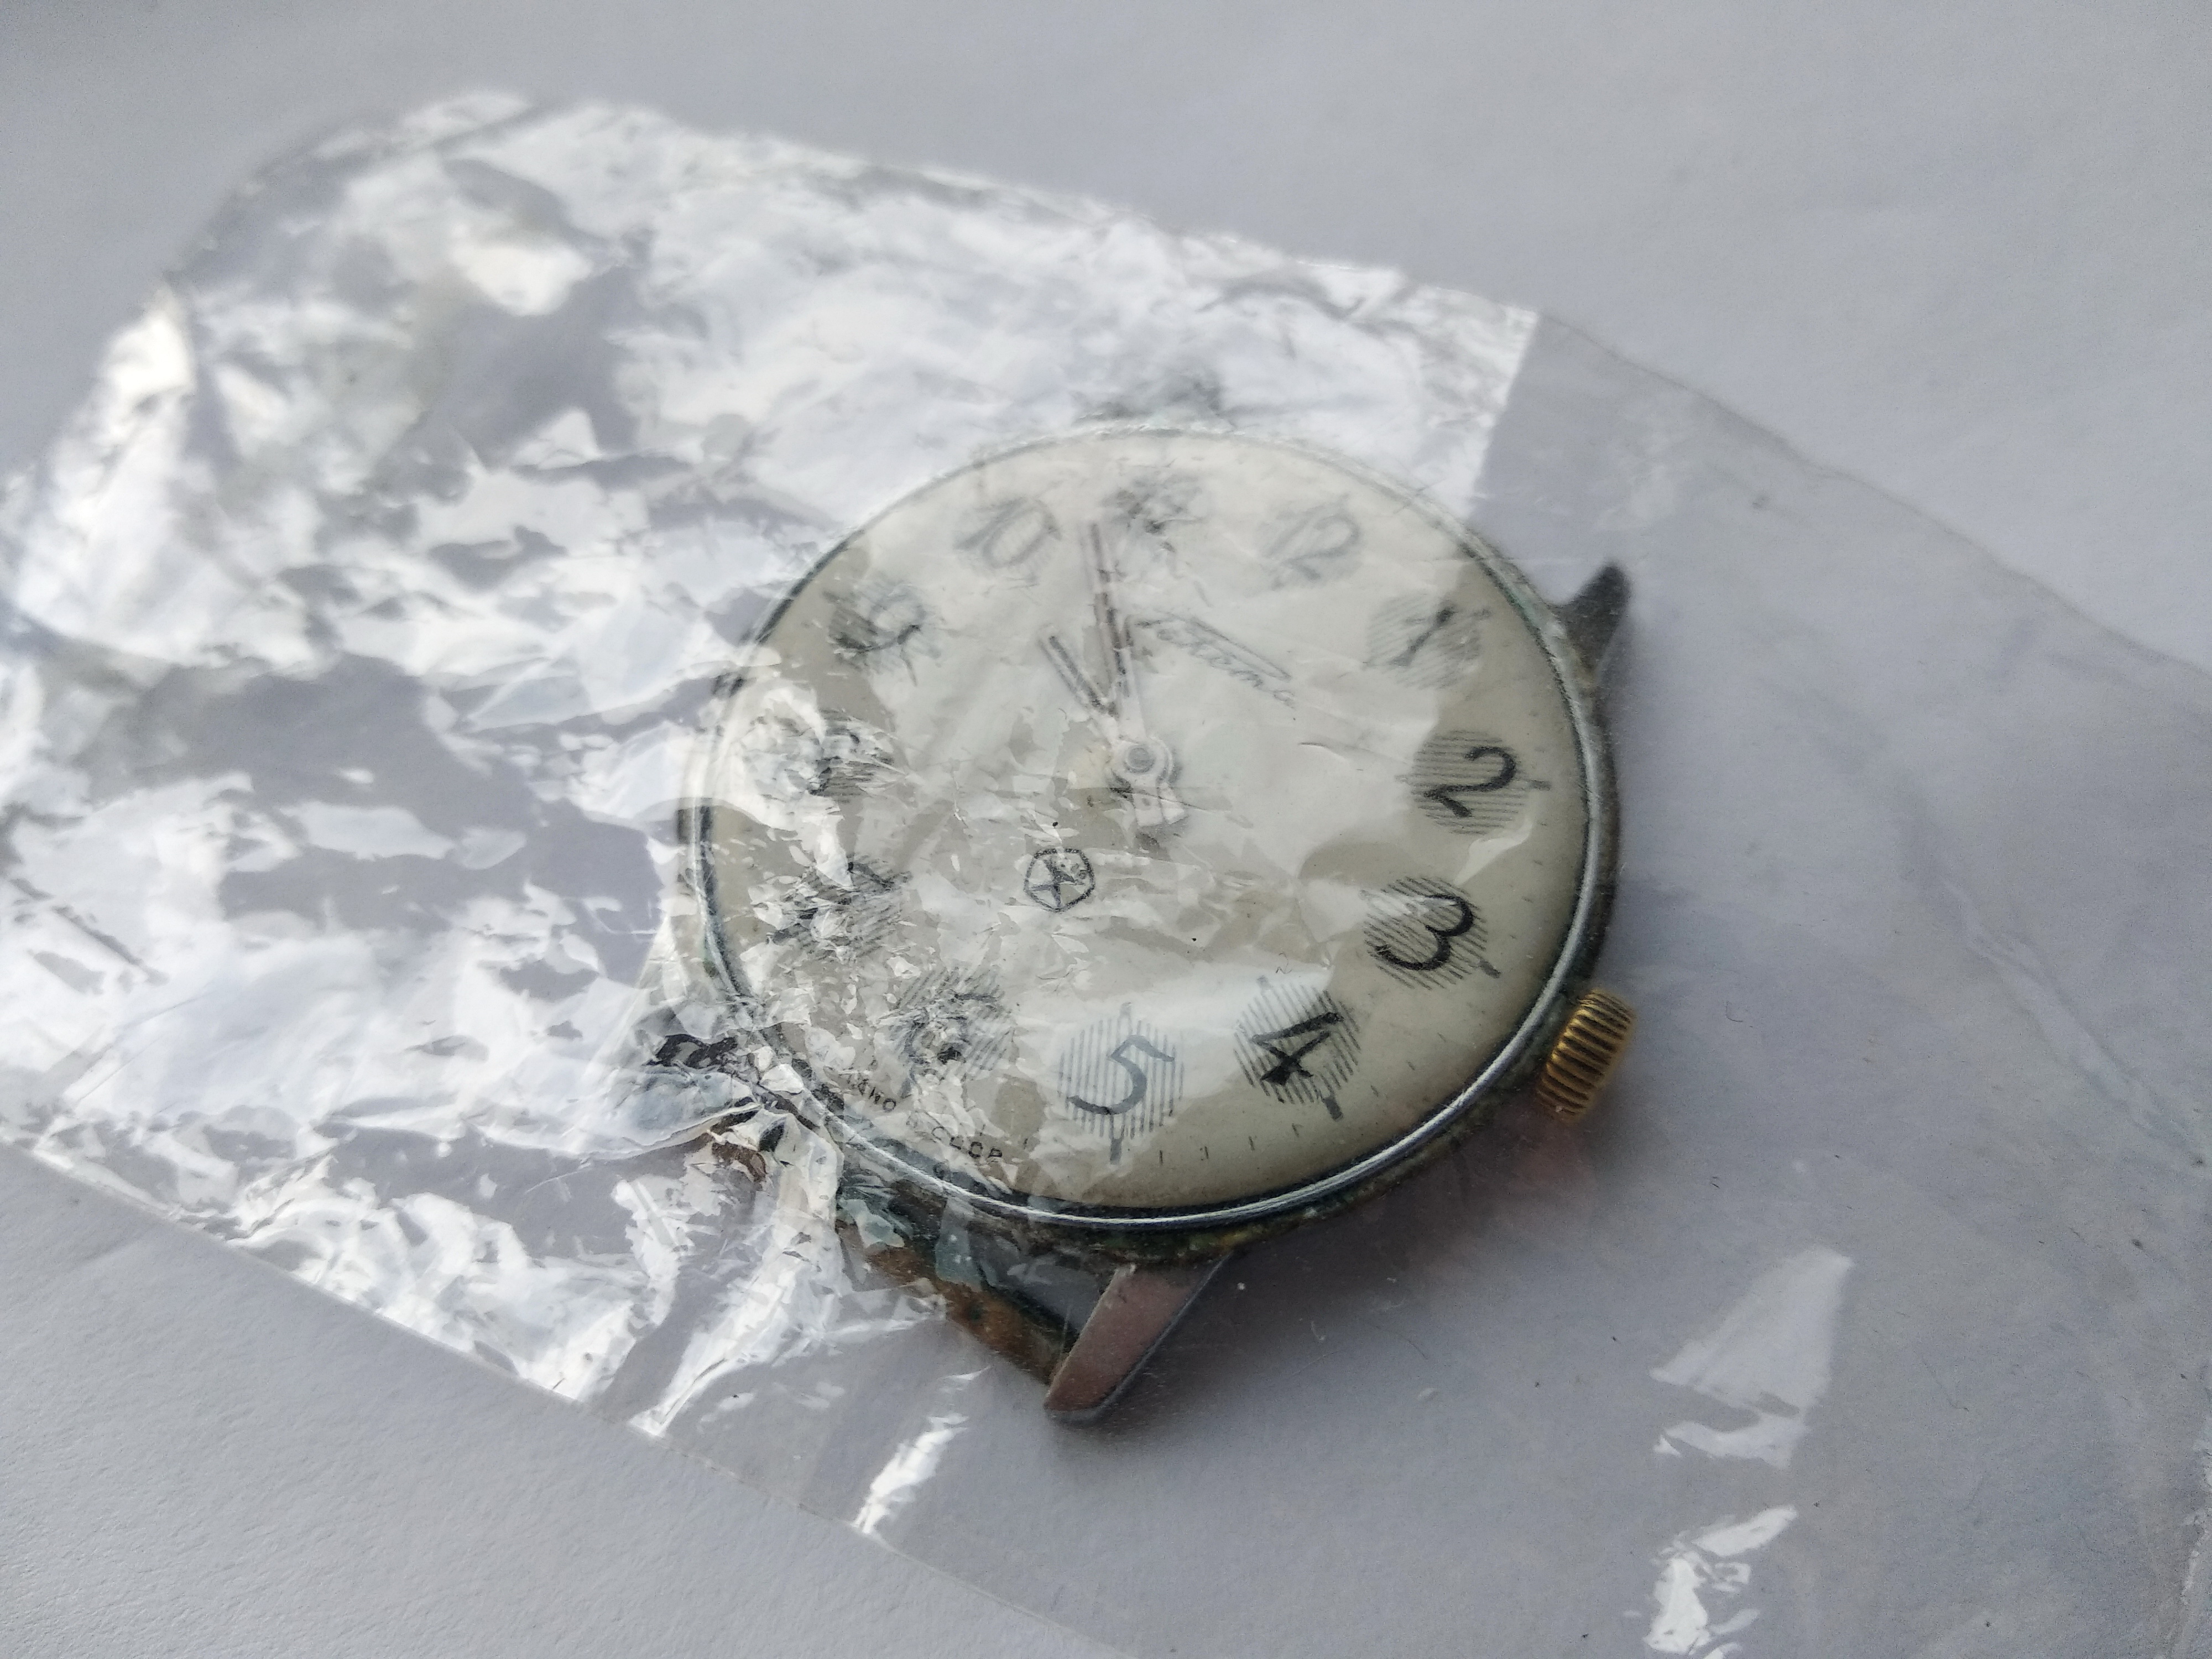
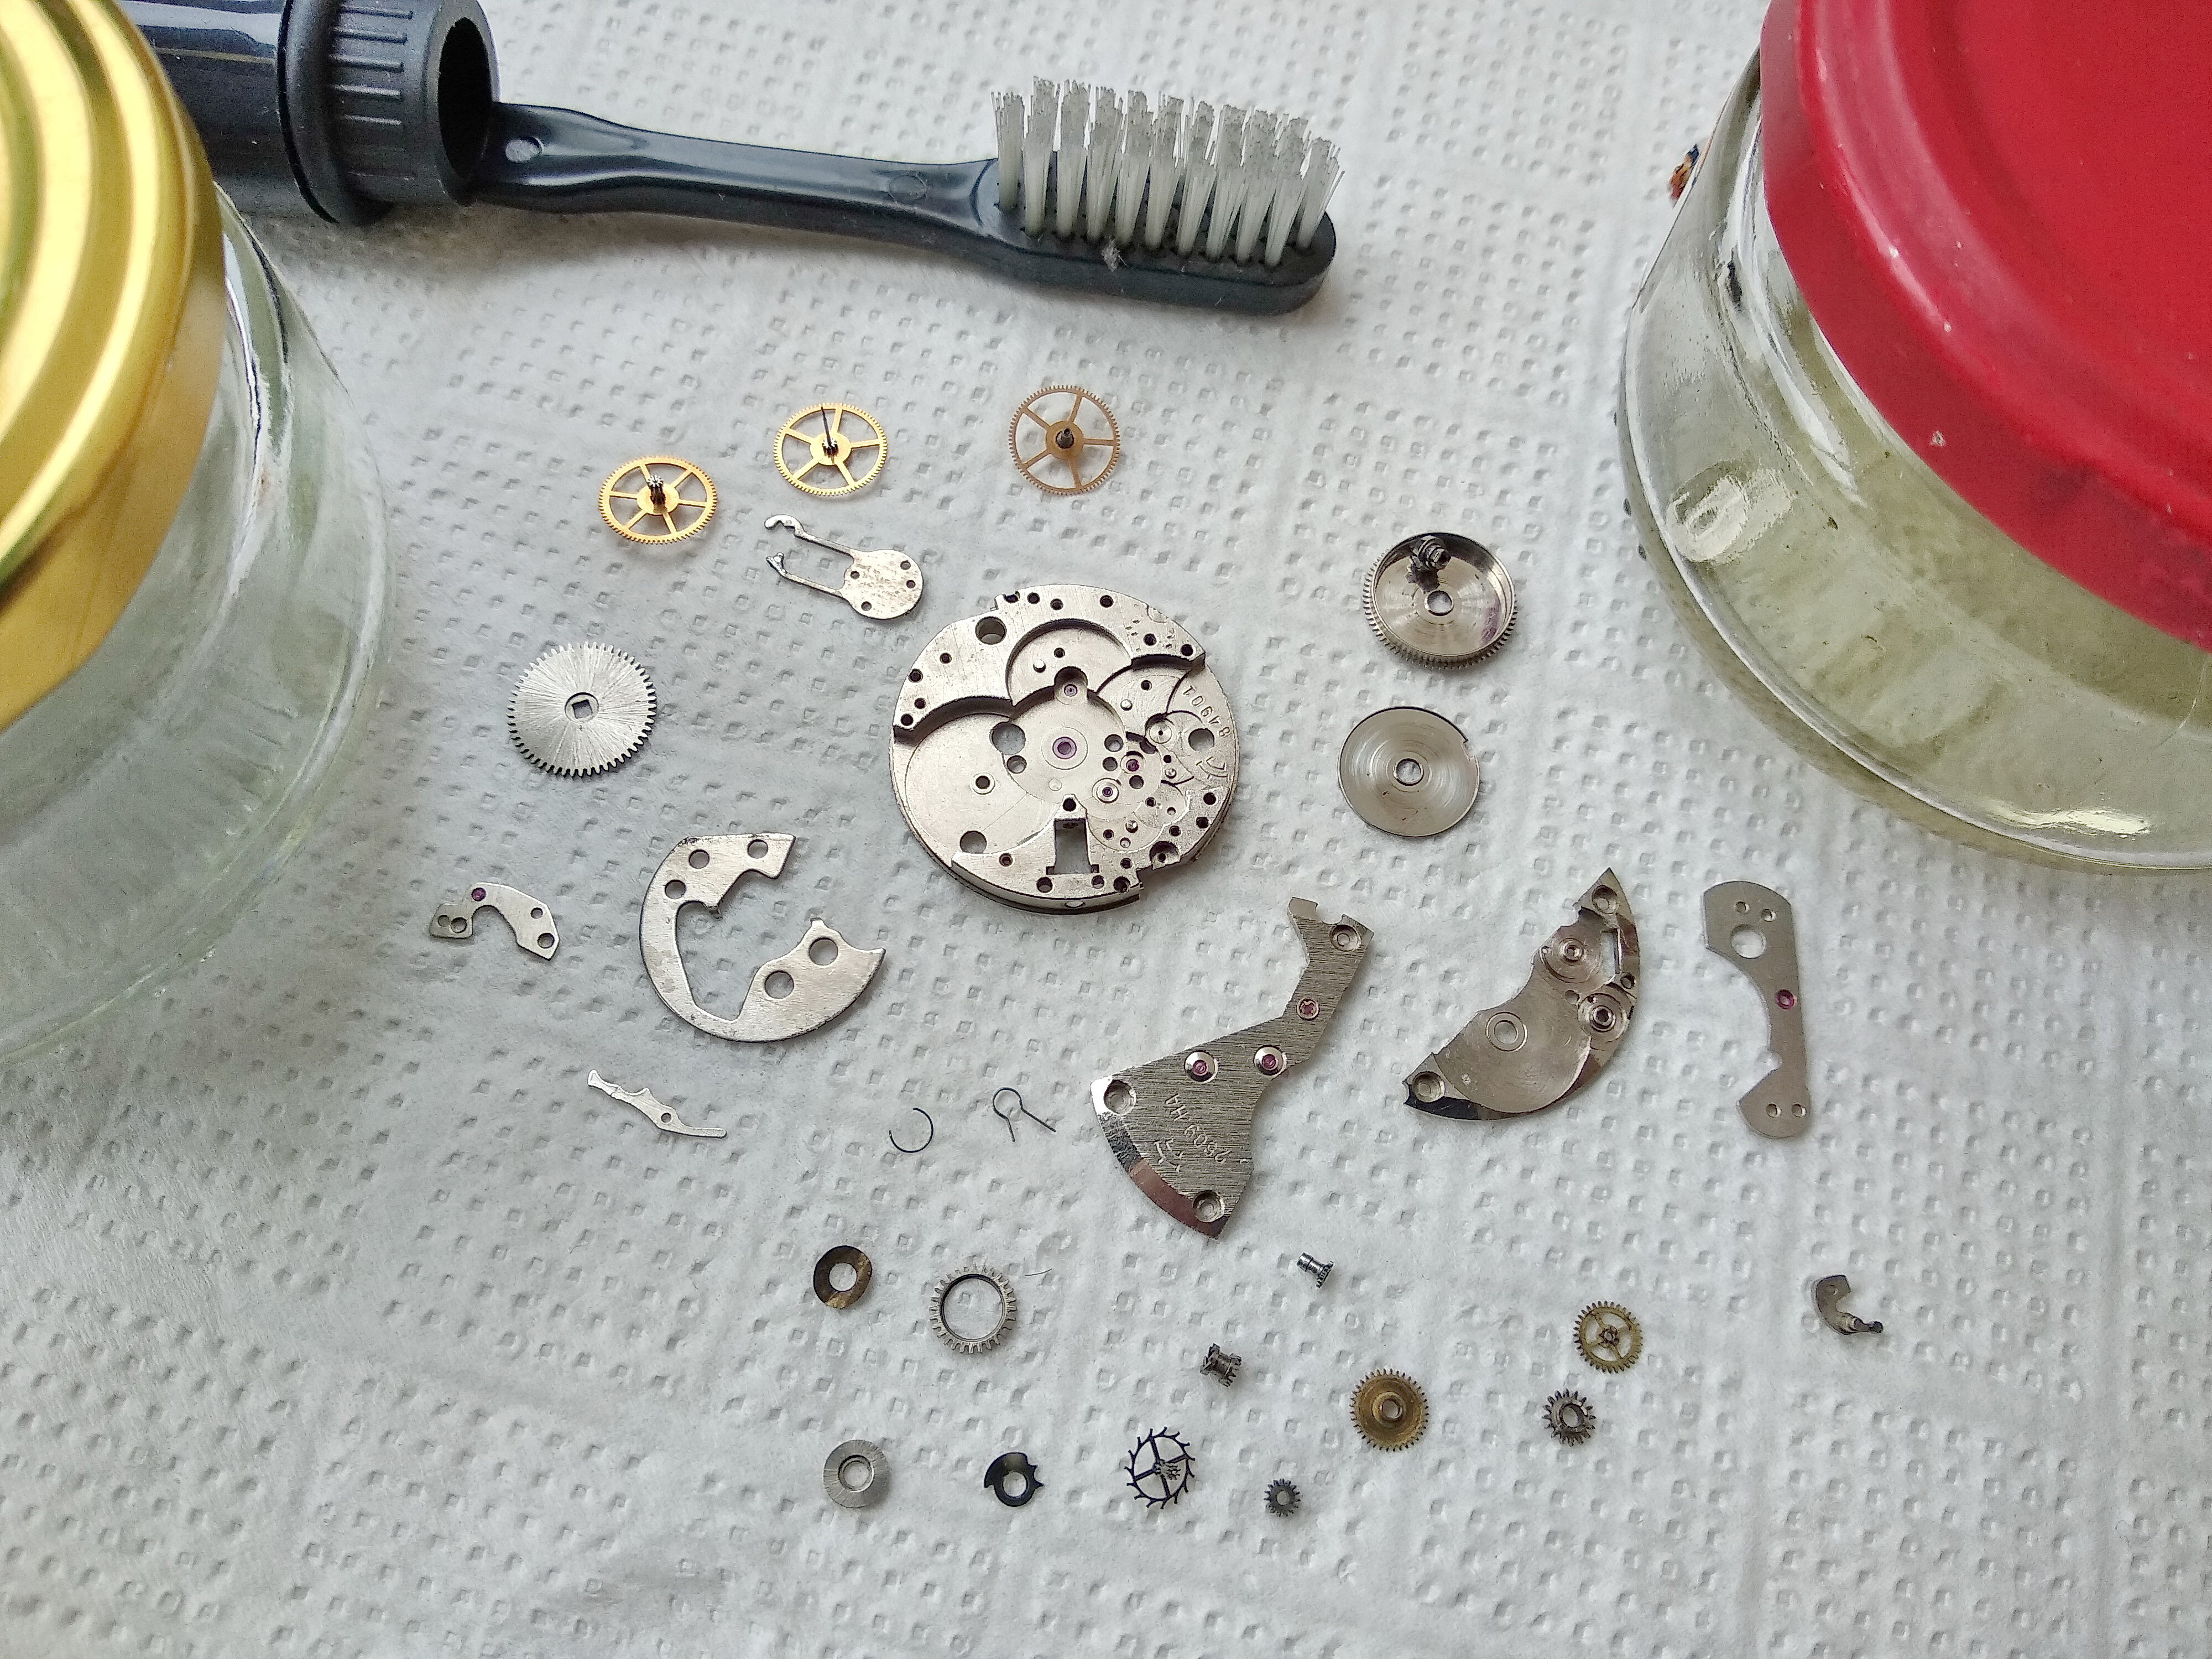
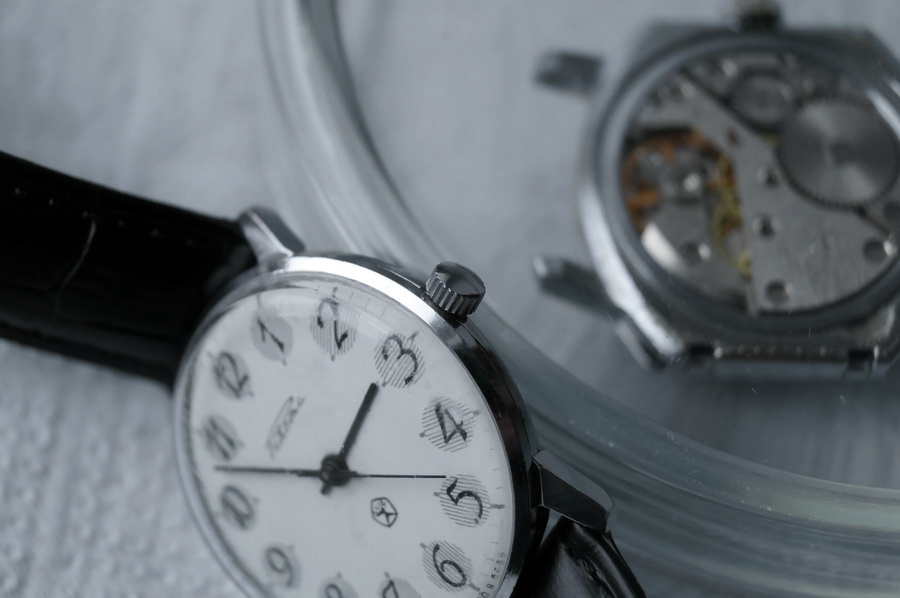
Dirt, and more dirt. Light corrosion. The watch had clearly been soaked more than once, and worn hard — look at how worn the crown is. There would be work to do here.

Front of a grimy Raketa wristwatch with a heavily worn crown and a stained dial bearing the Soviet Quality Mark
The patient as received: ingrained grime, faint surface corrosion, and a crown rubbed almost smooth by years of daily winding. The Quality Mark is still legible on the dial.

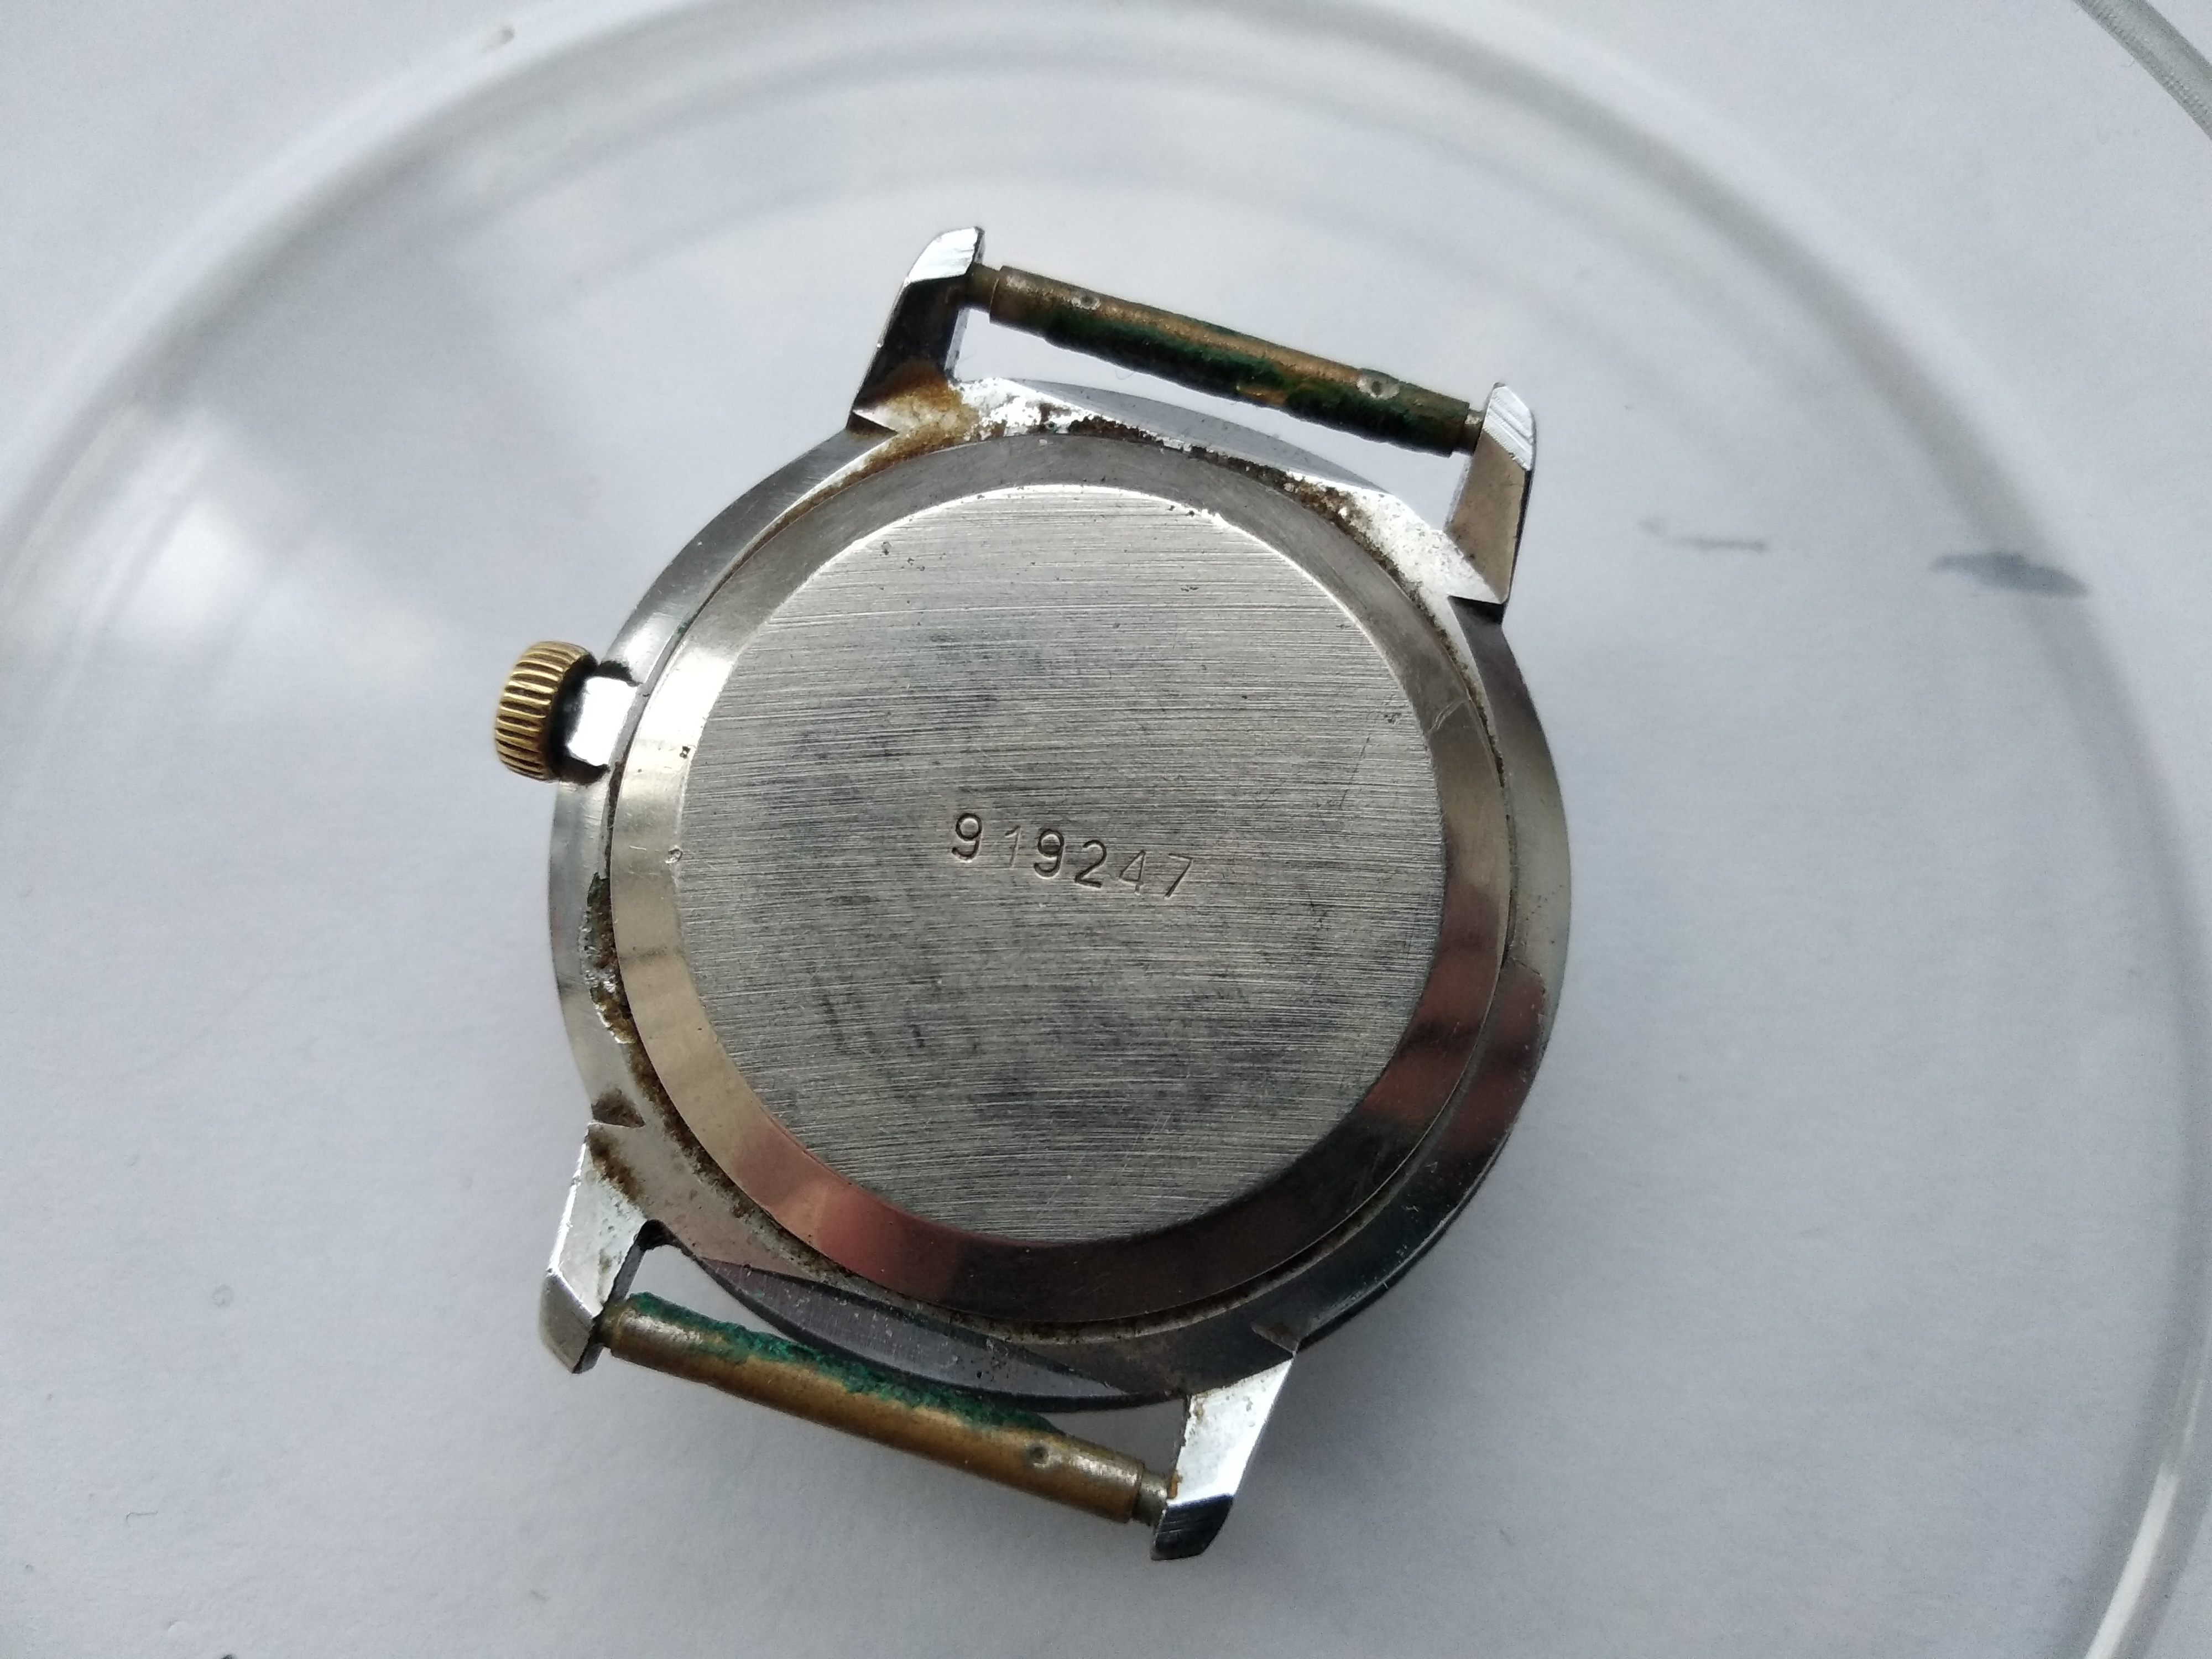
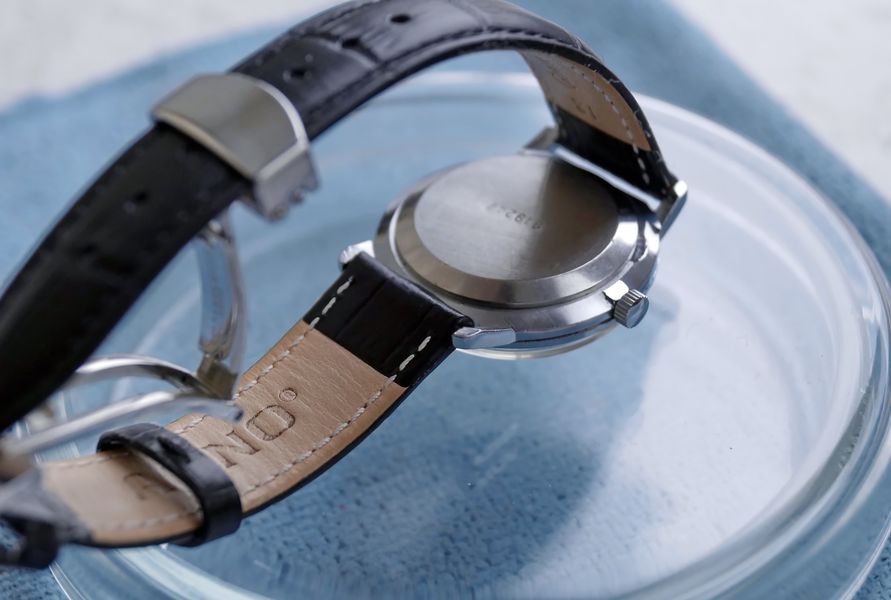
The back told the same story. The flat filed onto the case shows that the watch had been opened and re-opened many times over its life.

Caseback of the Raketa covered in dirt, with a filed flat on the case edge used as a pry point
The reverse is just as soiled. The worn flat on the case band is a tell-tale of repeated servicing — every previous watchmaker levered the snap-on back from the same spot.

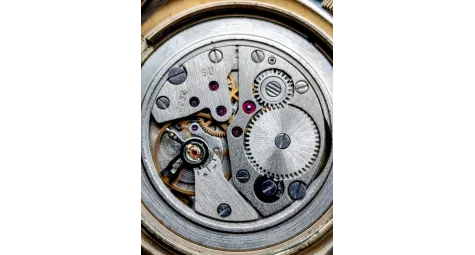
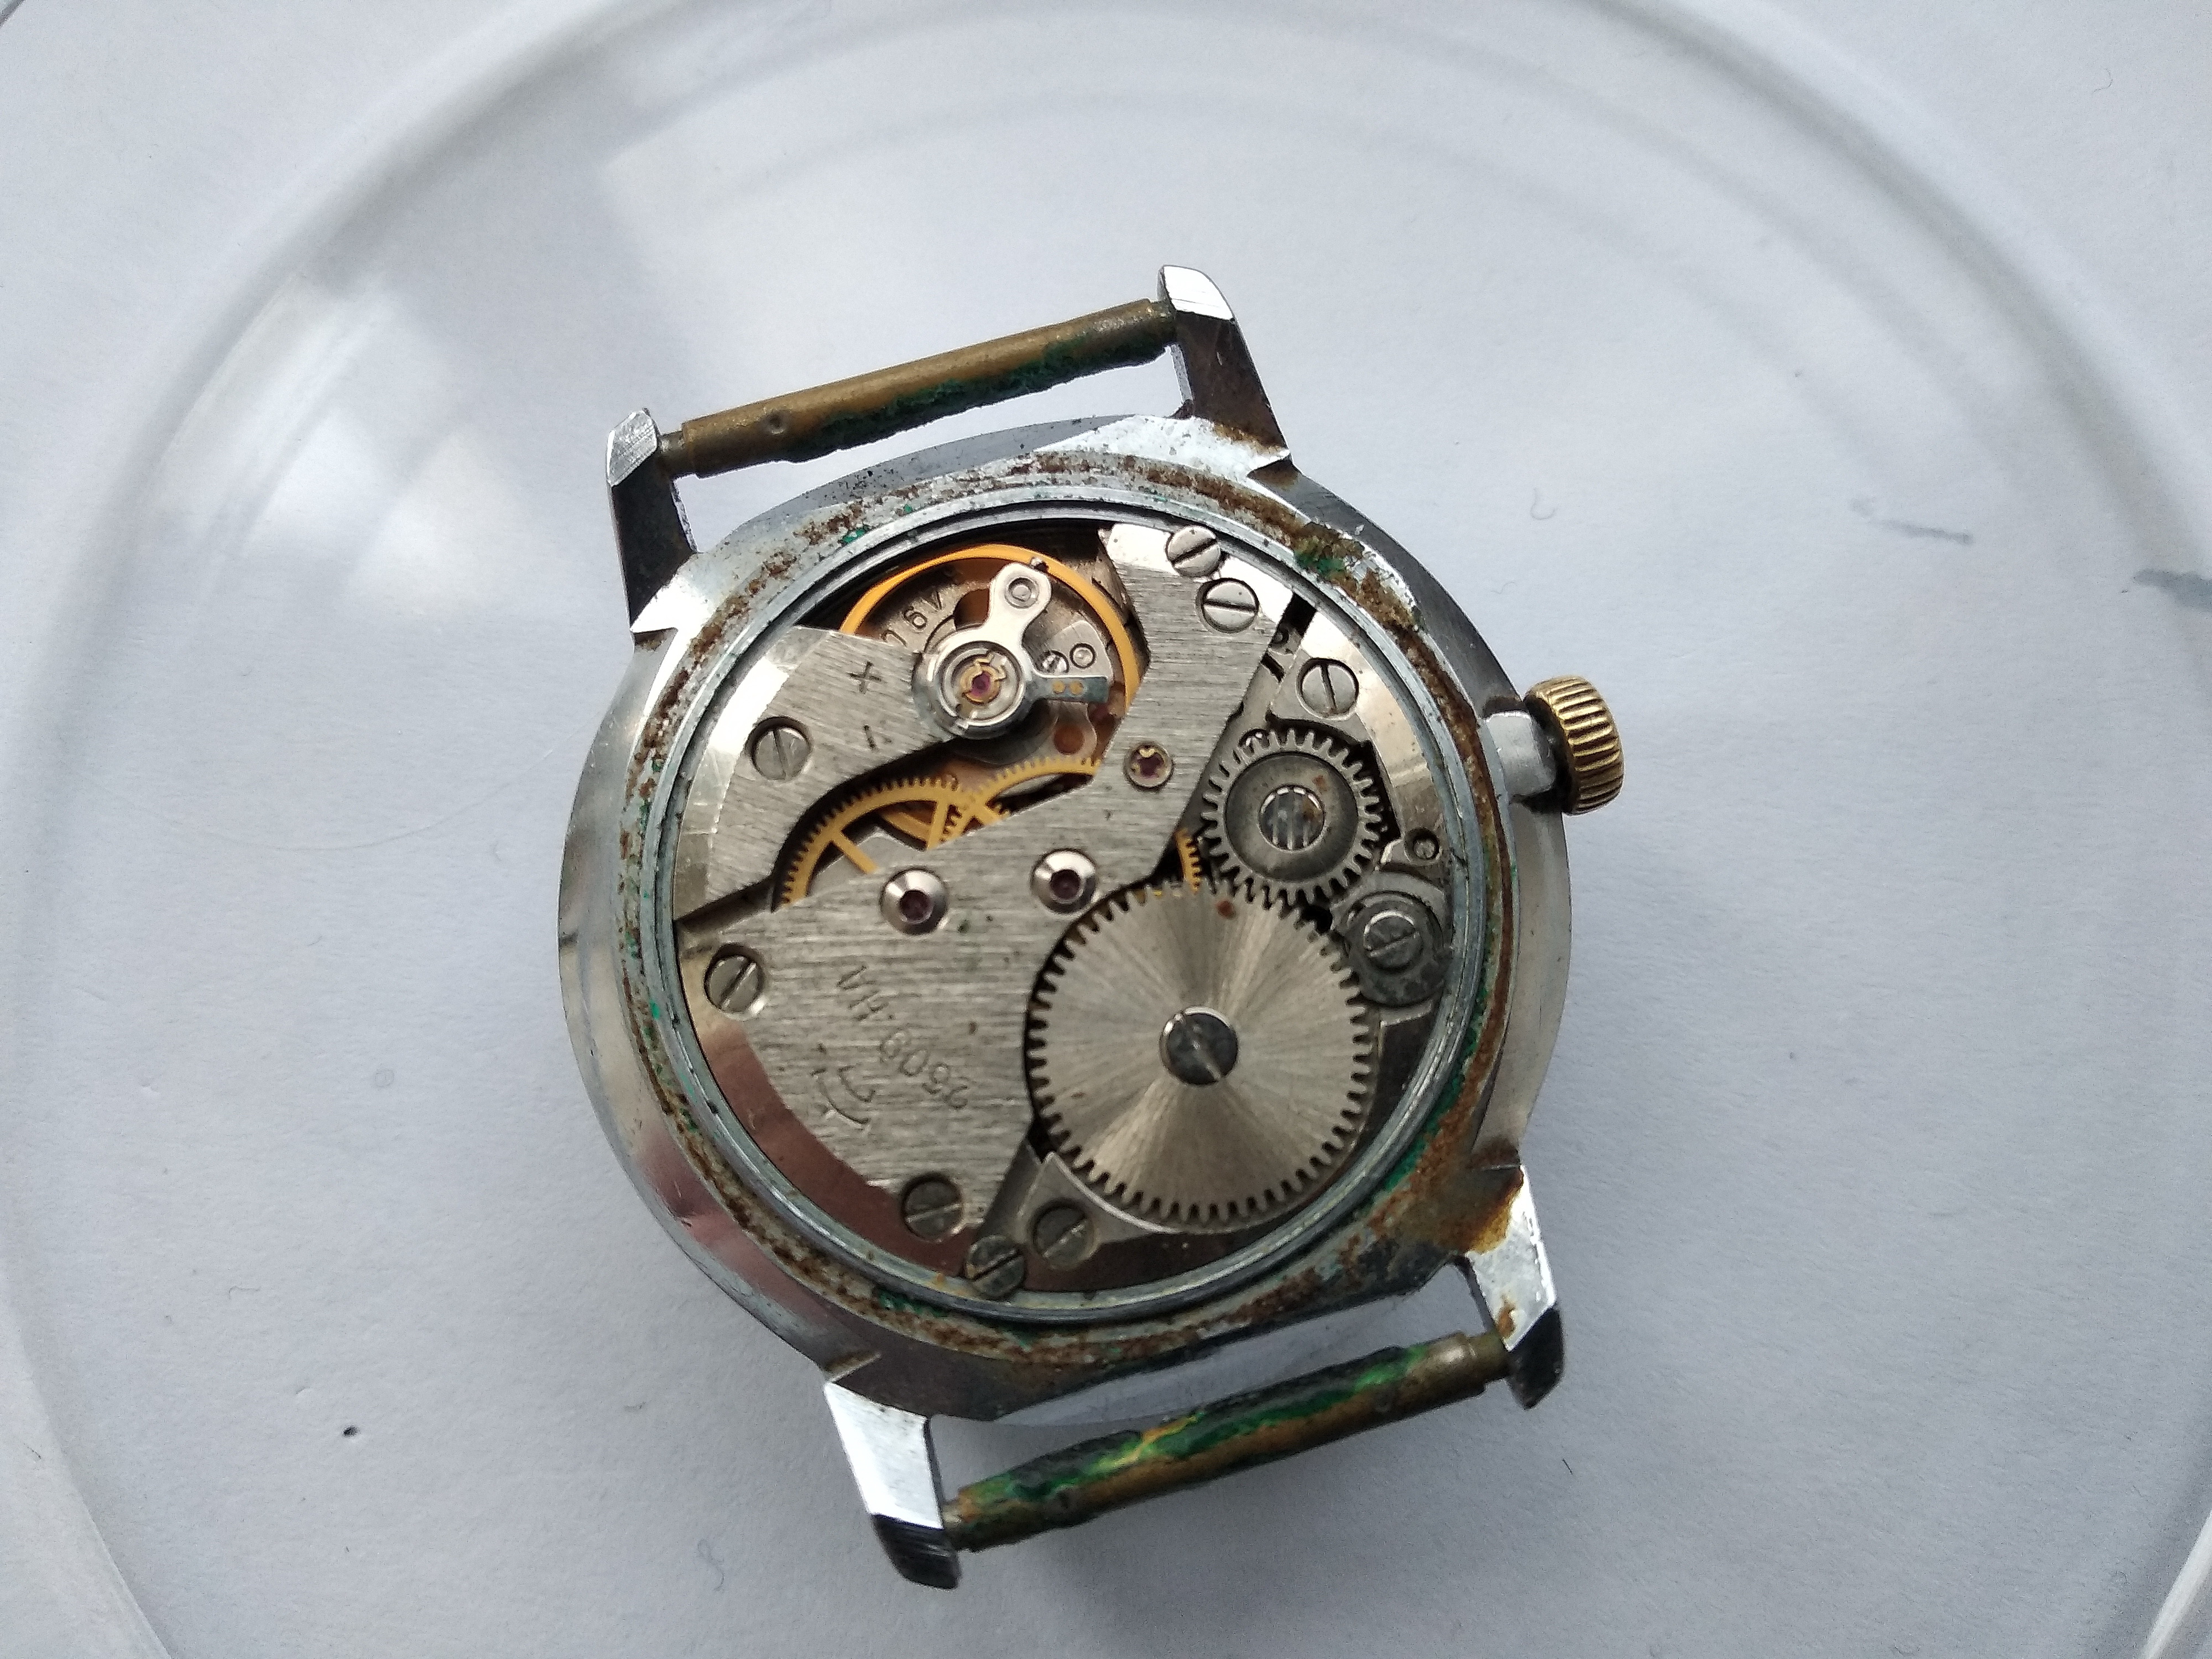
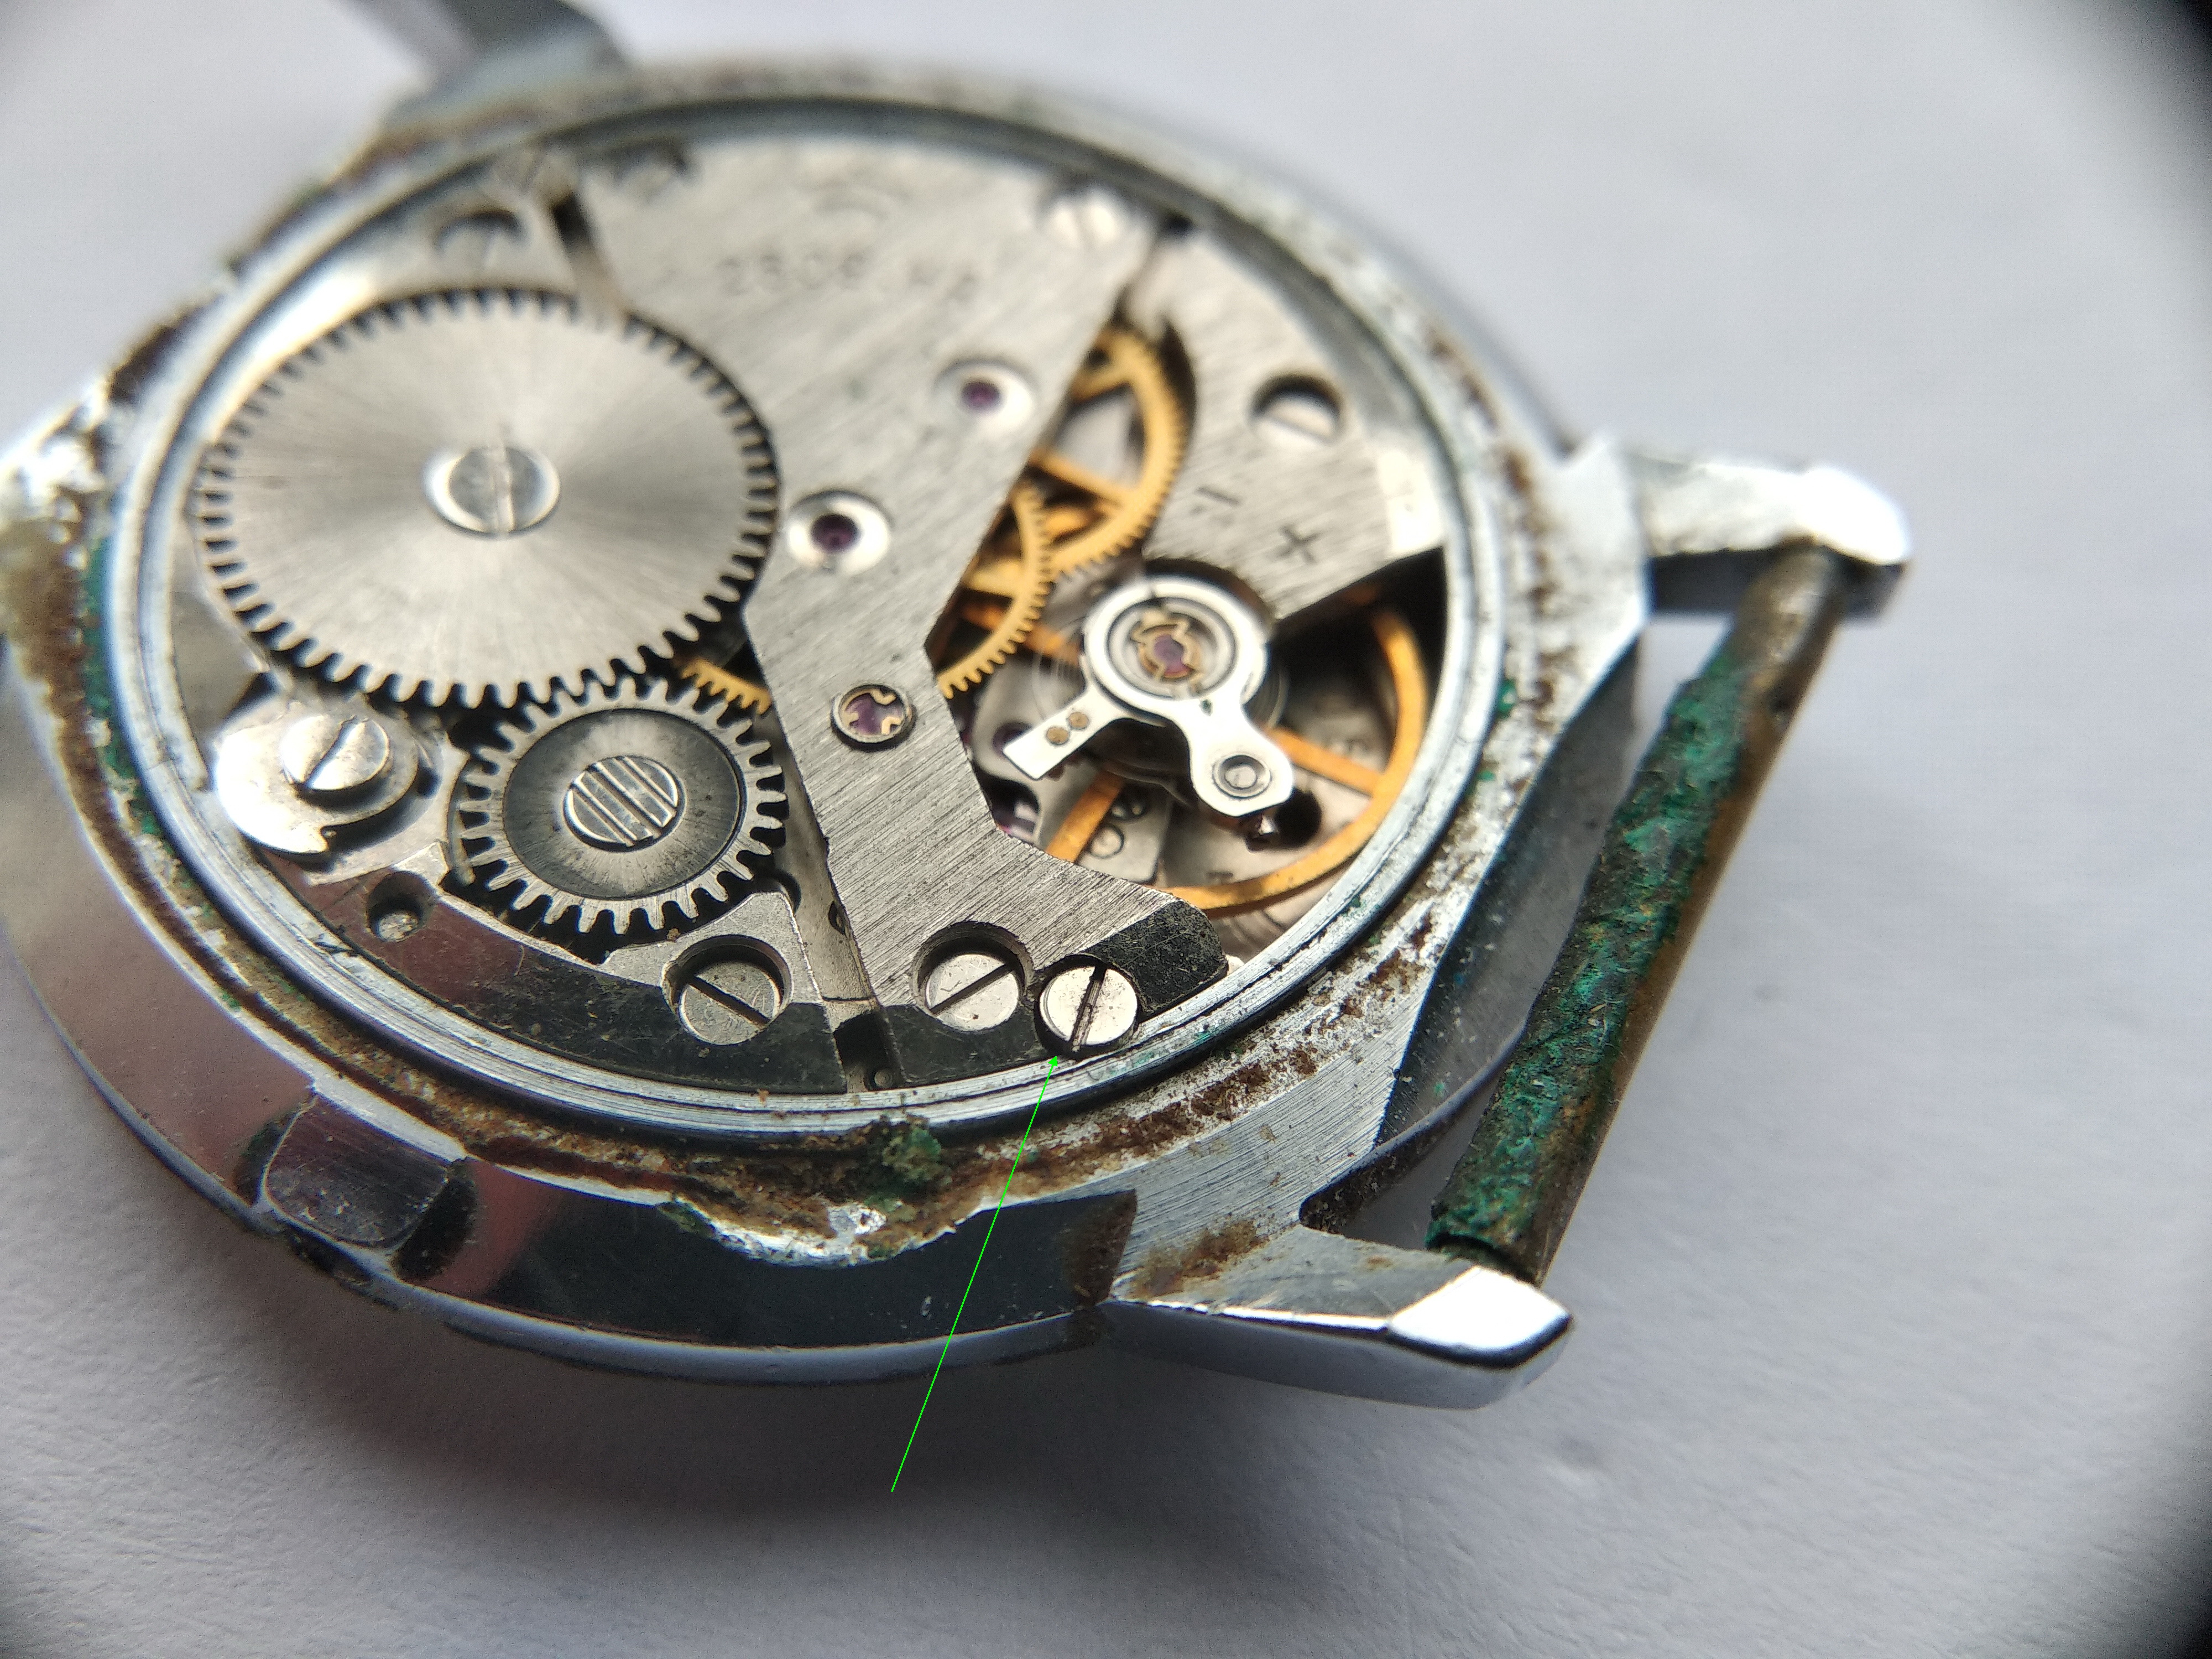
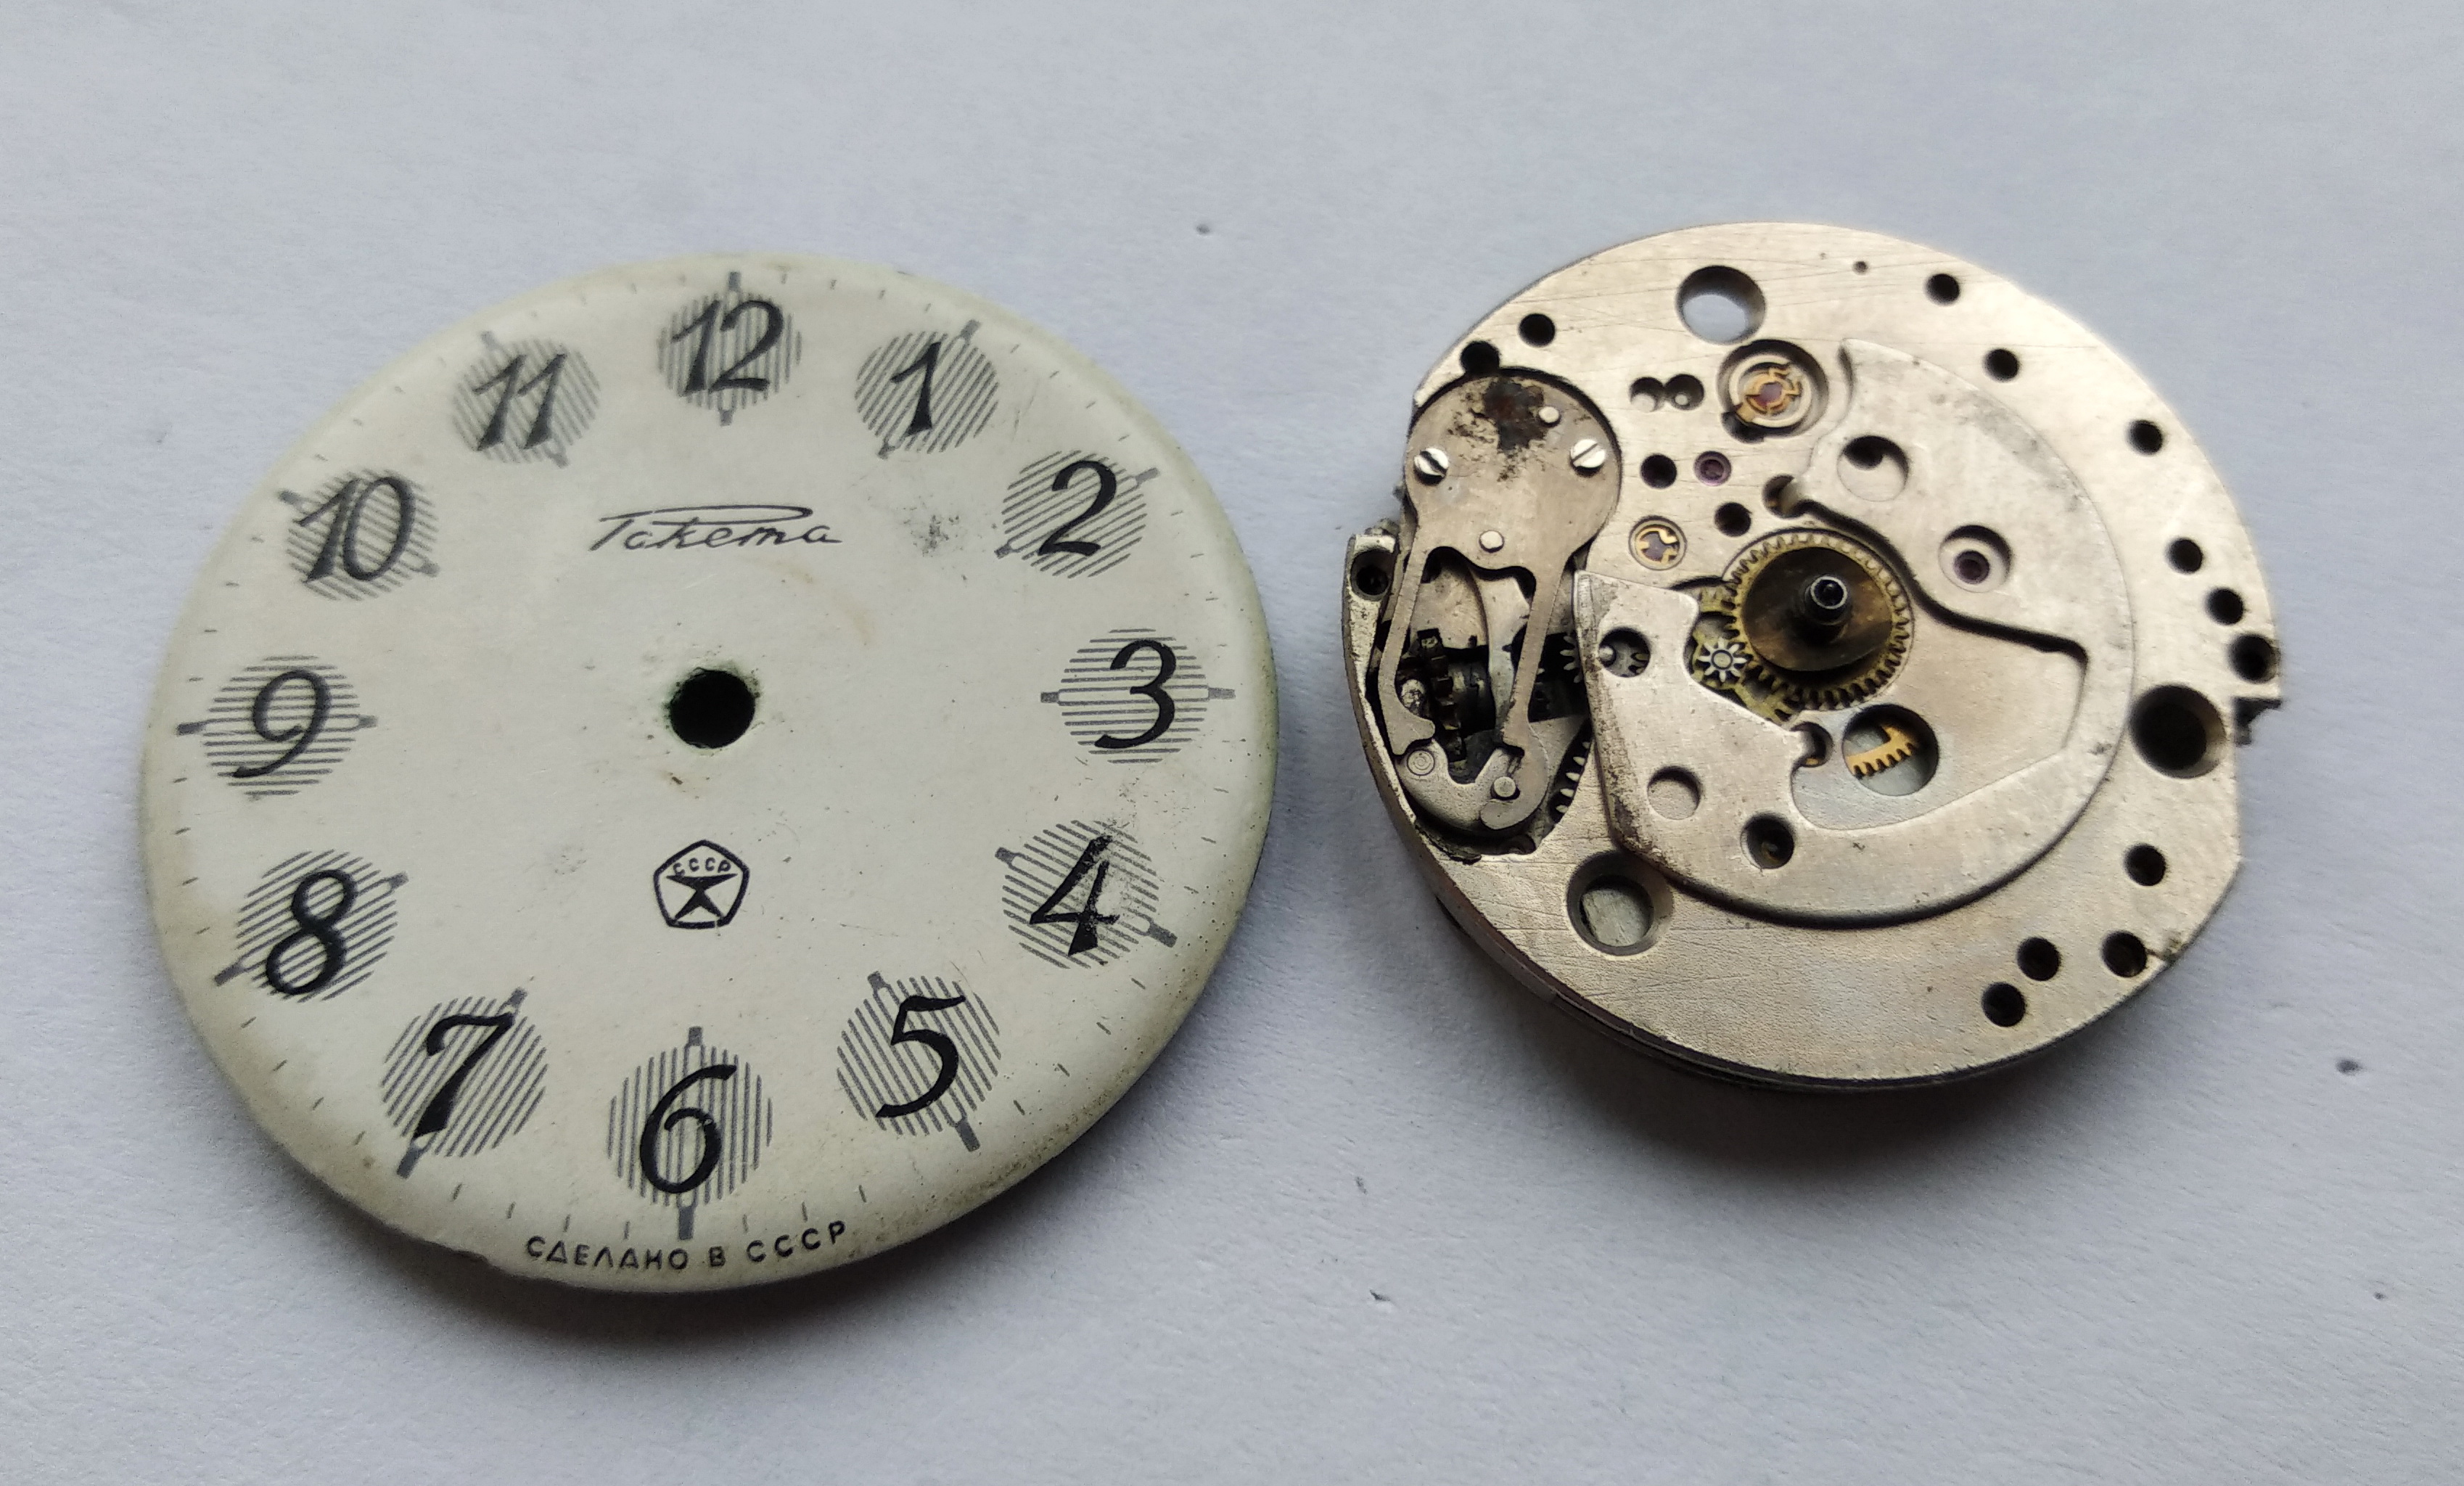
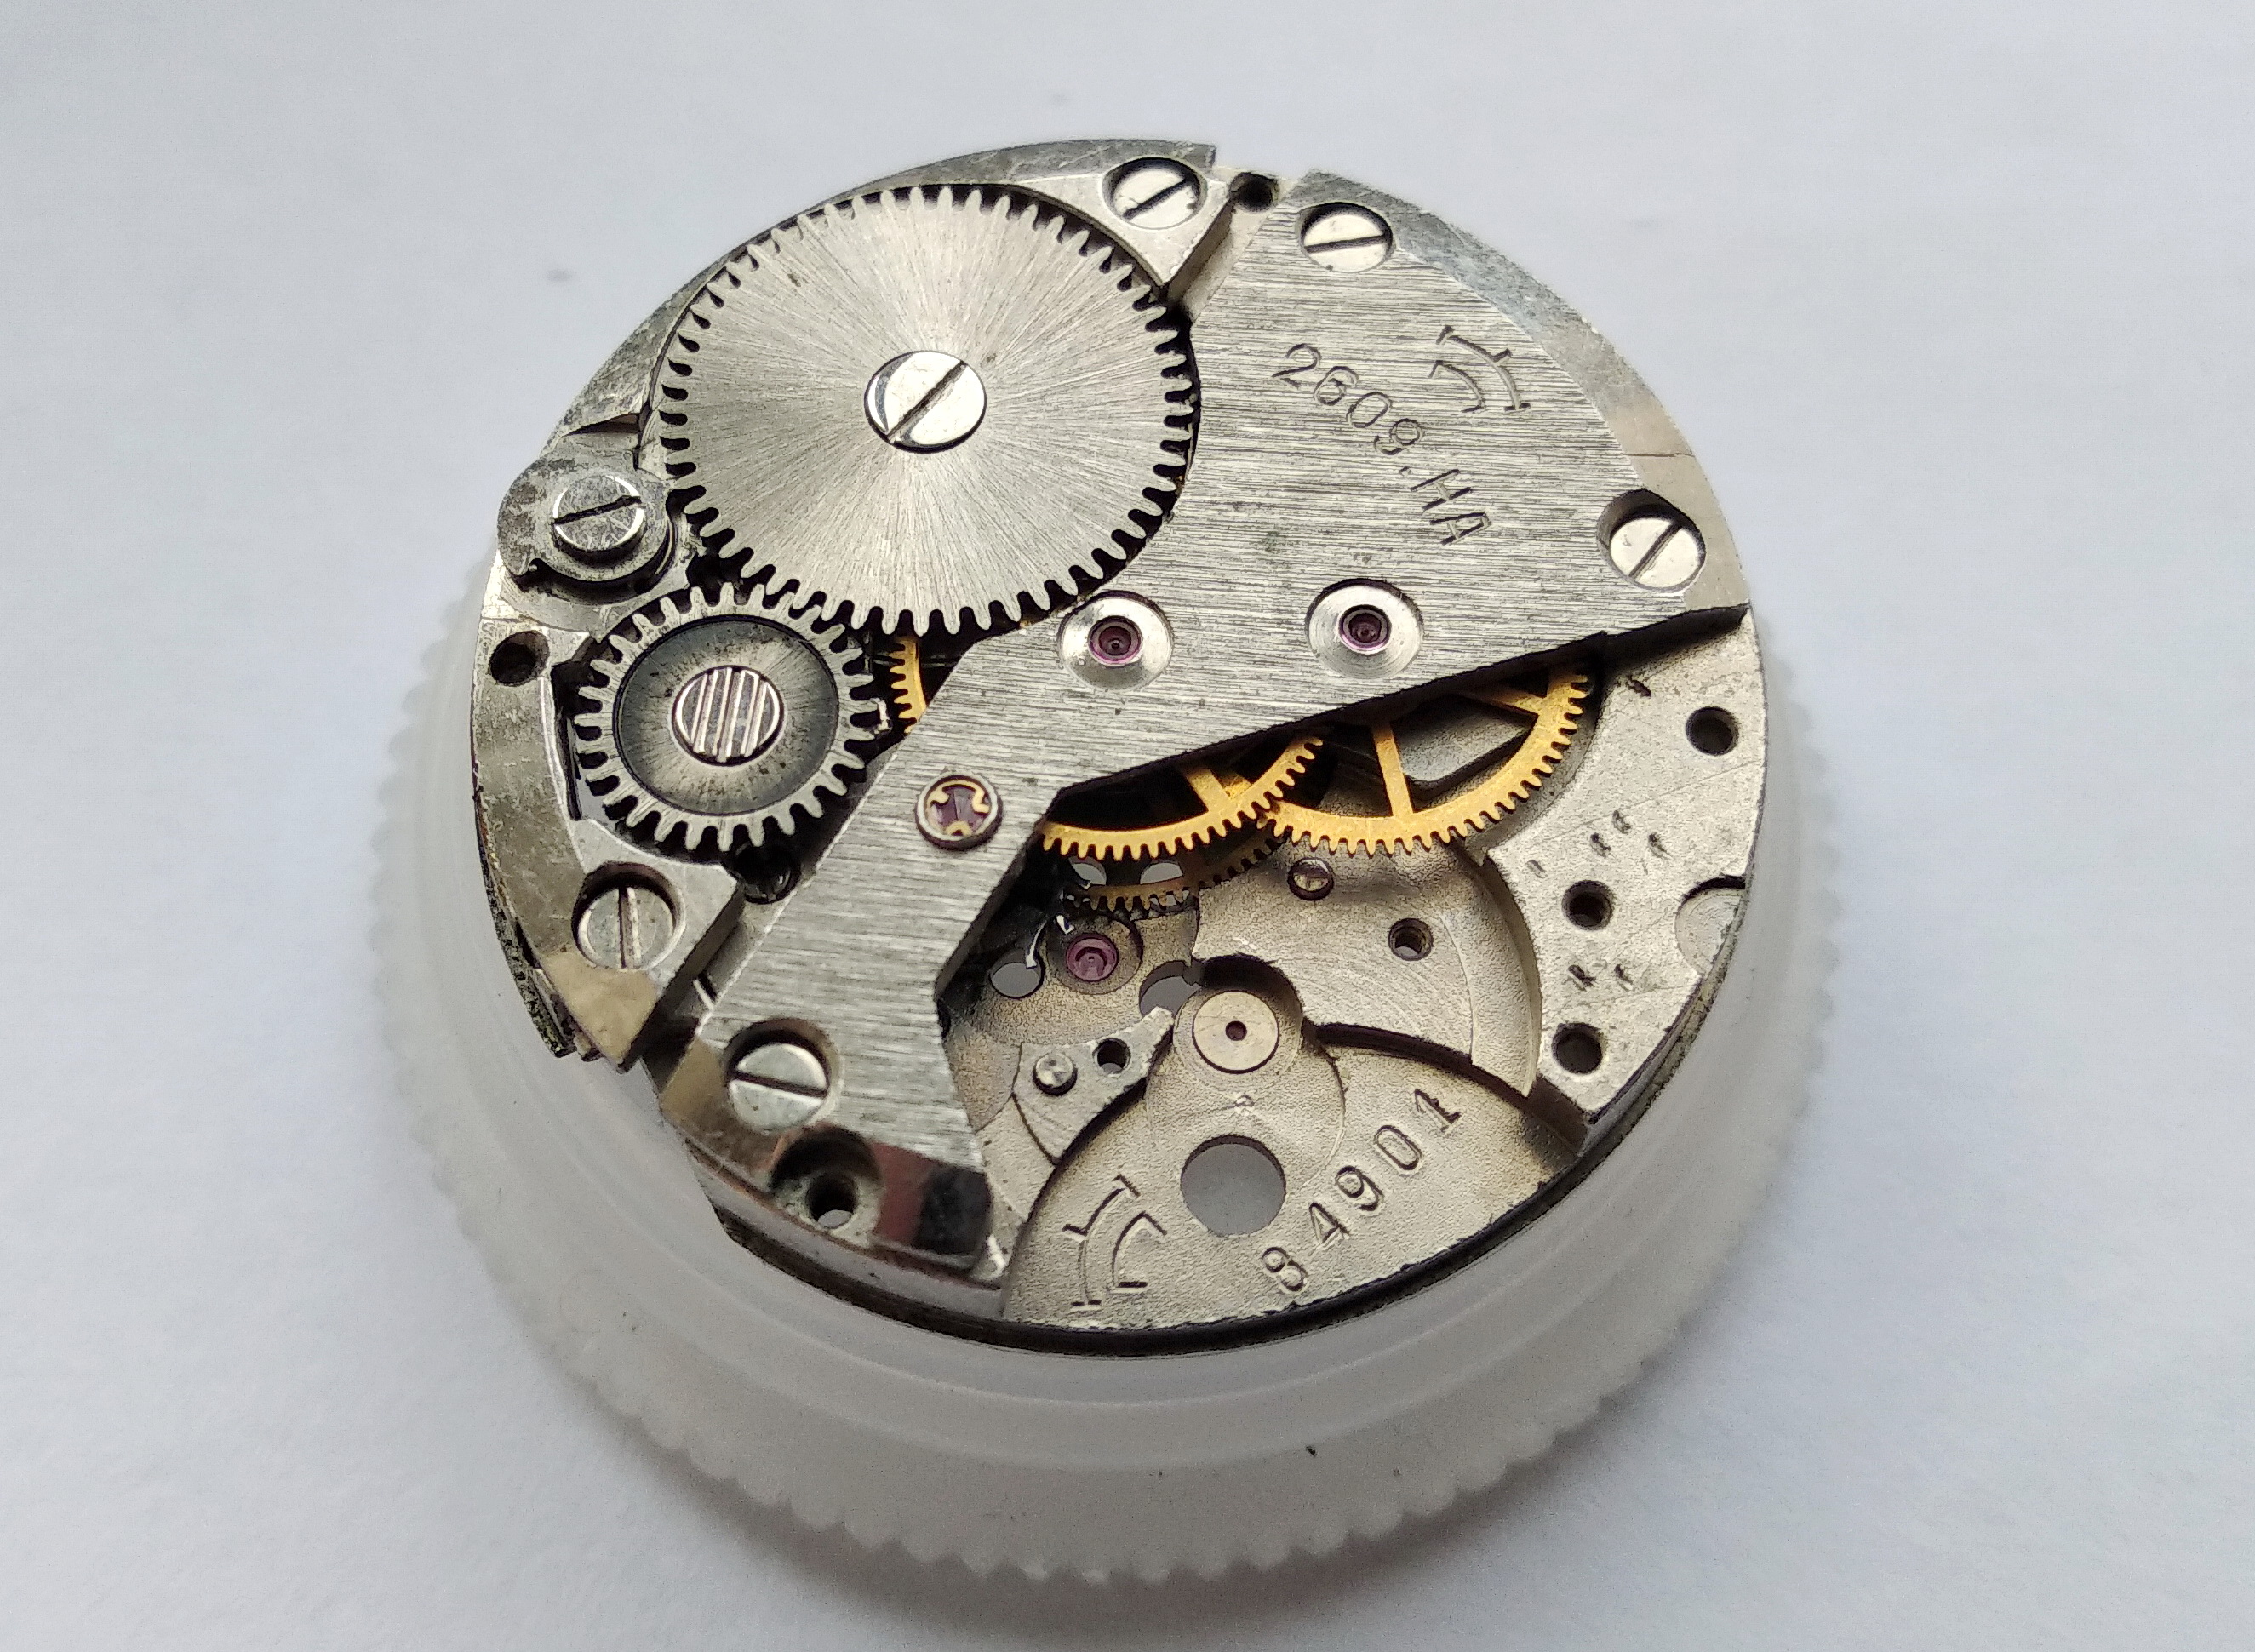
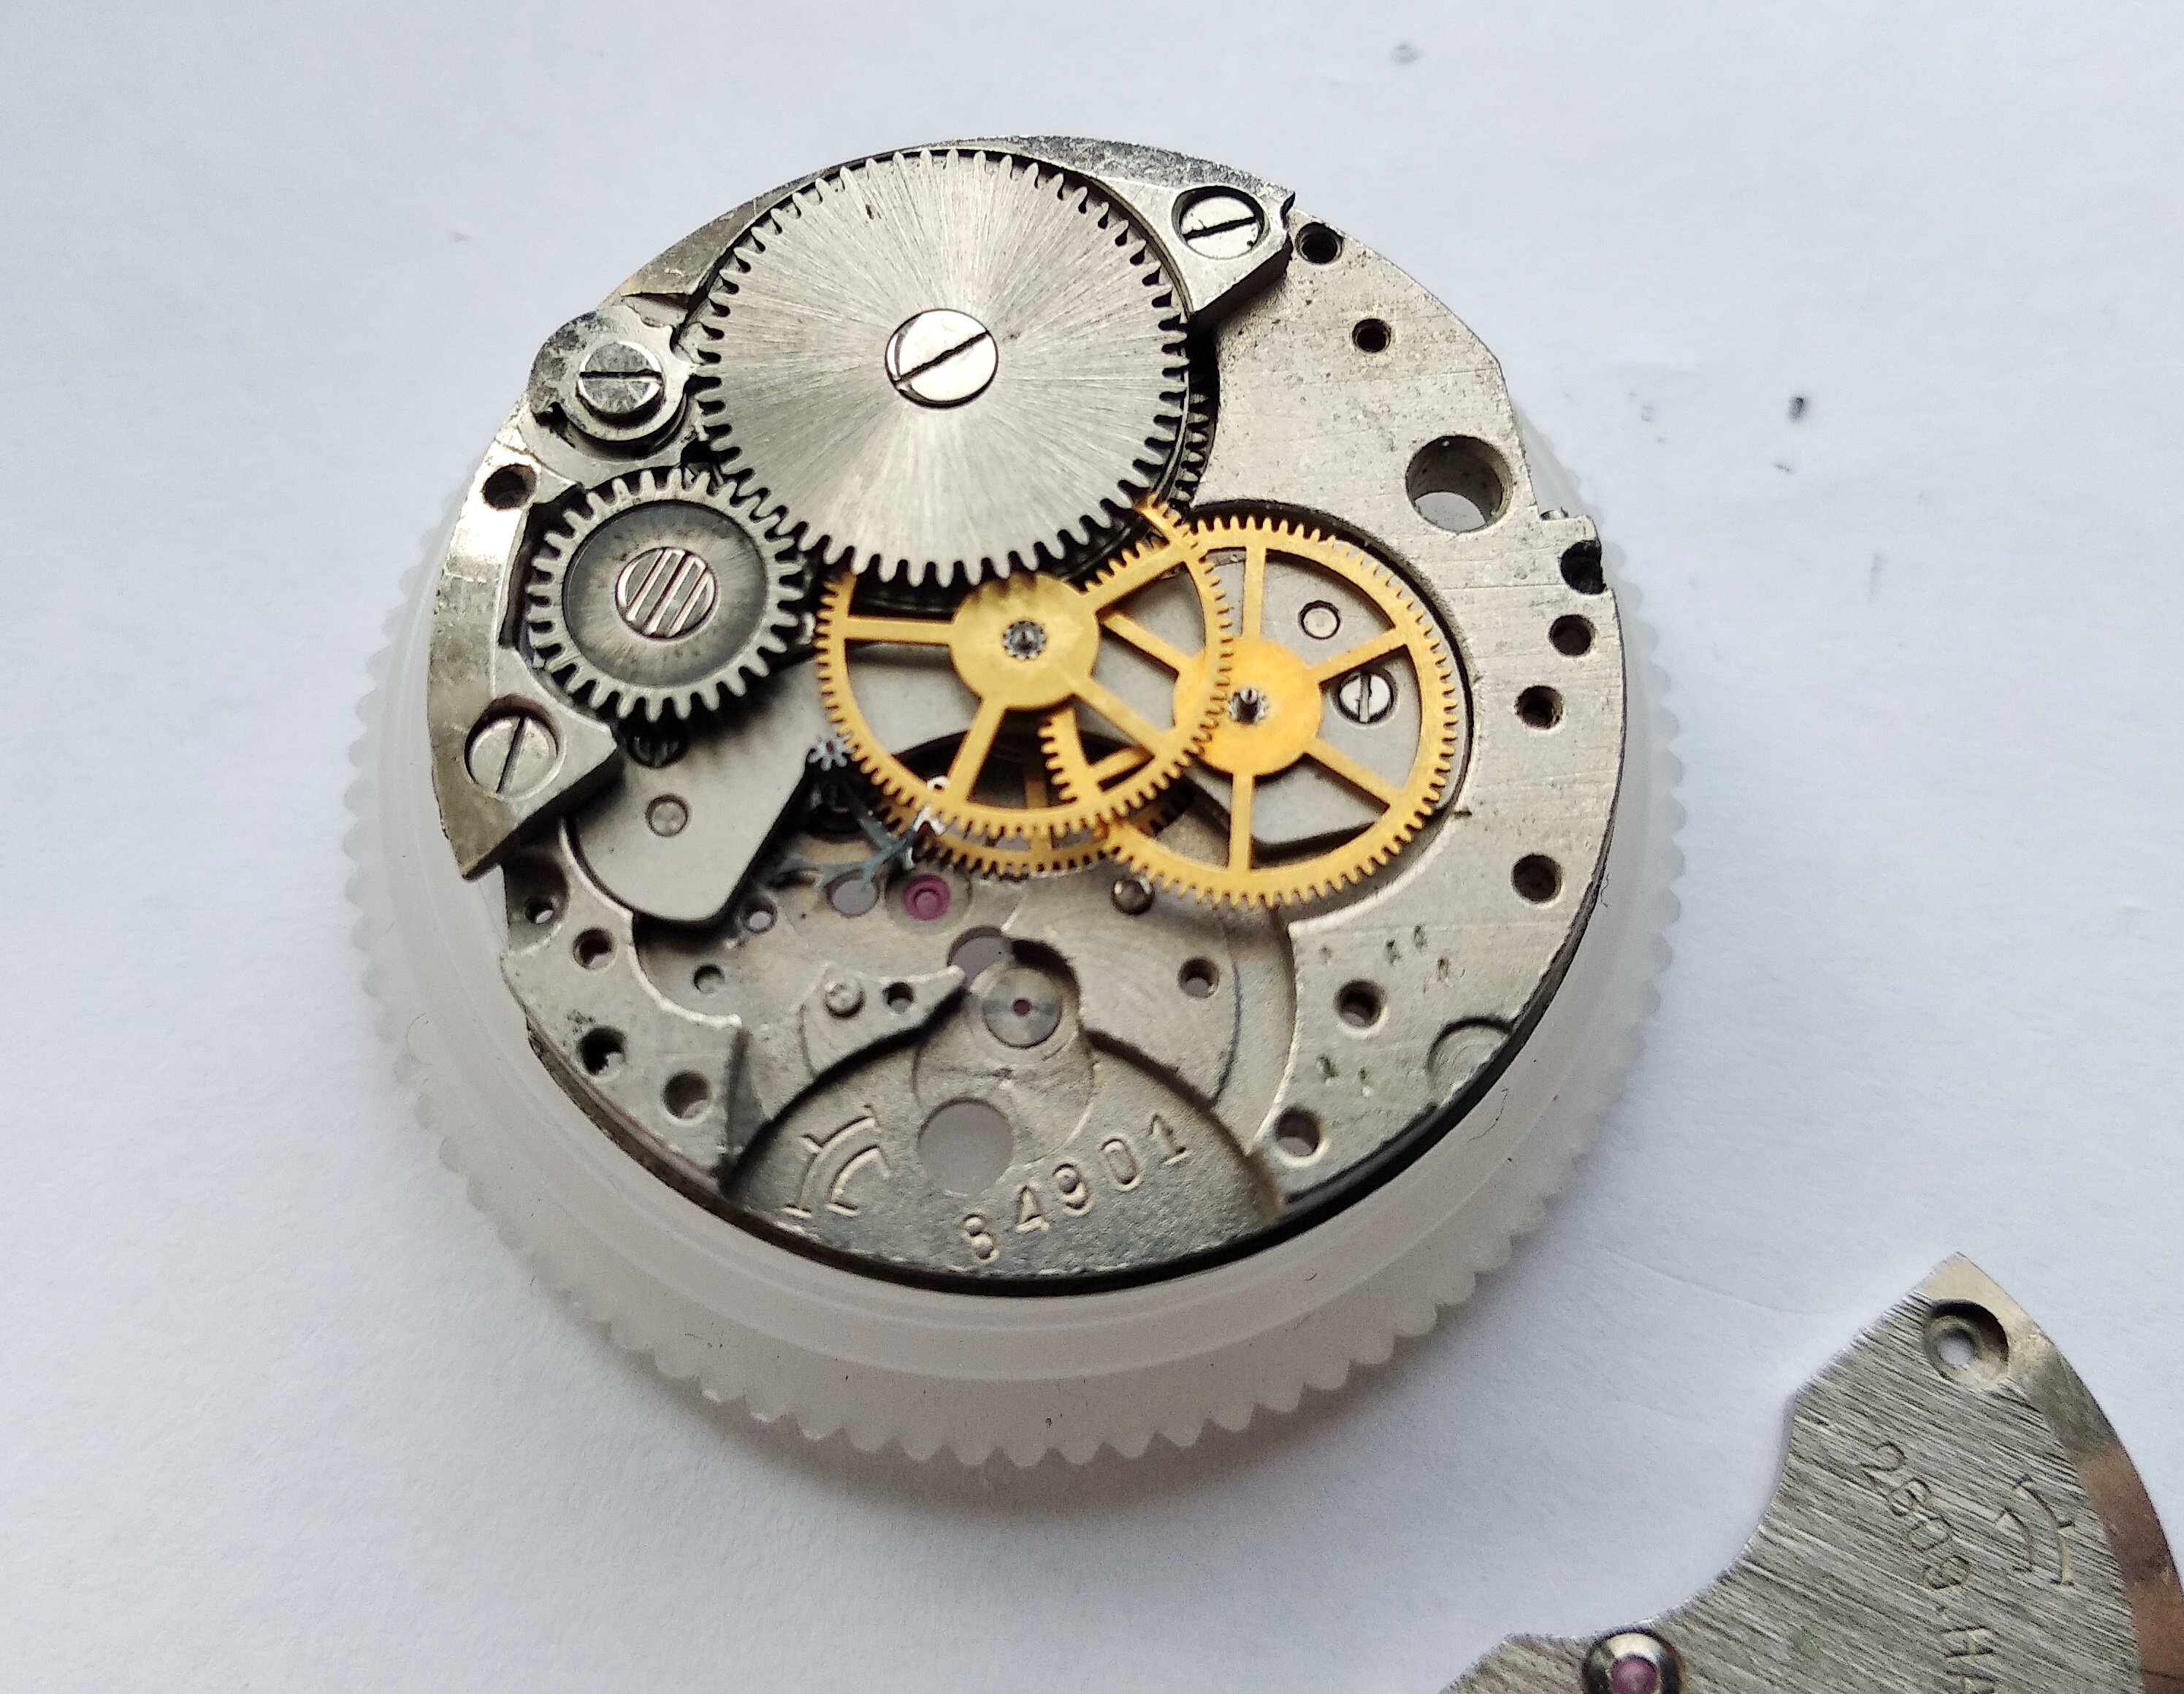
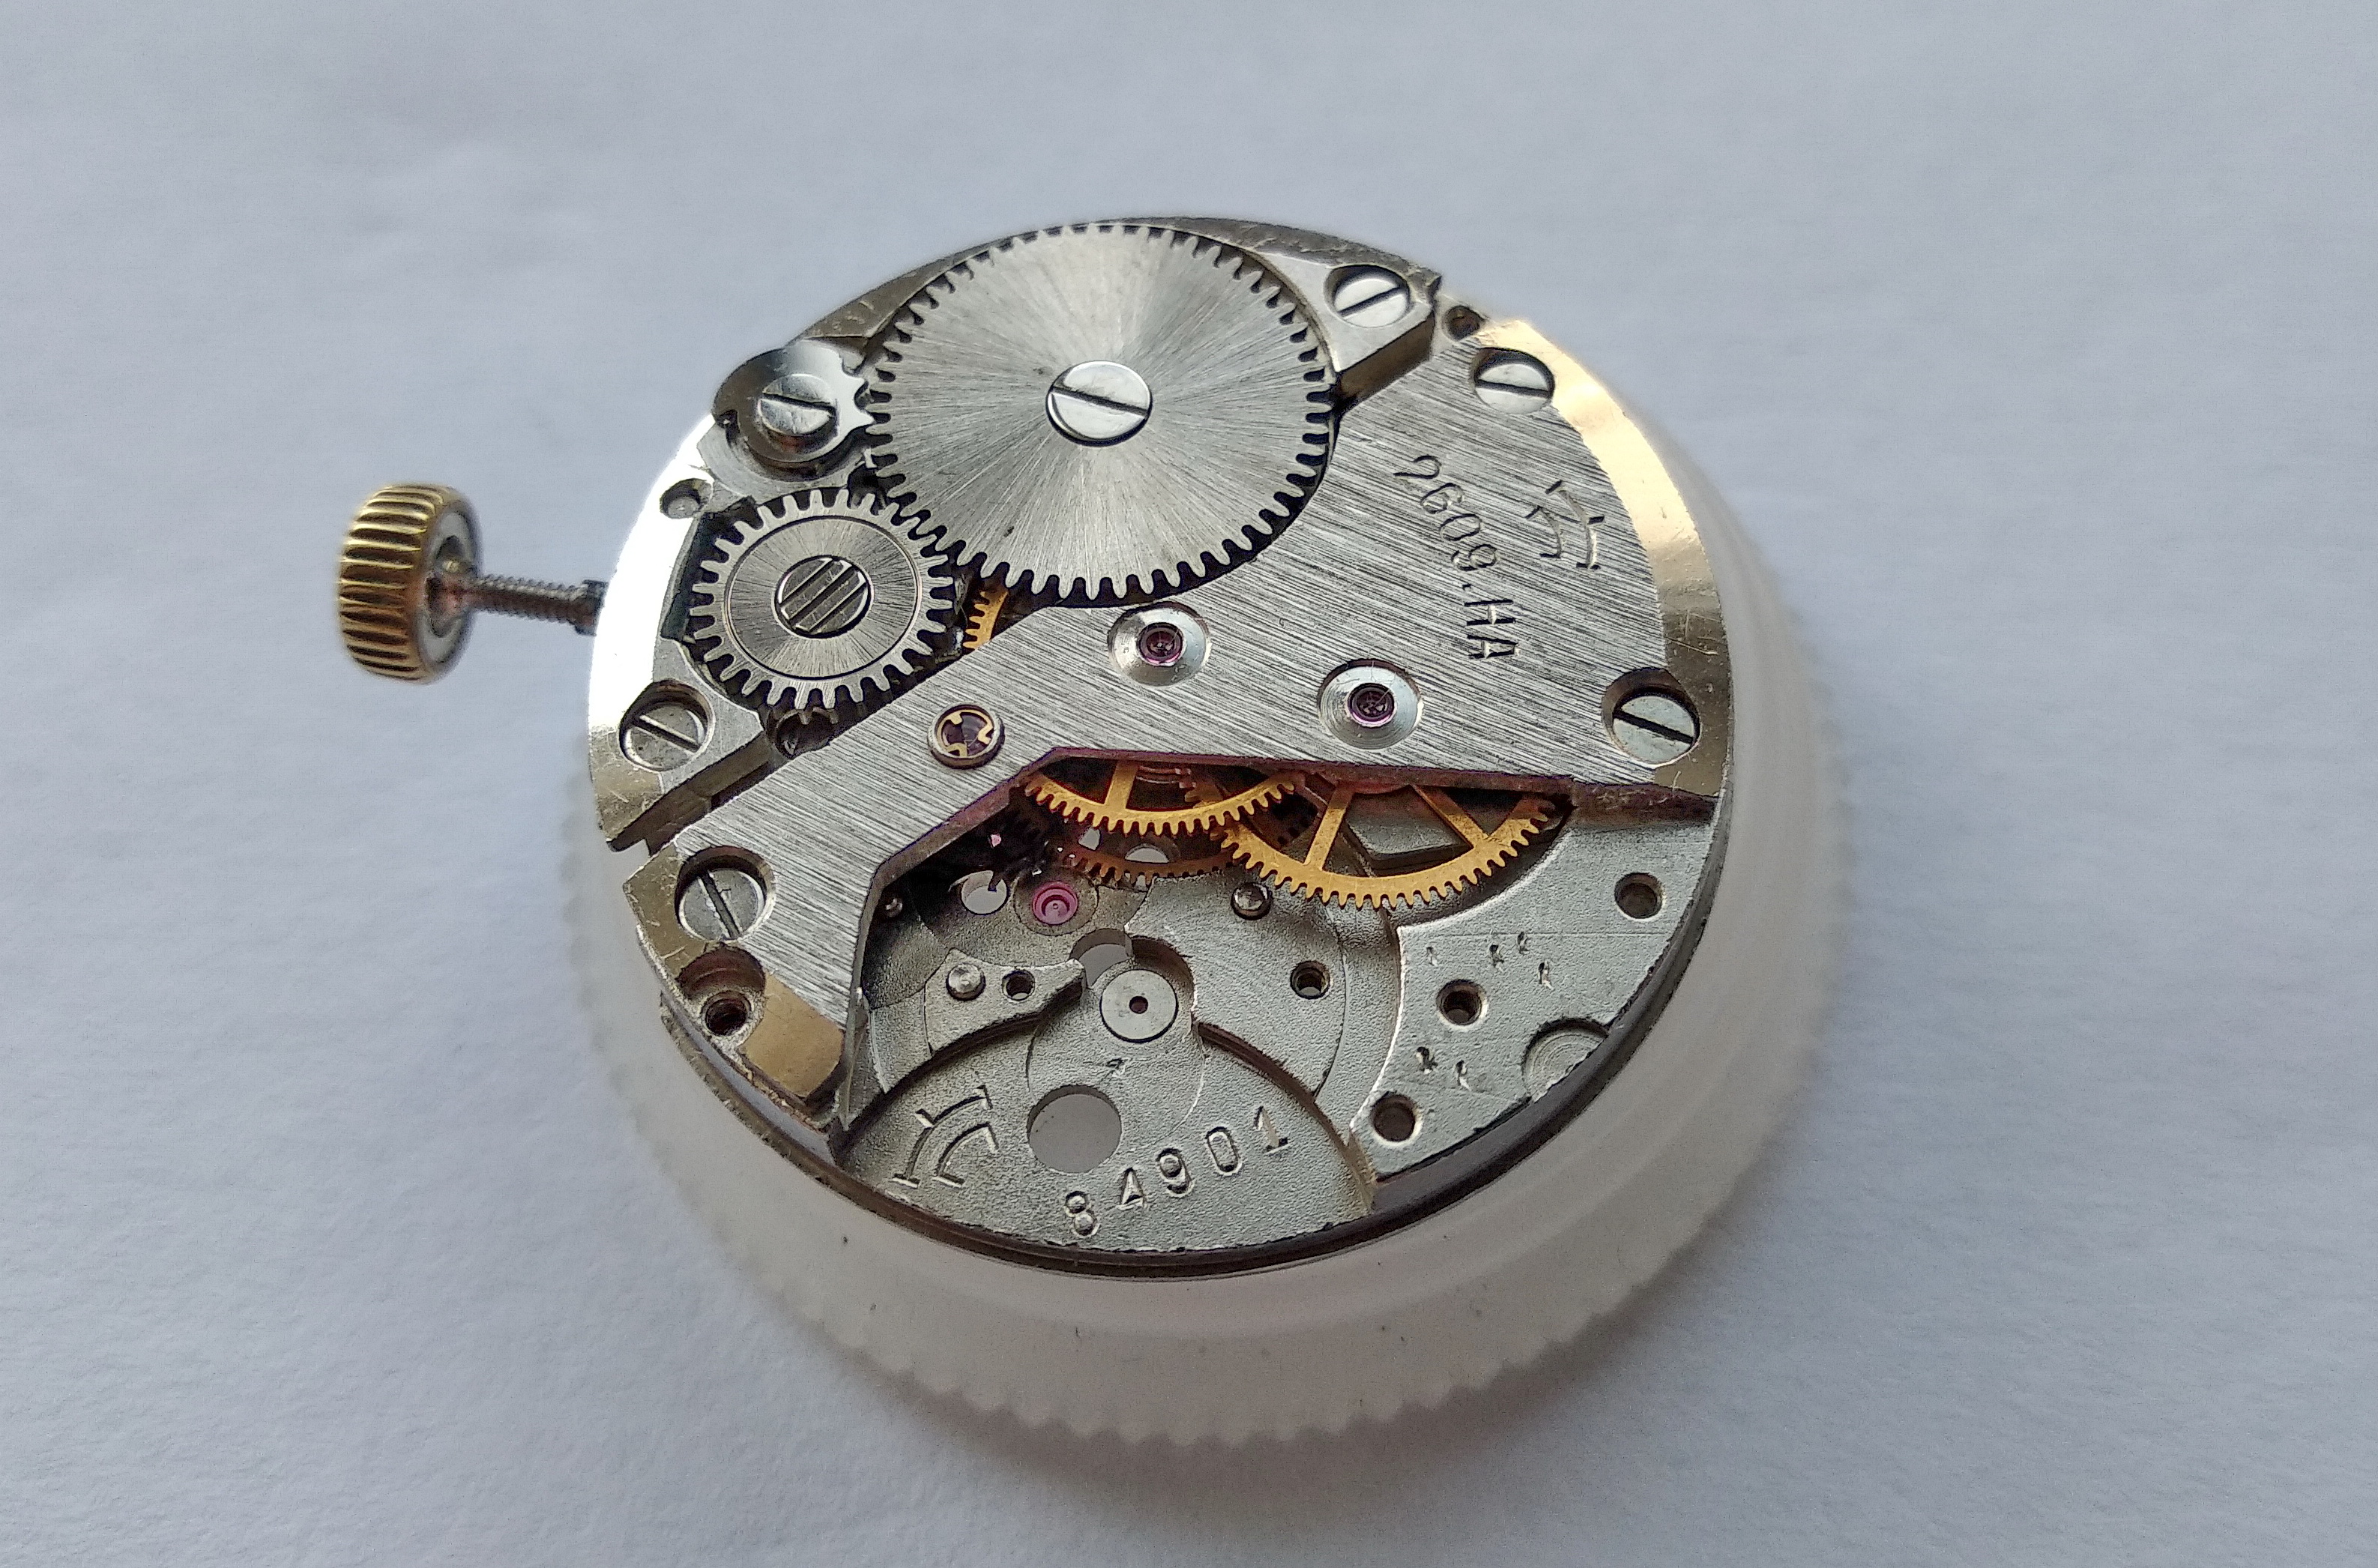
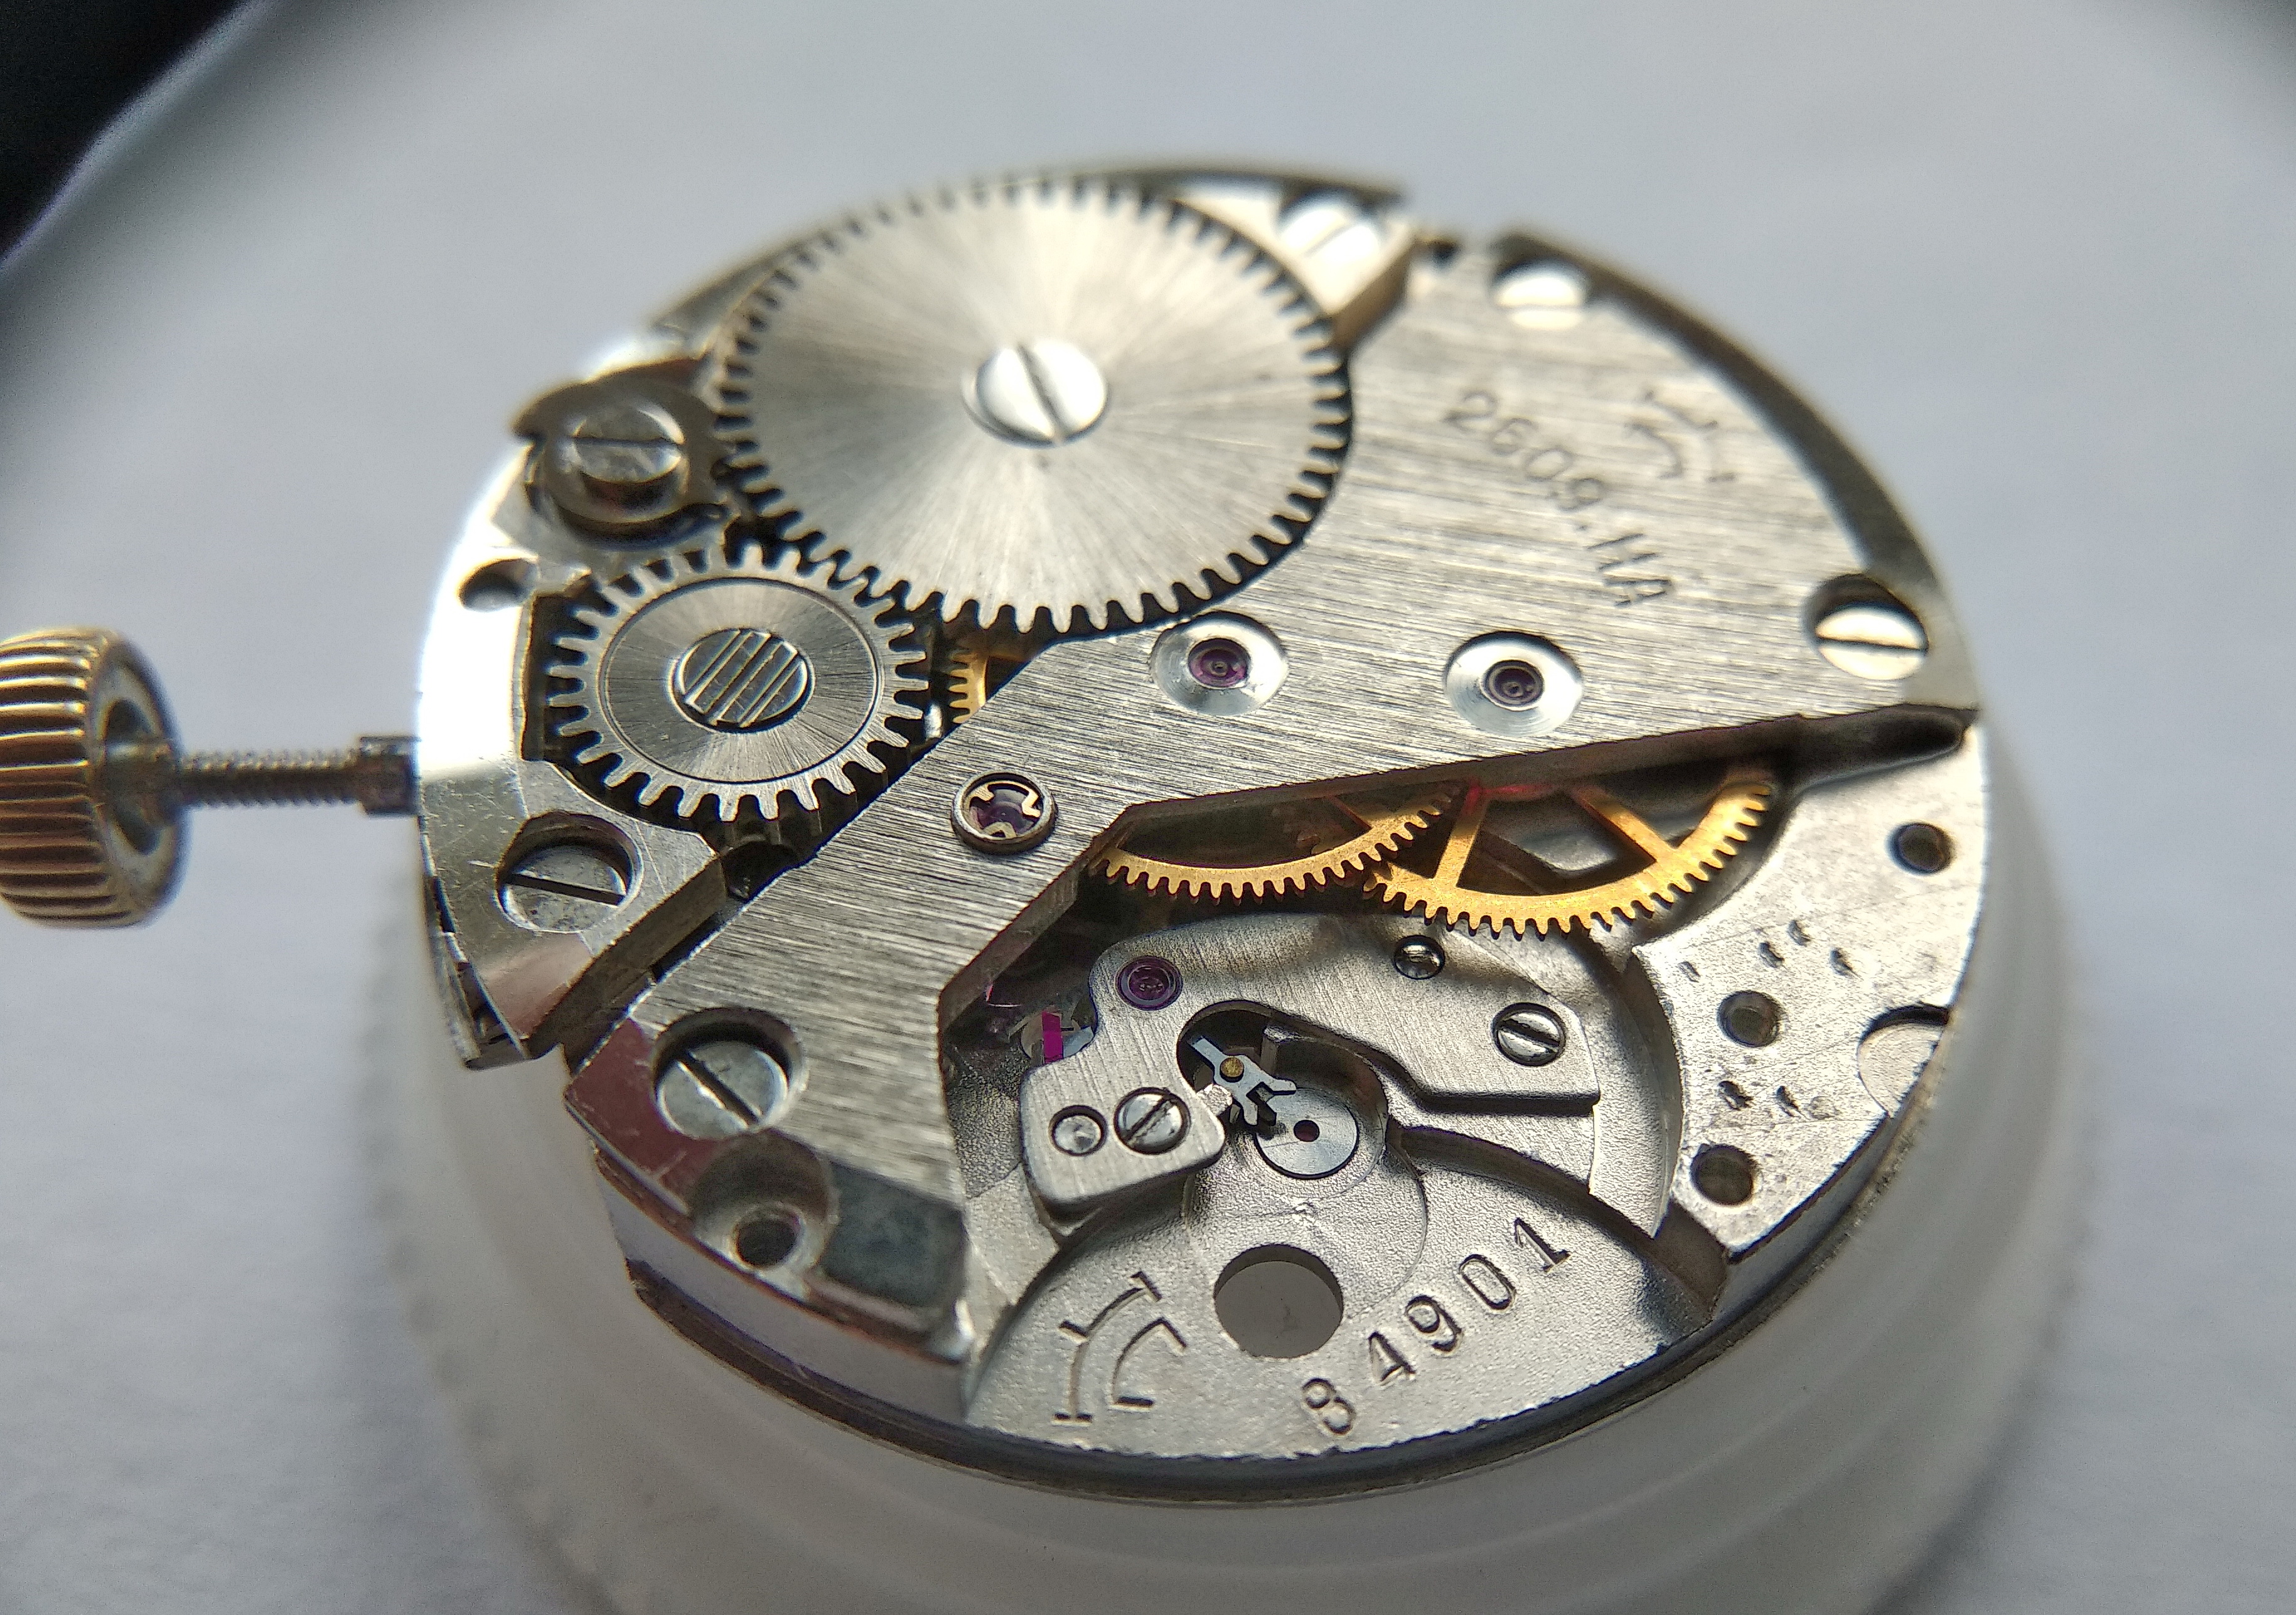
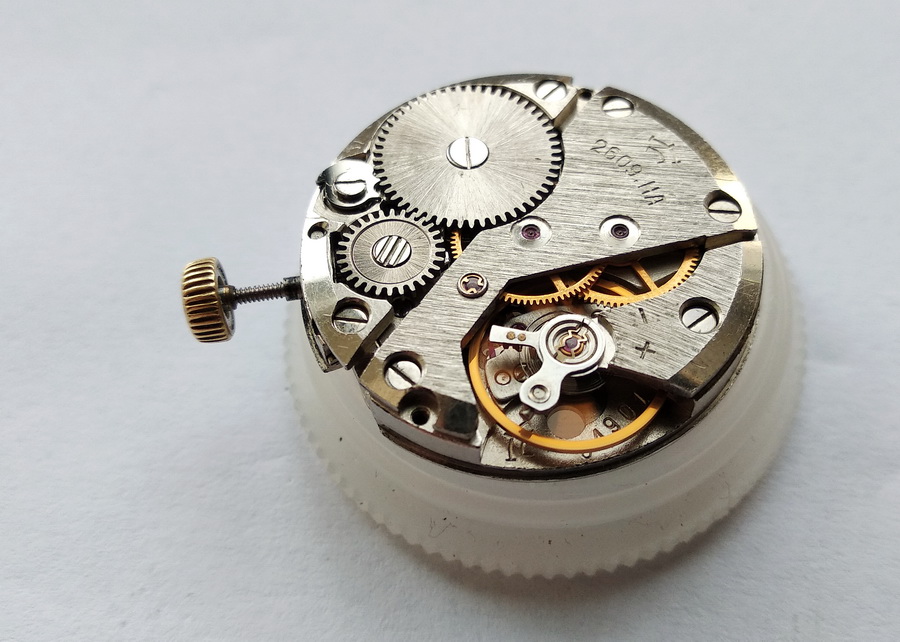
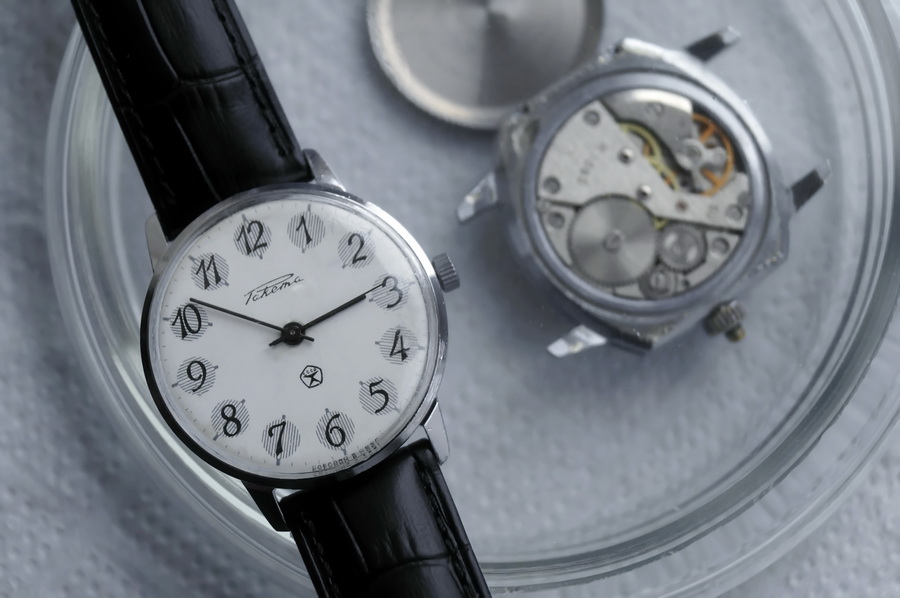
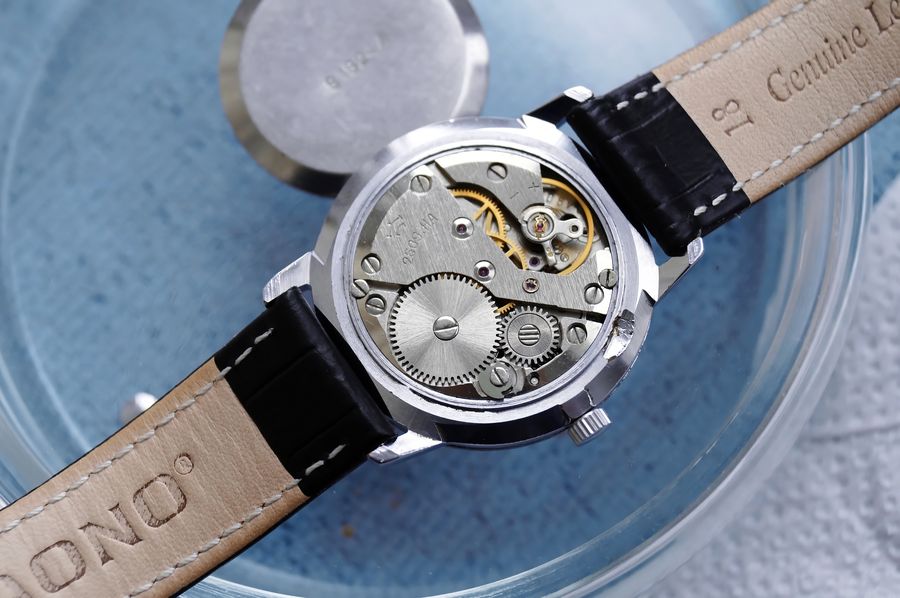
So let us open it ourselves. A gentle pry under the lip and the snap-on back pops free. And there it is — the famous 2609.NA. In this state it took off and ran. Magnificent.

Snap-on caseback levered open to reveal the dial side and movement of the running 2609.NA
The hinged-lid back ("khlopushka") lifts away with a light pry. The 2609.NA inside was filthy, yet it began ticking the moment the crown was wound — a first hint of how robust the design is.

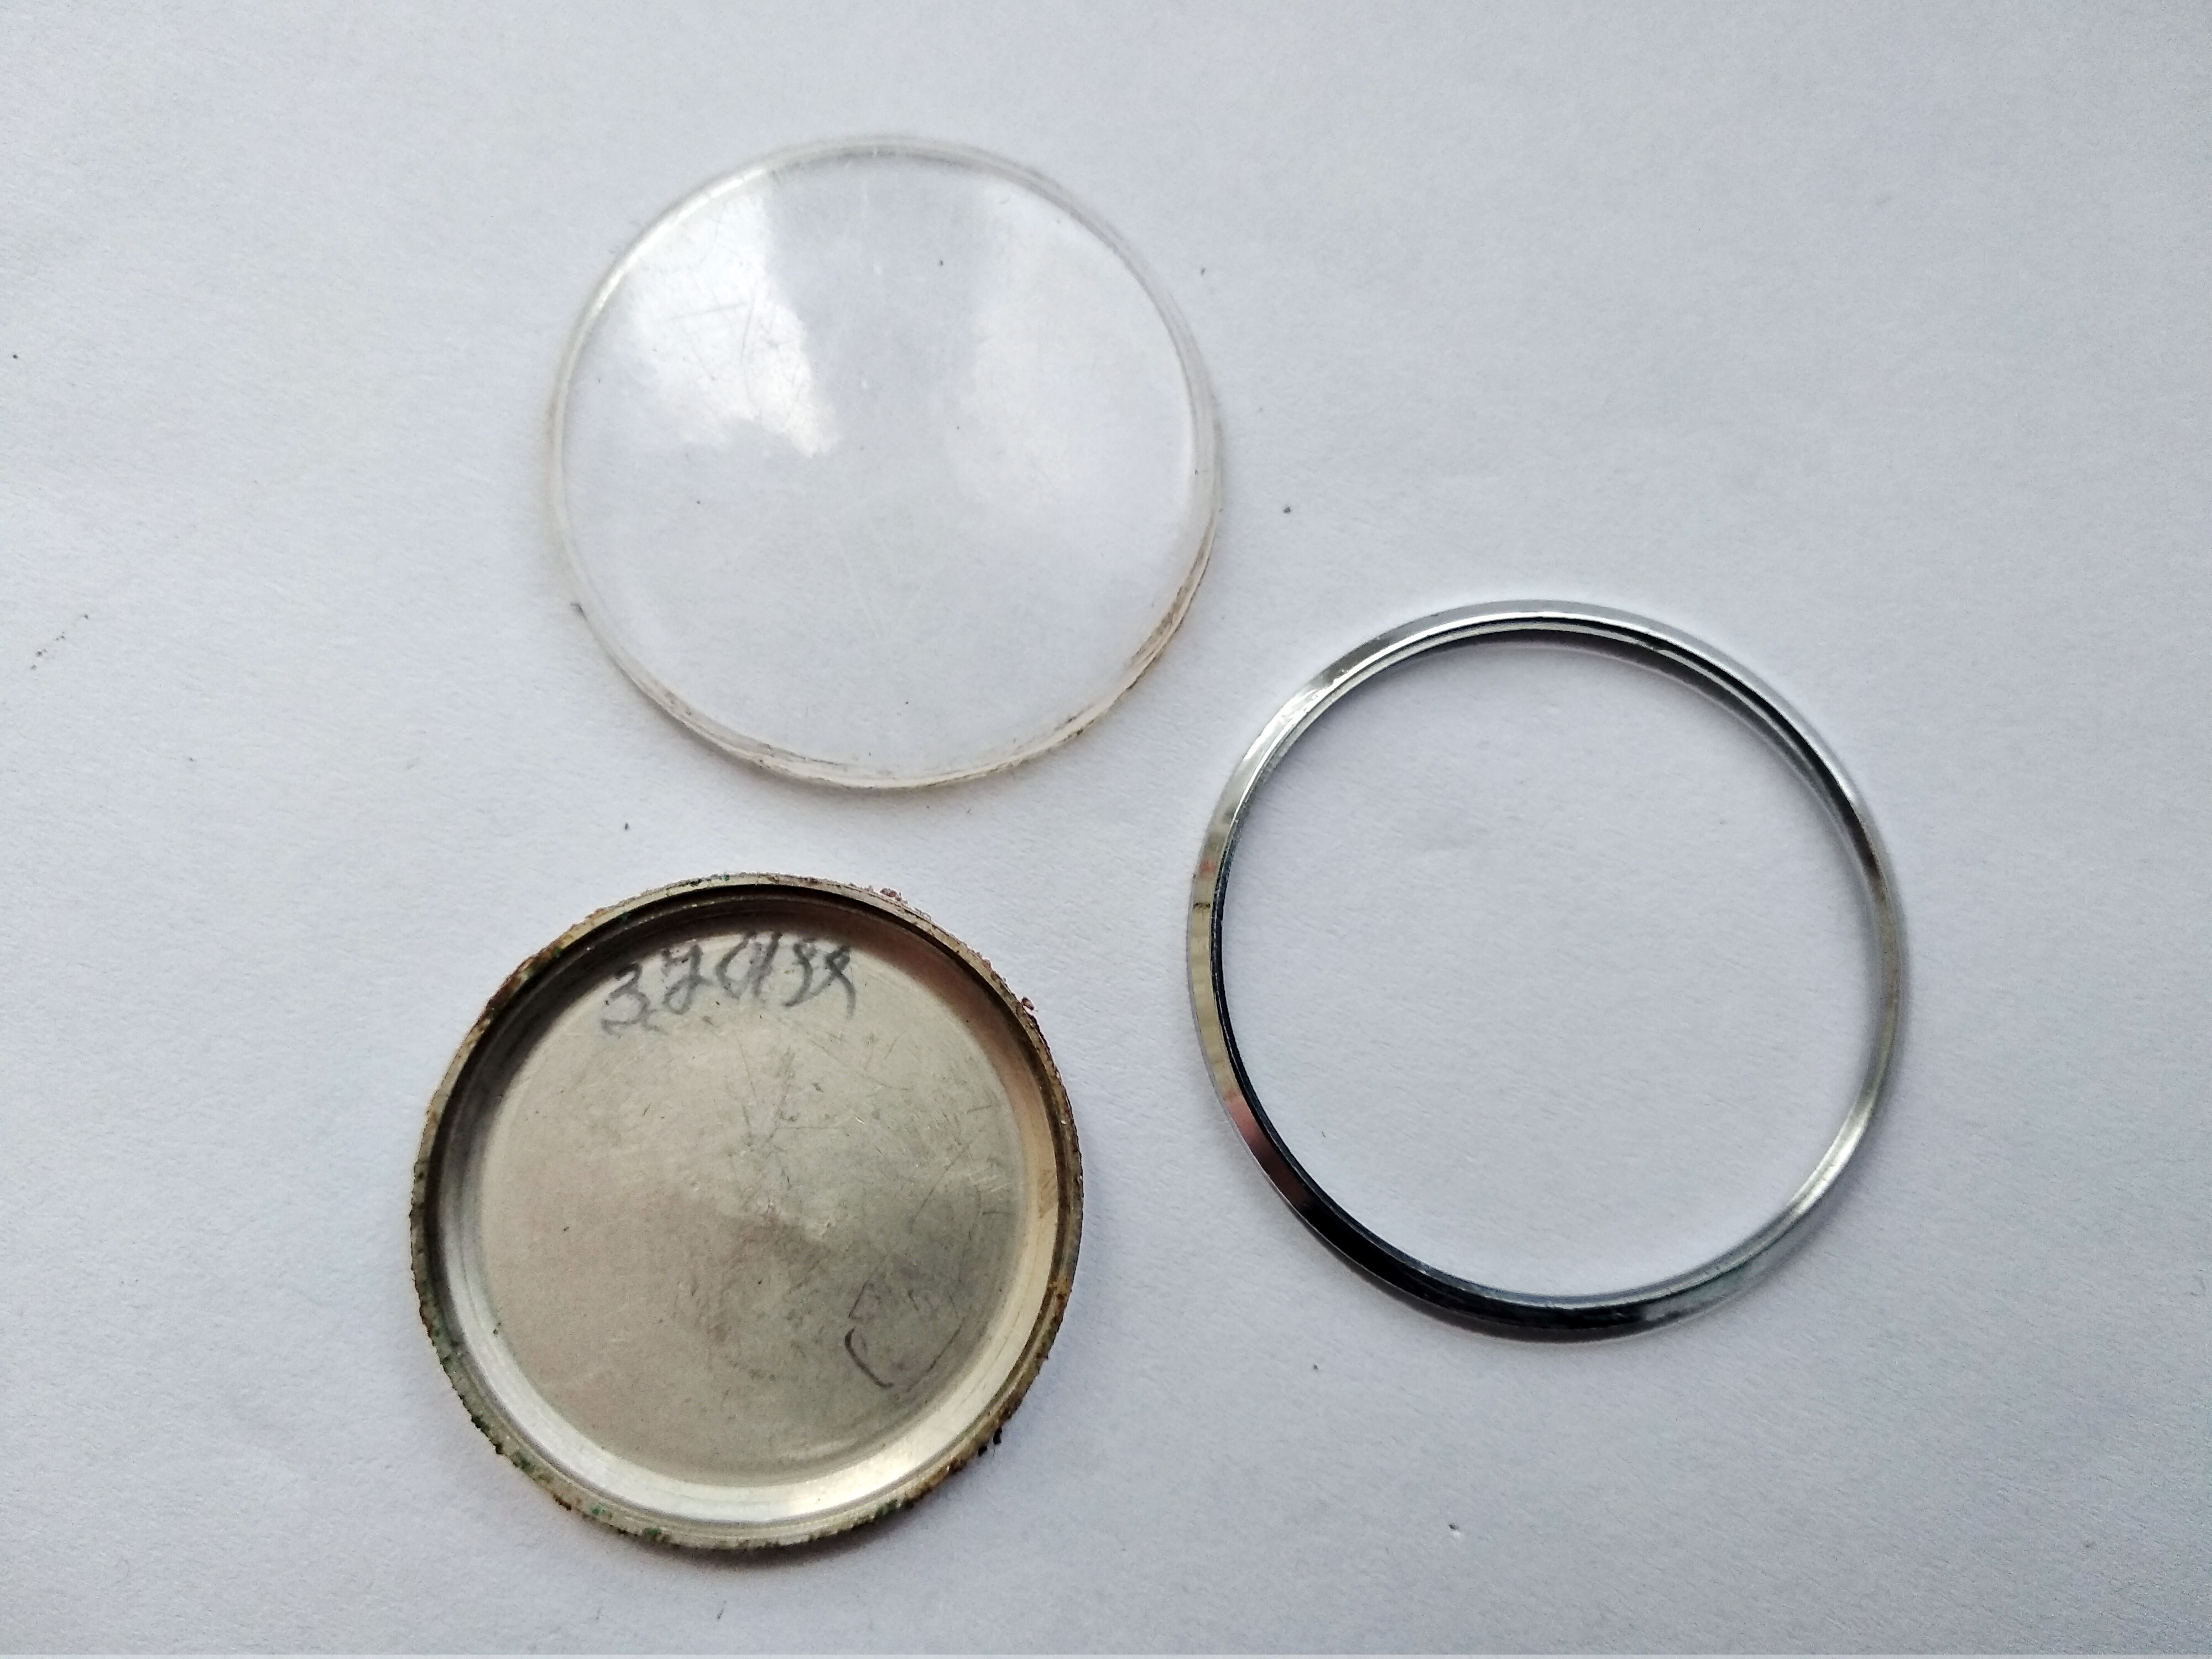
Next we remove the bezel together with its crystal and lift out the glass. The back is already off. On the inside of the caseback is a watchmaker's mark; by my reading, the last hand to touch this movement did so in the autumn of 2001. And yet here it was, running again.

Bezel and acrylic crystal separated from the case, with the caseback showing an old service mark
The three-part case begins to come apart. A faint engraved service mark on the back dates the last intervention to roughly autumn 2001 — more than two decades of neglect before this strip-down.

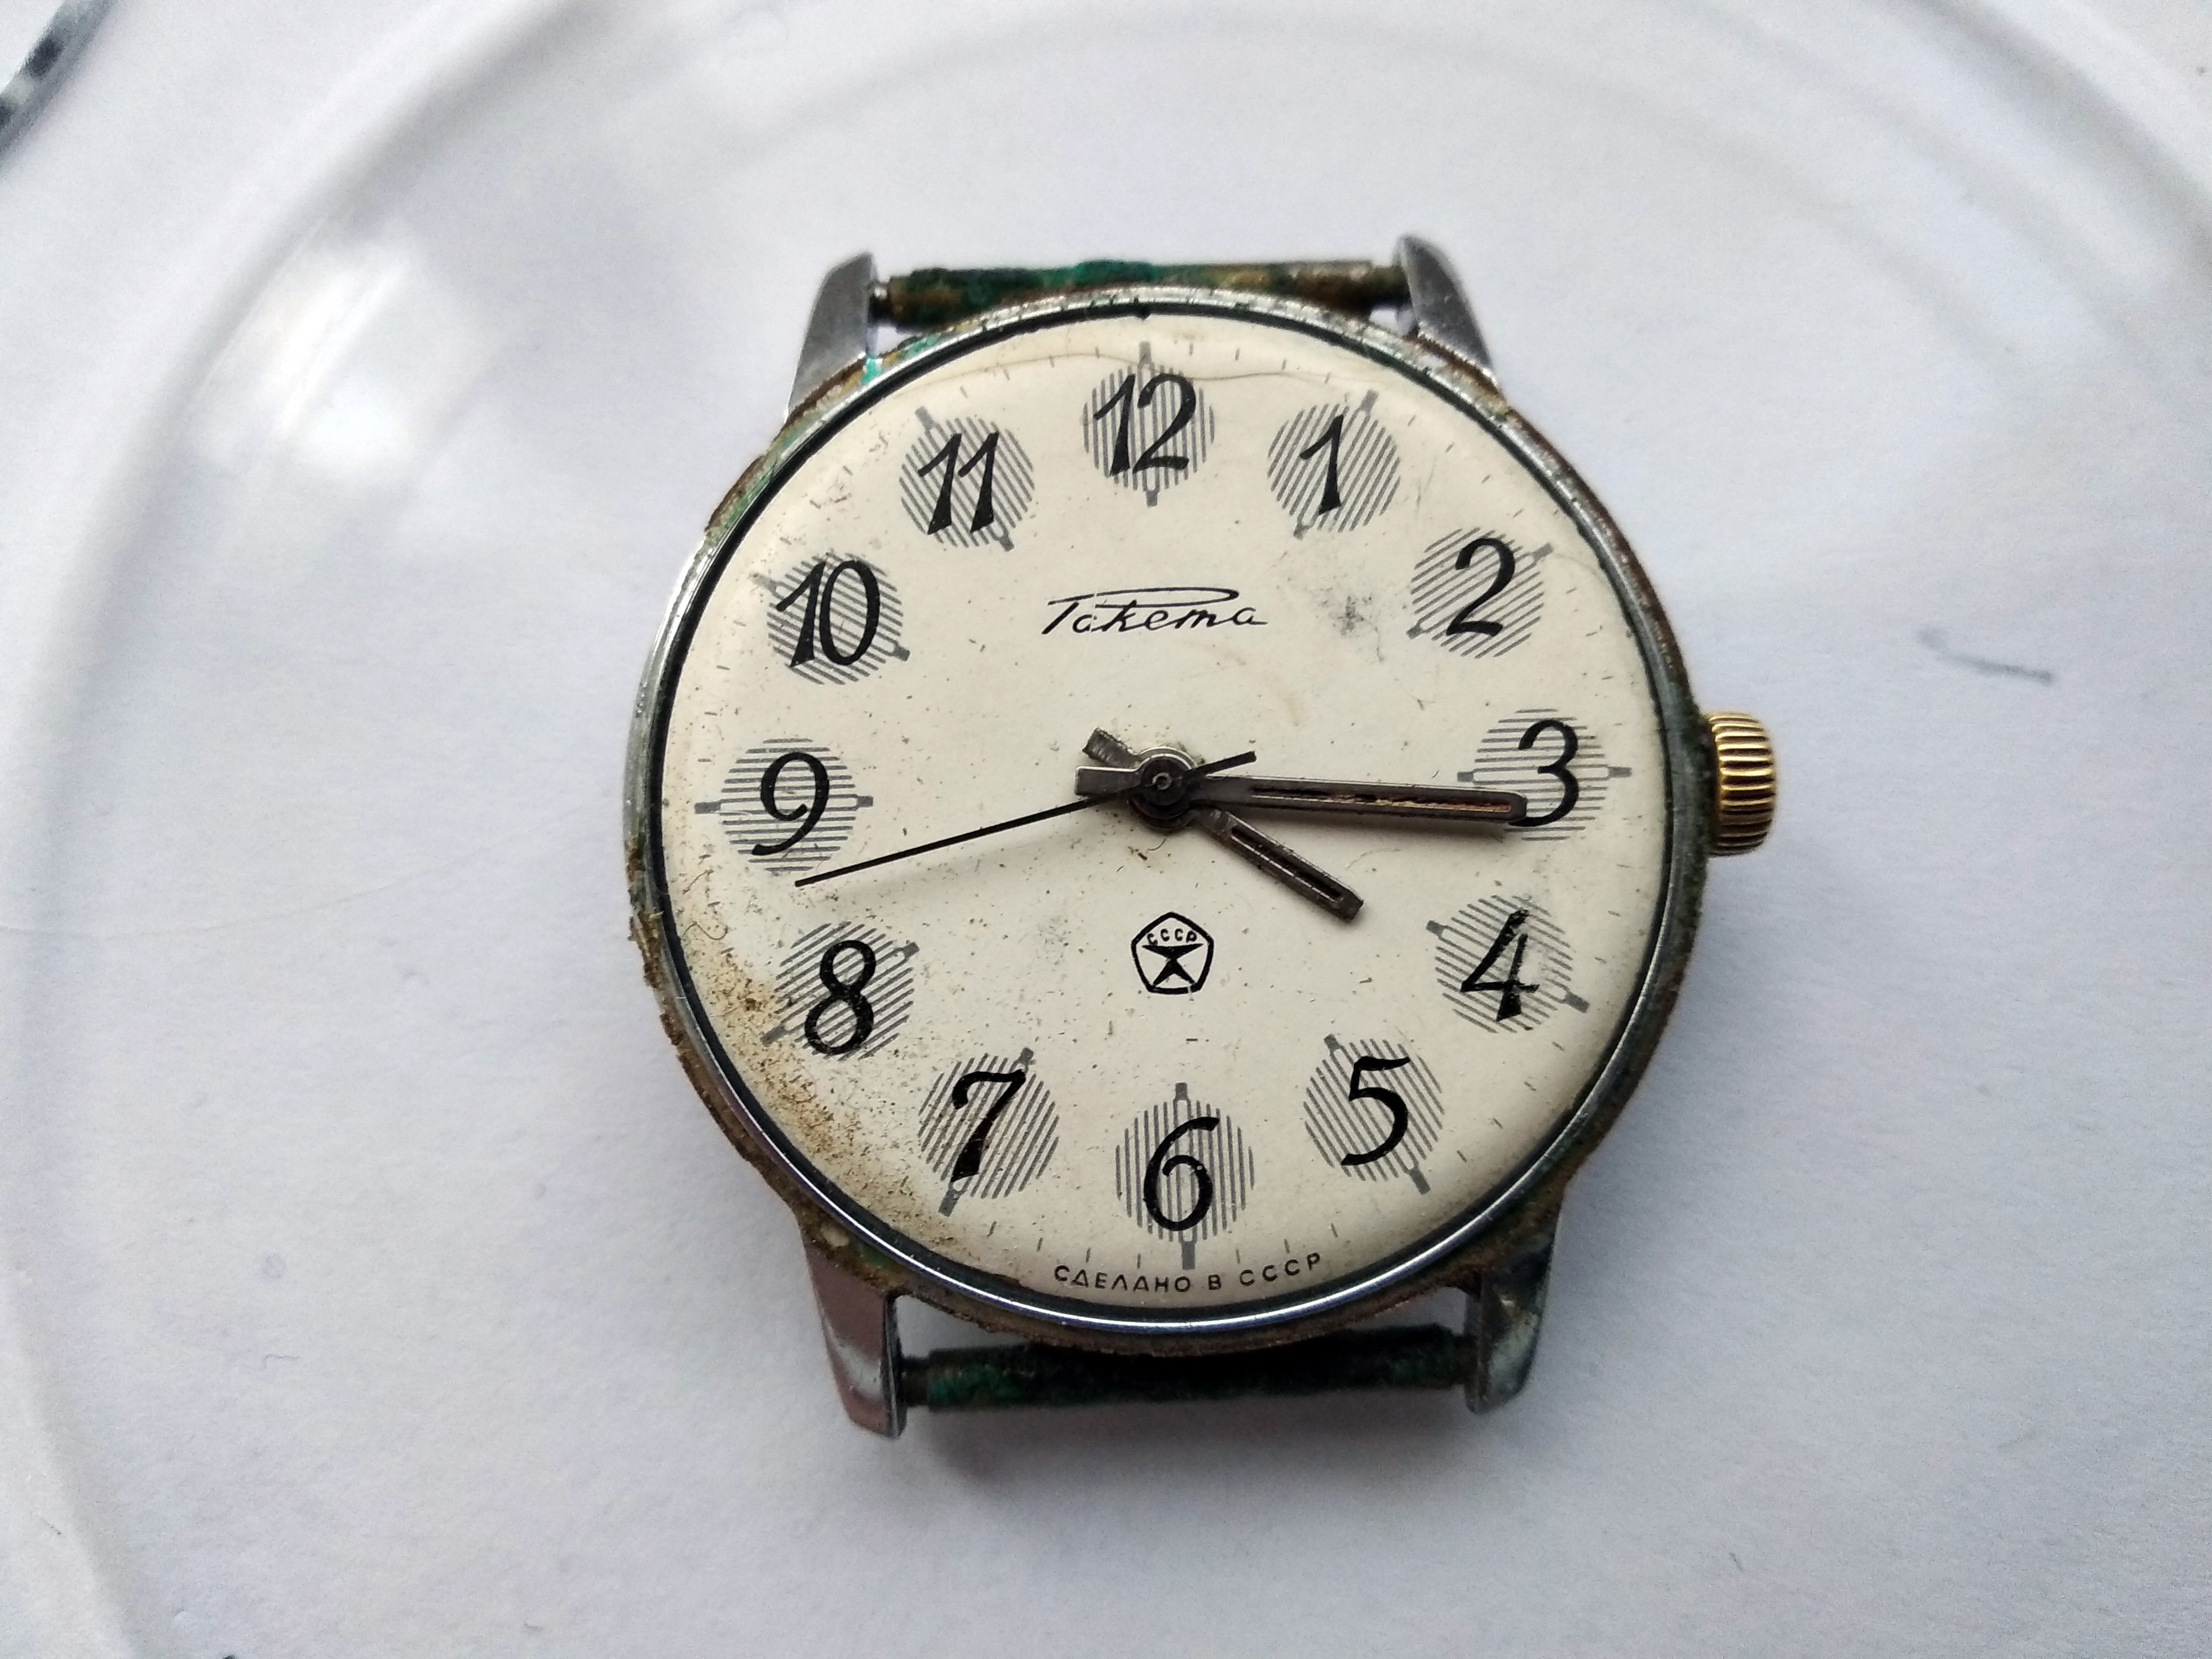
The dial carries the marks of moisture, rust, and dirt, but the finish itself is still in respectable shape. A little care, and its appearance should come back acceptably.

Close view of the matte white Raketa dial showing water staining and spots of rust but an intact coating
Water damage and rust spotting are visible across the dial, yet the matte white coating remains sound — a candidate for cleaning rather than refinishing.

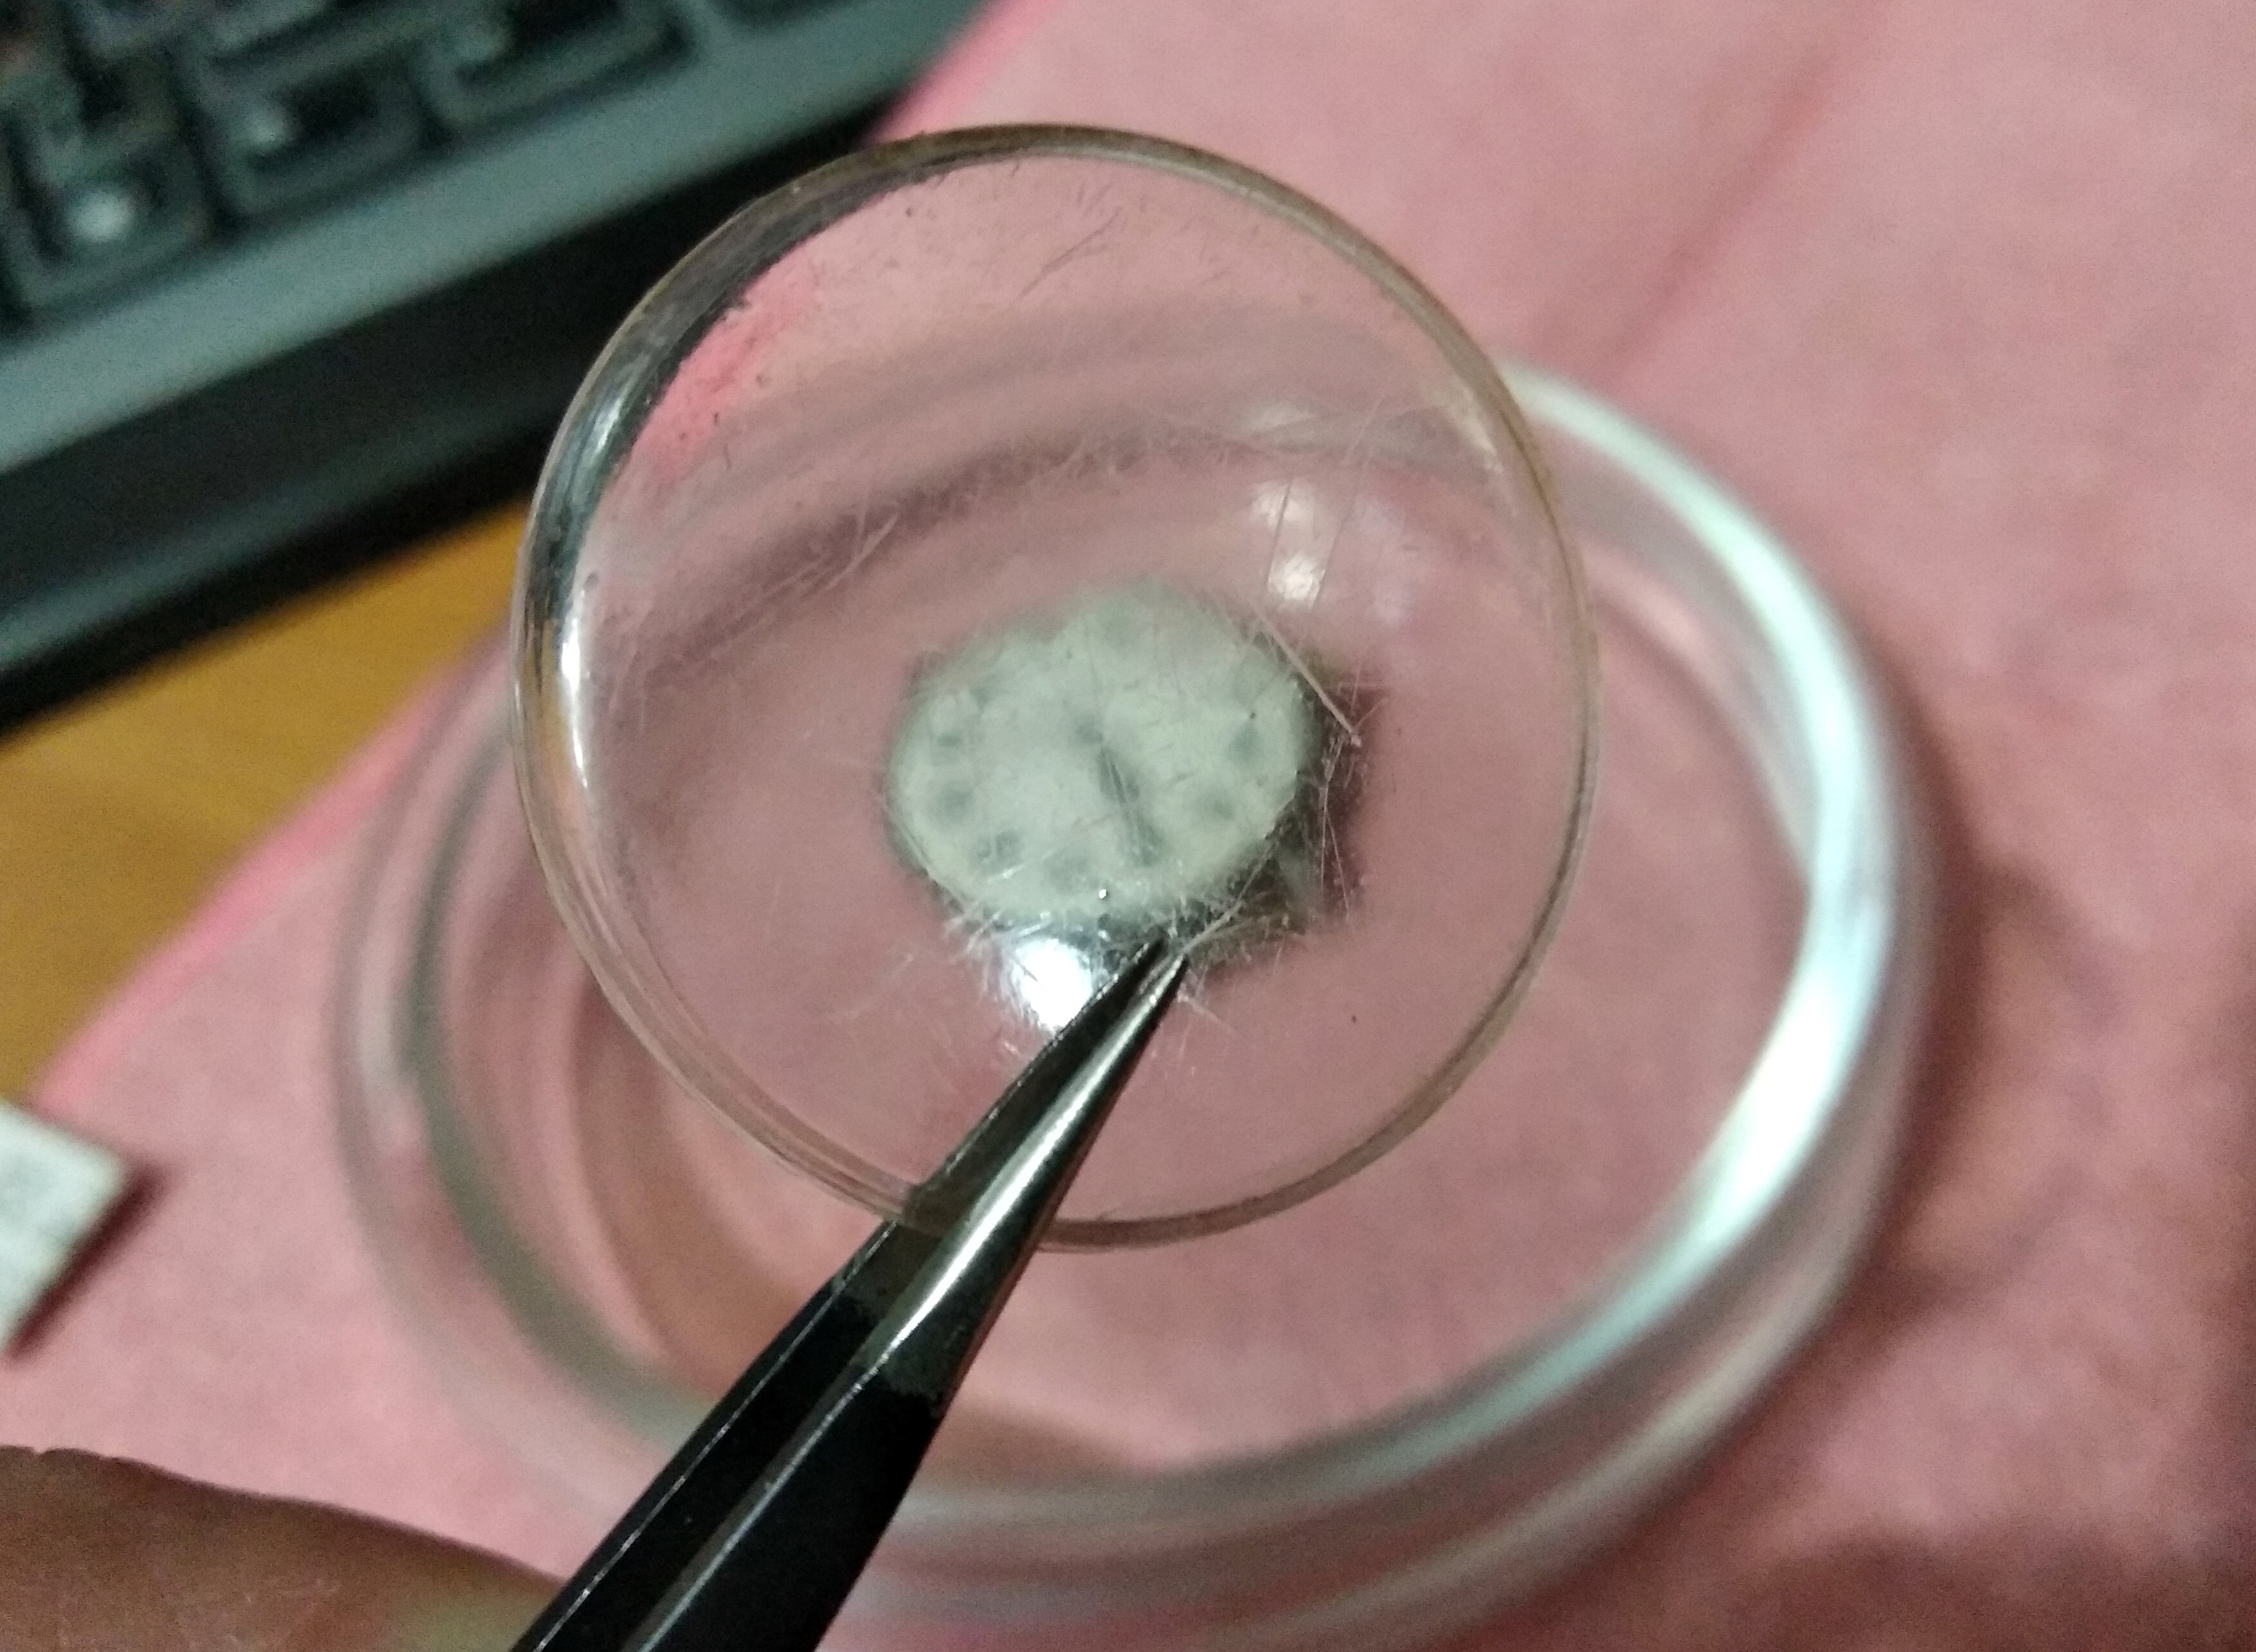
Here is the state of the crystal. It will need grinding and polishing; we can hope for a good result.

Scratched and clouded acrylic crystal removed from the watch, awaiting polishing
The acrylic crystal is heavily scuffed. Acrylic responds well to progressive abrasives and polish, so a transparent result was realistic without replacement.

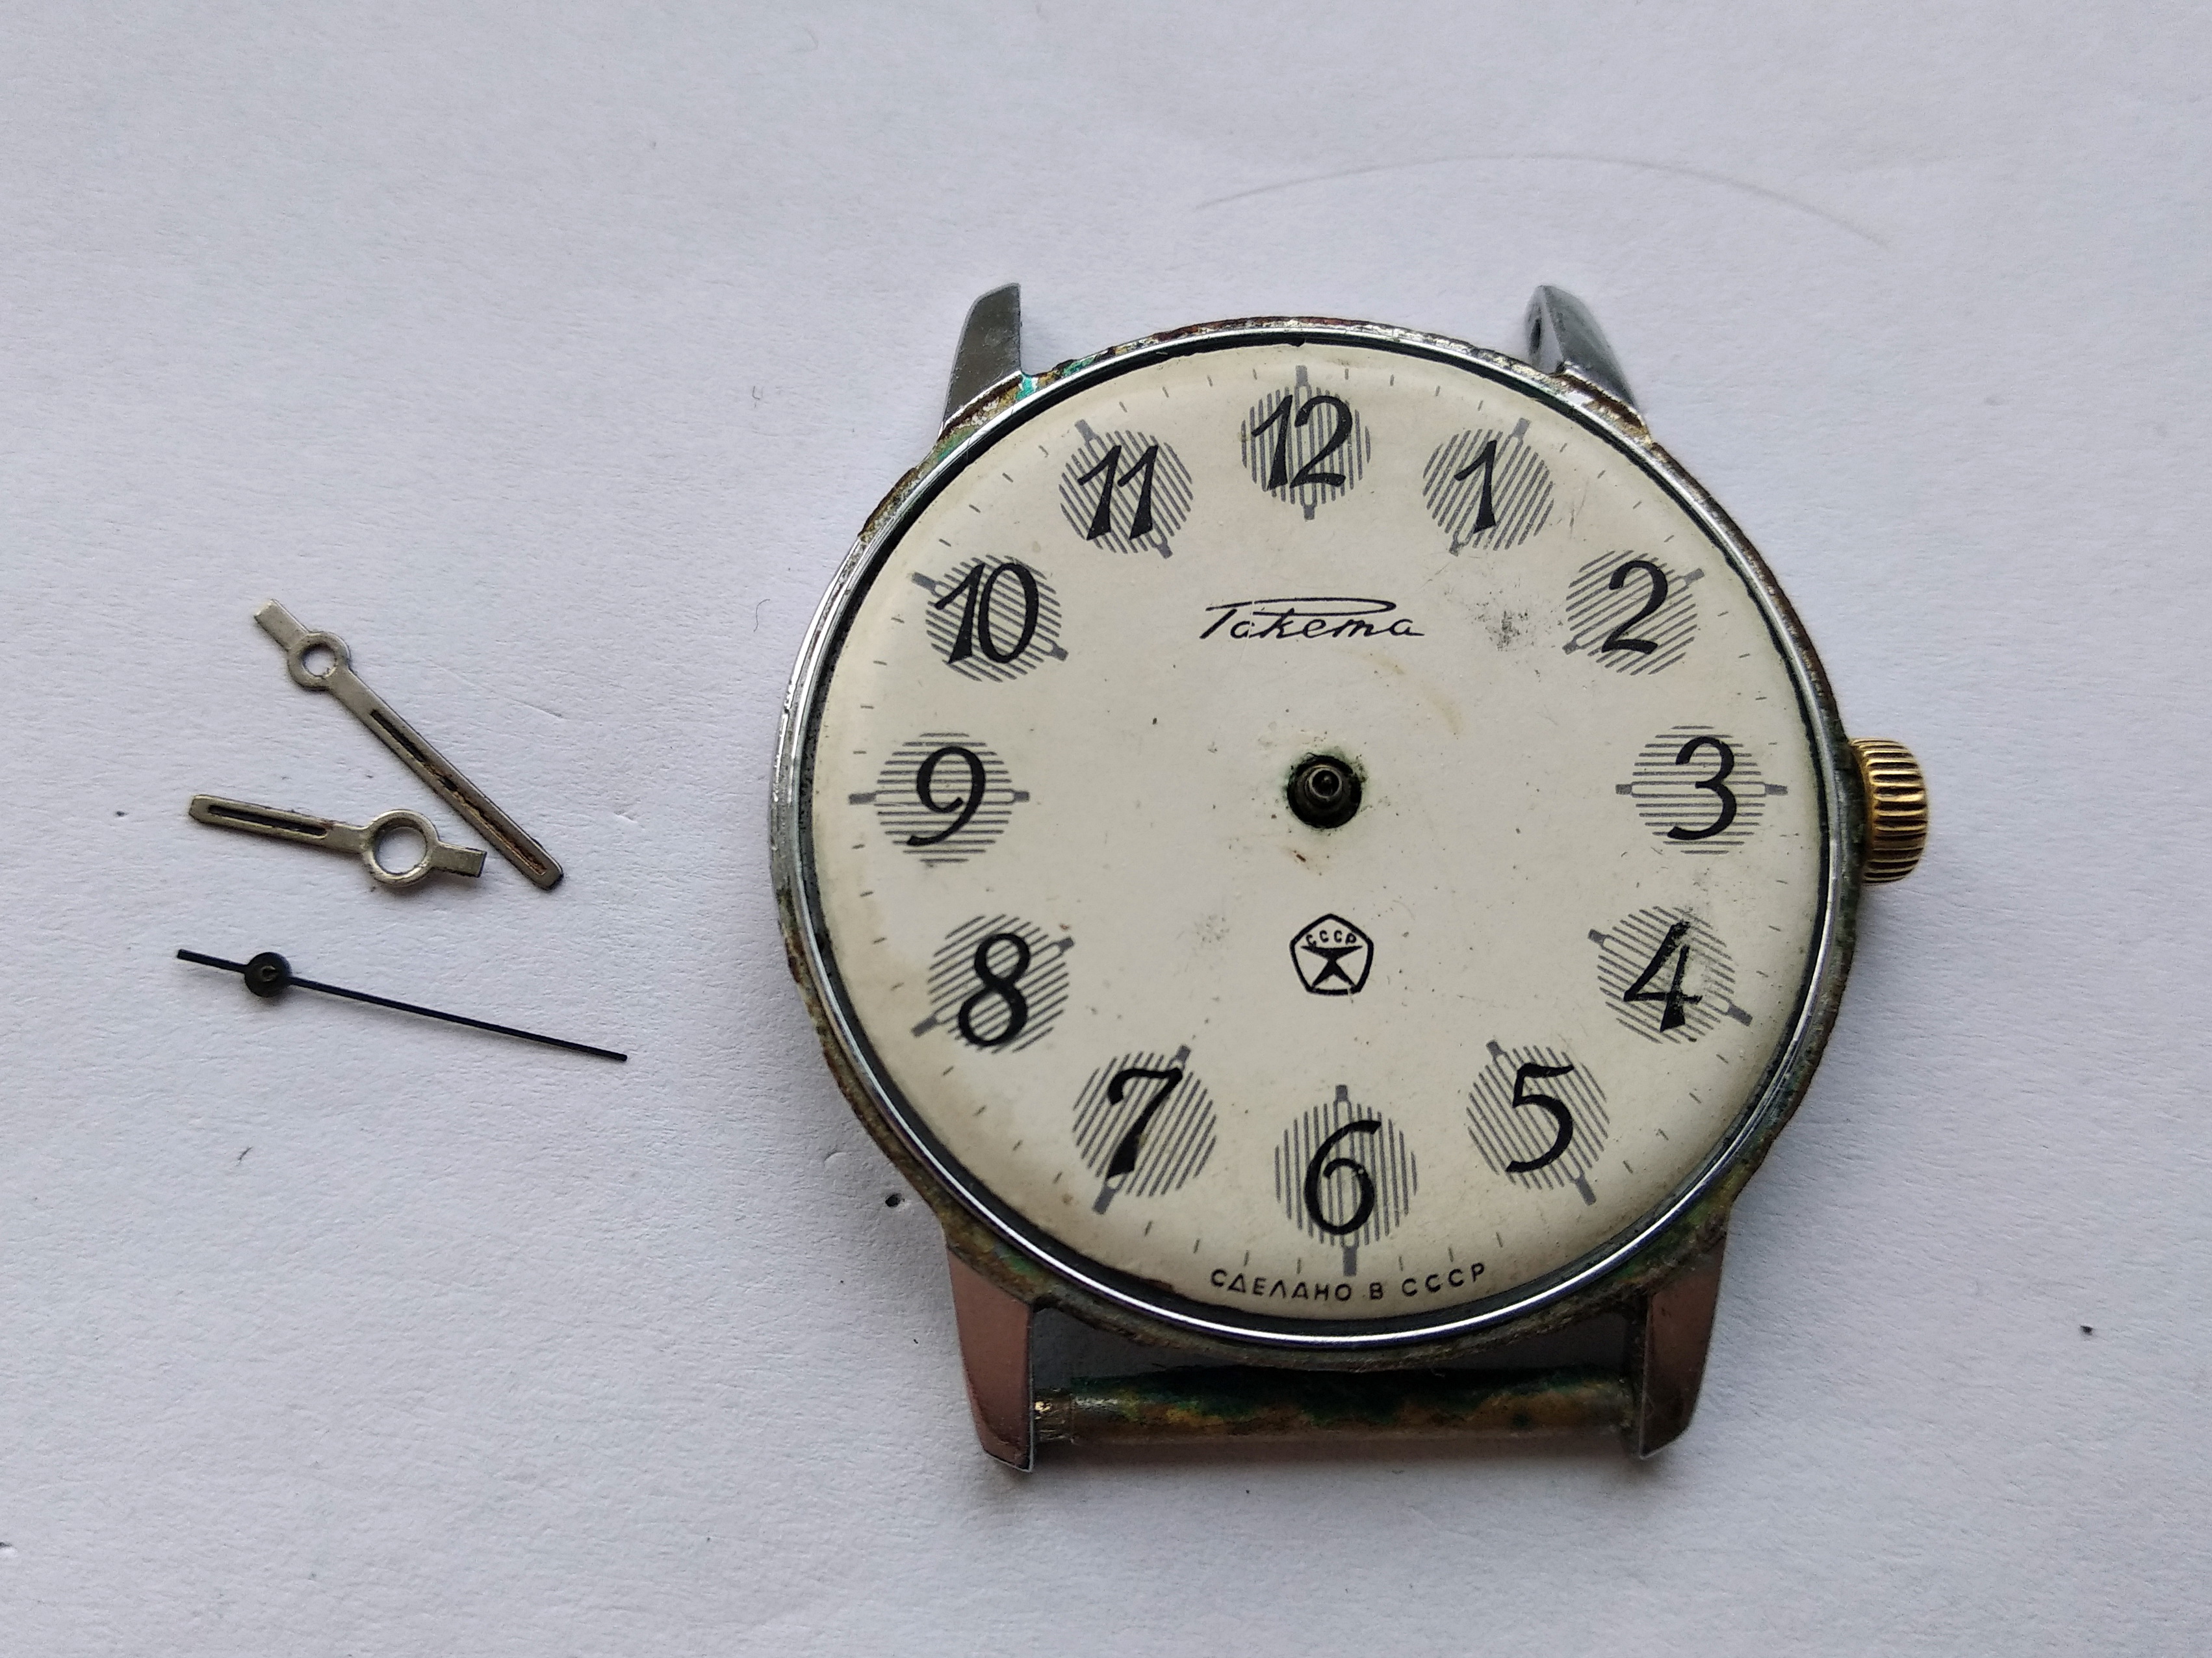
Now we lift the hands and brush the loose grime off the dial so it cannot cause further harm during the work that follows.

Dial and hands still fitted, dusted with loose dirt before the hands are pulled
Before any pulling, the surface debris is whisked away with a soft brush so that grit cannot be dragged across the dial during hand removal.

The hands come off like this: cover the dial with a sheet of film so it cannot be scratched, then pry the hands up through the film with a lever. There — reasonably clean. The hands themselves clearly need attention too: strip the paint, remove the rust, scrape gently with wood, and immerse them in orthophosphoric acid for a final de-rusting. Afterwards, a light pass with the rotary tool, a polish, and fresh lacquer.

Hands being levered off through a protective film laid over the dial to prevent scratches
A protective film shields the dial while the presser levers the hands free. The rusted, repainted hands were earmarked for a full clean-up: acid de-rusting, light rotary work, polishing, and re-lacquering.

Releasing the Power and Freeing the Movement

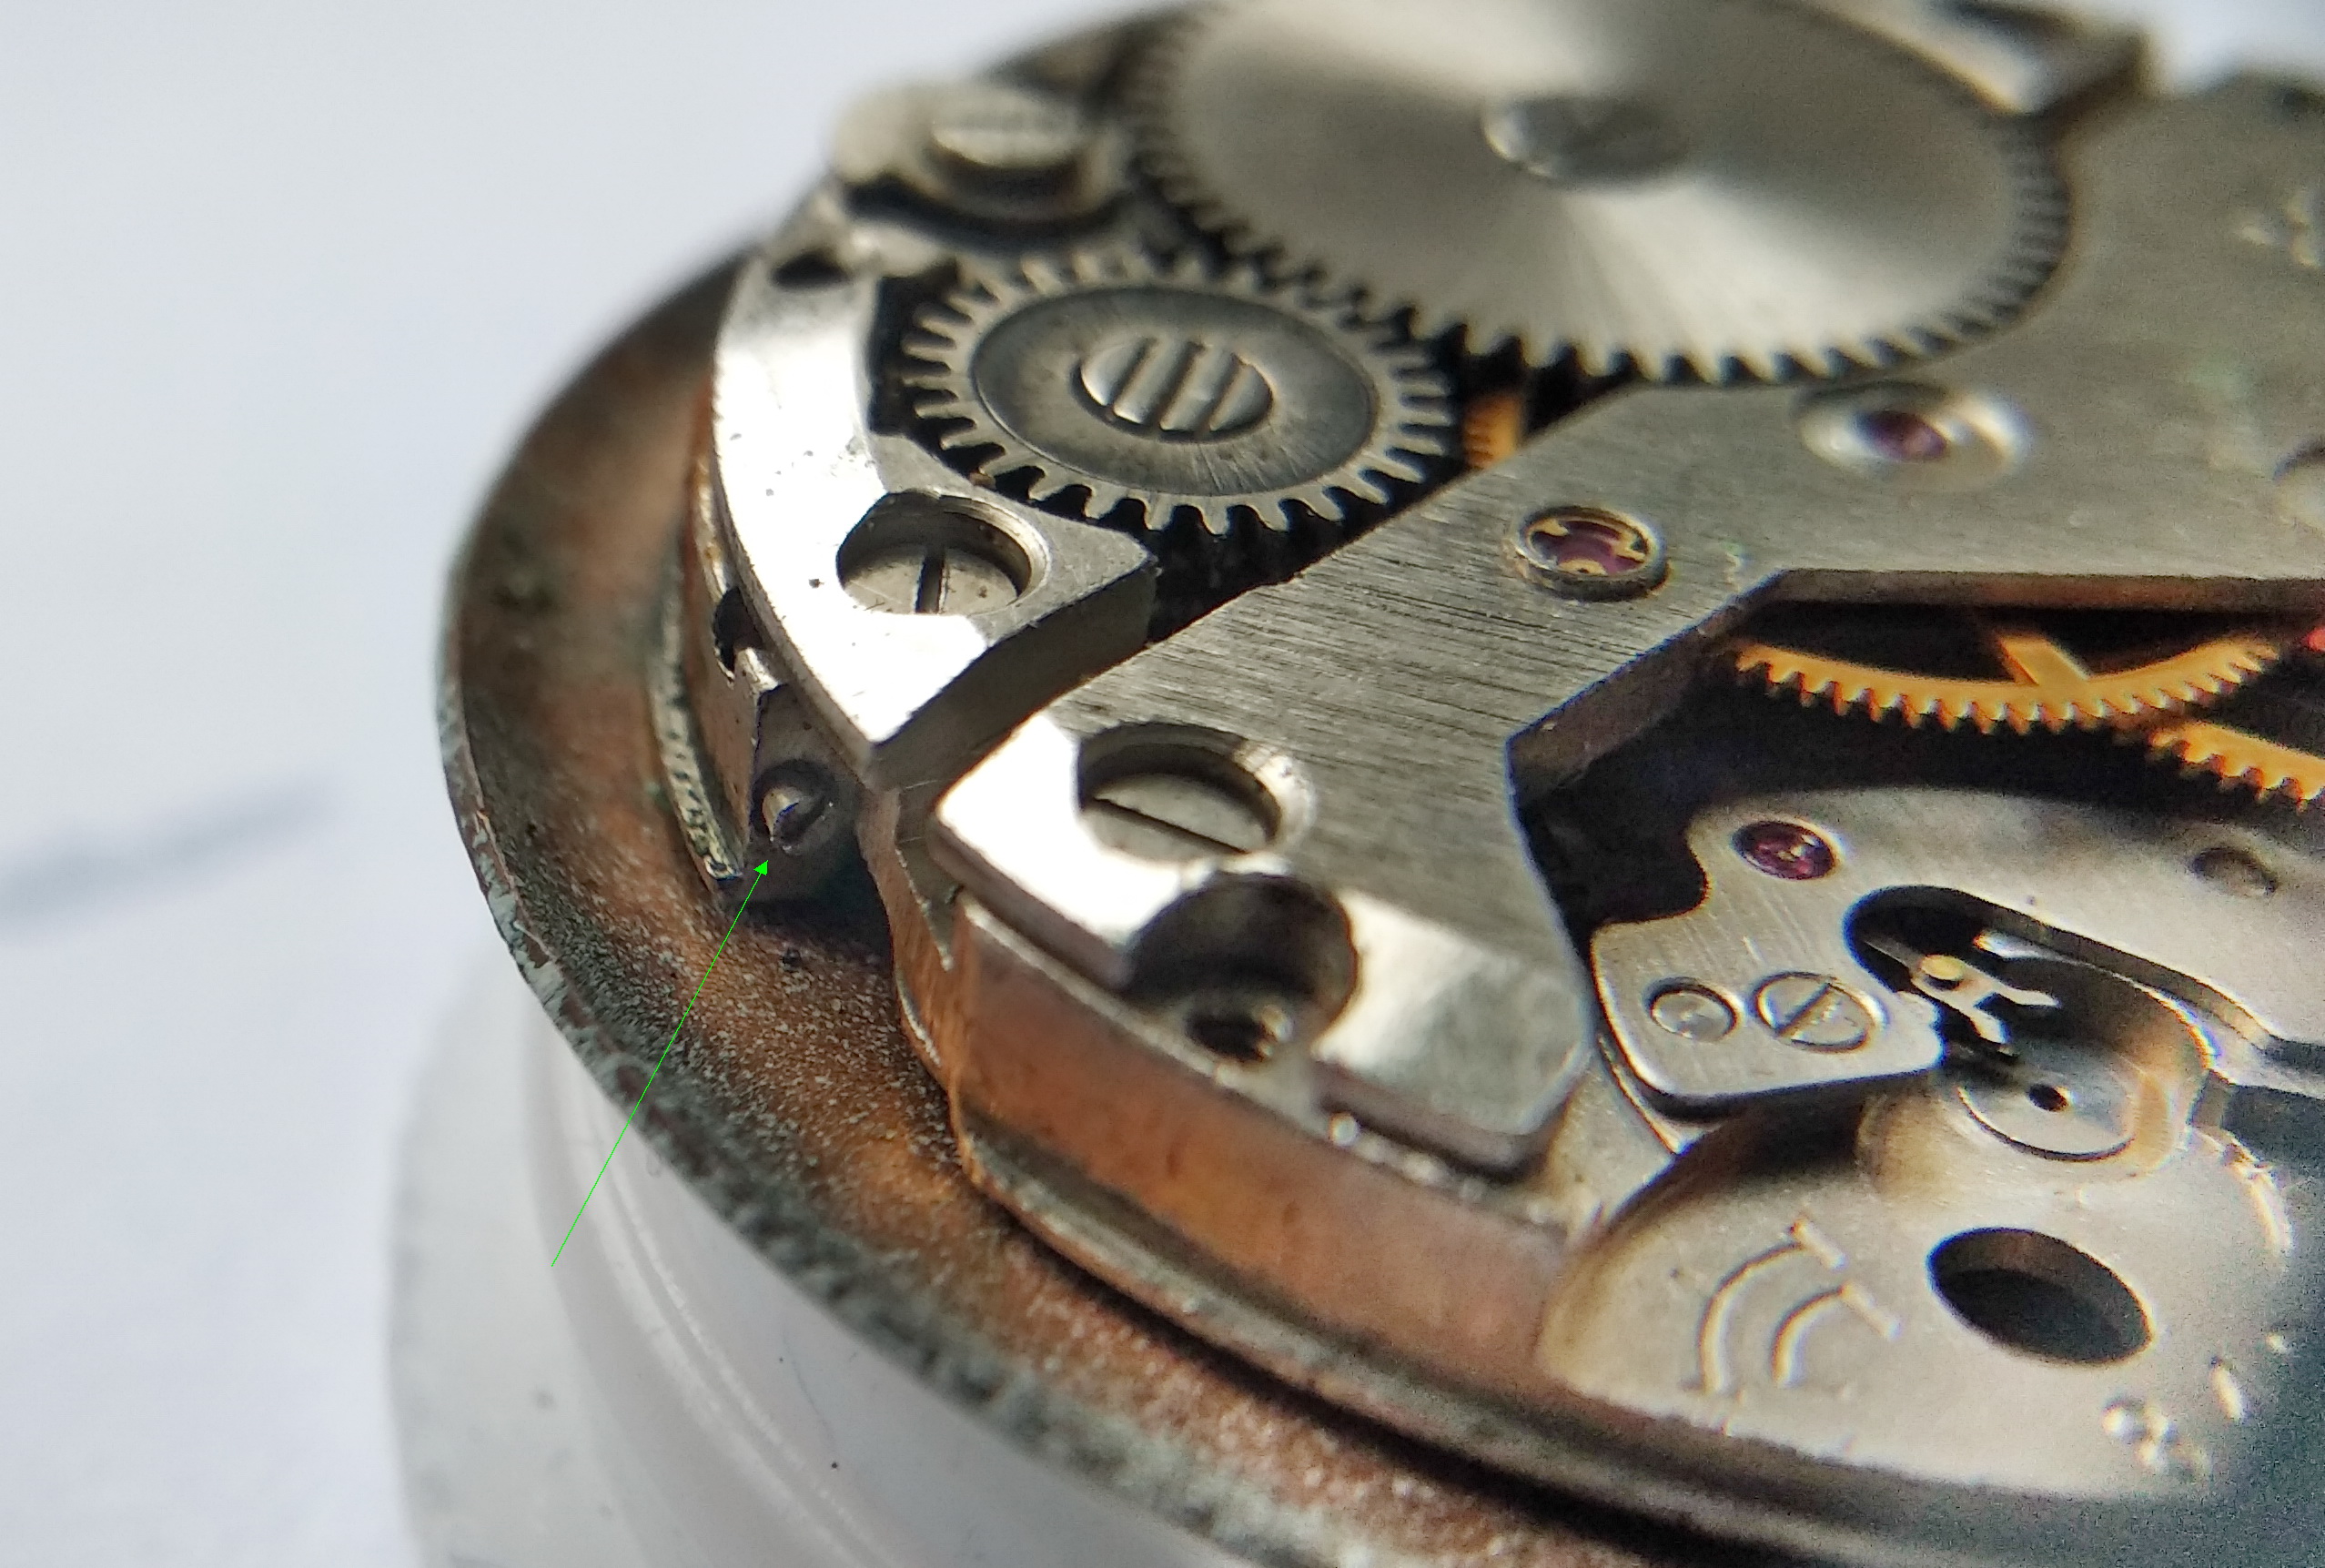
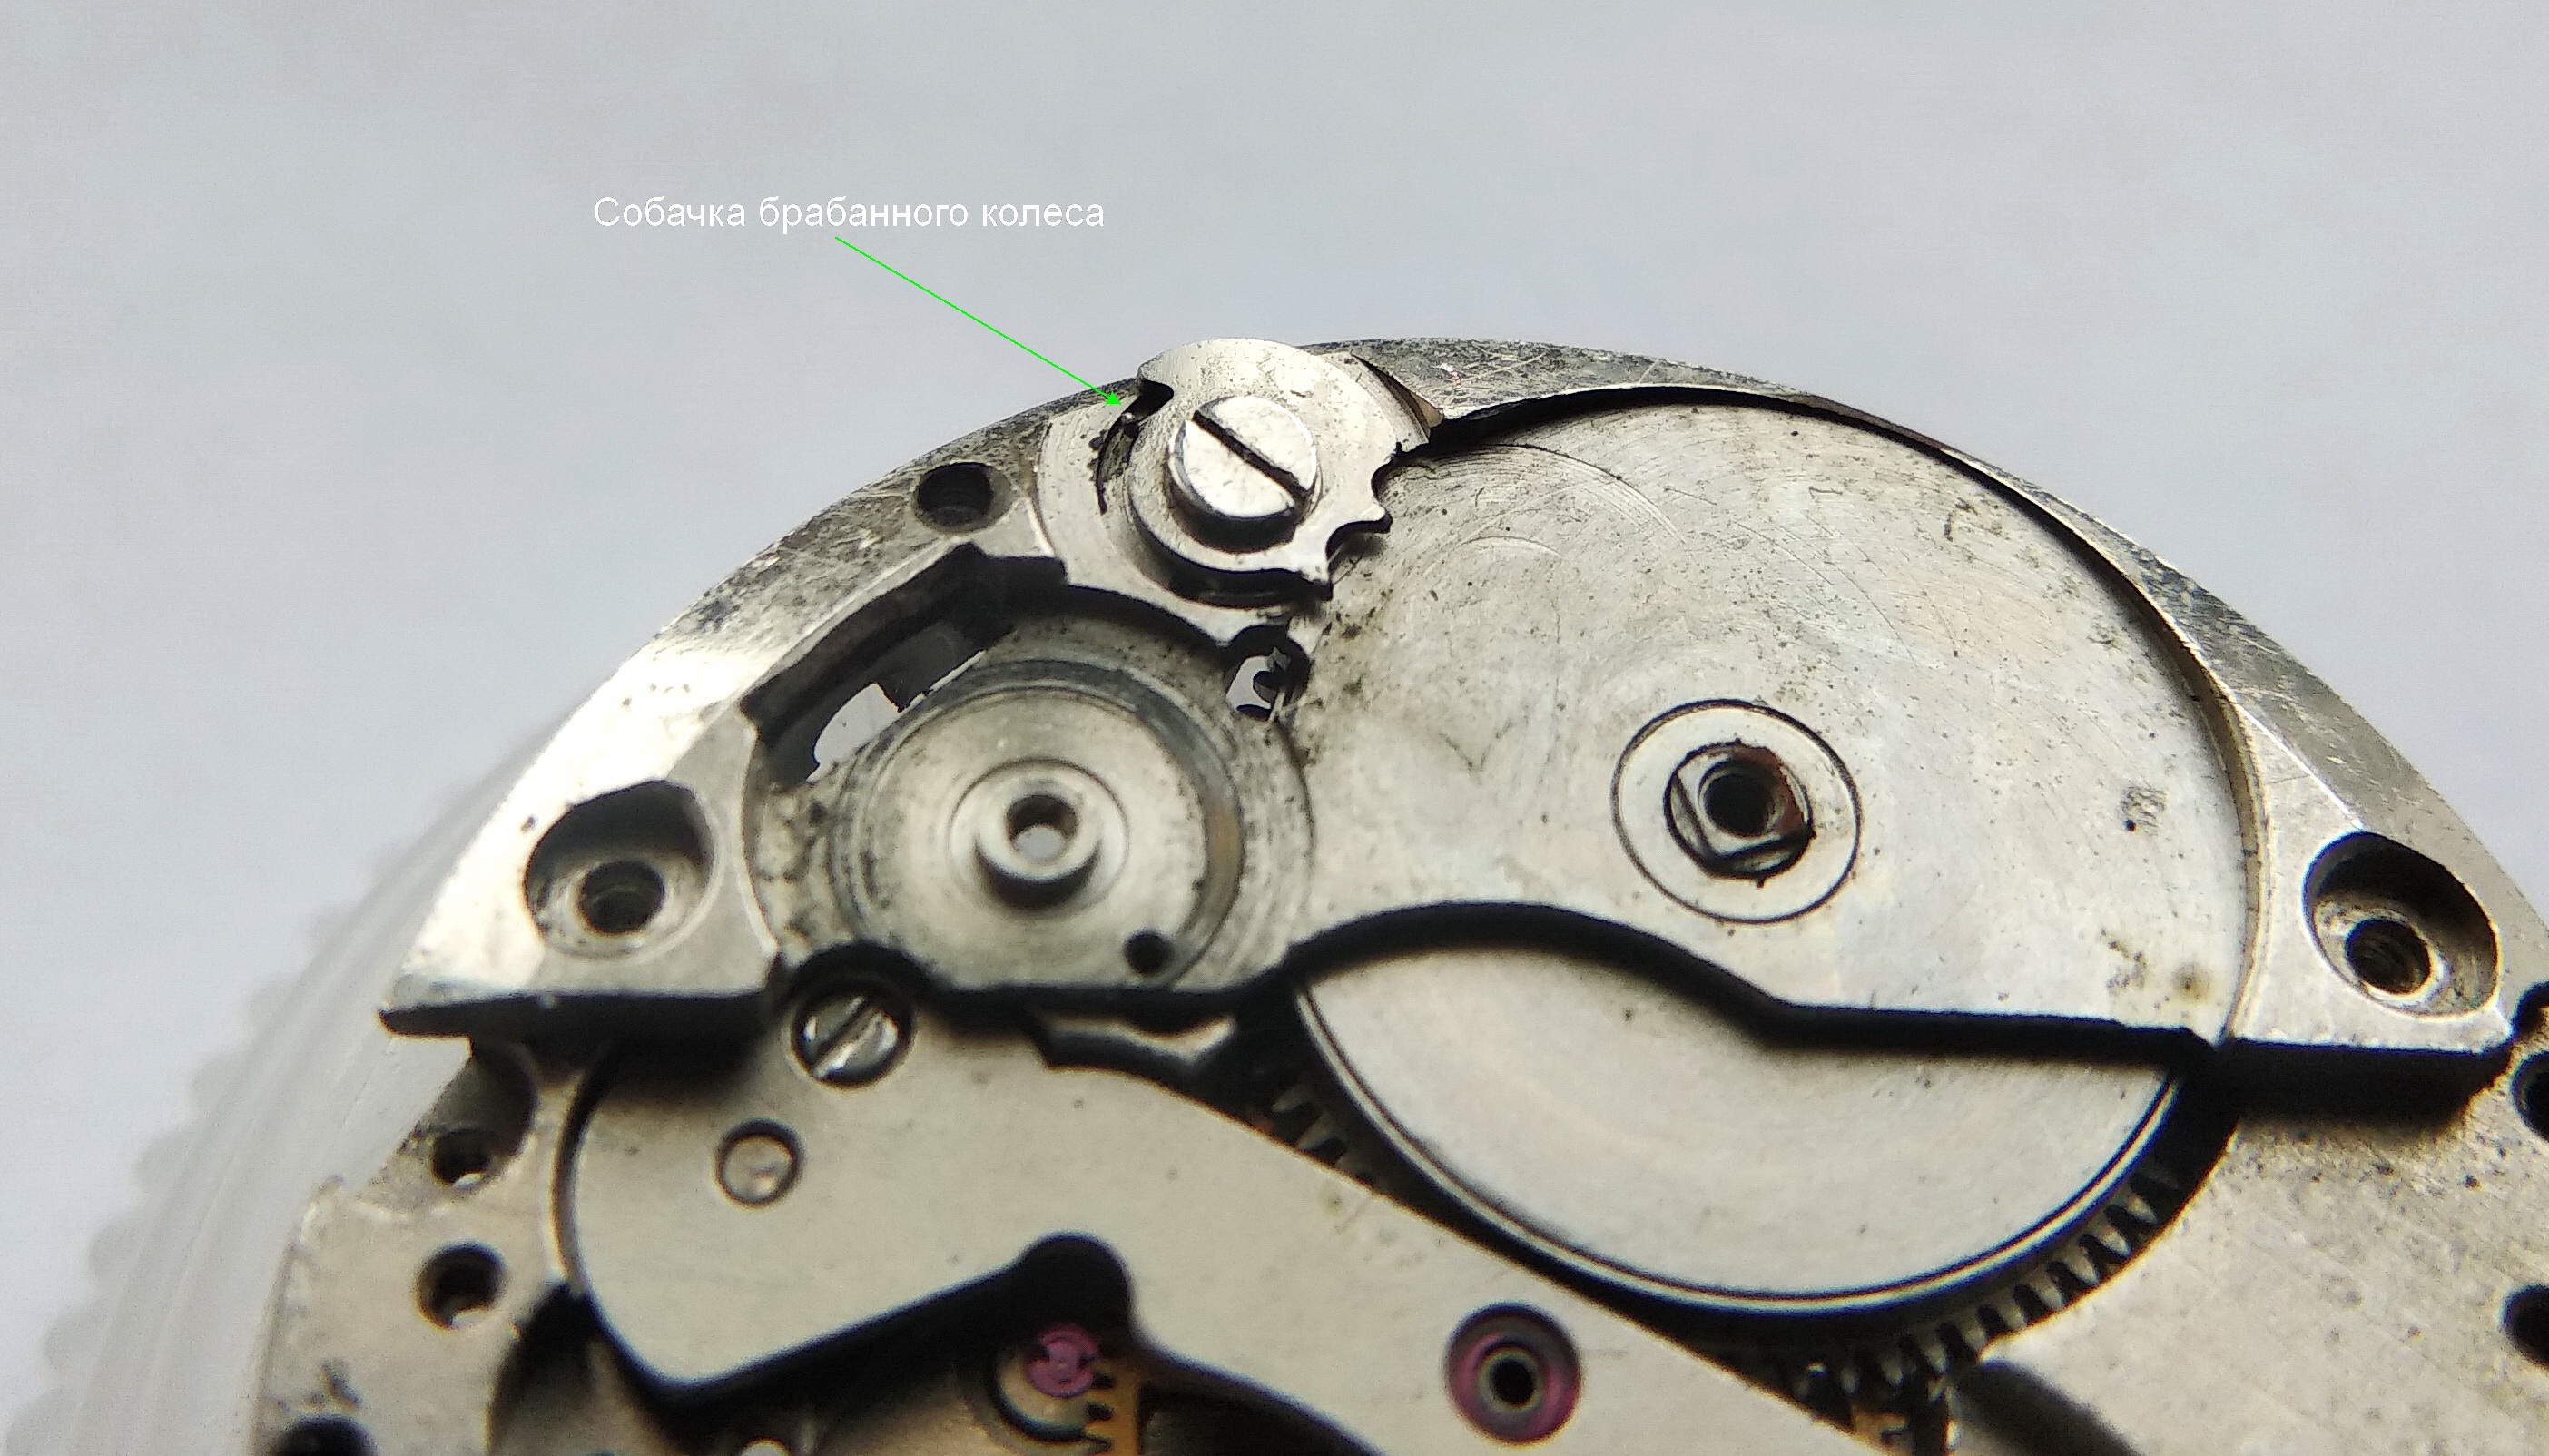
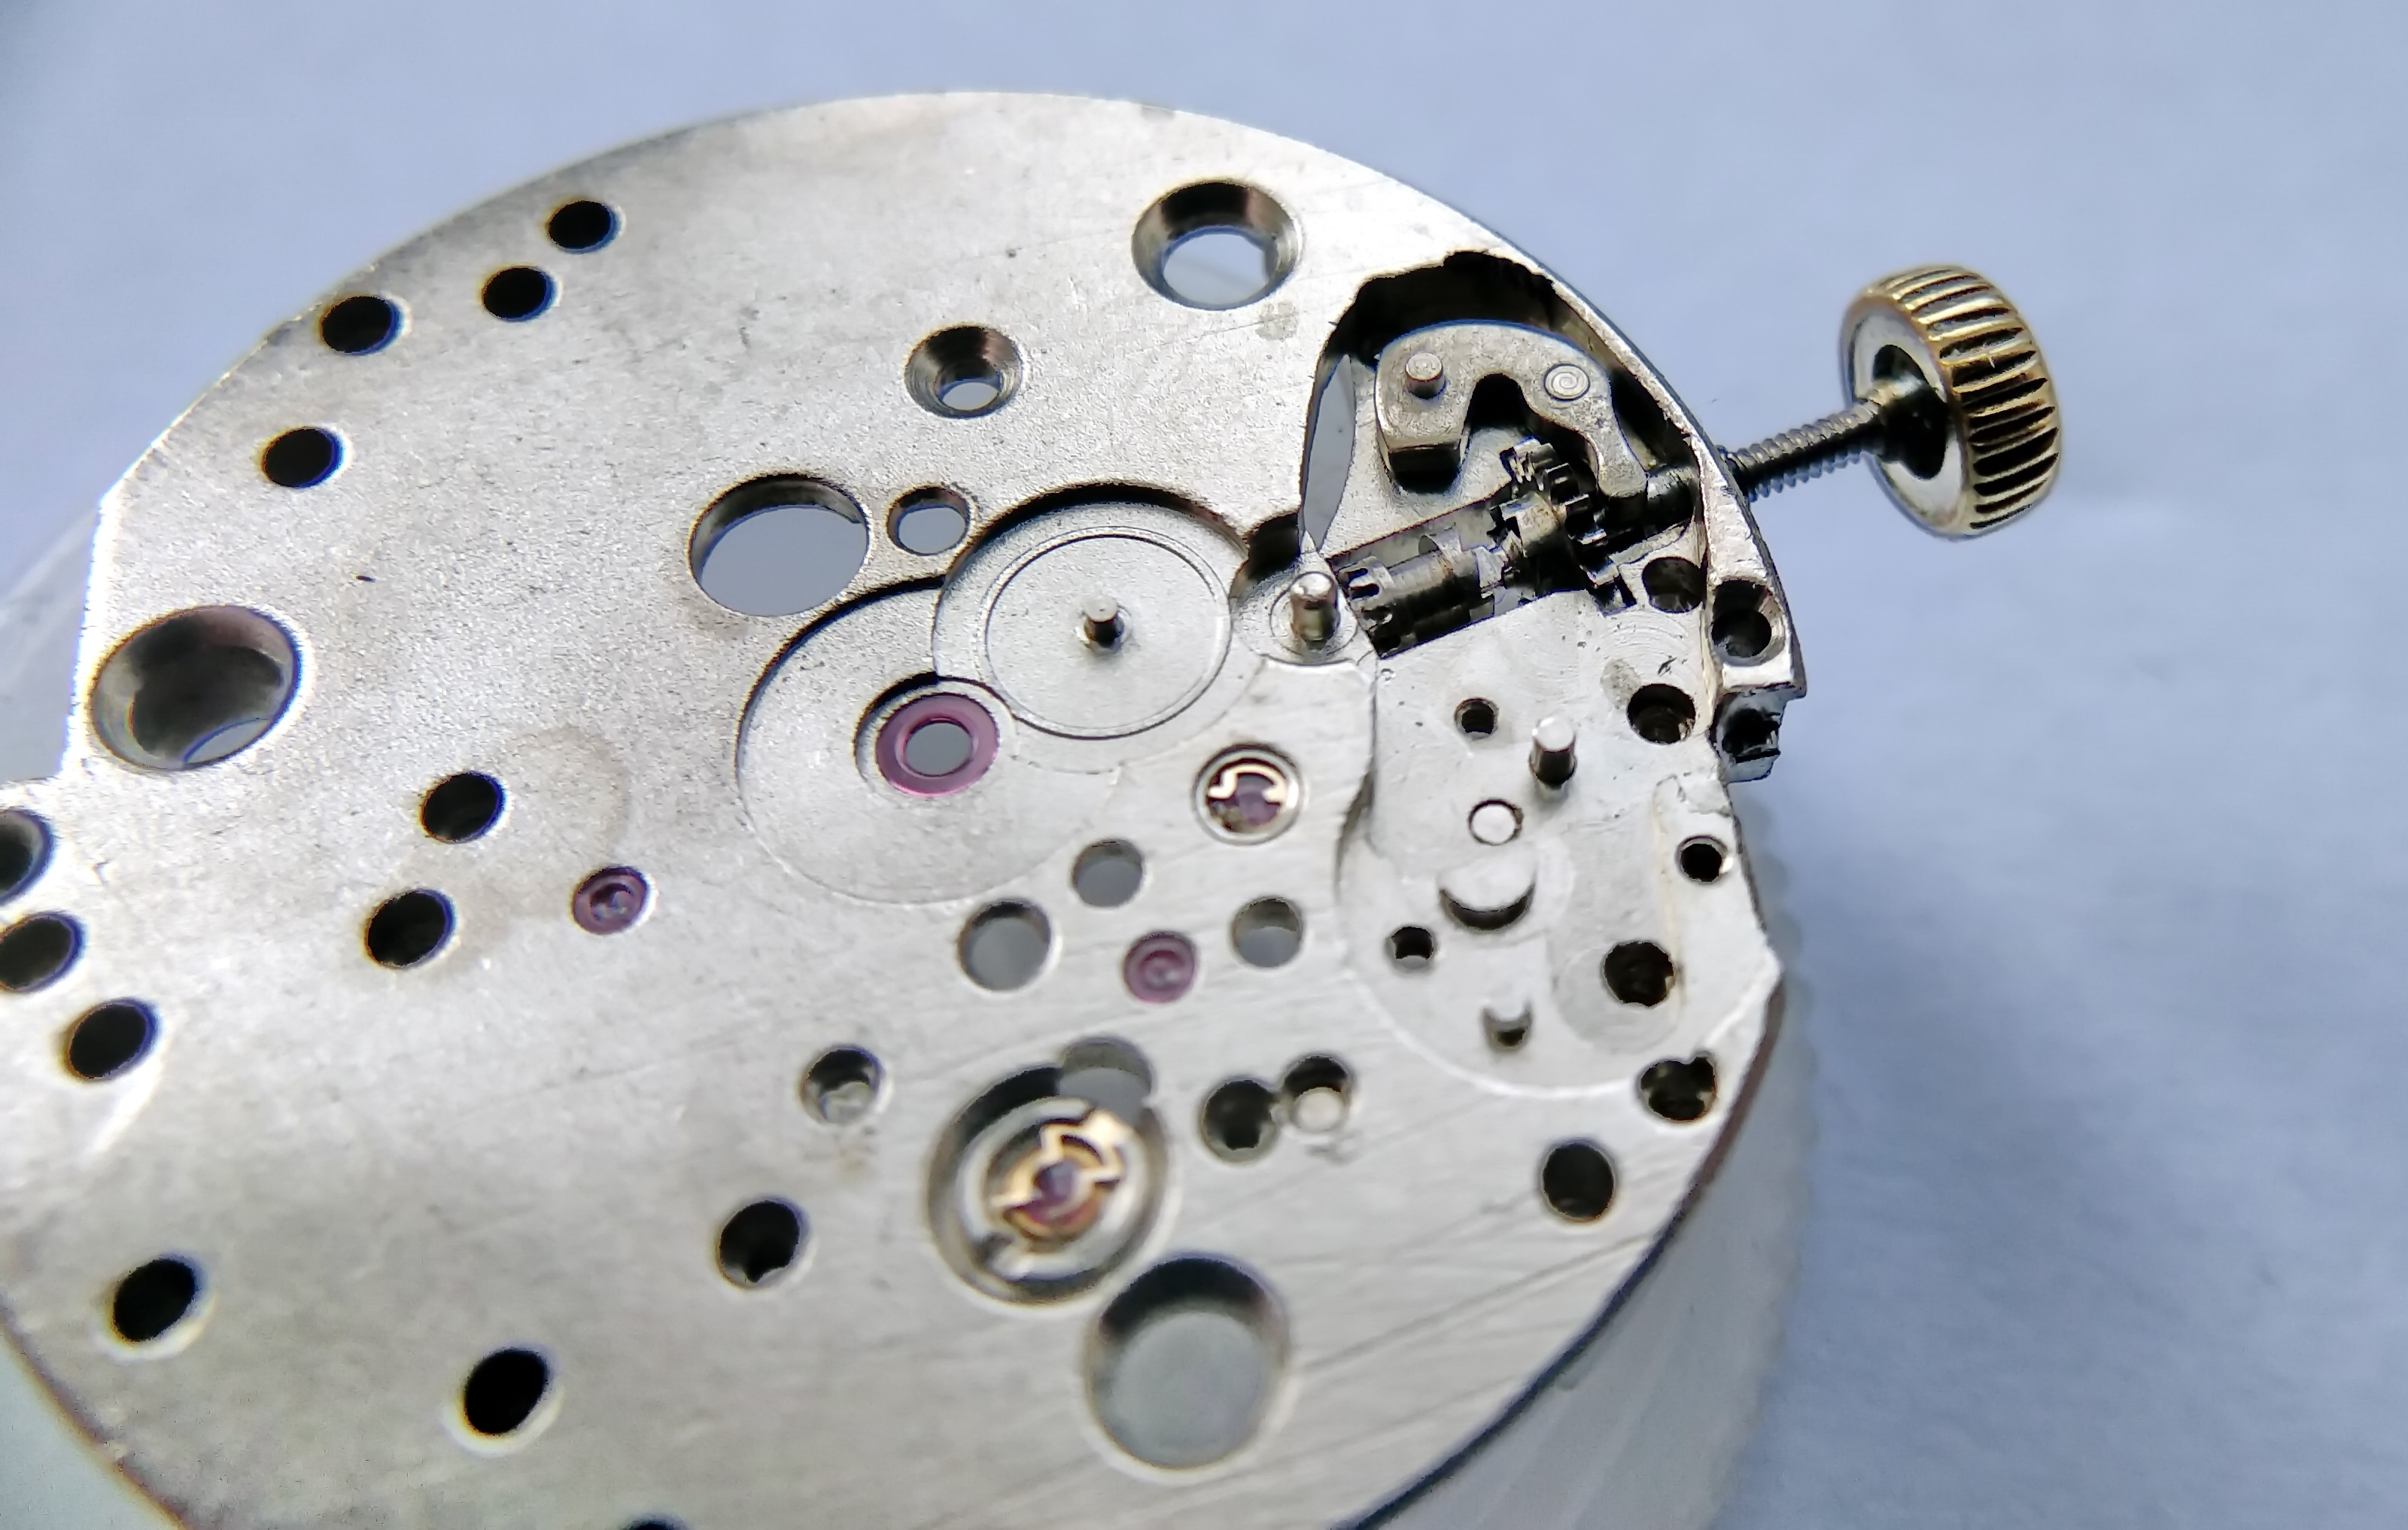
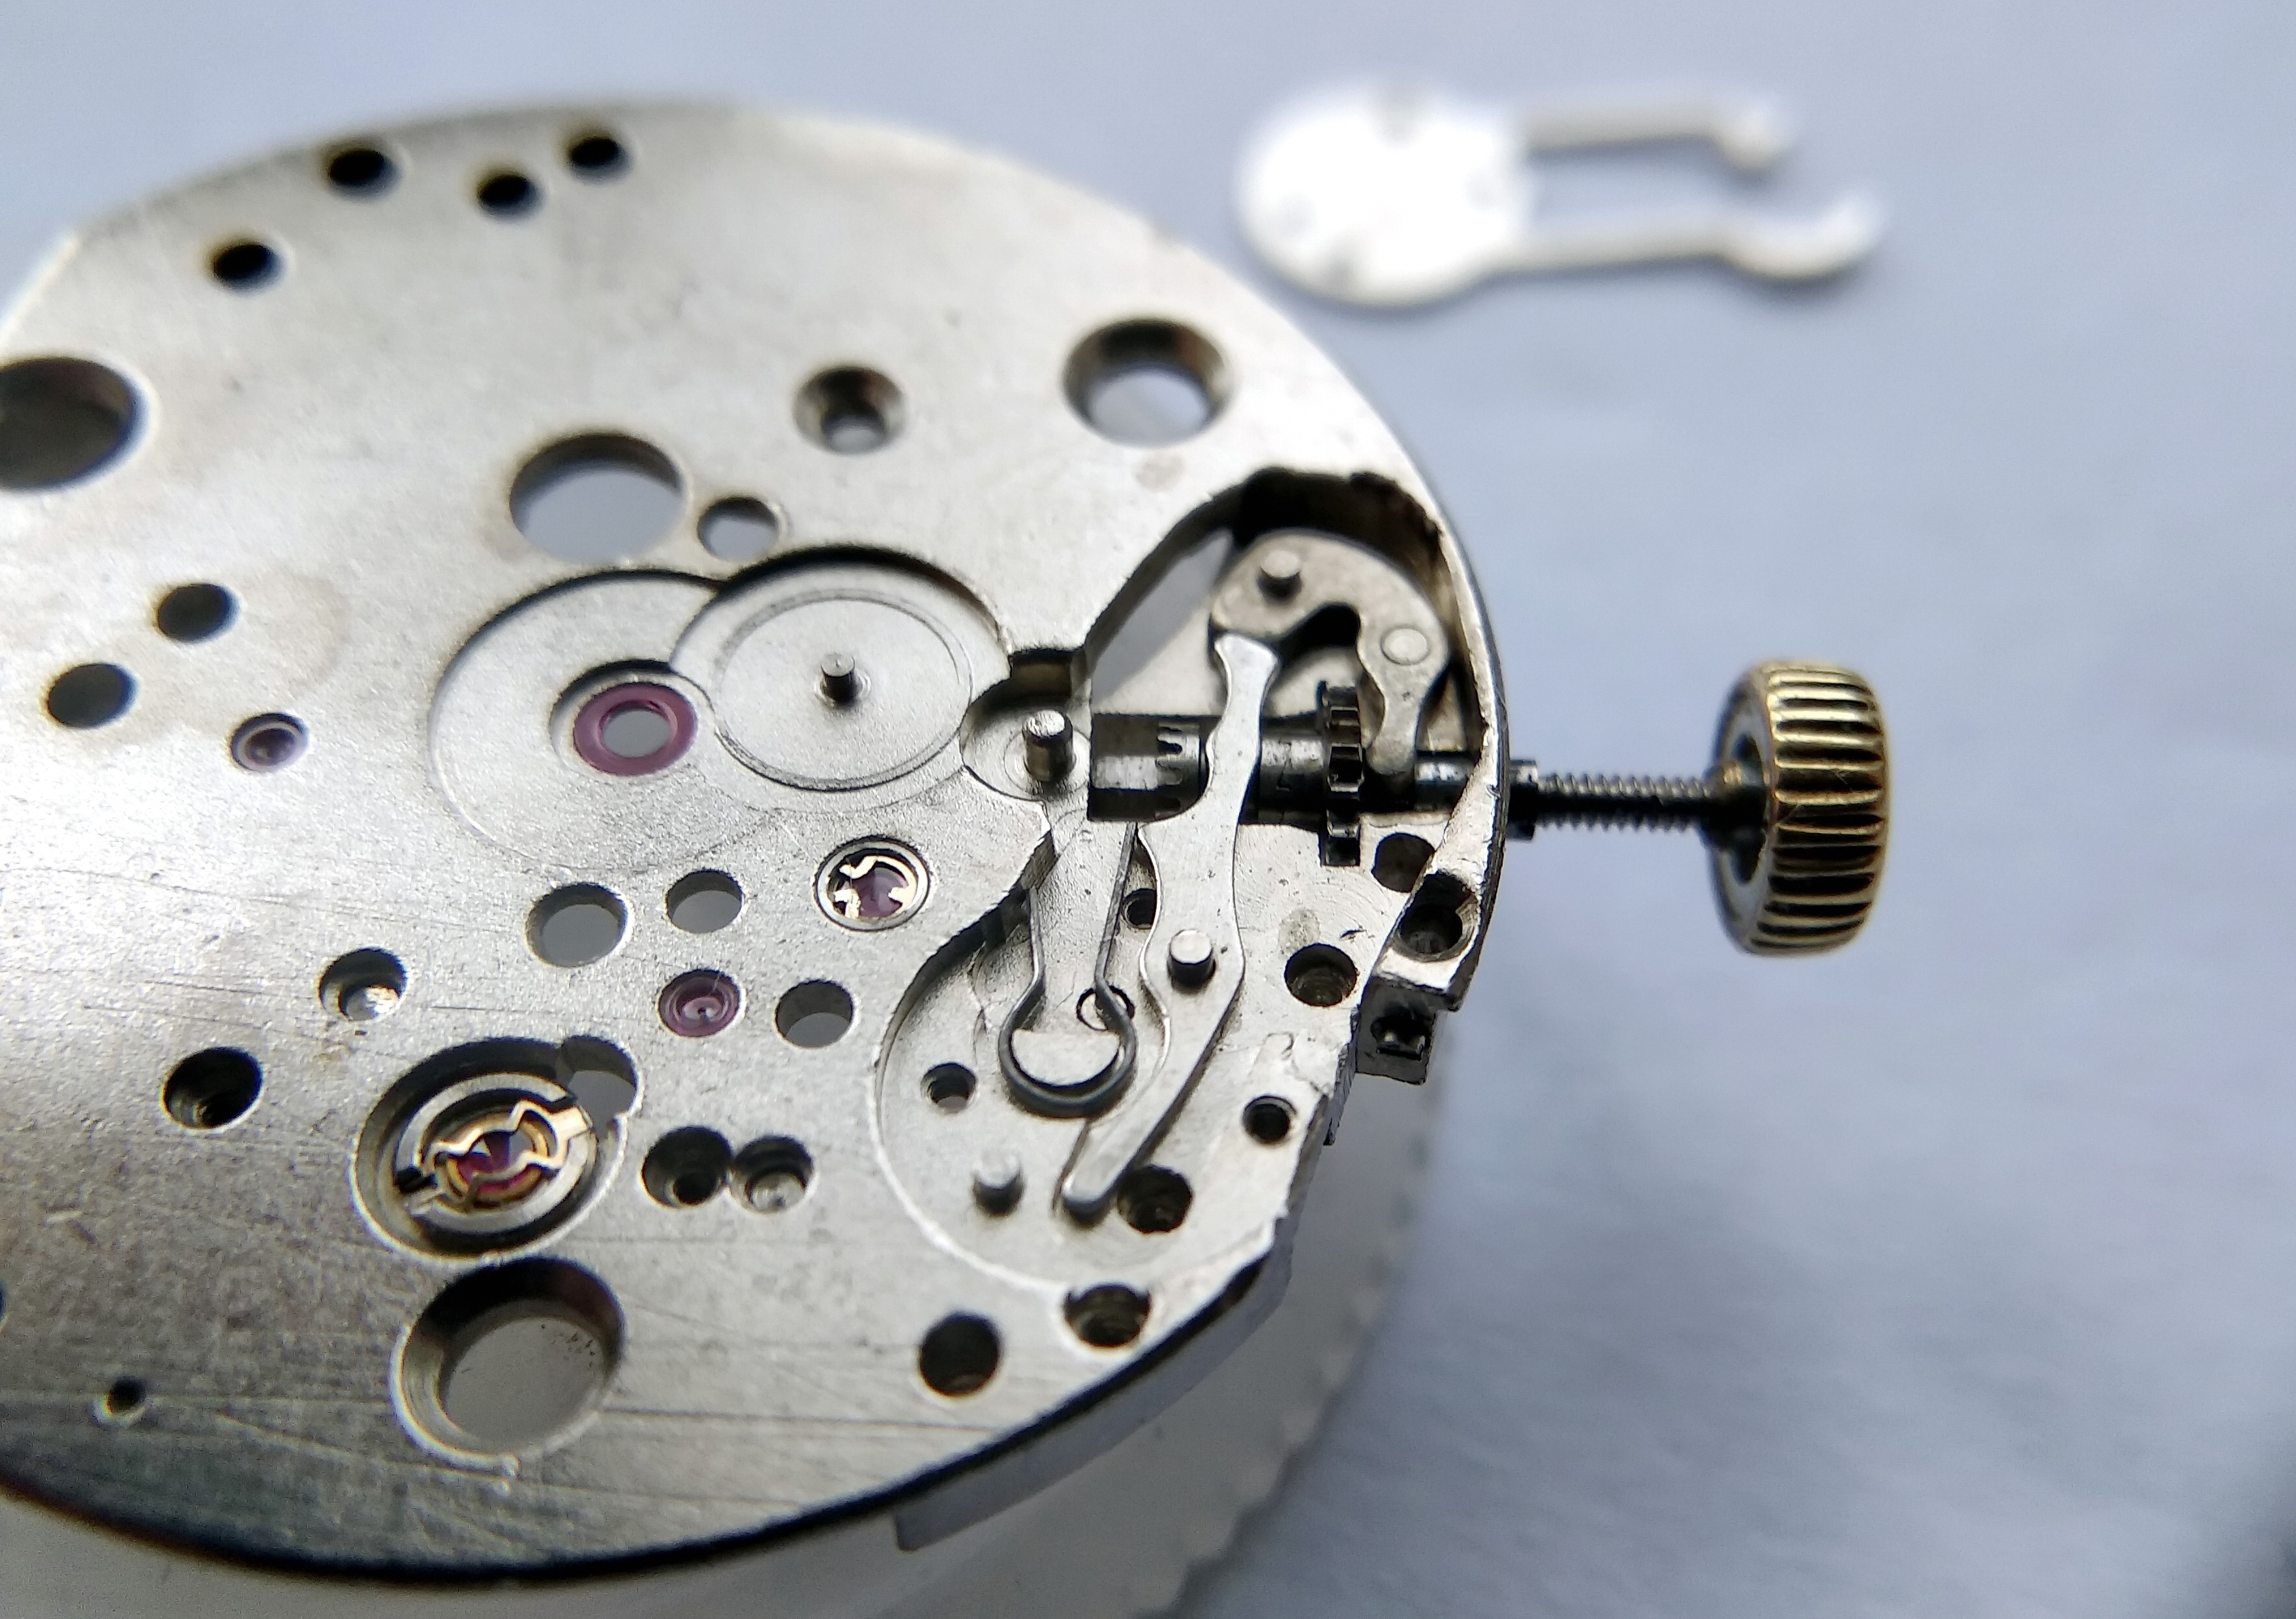
And now — the movement. First we let down the mainspring. You already know about the magic little keyless-release button, of course; just in case, the green arrow points straight at it. We press it…

Movement with a green arrow marking the keyless-works release button pressed to free the stem
With the mainspring let down, the stem-release detent — marked here by a green arrow — is depressed. This press-button release is one of the design's quiet conveniences.

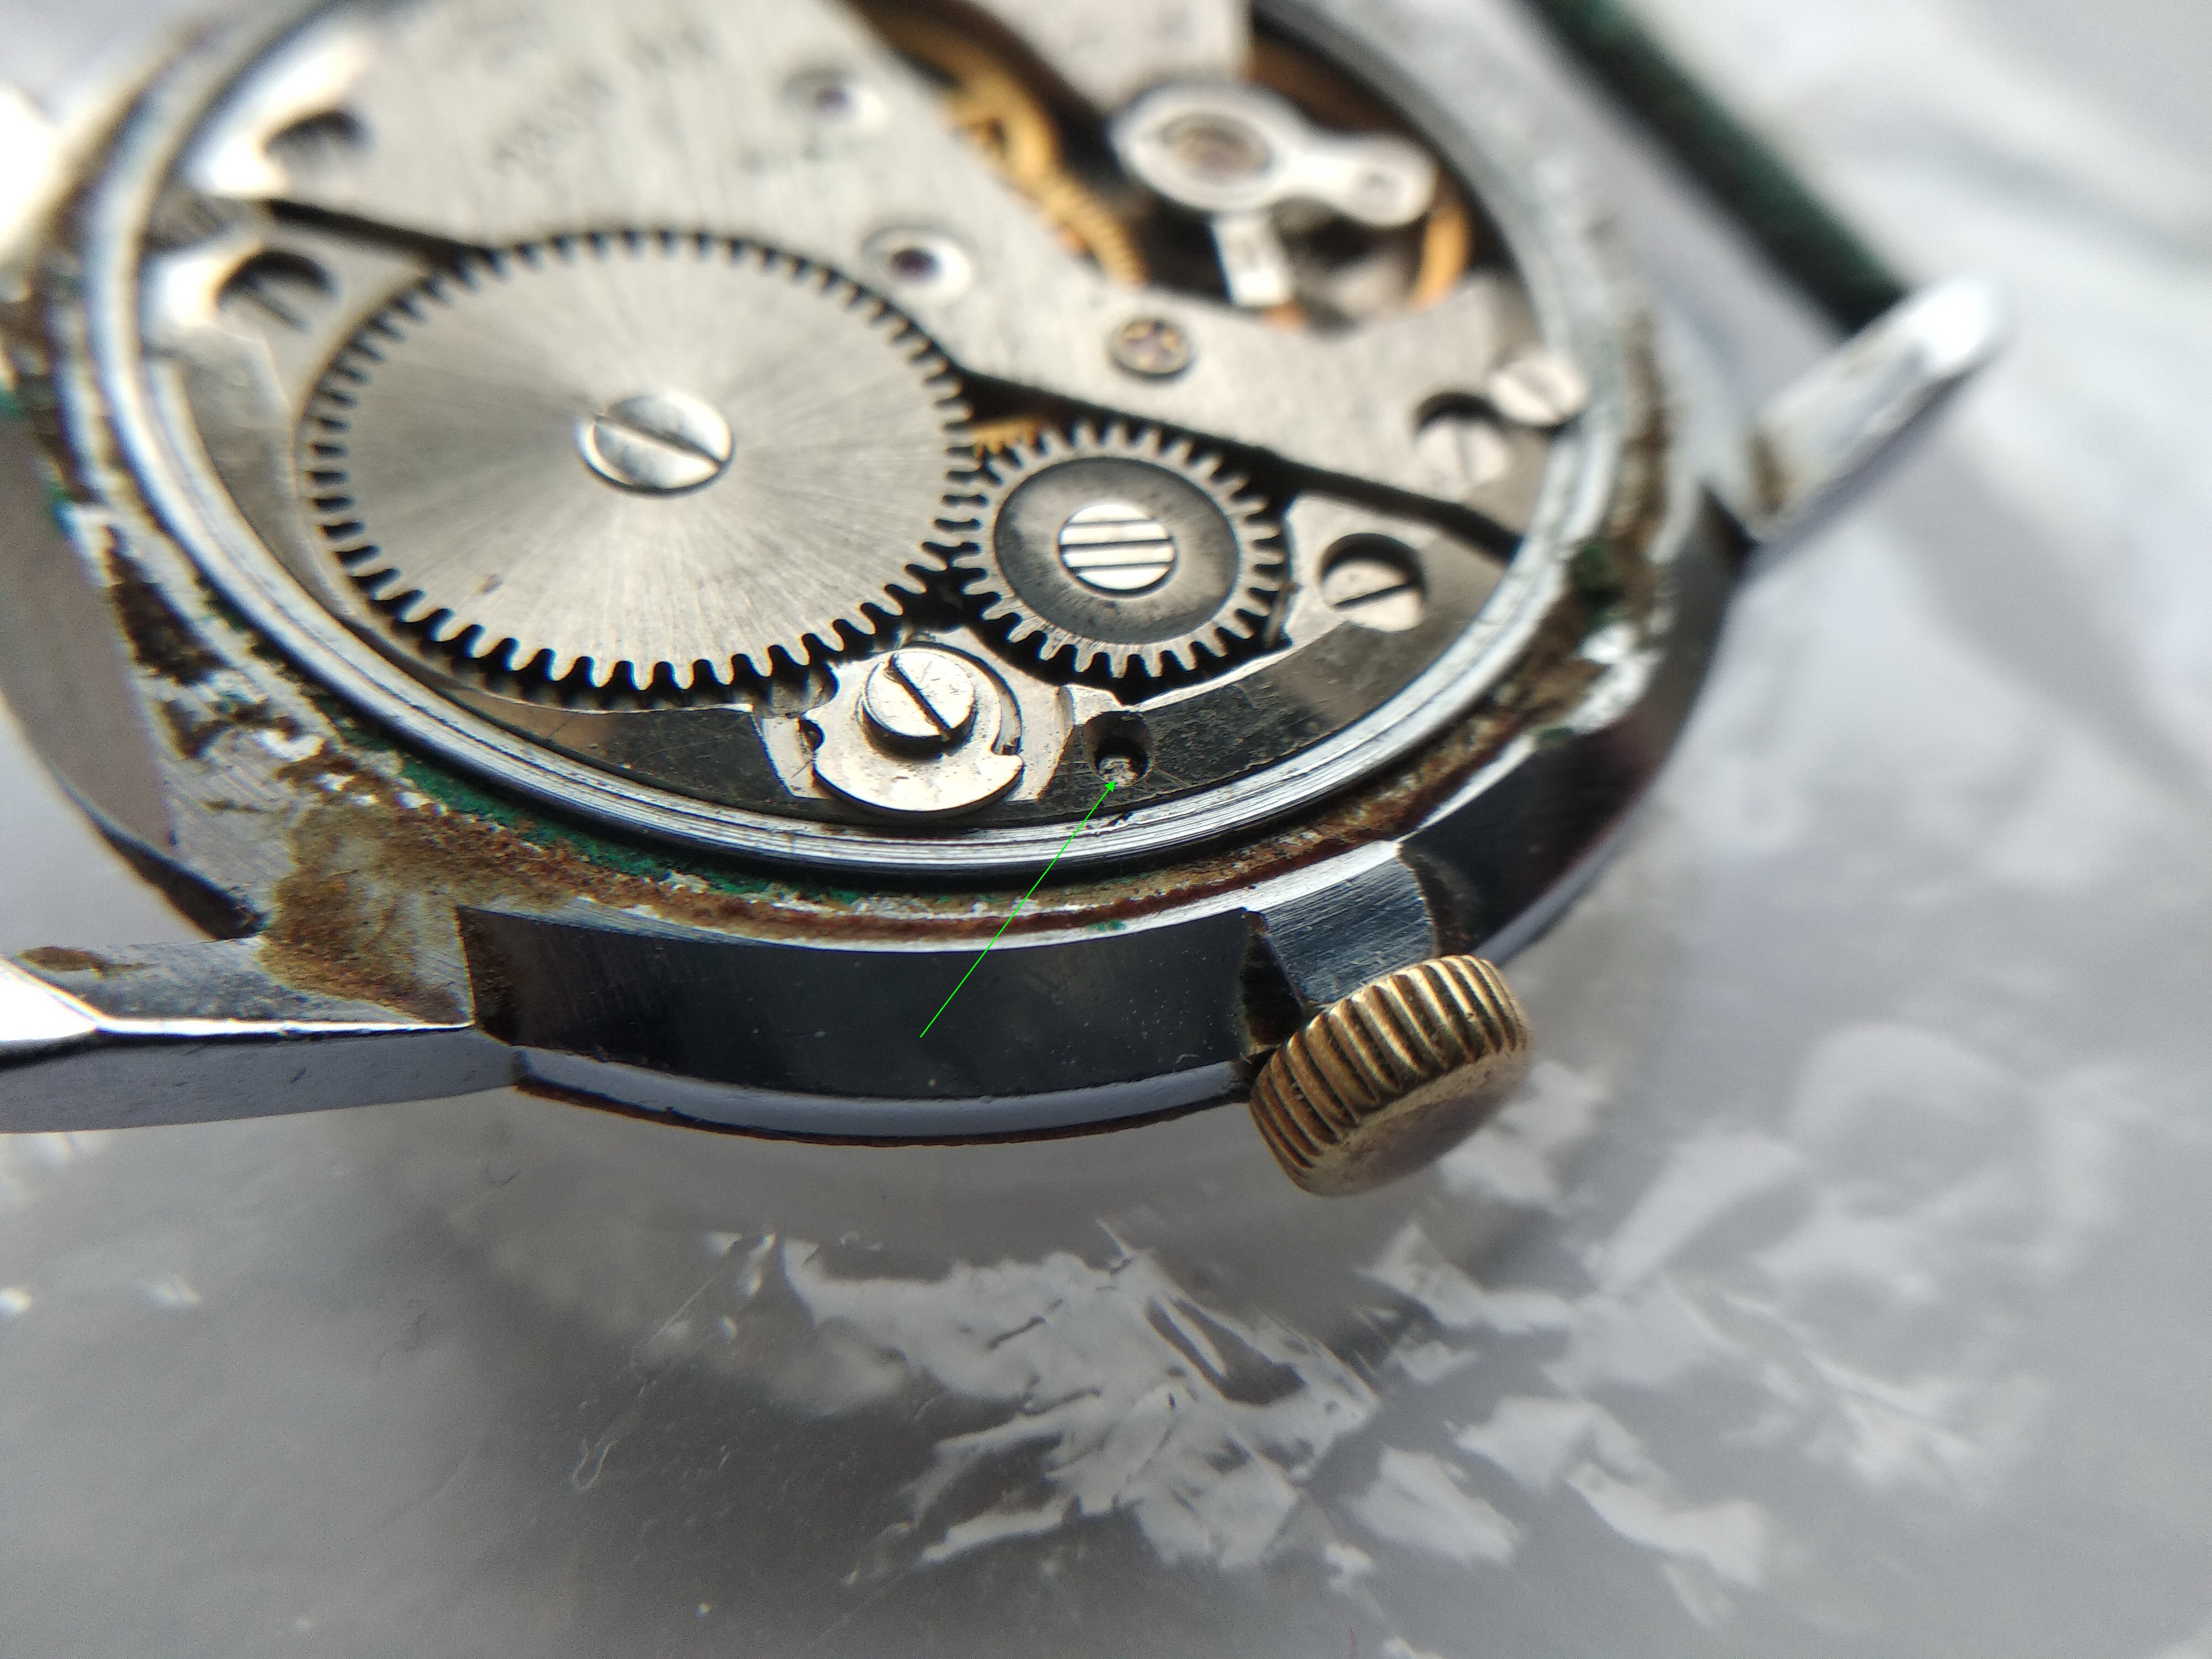
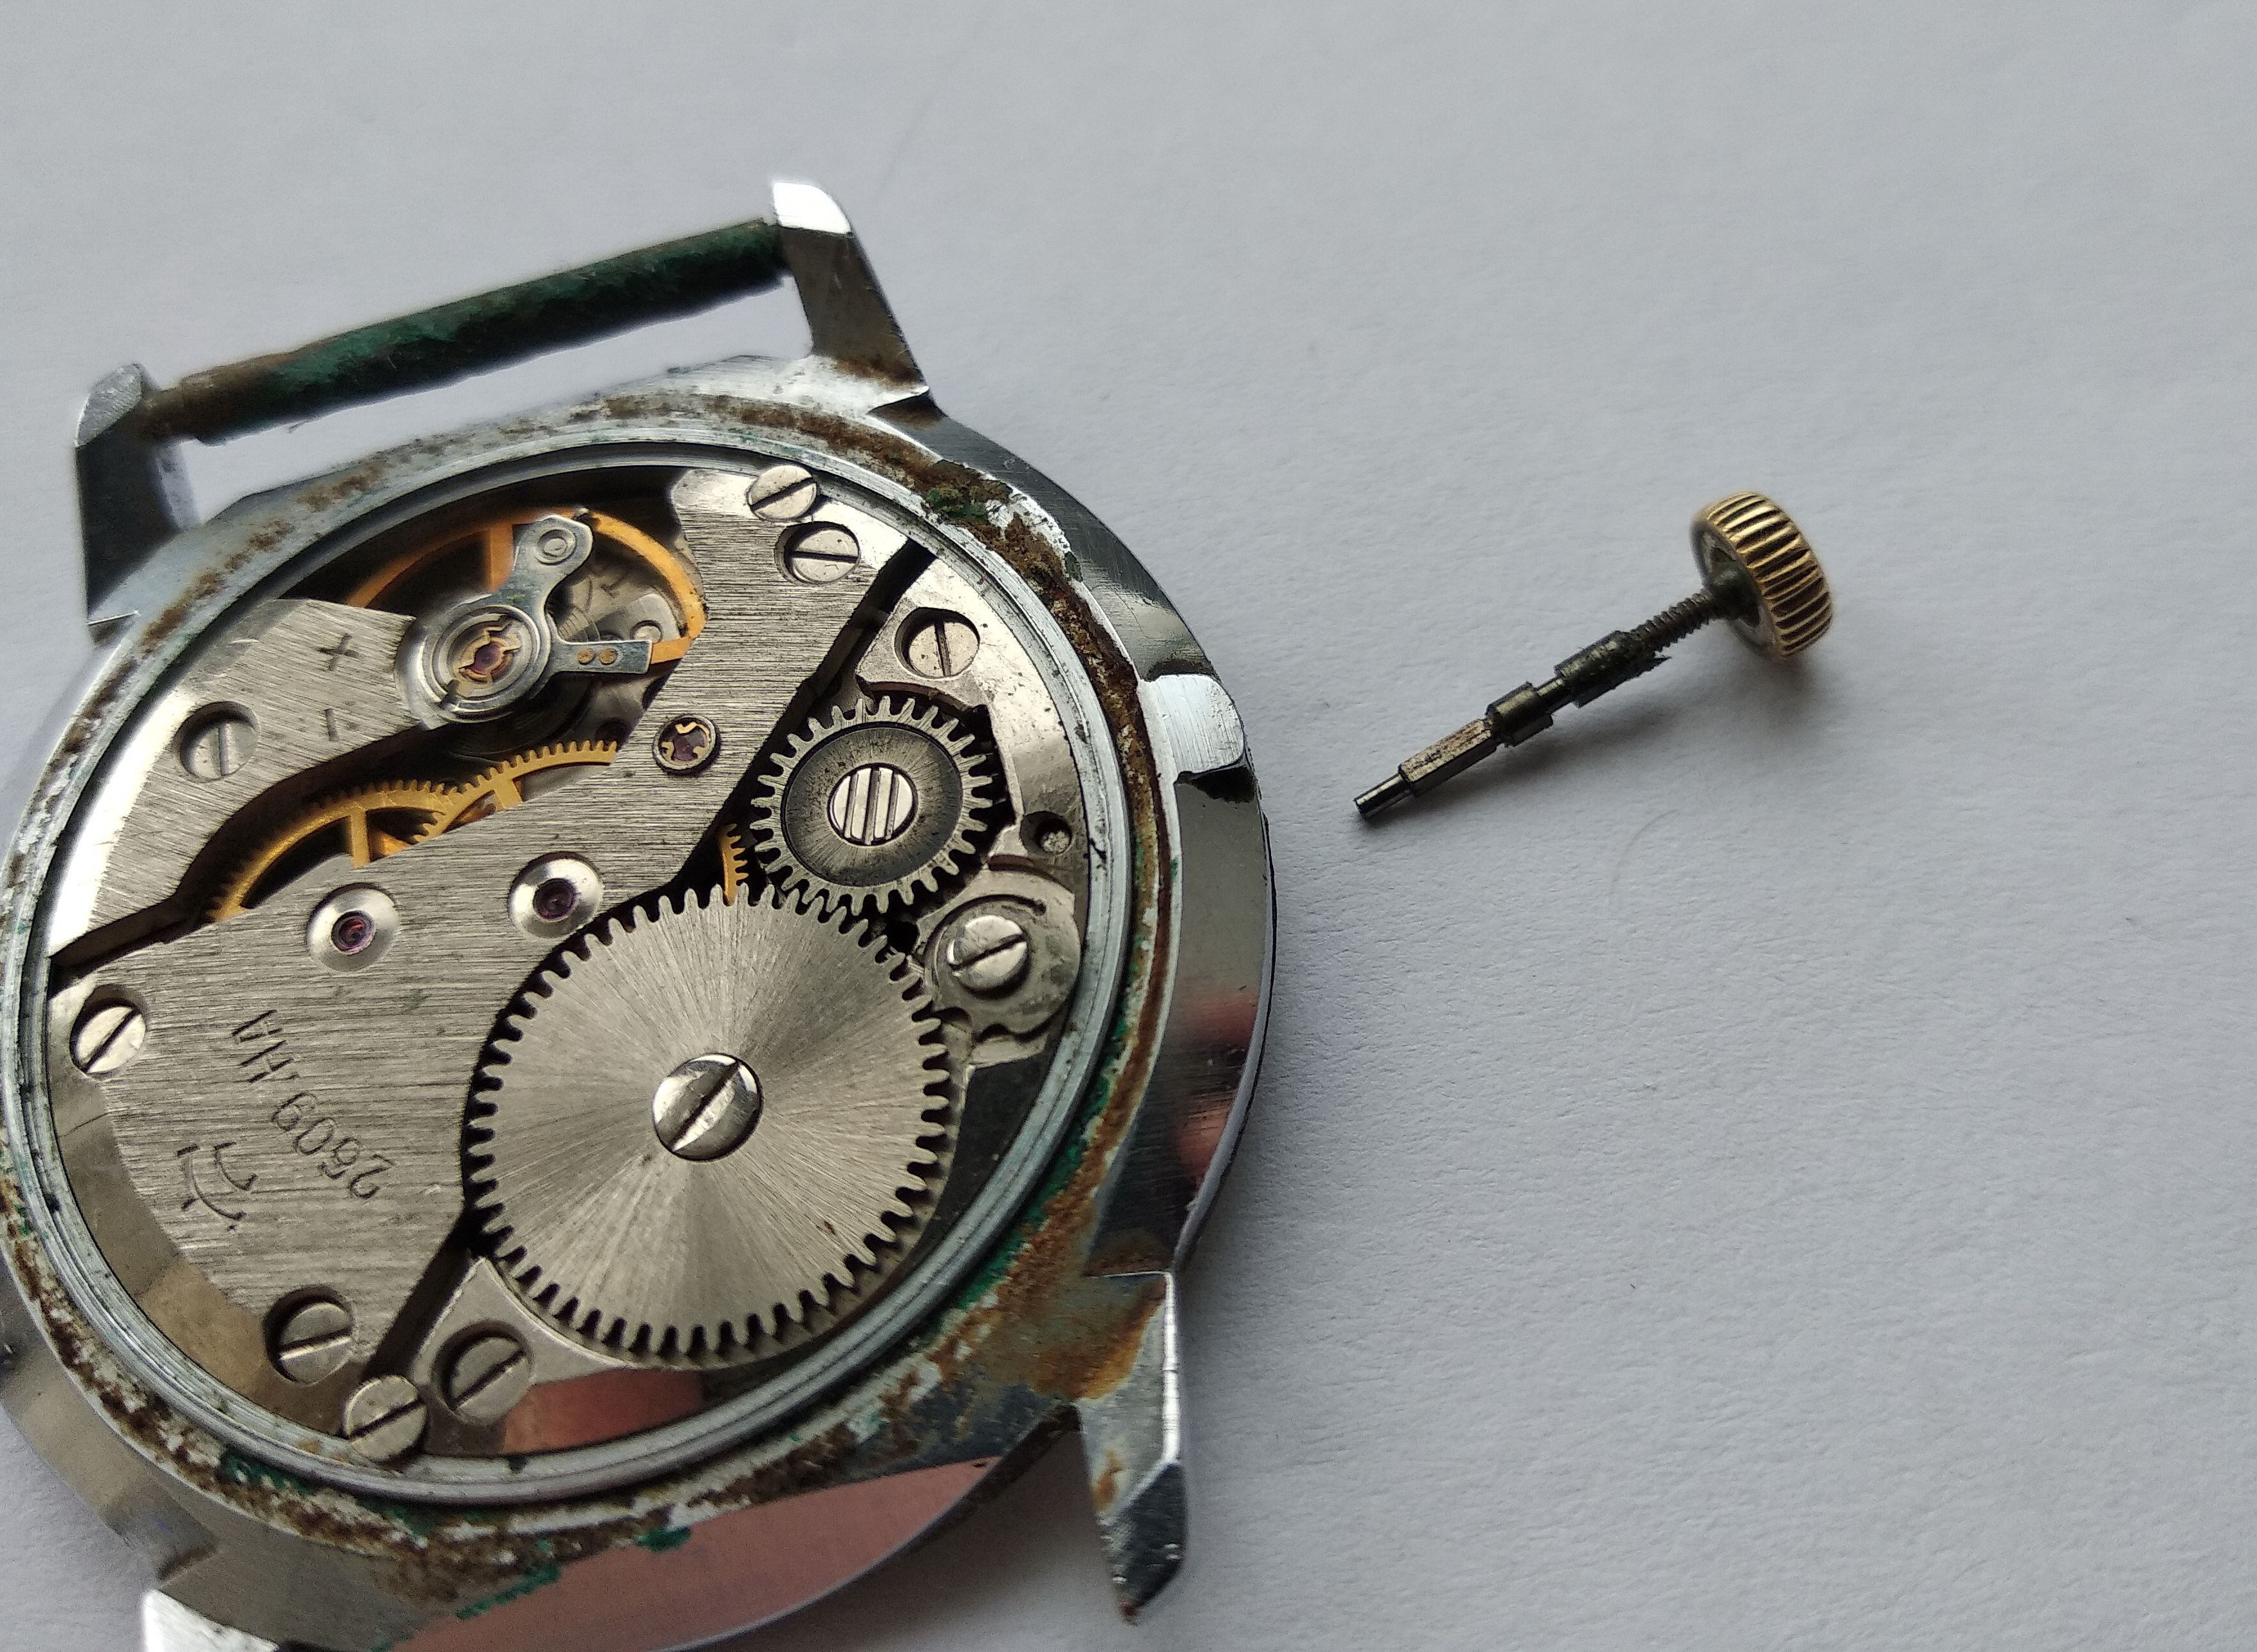
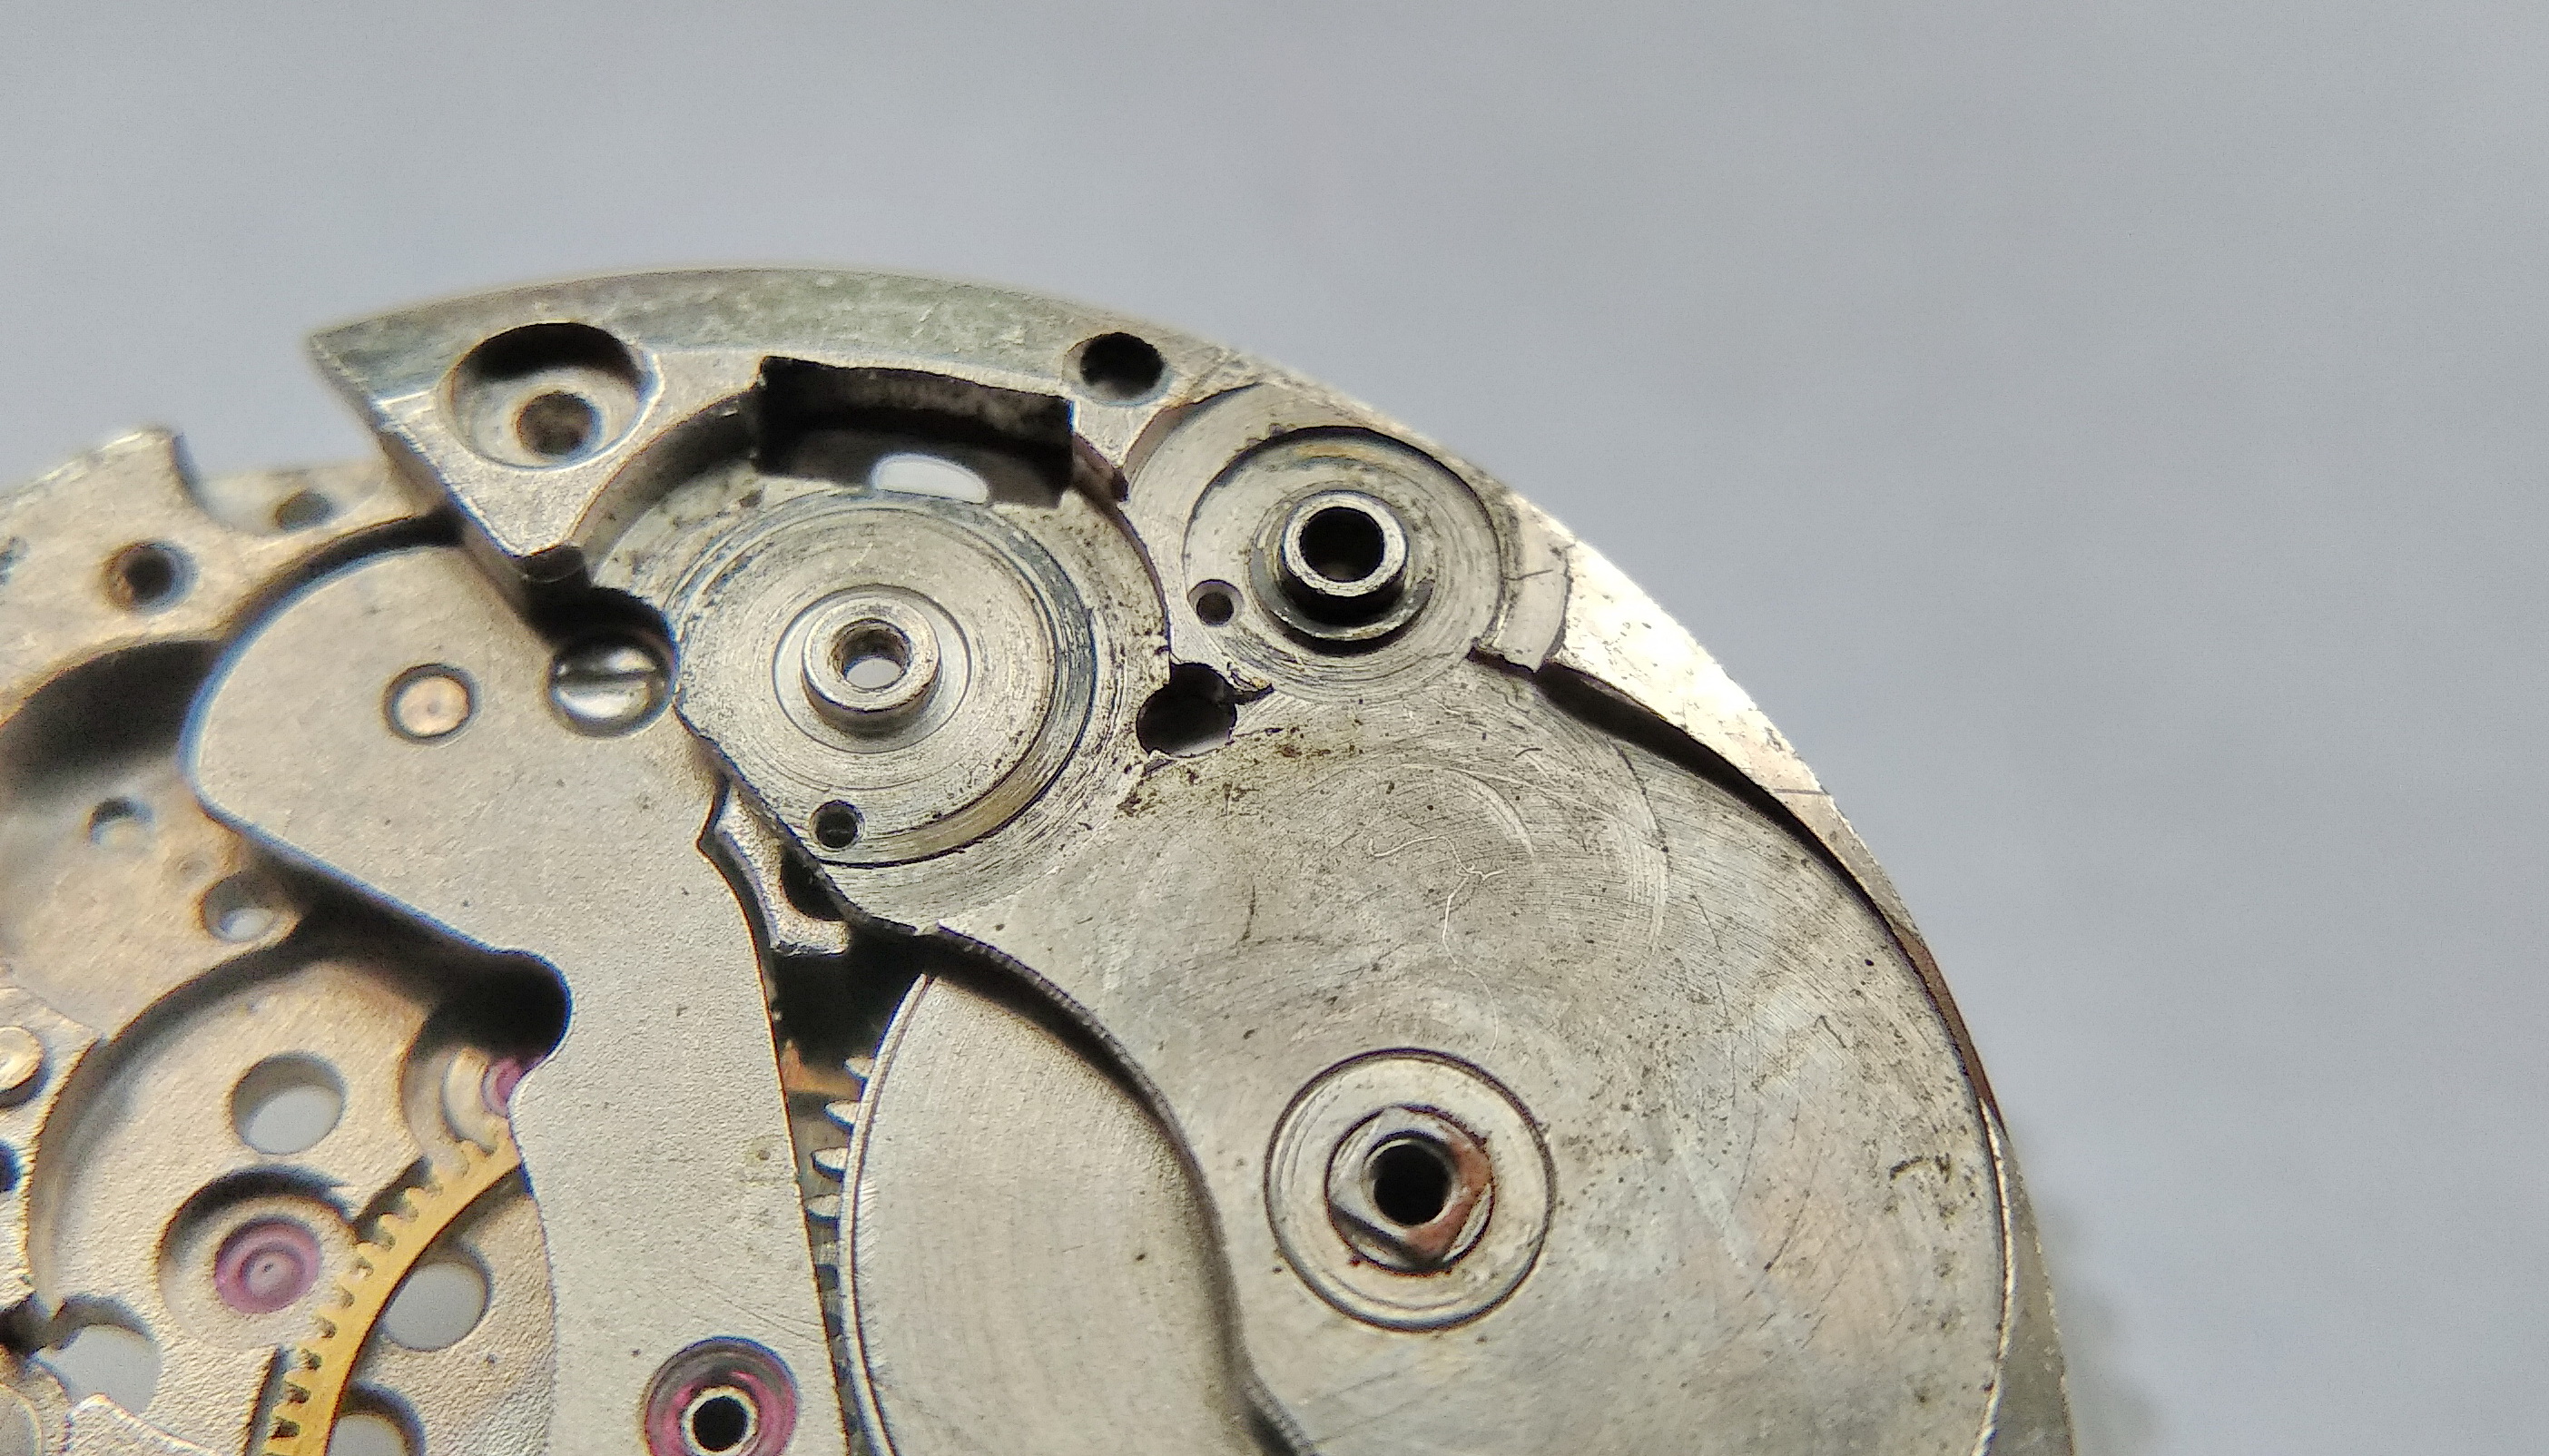
…and we draw out the winding stem, together with the grime, baked-on oil, and wear products clinging to it.

Winding stem withdrawn from the movement, coated in old hardened oil and debris
The stem slides out caked in congealed lubricant and metallic wear debris — a fair measure of how long the watch had gone without service.

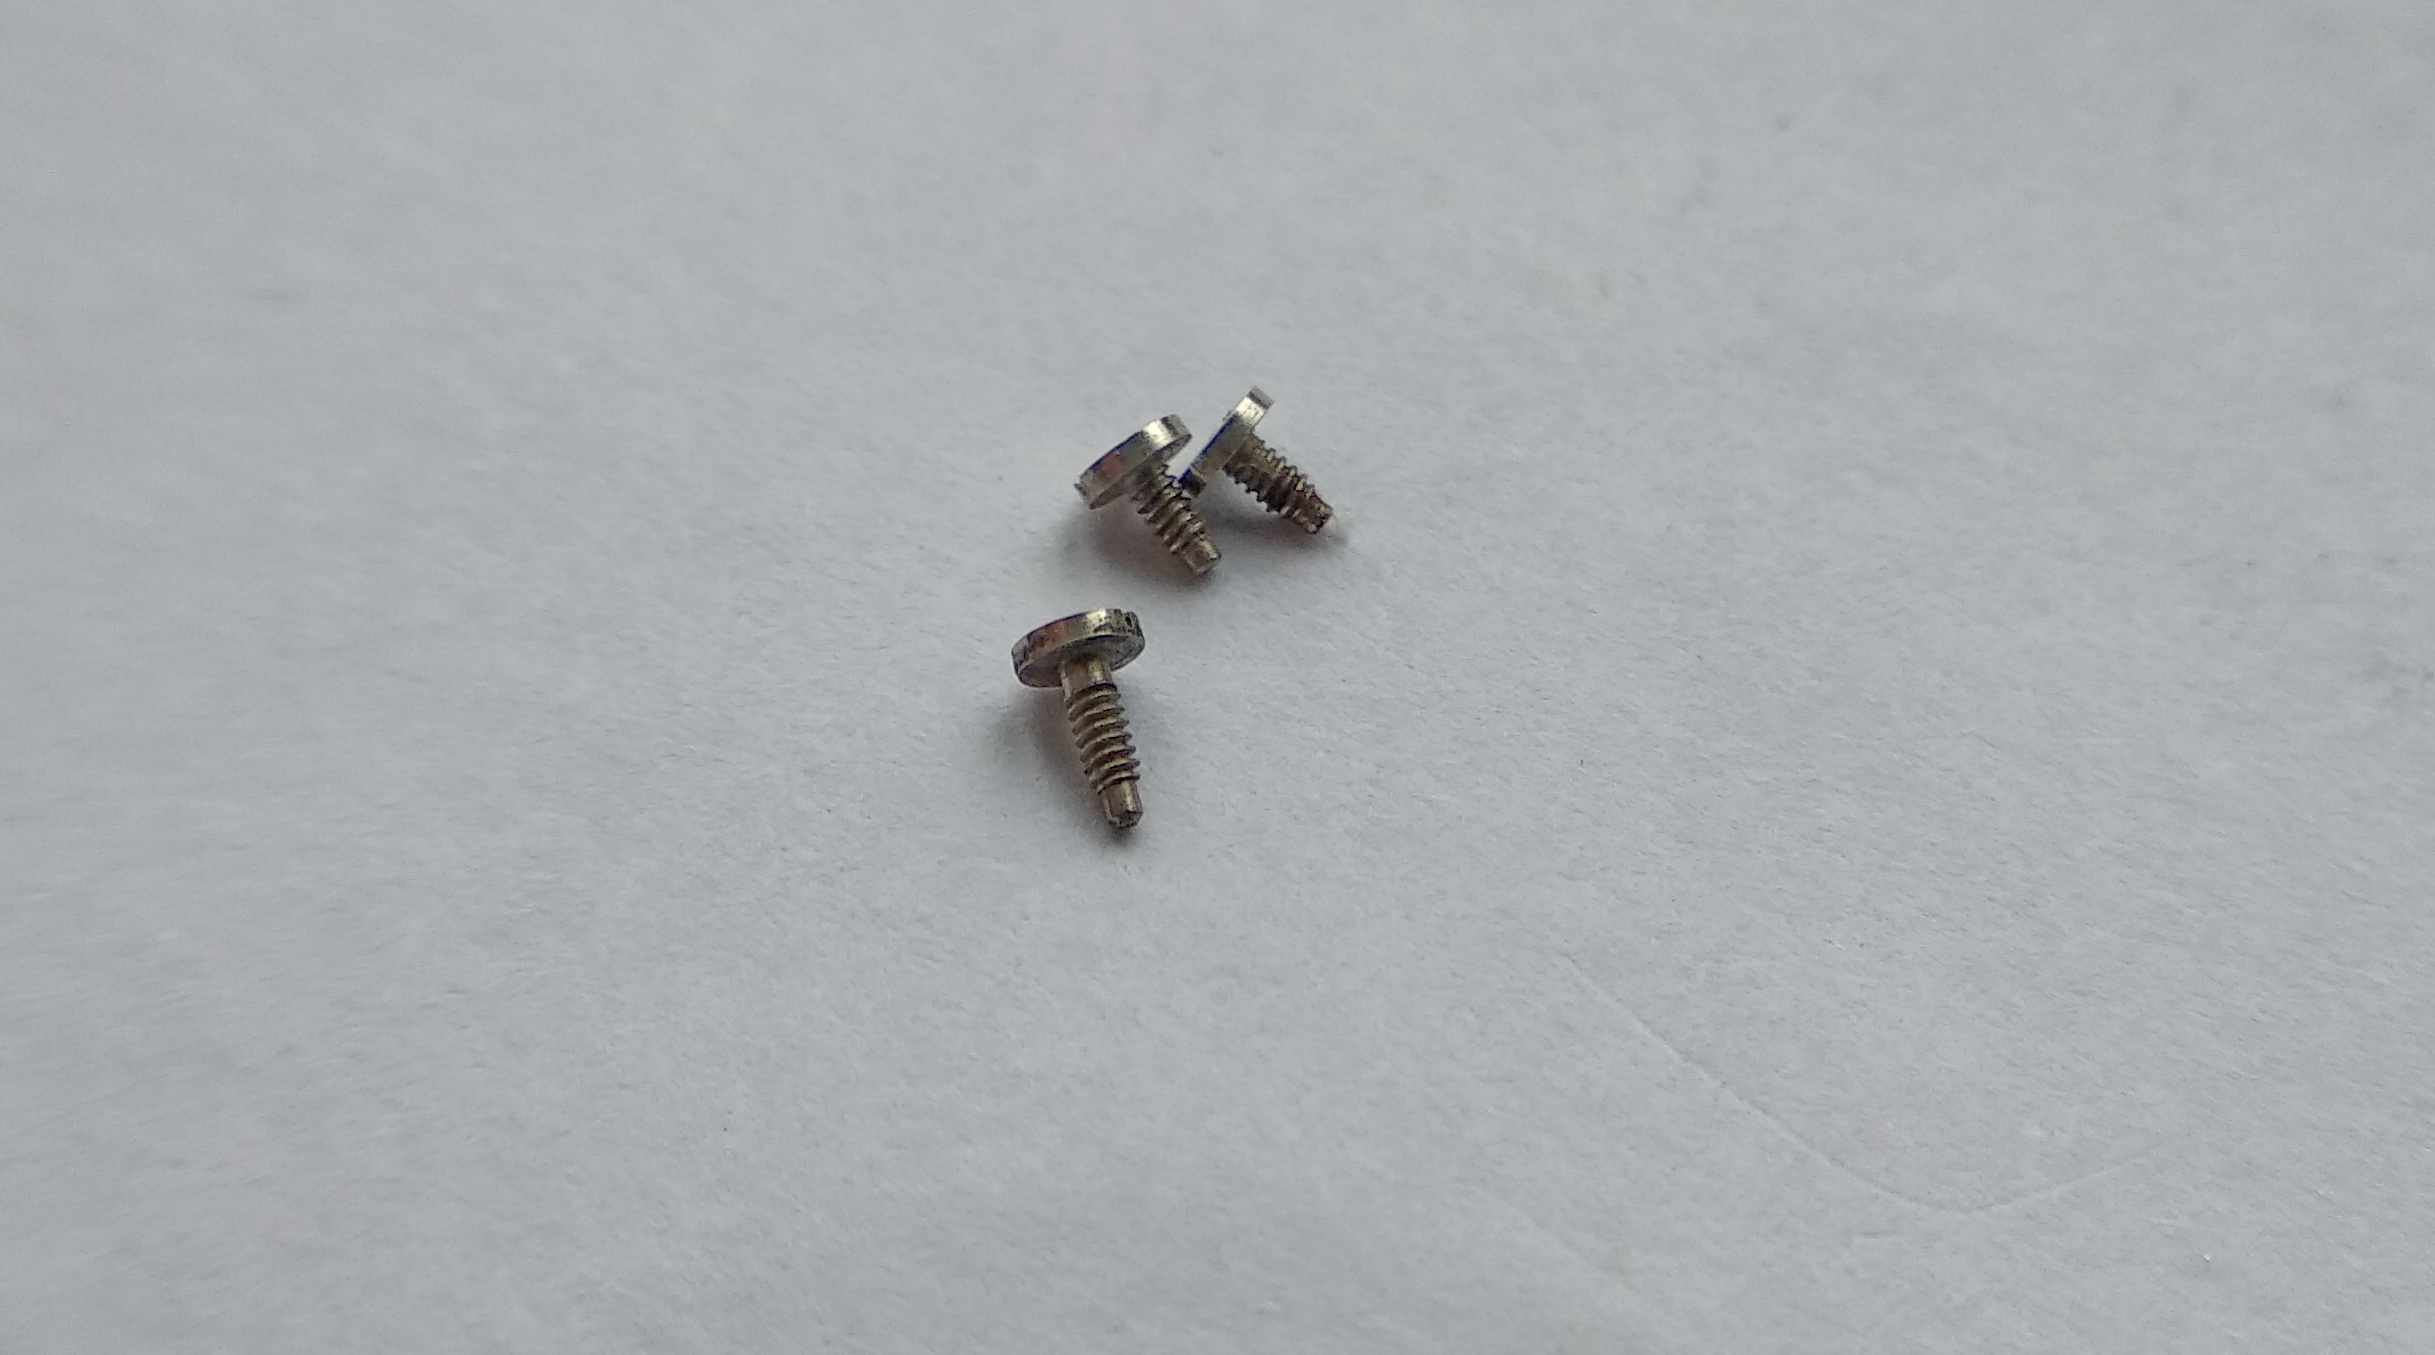
These screws secure the caliber within the case. As you will have gathered, the case is a three-part affair: the middle case, the snap-on back, and the bezel-with-crystal.

Case clamp screws that hold the movement inside the three-part case
The movement-retaining screws. The case is built in three components — middle, snap back, and crystal bezel — a straightforward construction typical of the dress Raketas.

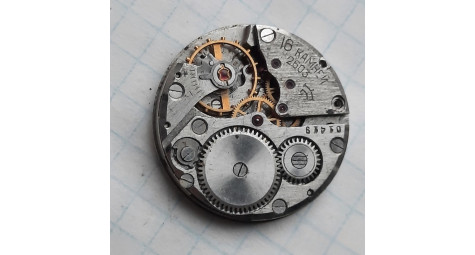
We back out the retaining screws and lift the movement out toward the crystal side. Yes — the dust of ages is present in abundance.

Movement lifted free of the case, thick with accumulated dust and dirt
Freed from the case and removed dial-side forward, the caliber shows the full extent of its long-accumulated filth before cleaning.

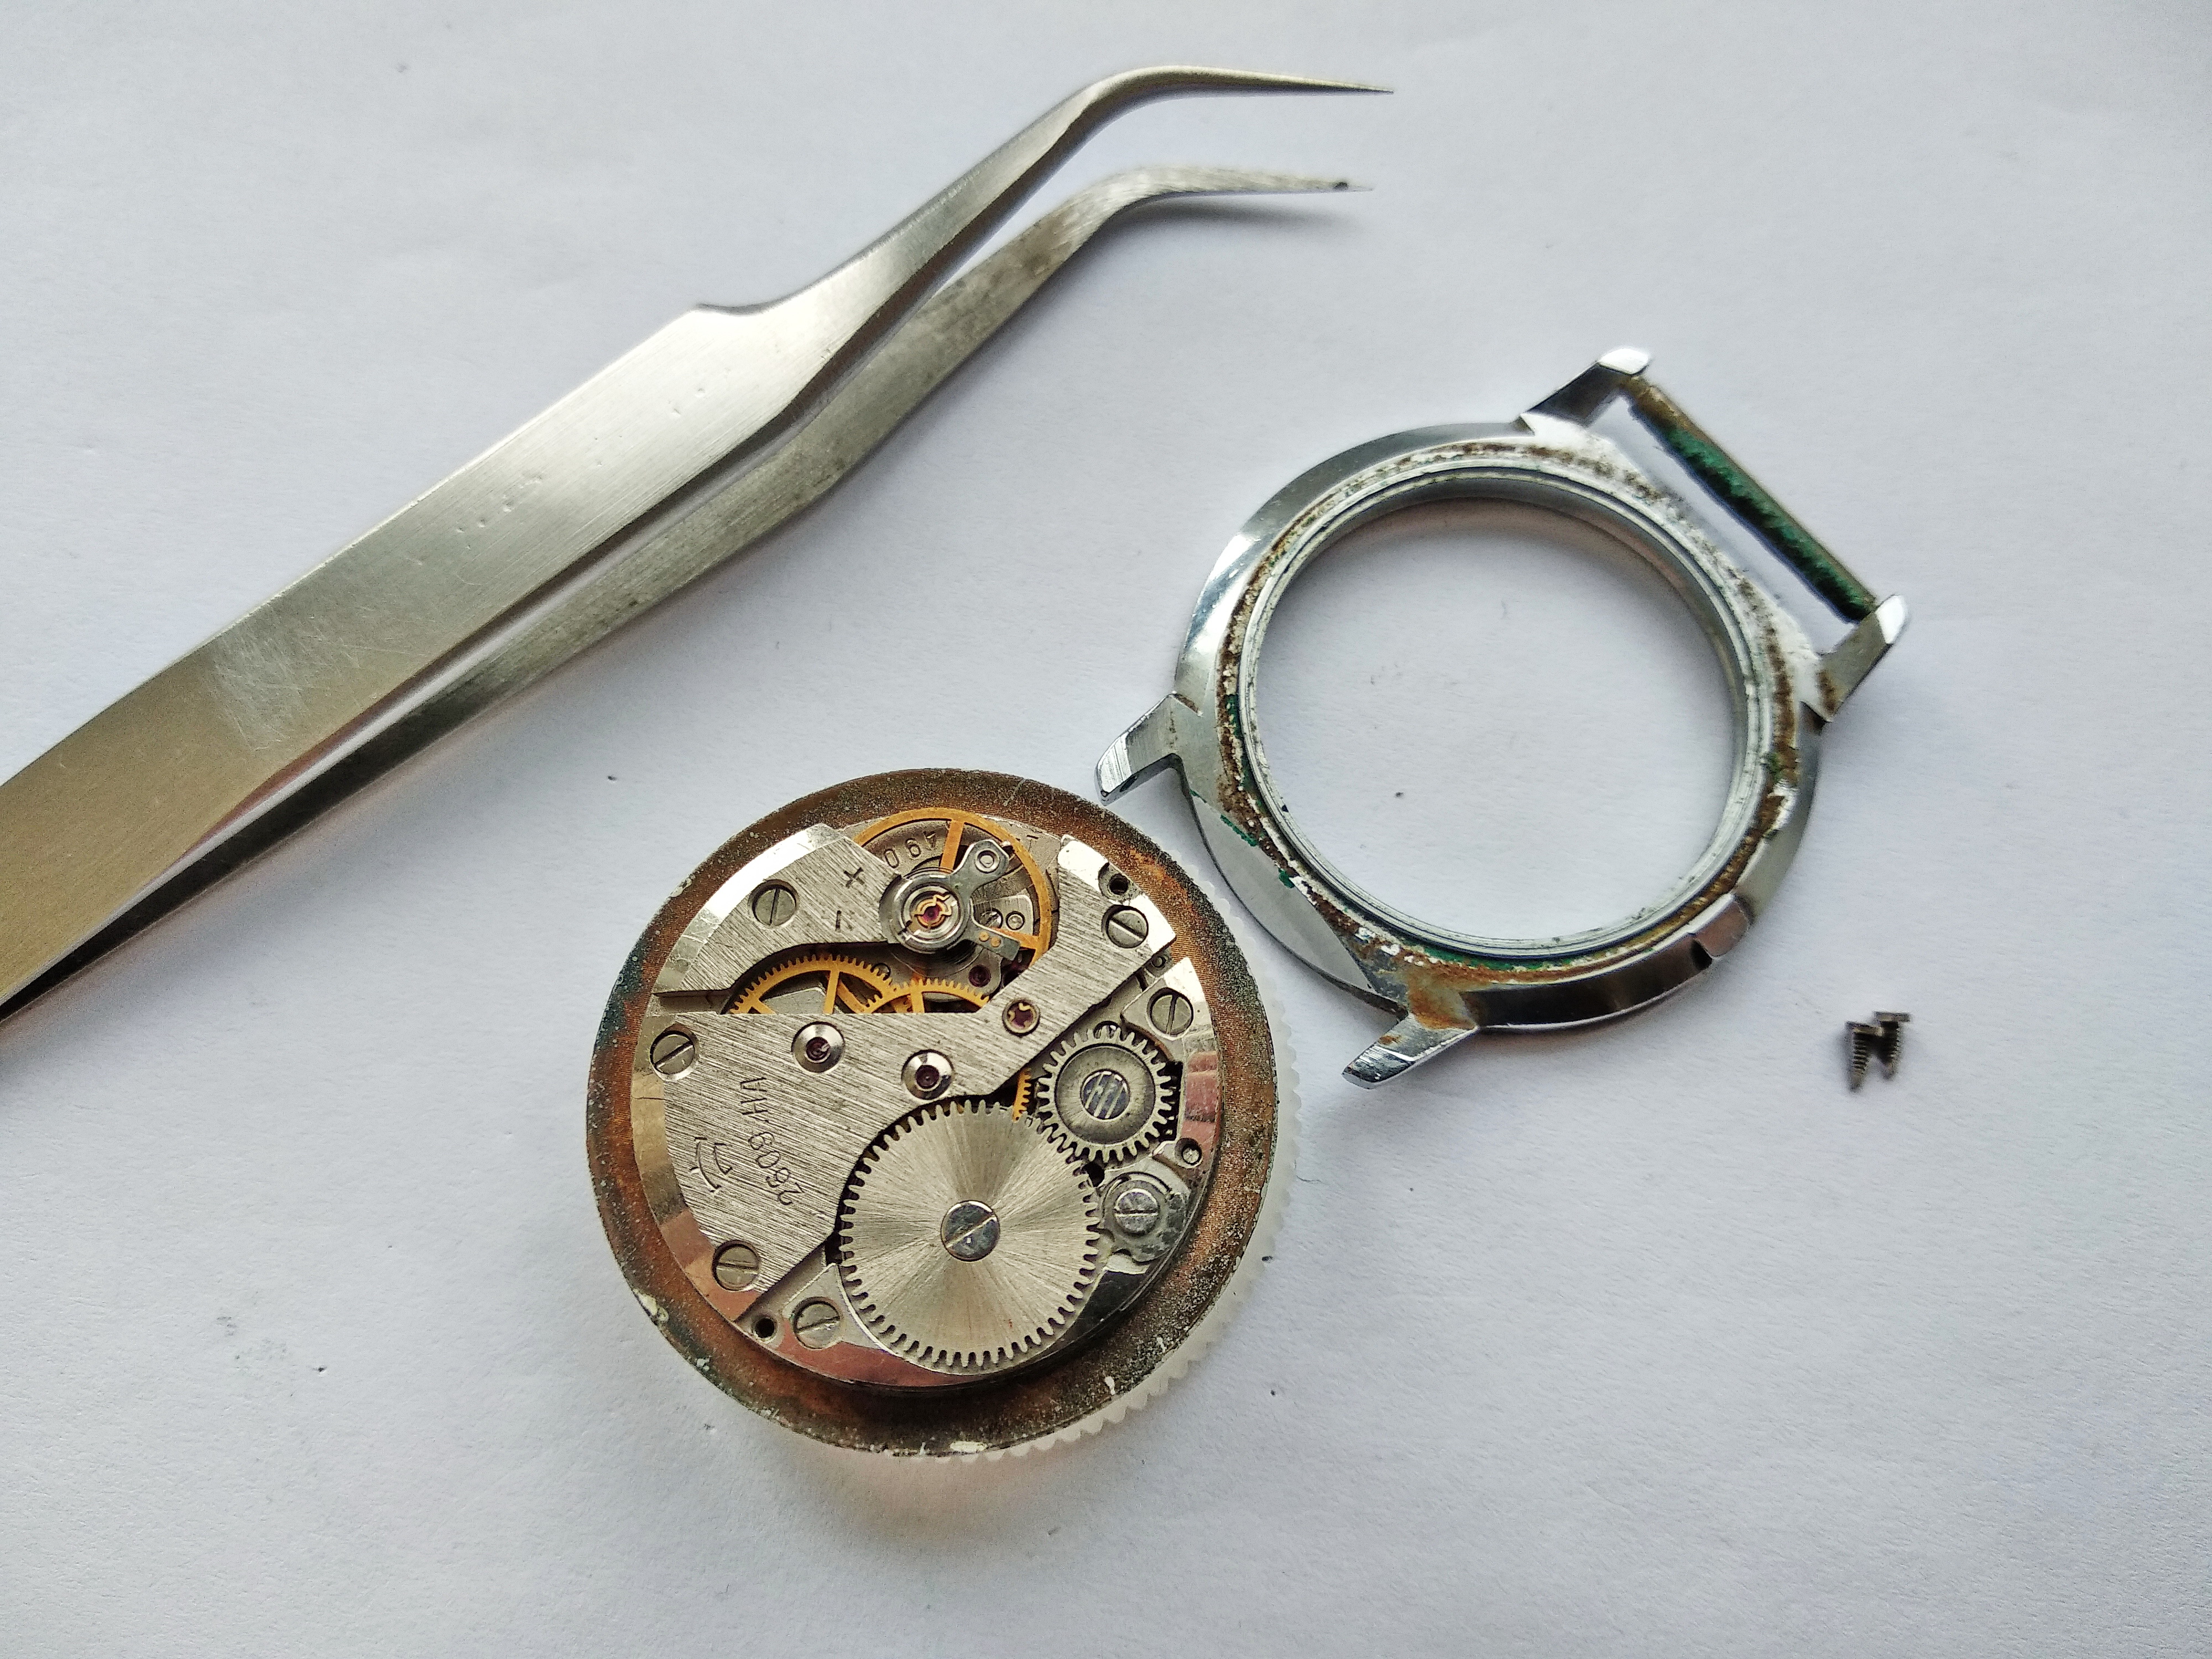
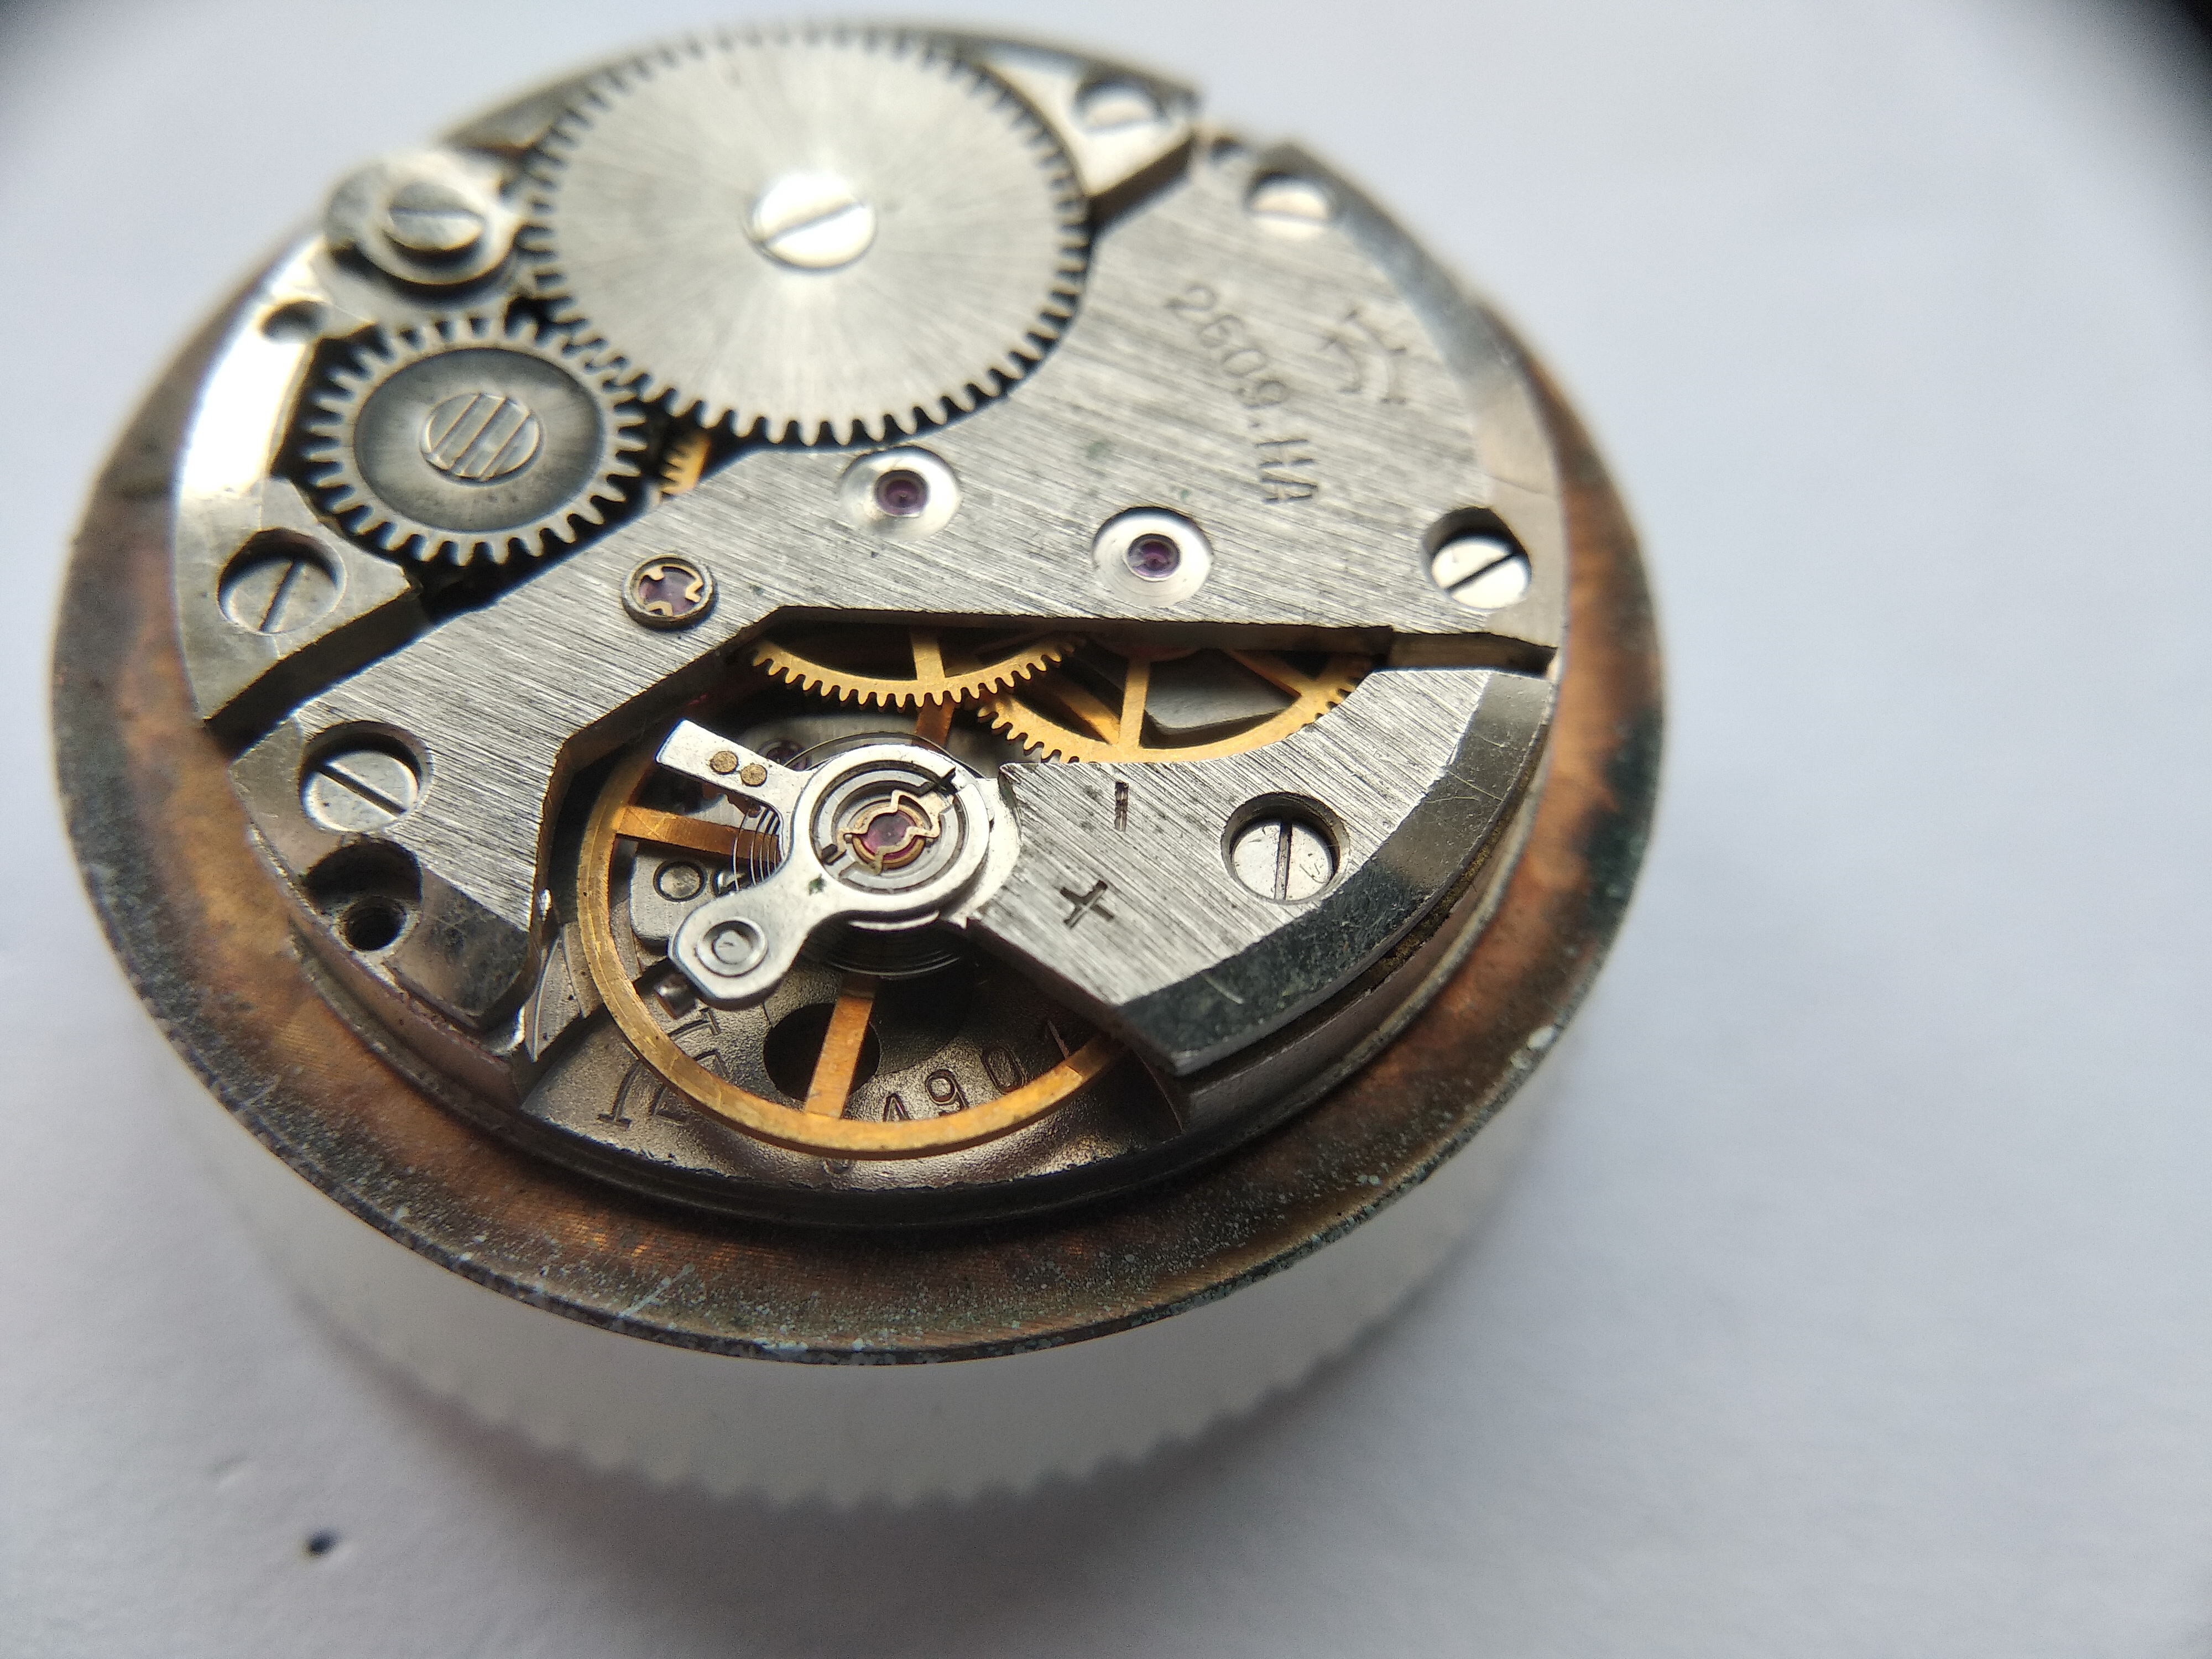
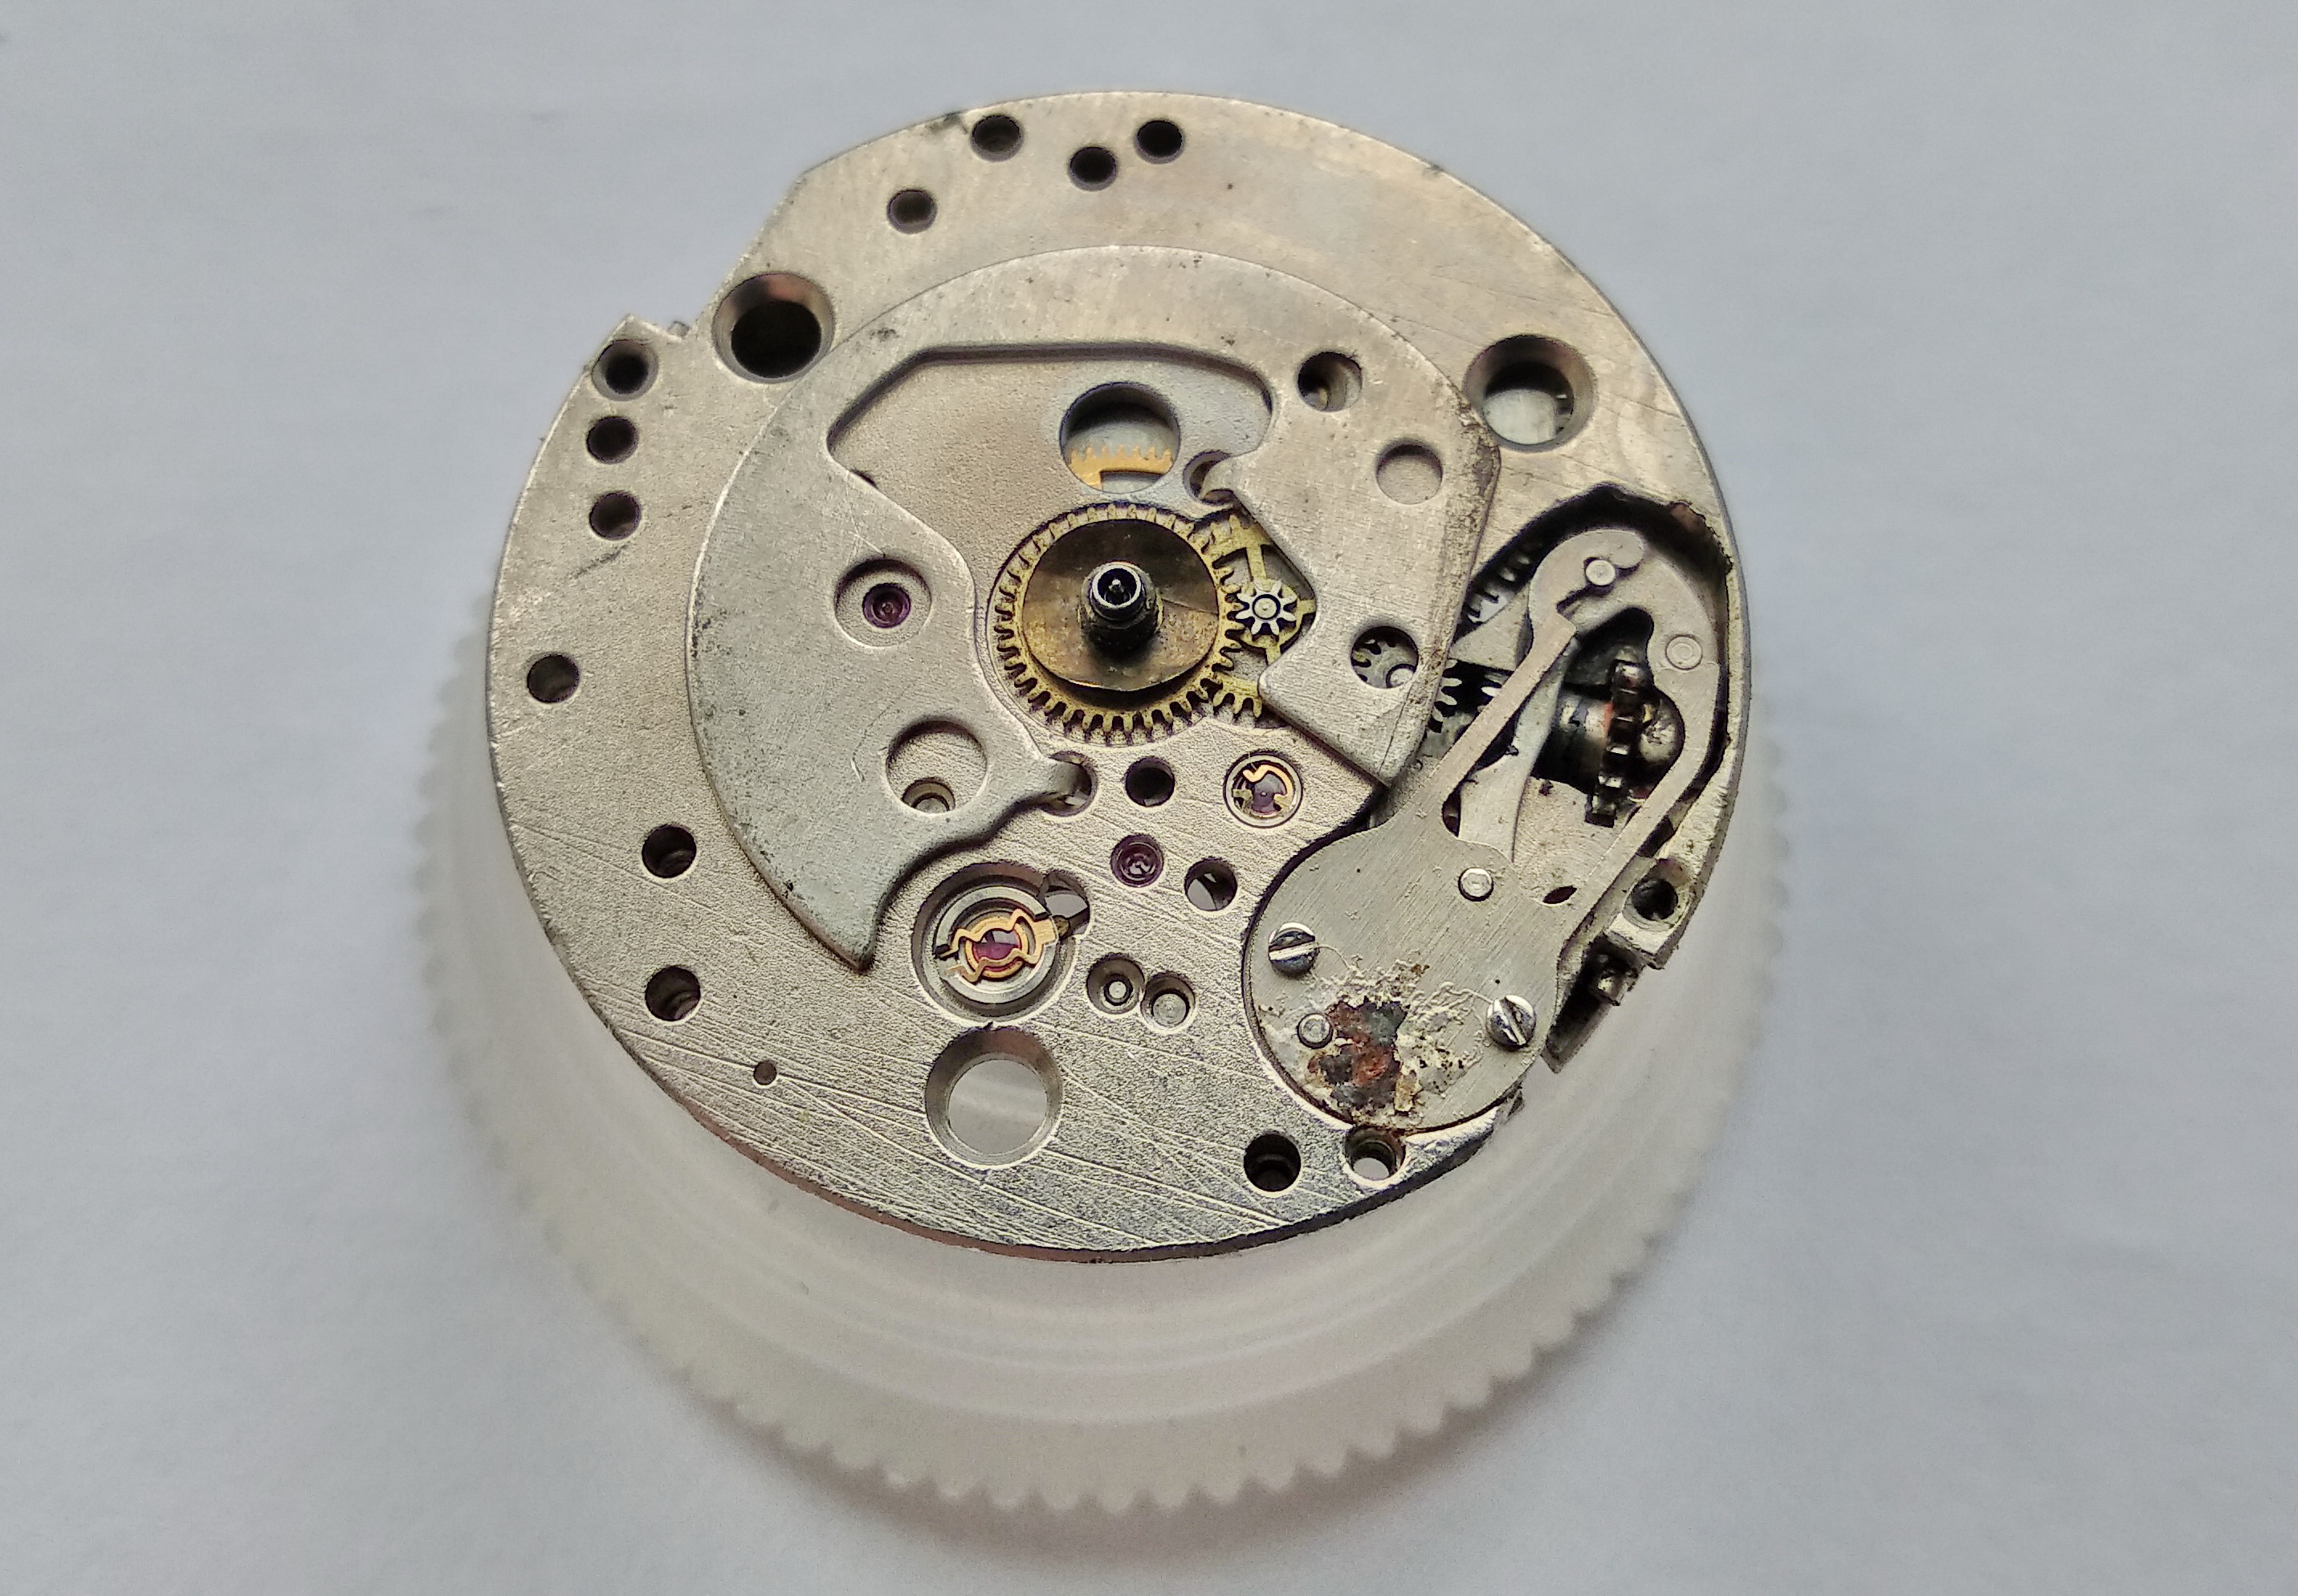
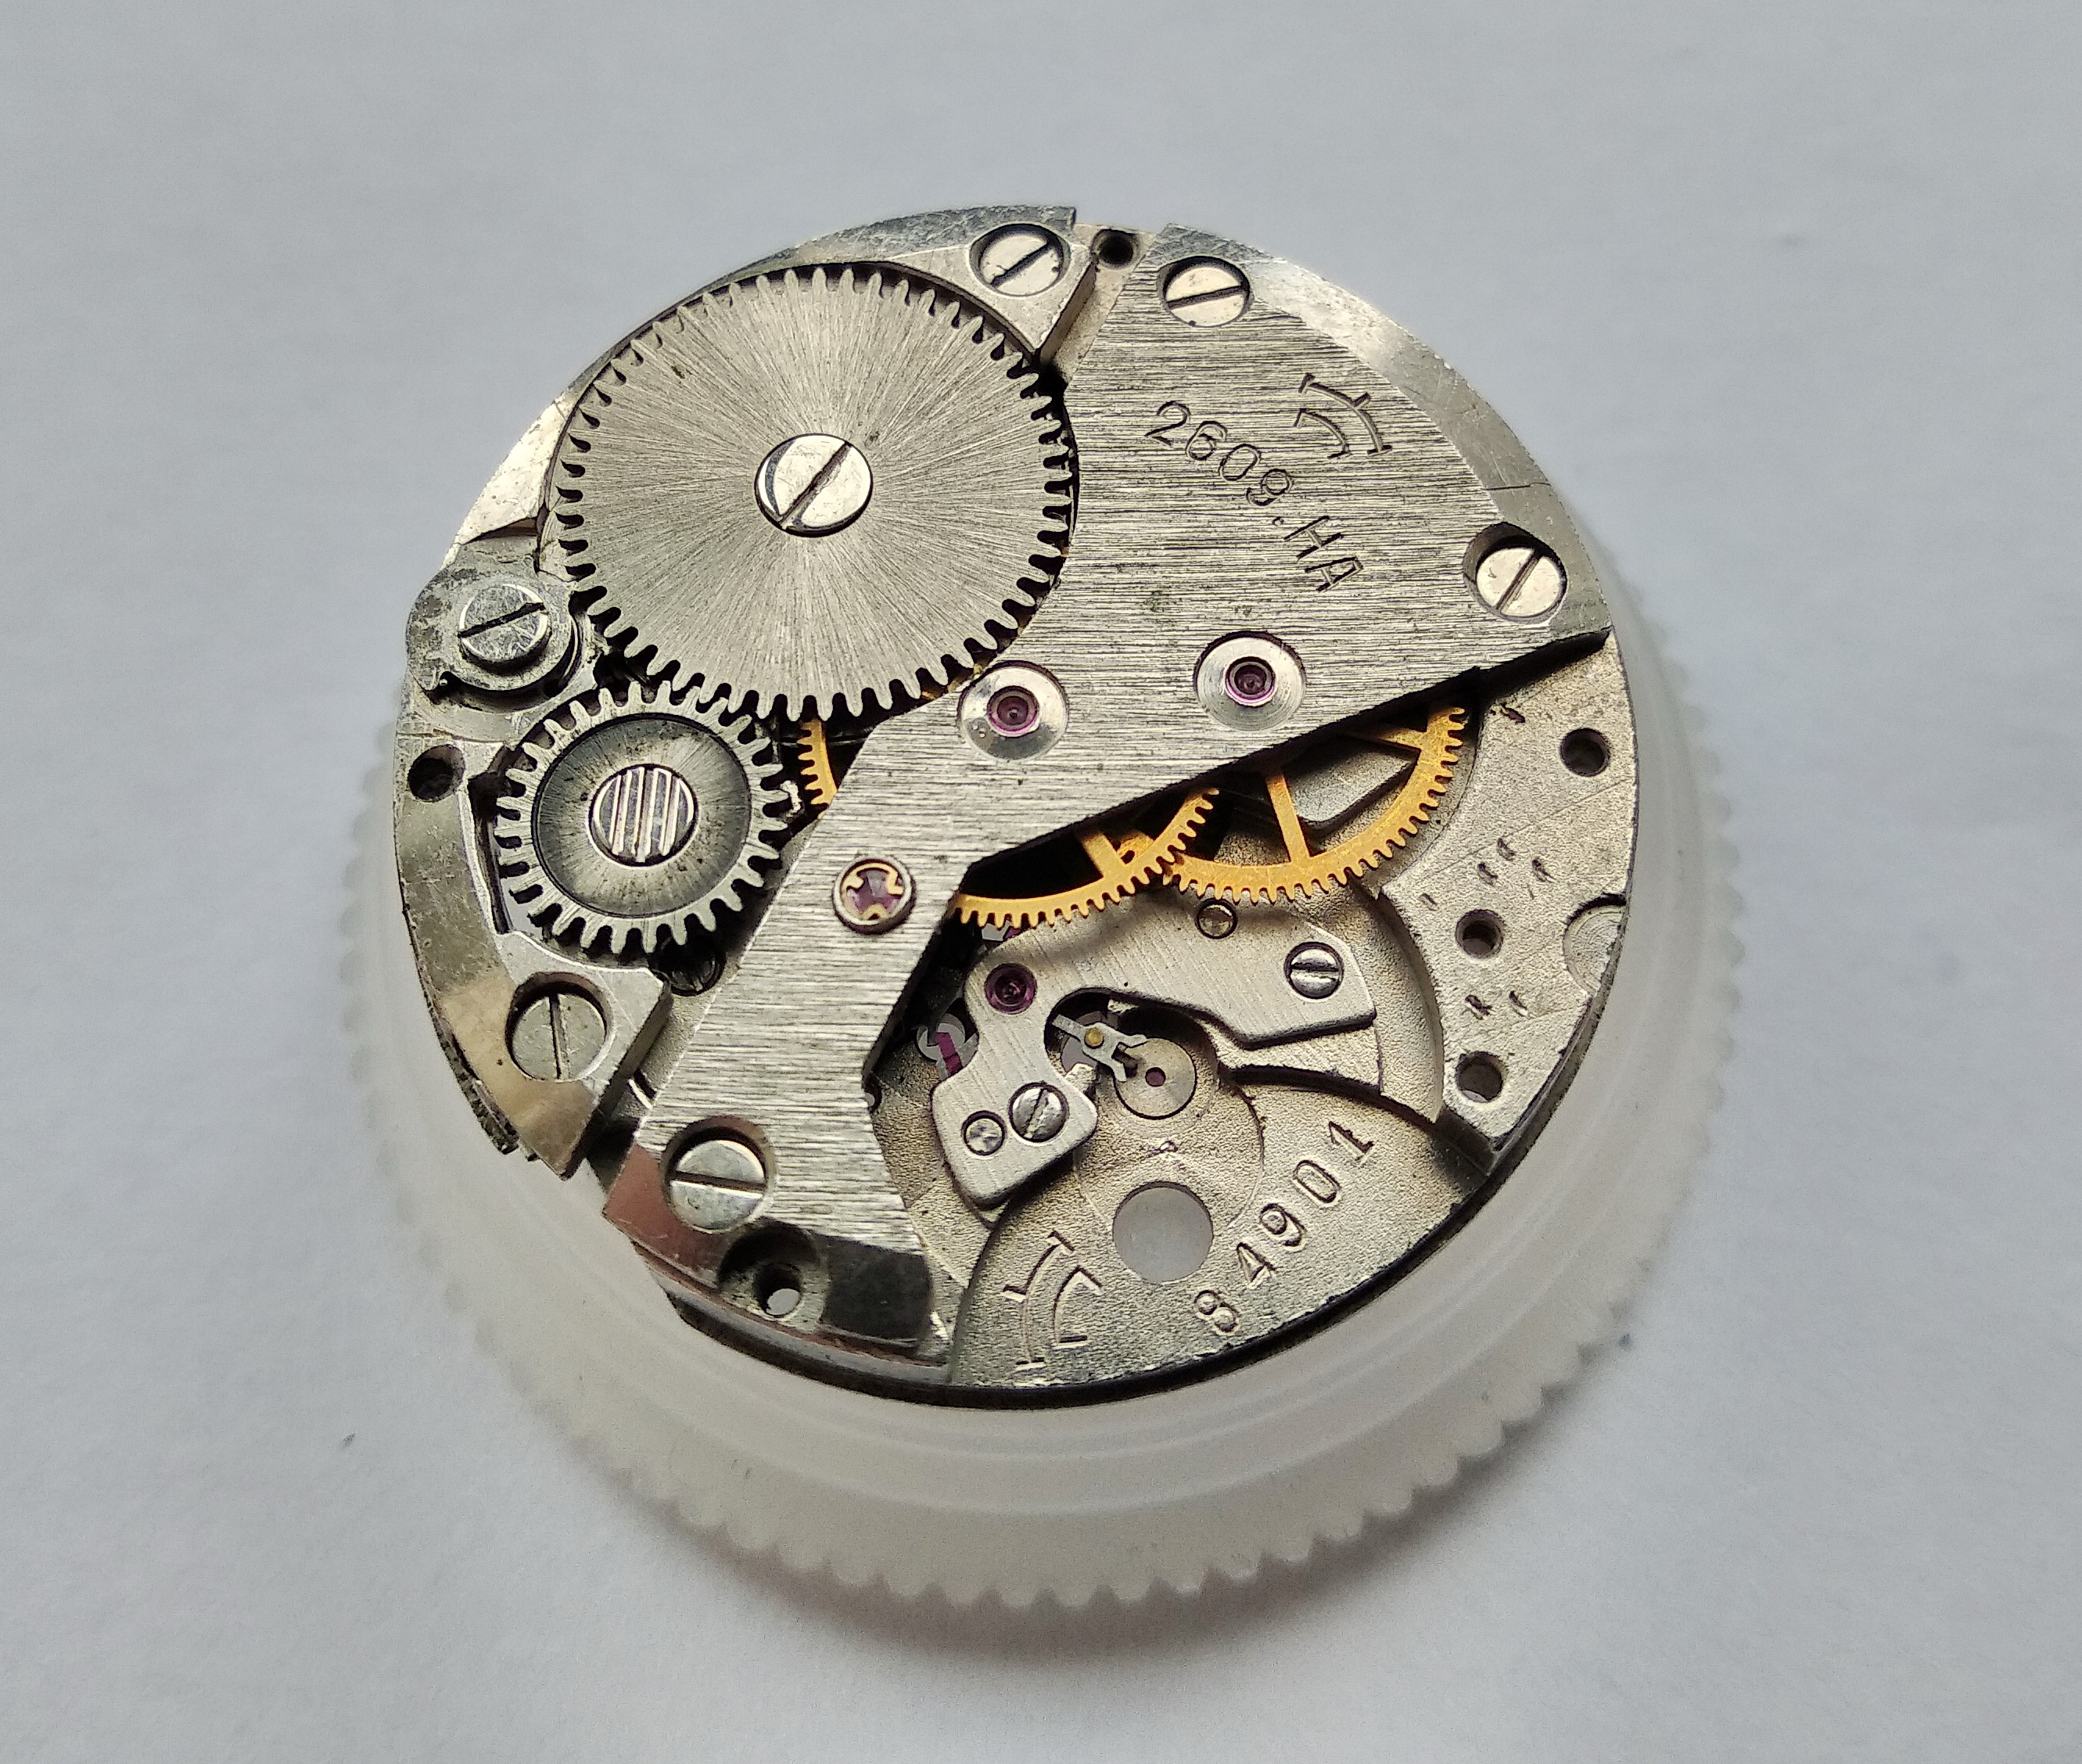
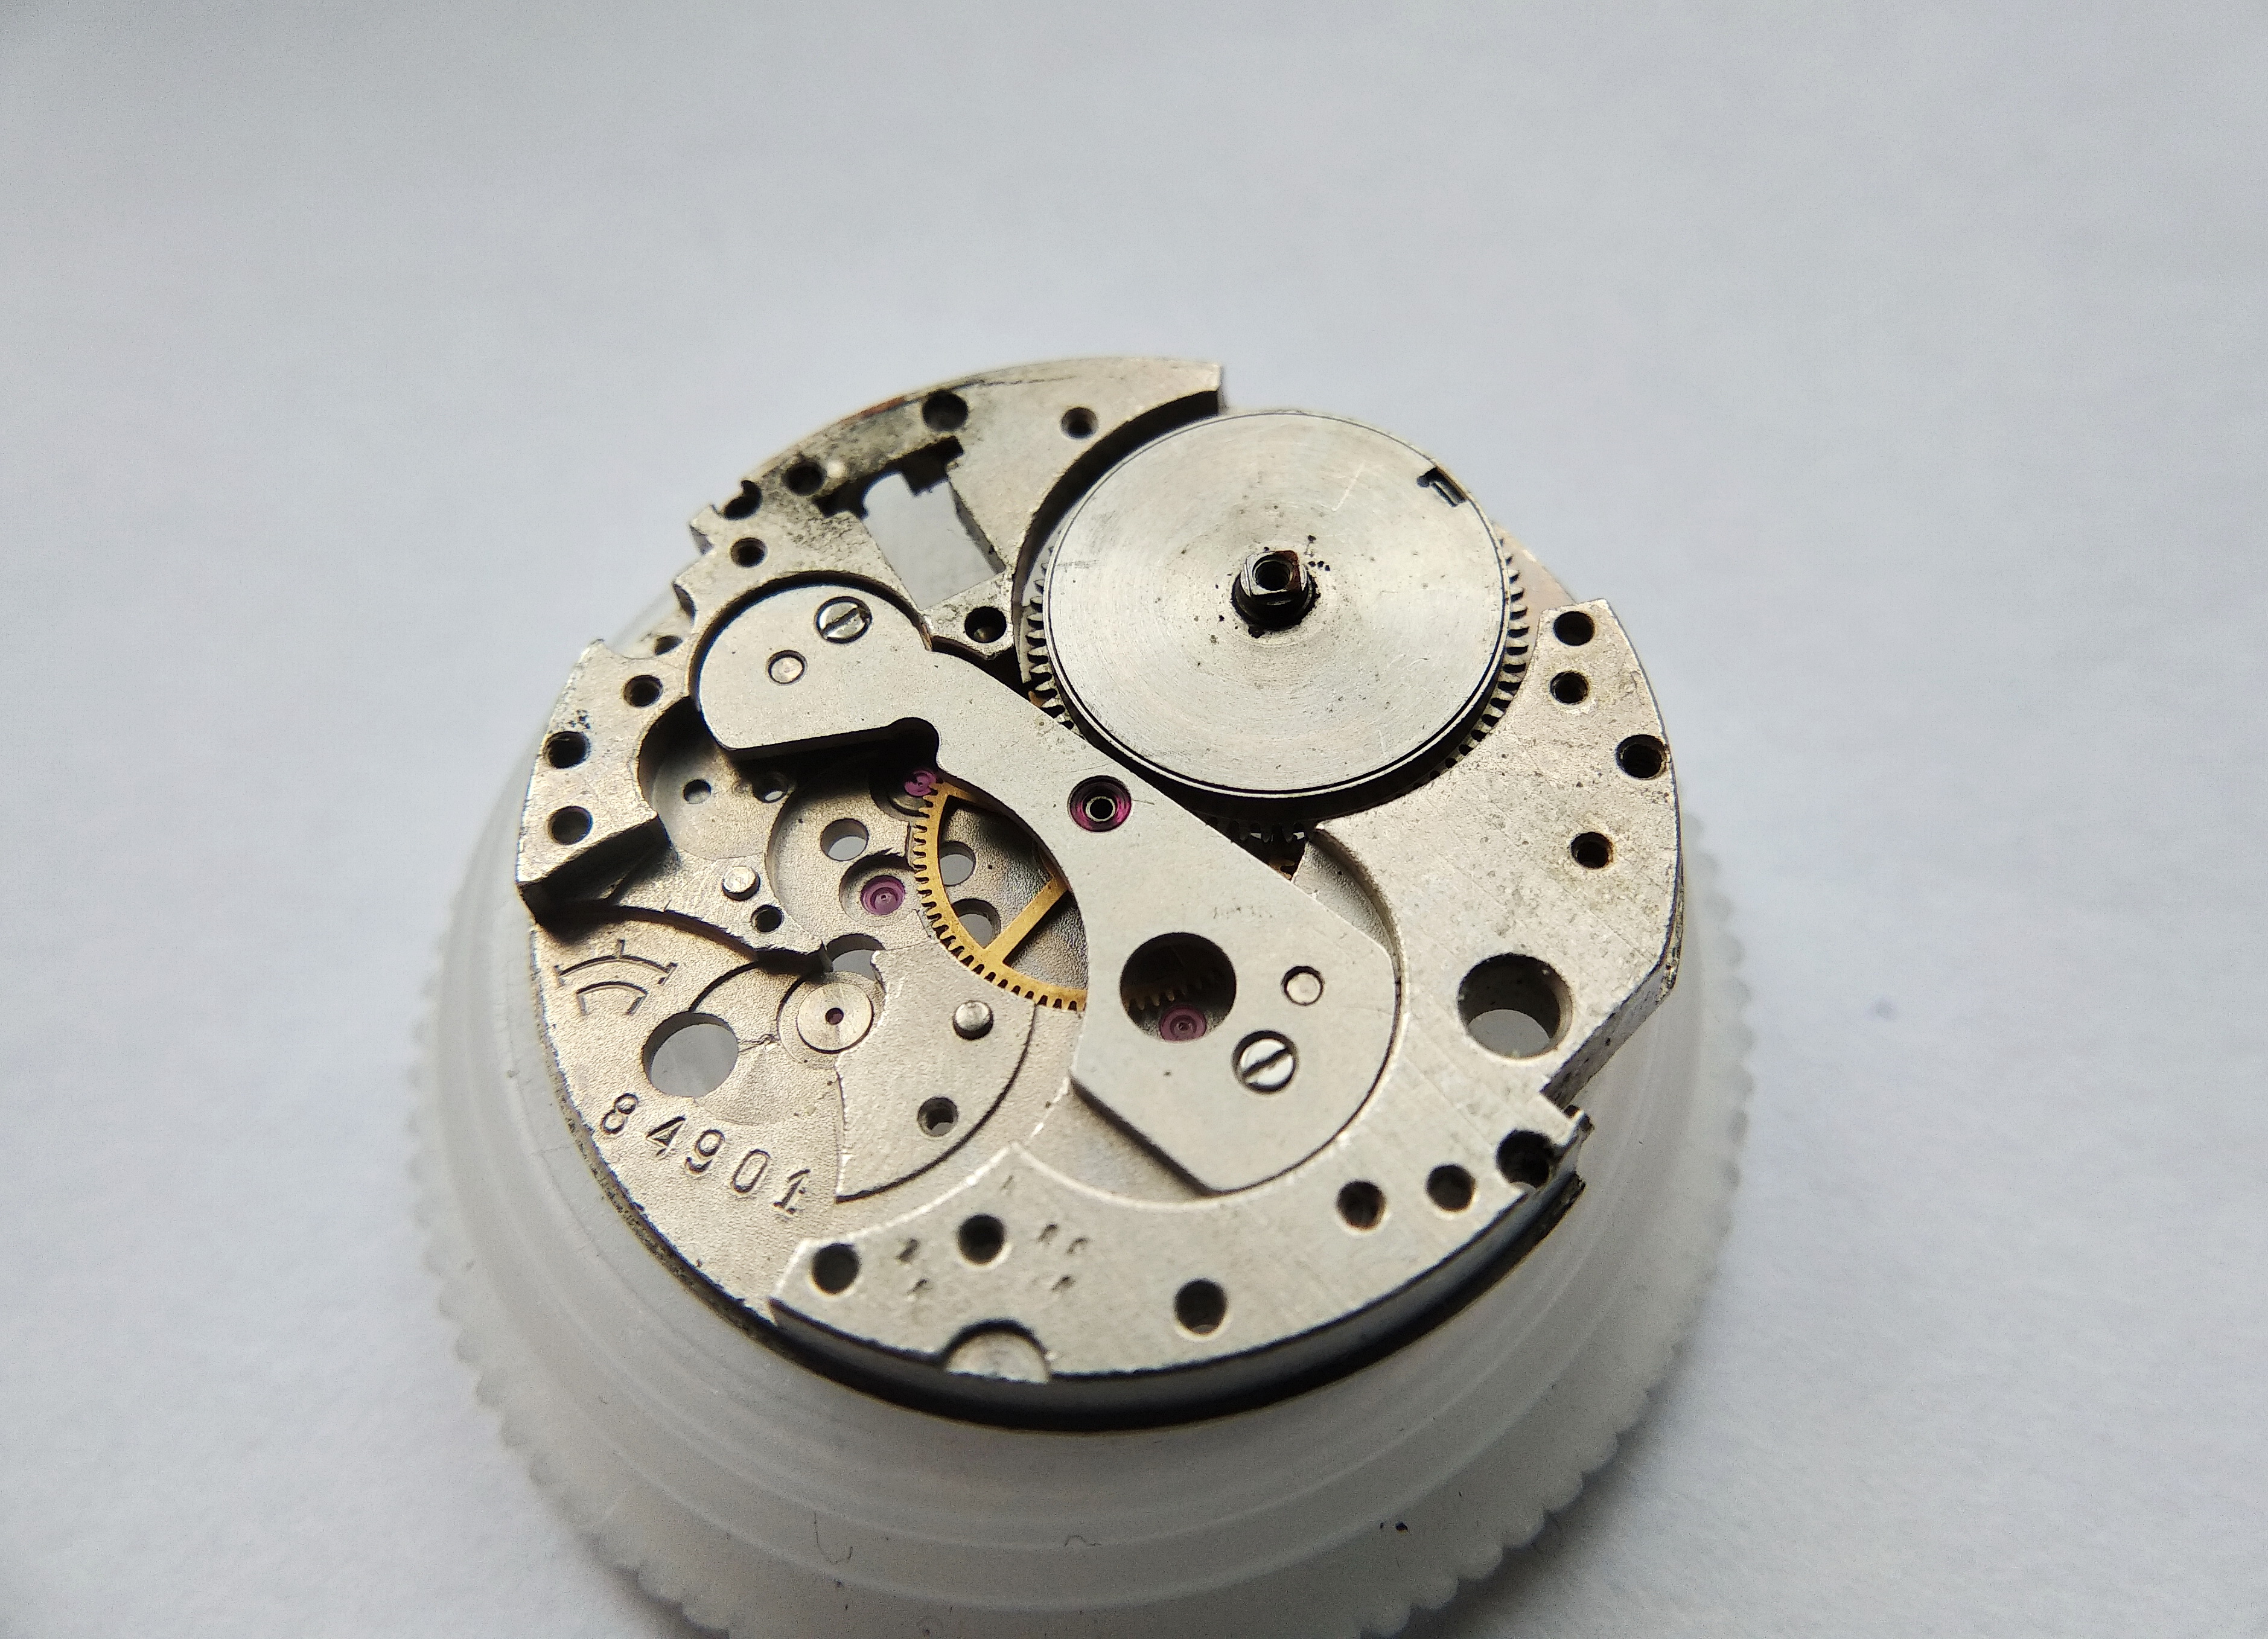
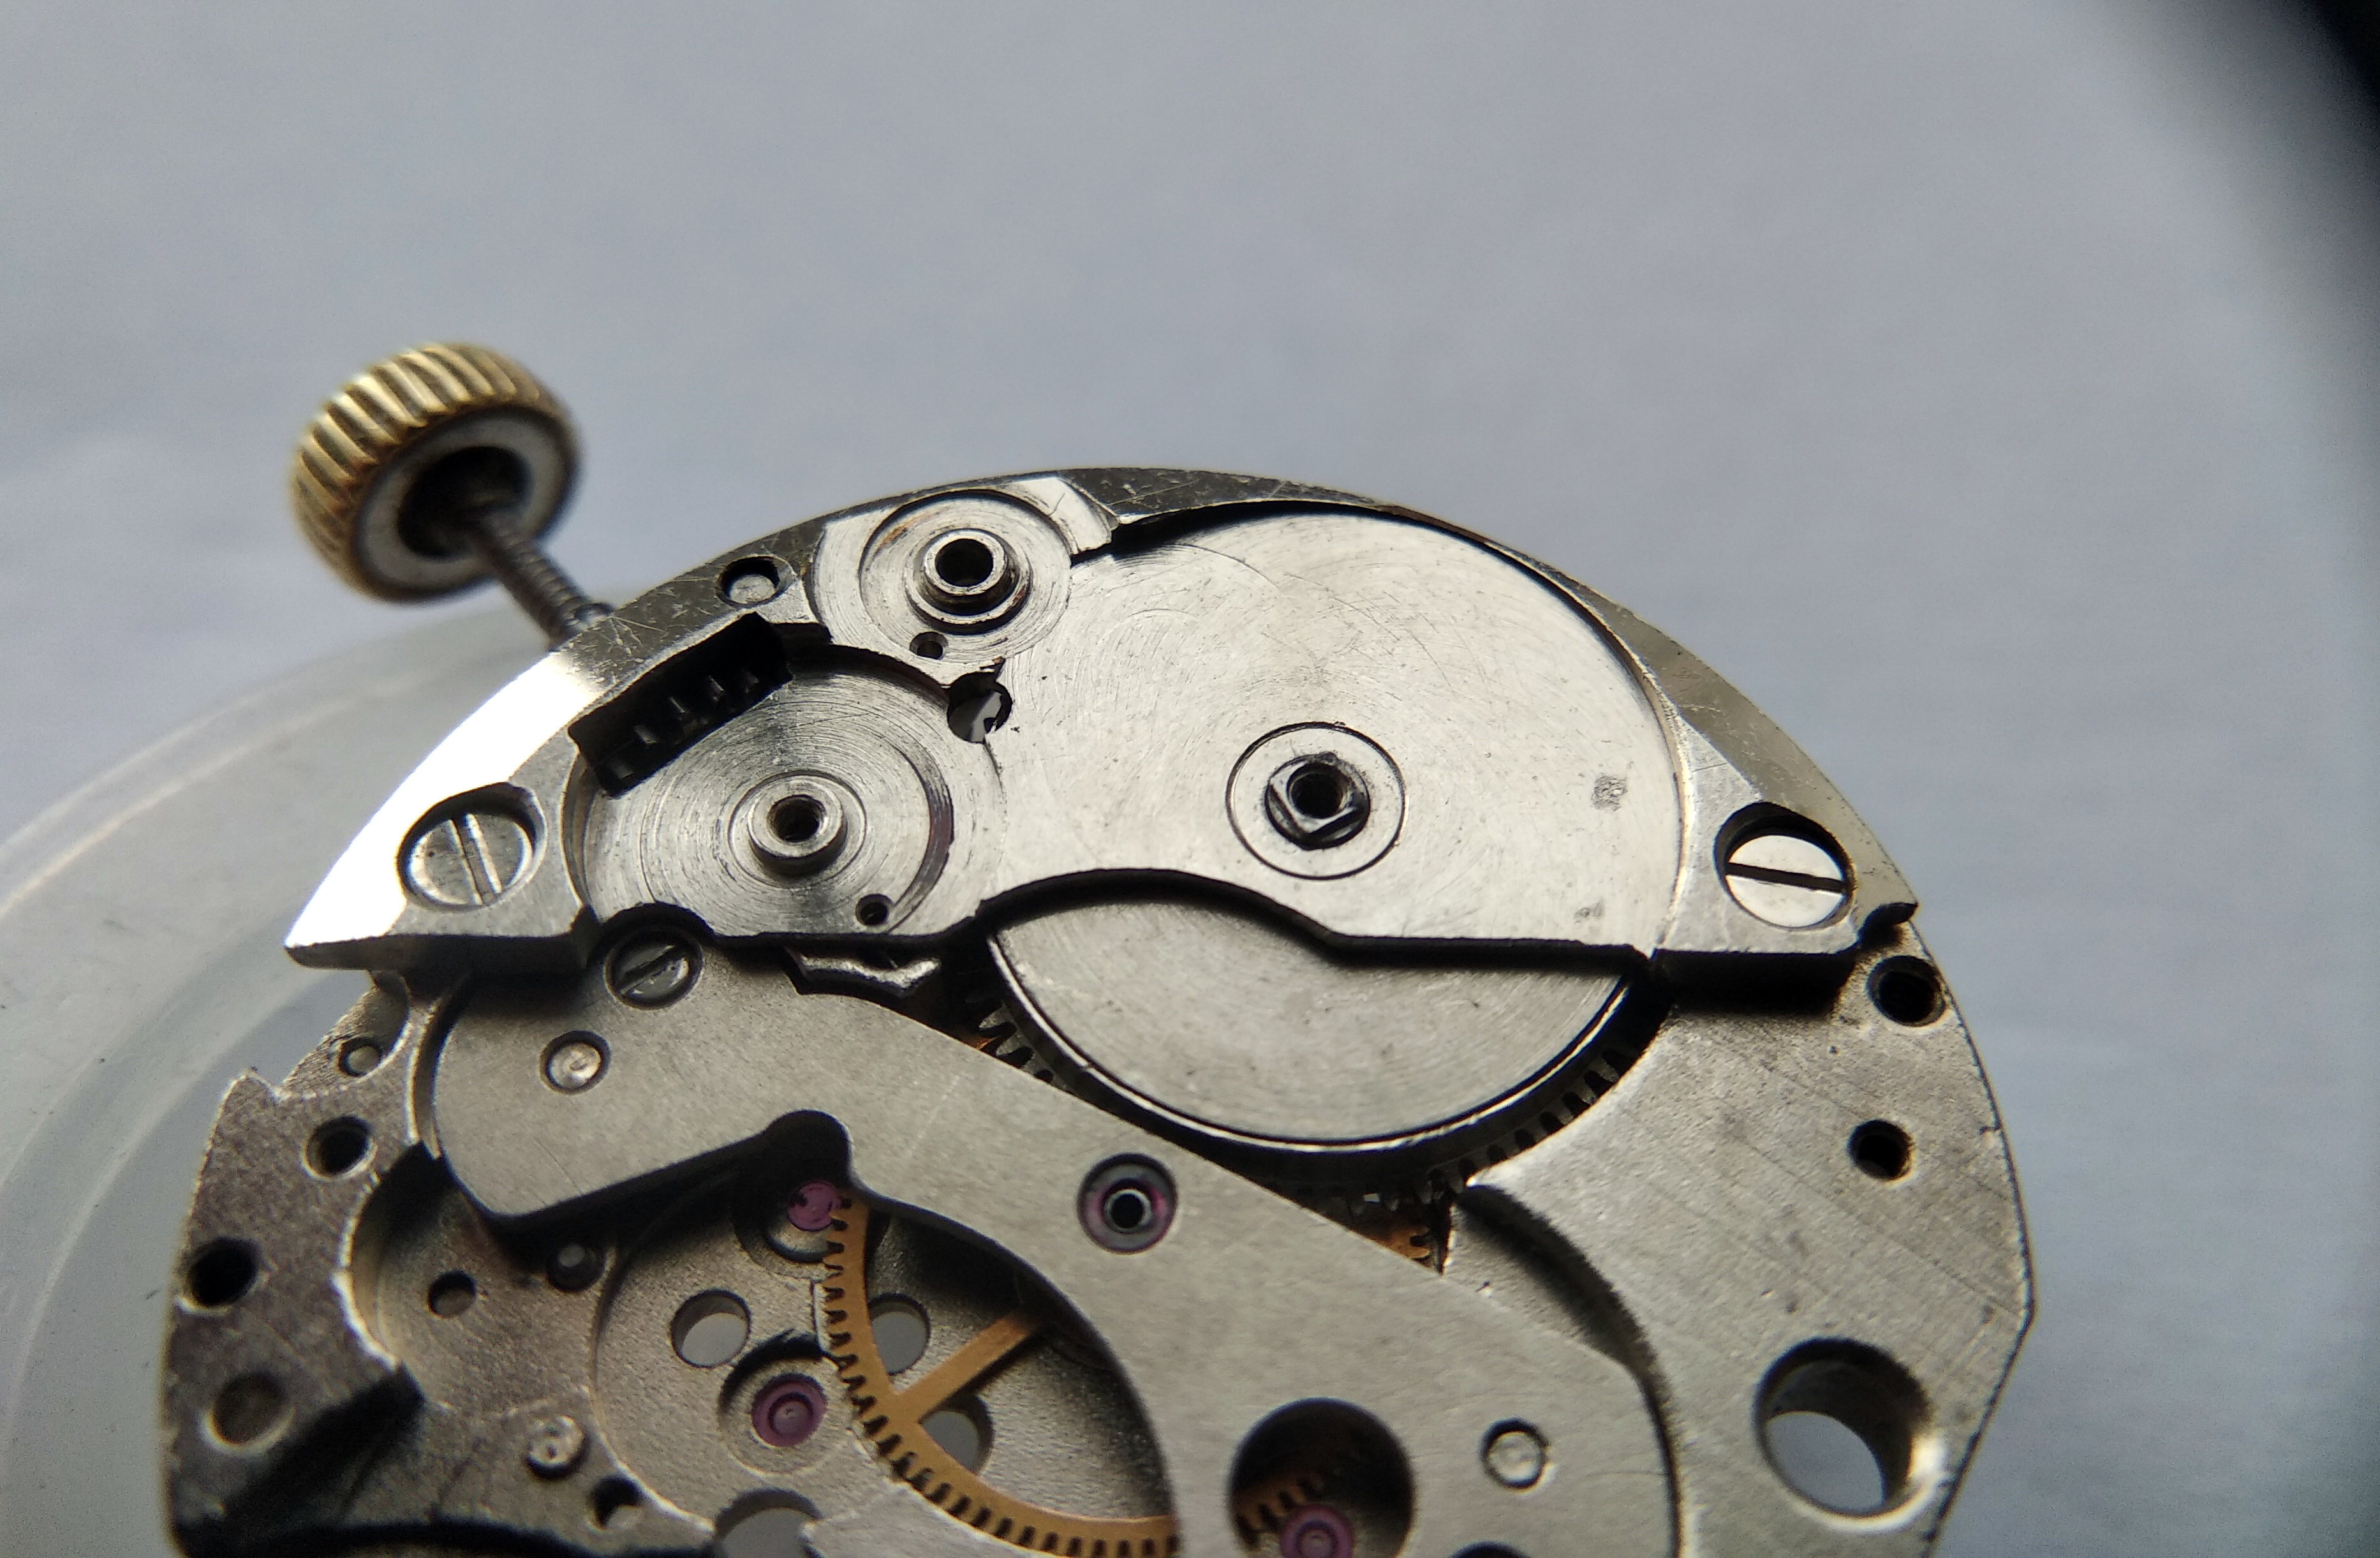
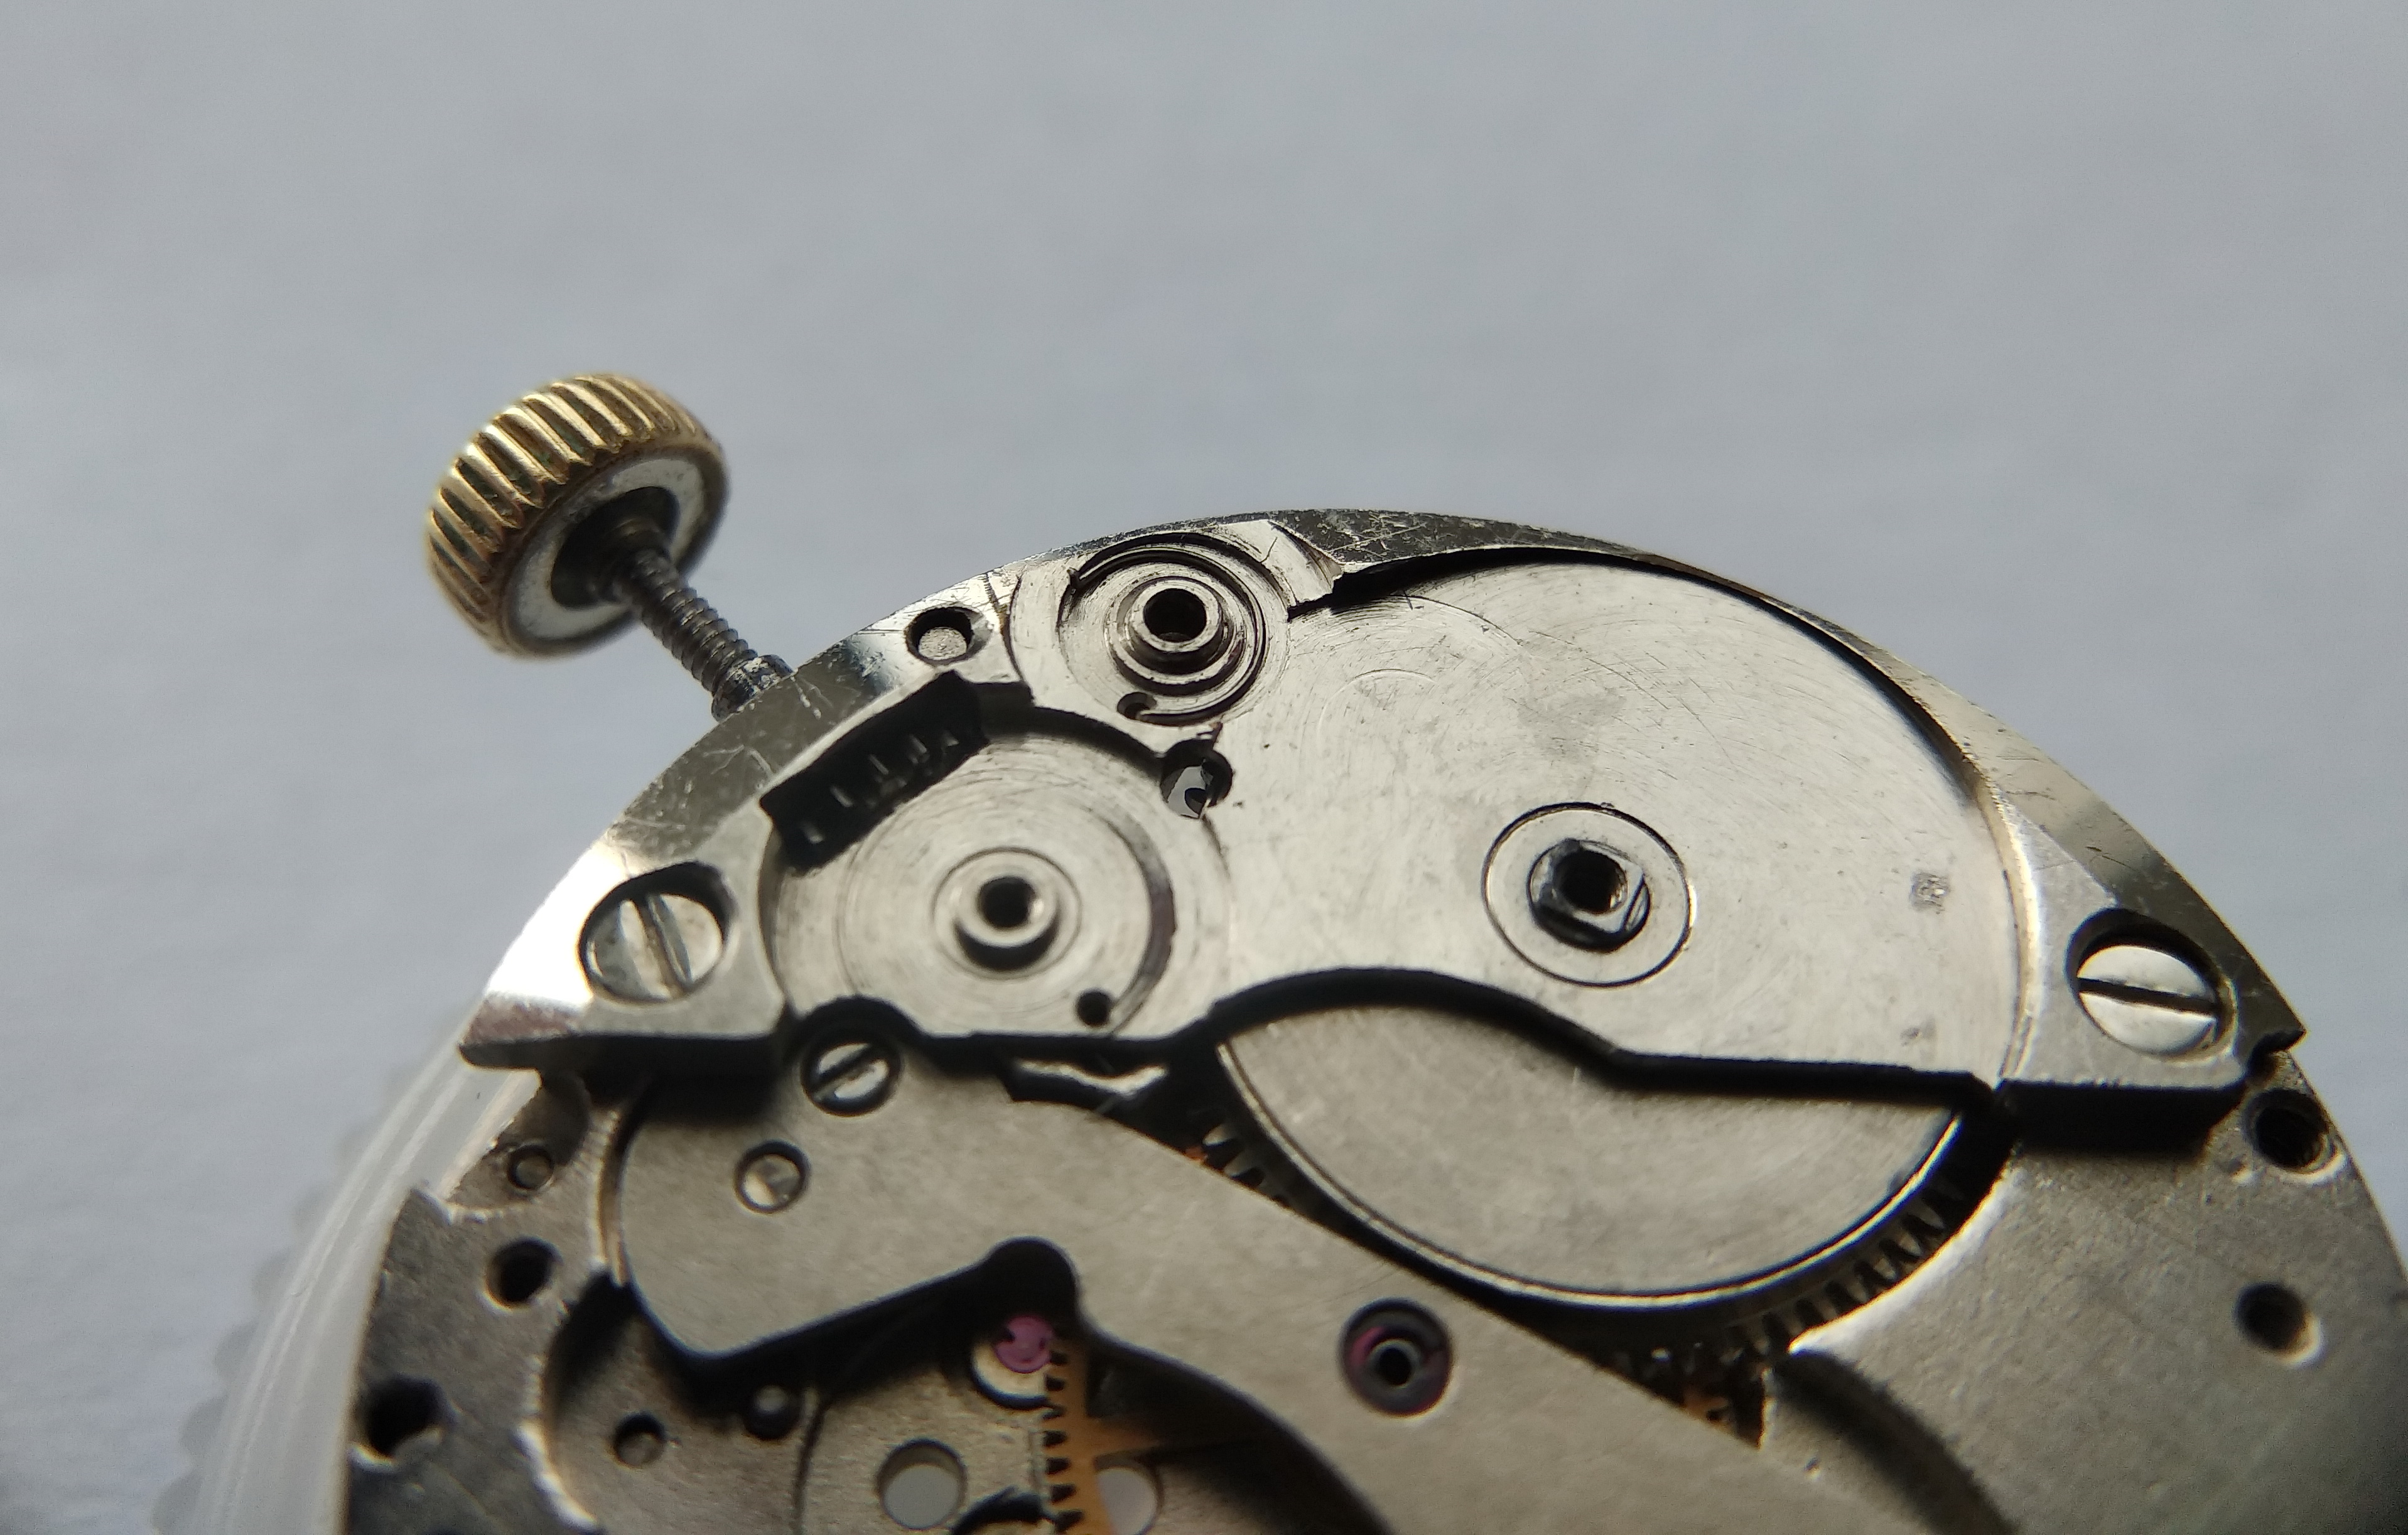
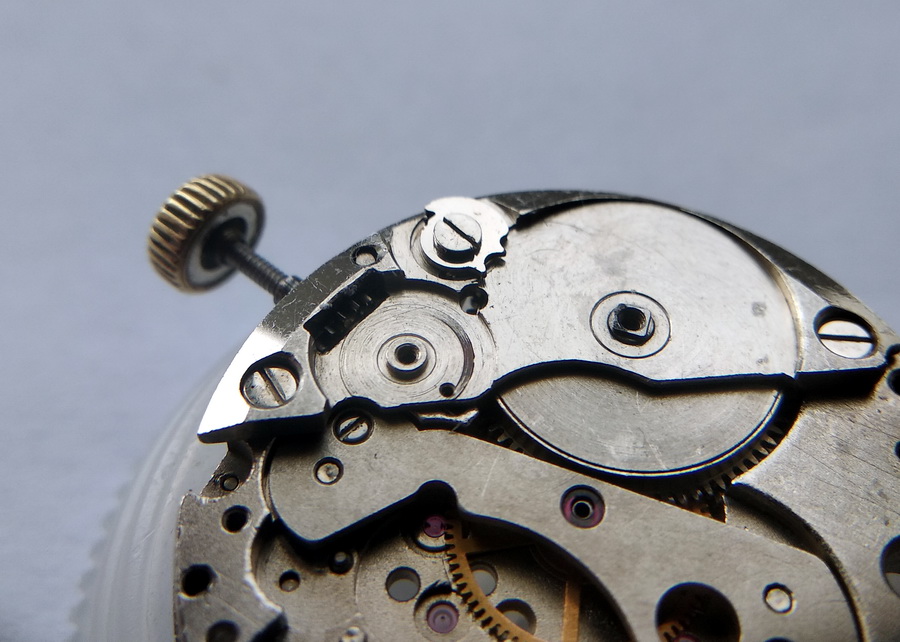
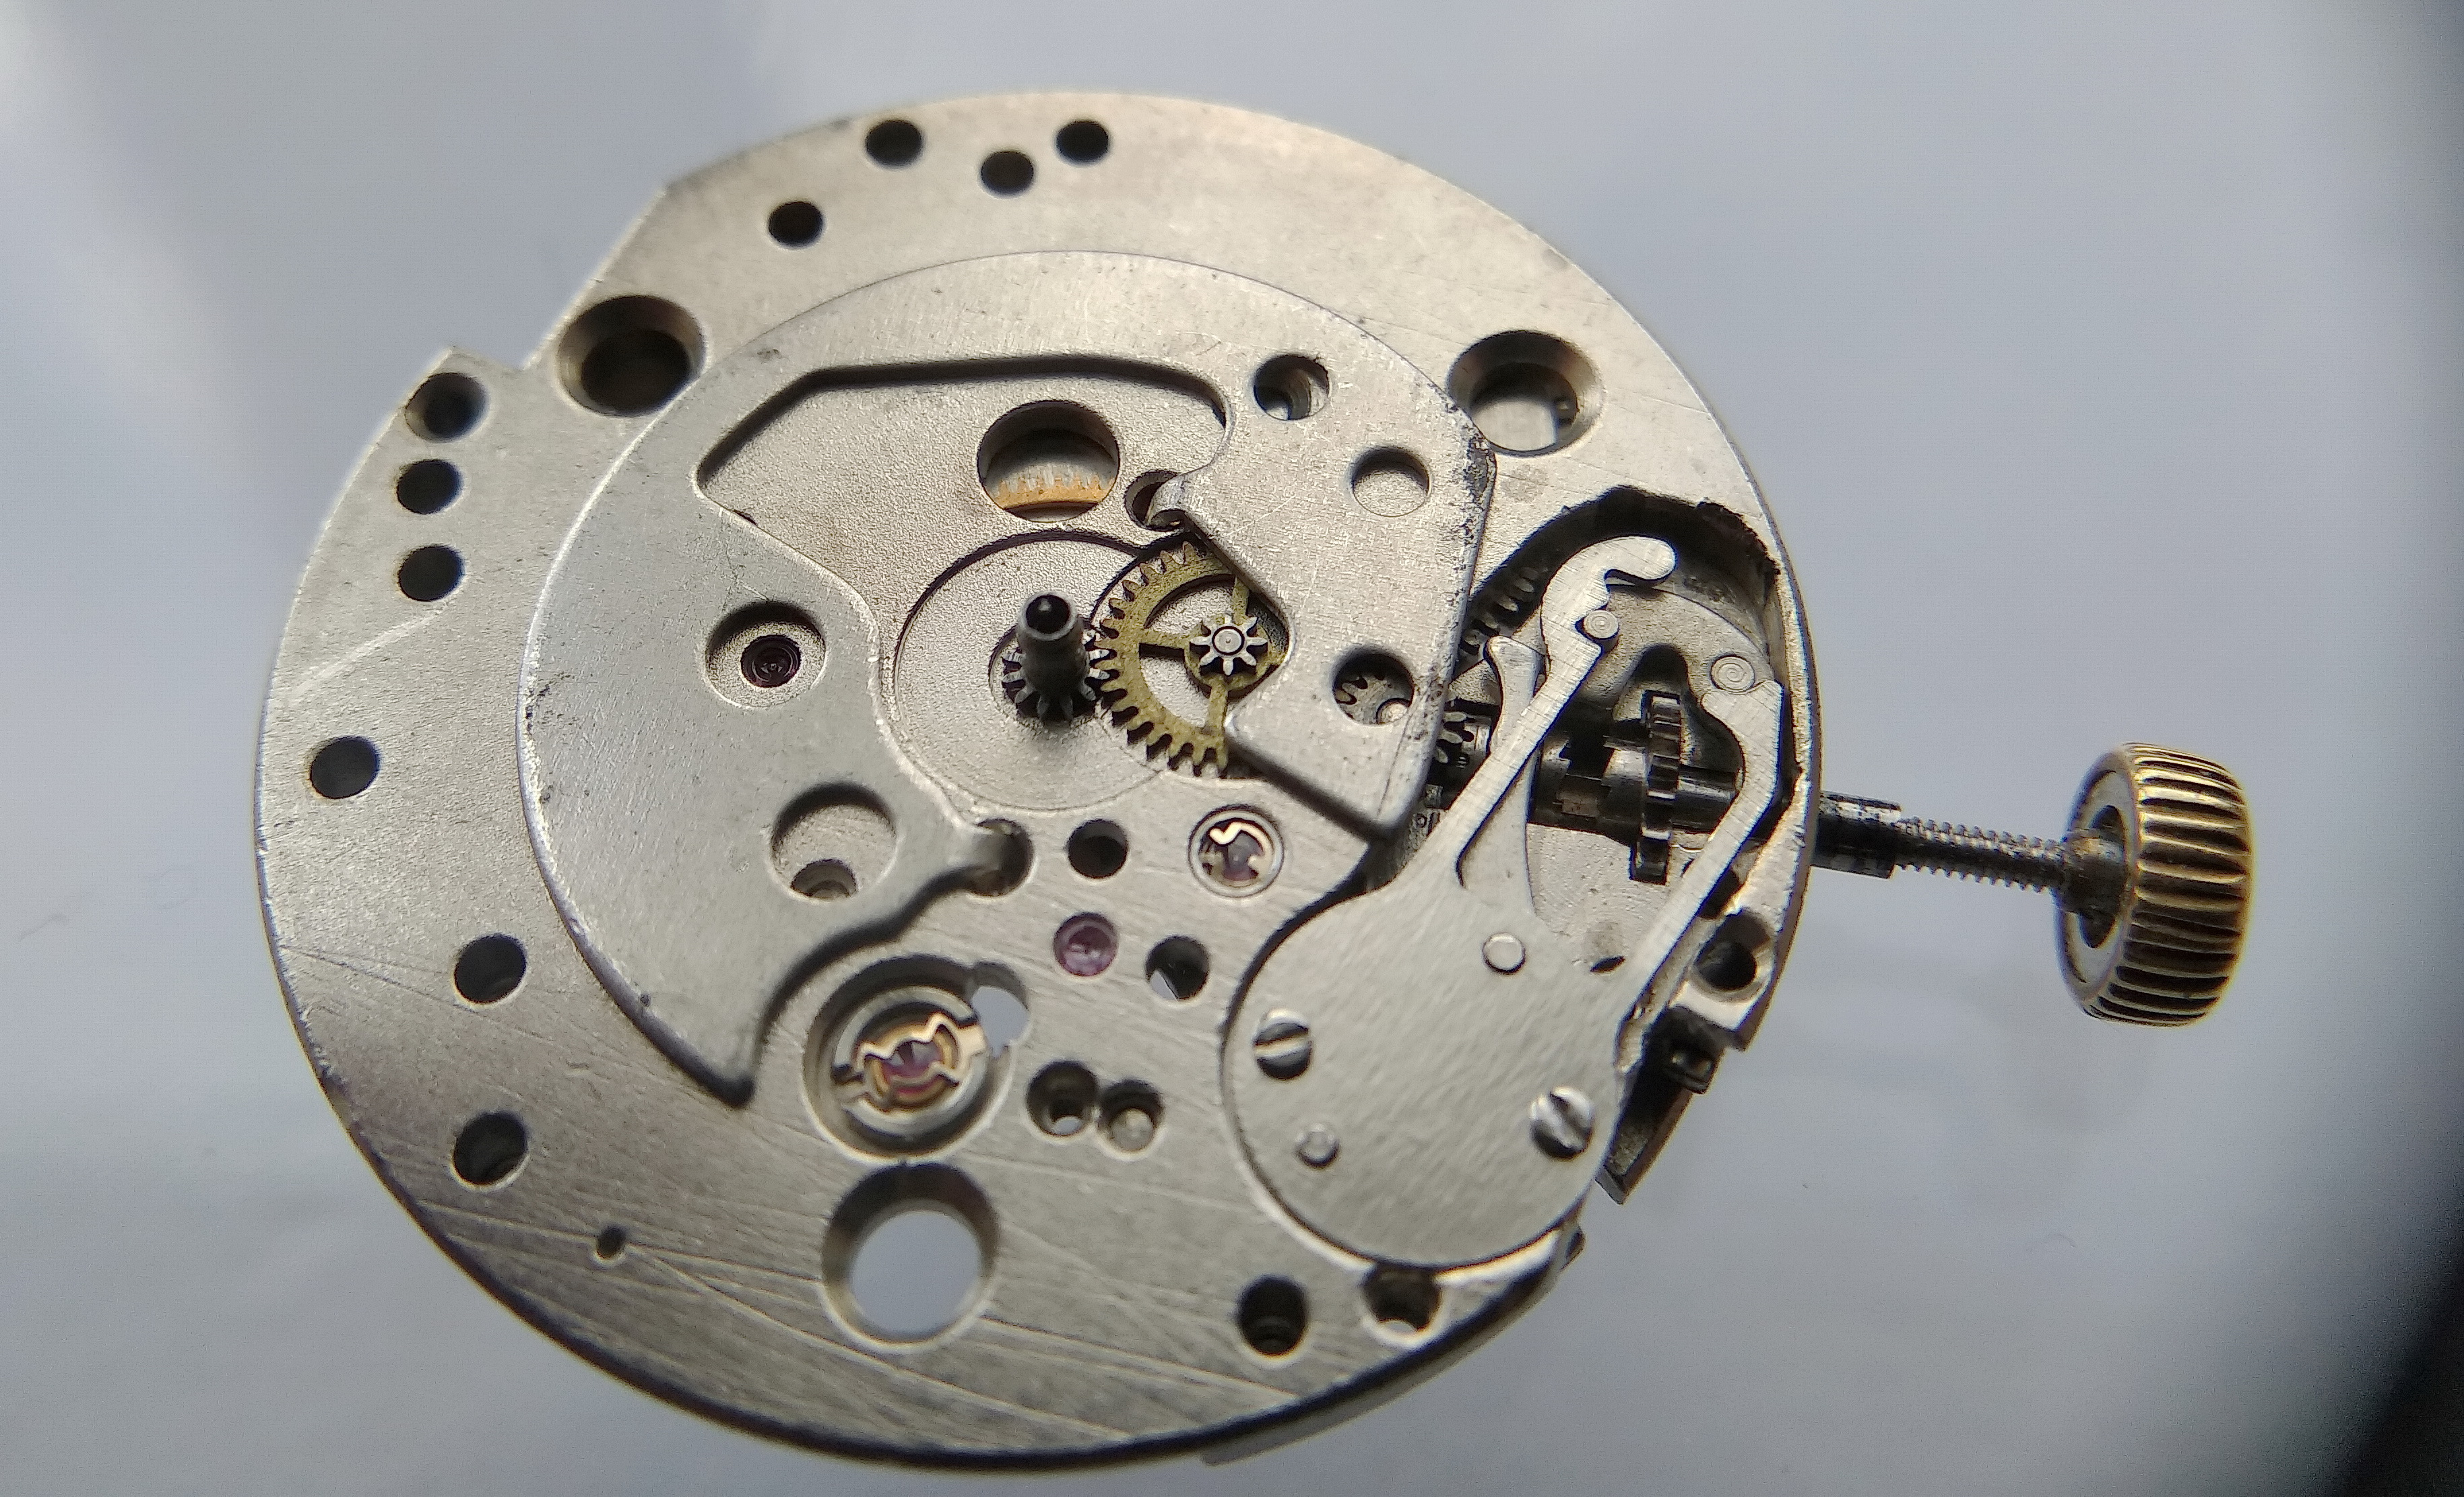
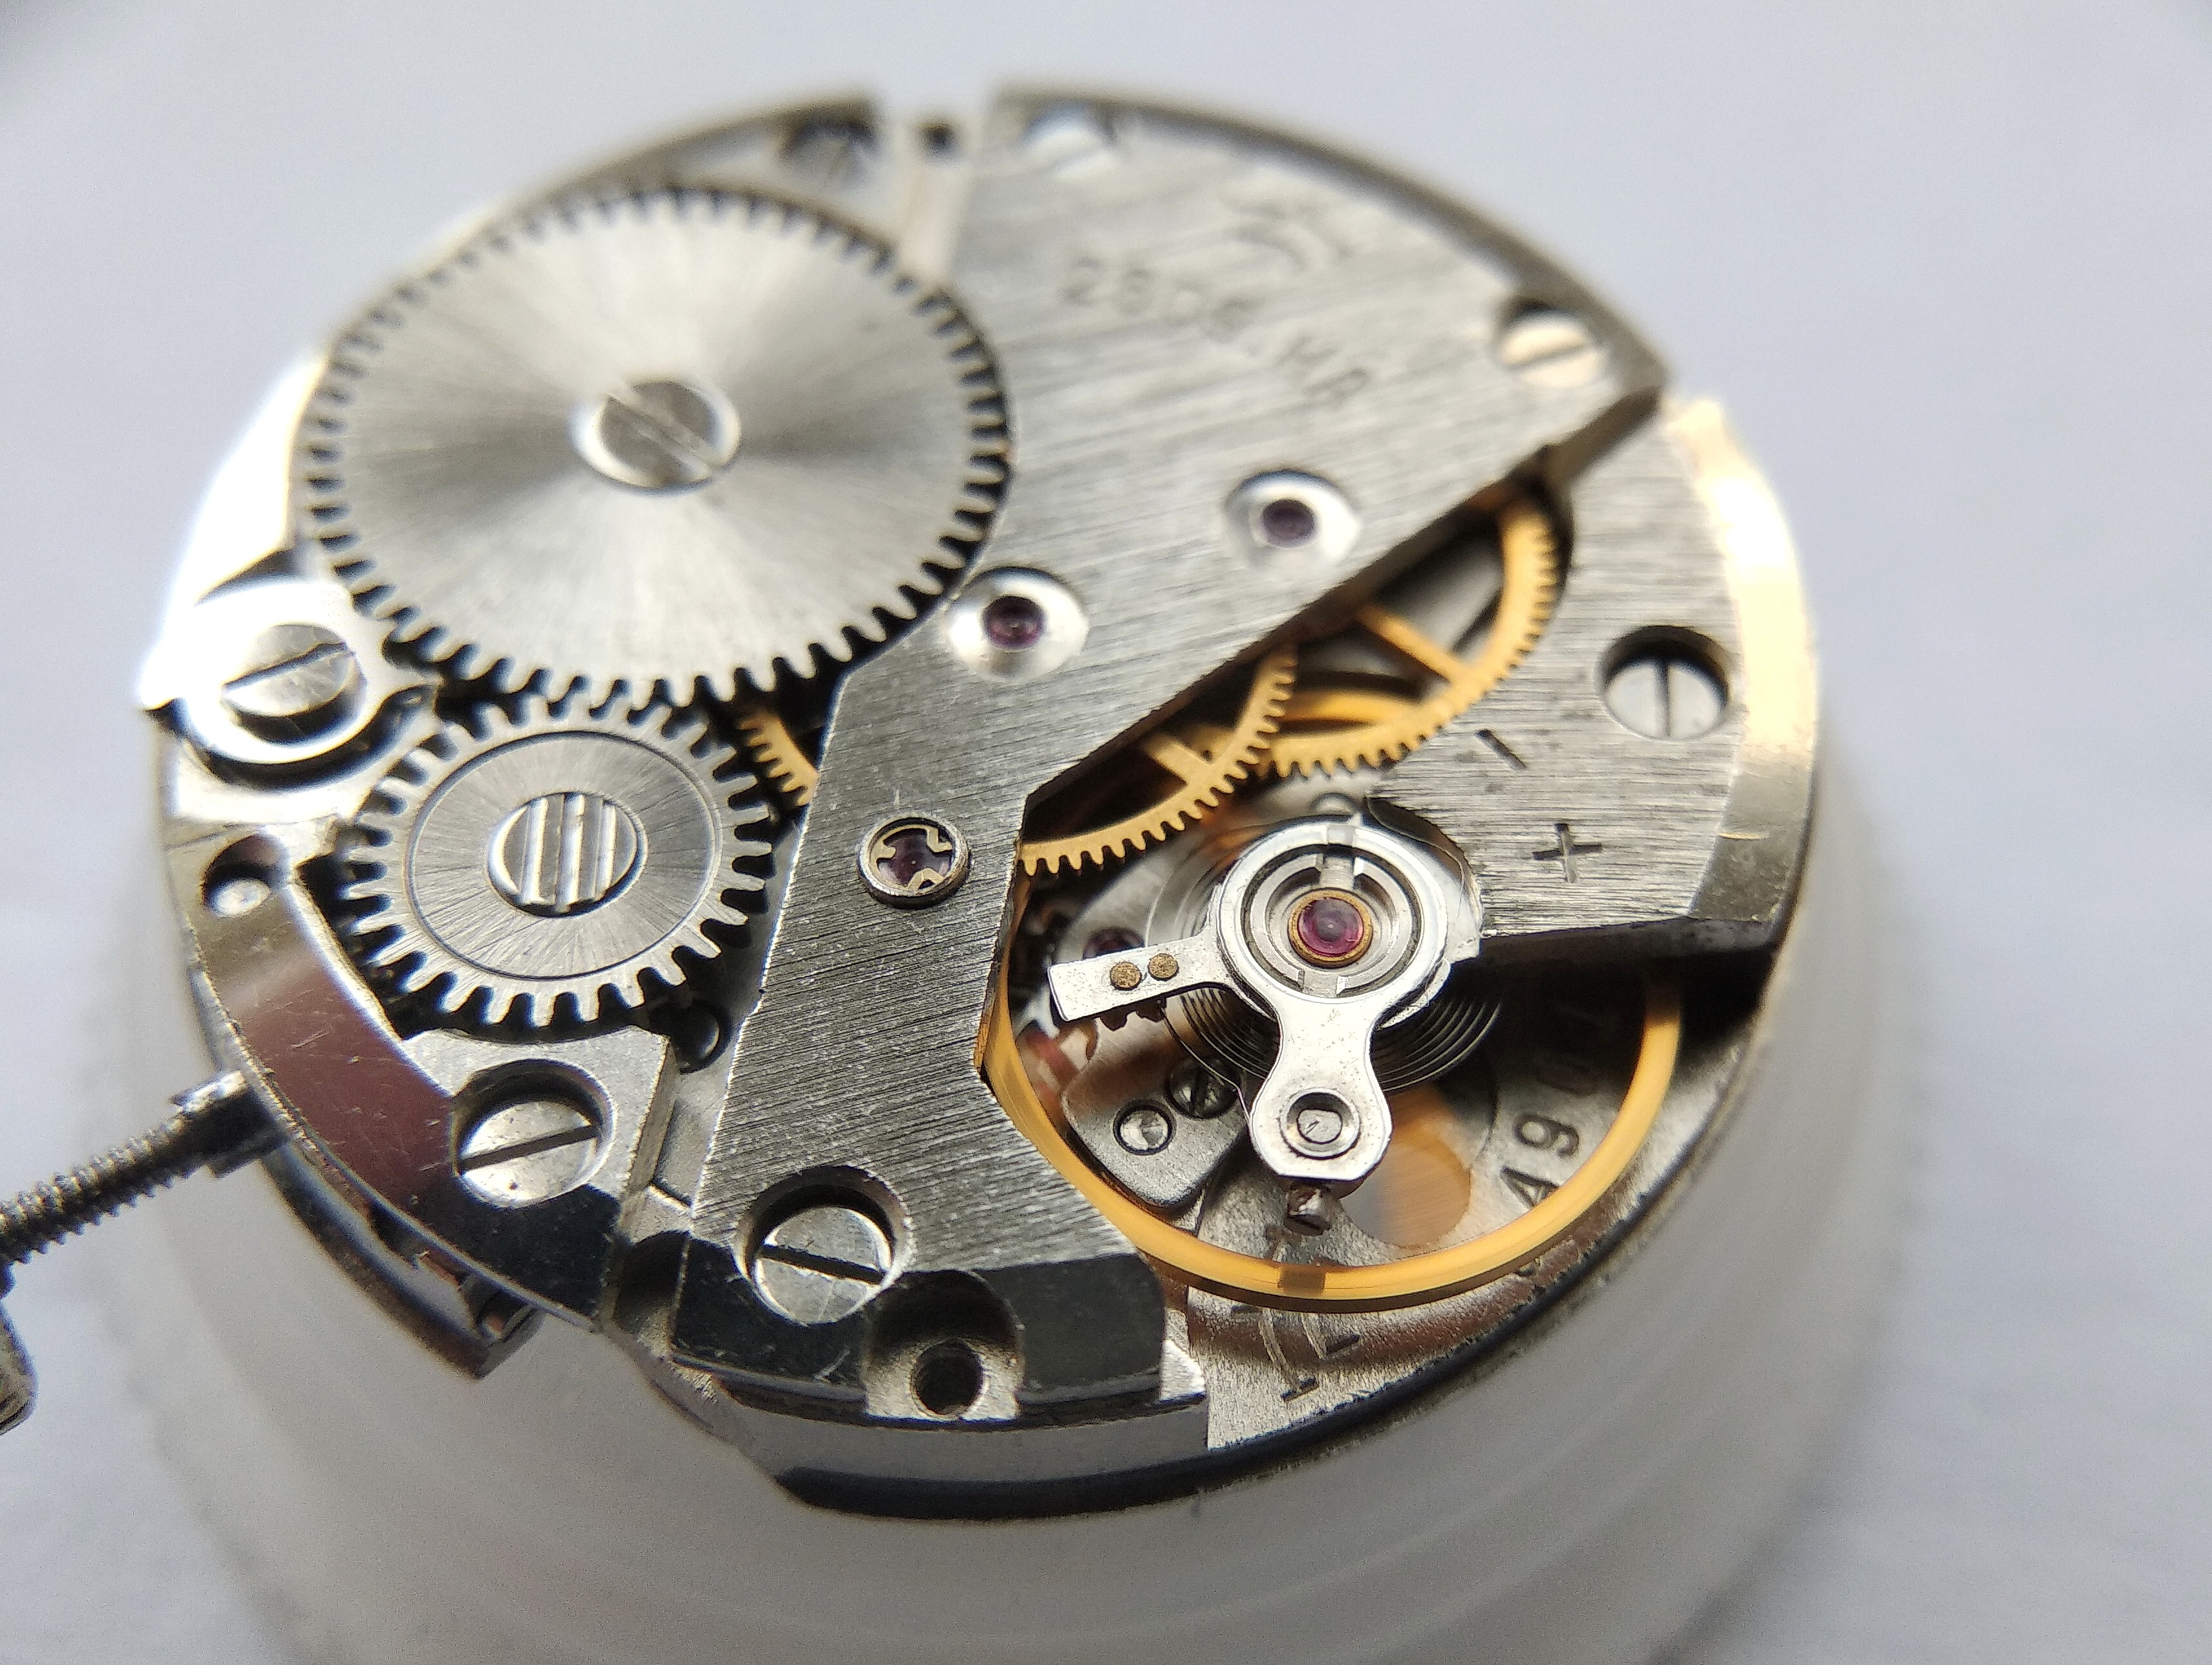
And there it is in the metal — the handsome 2609.NA, the "Flat Russia," the engine of the Raketa watches that took first prizes at international exhibitions.

Full view of the 2609.NA movement out of its case, dial removed, before disassembly
The 2609.NA in full. Slim, rationally laid out, and award-winning in its day — the movement that earned the Raketa its international reputation.

The Balance: Screwless, Shock-Protected, and Glued

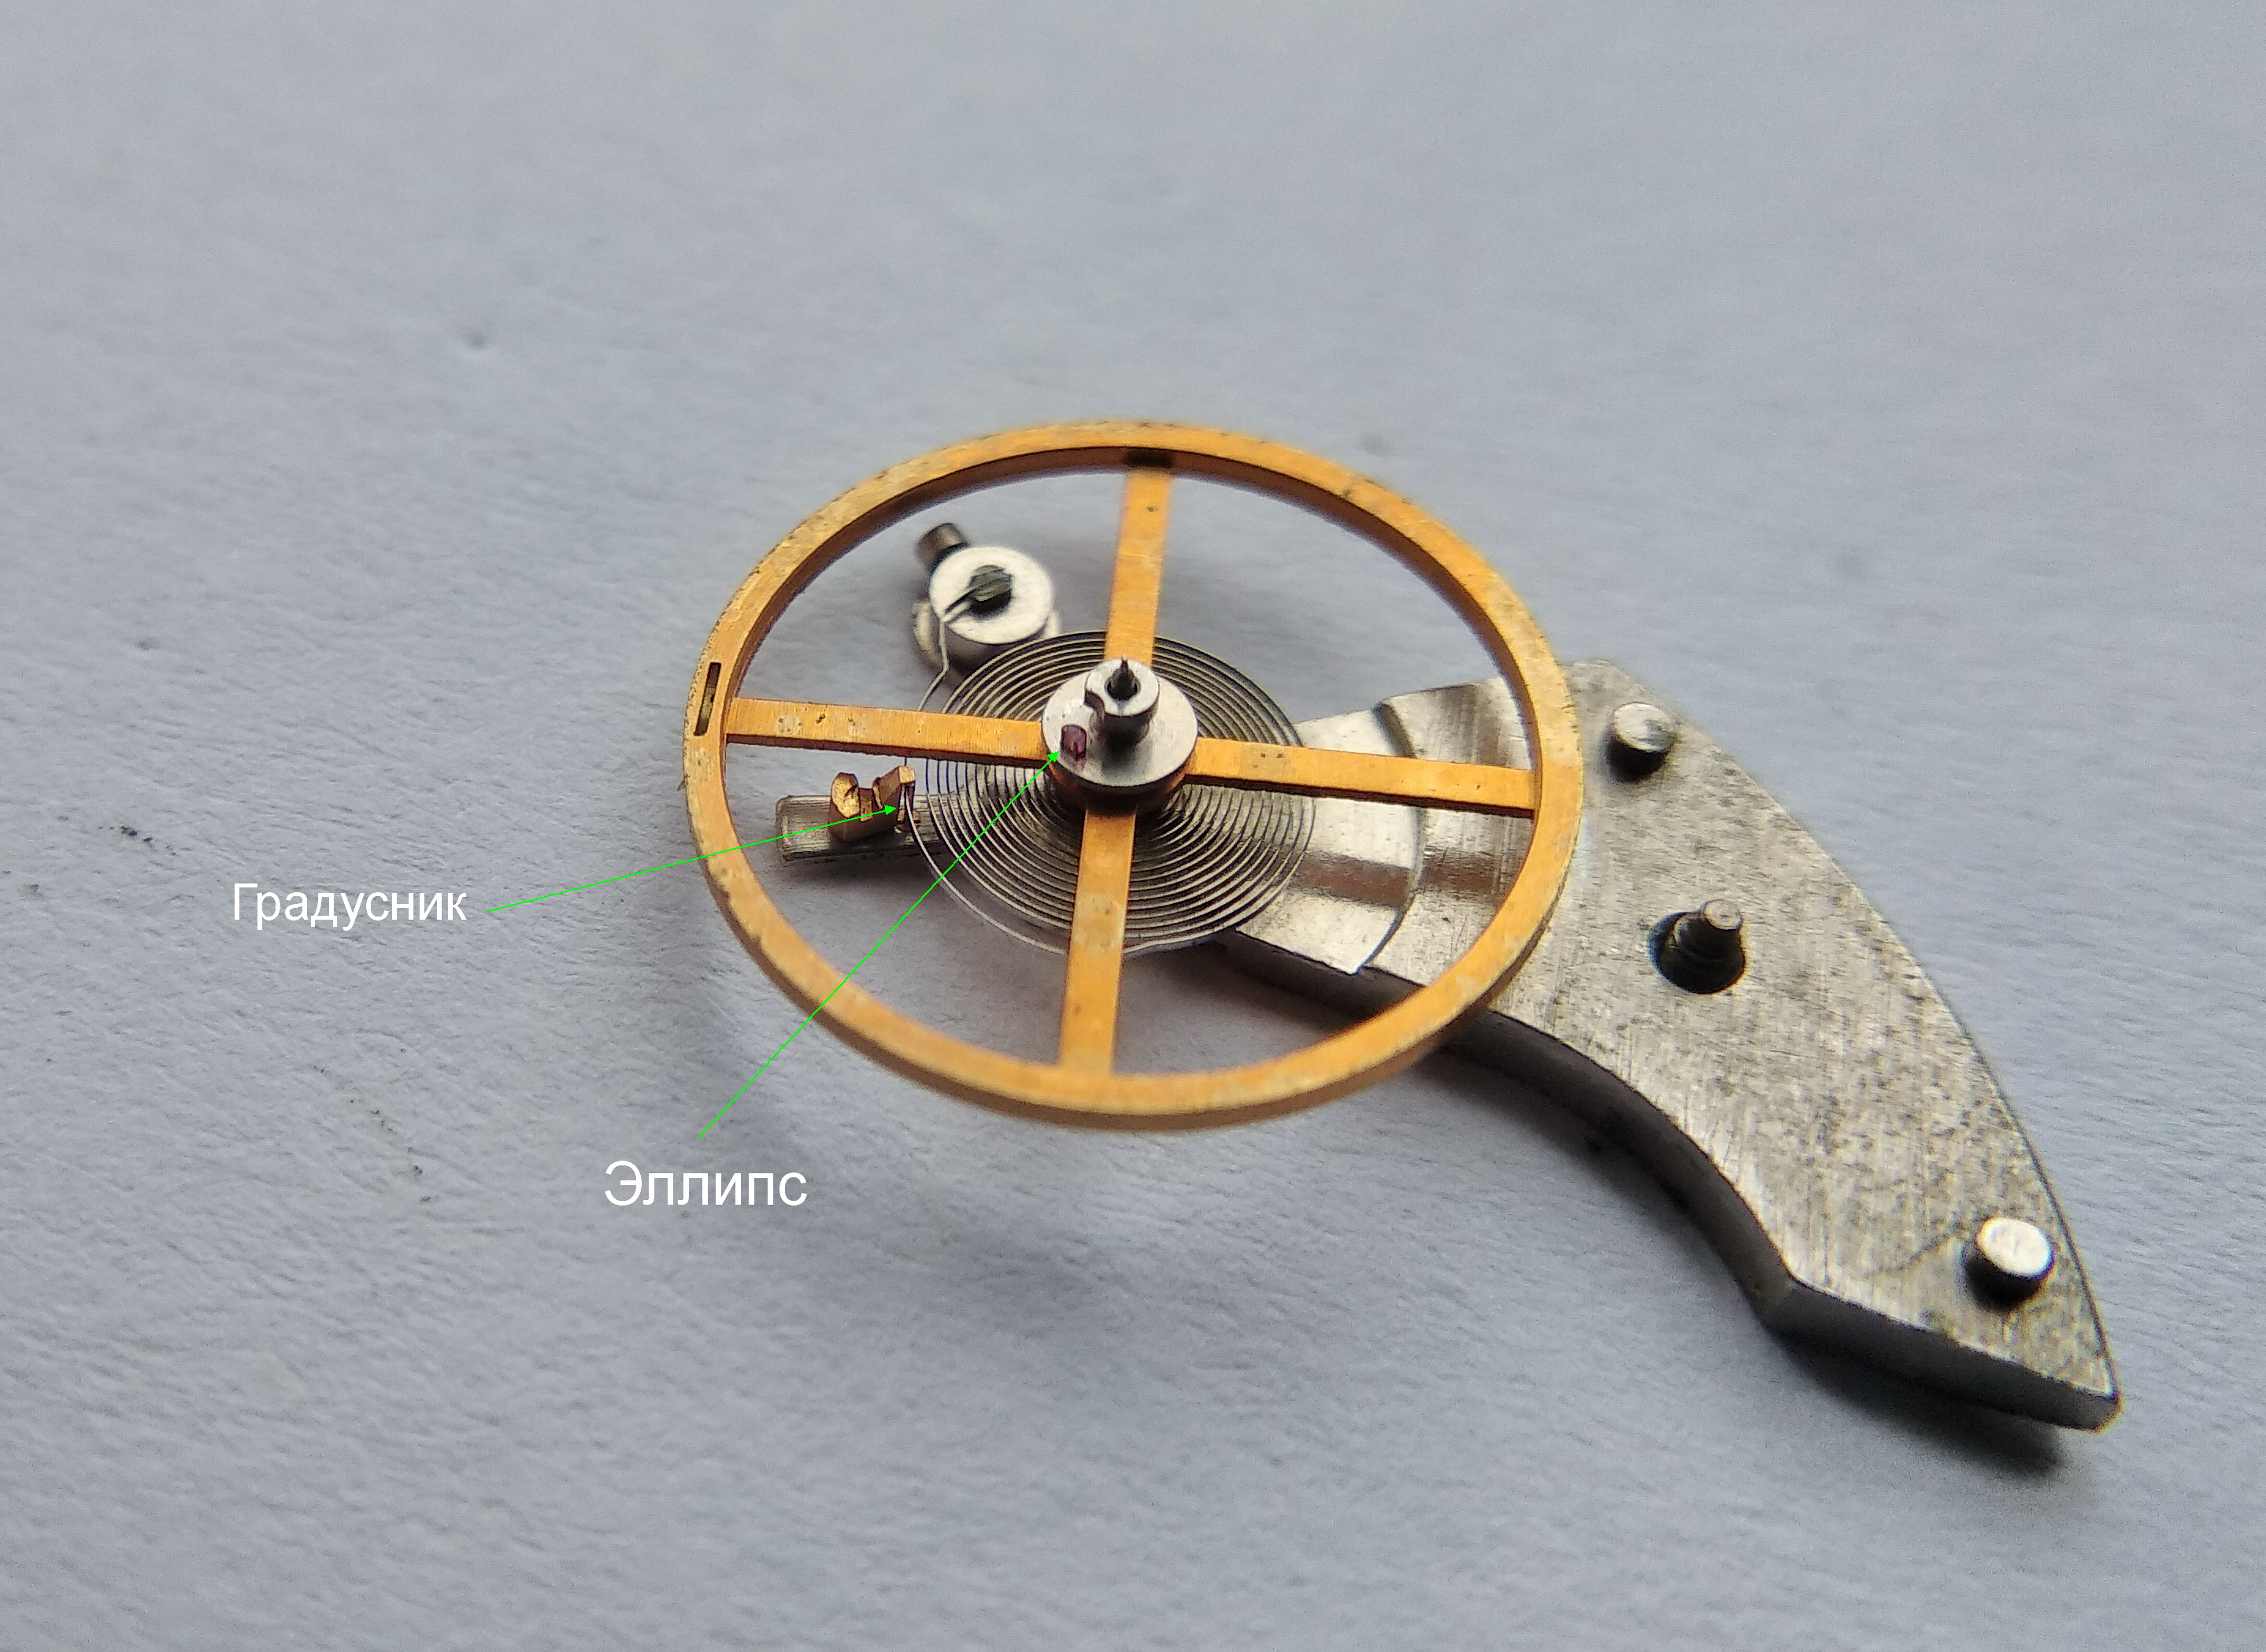
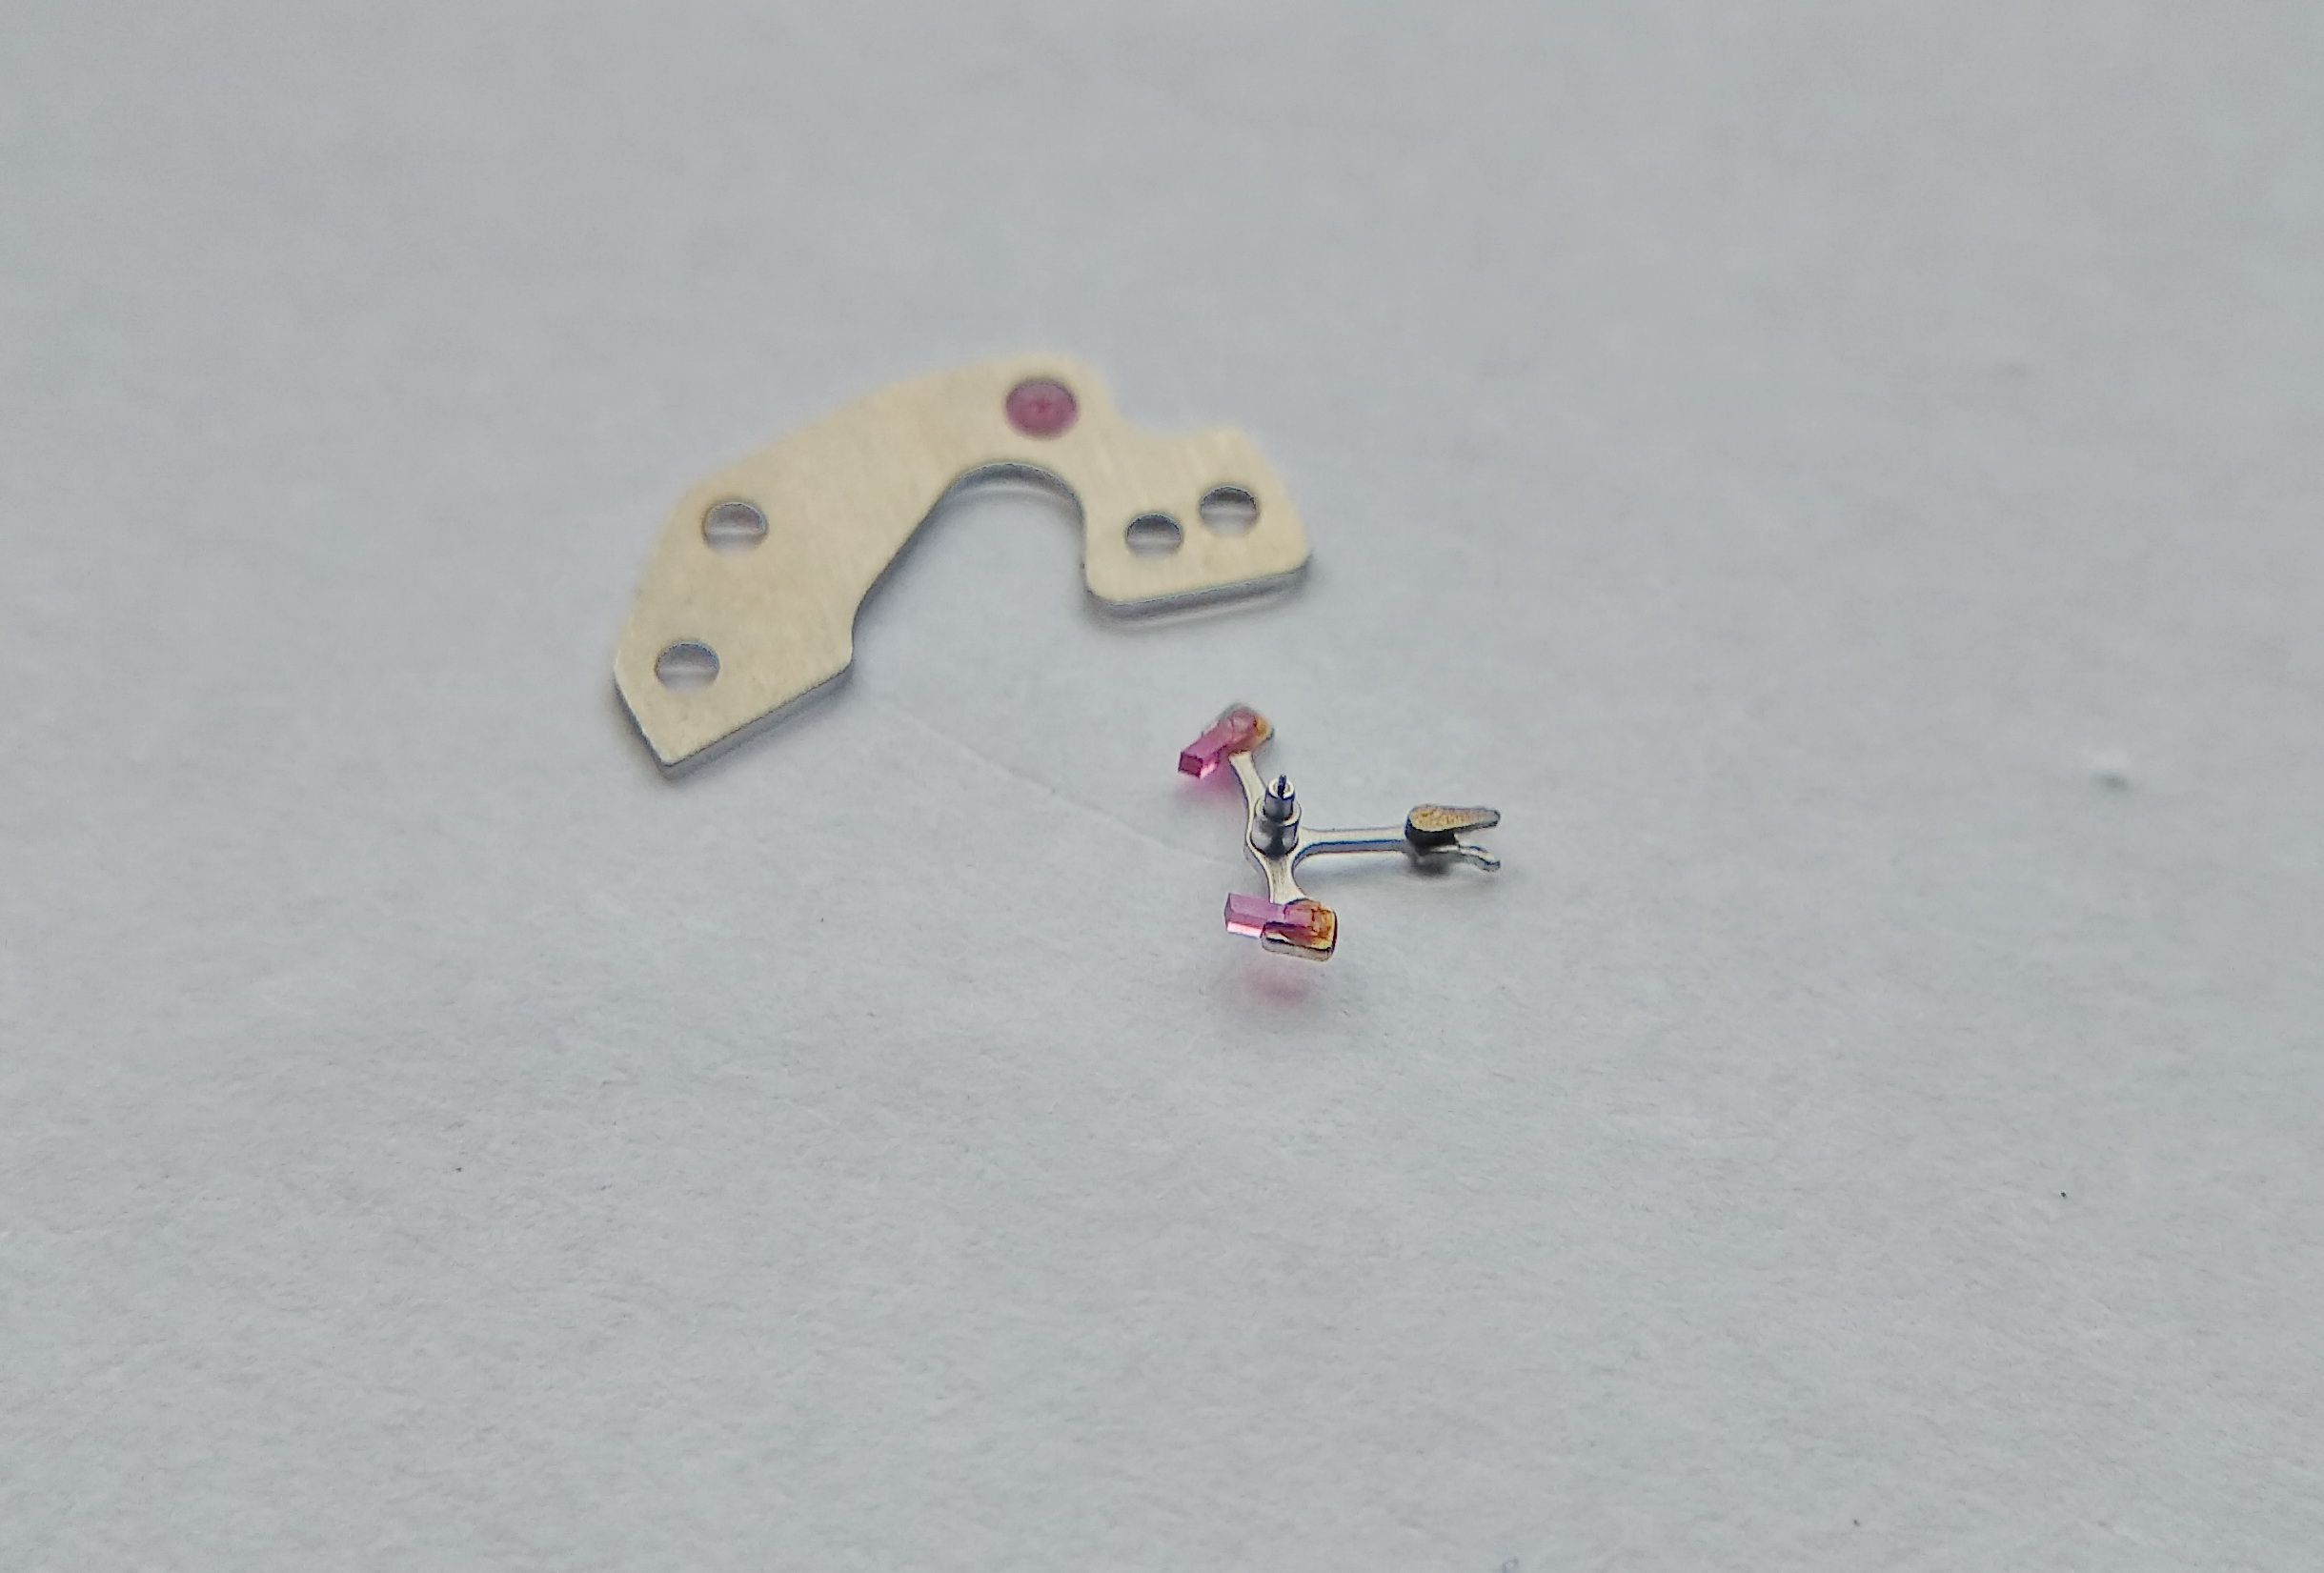
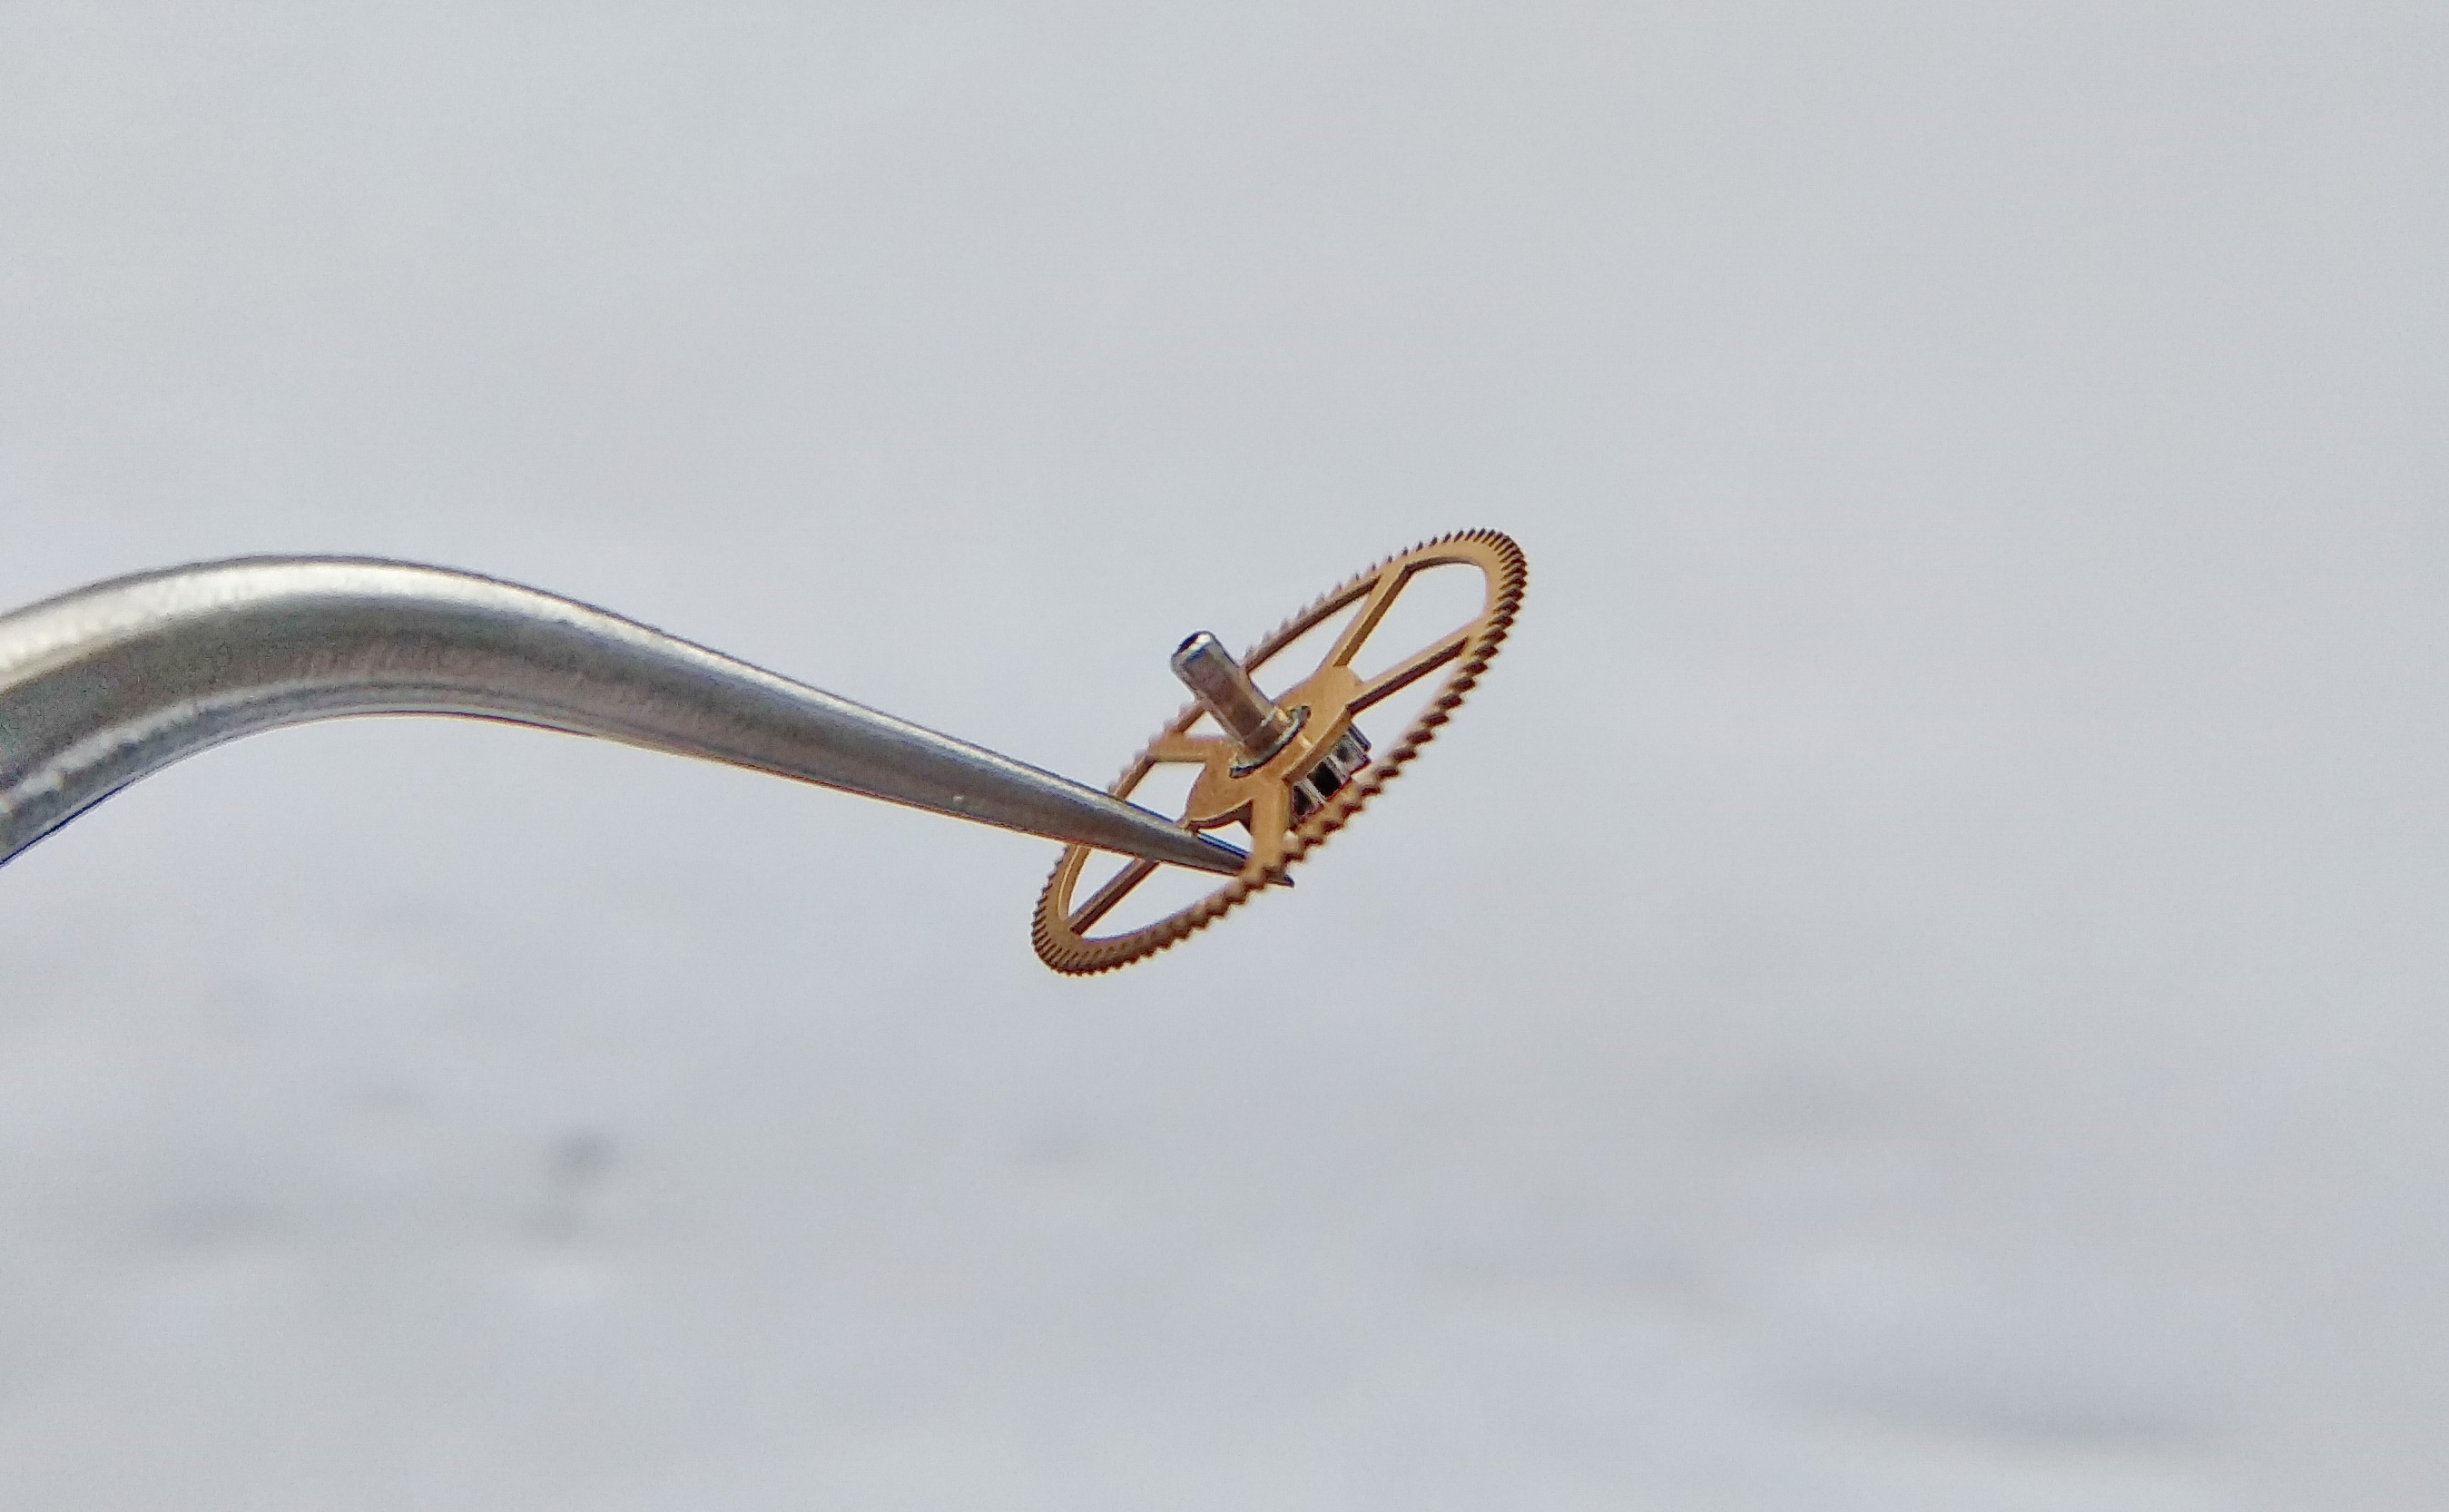
We remove the balance. The spacers — well, of course there are spacers — and the balance itself. A splendid balance. The regulator is in place, naturally, and the hairspring stud carrier is the movable type, which means we will be able to set the beat without the slightest difficulty.

Balance assembly lifted from the movement together with thin shim spacers under its cock
The balance comes away with its shim spacers. A traditional regulator and, crucially, a movable stud carrier mean beat error can be corrected directly — no guesswork.

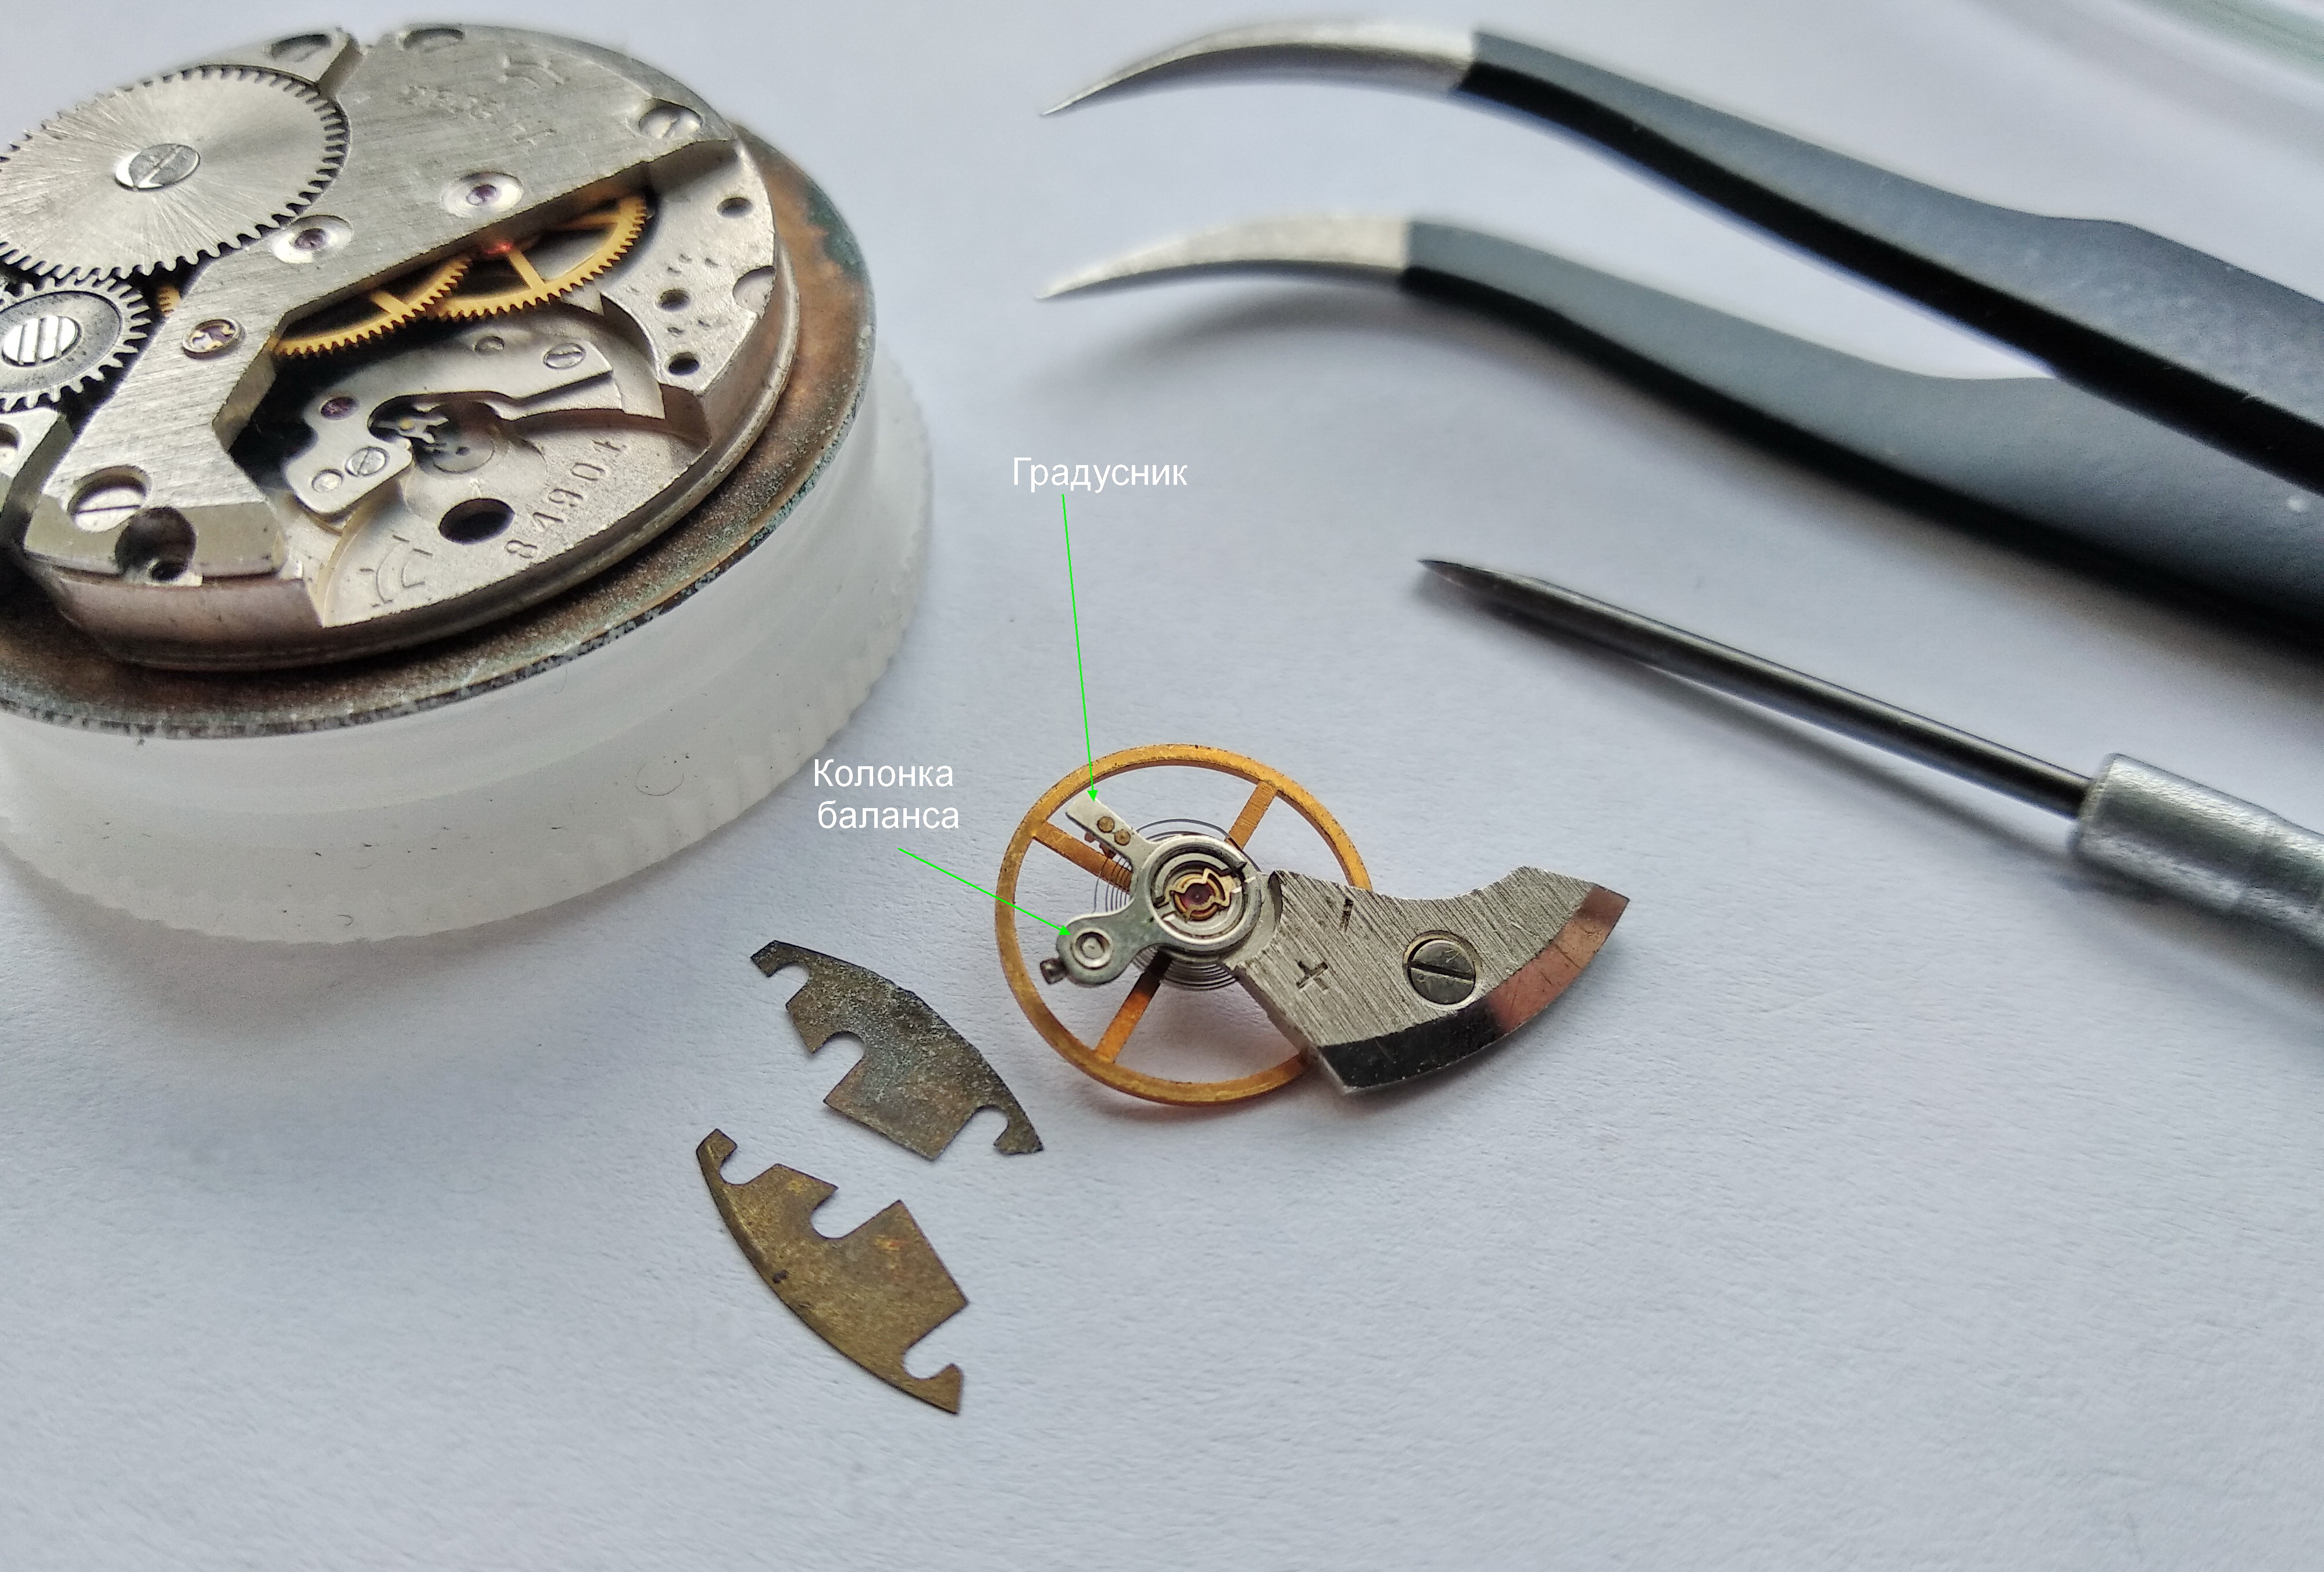
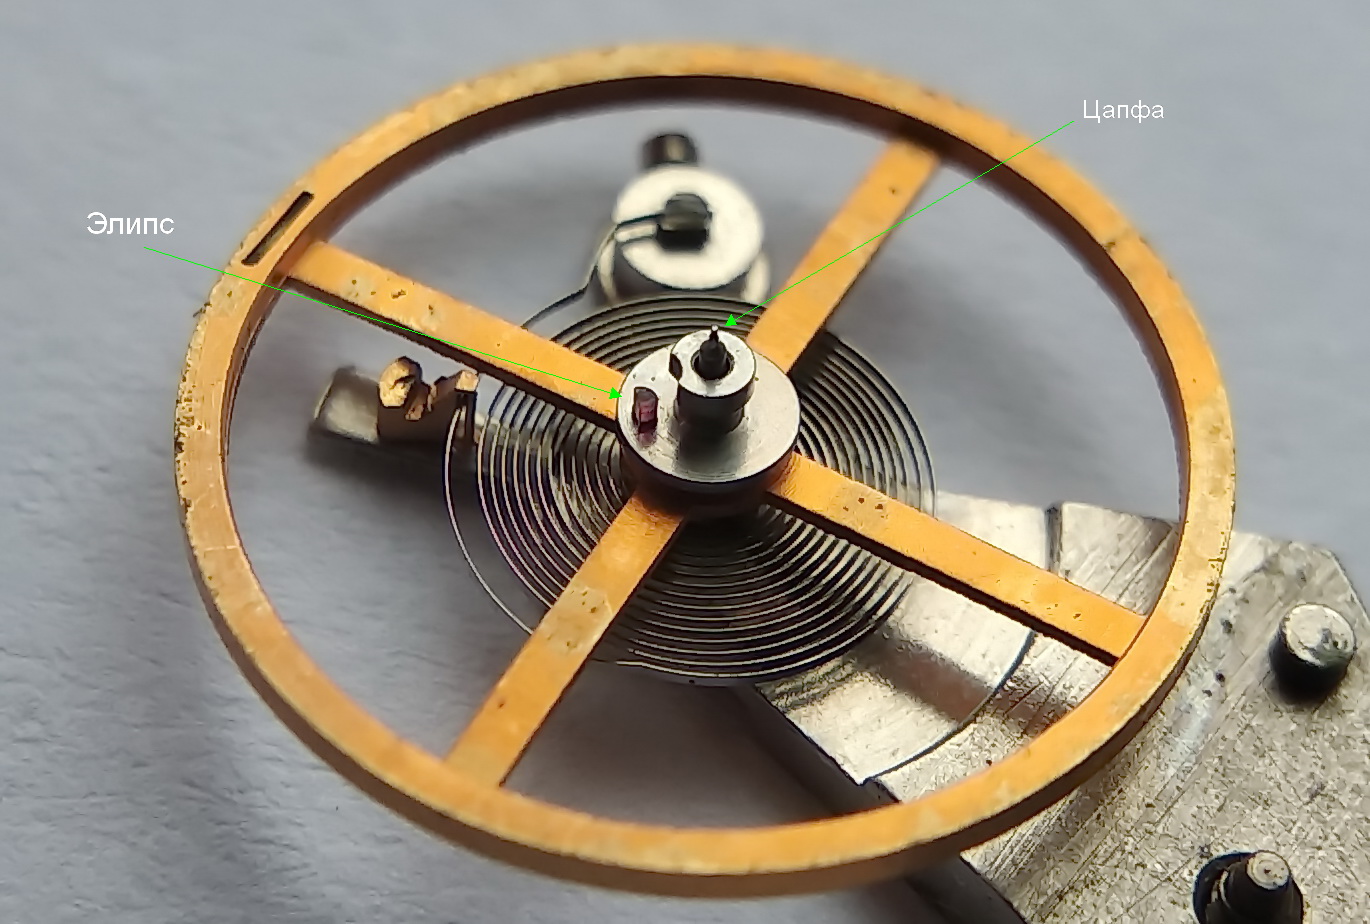
Let us look at the balance more closely. Here you can see the regulator lock with its curb pins, which limit the breathing of the hairspring, and the ellipse — the impulse jewel. It is this roller jewel that enters the horns of the pallet fork and interacts with it, and through that interaction the rate of the watch is governed.

Close-up of the balance showing the regulator curb pins and the impulse roller jewel
Detail of the regulator: the curb pins bracket the hairspring to control its breathing, while the ellipse — the impulse jewel — drives the fork horns. The dialogue between the two sets the rate.

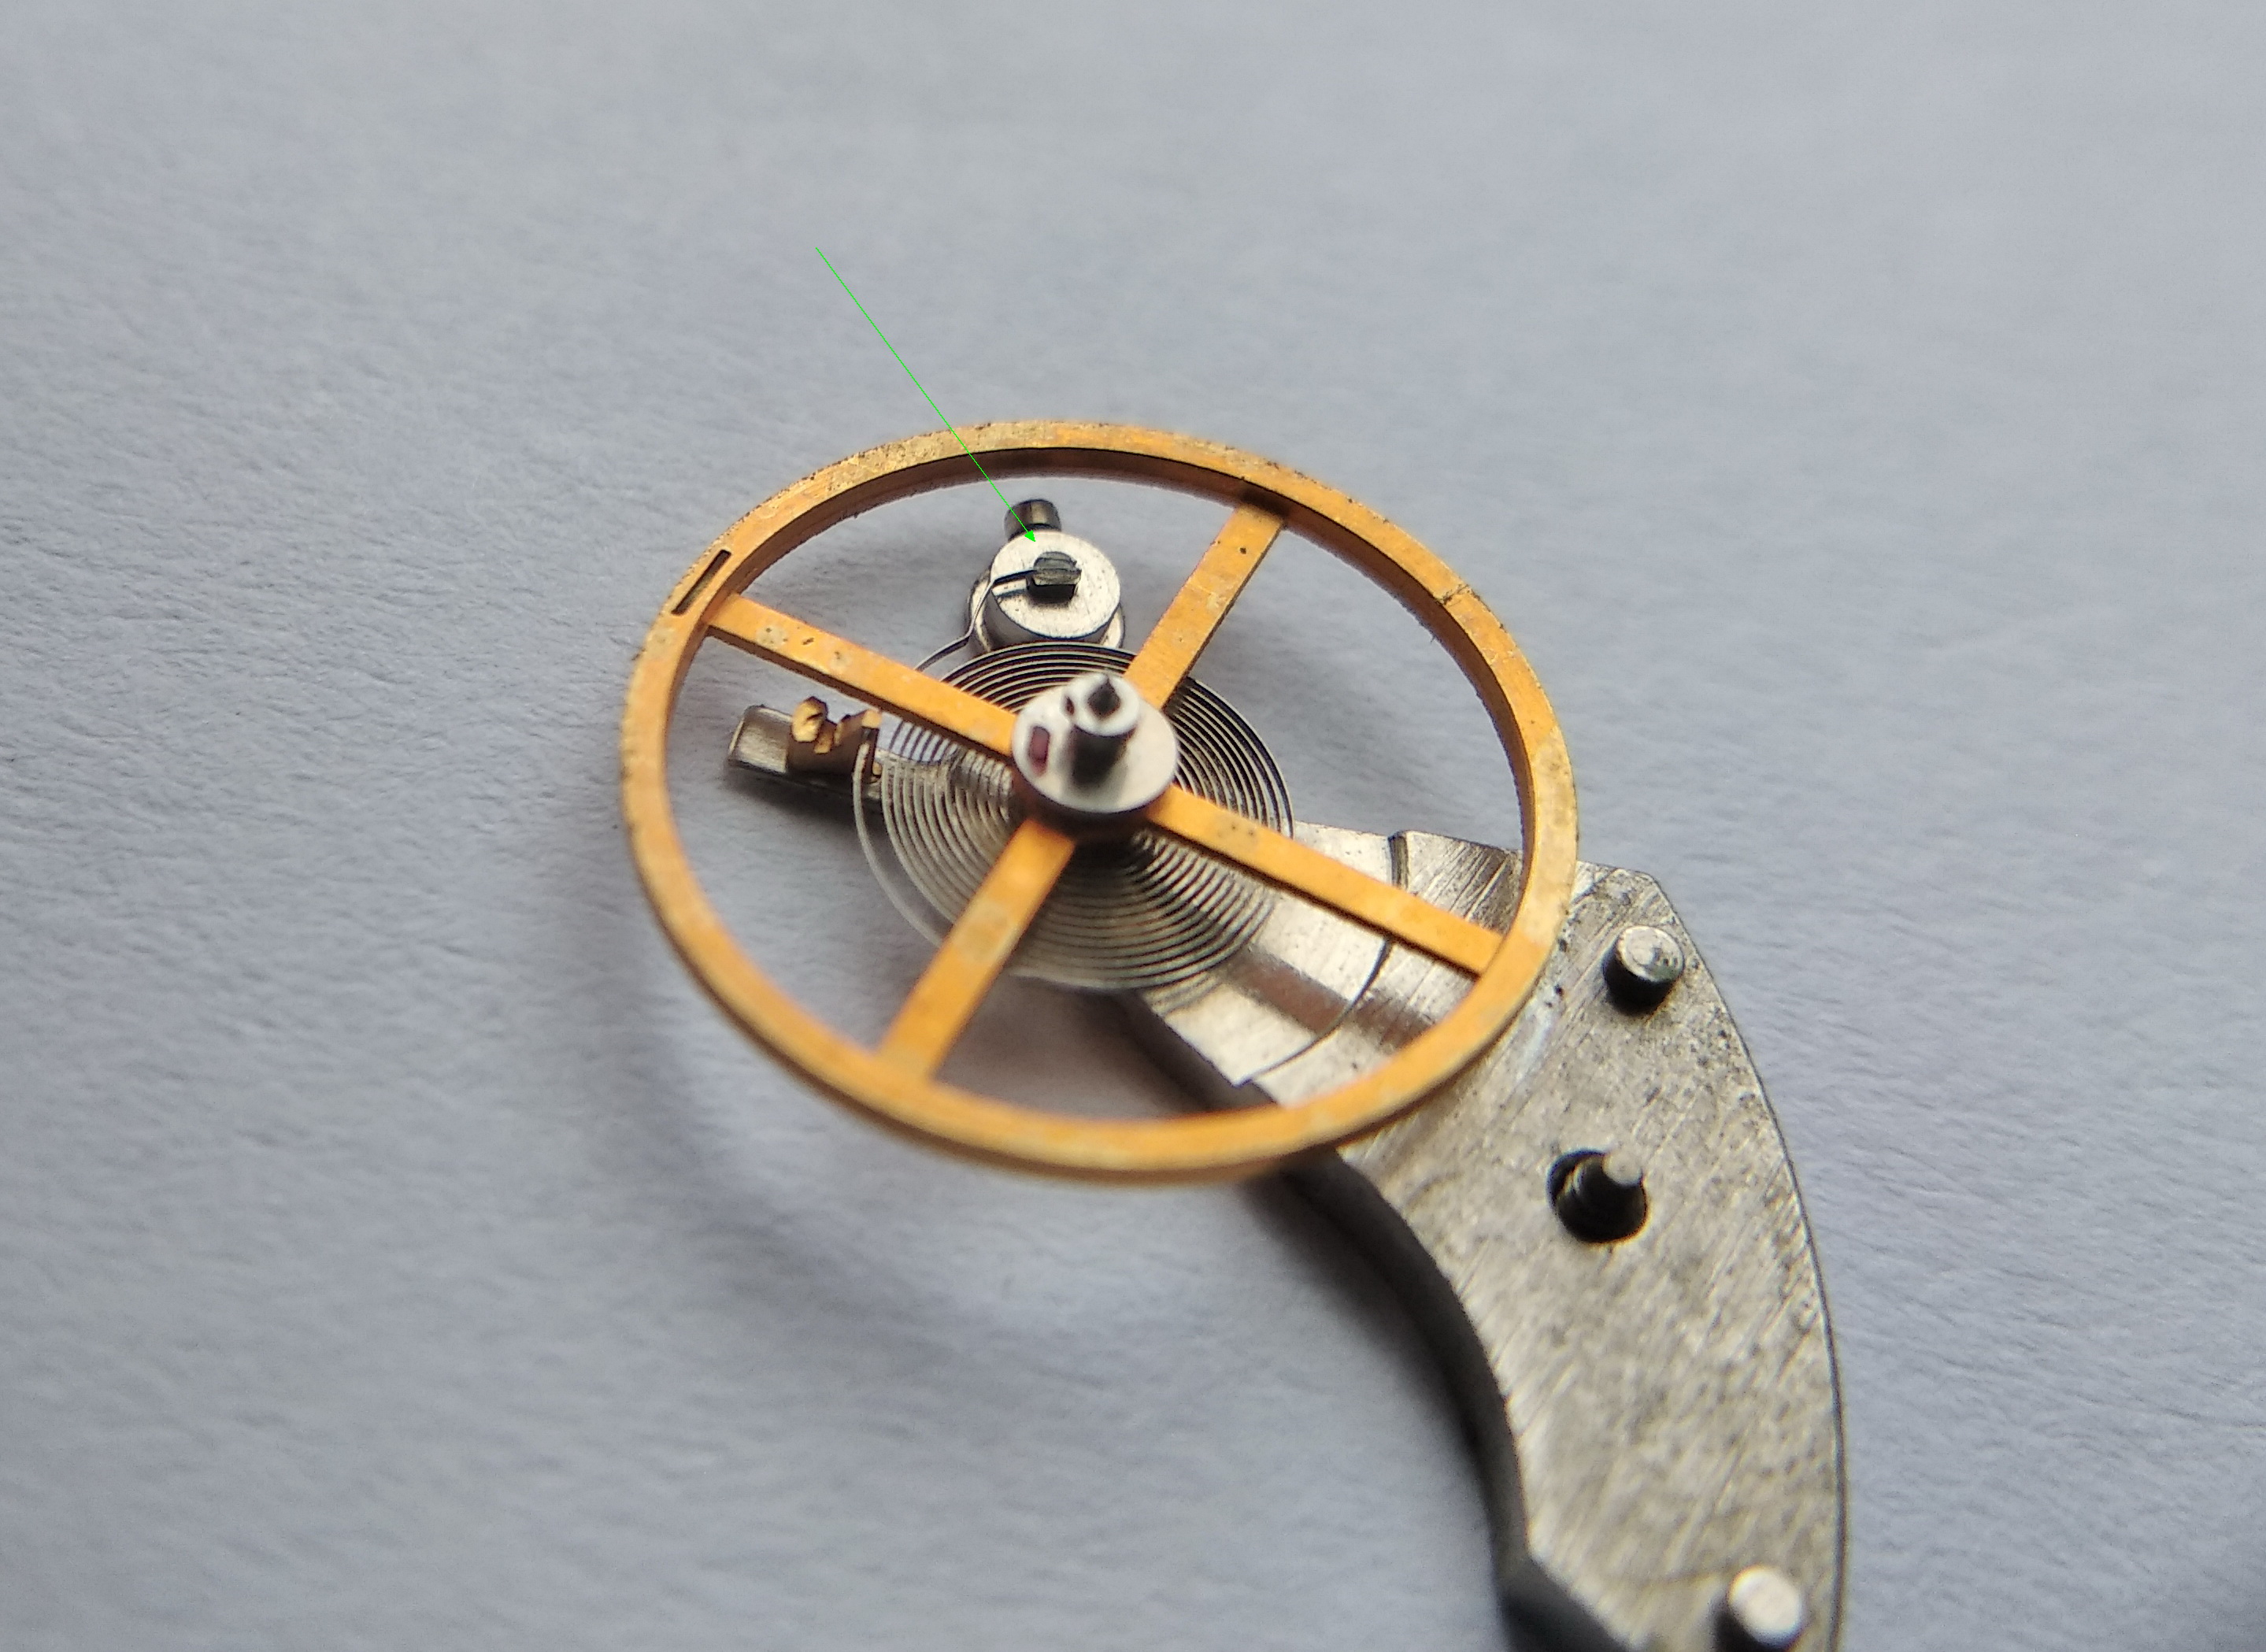
And here you can clearly see a manufacturing peculiarity of how the hairspring is fixed to the stud — it is held in place with glue! Normally the hairspring is secured to the stud with a special pin driven into the stud's hole alongside the spring, a fiddly procedure, especially in small wristwatch calibers. Here the technology has been modernised. True, dyed-in-the-wool watch lovers received this with obvious displeasure — glue, how vulgar! And yes, leave the spring a touch too long in benzine, or over-bend it while adjusting, and it can fall out of its slot. But then a drop of cyanoacrylate solves the problem in an instant. So, as they say — "don't fret about it."

Hairspring outer end fixed to the stud with adhesive rather than a traditional pin
A frank look at the modernised stud fixing: the hairspring is bonded rather than pinned. Purists object, but a fresh drop of cyanoacrylate re-secures it in seconds — a pragmatic production shortcut.

And here you can see the balance staff pivot well — that very "needle" that snaps under a shock. All is well here. The shock protection has done its job.

Magnified view of the slender balance staff pivot, intact and undamaged
The fragile balance-staff pivot — the part most often broken by a drop — survives intact. Evidence that the staff's shock setting worked exactly as intended.

The Dial Side — the "Slow Side"

Now we take off the dial. Along the edge of the main plate are machined bevels, and set into those bevels are the screws that clamp the dial by its feet. We slacken each screw a turn or a turn and a half, until the dial begins to lift, draw the dial off, and then run the little screws back down to a light stop — so they do not get lost, and so we are not later left fishing for thread in an awkward spot.

Dial-foot clamp screws set into bevels on the edge of the main plate being loosened
The dial is retained by side screws seated in plate-edge bevels. Backing them off a turn or so frees the feet; running them back down afterward keeps the tiny screws from wandering off the bench.

There — done.

Dial lifted clear of the movement, exposing the motion-works side
The dial is off, exposing the dial-side mechanism beneath.

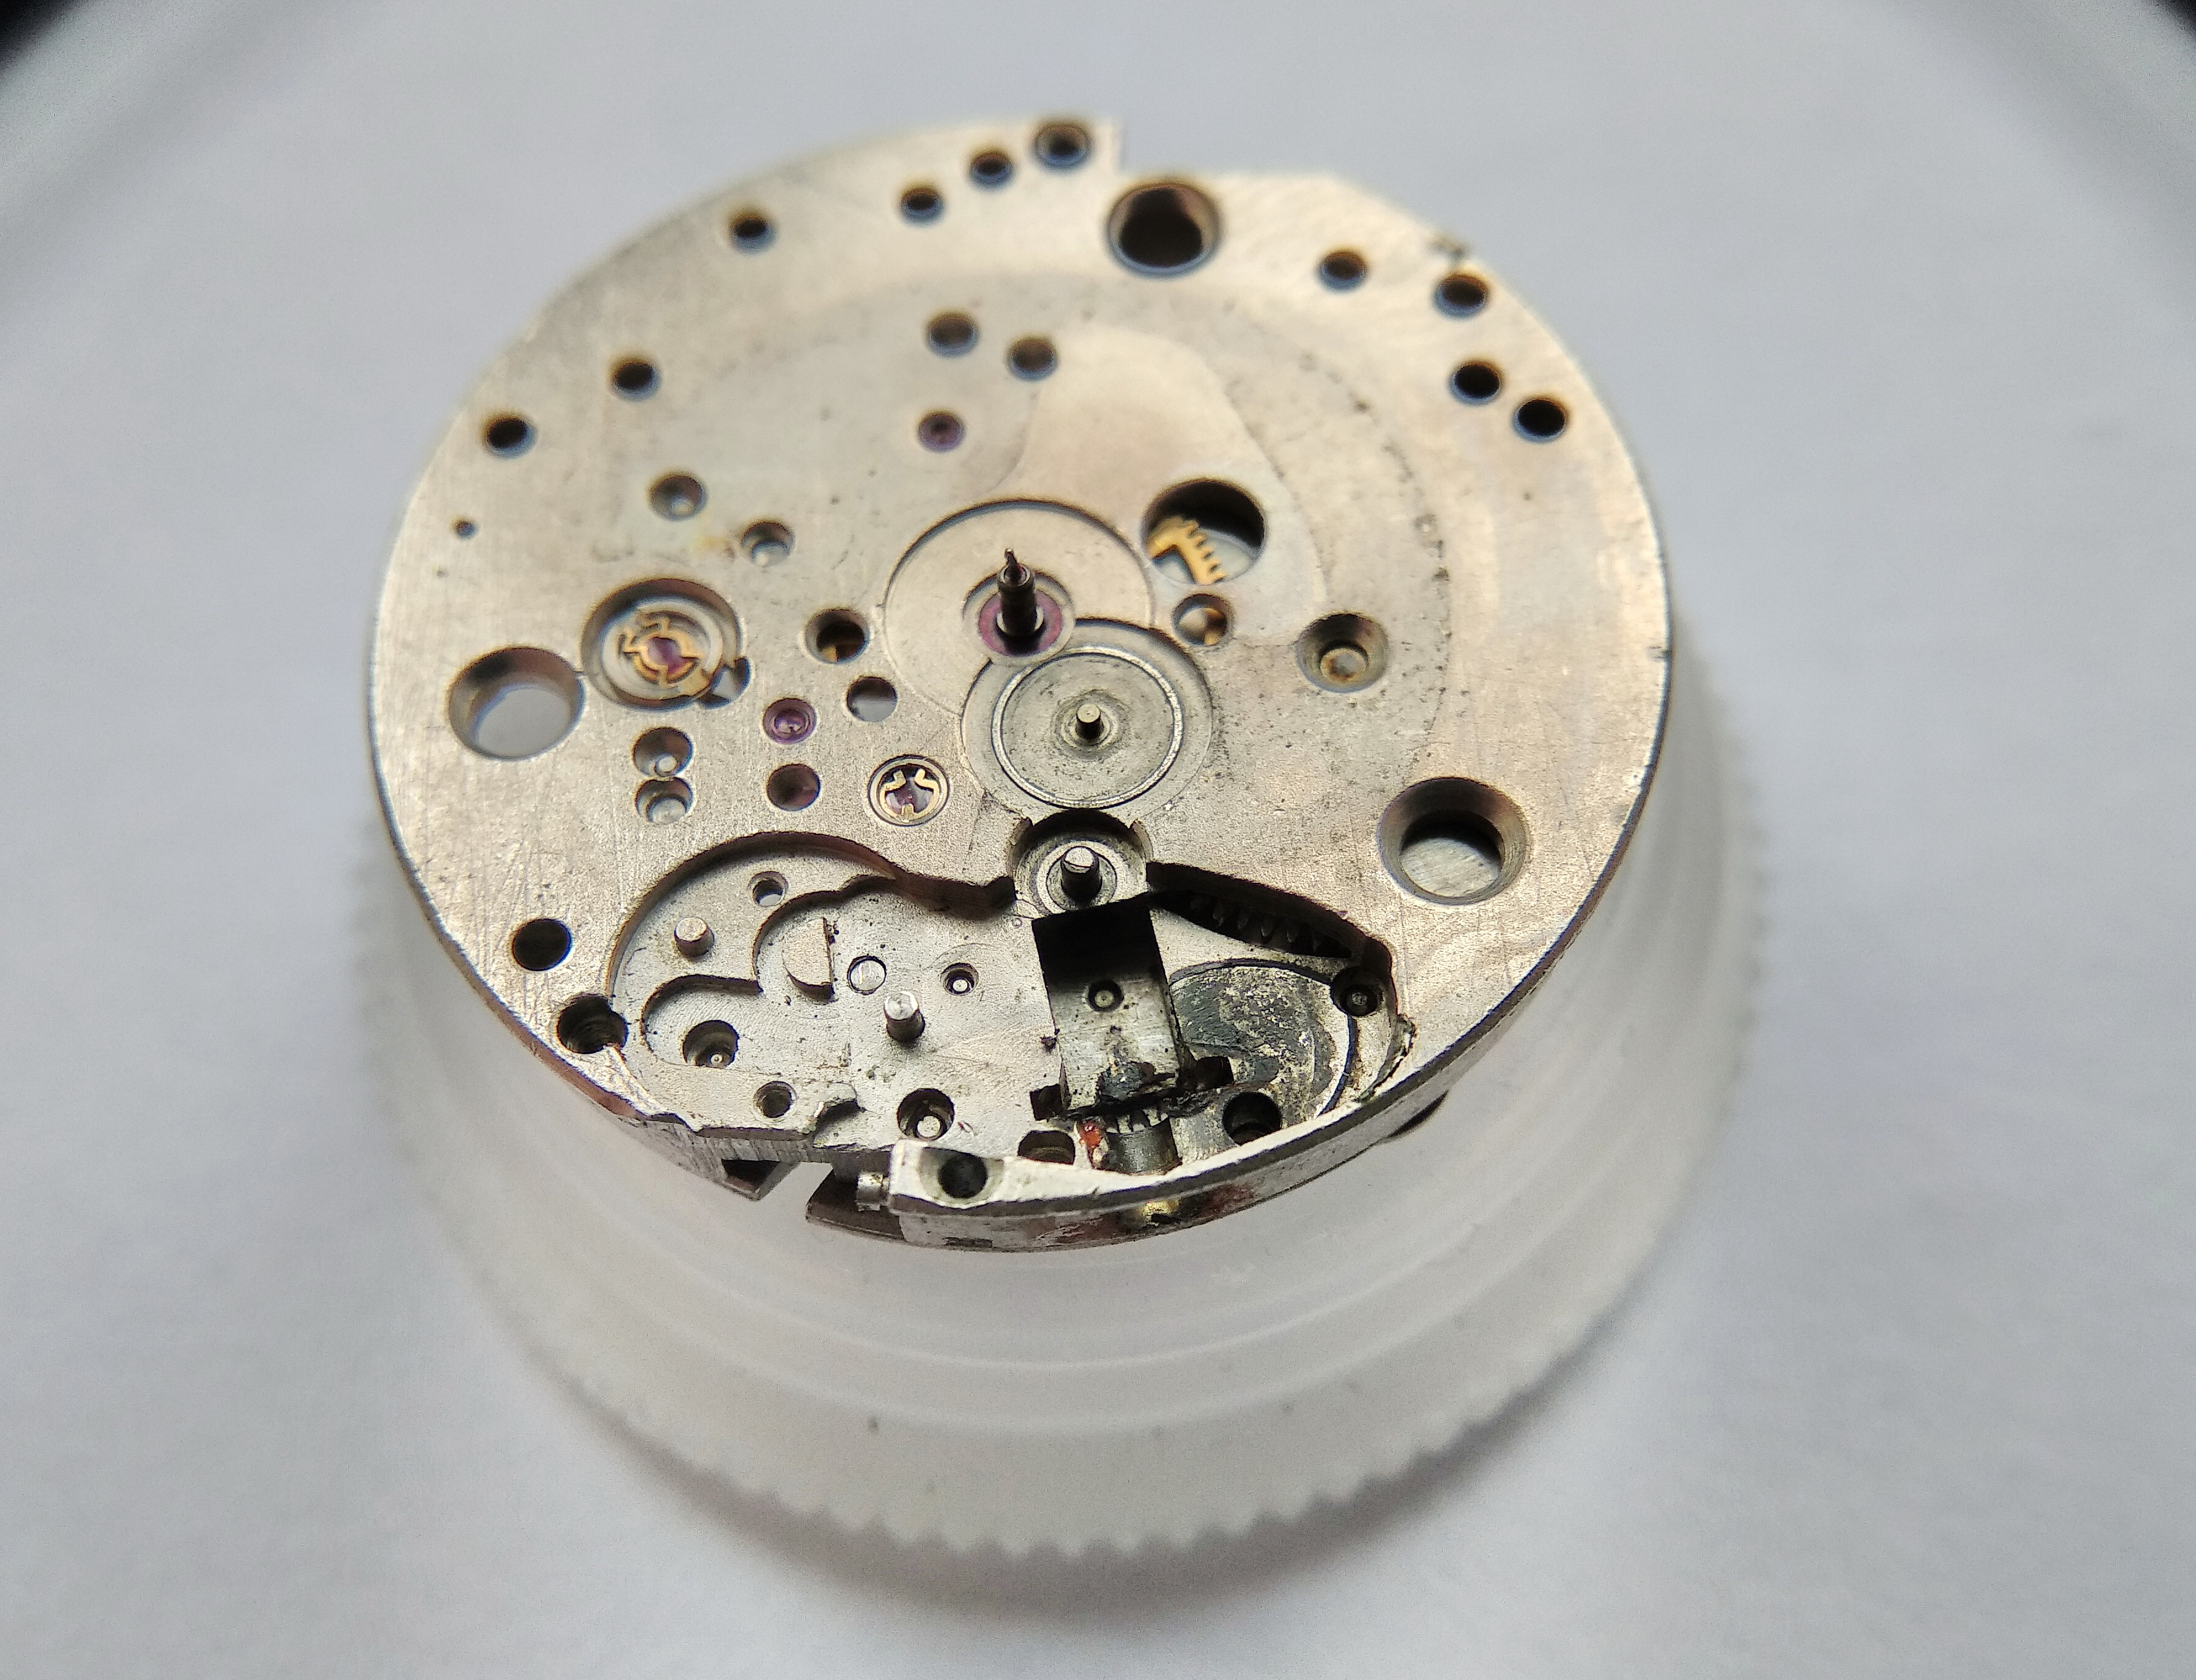
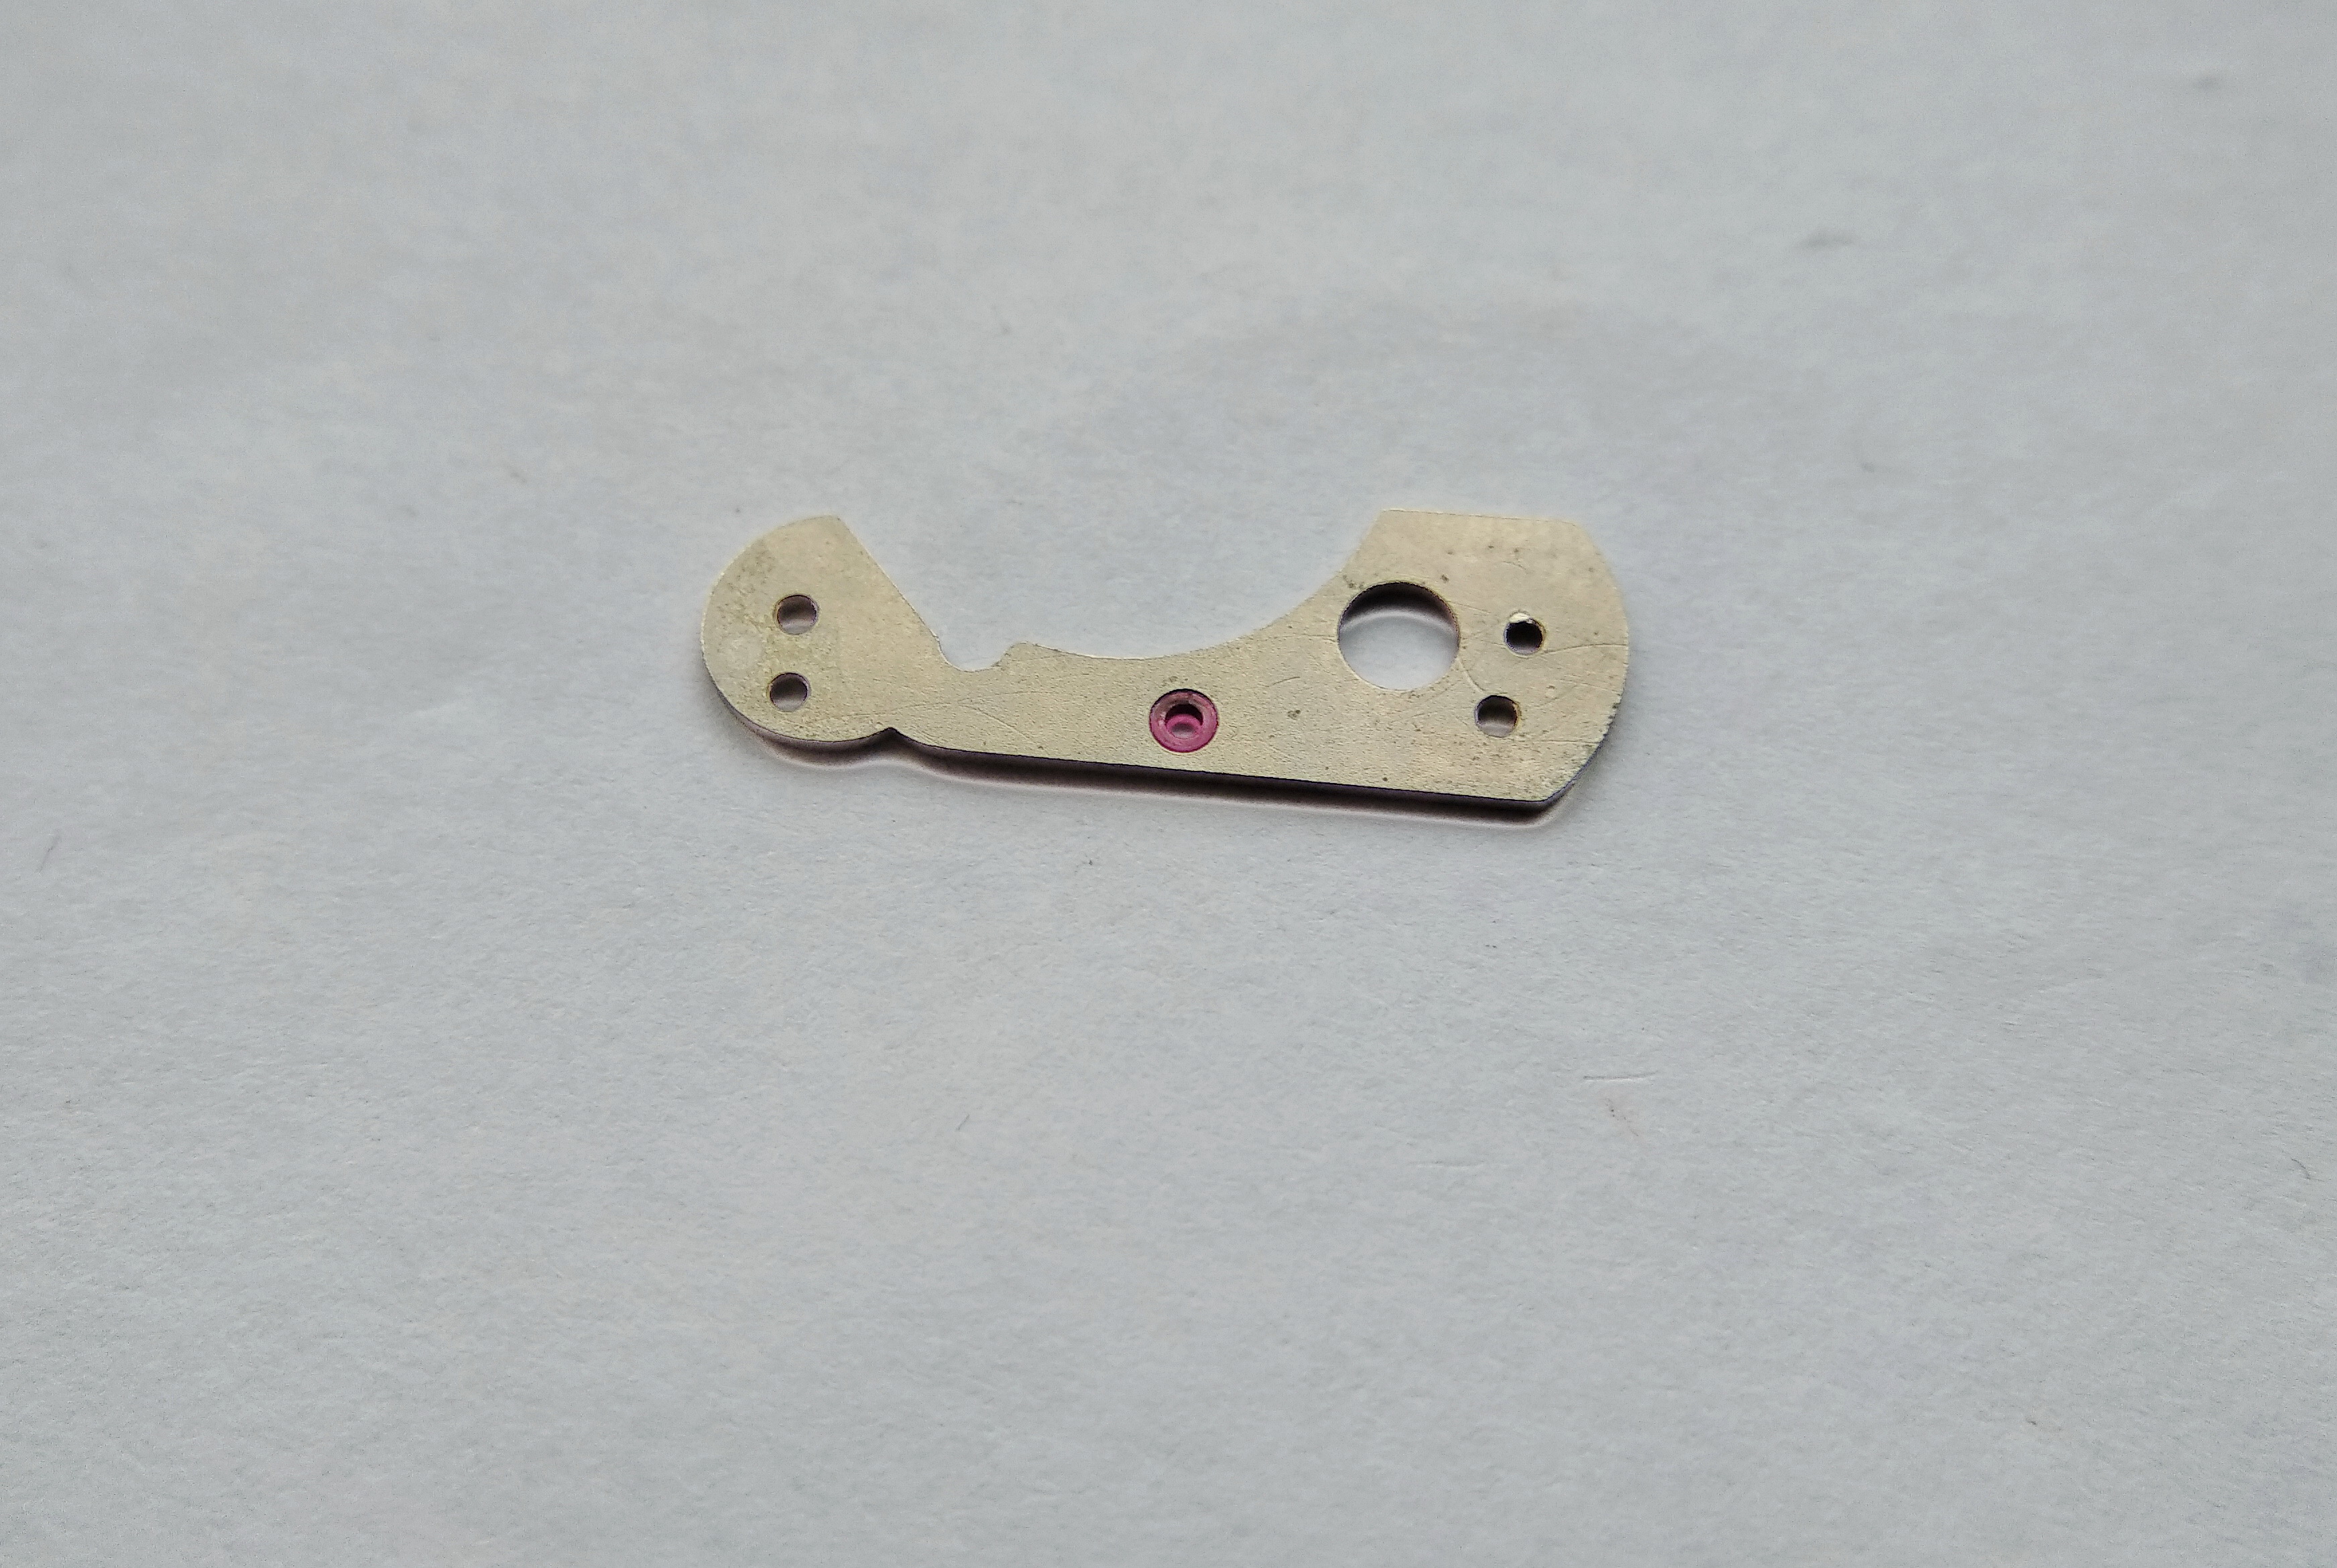
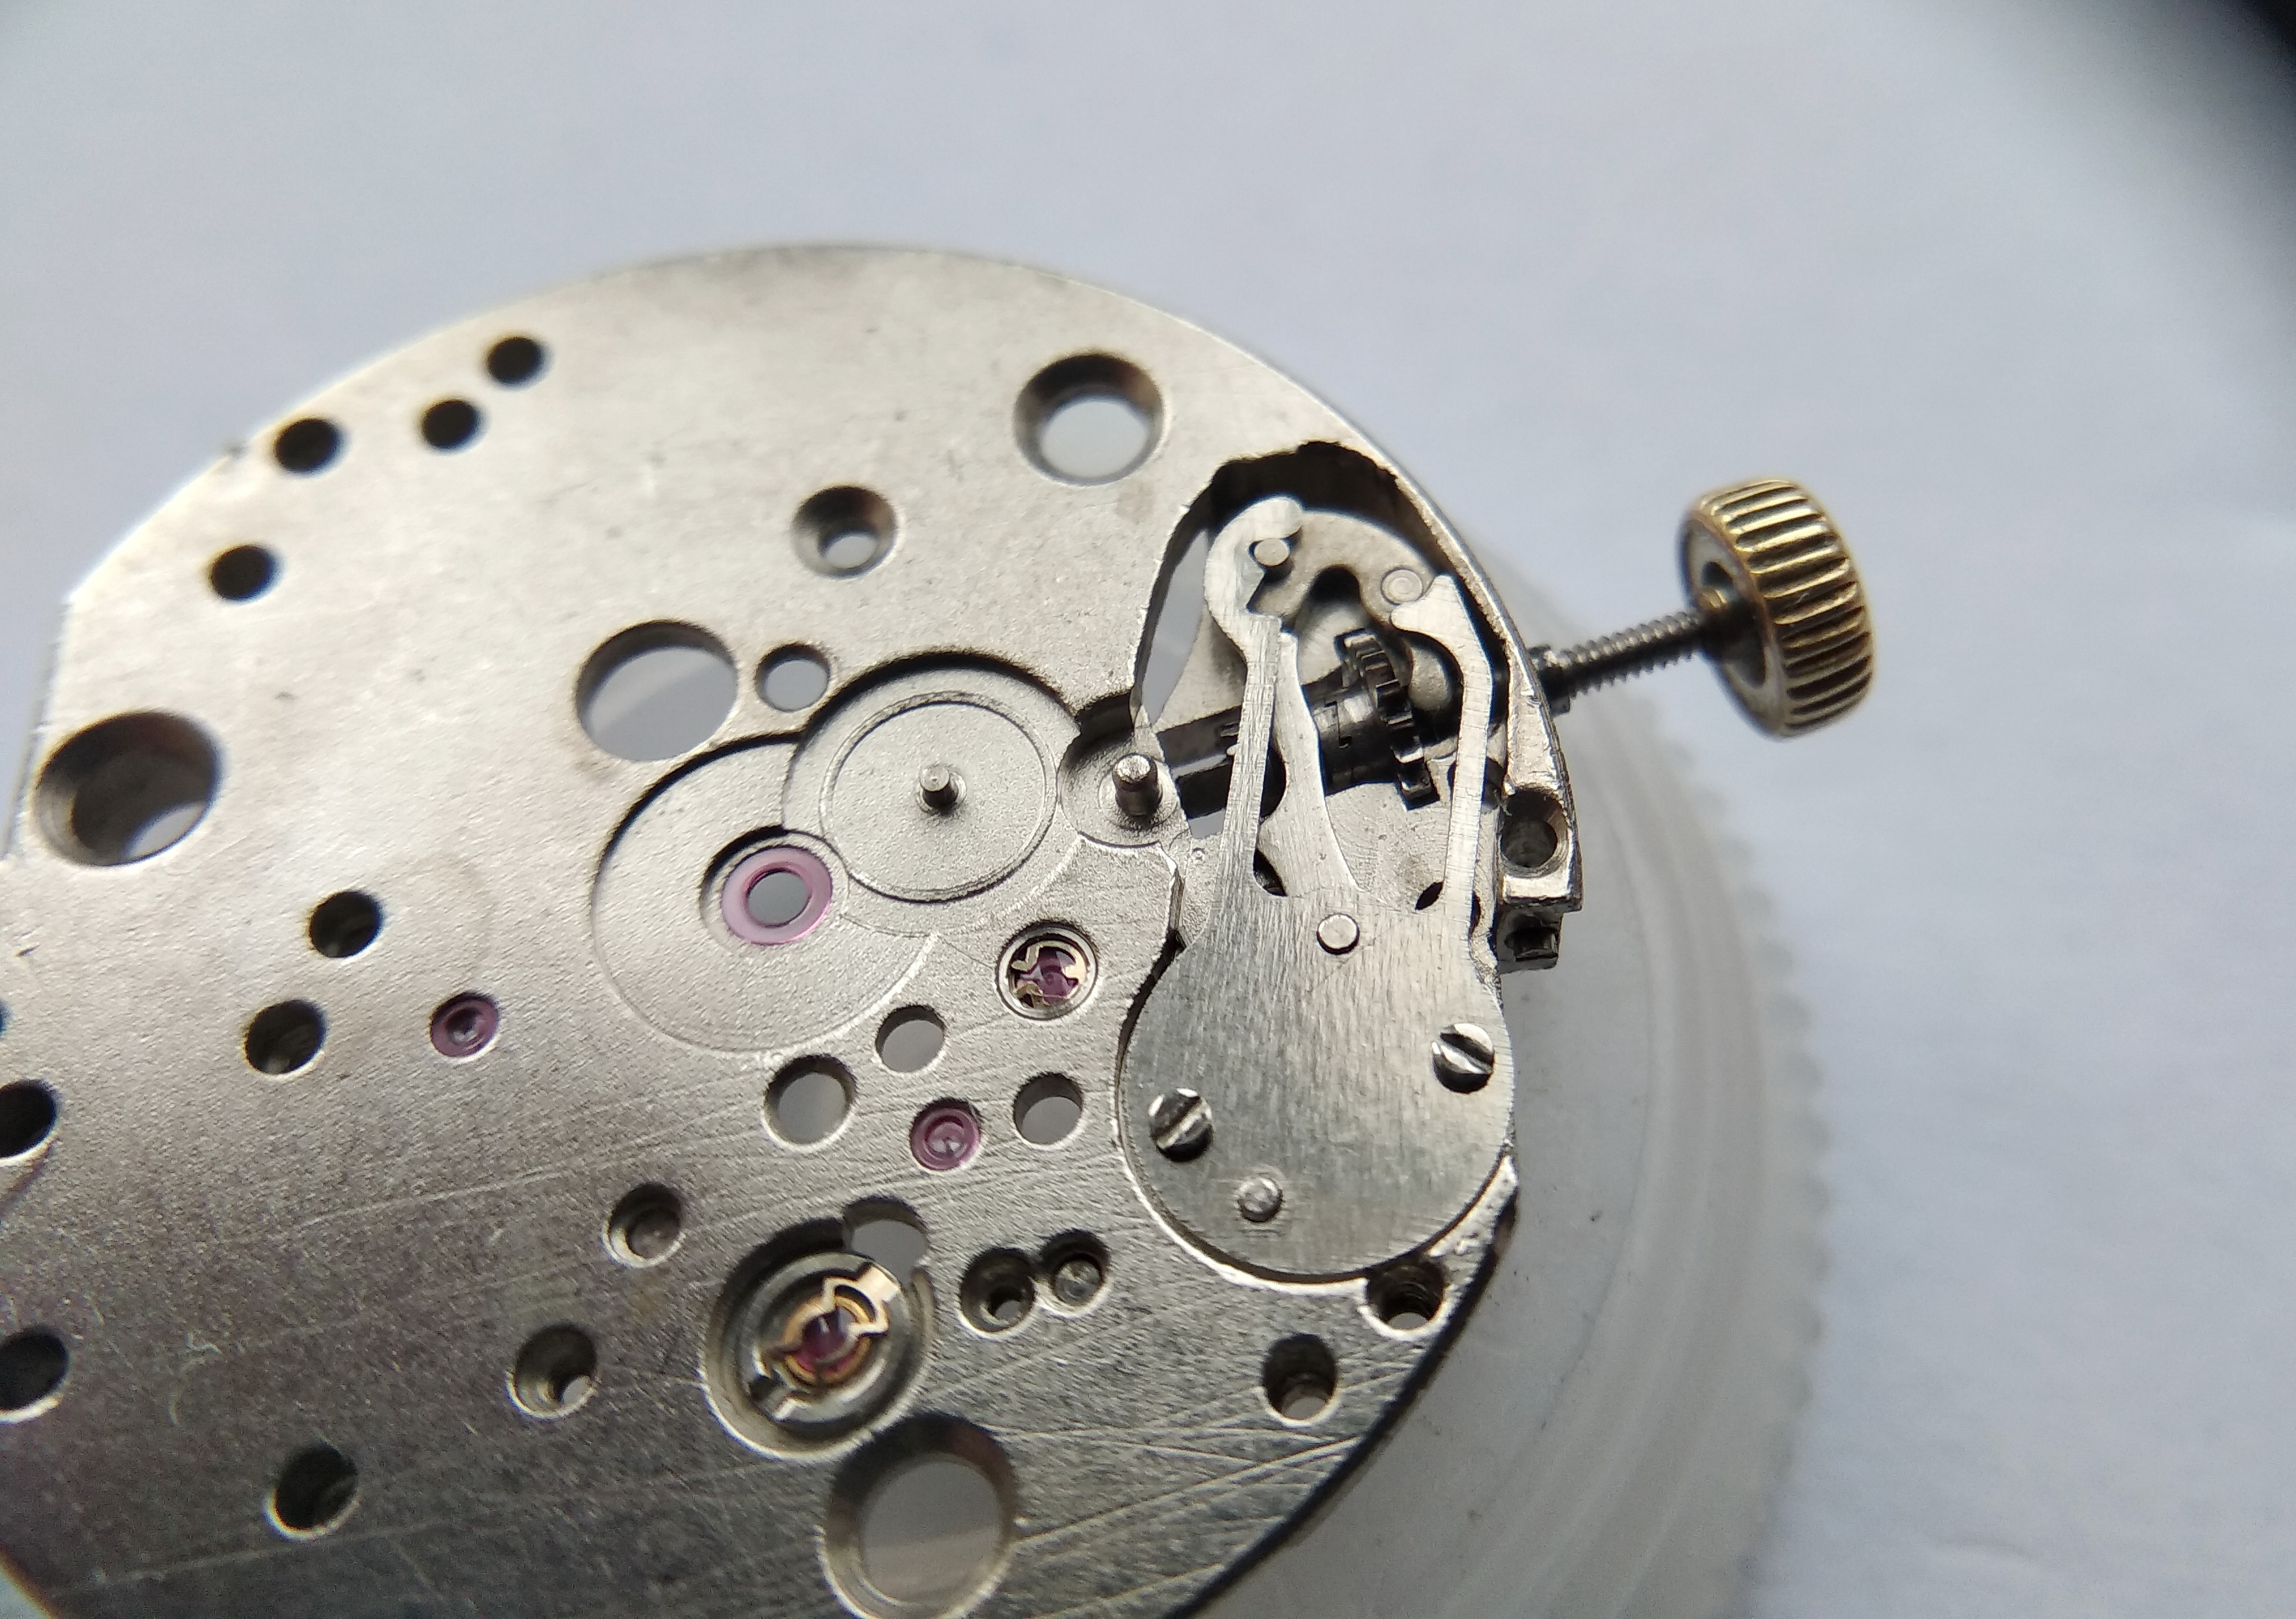
Here is what lies under the dial — the so-called "slow side." On this side time flows smoothly; it is the opposite, "fast" side where the seconds race and the balance chatters, while here all is calm. Before us is the hour wheel with its spring washer, which keeps the hour wheel from drifting away from the minute wheel; the minute wheel itself; the setting wheel of the keyless works; and a rust-covered keyless cover spring — that one is clear enough: for replacement. What else is special? The balance shock setting and — the escape-wheel shock setting. In the 2609.NA the escape wheel runs in shock protection of its own. Moreover, the bouchon lets the lubricant stay at its proper level for a very long time in so critical an assembly as the escape wheel of the going train.

Under-dial view showing the hour wheel with spring washer, minute wheel, setting wheel, and a rusty keyless cover spring
The motion works and keyless works under the dial: hour wheel with its retaining spring washer, minute wheel, setting wheel, and a corroded keyless cover spring marked for replacement. Note the shock settings — one for the balance, and unusually a second for the escape wheel.

We strip the wheel work and lift off the cannon pinion.

Cannon pinion being removed from the center post on the dial side
The cannon pinion comes off the center arbor, clearing the dial-side wheelwork for cleaning.

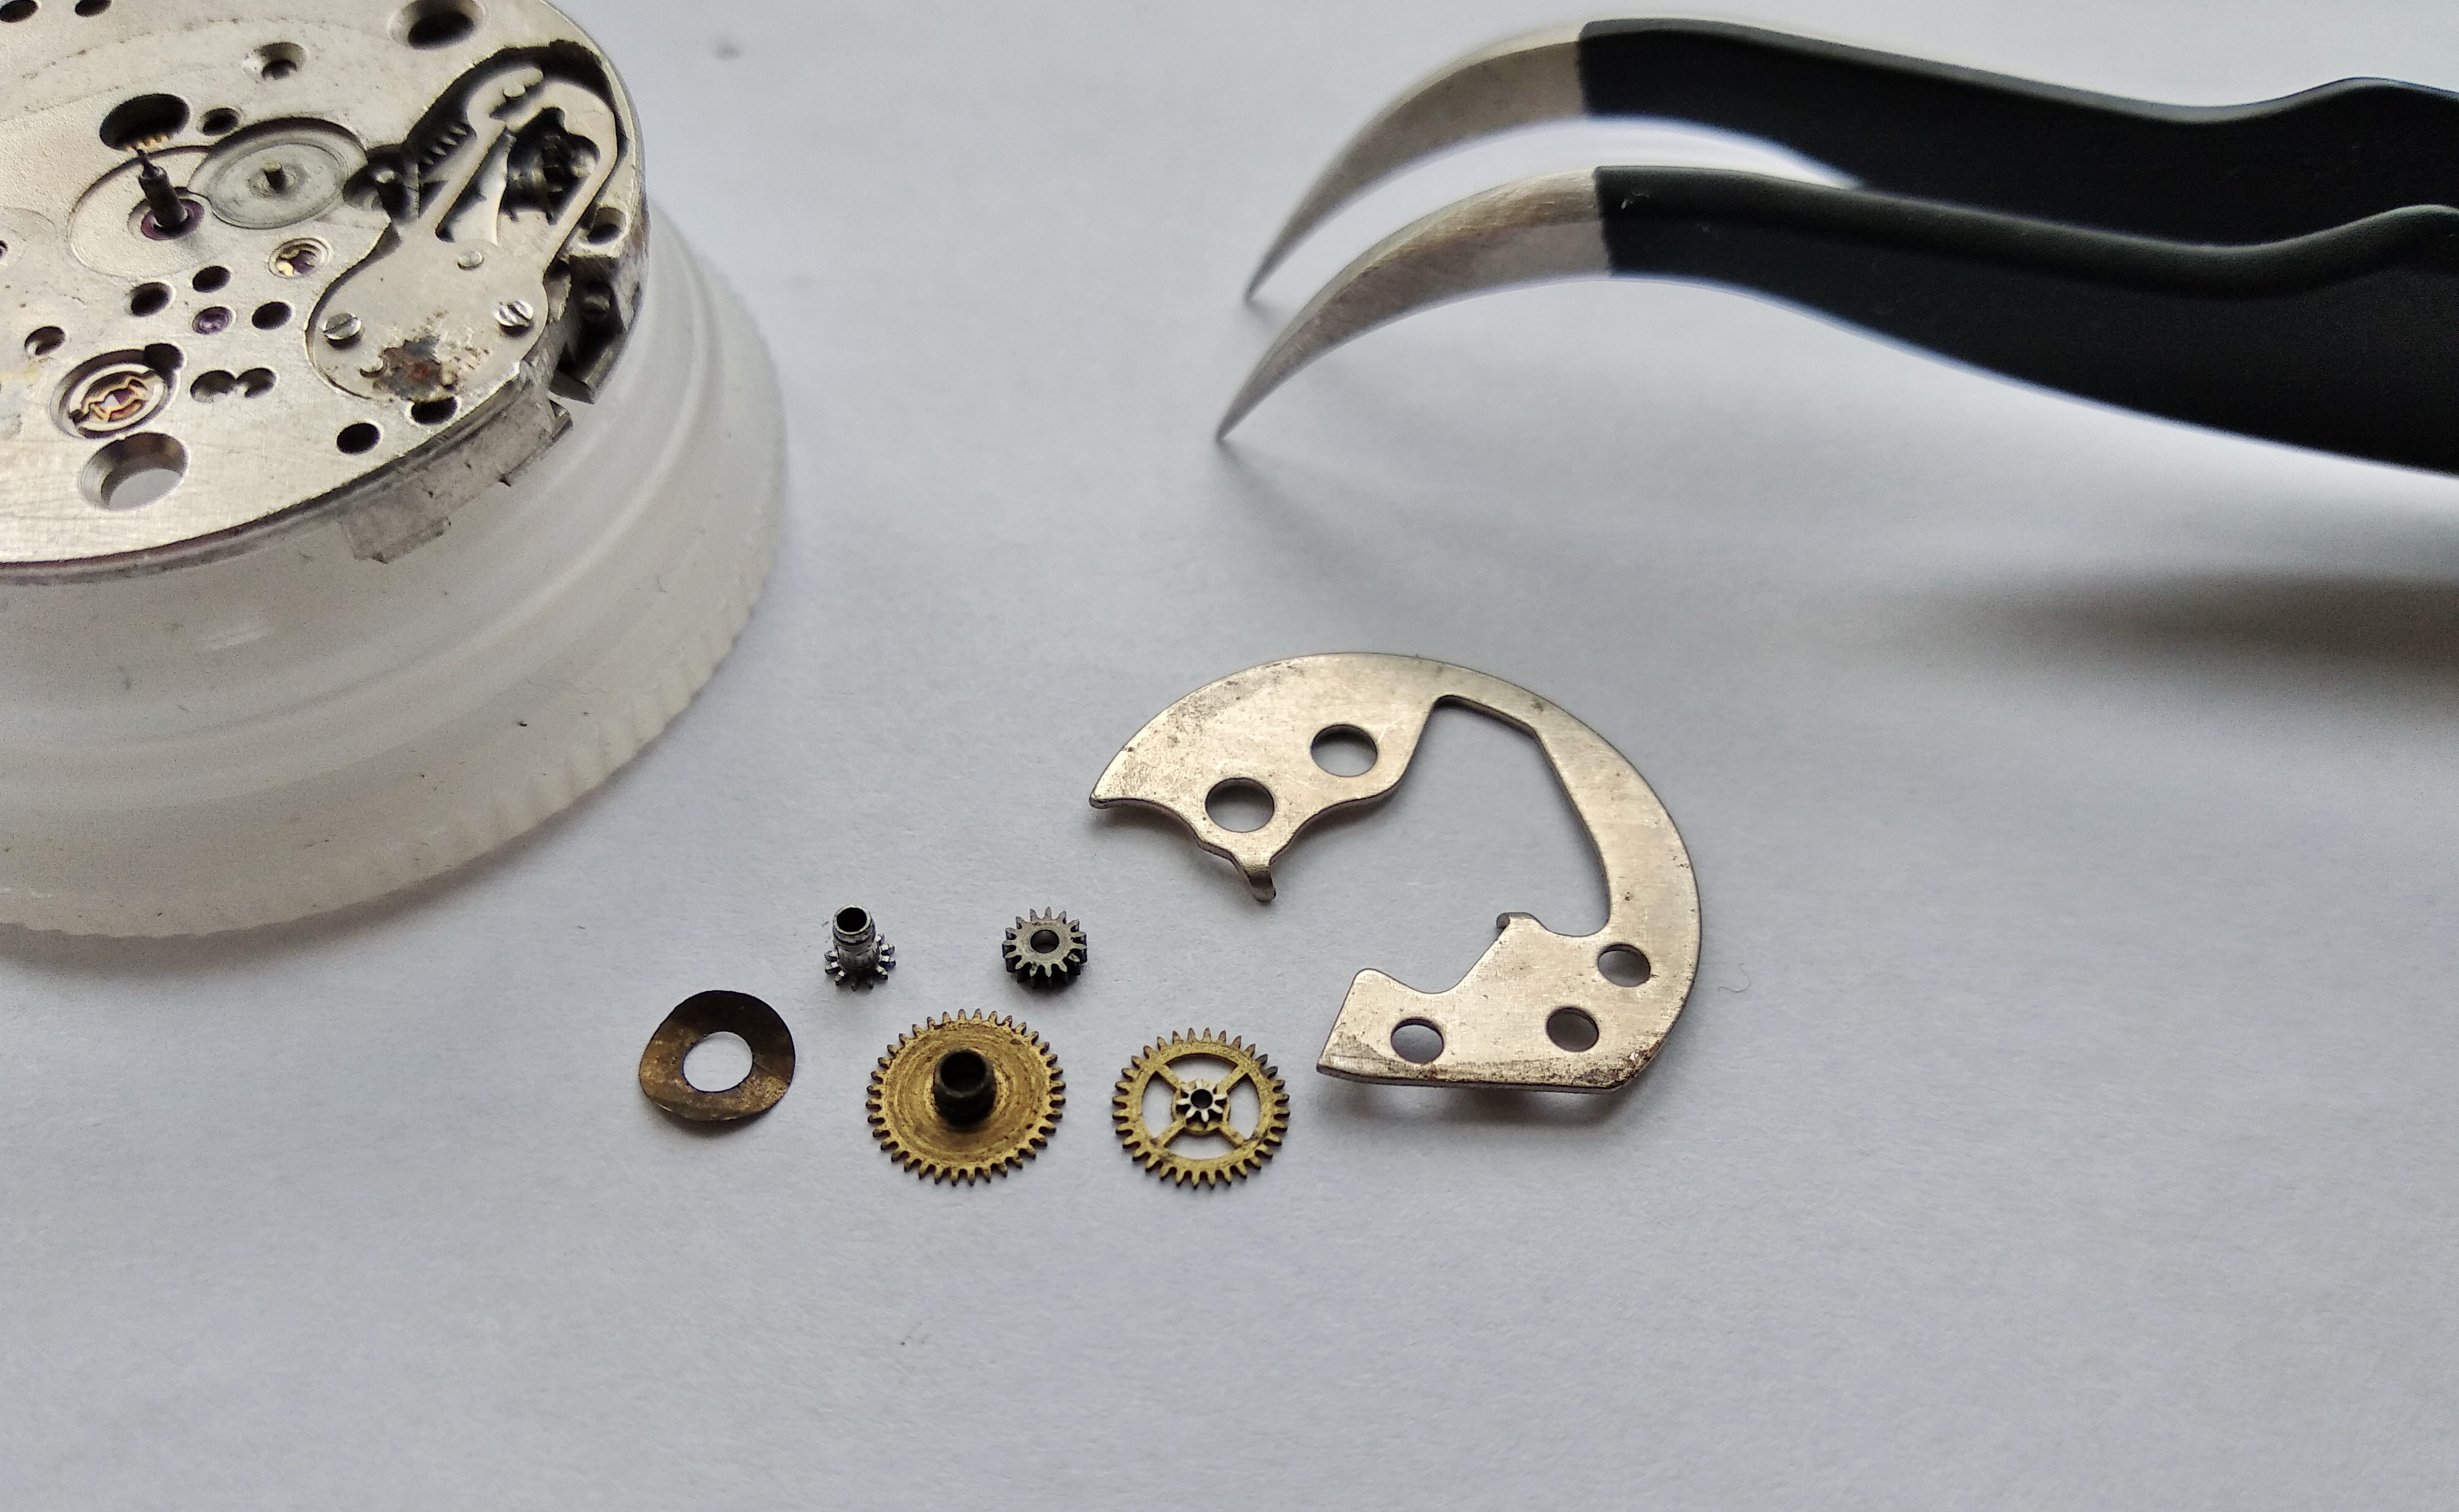
We back out the screws holding the keyless cover…

Screws securing the keyless-works cover plate being unscrewed
The keyless cover screws are removed next, opening access to the winding and setting mechanism.

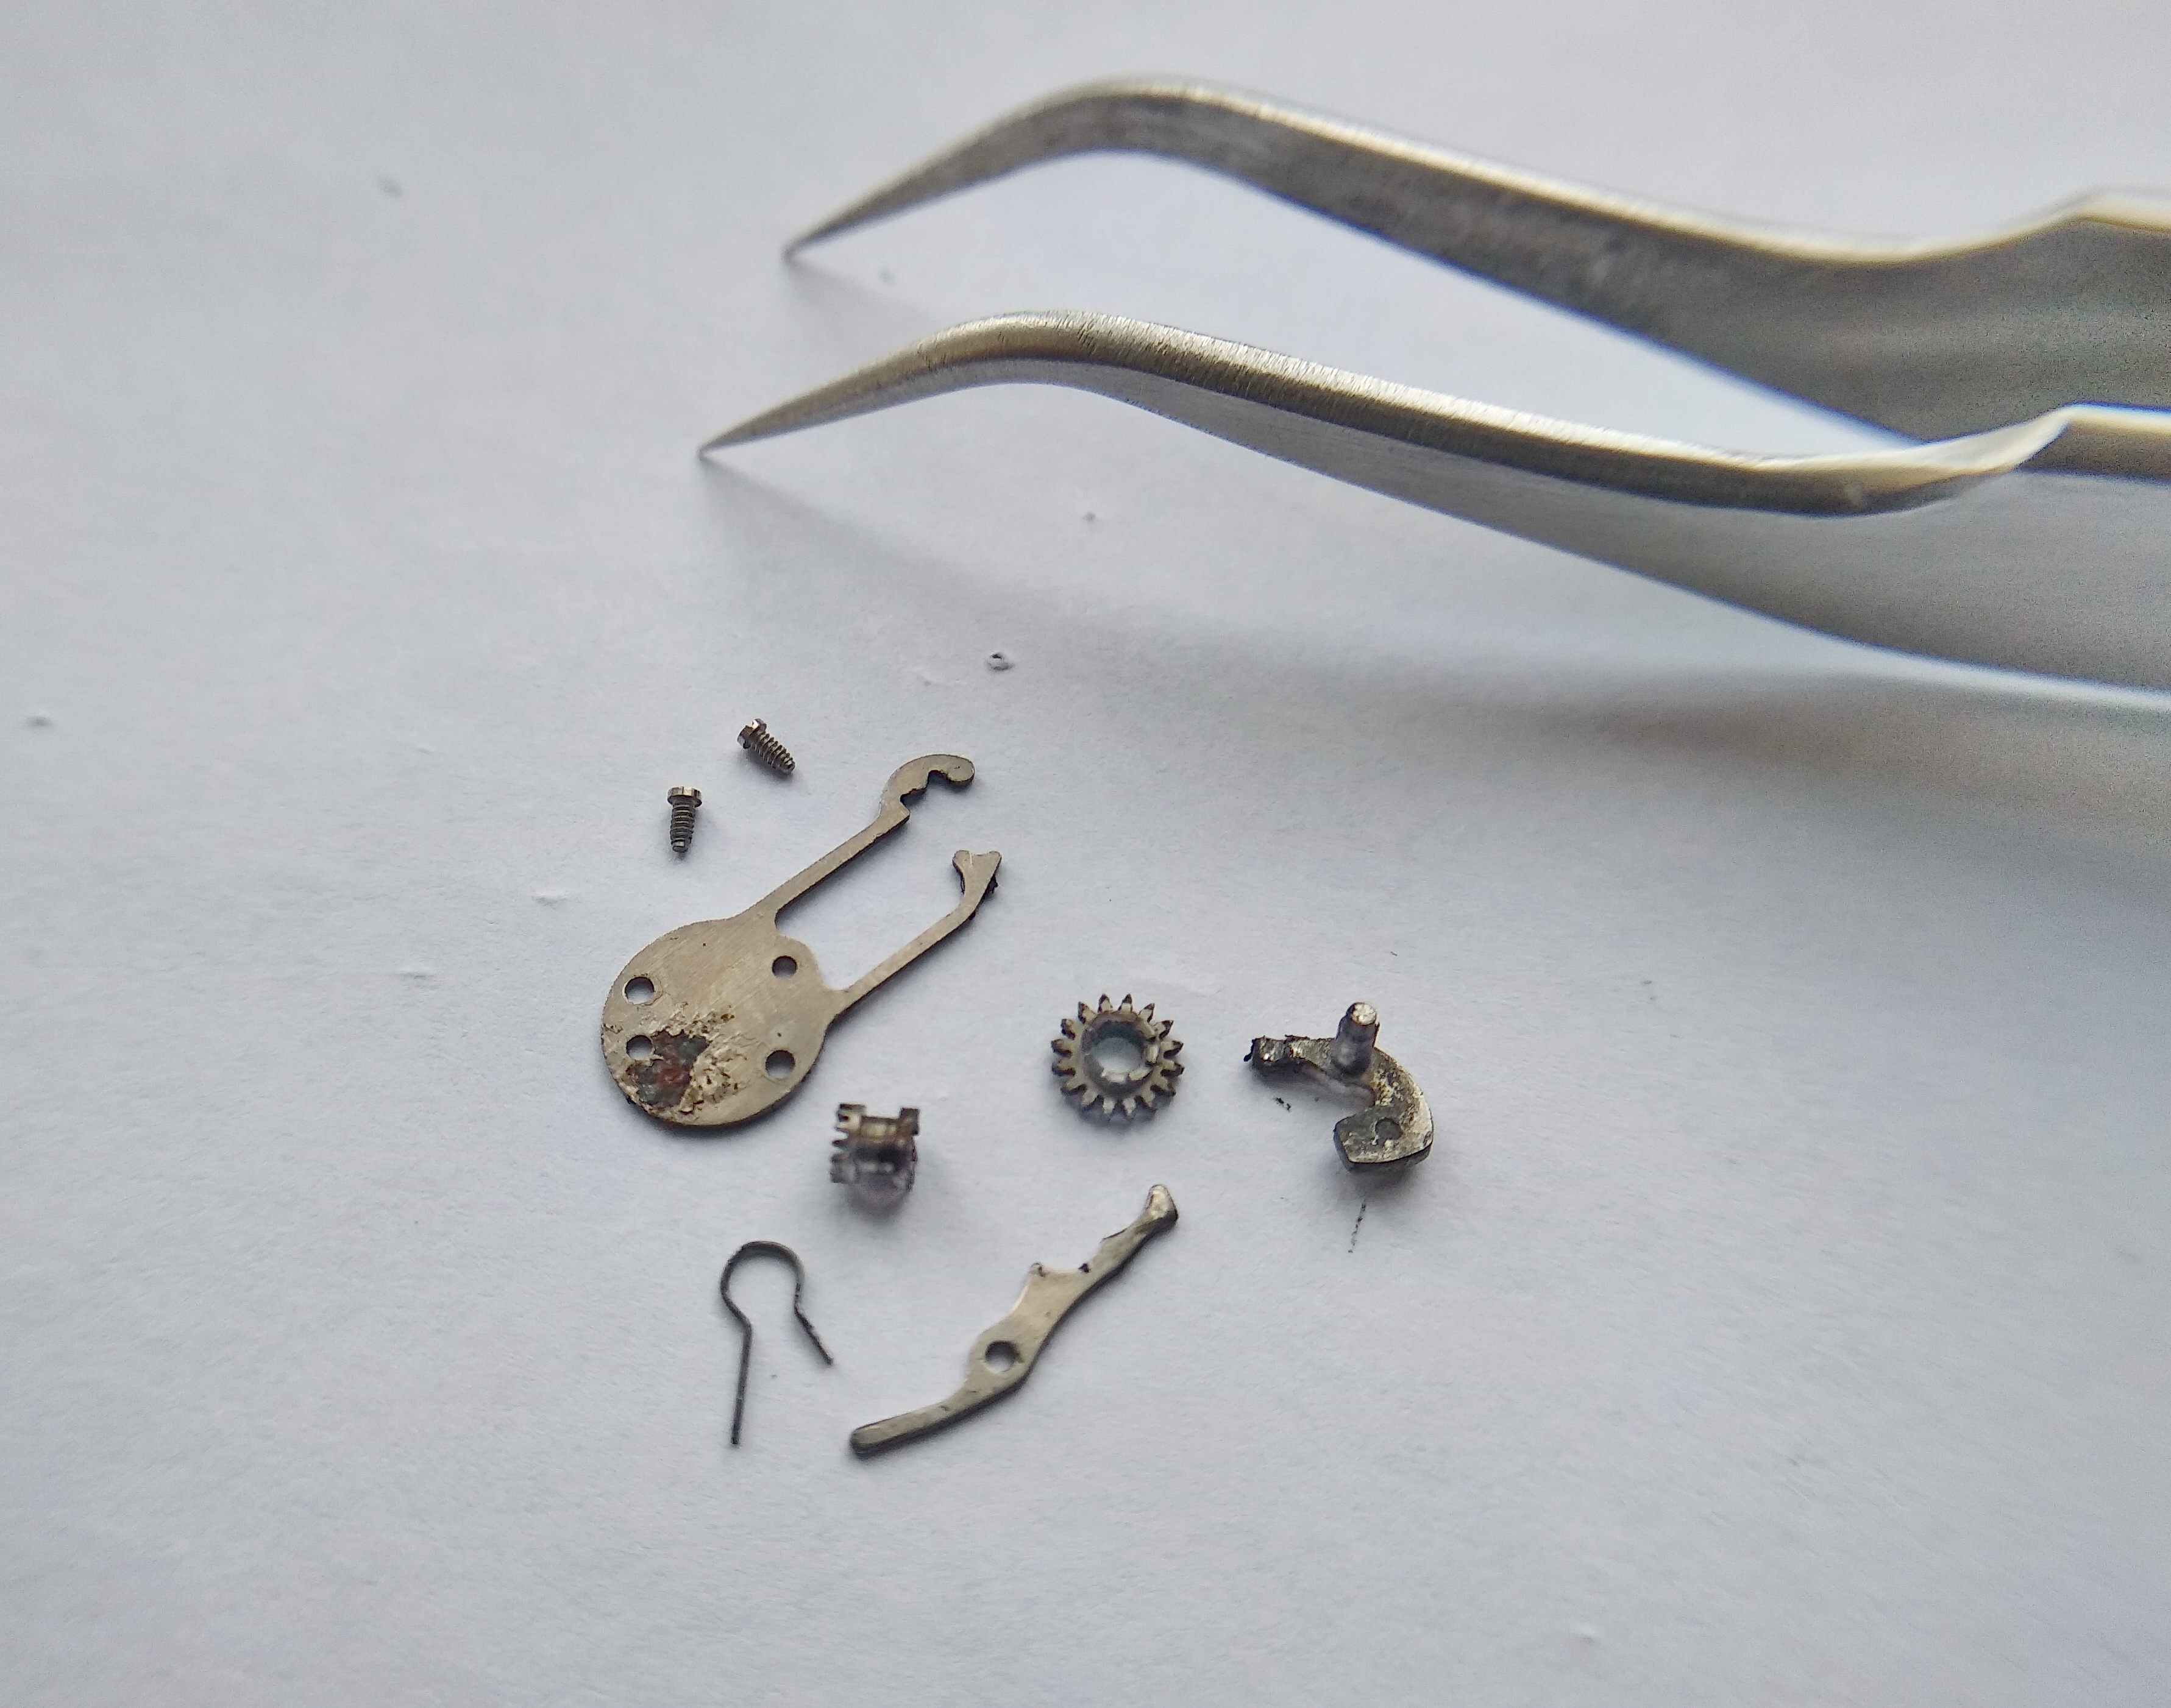
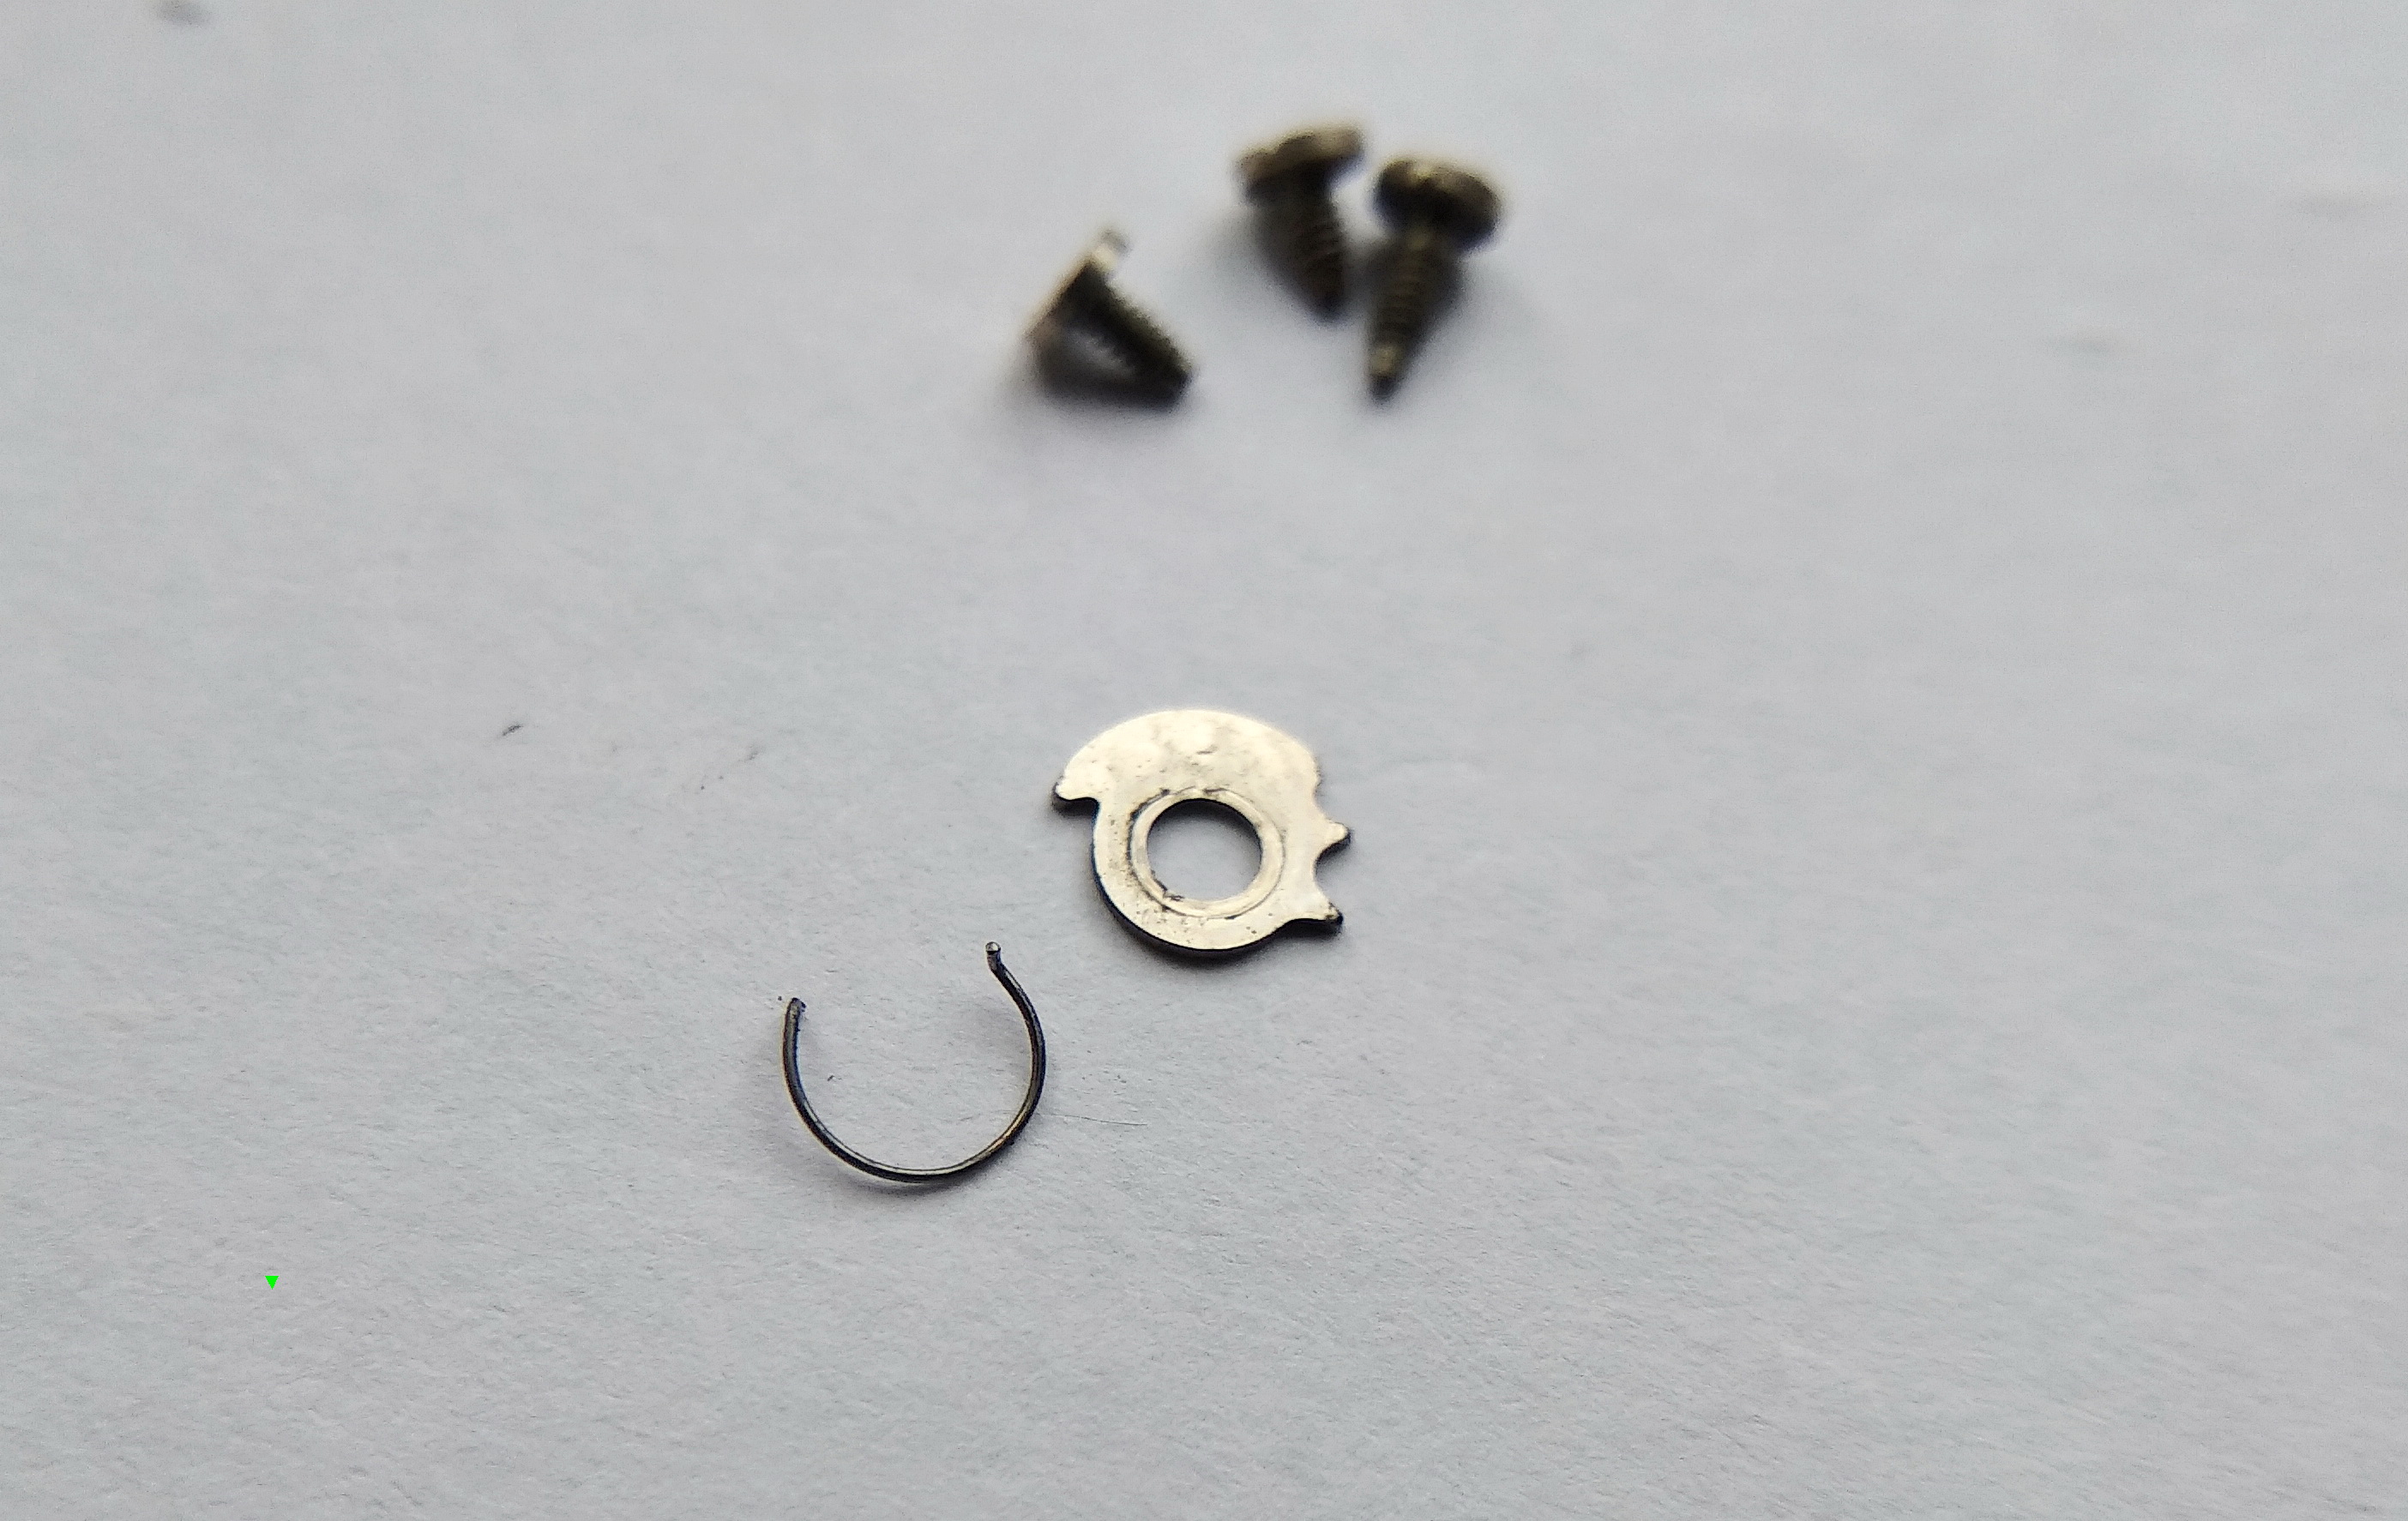
…and we take the keyless works apart. A very simple system, by now a classic: an R-shaped spring, the setting levers for the sliding clutch and the stem with its release button, the castle clutch, and the cover-spring. That is all. Simple, reliable, and easy to make.

Disassembled keyless works laid out: R-spring, setting levers, castle clutch, and cover spring
The keyless works disassembled — an R-shaped detent spring, the yoke and setting lever, the castle (sliding) clutch, and the cover-spring. A textbook layout: few parts, high reliability, low cost to produce.

Crossing to the "Fast Side"

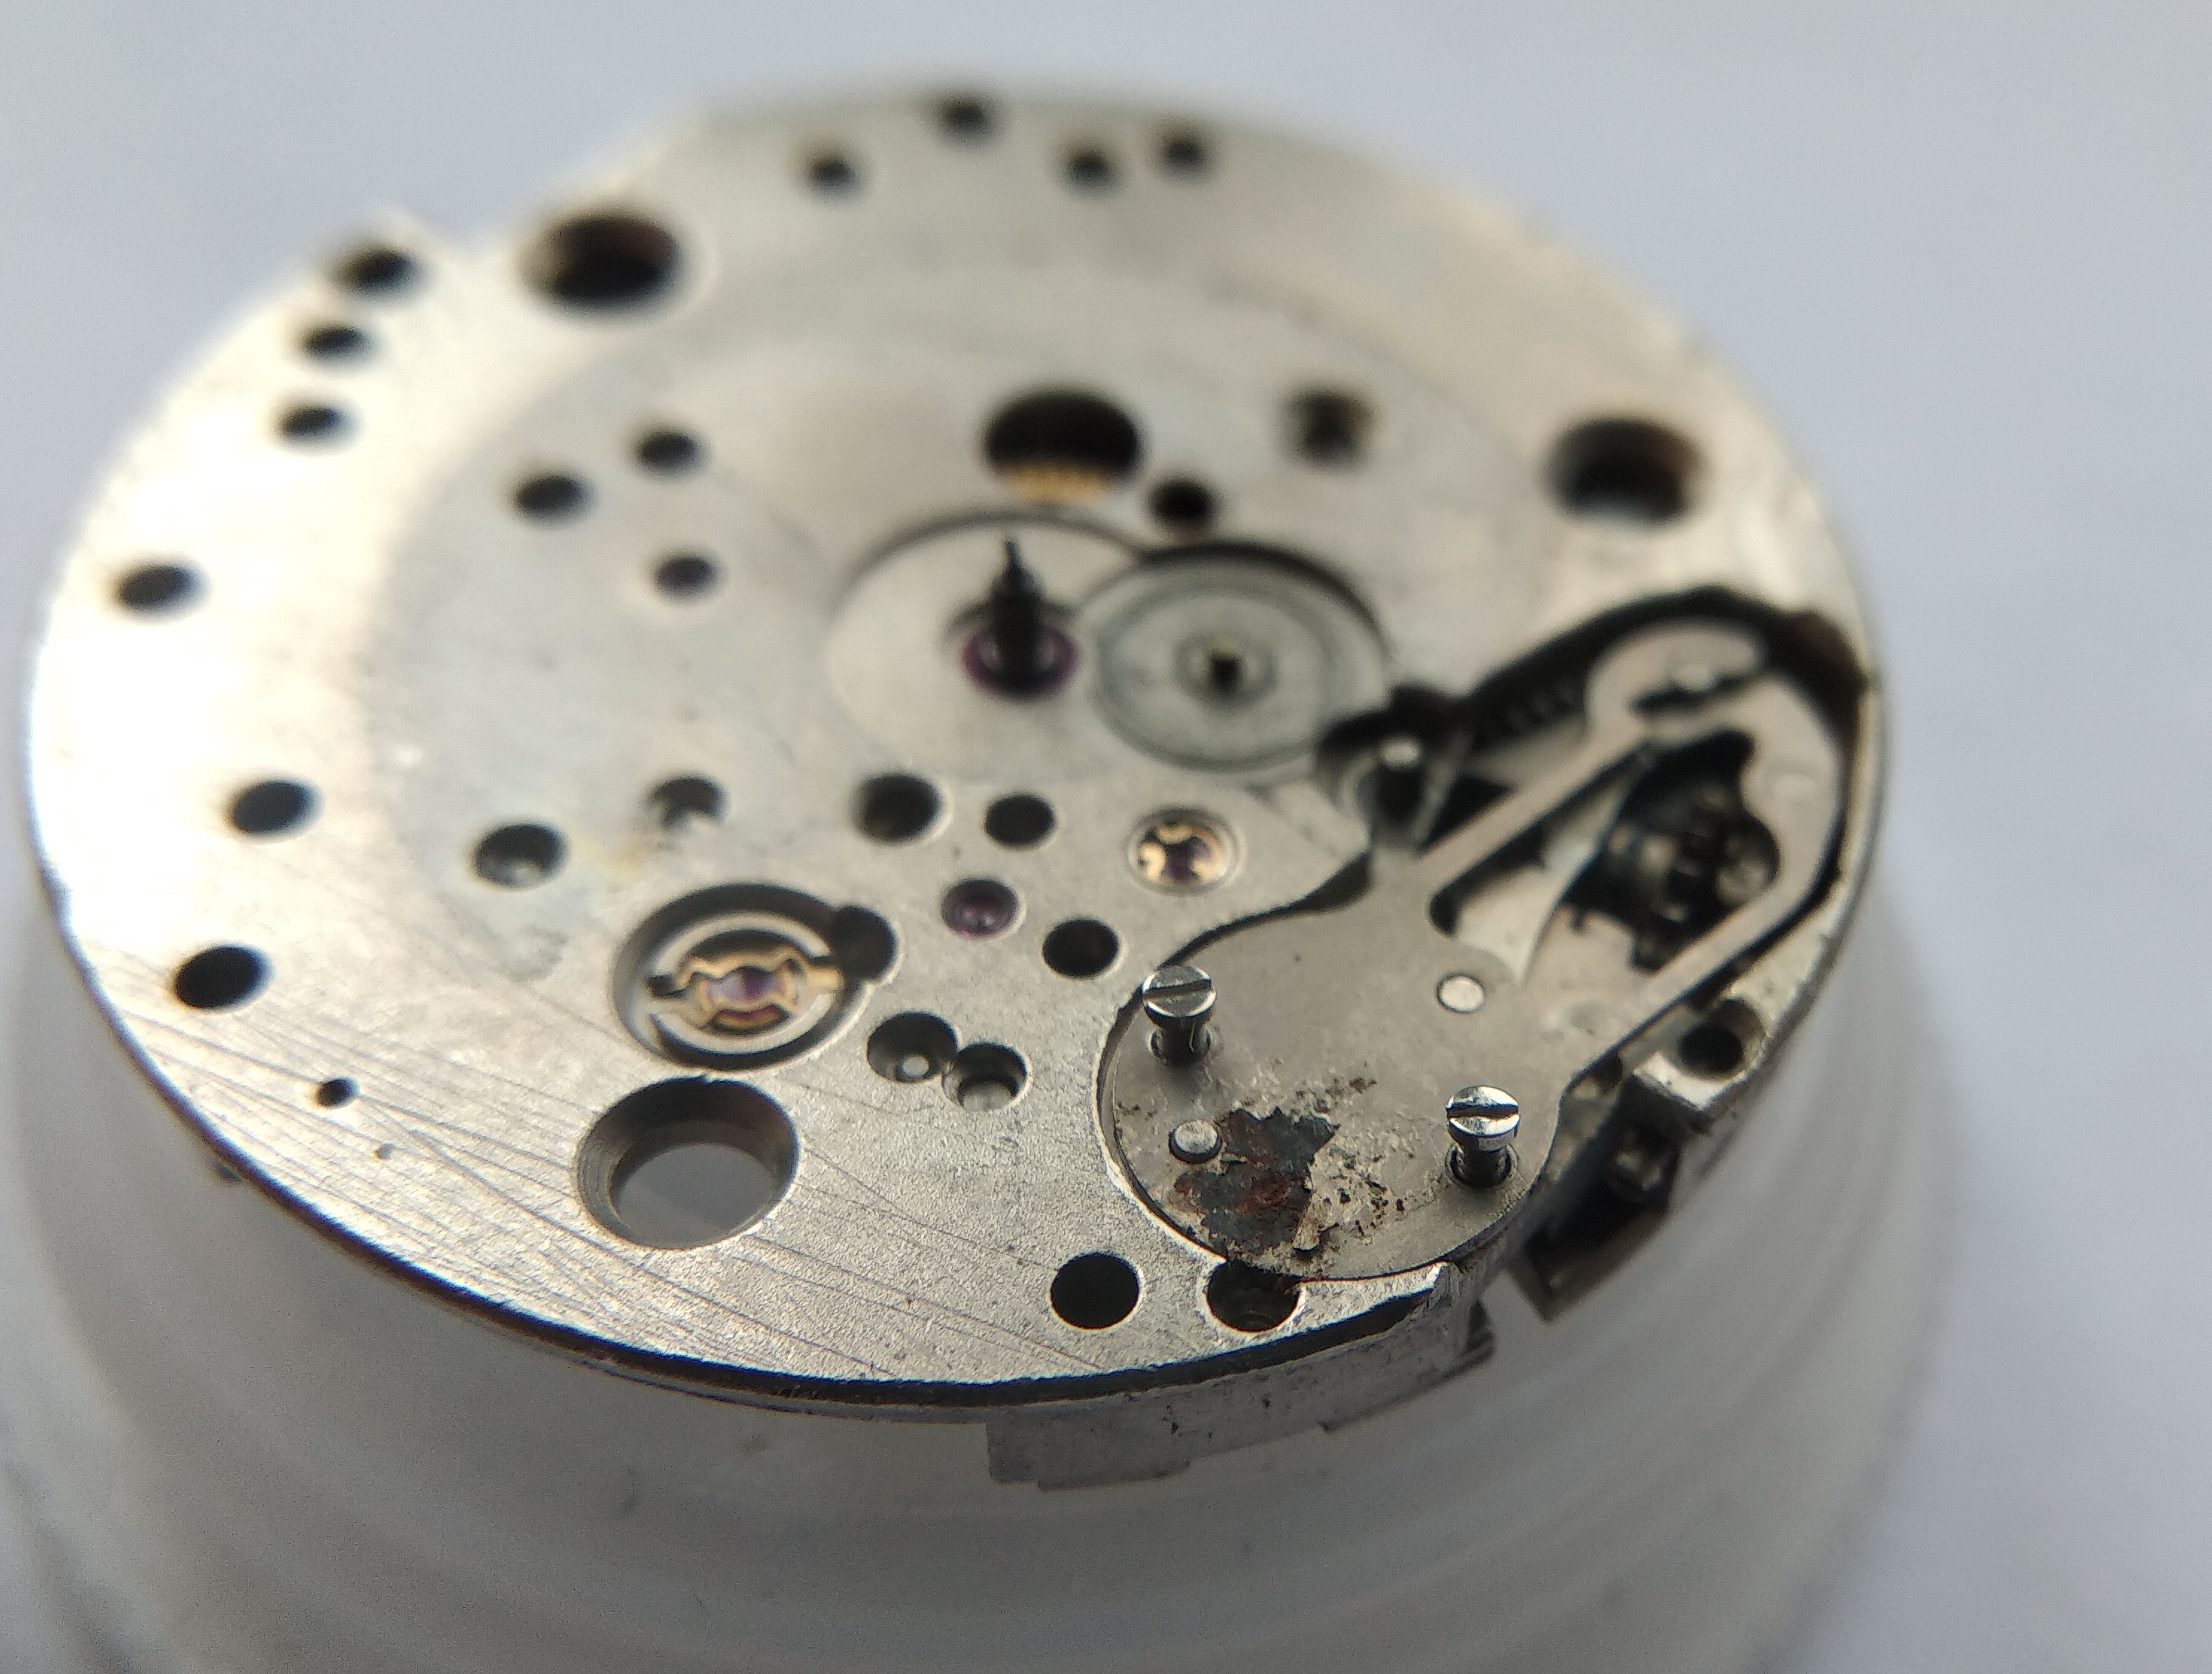
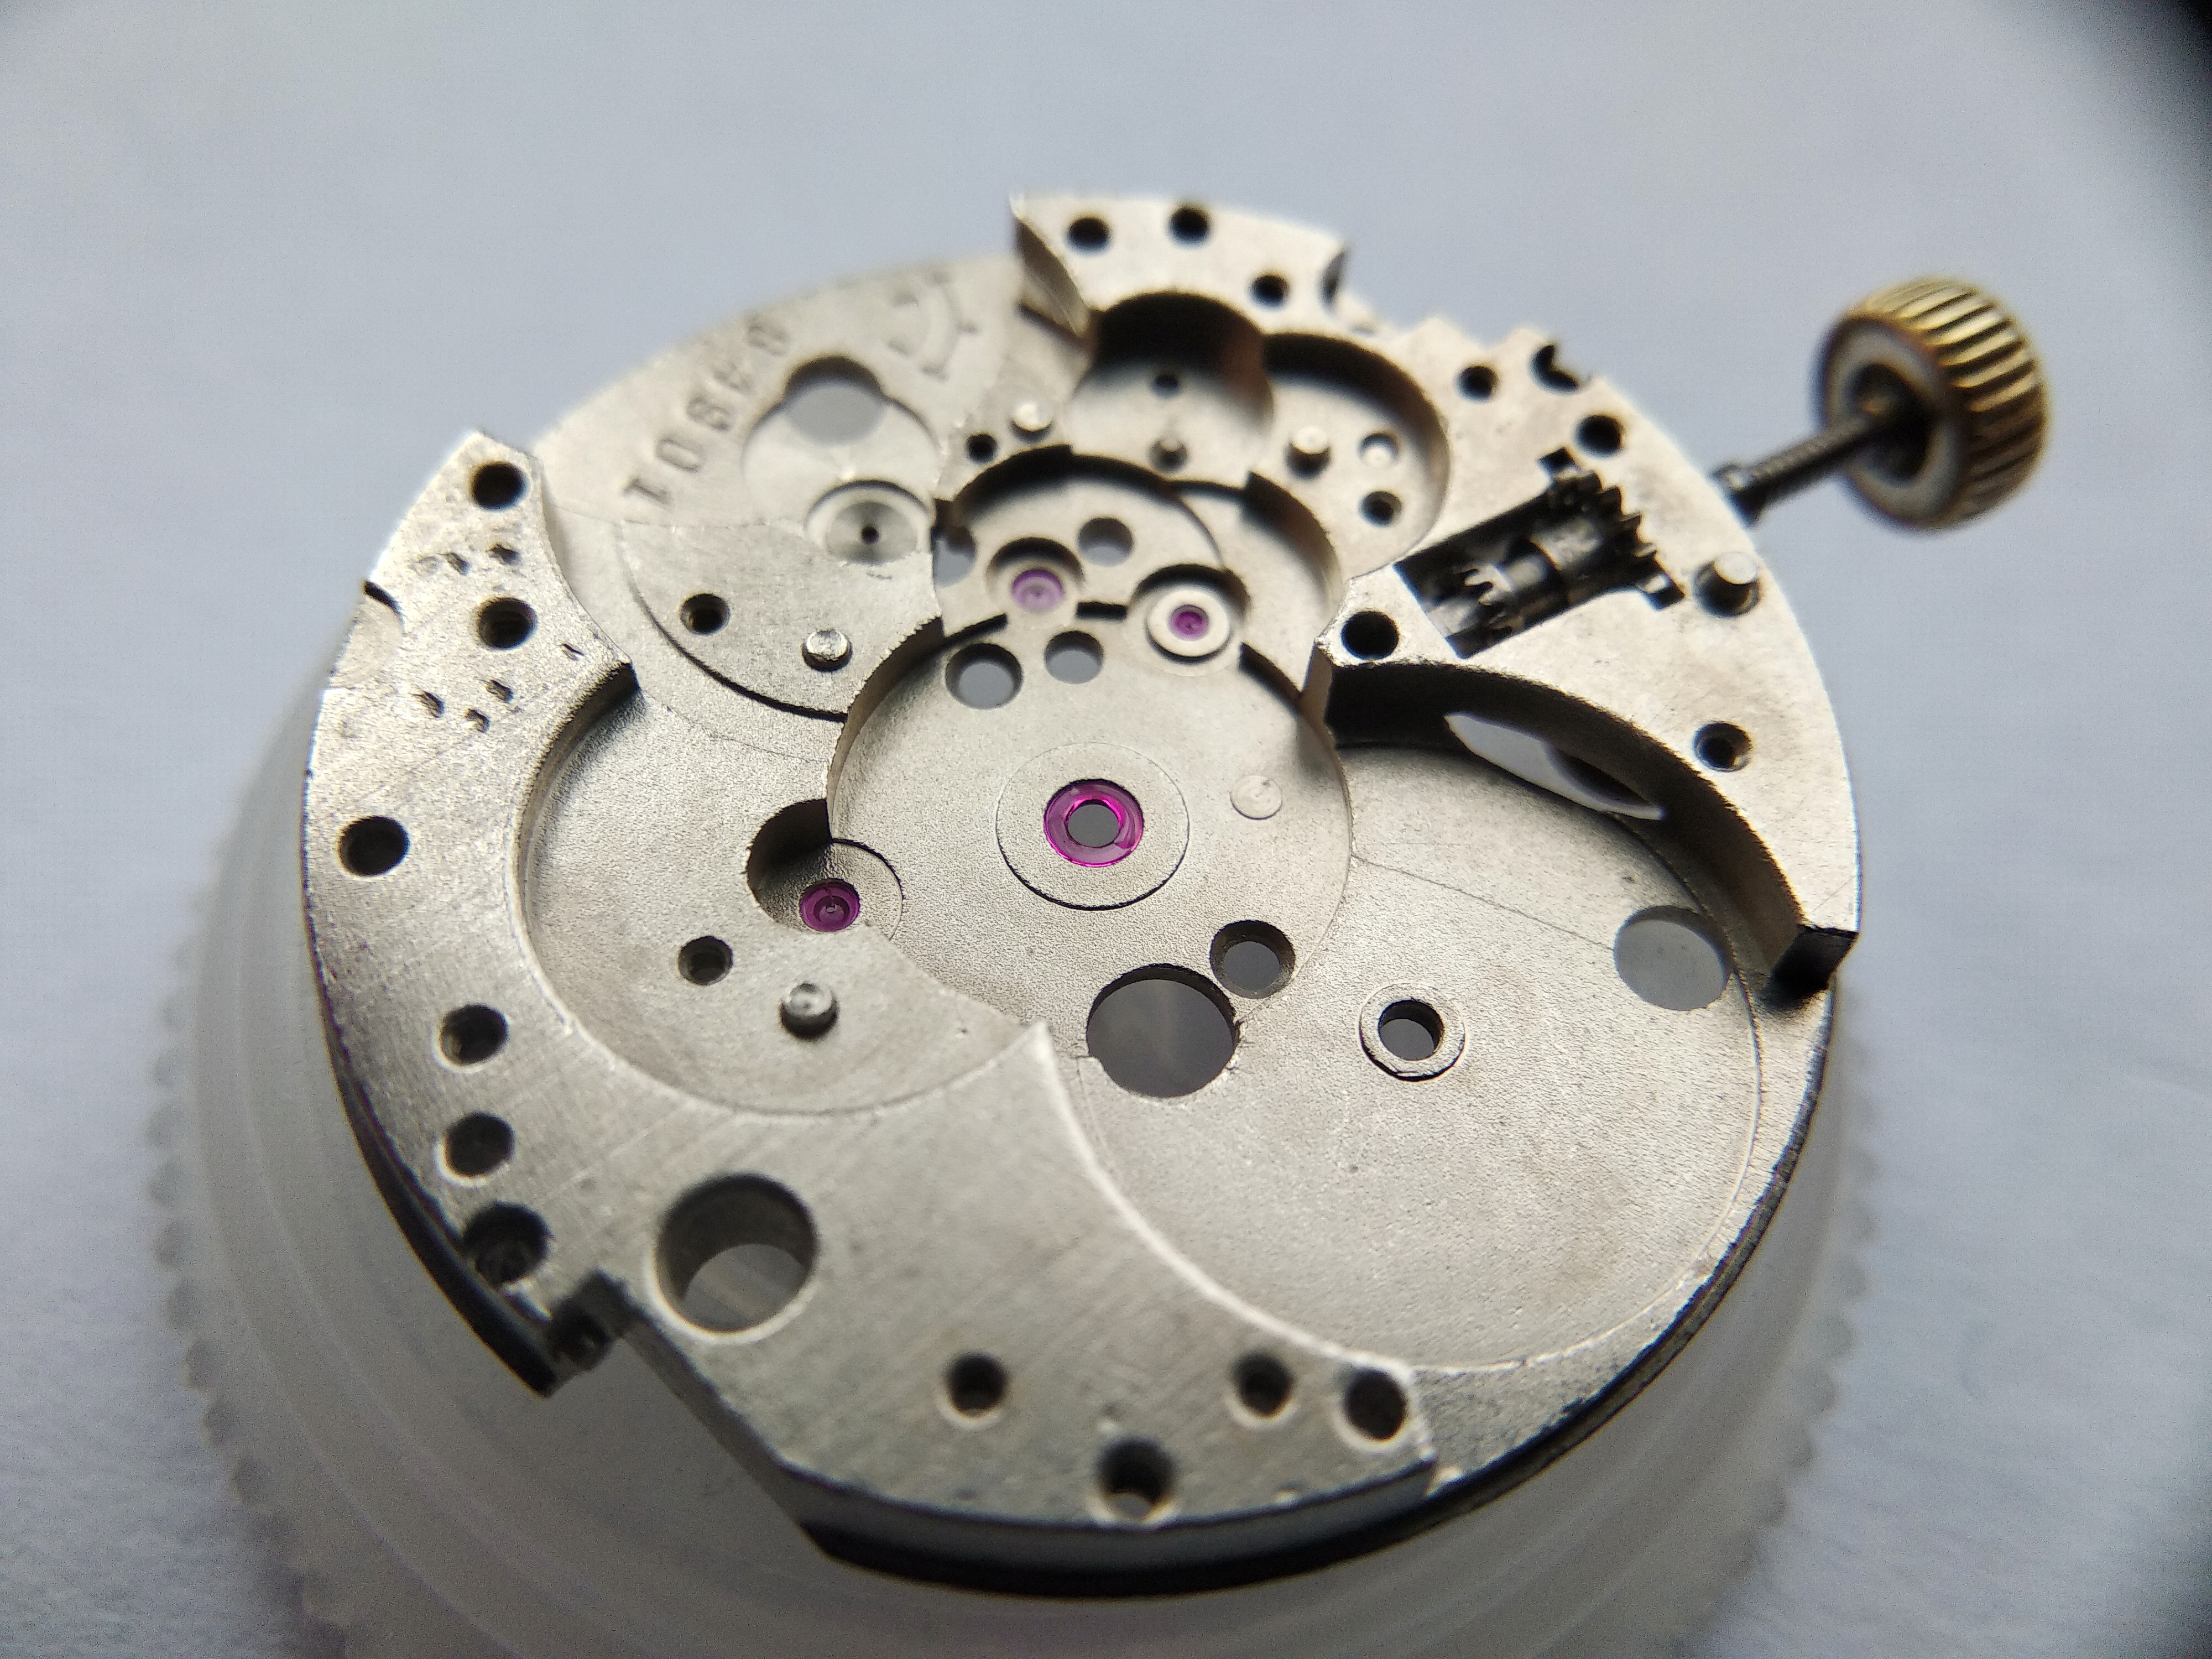
The slow side is clear. We move to the fast side.

Movement flipped over to begin work on the train and escapement side
Dial-side work finished, the movement is turned to address the going train and escapement.

Here it is, the fast side. The first job is to demount the pallet fork. We back out the two screws of the pallet bridge and dismantle the assembly. Notice the punch marks under the removed balance cock: in this way a previous watchmaker tried to seat the cock without spacers. It did not work. Why he attempted it, I do not know — perhaps he had changed the balance and the staff was to a different tolerance, so he experimented. But a spacer is a spacer. In the end he fitted two of them.

Fast side of the movement with the pallet bridge being removed; punch marks visible where the balance cock was staked
The escapement side, with the pallet bridge coming off. The stake marks beneath the balance cock record a former repairer's failed attempt to seat it without shims — he ended up using two spacers anyway.

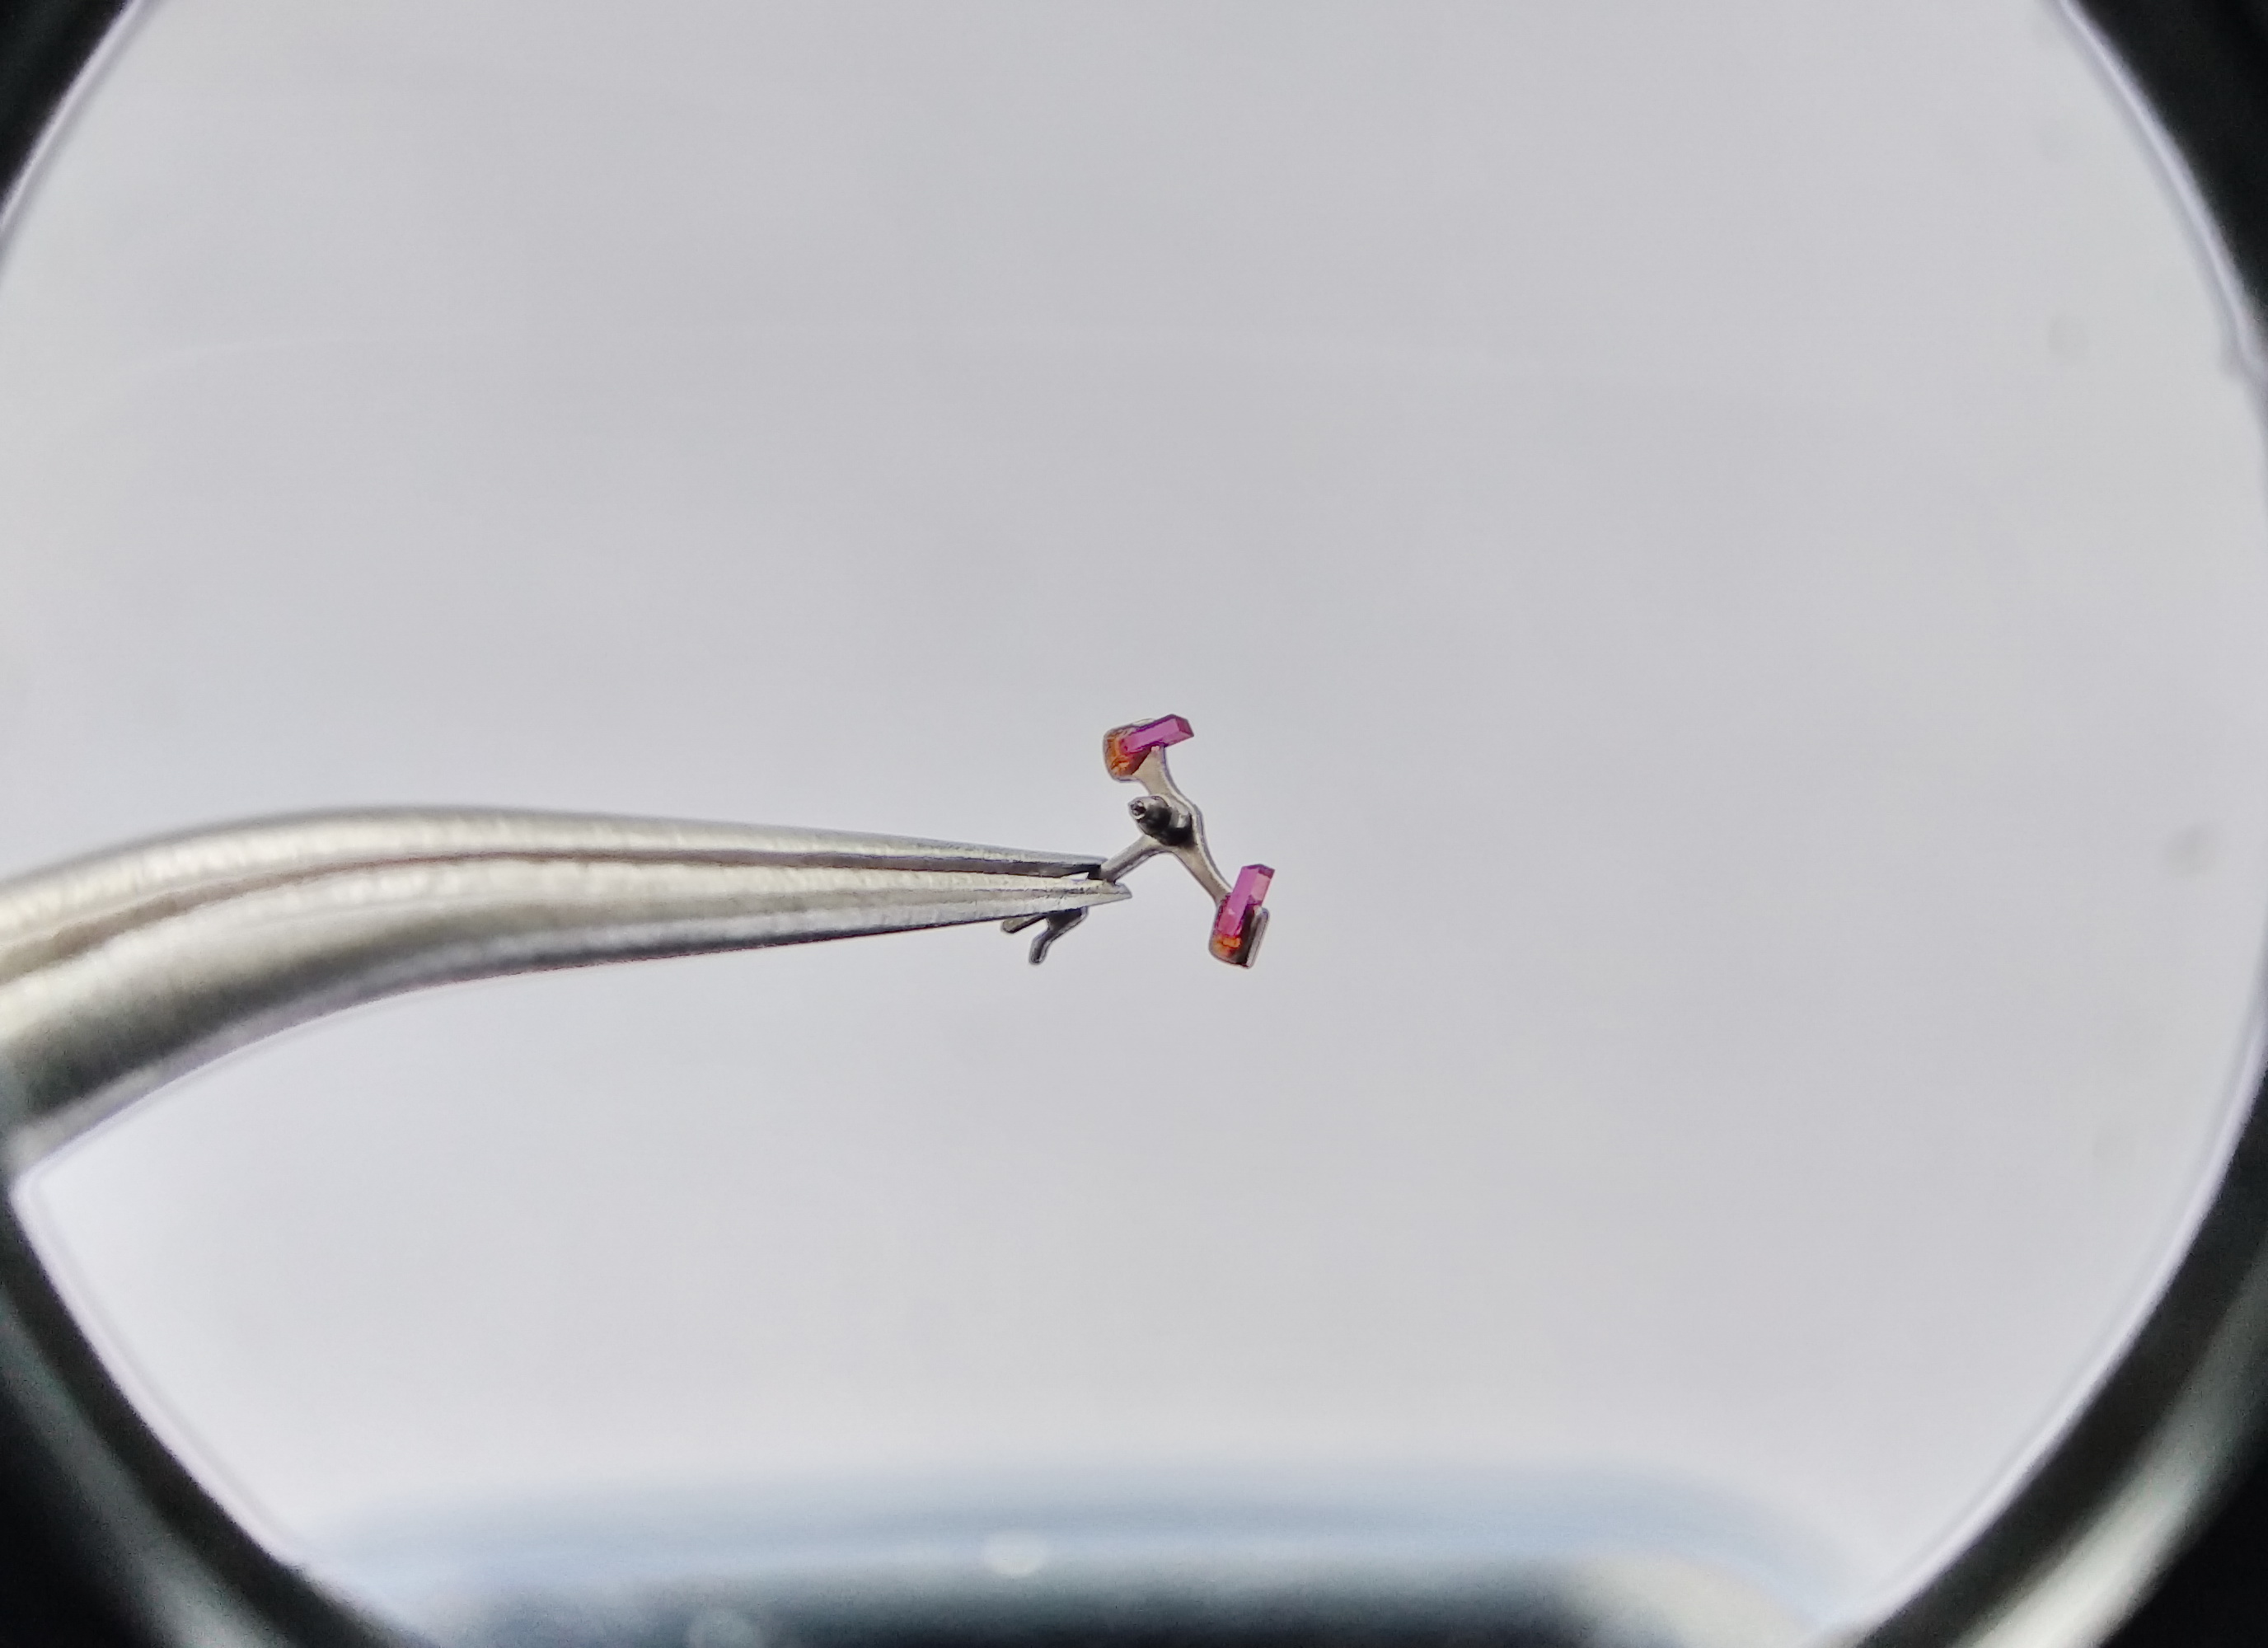
And so the fork, as very often happens in watches left unserviced for many years, has glued itself to the jewel of its bridge. Debris and stray fibres had stuck to the horns…

Pallet fork stuck to its bridge jewel by dried oil, with fibres caught on the horns
Years of dried oil had cemented the pallet fork to its bridge jewel, with lint snagged on the horns — a classic symptom of a long-dormant movement.

We free it by dipping it briefly in benzine and recover a nice clean pallet fork.

Cleaned pallet fork after a short bath in benzine
A short soak in benzine releases the fork and dissolves the old oil, leaving the lever and its pallet stones clean.

Here it is under the microscope. All in order.

Pallet fork examined under a microscope, pallet stones intact
Under magnification the pallet stones and lever are sound — no chips, no cracks. The fork is fit to return to service.

And this is the pallet bridge. An oil sink has been machined into the jewel, but we will not give it any oil — not out of stinginess, but because it does not belong there. The fork must deliver a crisp, sharp impulse to the balance, and oil acts as a damper. So if we lubricate it, the balance may swing through a smaller arc; that is, less energy would be passed to it from the fork. And it will not glue itself to the jewel afterward, either.

Pallet bridge with a machined oil sink in its jewel, deliberately left dry
The pallet-bridge jewel even has an oil sink — yet it is left deliberately dry. Oil here would dampen the impulse and cost amplitude, and it is precisely what glues the fork down over time.

The Going Train

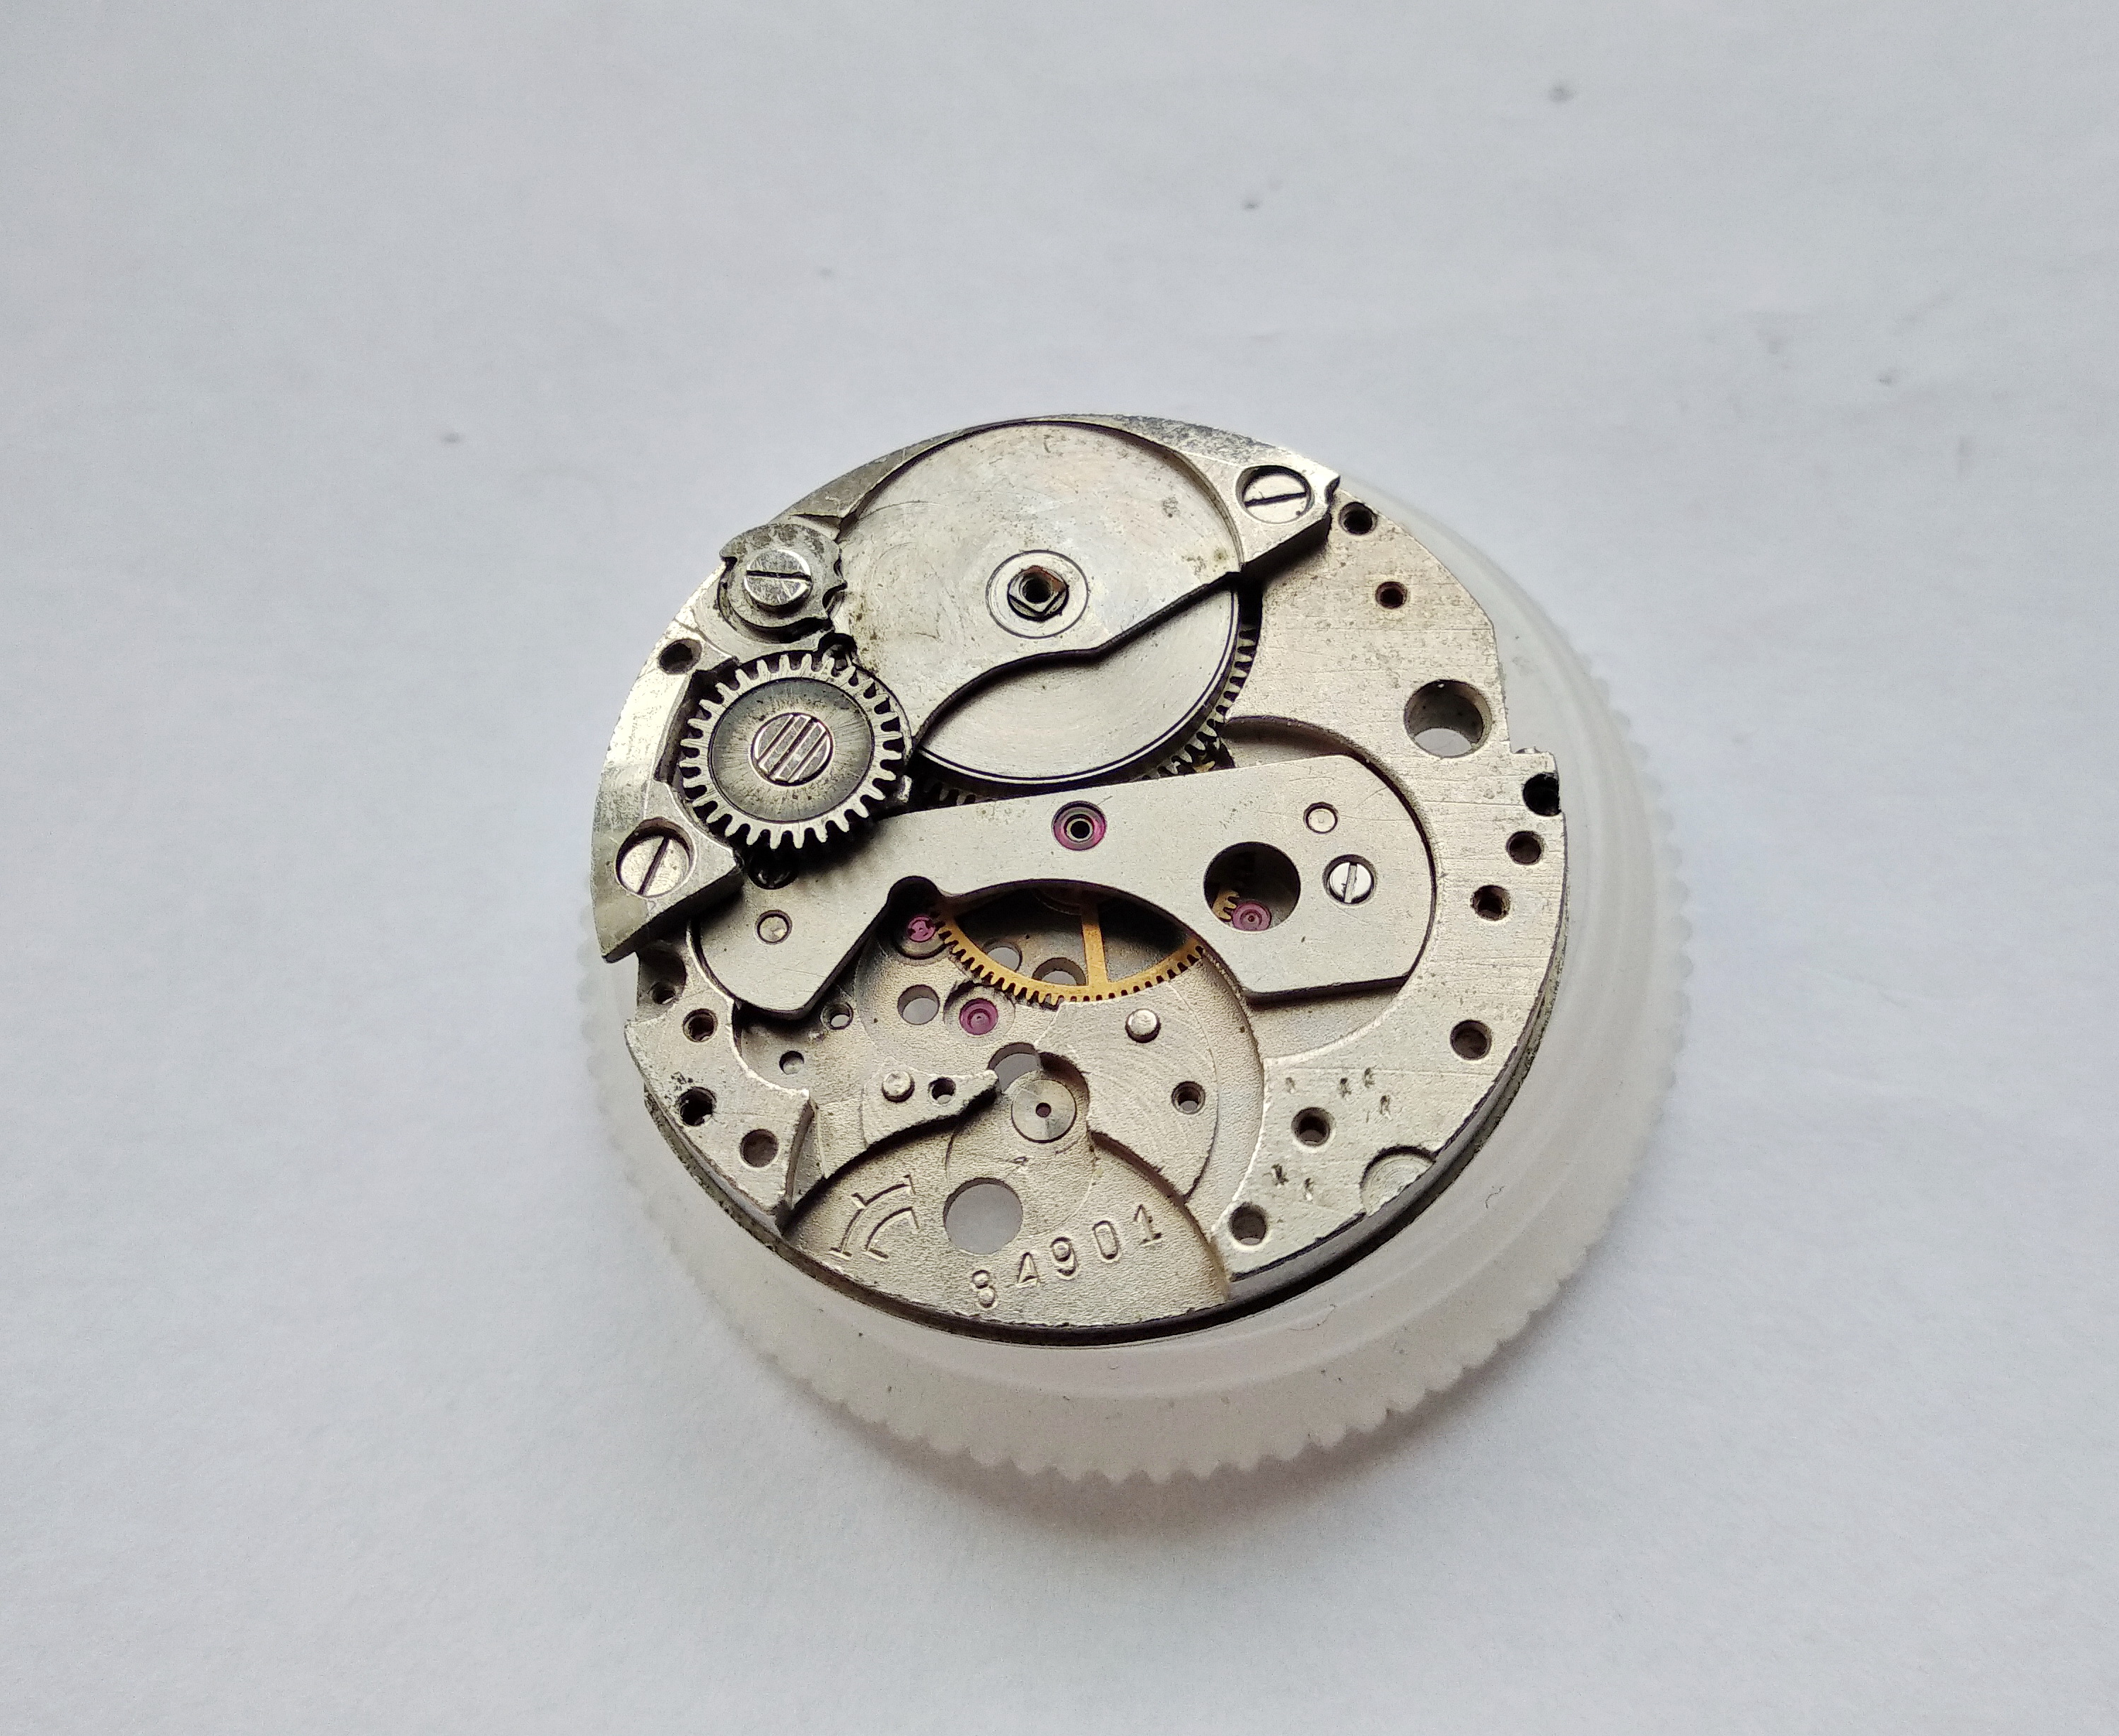
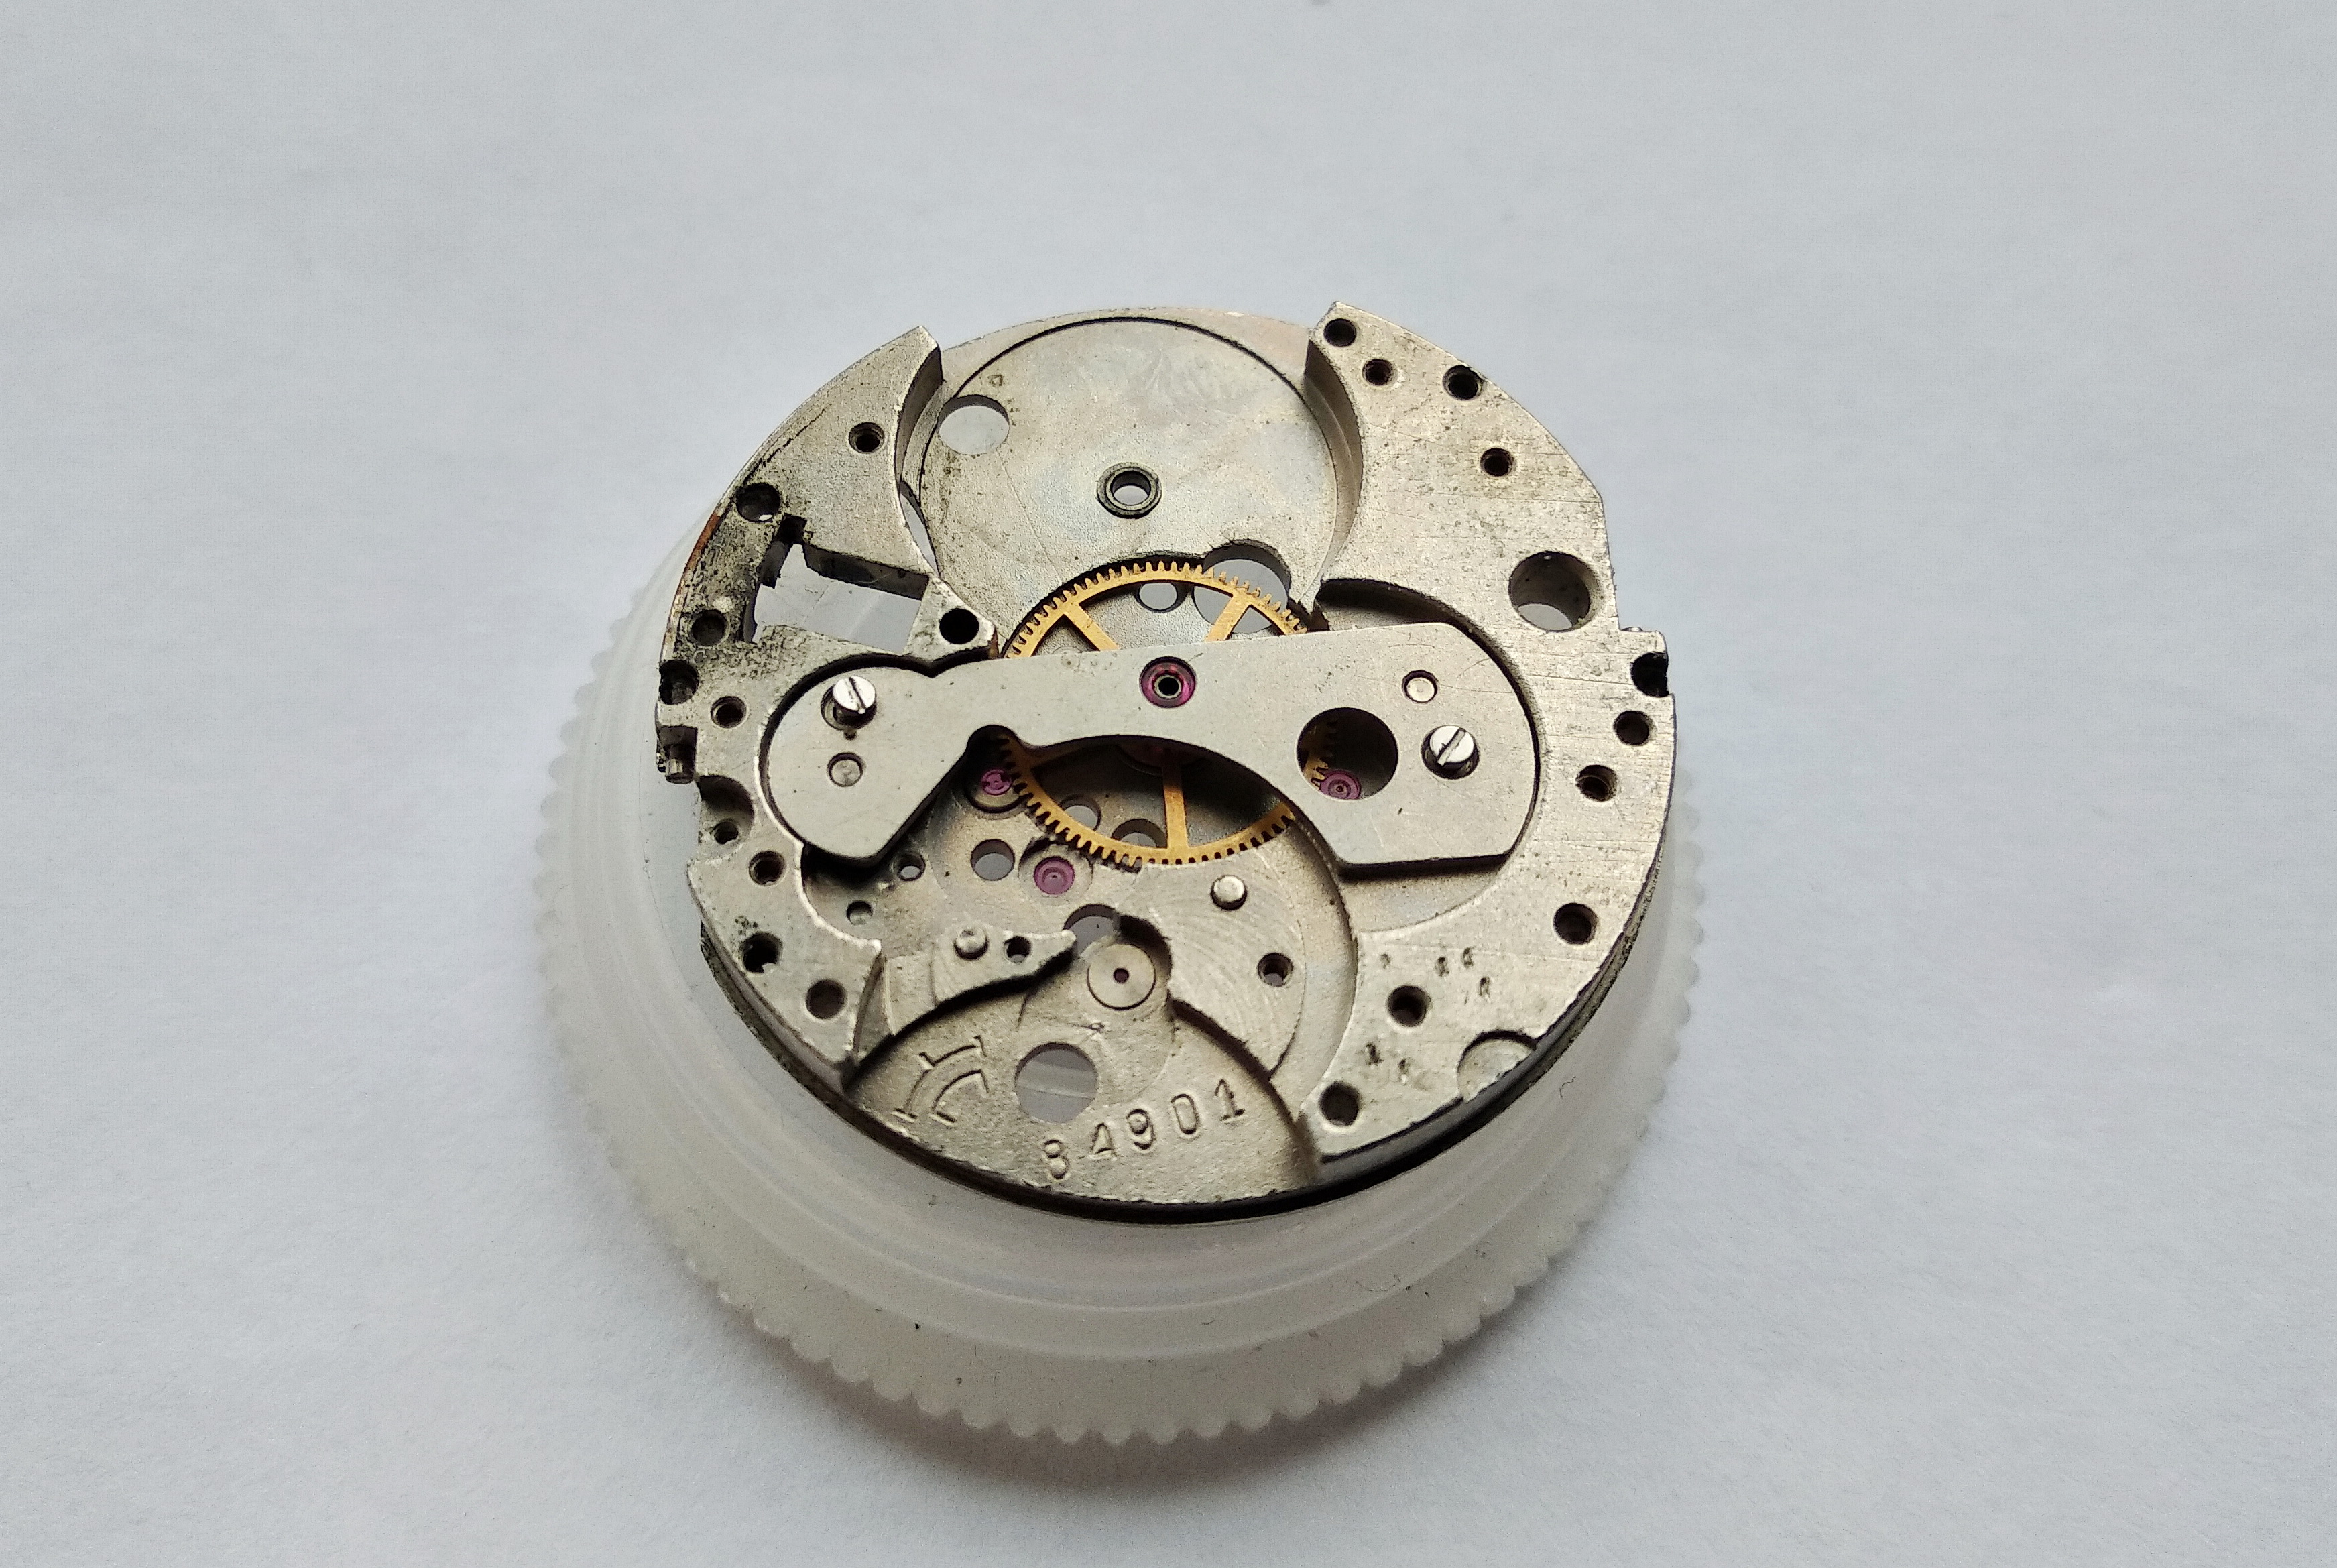
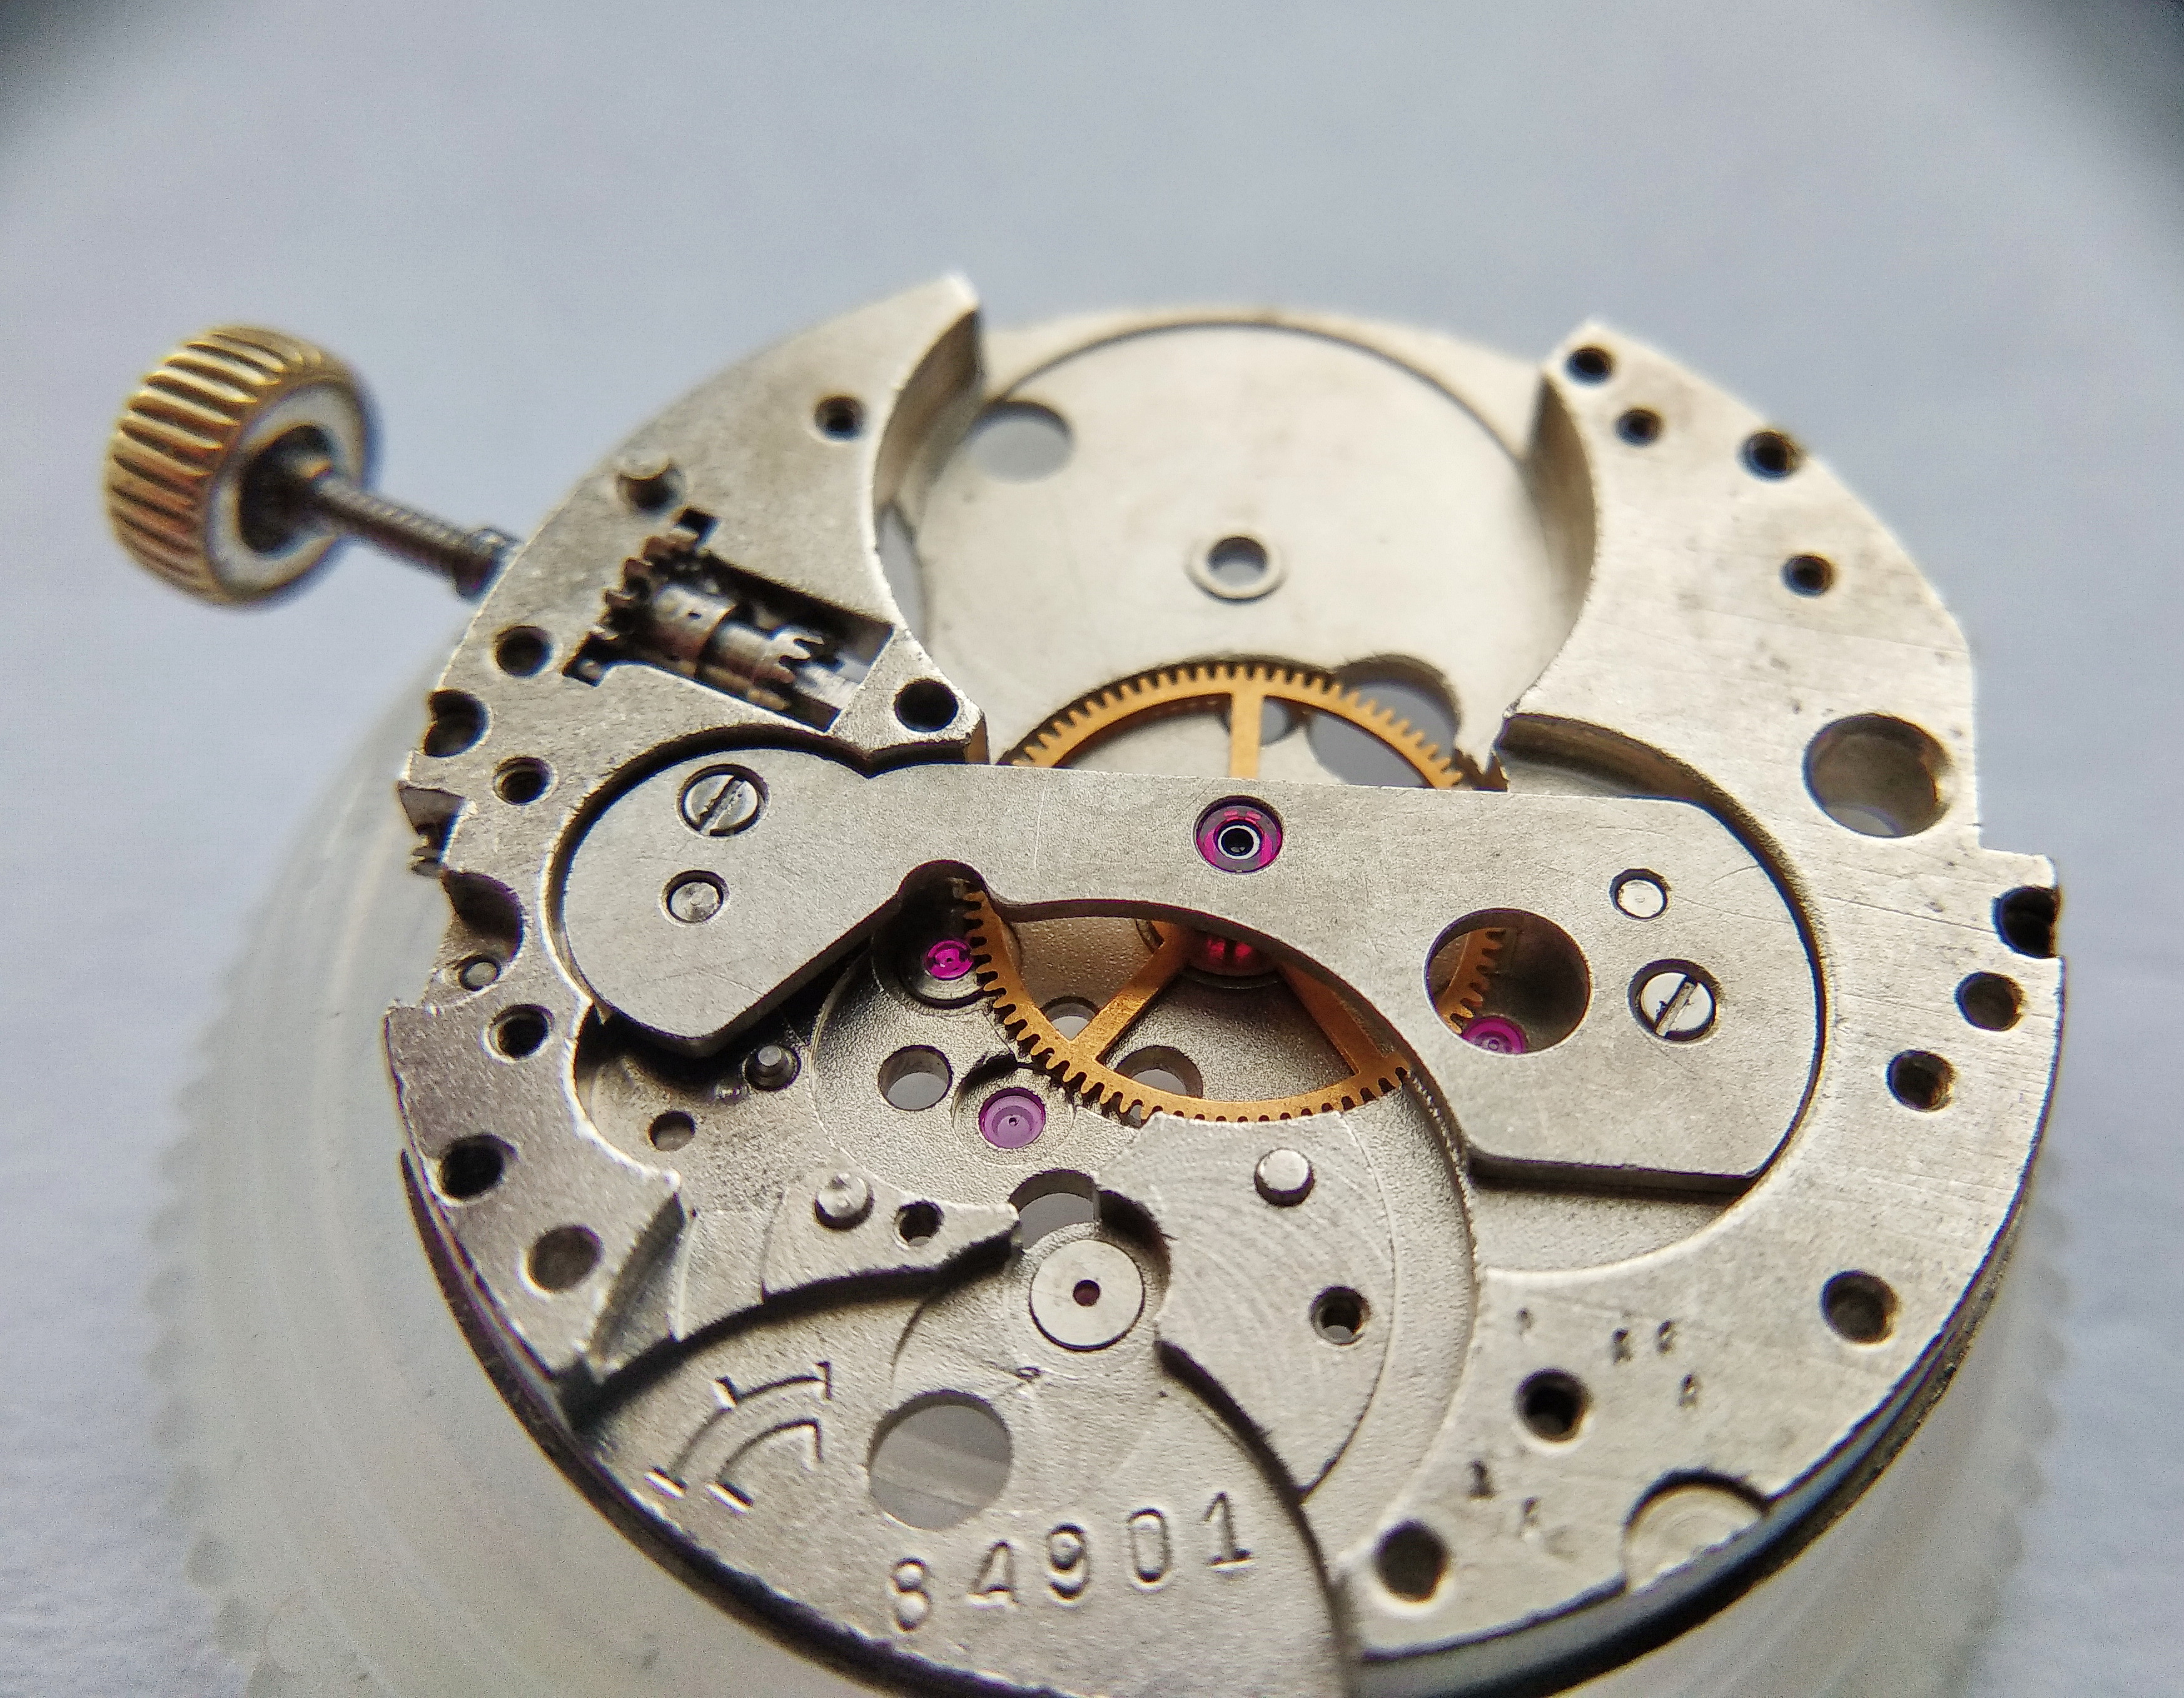
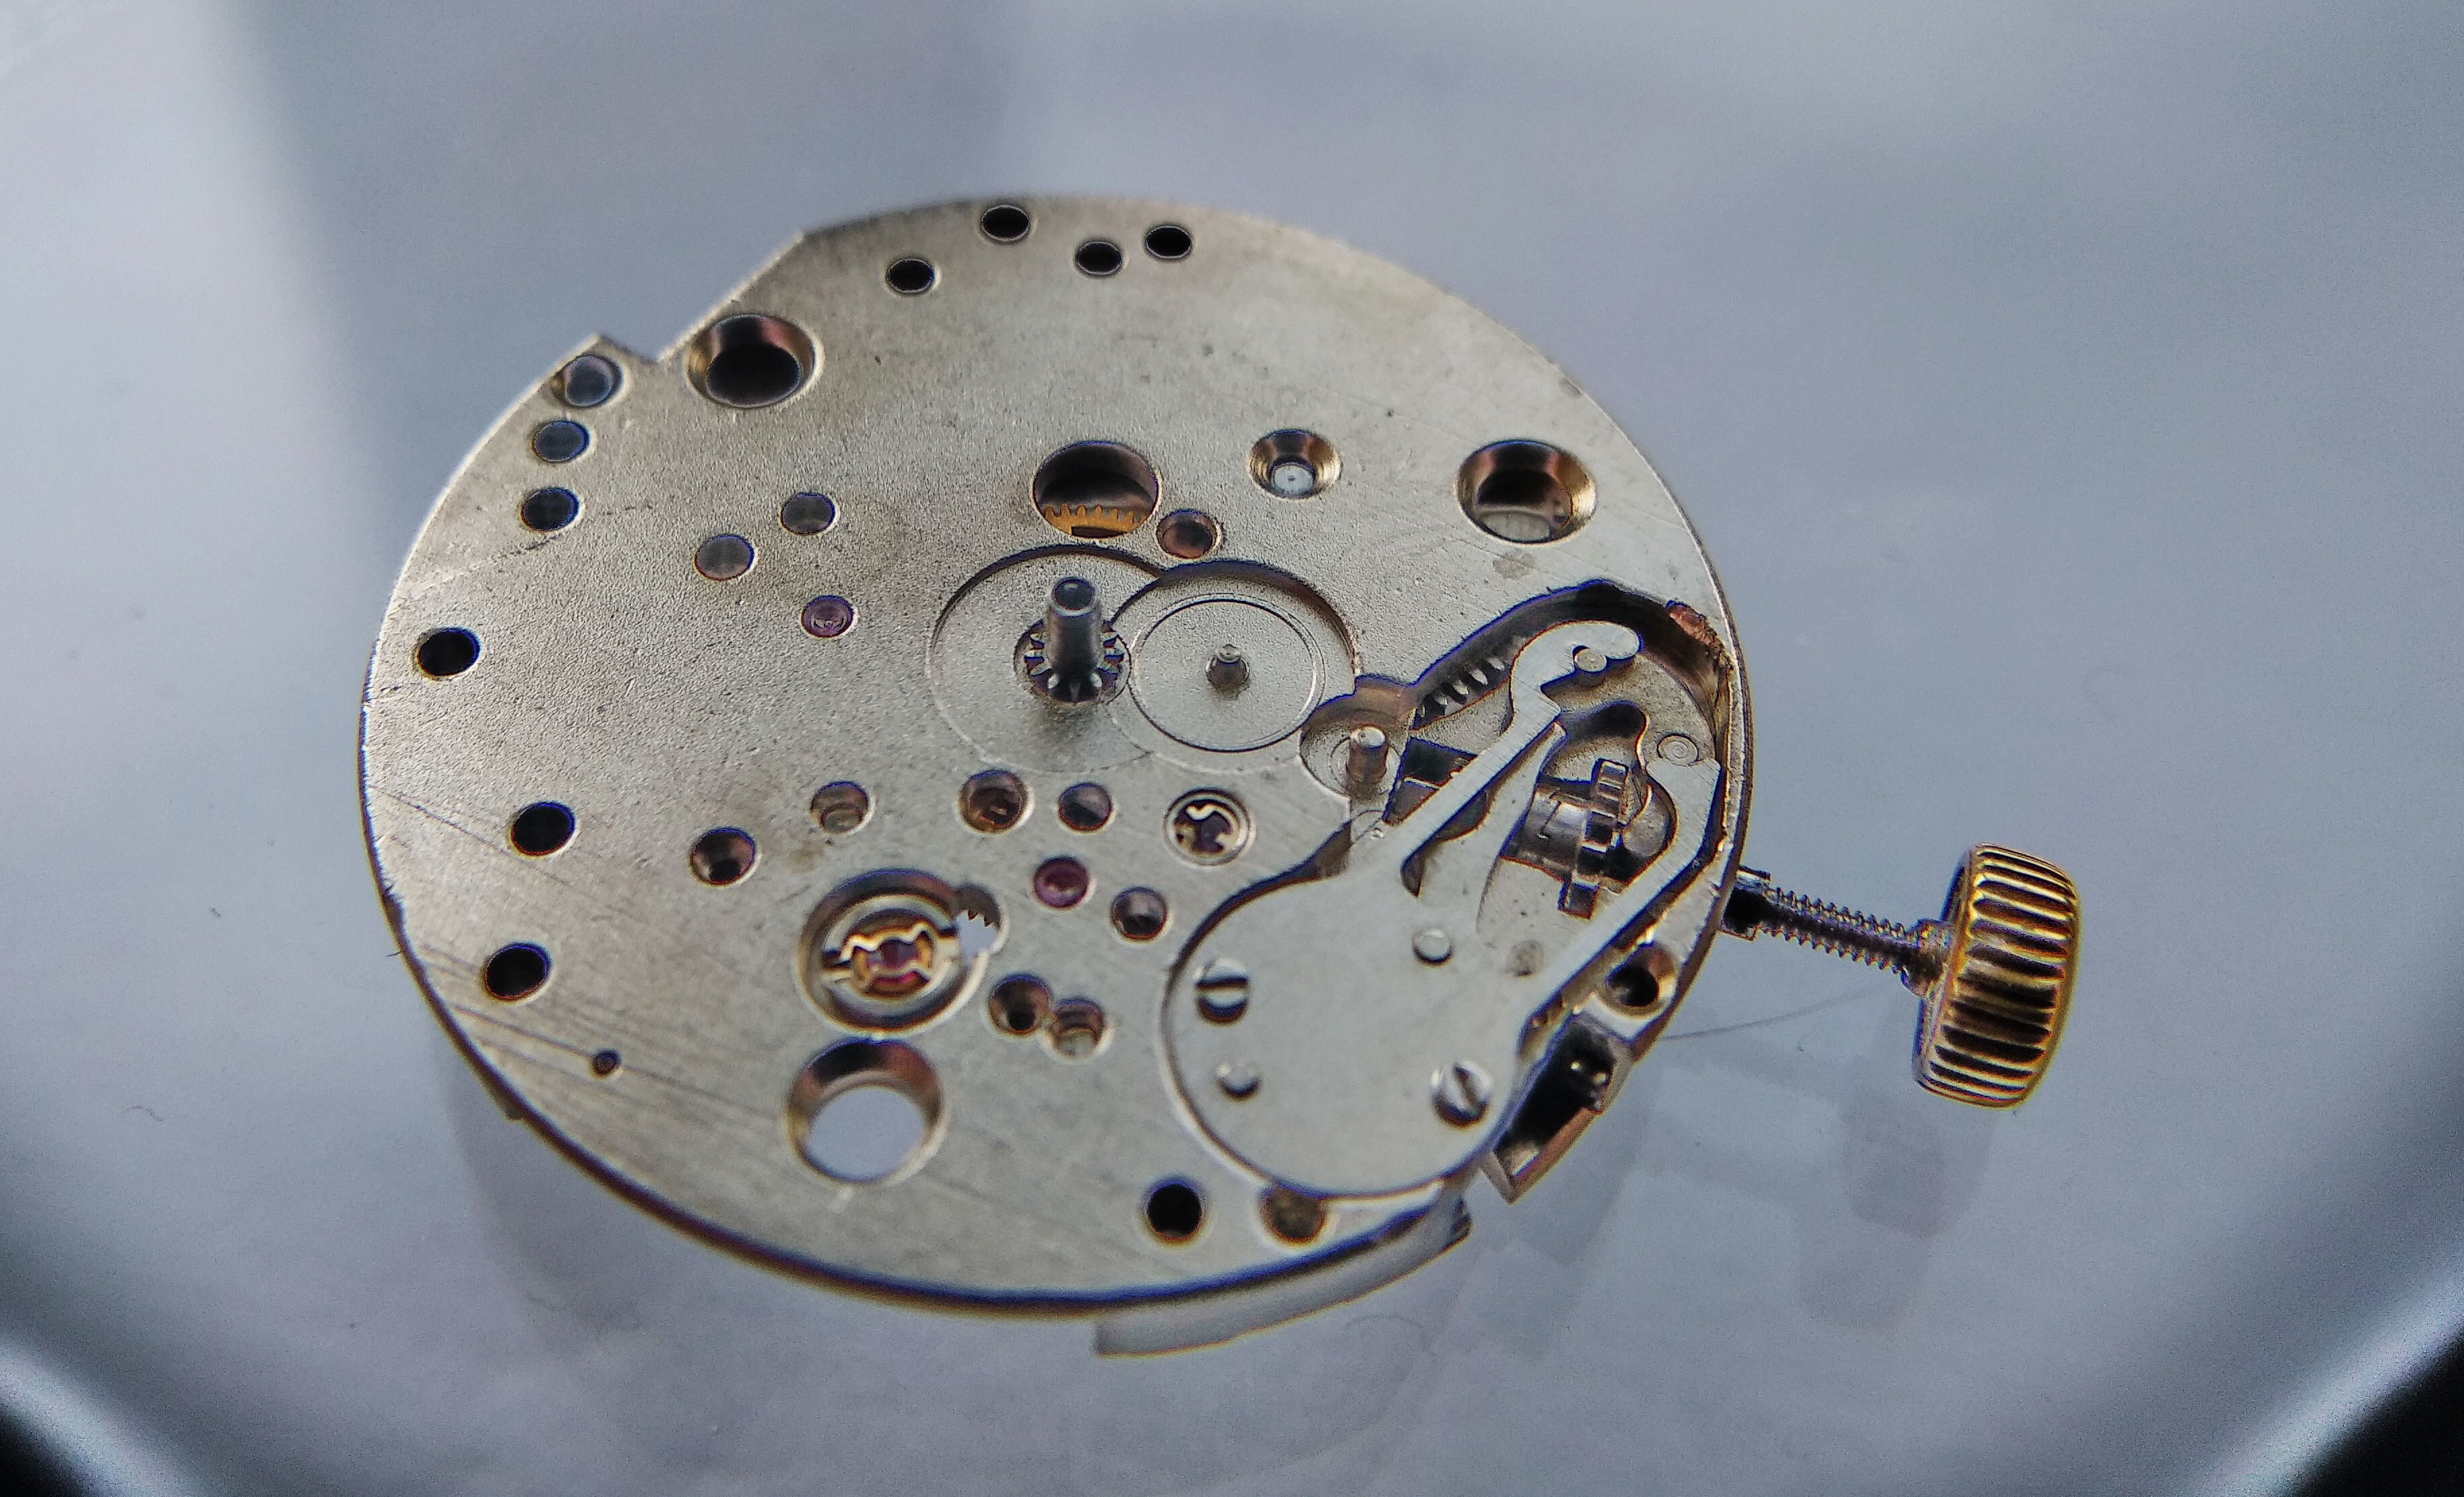
The fork is out. The going train is next. We demount the train bridge.

Train bridge being lifted off to expose the going-train wheels
The train bridge is removed to reach the wheels beneath.

Two wheels are revealed before us — the seconds wheel and the intermediate wheel.

Seconds wheel and intermediate wheel exposed on the main plate after the bridge is removed
With the bridge gone, the seconds and intermediate wheels sit exposed on the plate, ready to be lifted once the barrel is cleared.

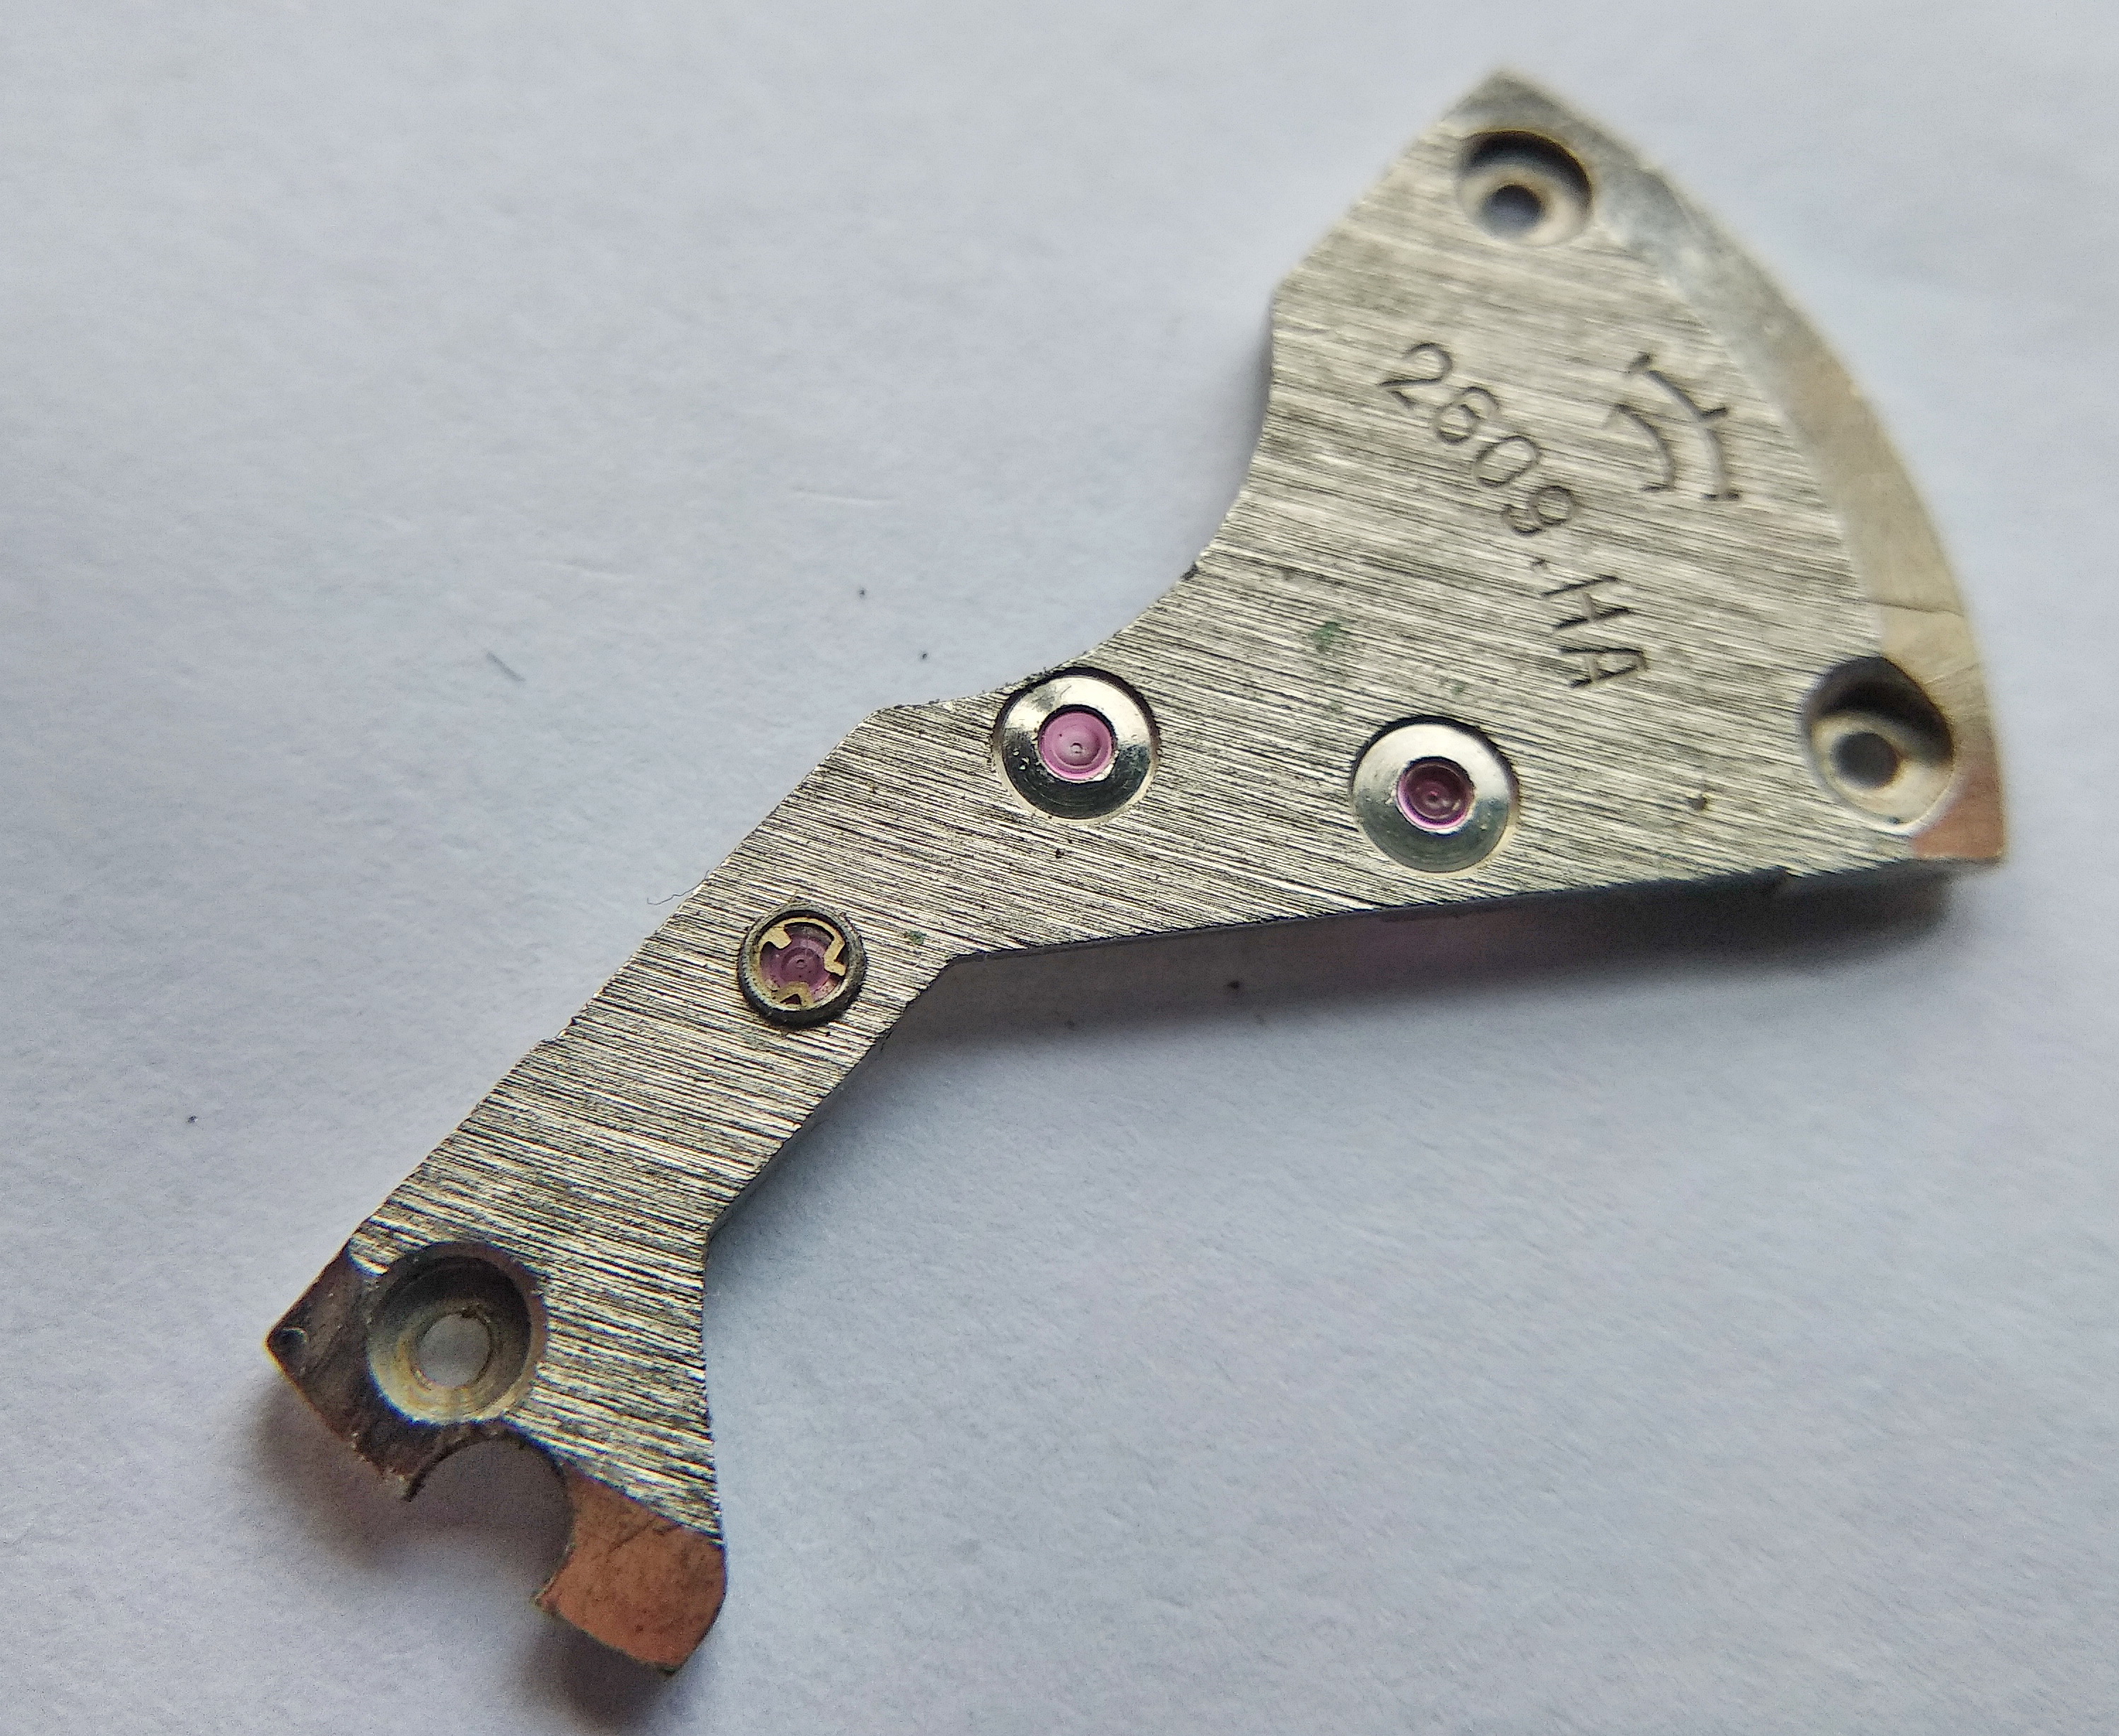
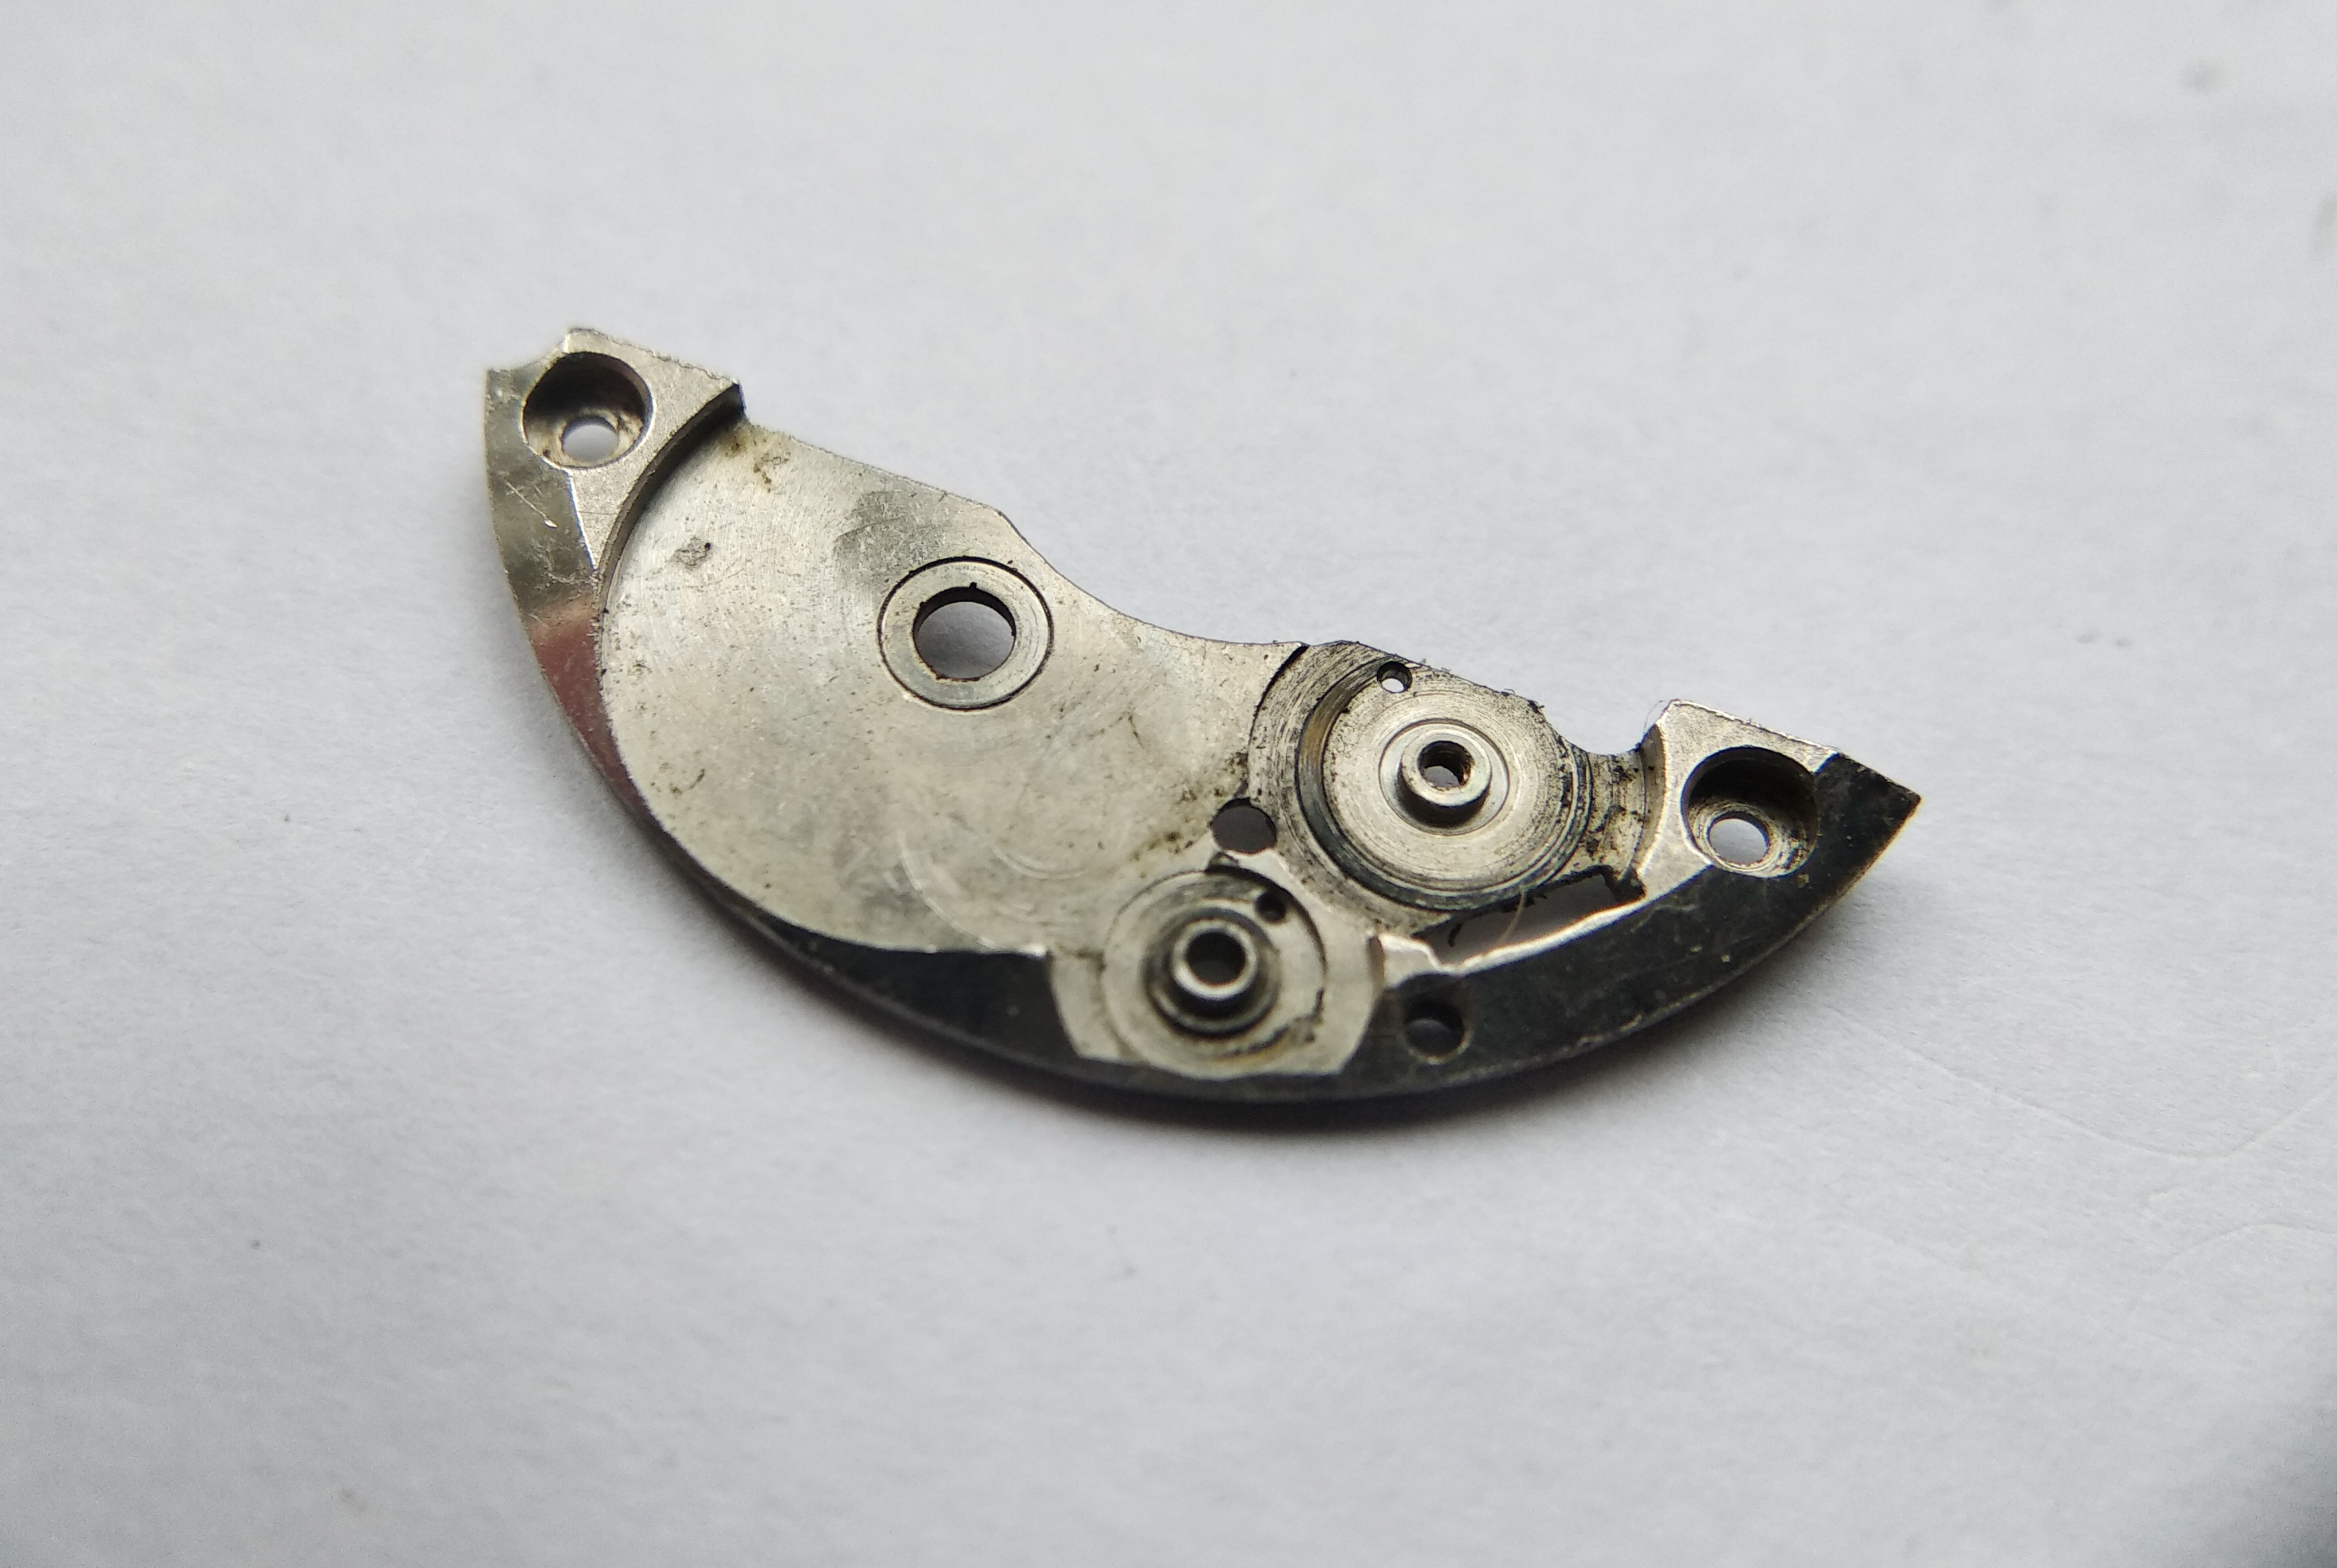
And here is the bridge, seen from above. Note the bevels.

Top face of the train bridge showing polished bevels along its edges
The bridge from the top side. The polished bevels along its edges are the hallmark of the earlier, hand-finished production runs of this caliber.

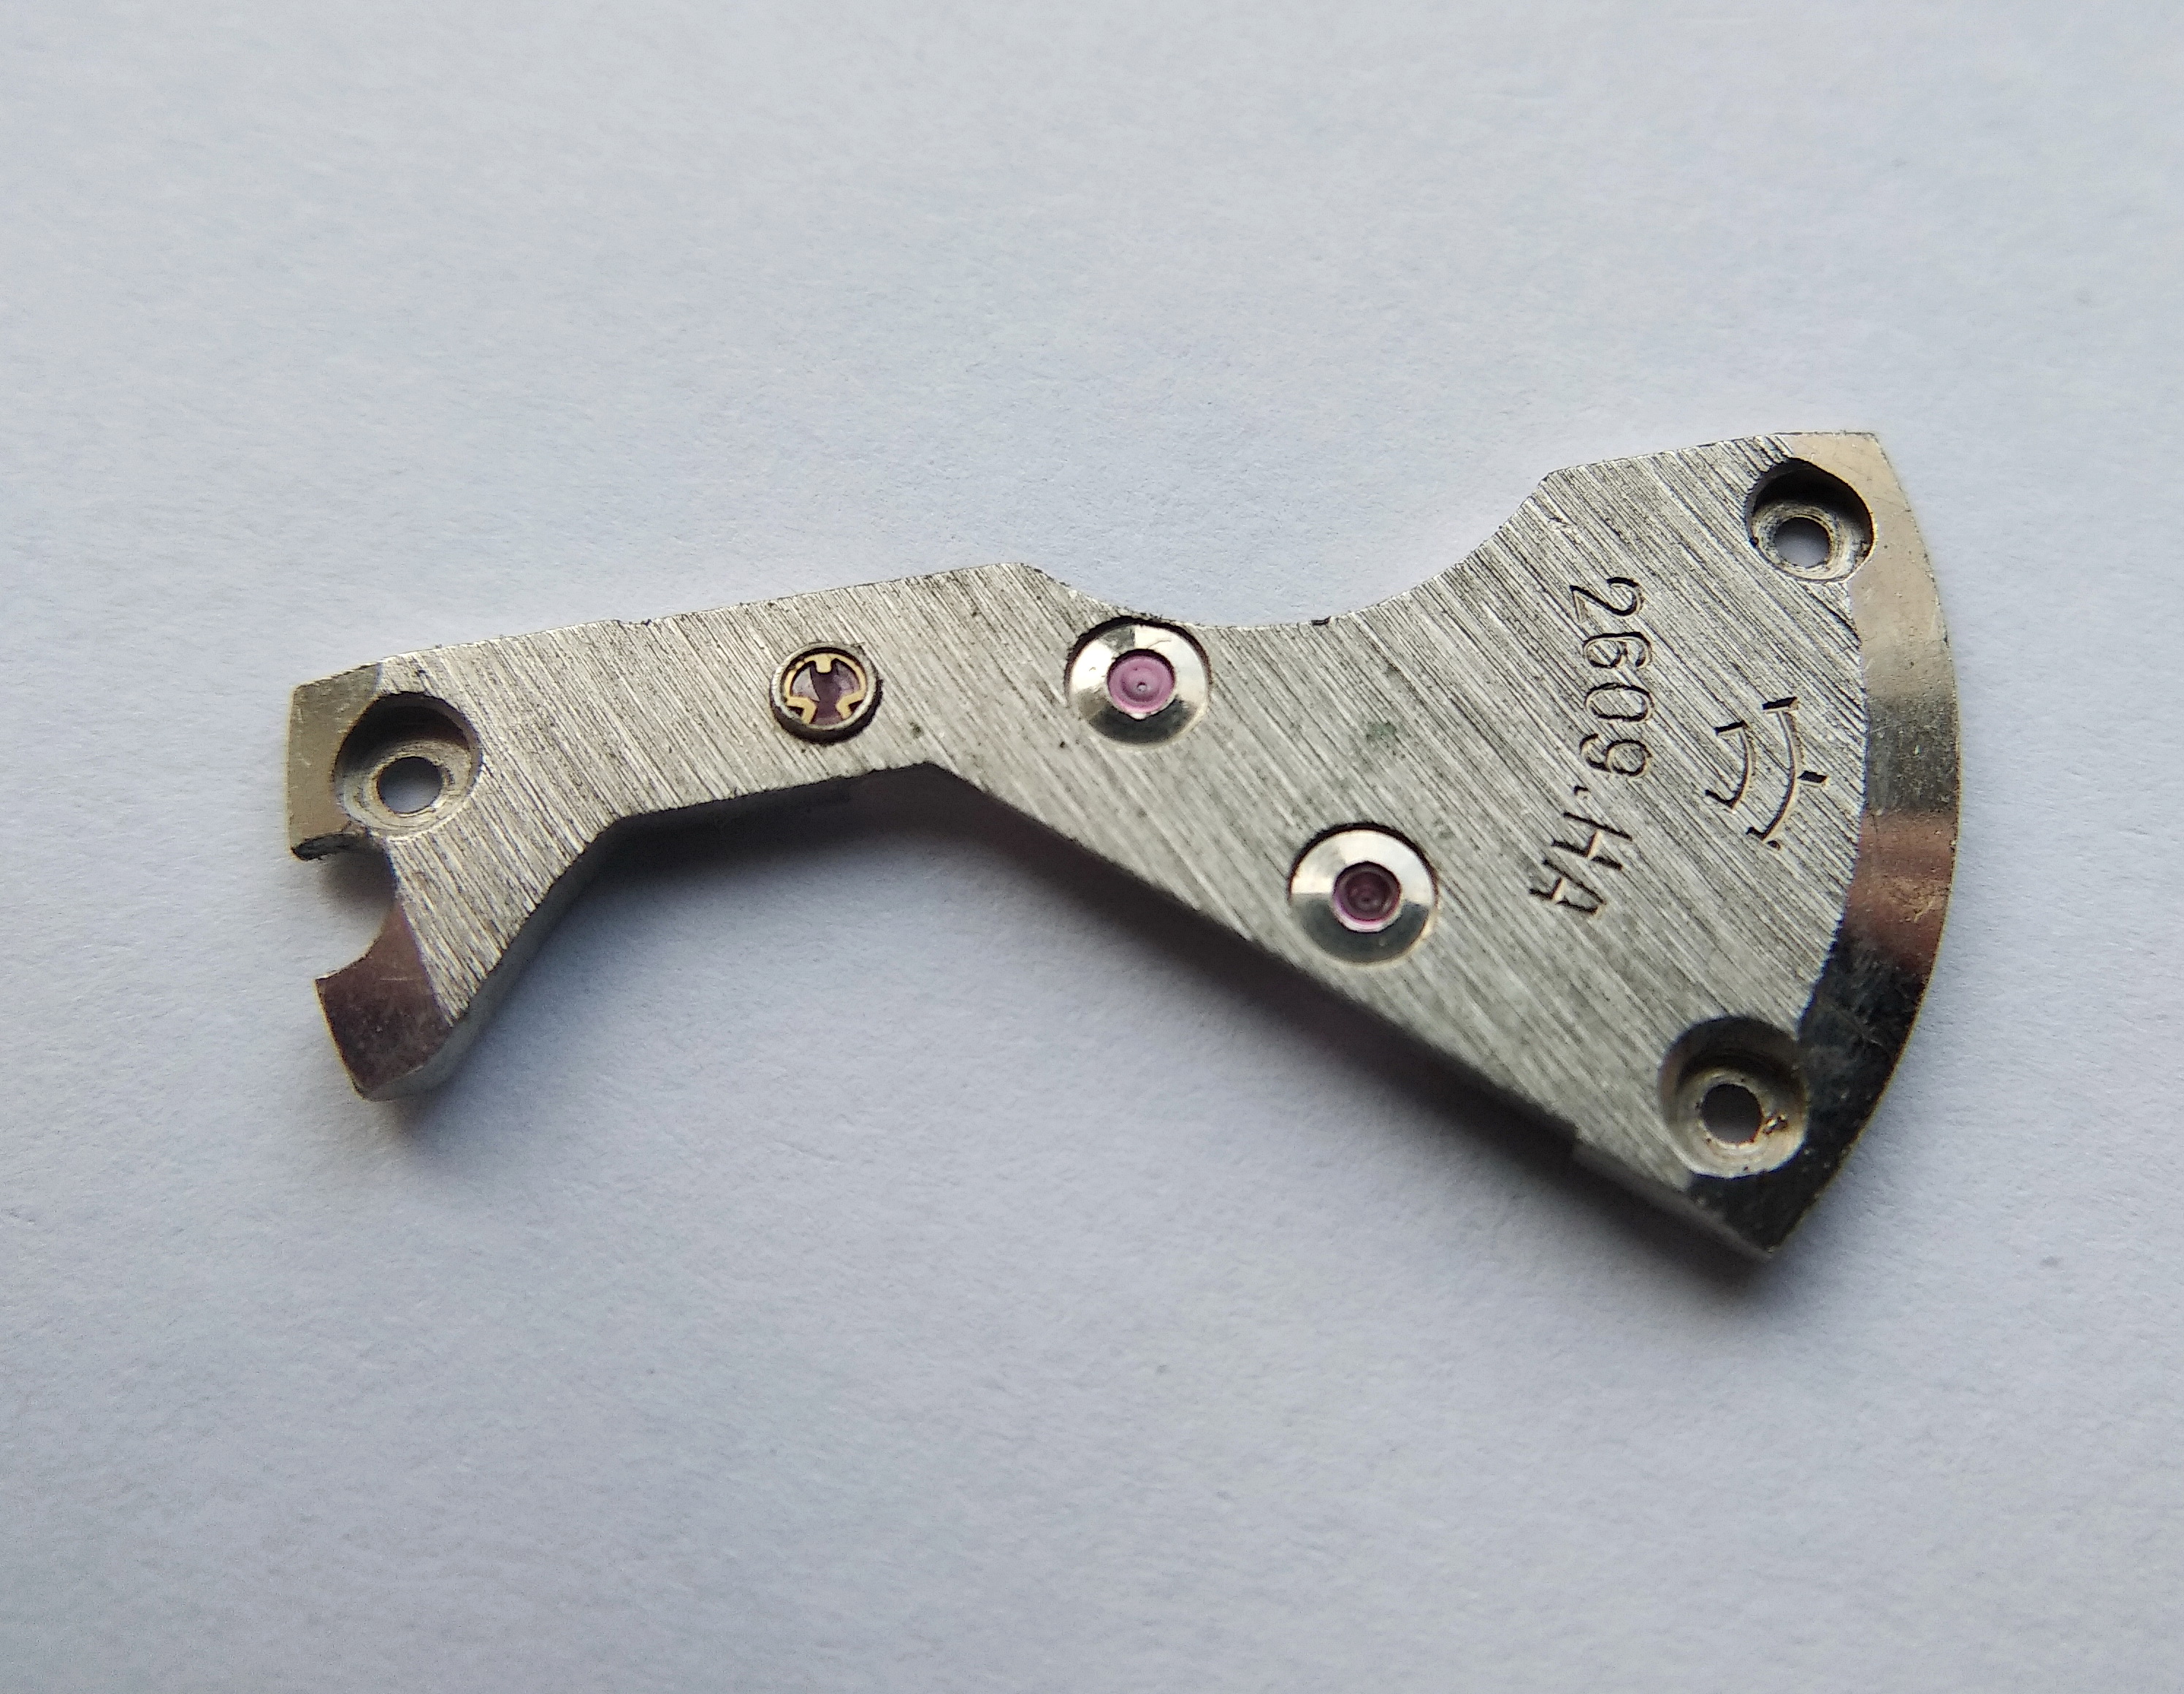
And this is how the bridge looks from the reverse. A complex piece of work, with a great many operations in its manufacture: milling, decoration, polishing. Despite its apparent thinness, the bridge is rigid — it does not flex or spring.

Underside of the train bridge revealing its milled recesses and jewel settings
The reverse of the bridge: heavily milled and finished, yet stiff in use. Thin as it looks, it neither bows nor springs under the wheels it carries.

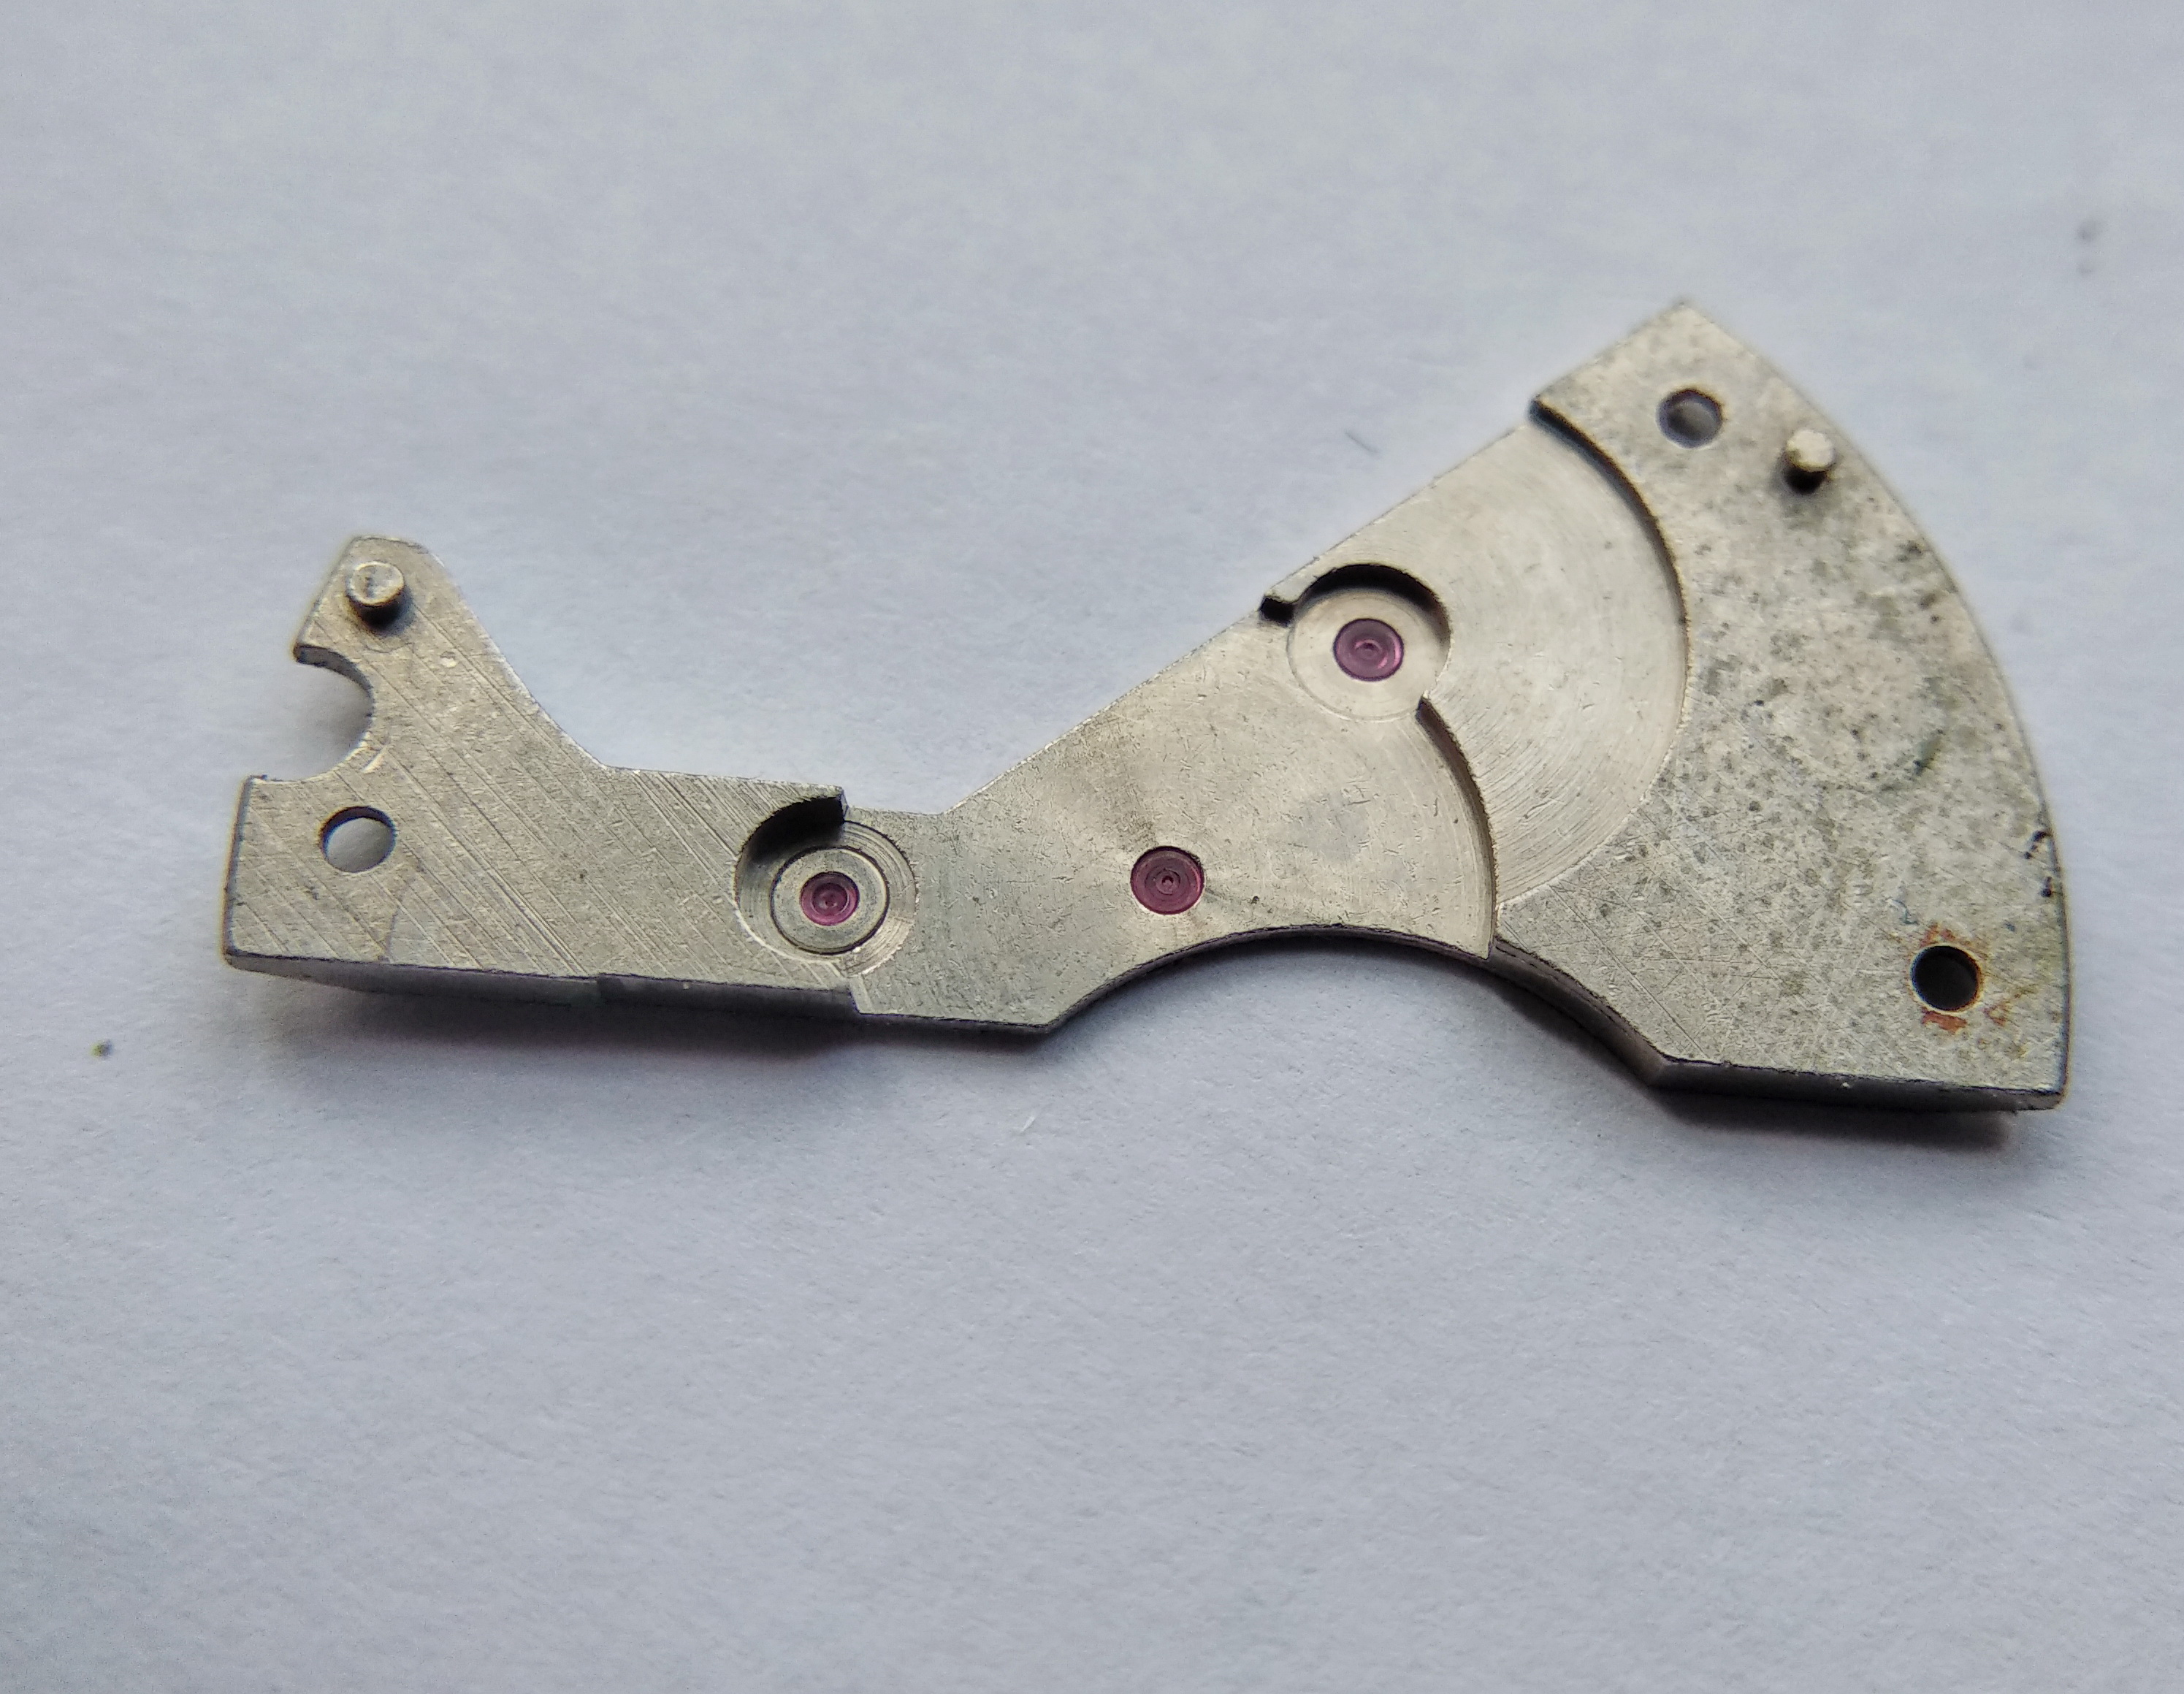
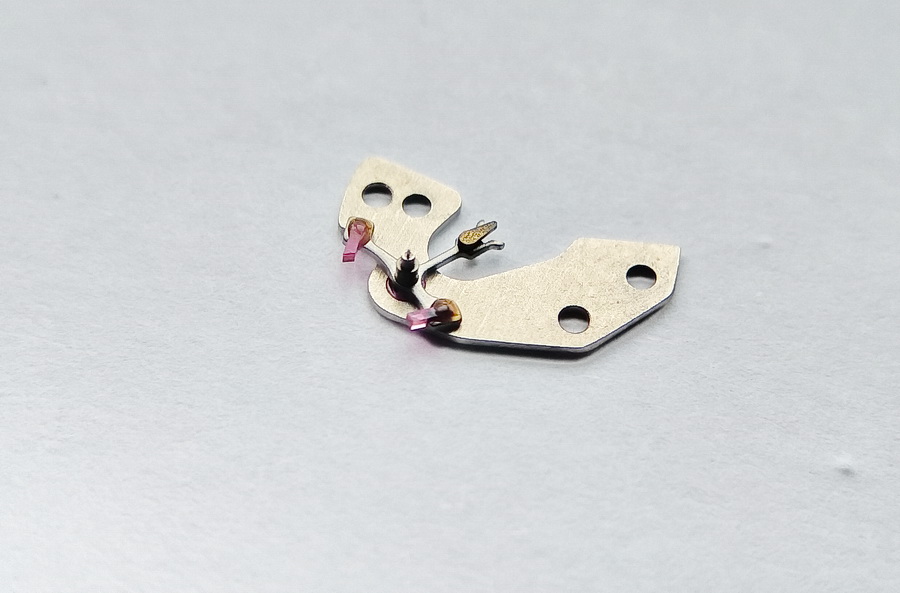
Let us look at it more closely. Here is the bouchon of the escape wheel's shock-protection system, and two jewels for the intermediate and seconds wheels. The jewels are set in polished chatons. The bridge is fixed to the plate by two screws. The construction is stable and very easy to assemble — a well-thought-out design.

Close detail of the bridge showing the escape-wheel shock bouchon and two jeweled chatons for the train wheels
Detail of the bridge: the escape wheel's shock bouchon alongside the polished chatons carrying the intermediate- and seconds-wheel jewels. Two screws hold it all — a stable, assembly-friendly arrangement.

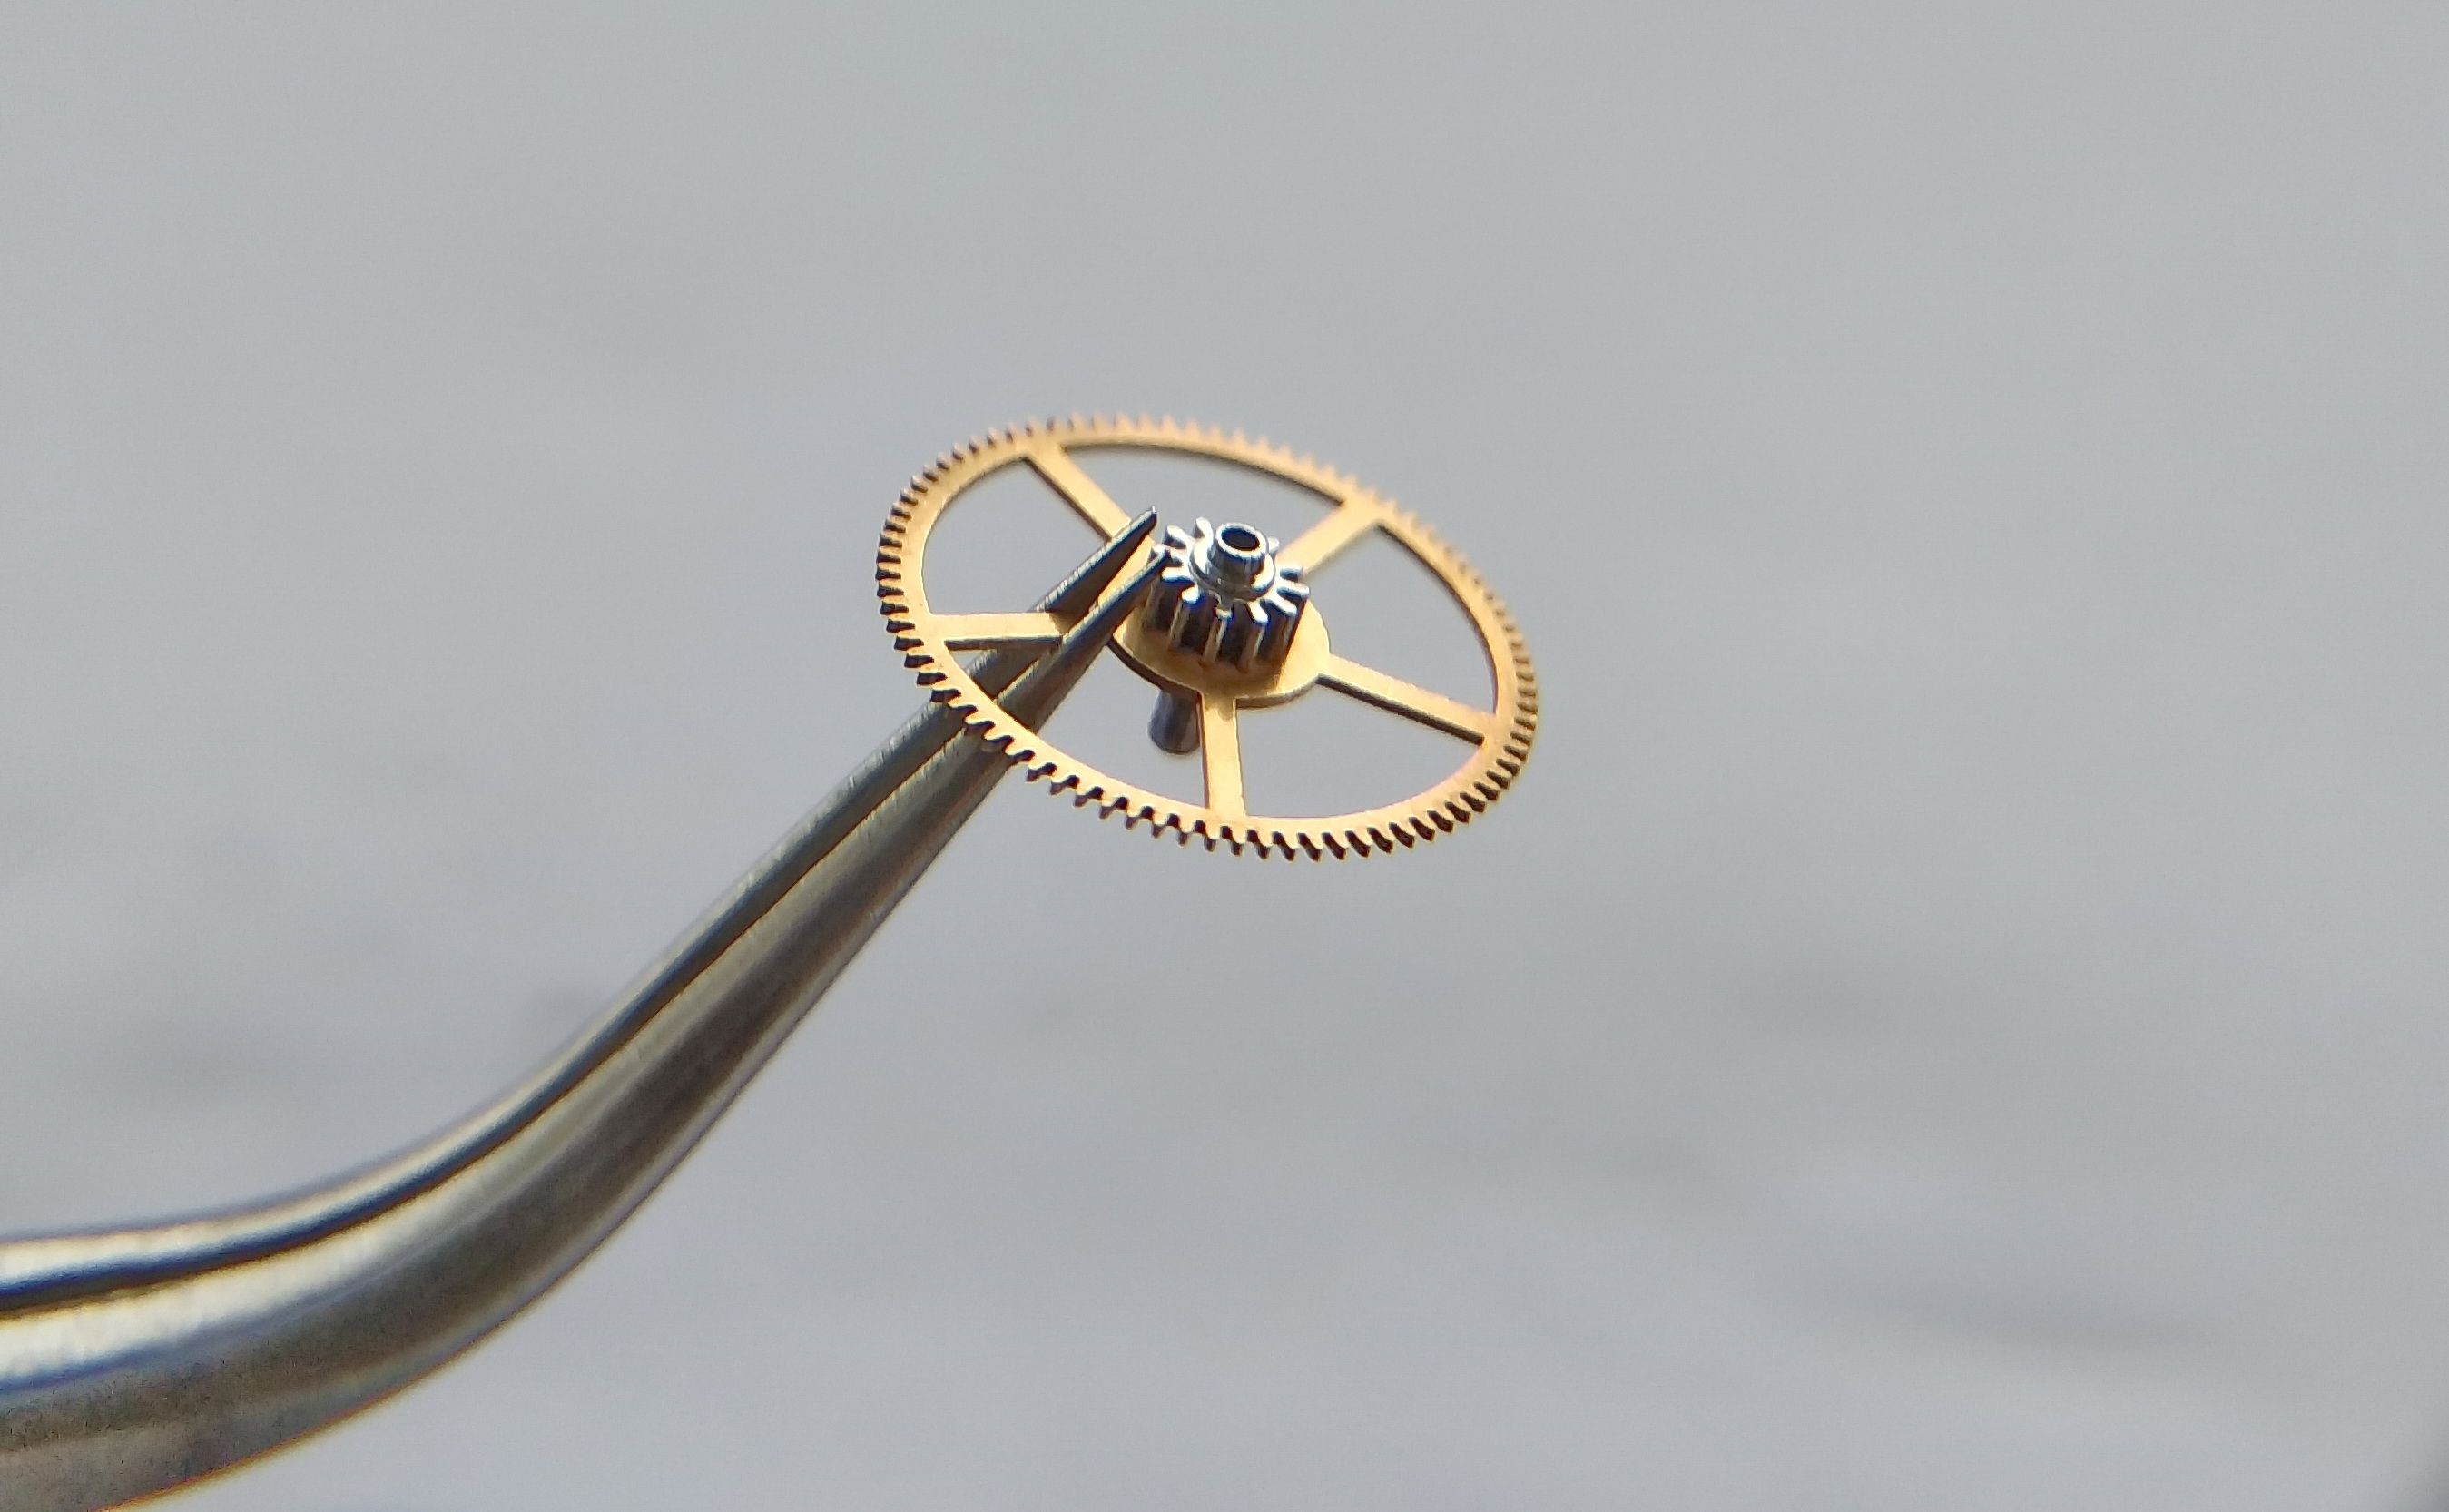
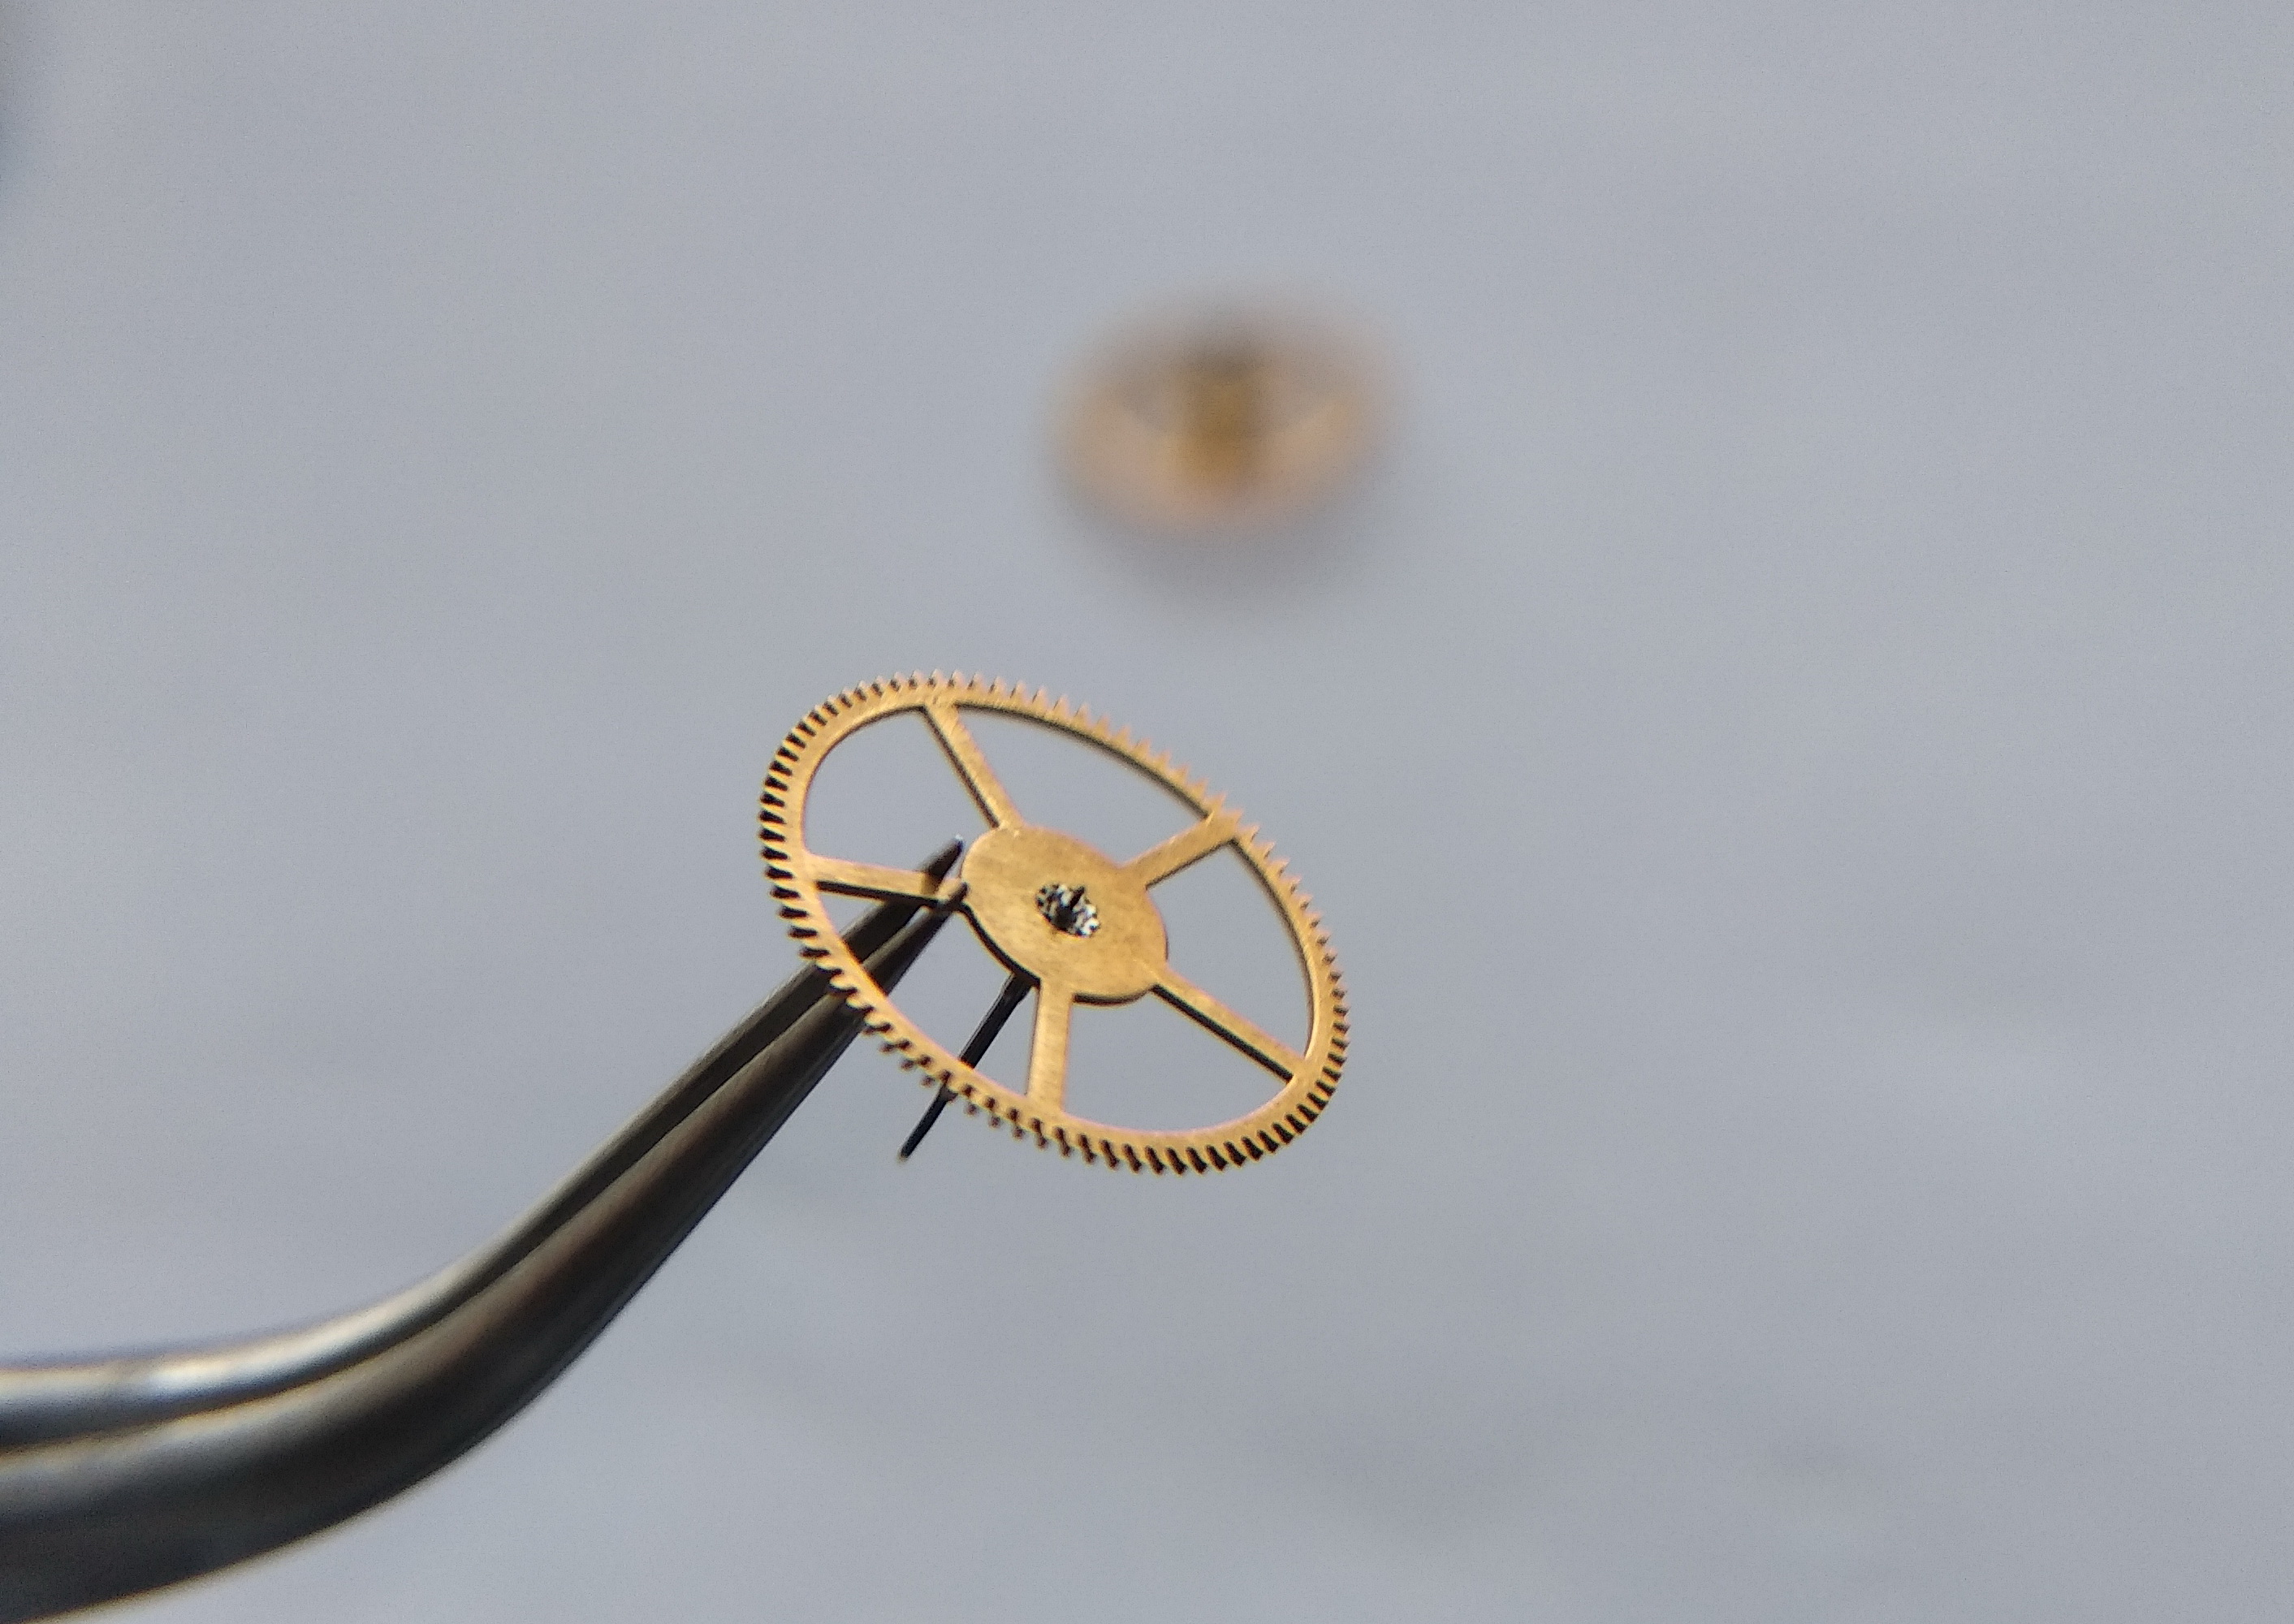
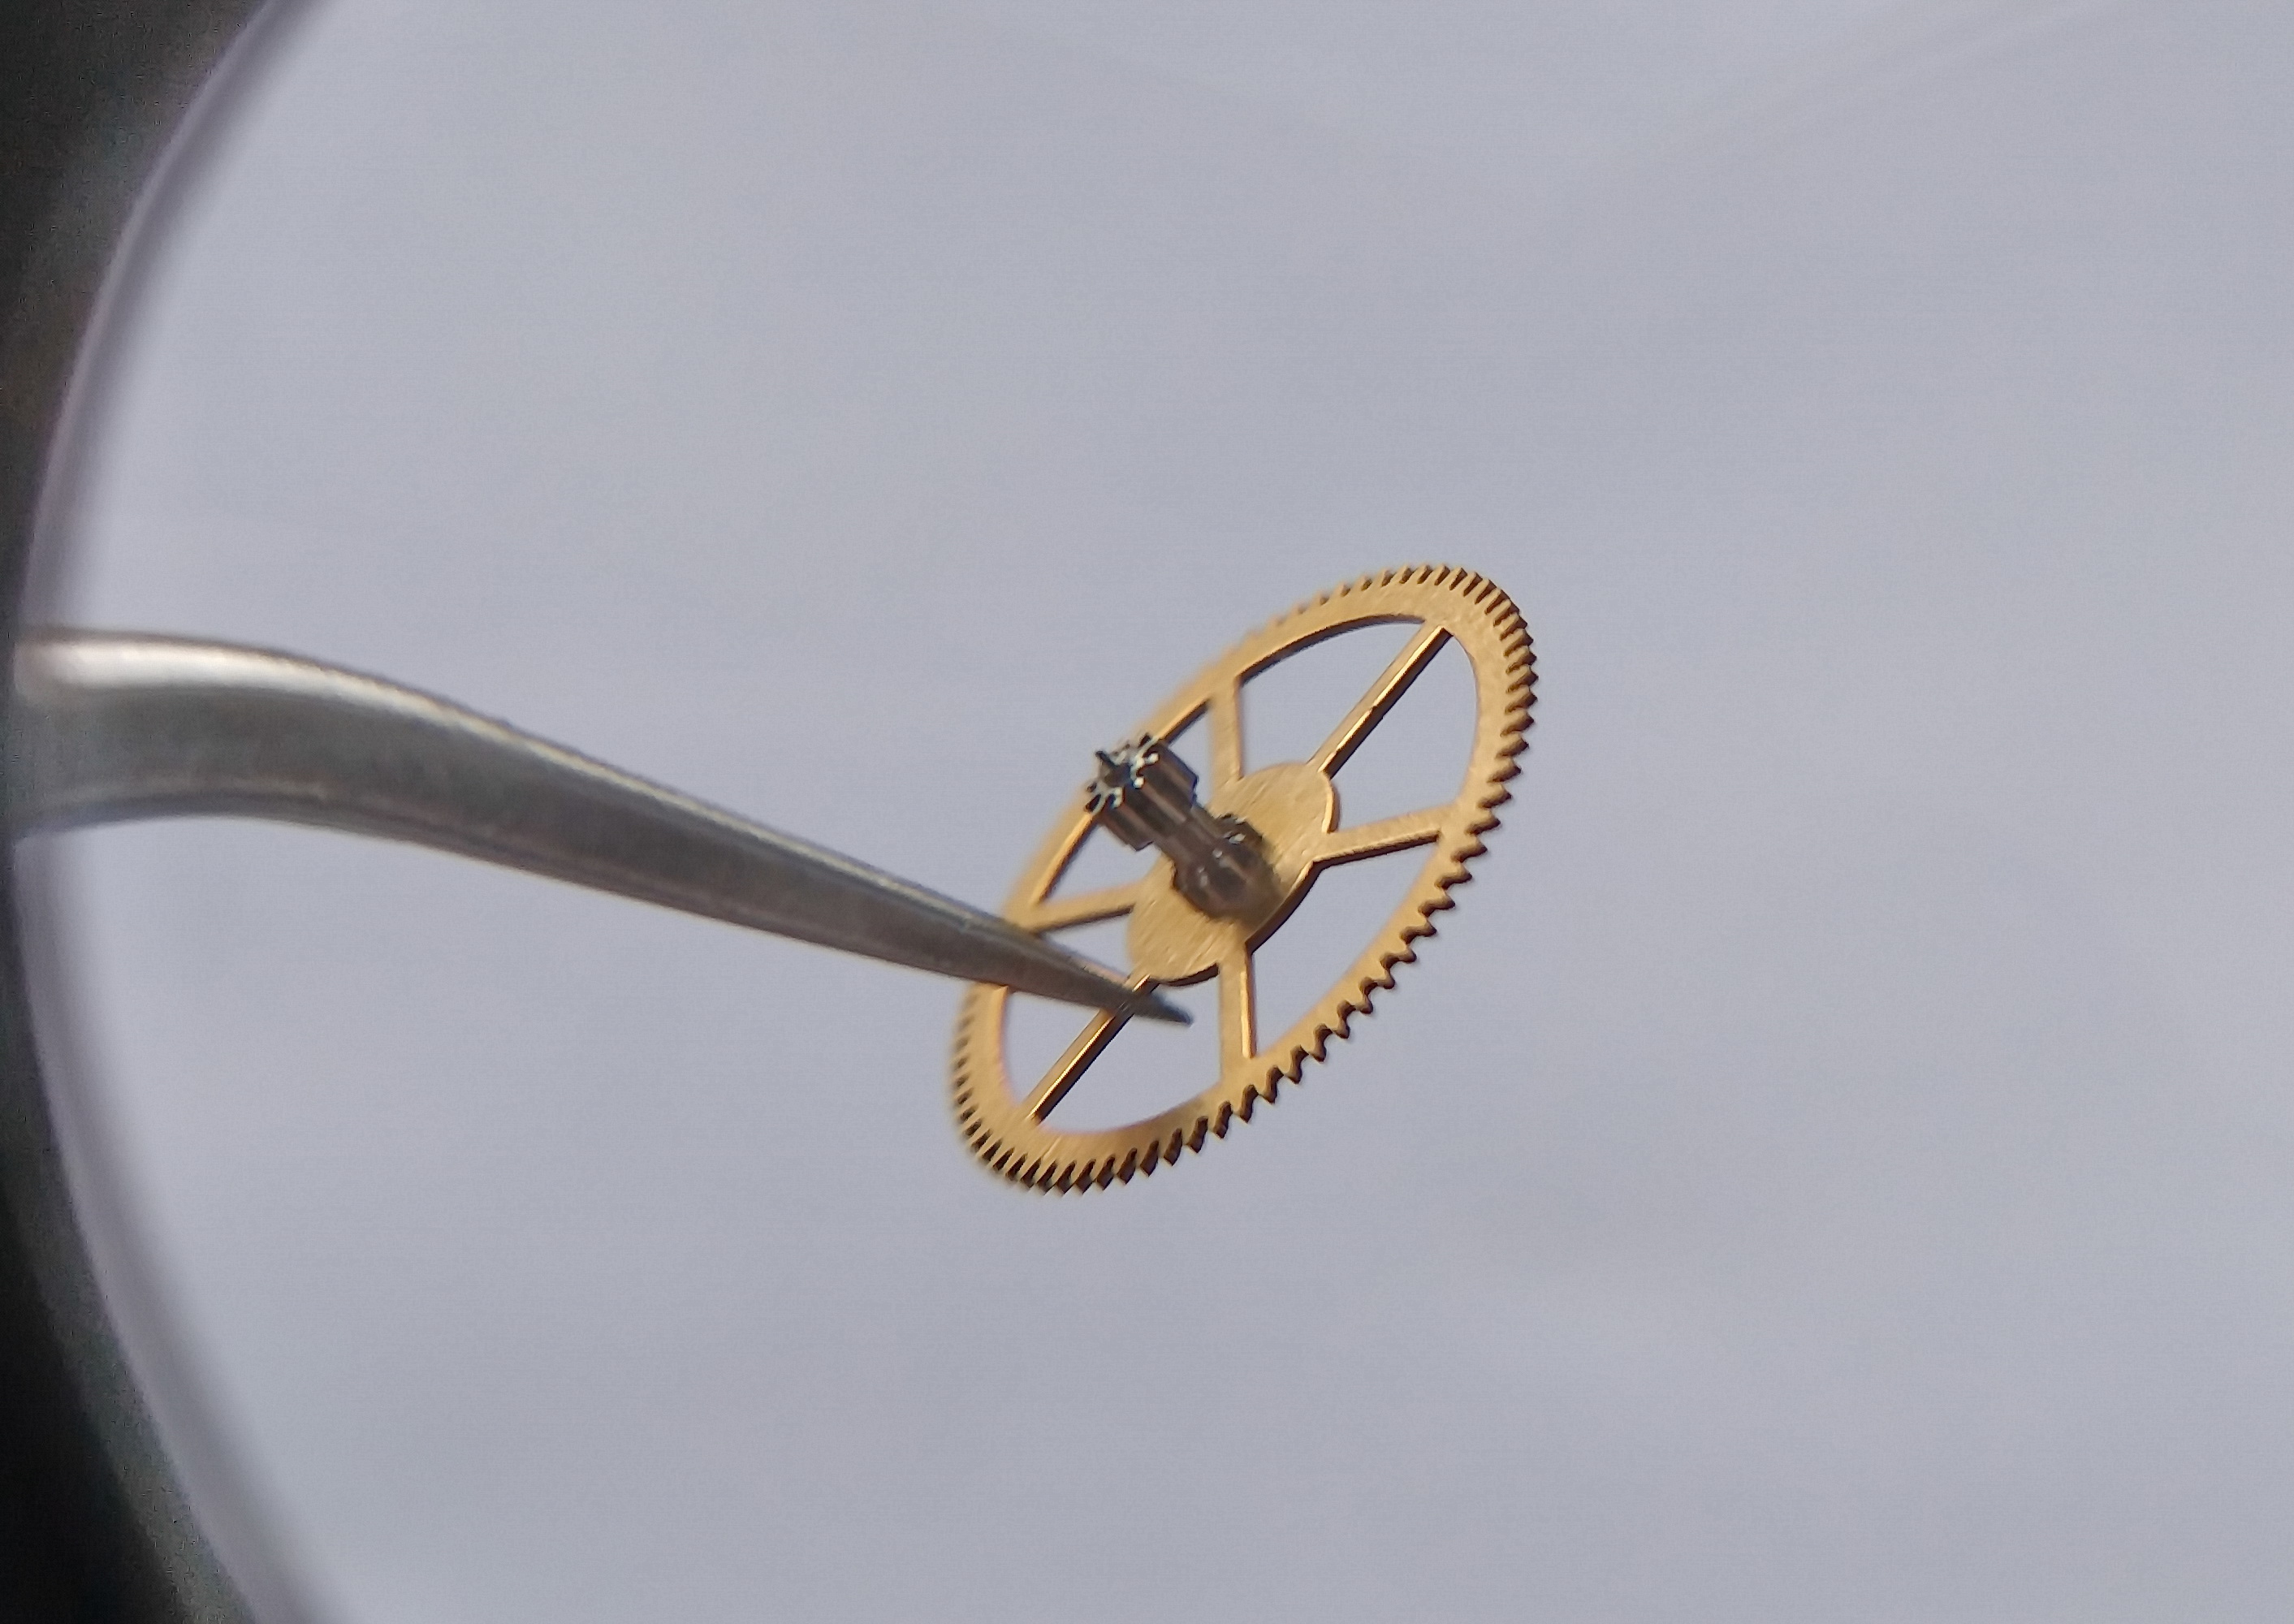
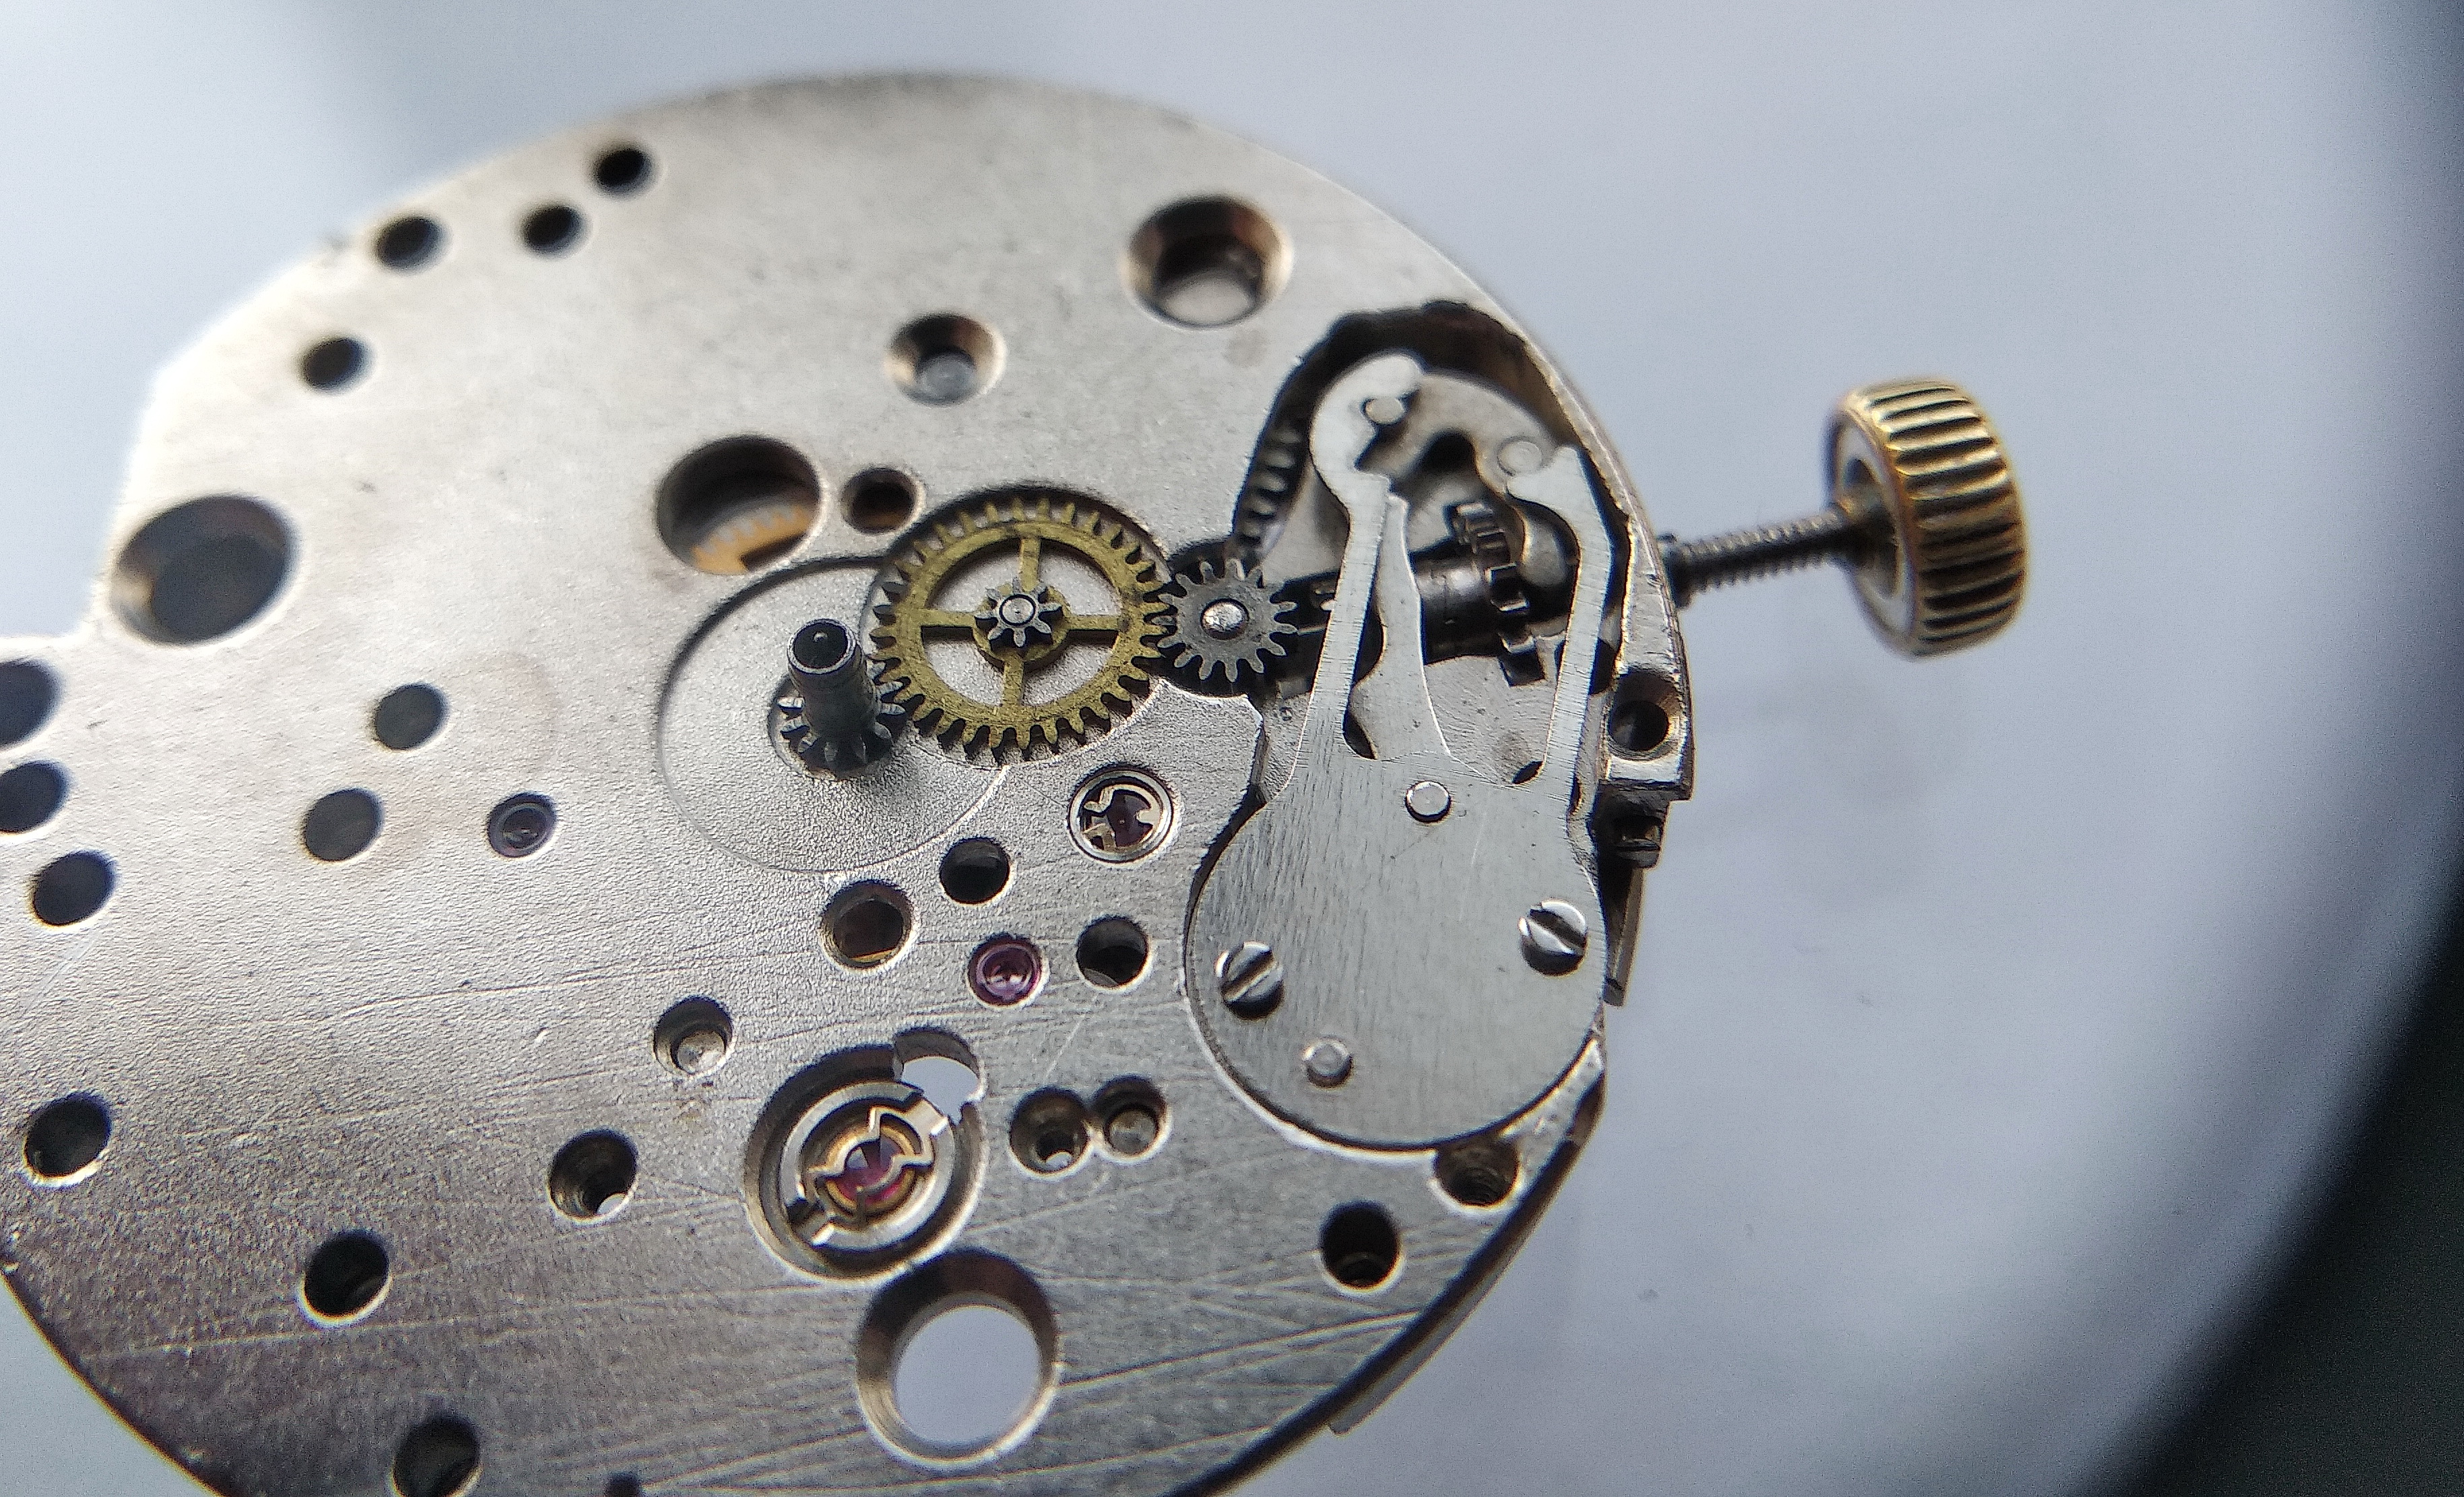
Now we lift out the train wheels. But before that we must demount the barrel wheel; without doing so there is no access to the train.

Barrel wheel being removed to gain access to the going train
The barrel wheel must come off first — it overlaps the train and blocks access to the wheels until it is cleared.

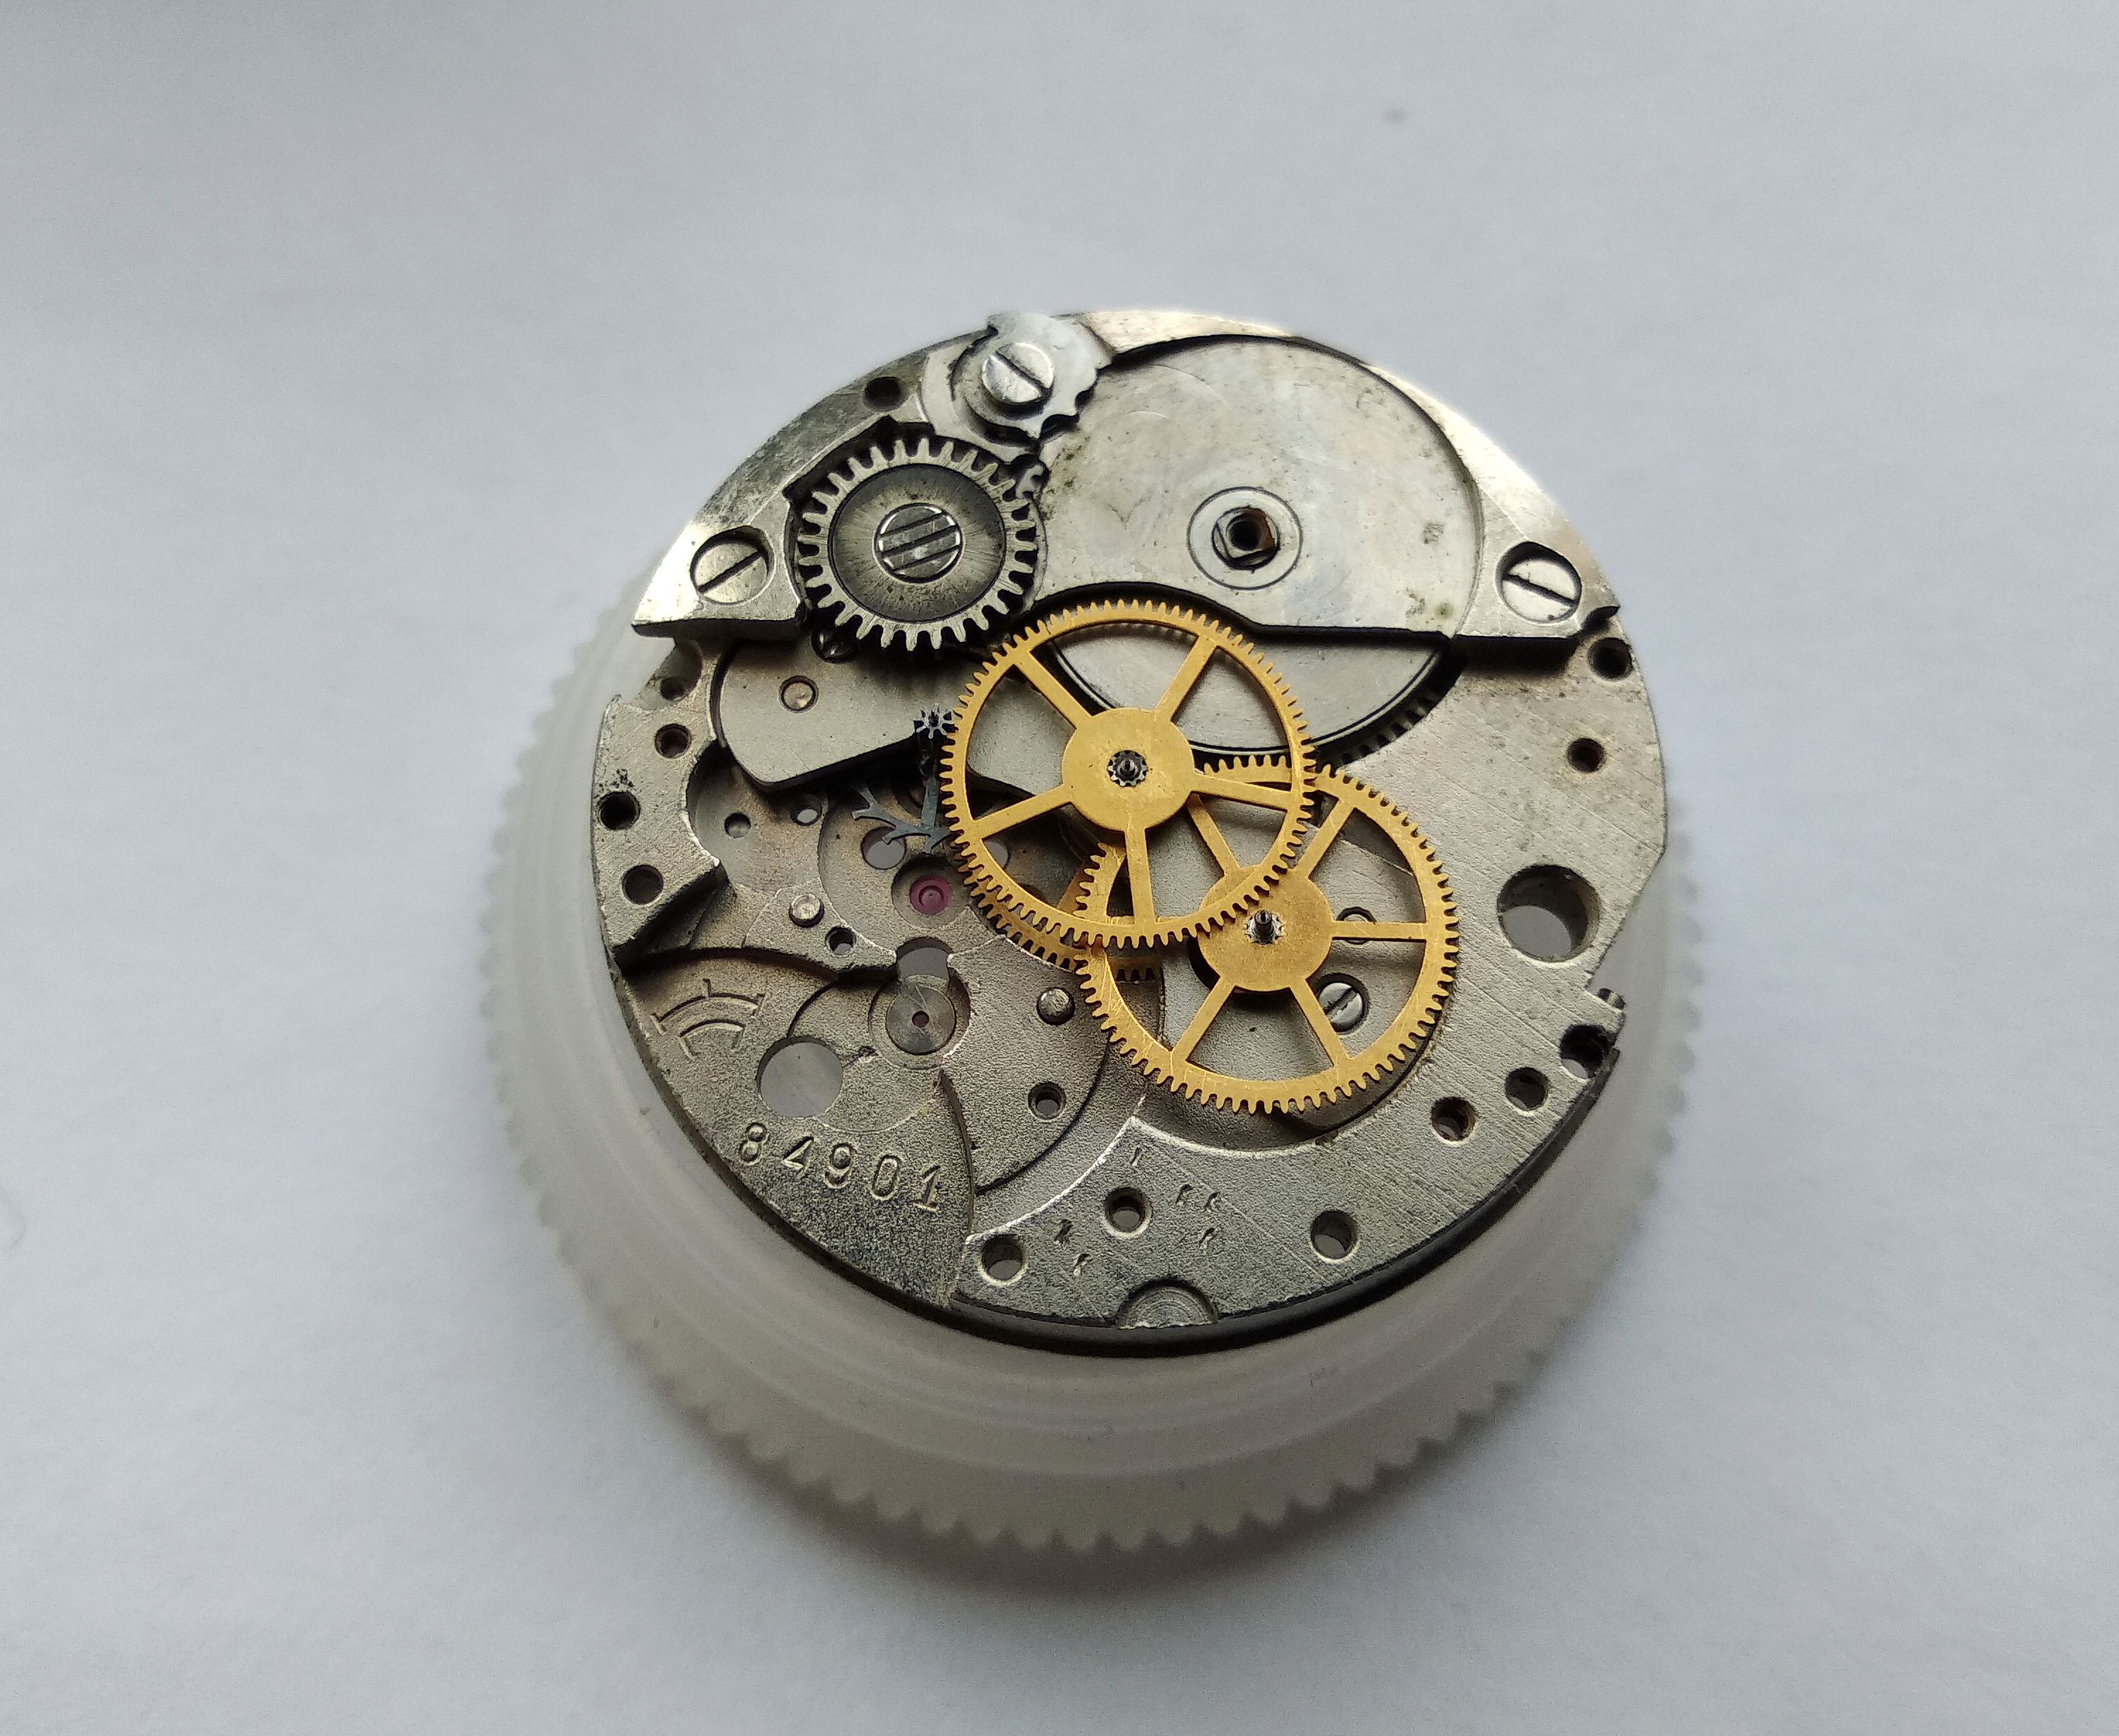
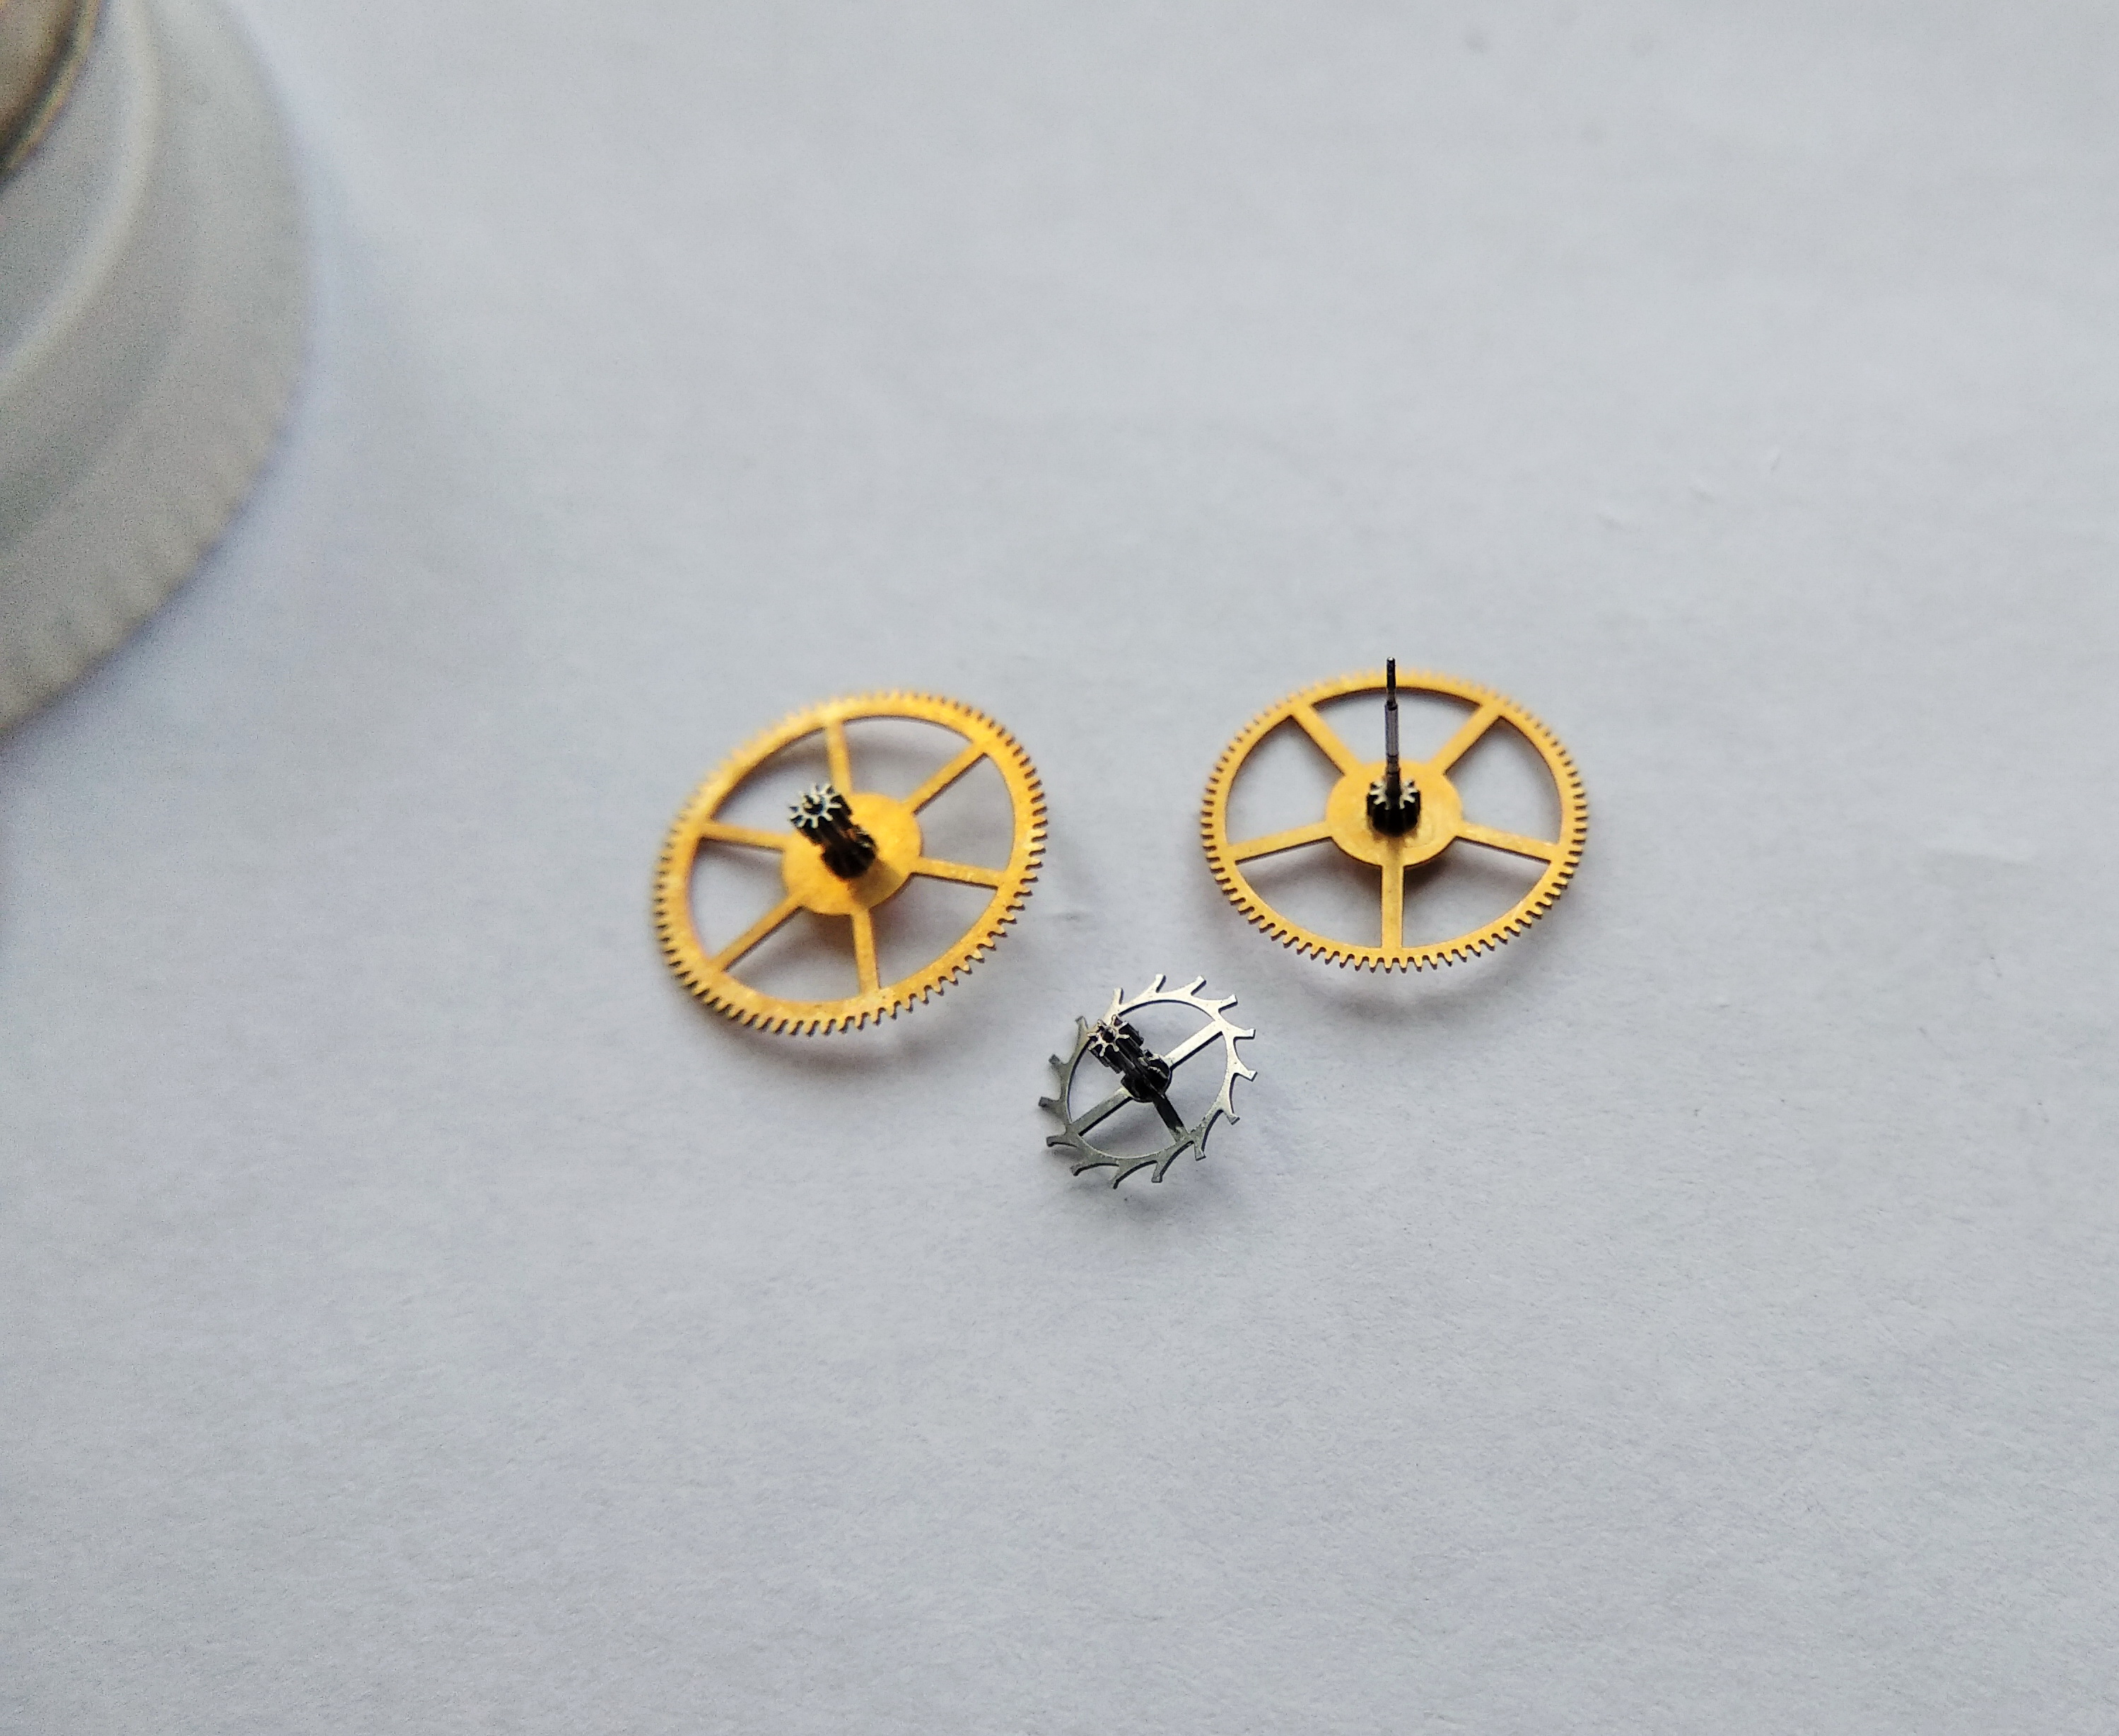
We lift out the wheels: the intermediate, the seconds, and the escape wheel.

Intermediate, seconds, and escape wheels removed from the plate
The going-train wheels — intermediate, seconds, and escape — are removed together for cleaning.

The Mainspring Motor

After that we take apart the mainspring motor.

Beginning disassembly of the mainspring barrel assembly and its bridge
Attention turns to the motor — the barrel, its bridge, and the winding wheels that drive it.

We demount the ratchet wheel. We have not forgotten that it is held by a left-hand-thread screw, have we? No matter — the three slots cut into the screw head will remind us of it.

Ratchet wheel screw with three slots marking its left-hand thread
The ratchet wheel is secured by a left-hand-thread screw — its head deliberately cut with three slots as a warning to turn it the "wrong" way.

The barrel bridge is held by three screws. The third, the middle one, also serves to retain the click of the ratchet wheel. The designers, I understand, wanted to consolidate fastenings as far as possible. But it means the click has to come off together with the bridge. The click is made in the classic way, with a click spring. The spring is tiny, and one must be attentive during removal. Between us, in those movements where the click is held by a separate screw, it is not removed at all — there is no dirt under it, and it washes clean along with the bridge. Well, this is a feature of the construction.

Barrel bridge held by three screws, the middle one also retaining the ratchet click
Three screws hold the barrel bridge; the central one doubles as the click's anchor. Consolidating the fixings is tidy in principle, but it forces the delicate click and its tiny spring to come off with the bridge.

Anyway — the click is demounted.

Ratchet click detached from the barrel bridge area
The click is off. Care here is essential — its spring is small enough to launch itself across the bench if mishandled.

Here are its parts: the click, the spring, and the screw. The screw, note, is the long one.

Click components separated: click, click spring, and the long retaining screw
The click broken down into click, spring, and screw. The screw is the long member of the set — a detail worth remembering at reassembly.

And here they are, the three screws. Two short, one long — the long one carrying the ratchet-wheel click.

The three barrel-bridge screws compared: two short and one long
The barrel-bridge screws side by side: two short, one long. They are not interchangeable, and the long one belongs to the click — mixing them up is a classic reassembly trap.

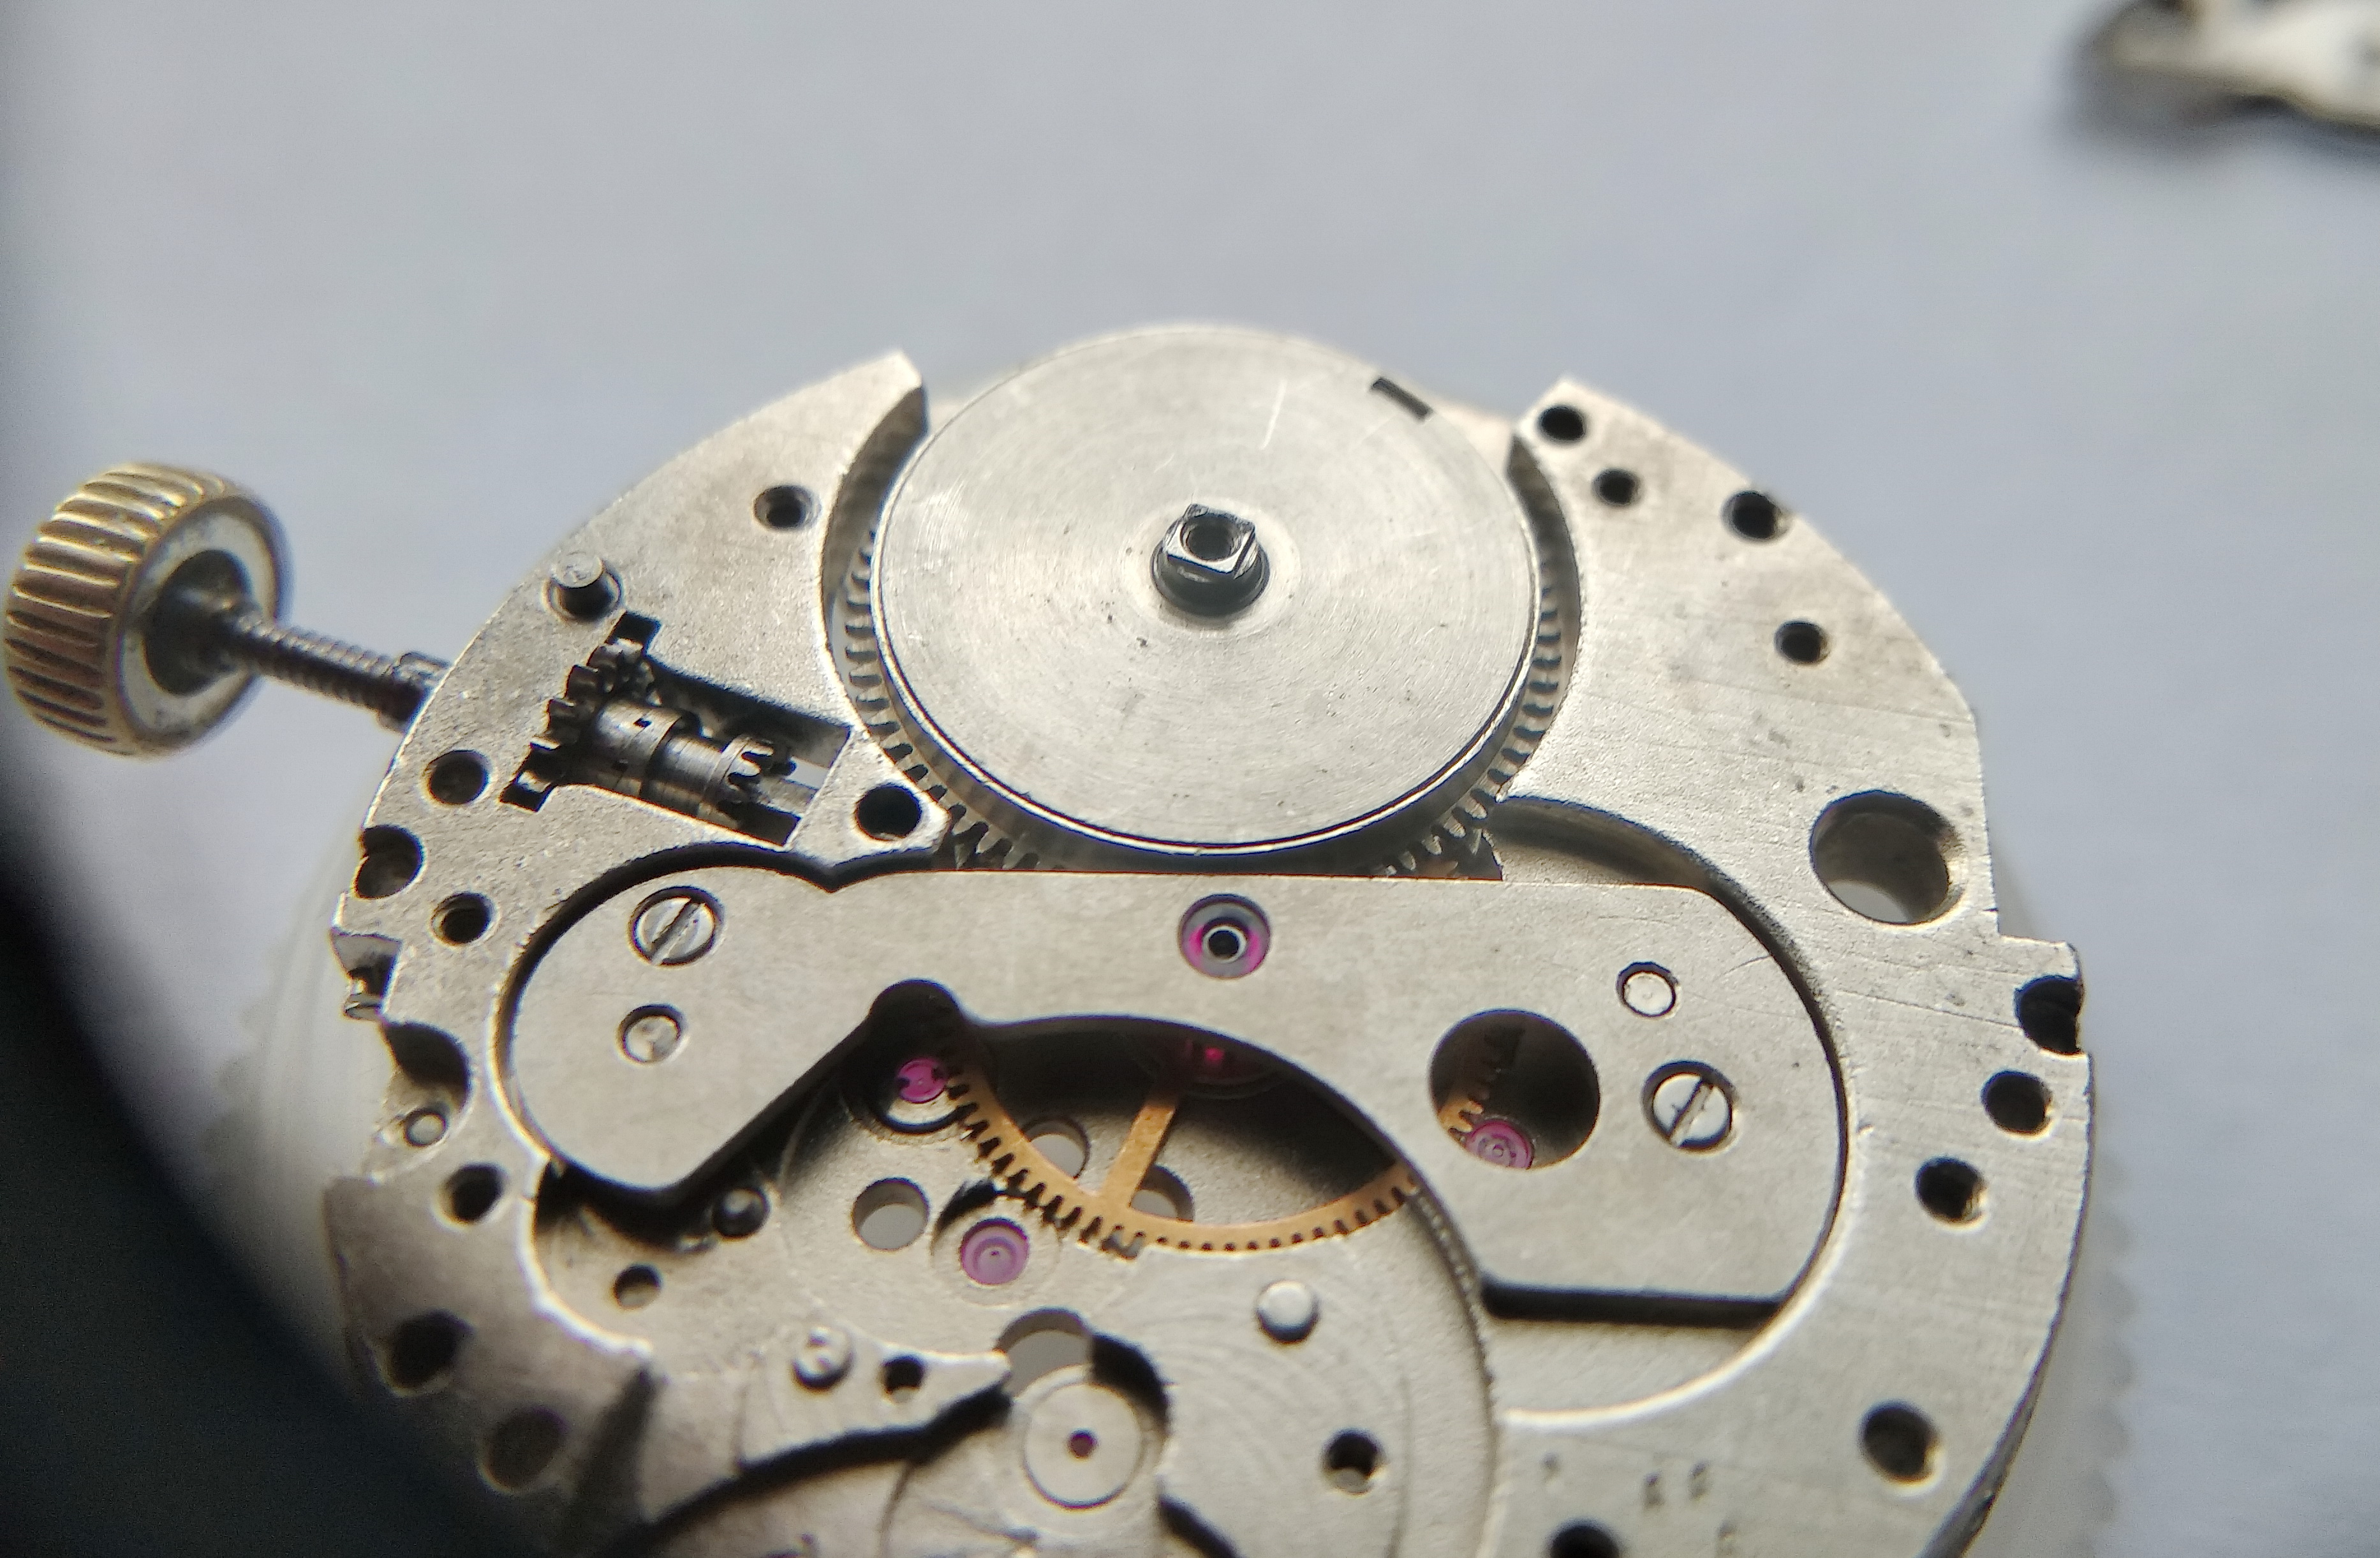
We remove the barrel bridge.

Barrel bridge lifted away from the main plate
With its screws out, the barrel bridge lifts clear.

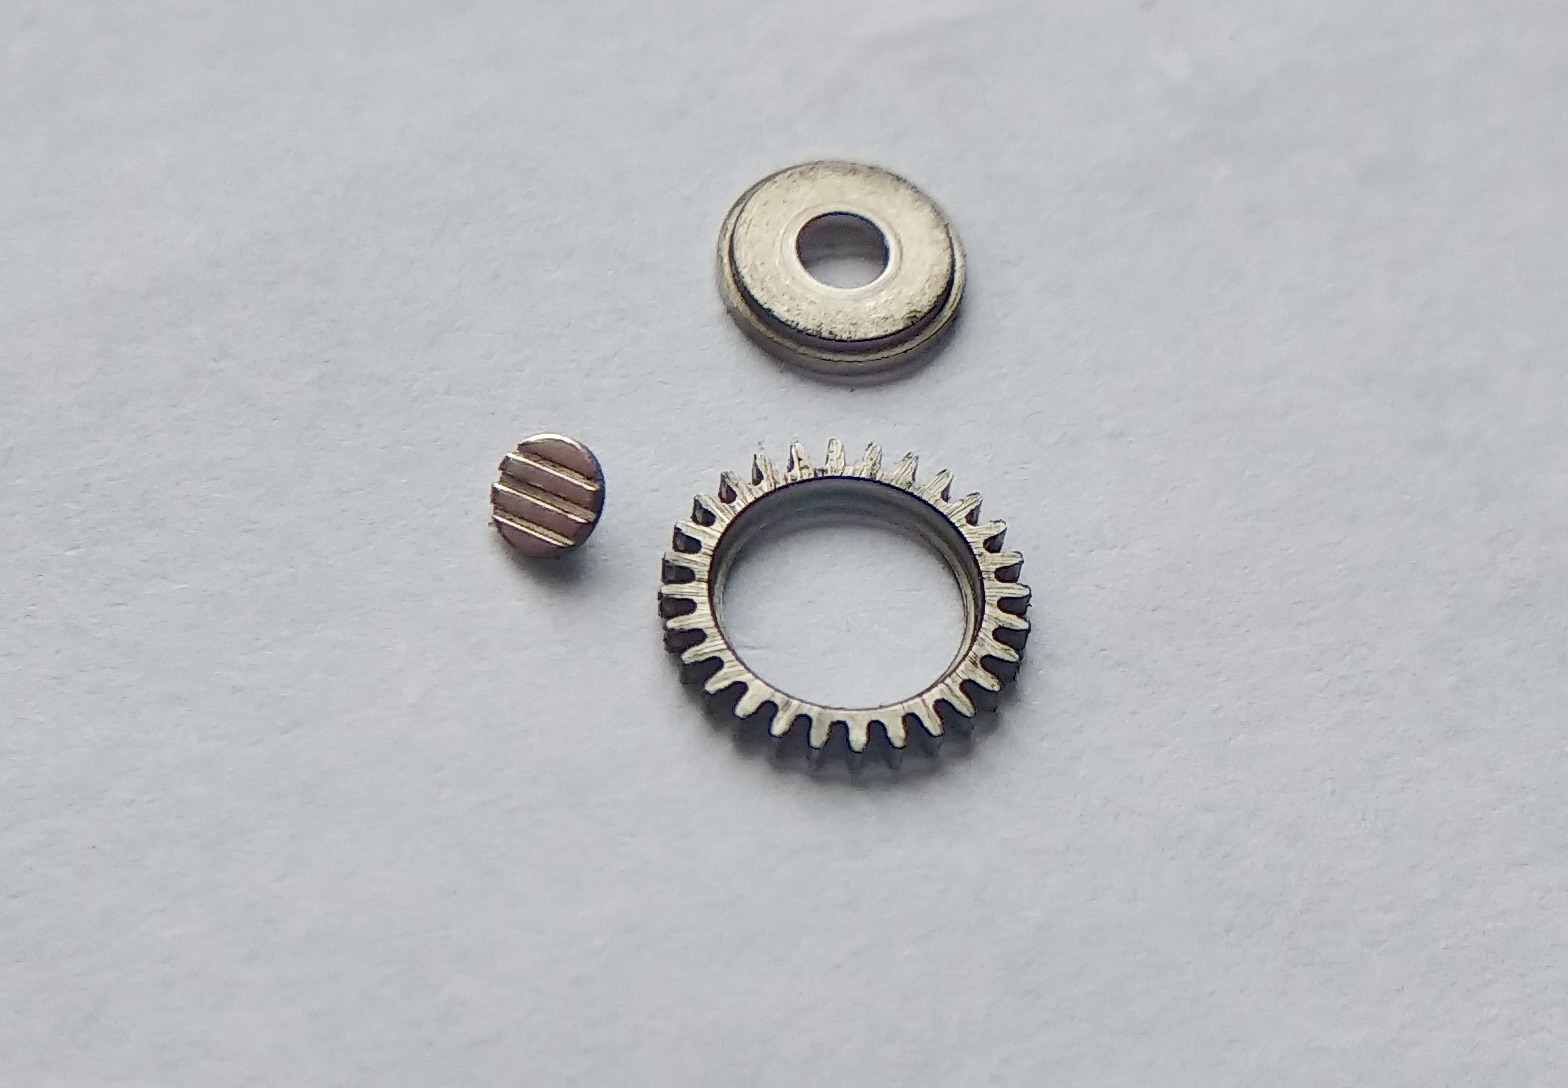
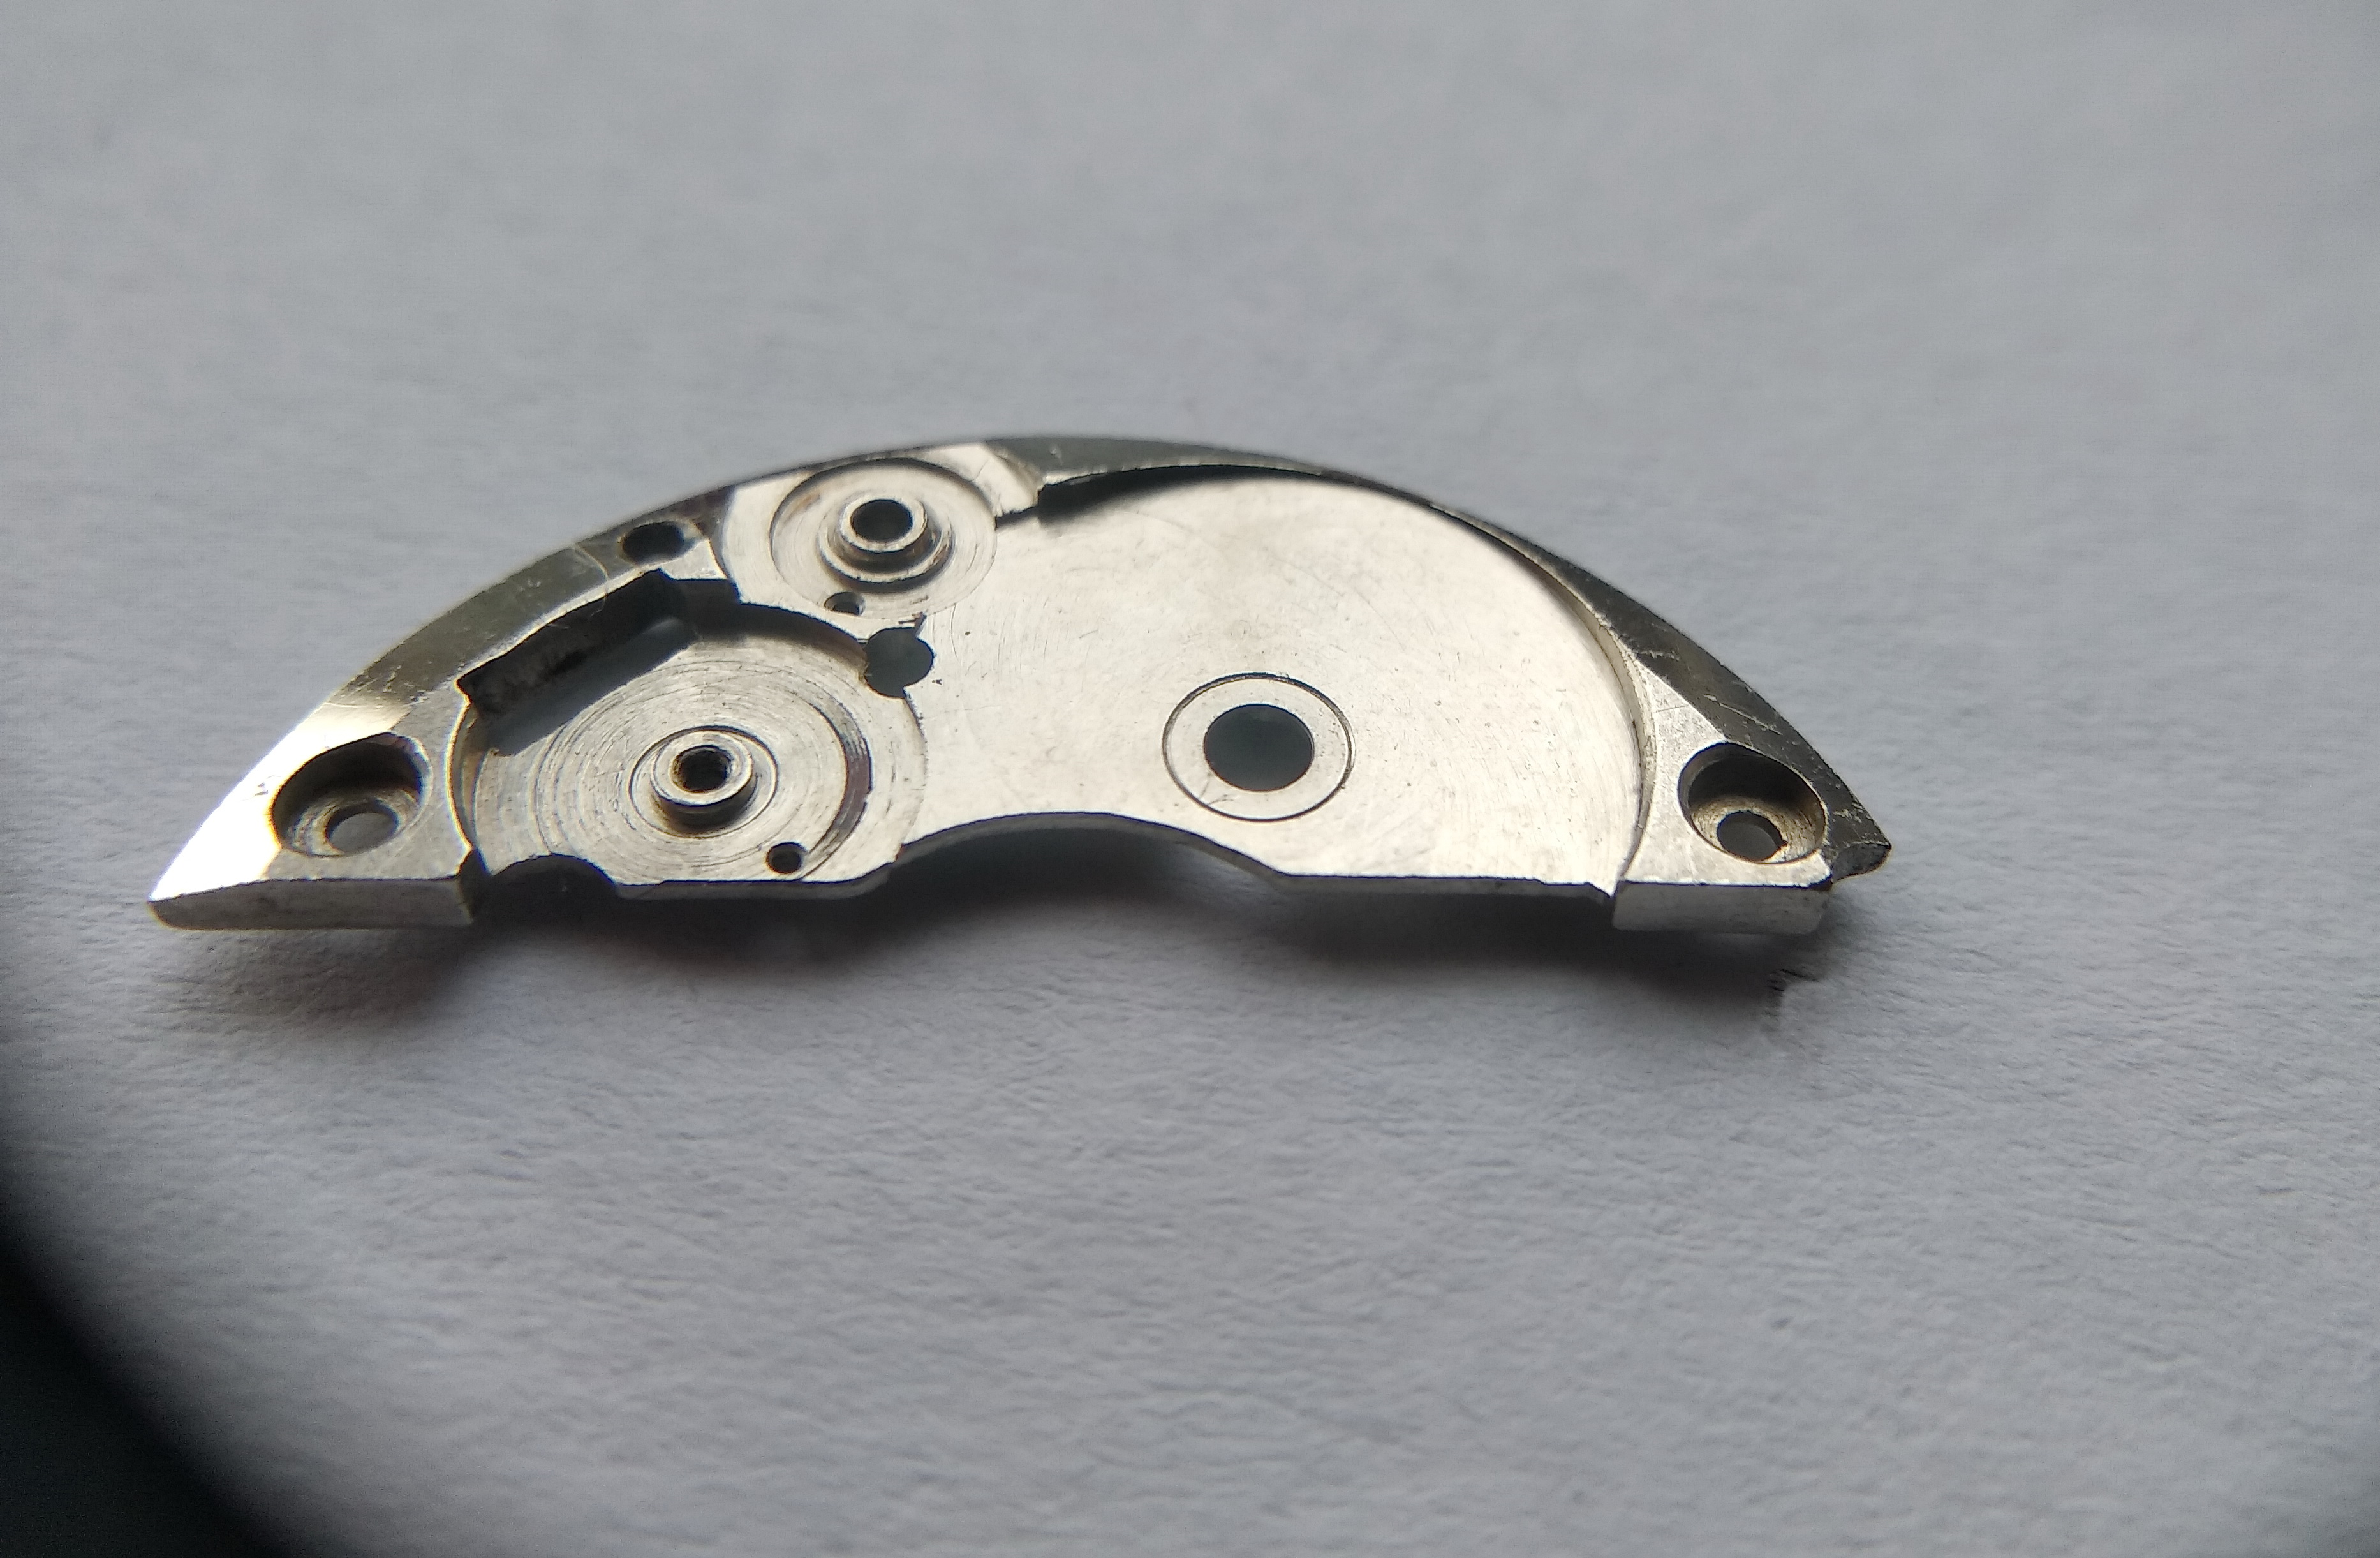
Here it is, the barrel bridge. Notice where the arrow points: that is the bushing for the barrel arbor. In this movement a bushing of hard-alloy material is pressed into the bridge. At one time a jewel was fitted there. Chinese watchmakers still do it that way (or did). But our rationalisers took a different path — and, as we can see, half a century of work has not told on the barrel assembly. The arbor has no play. It is hard to say which is better, a jewel or a hard alloy. But this works.

Barrel bridge with an arrow indicating the hard-alloy bushing pressed in for the barrel arbor
Instead of a jewel, the barrel arbor runs in a pressed-in hard-alloy bushing — arrowed here. After fifty years of service the arbor shows no slop: an unglamorous but thoroughly effective engineering choice.

The bridge, too, is of no simple shape. There is no small amount of milling work in it.

Barrel bridge showing its intricately milled profile
The barrel bridge from another angle — its profile demanded considerable milling, in keeping with the rest of the movement's finishing.

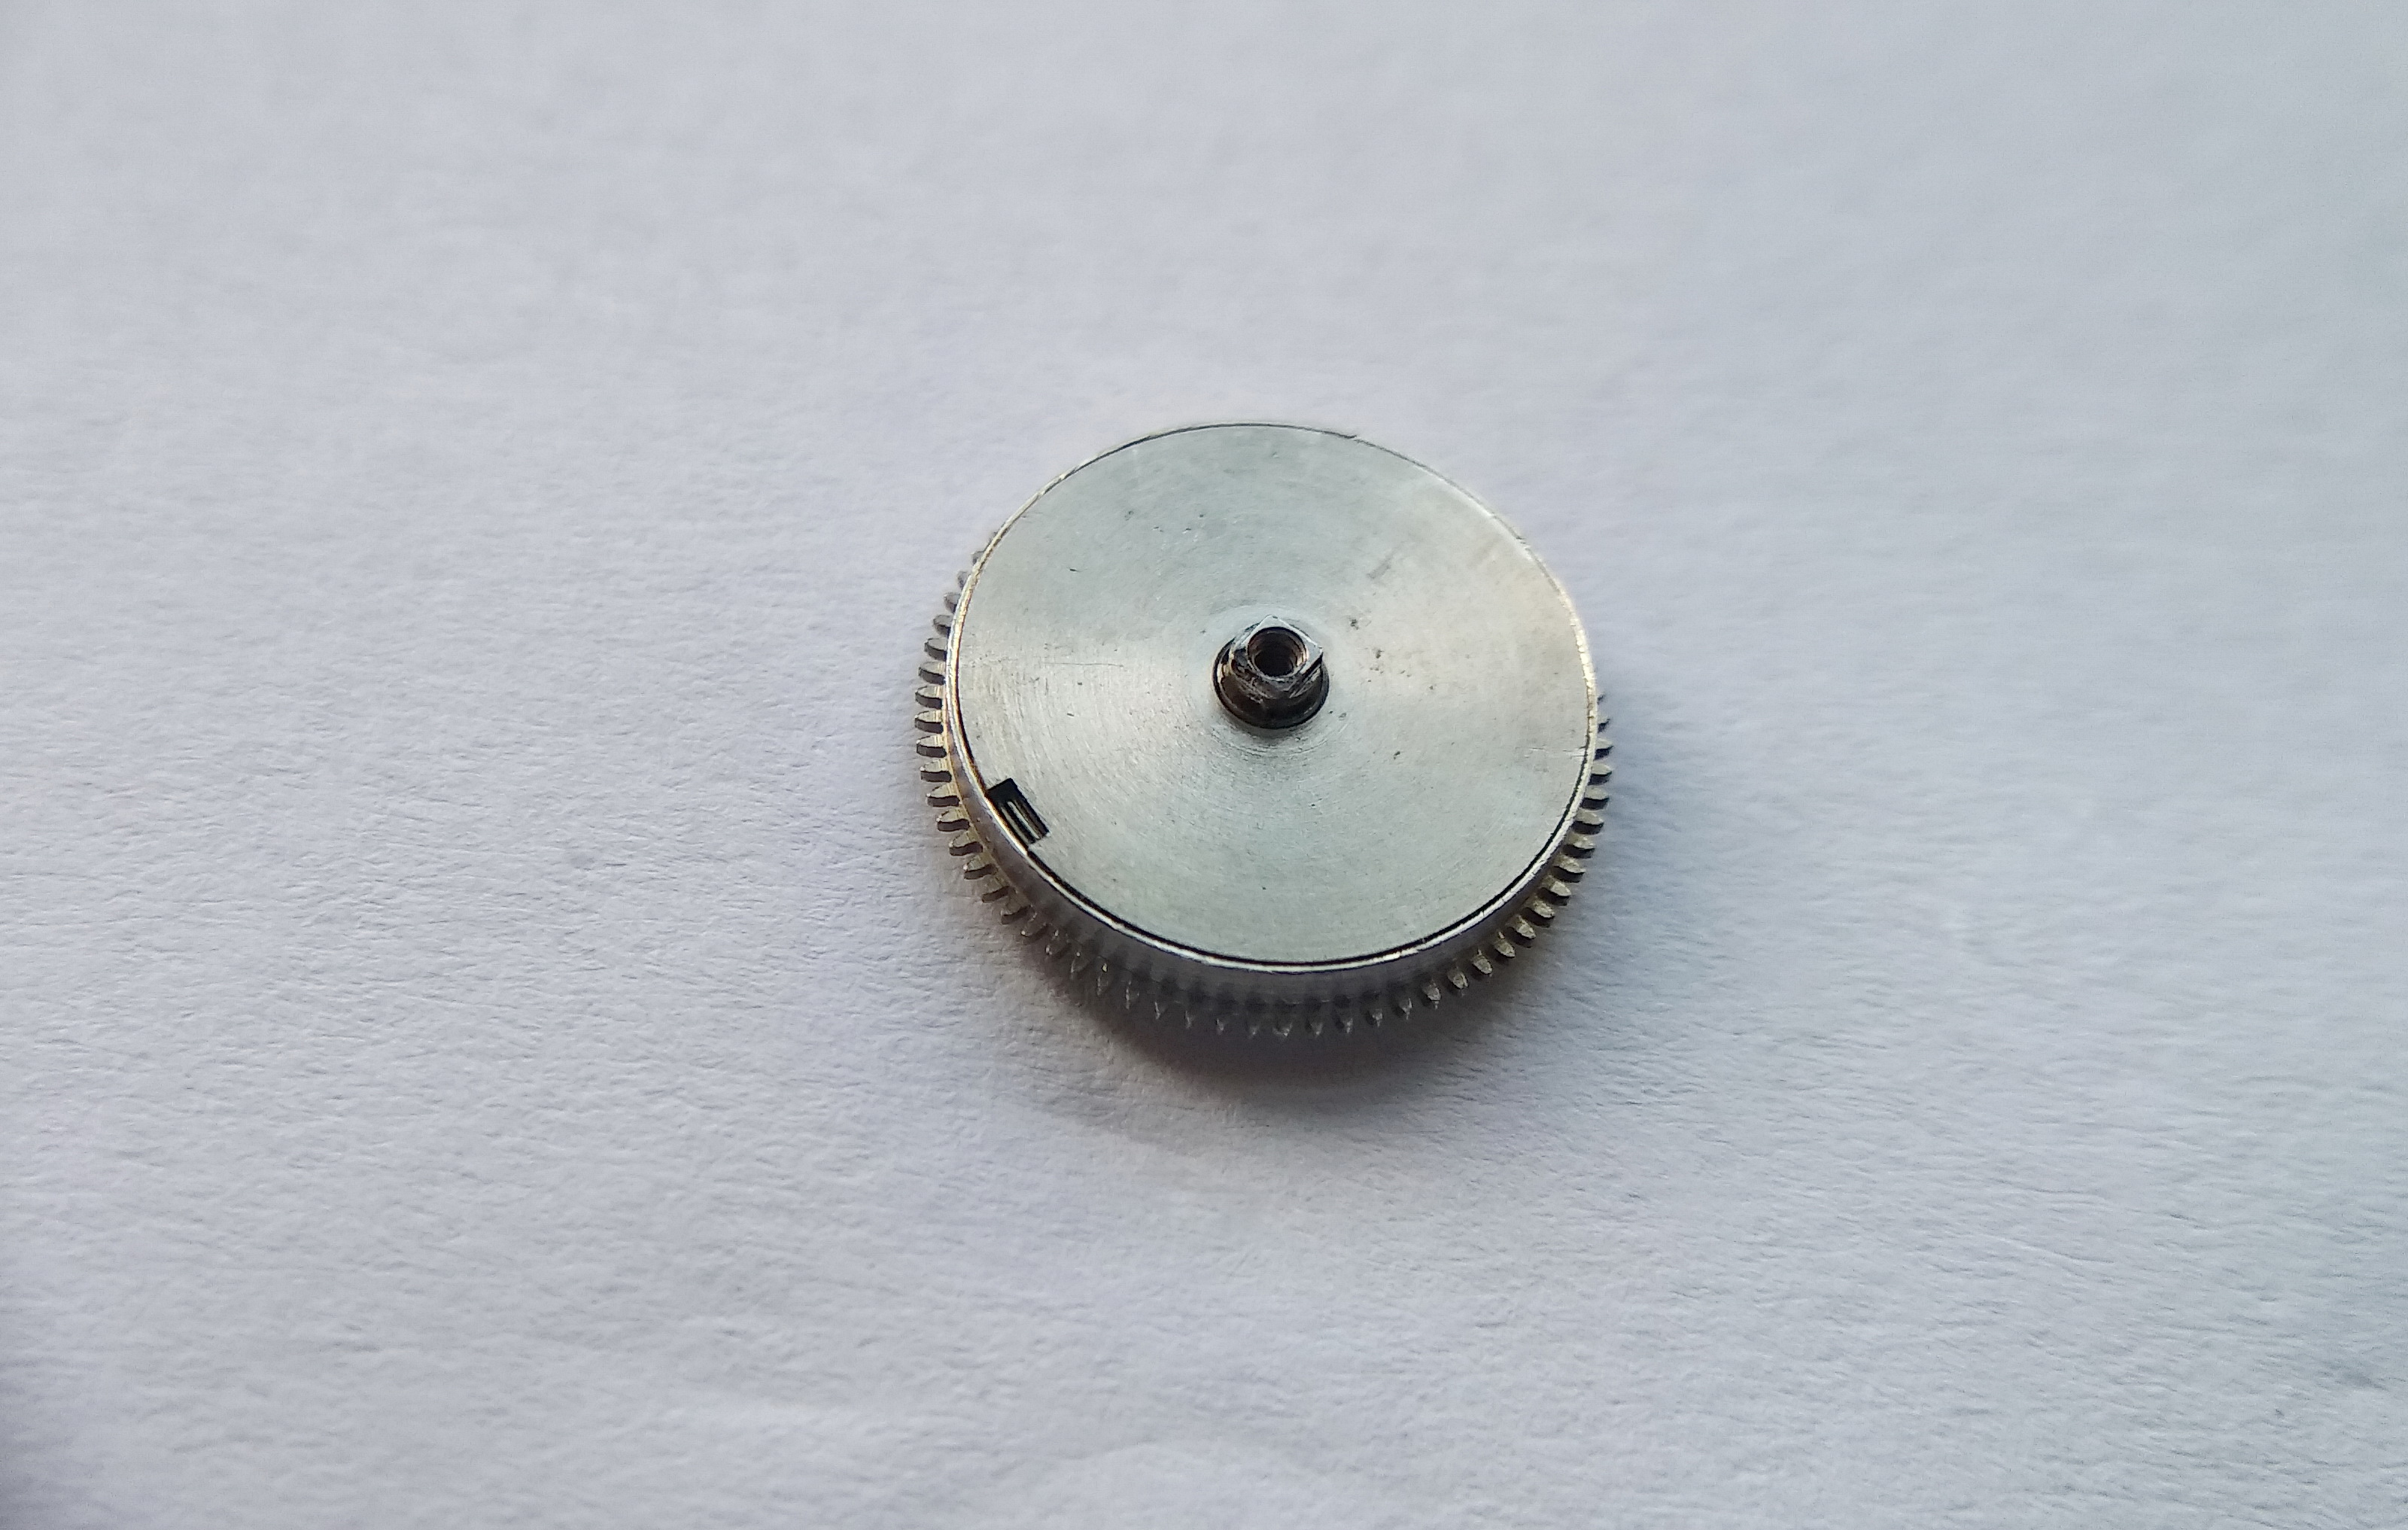
Now we remove the barrel.

Mainspring barrel lifted out of the movement
The barrel itself is lifted from the plate, the last major component of the motor to be freed.

The Center Wheel

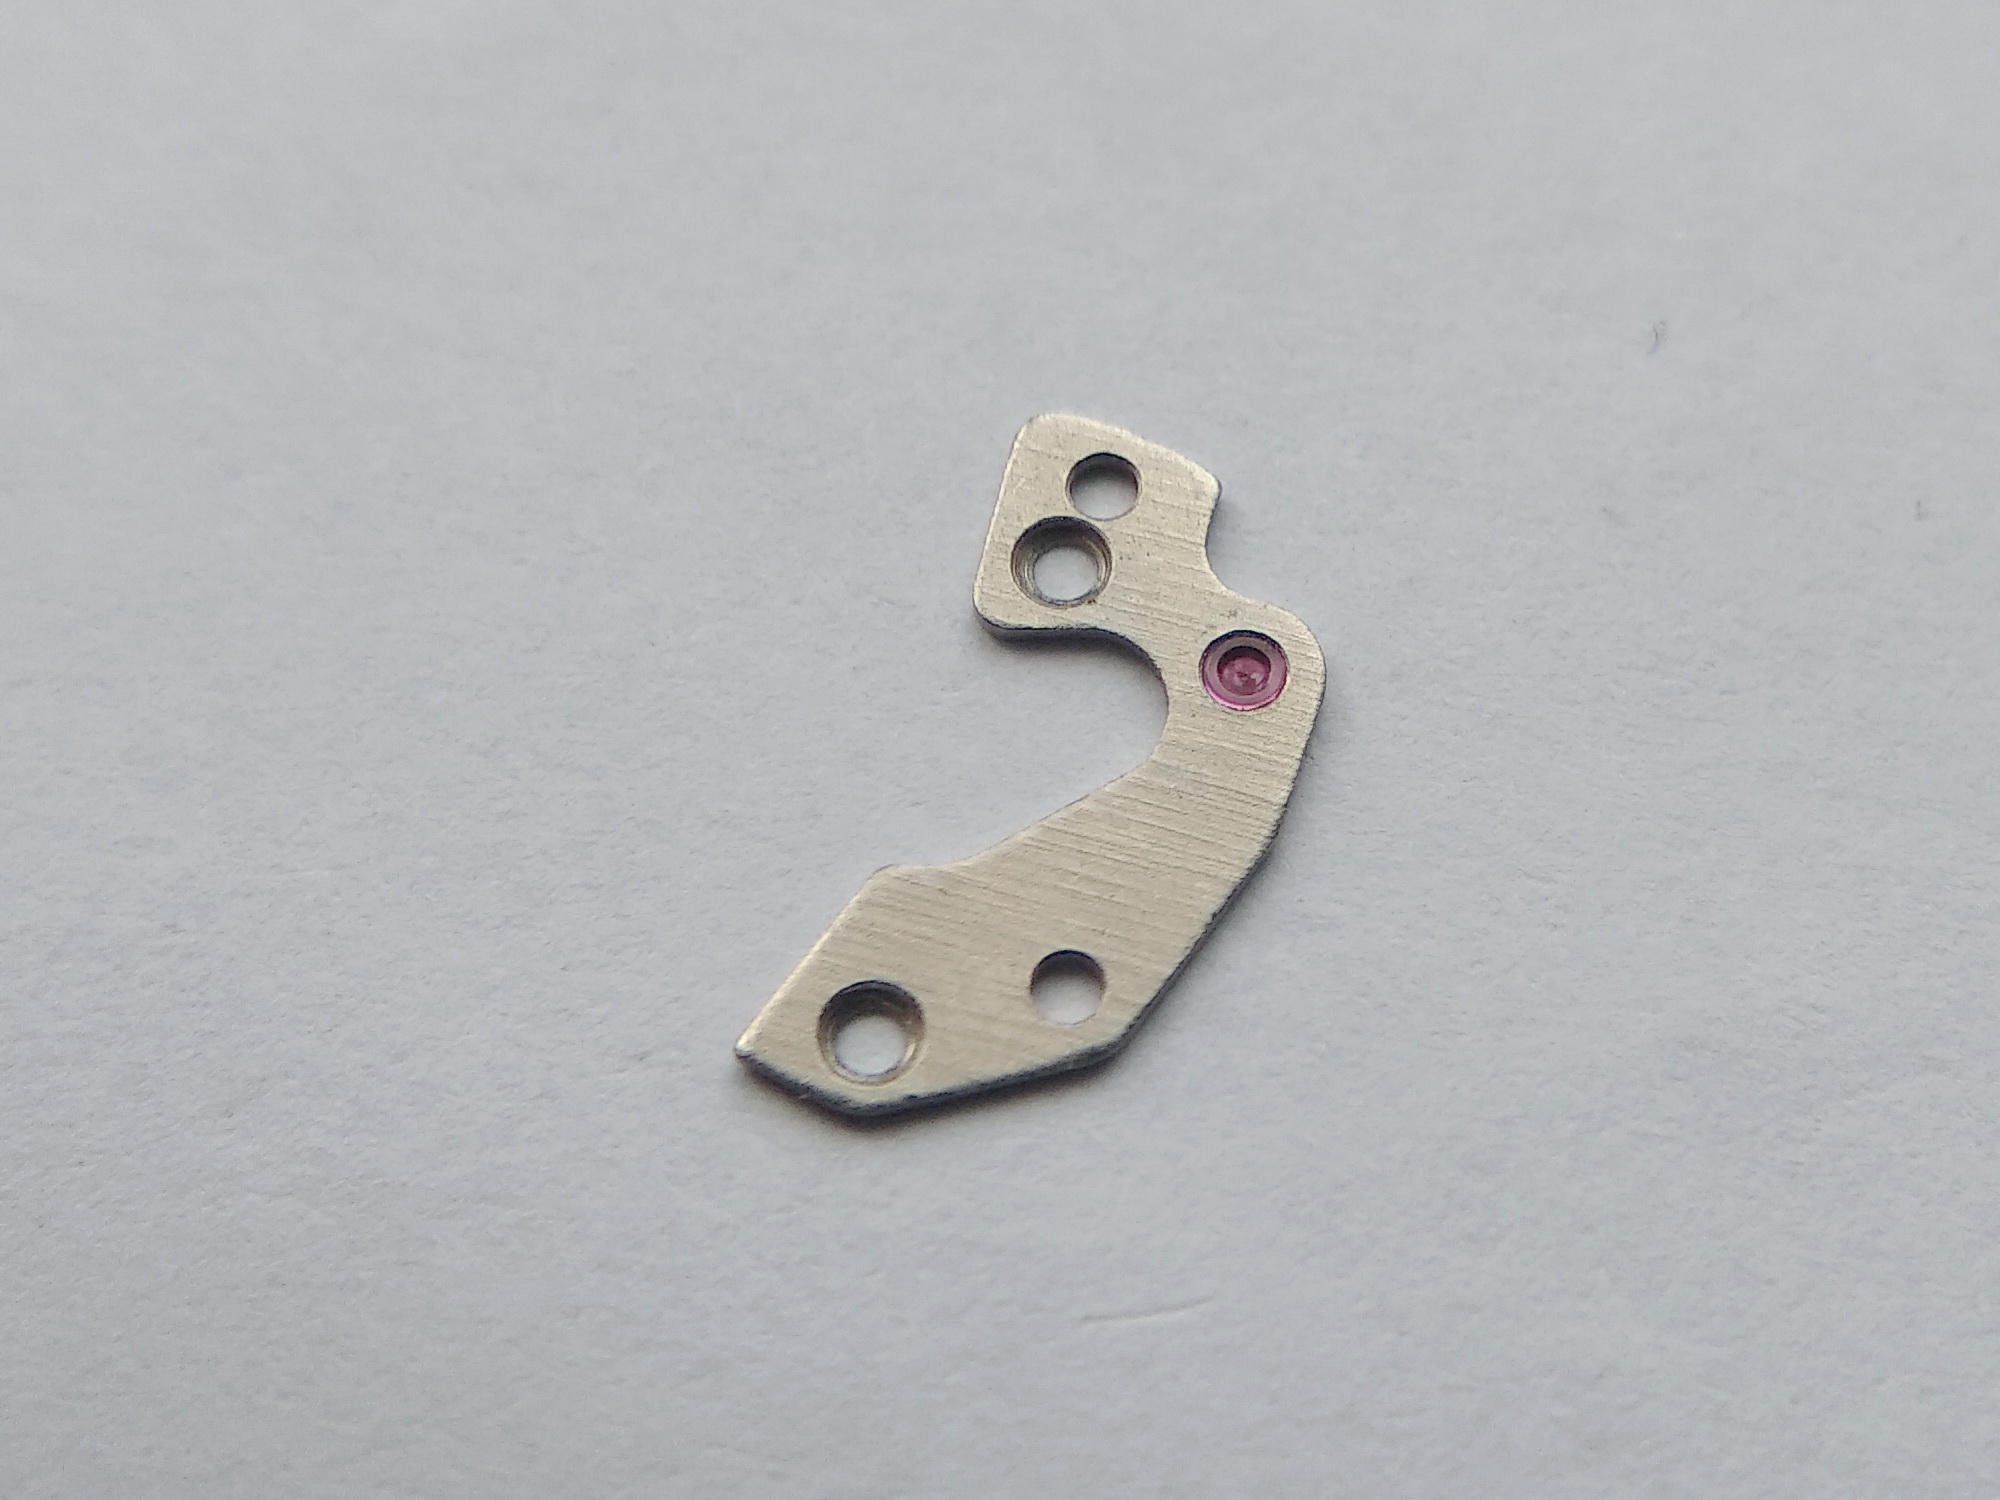
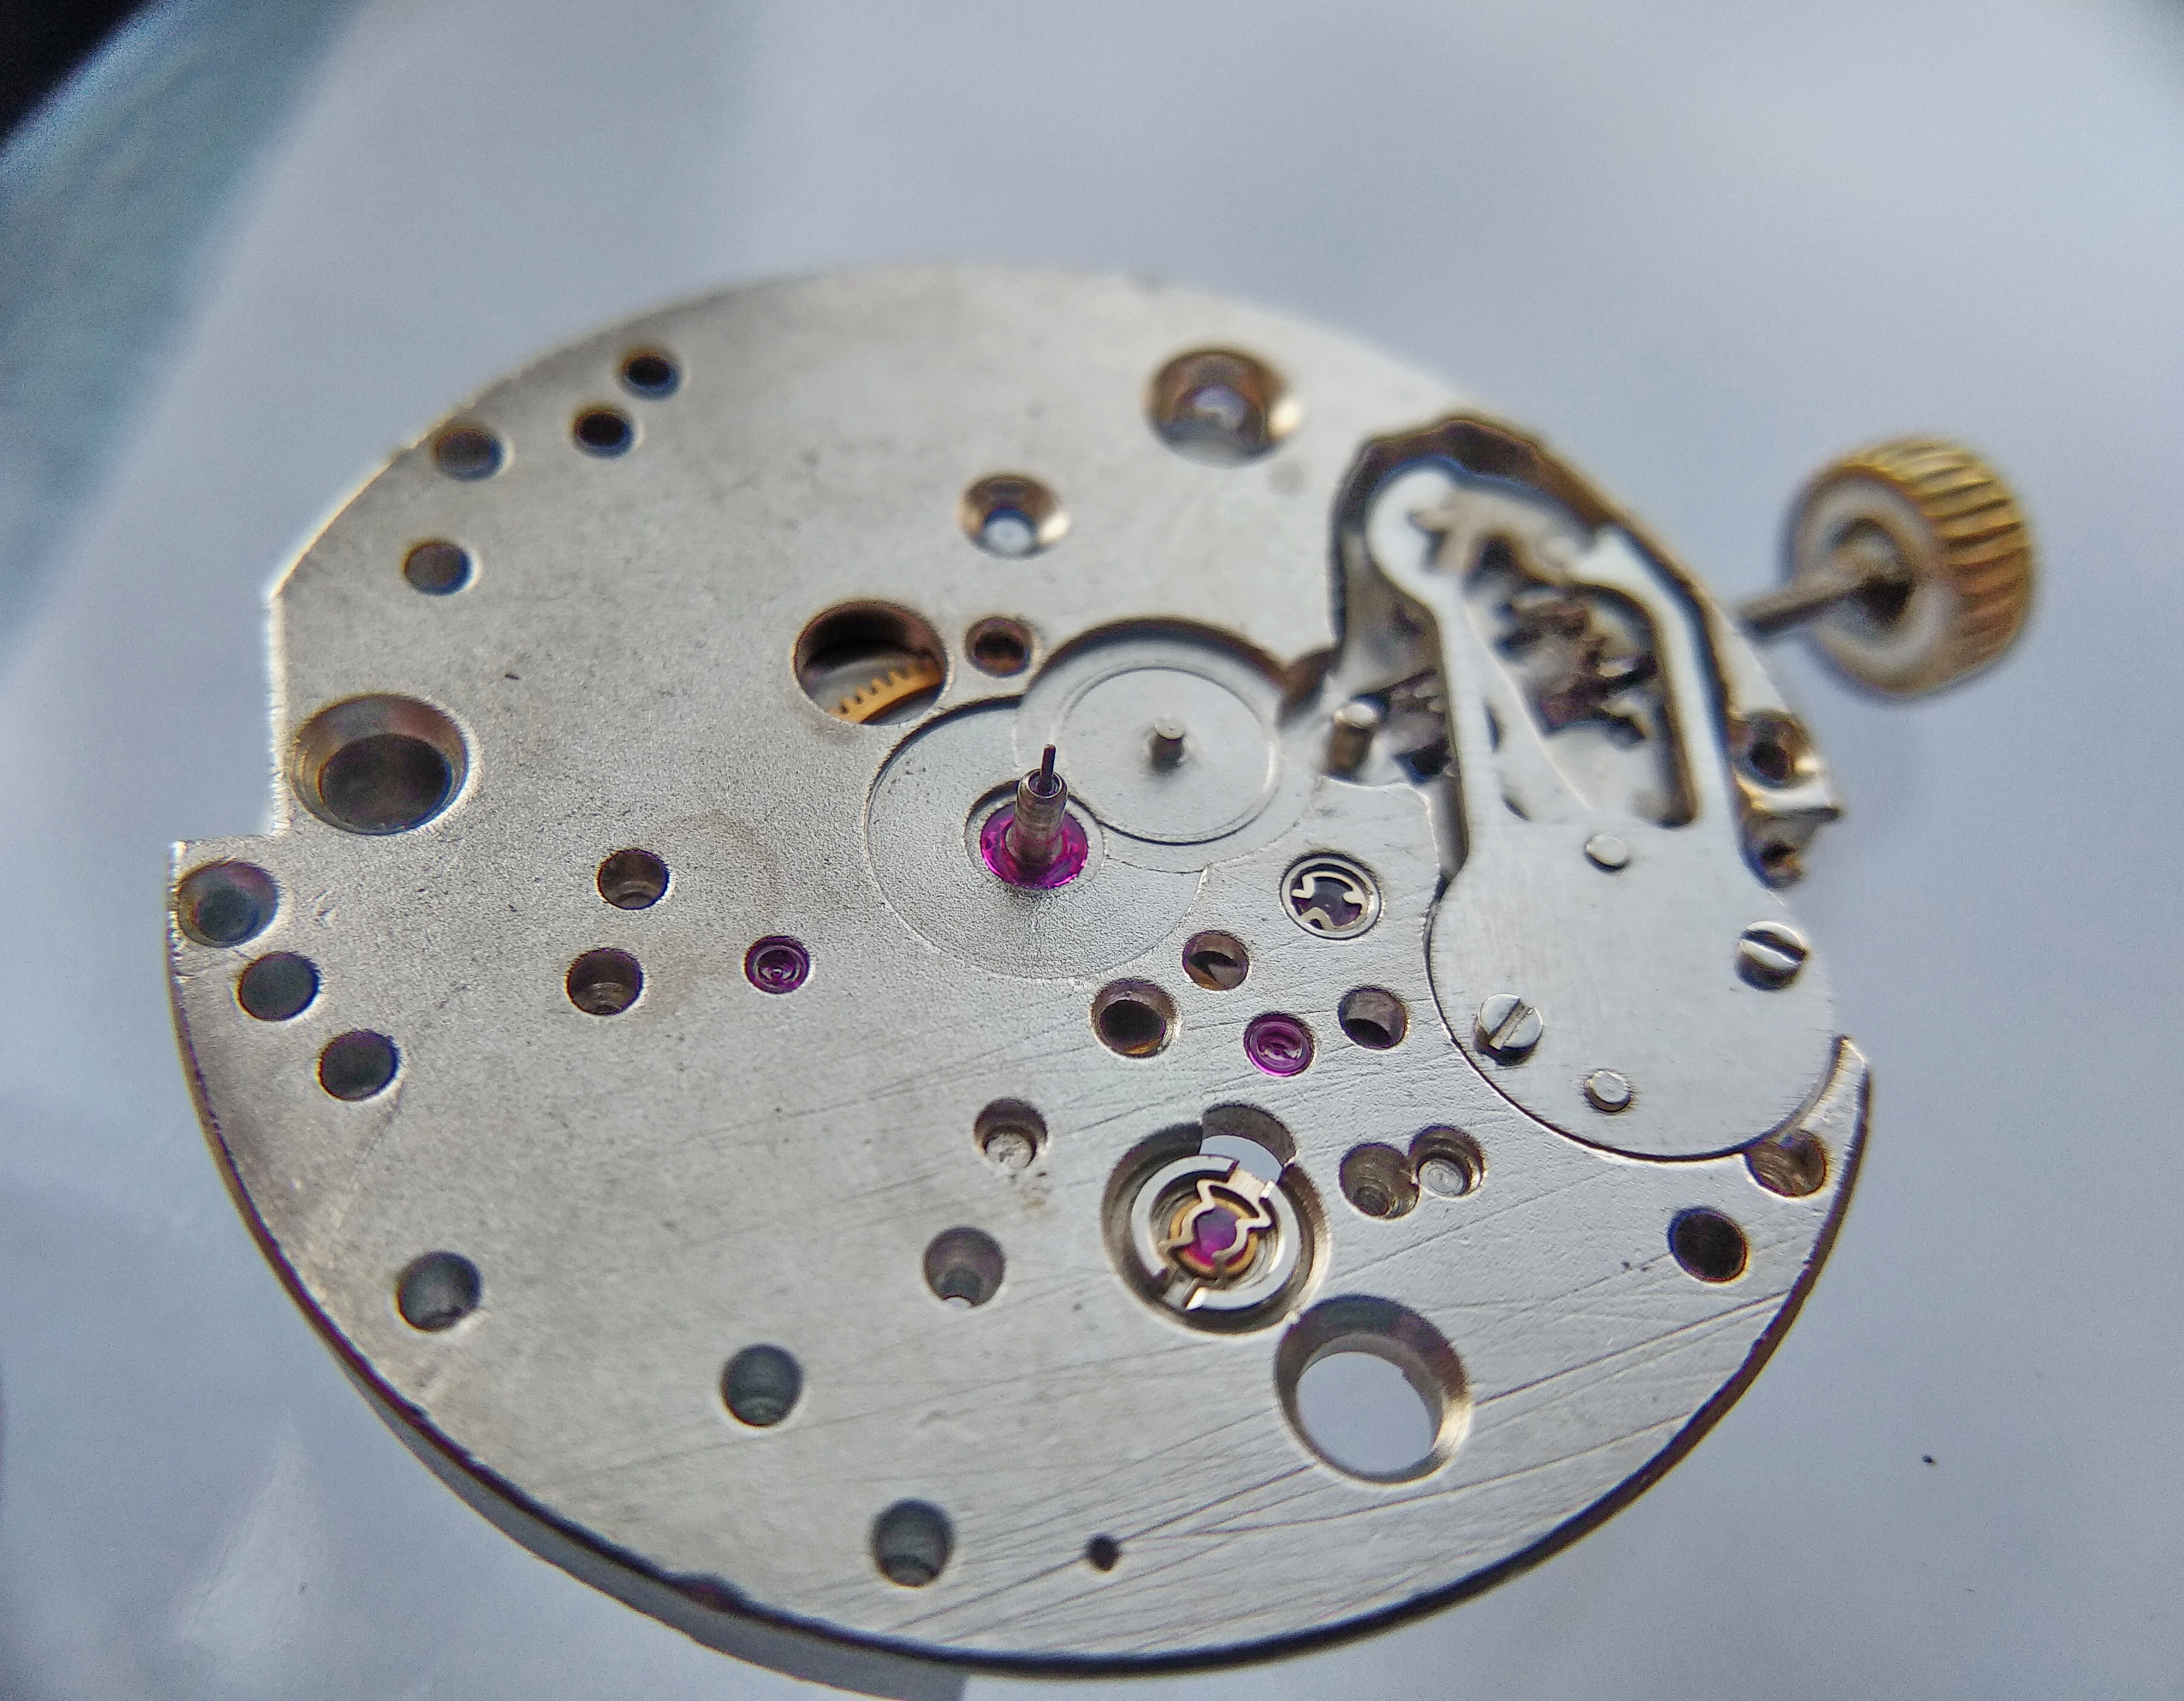
We demount the center wheel bridge. Here, too, not everything is straightforward, though it is simpler than the previous bridges.

Center wheel bridge being removed from the main plate
The center wheel bridge comes off next — a smaller piece than the train and barrel bridges, but no less carefully made.

The shape is complex, the center wheel runs on a jewel, and the fixing screws are countersunk into the bridge.

Center wheel bridge detail showing a jeweled bearing and countersunk fixing screws
The center wheel turns in a jewel; the bridge screws sit countersunk flush. Even this minor bridge is a substantial, well-finished component.

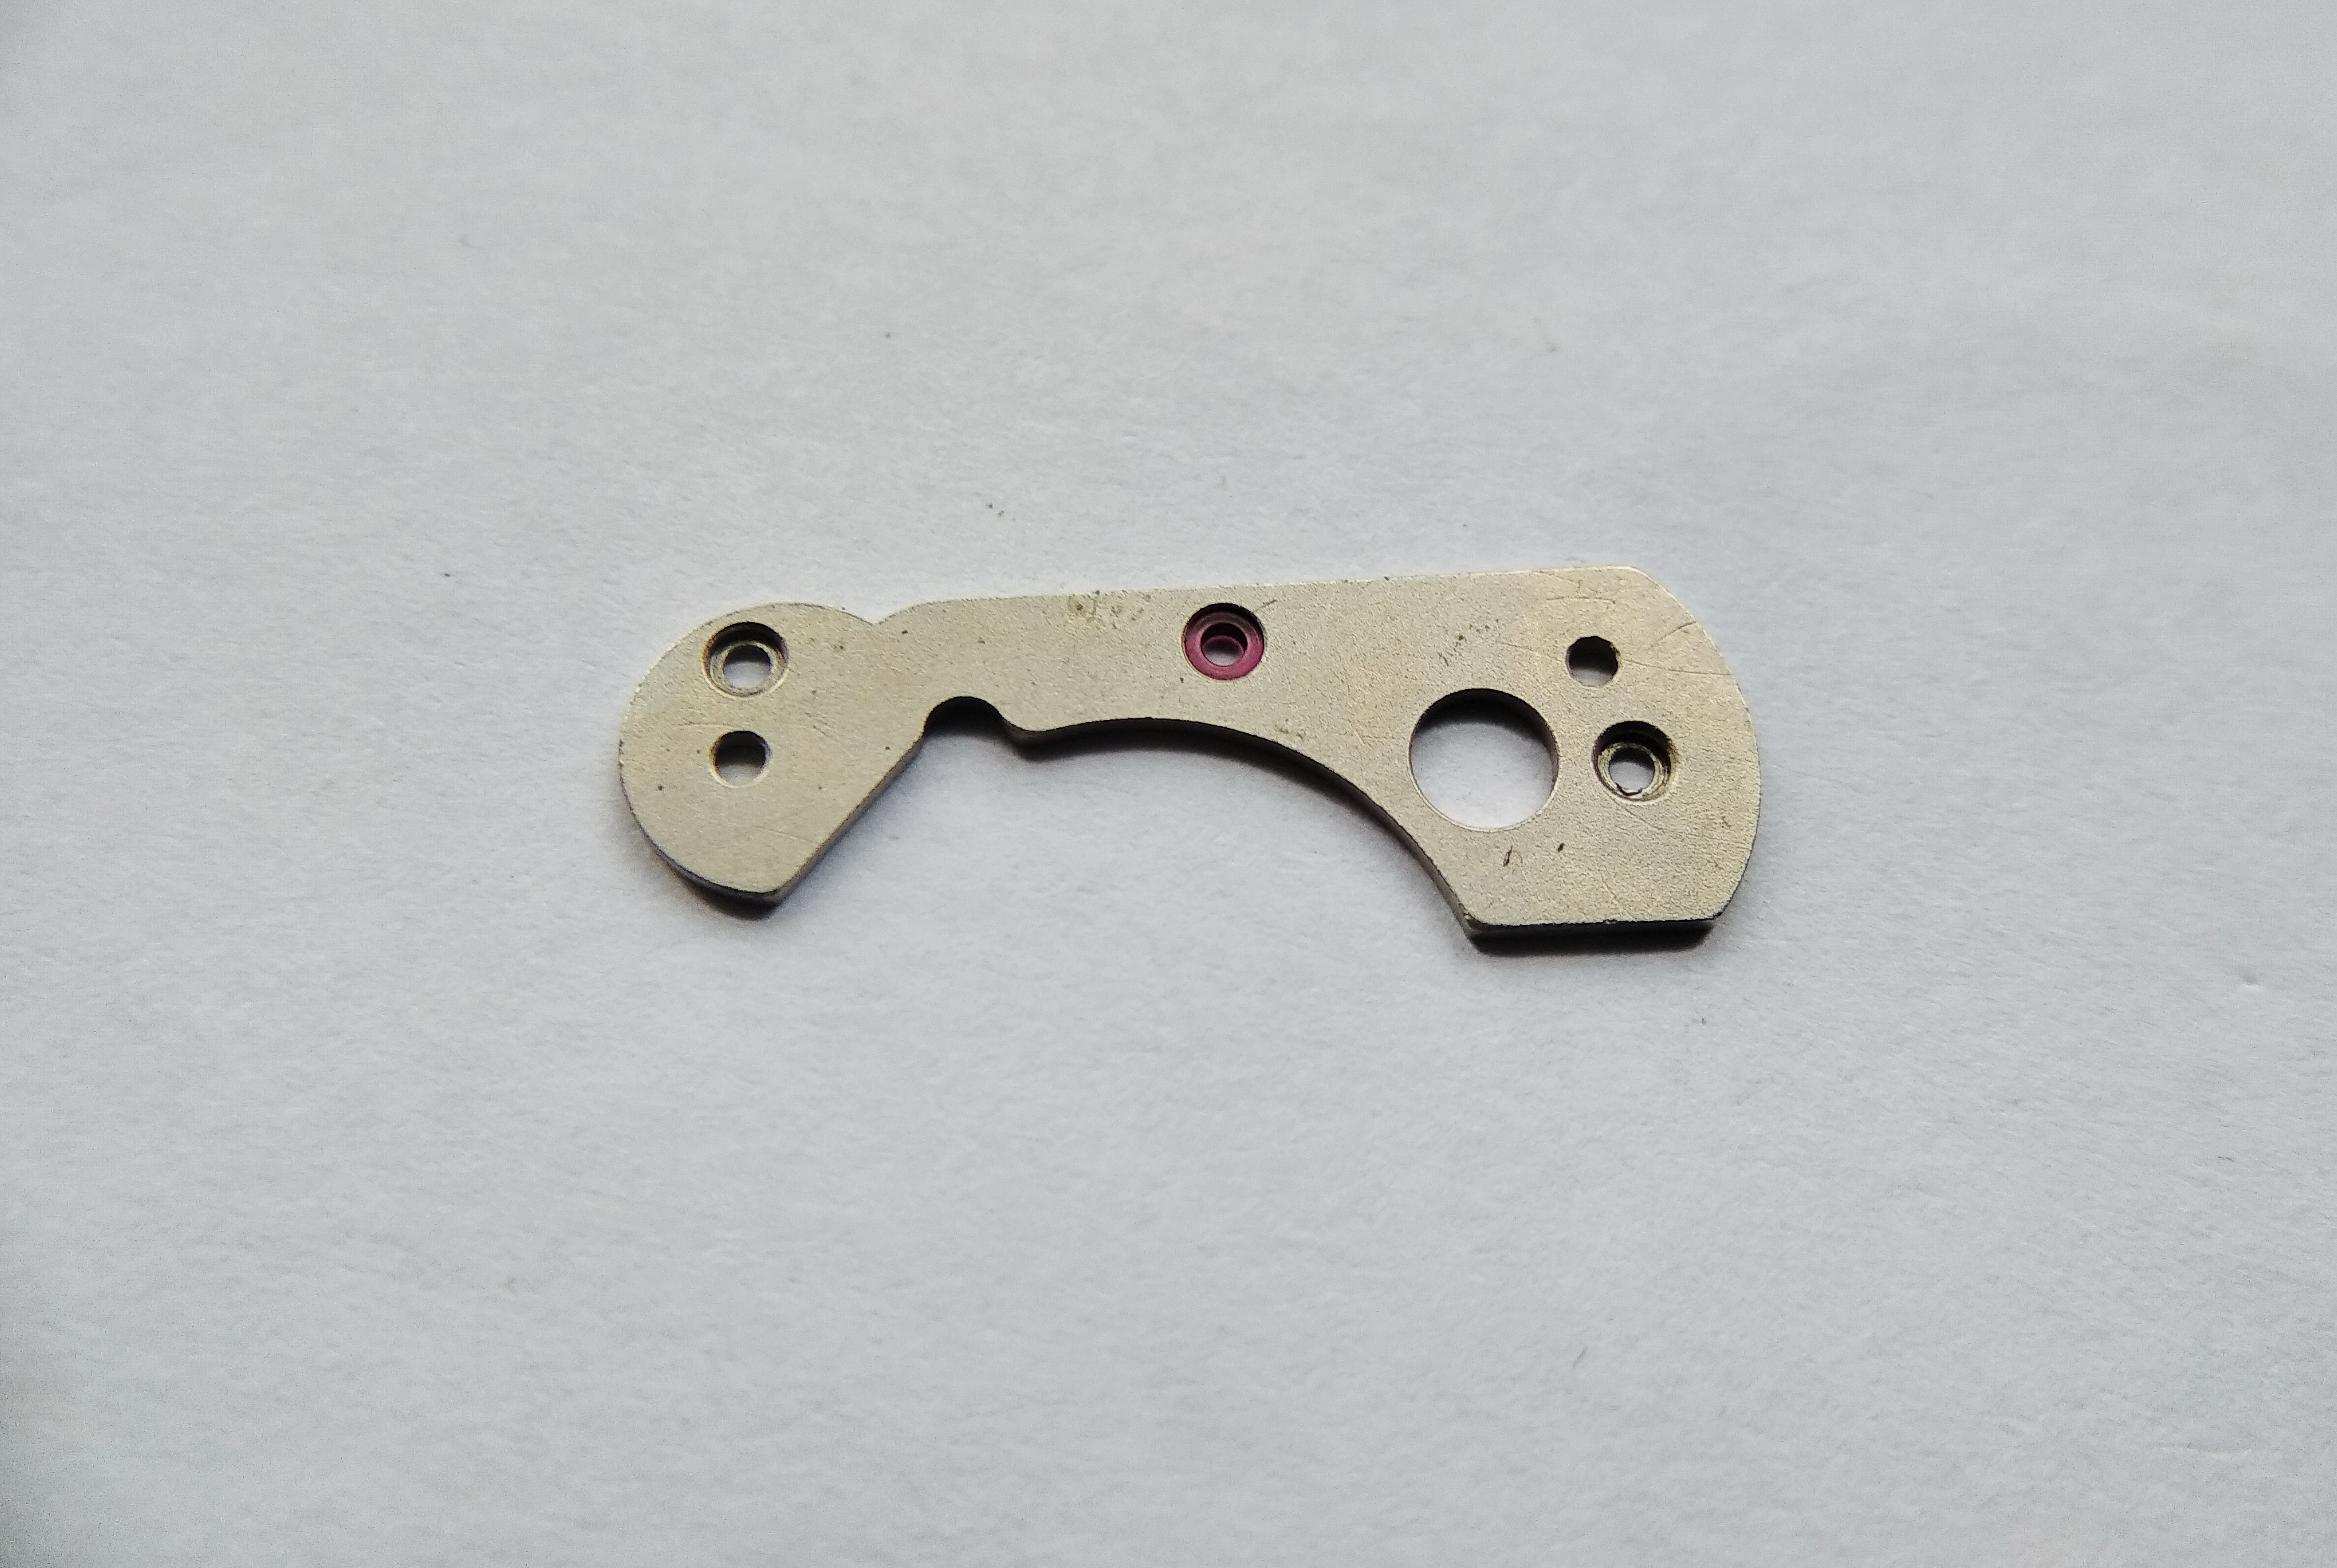
Notice how the jewel is set. This is not an oil sink — the boss of the center wheel enters here. So this jewel must be oiled from the other side. And the seconds wheel runs against the flat face of the jewel.

Center wheel jewel that receives the wheel boss, to be oiled from the reverse side
The center jewel is no ordinary oil-sink bearing: the center-wheel boss passes through it, so lubrication must be applied from the reverse, while the seconds wheel bears against the jewel's flat face.

The Barrel and the S-Shaped Mainspring

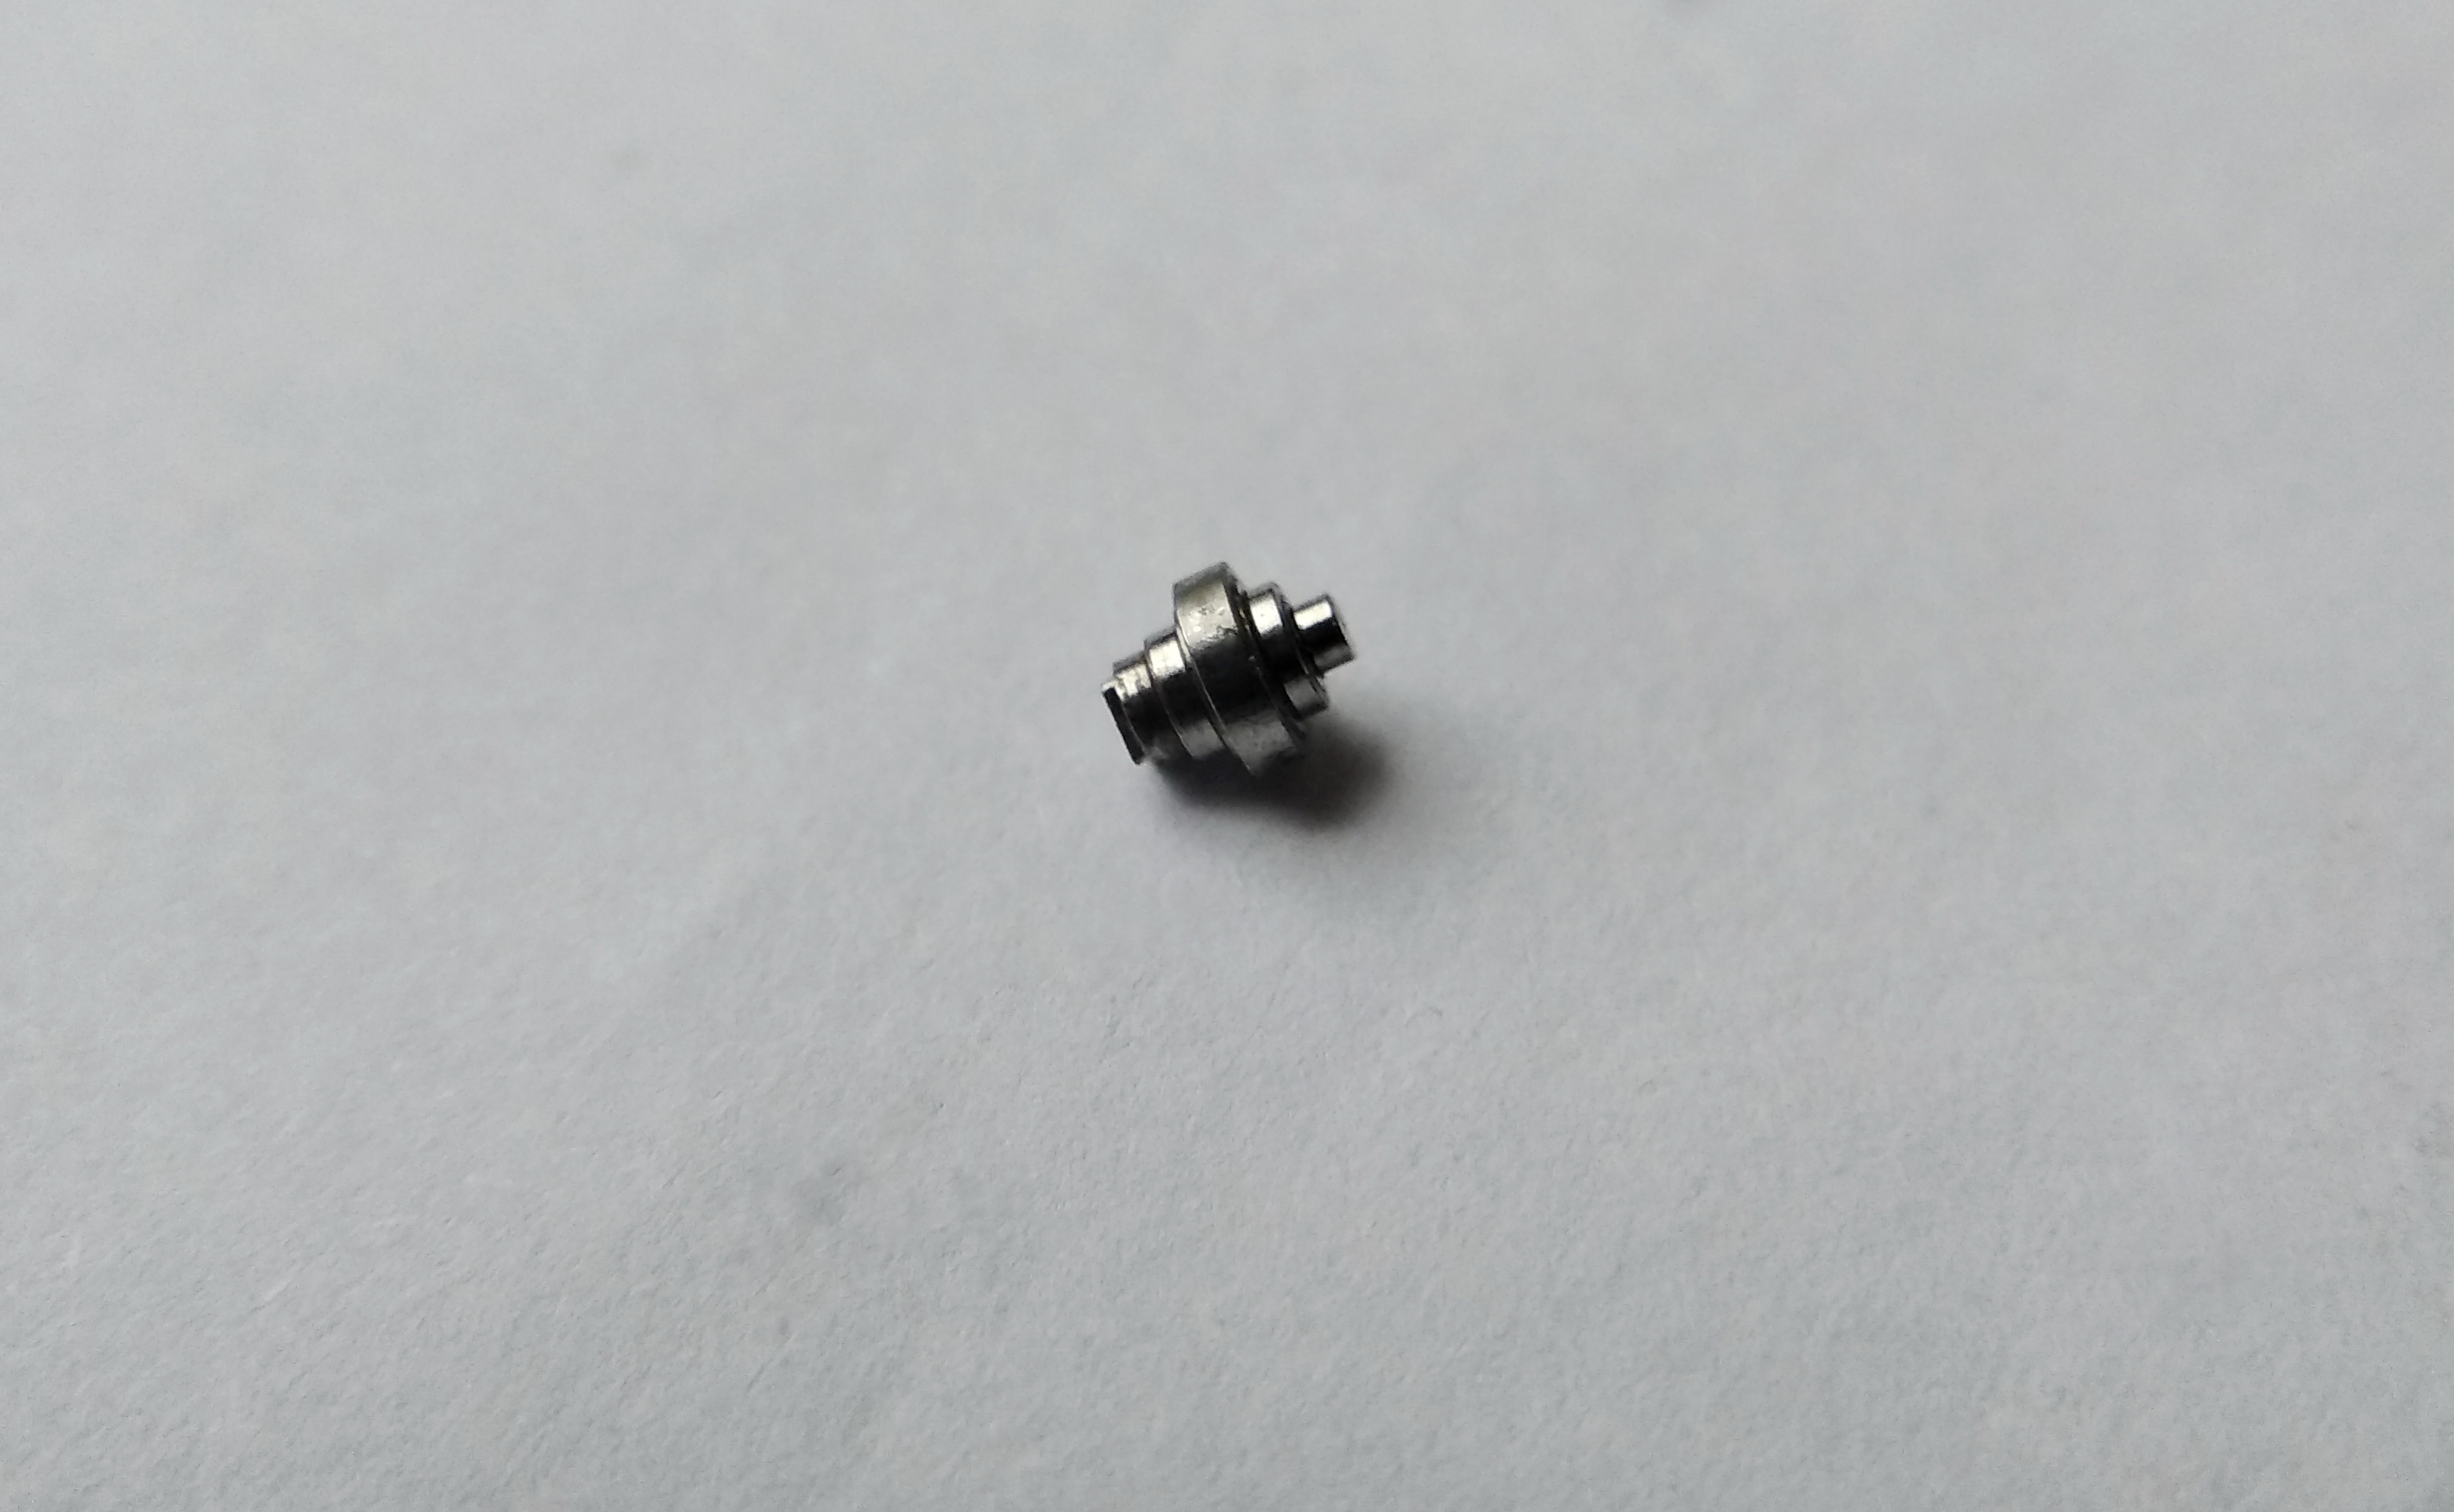
This part is called the kore — the barrel arbor. The mainspring is anchored to it by one end, the short end, and the barrel turns upon it.

The barrel arbor, around which the barrel rotates and to which the inner mainspring end hooks
The barrel arbor — the axis on which the barrel rotates and to which the mainspring's inner coil is hooked.

And here is the barrel with its mainspring. In the center is the tail of the spring, with the loop that fits over the lug of the arbor. There is dirt enough inside the barrel; this time an ordinary rinse will not do. We take the barrel apart and draw out the spring.

Open barrel with the coiled mainspring inside, its inner loop visible at the center
The barrel opened with the mainspring coiled inside; the inner loop that catches the arbor is visible at the hub. The barrel was dirty enough to demand a full strip rather than a quick flush.

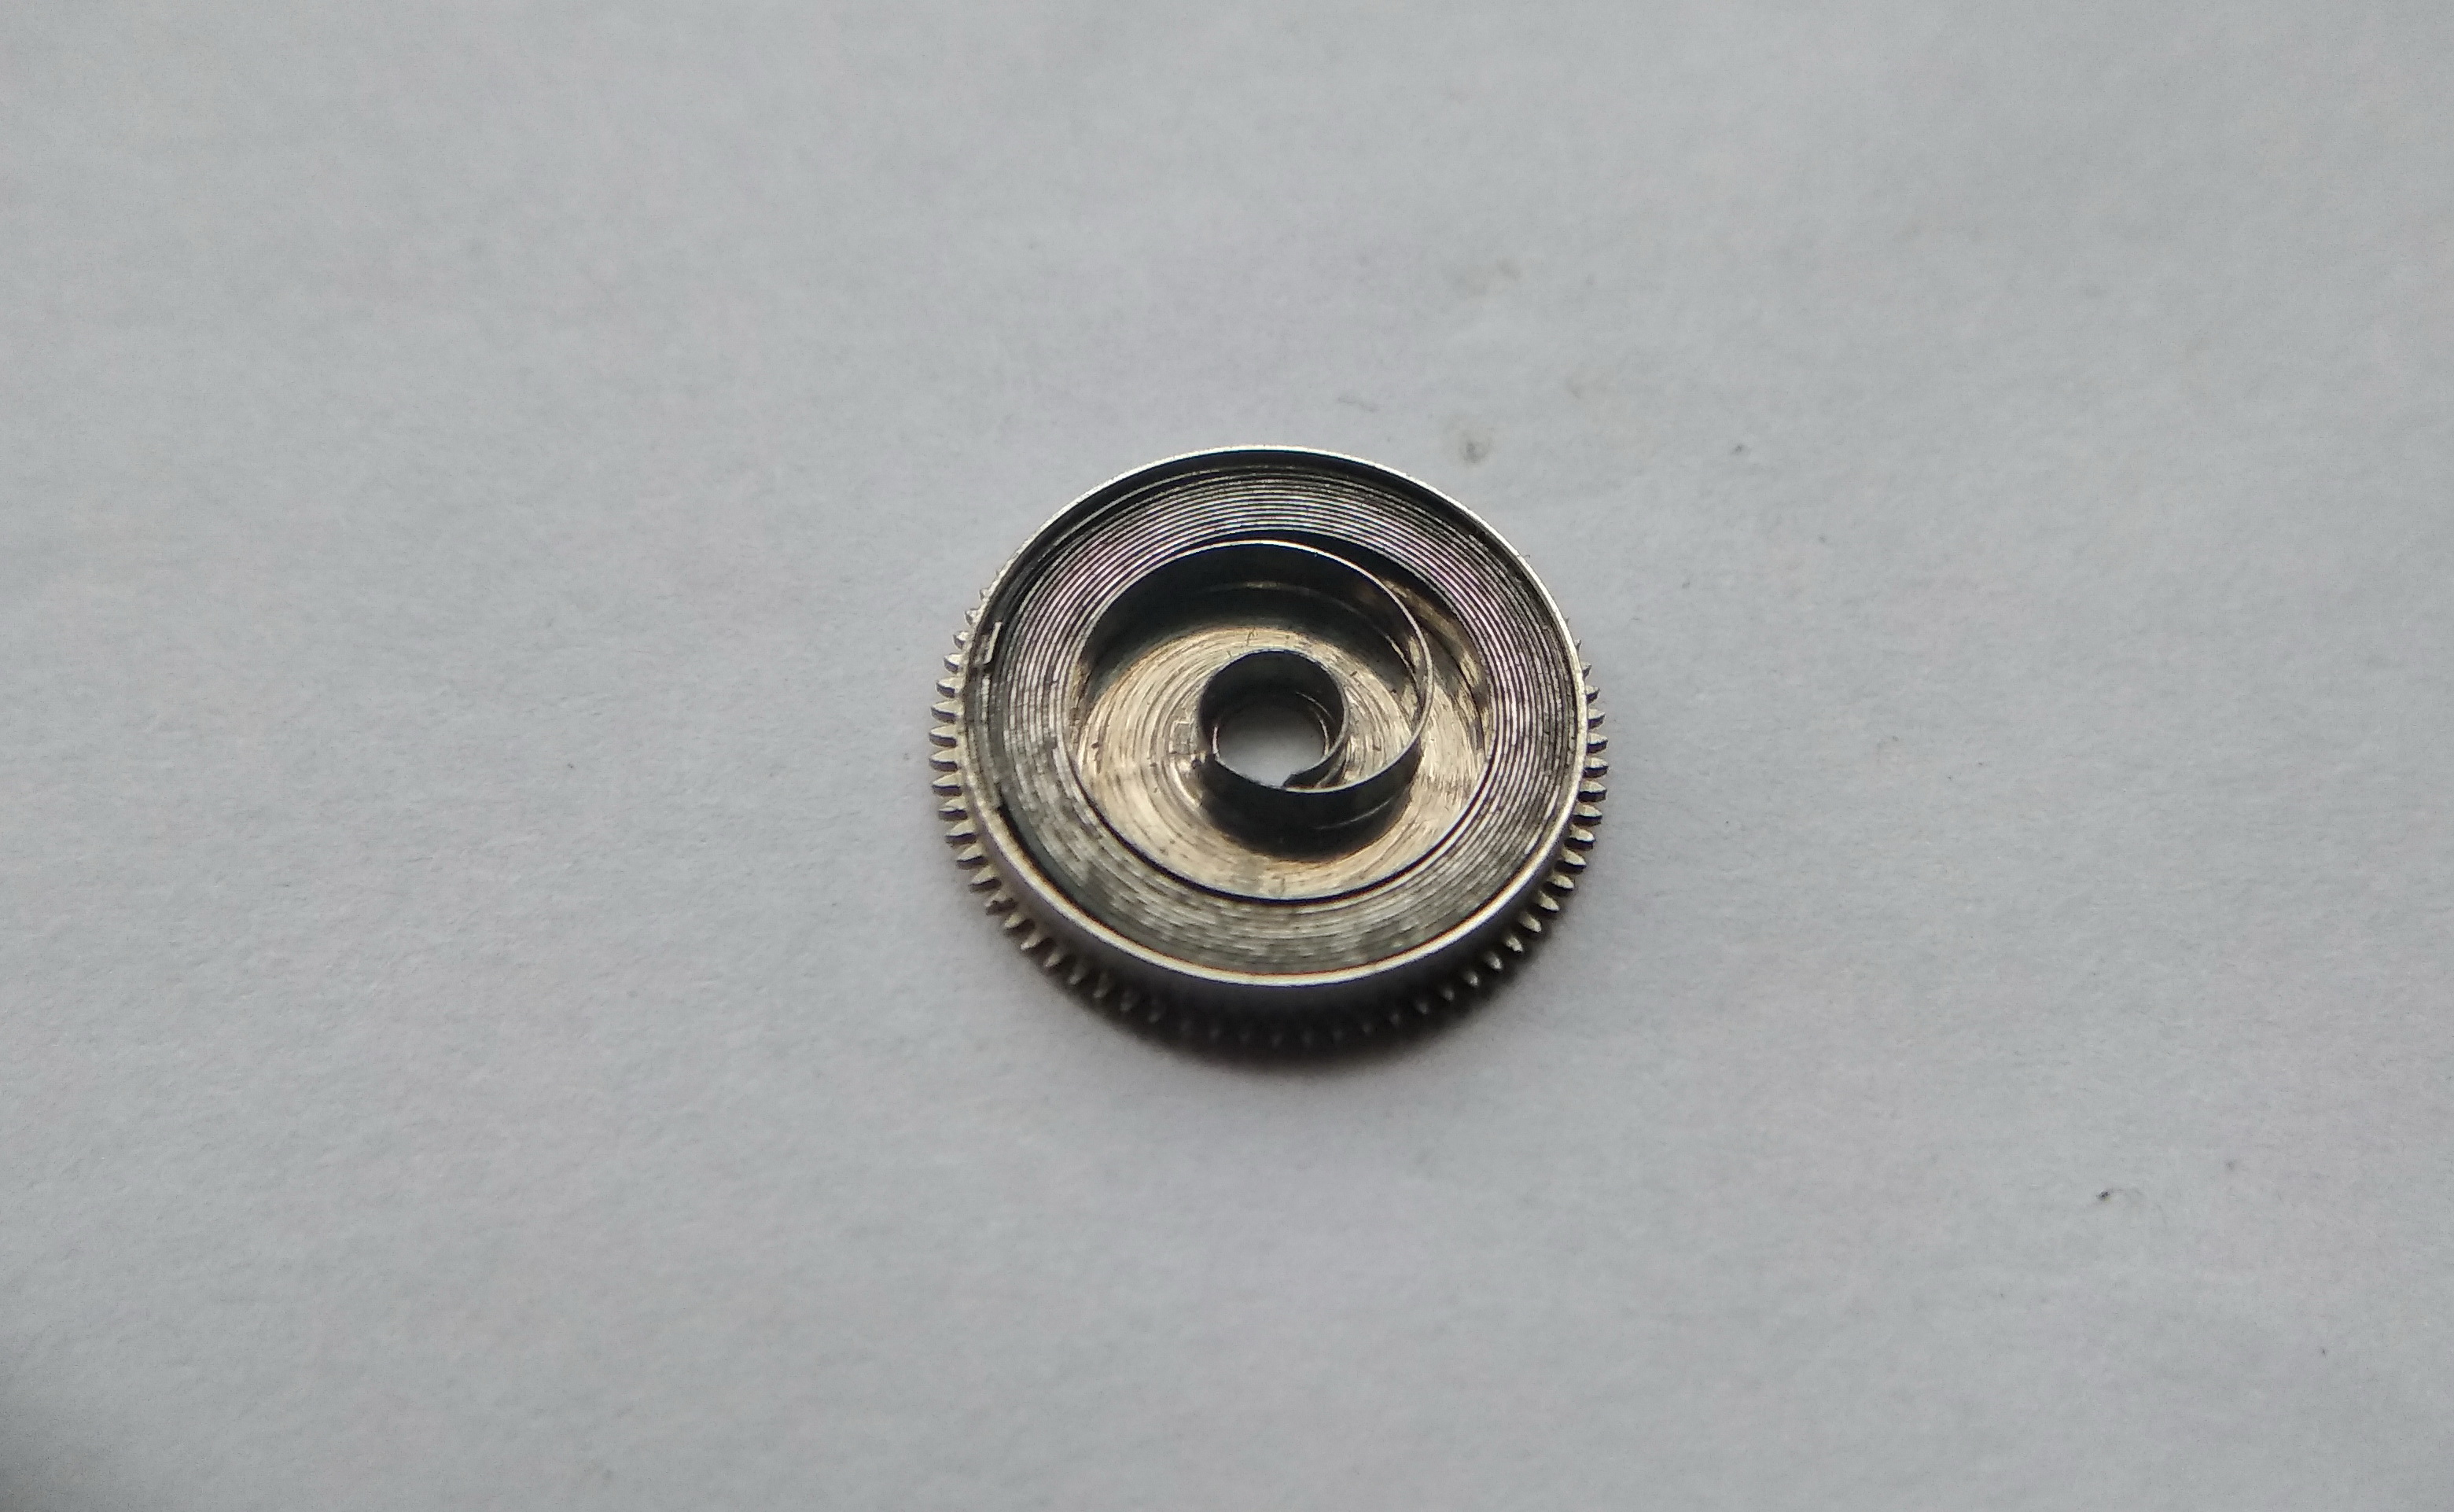
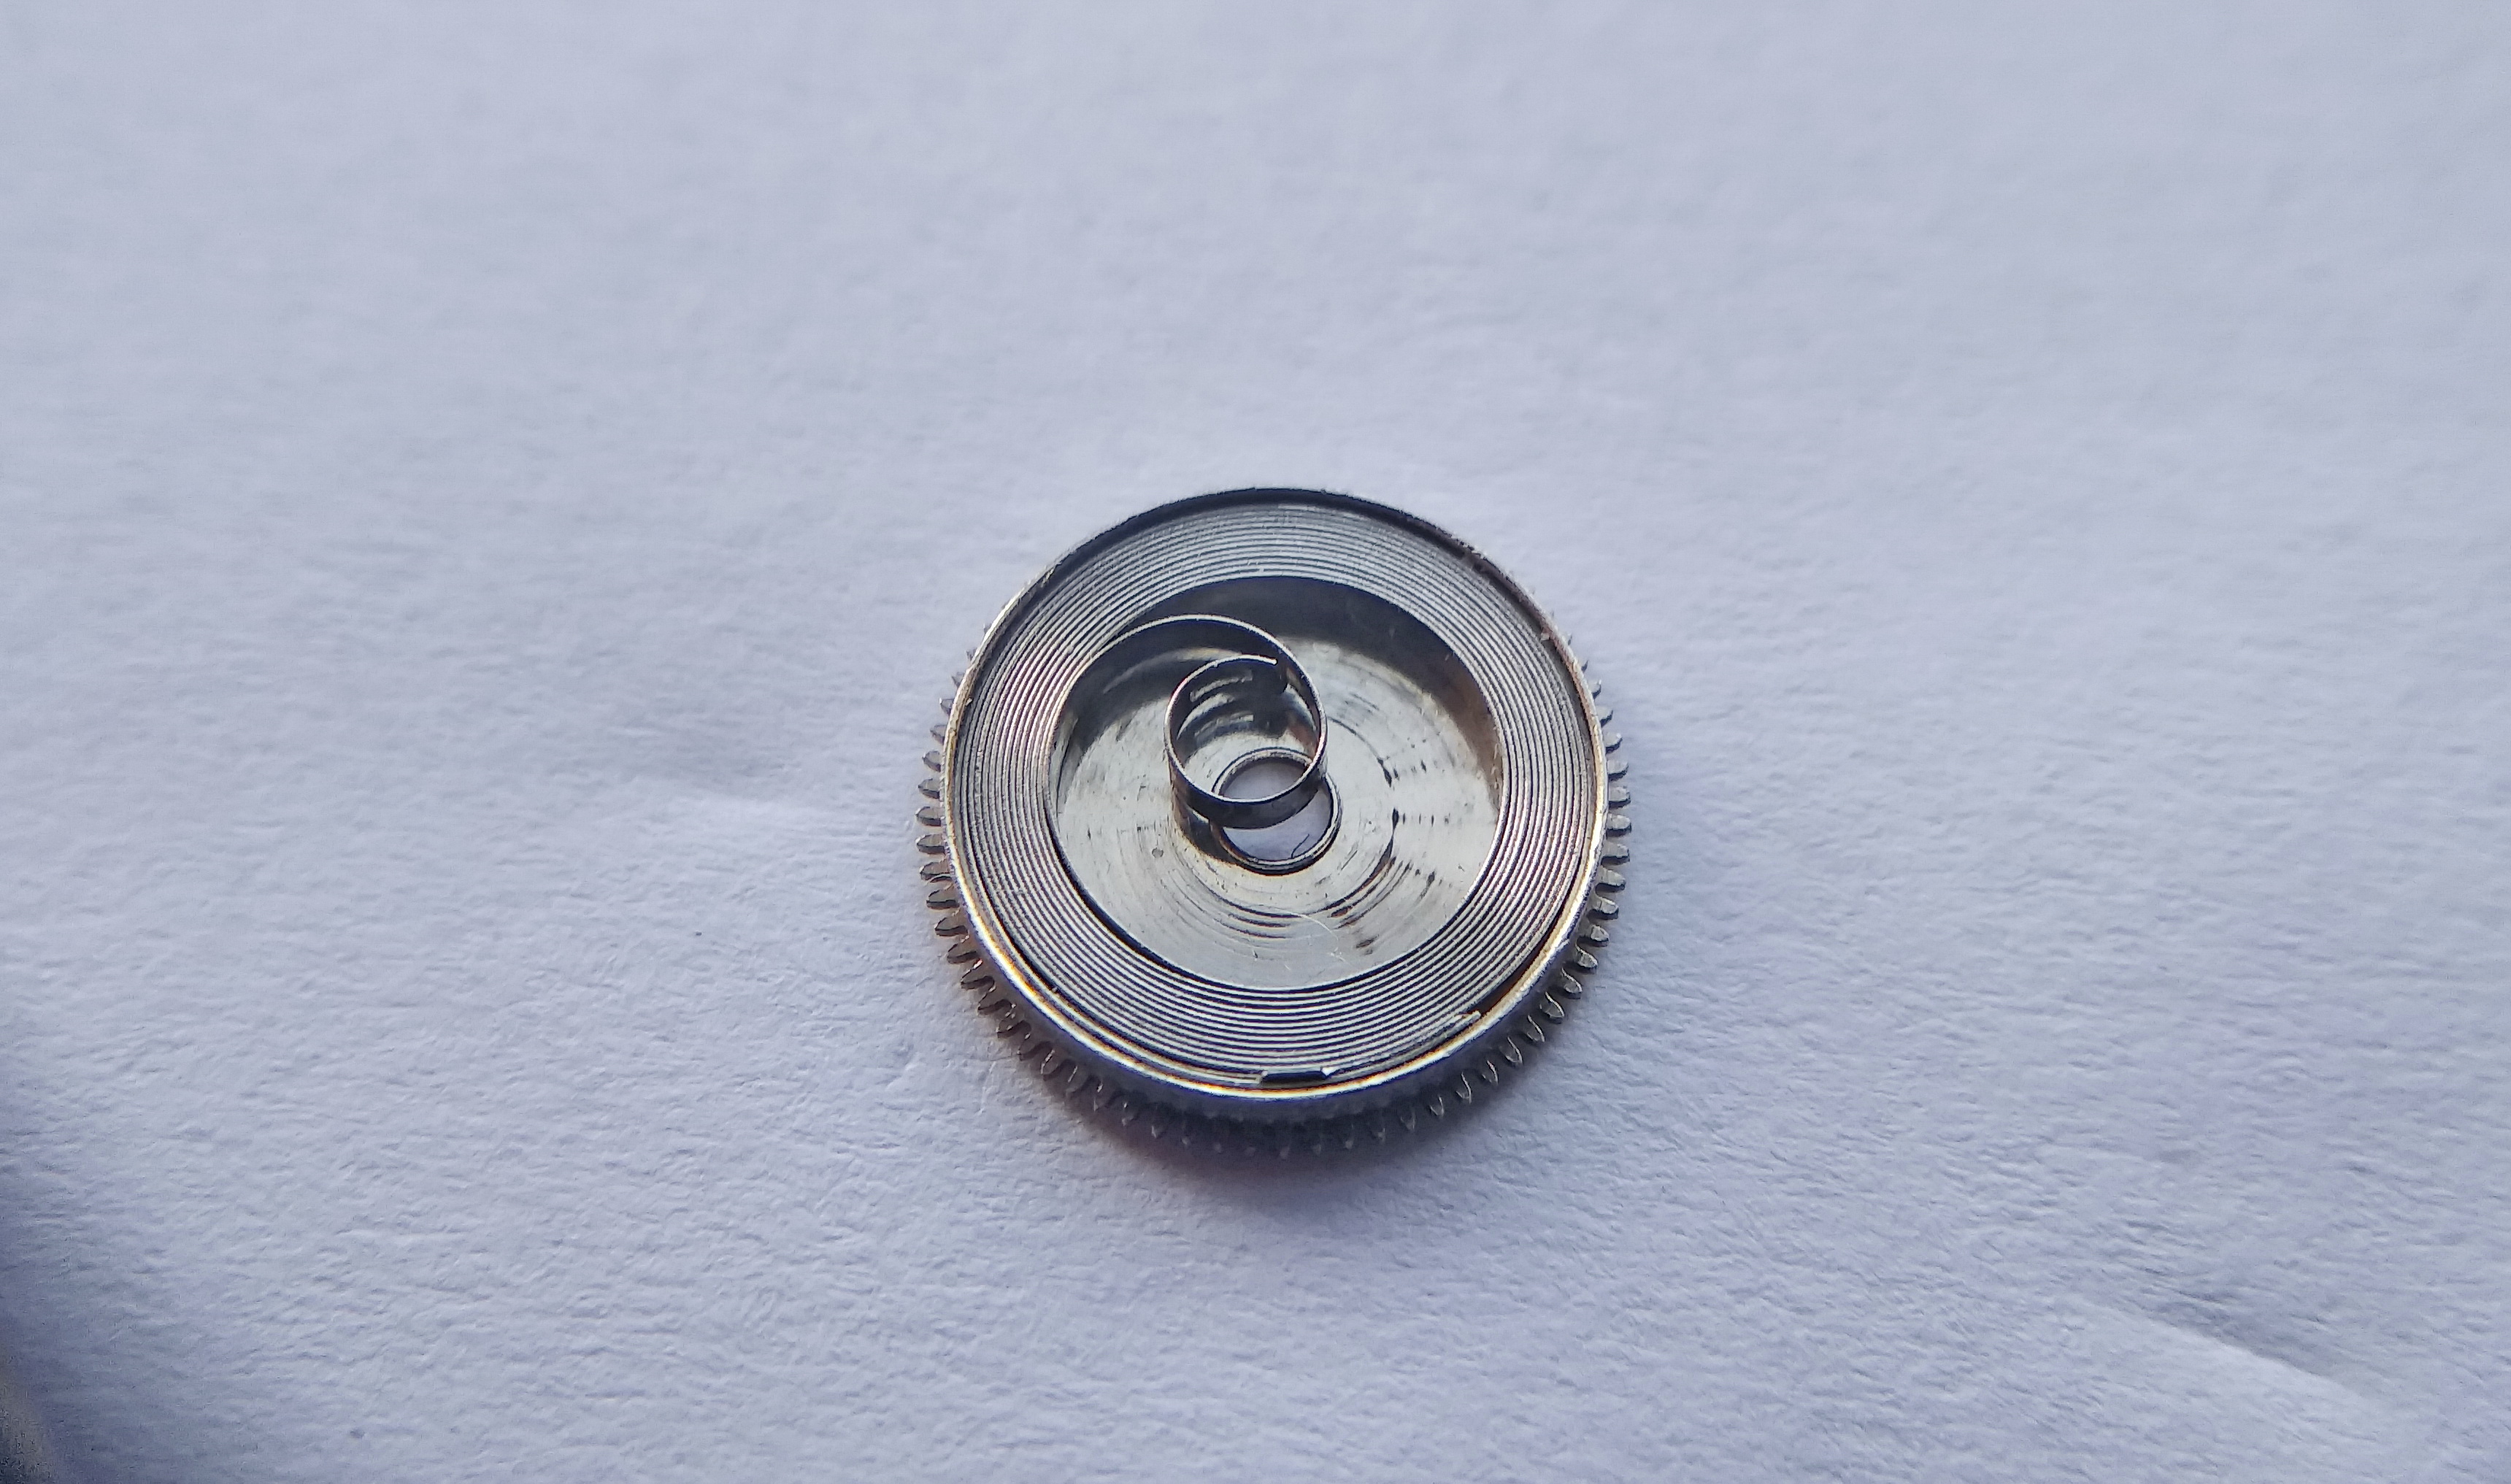
And here it is before us — Her Majesty the Mainspring, and her royal apartments, the barrel.

Mainspring fully removed from the barrel, the two laid side by side
Spring and barrel separated for cleaning — the heart of the motor laid bare.

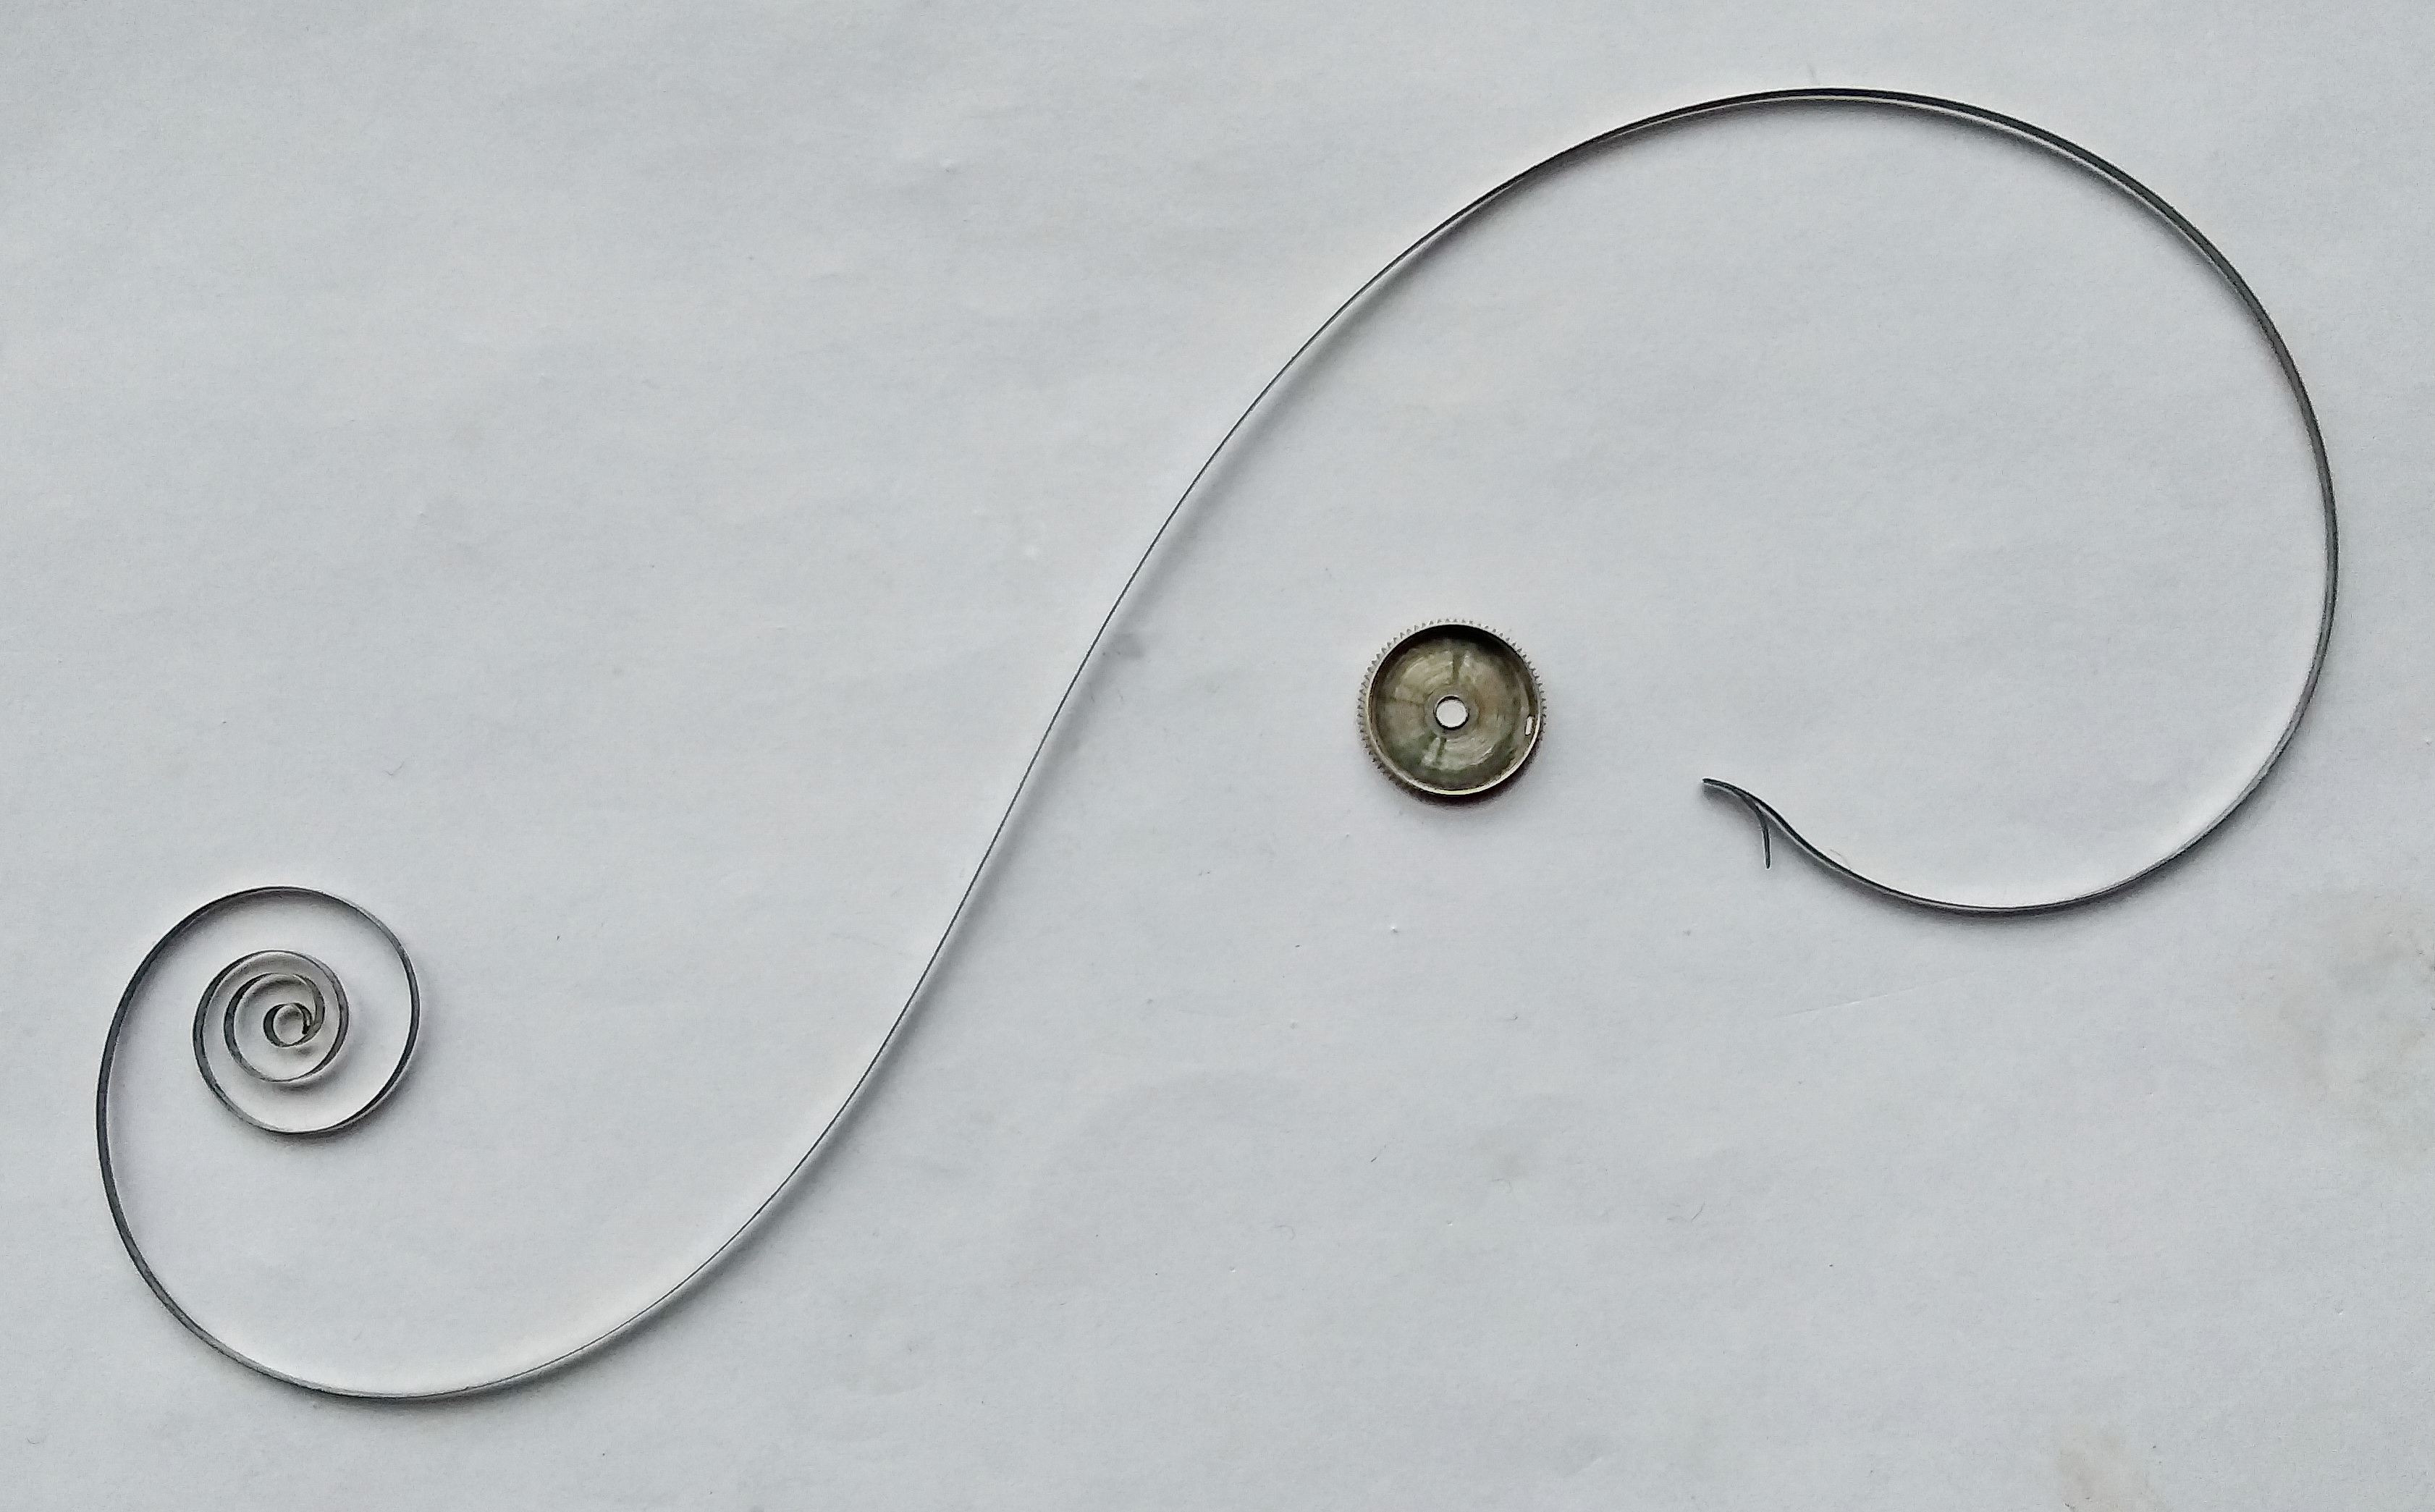
So — the mainspring. The Raketa 2609.NA does not use a plain spiral spring but a so-called S-shaped spring. The secret of this spring is that an ordinary spiral spring releases its energy unevenly, which affects both the rate and how long the movement will run on a single wind — that is, the power reserve. If, however, the spring is pre-formed into an S, then all its sections are stressed evenly, it stores far more potential energy, and it gives that energy back uniformly. That is precisely why the power reserve of the 2609.NA is no less than forty-two hours, whereas a watch with a plain spiral spring manages thirty-six.

The S-shaped mainspring uncoiled, showing its reverse-curved form
The S-shaped (reverse-curve) mainspring. Pre-forming the spring evens out the stress along its length, storing more energy and releasing it steadily — the reason a 2609.NA runs at least 42 hours where a plain-spring movement gives 36.

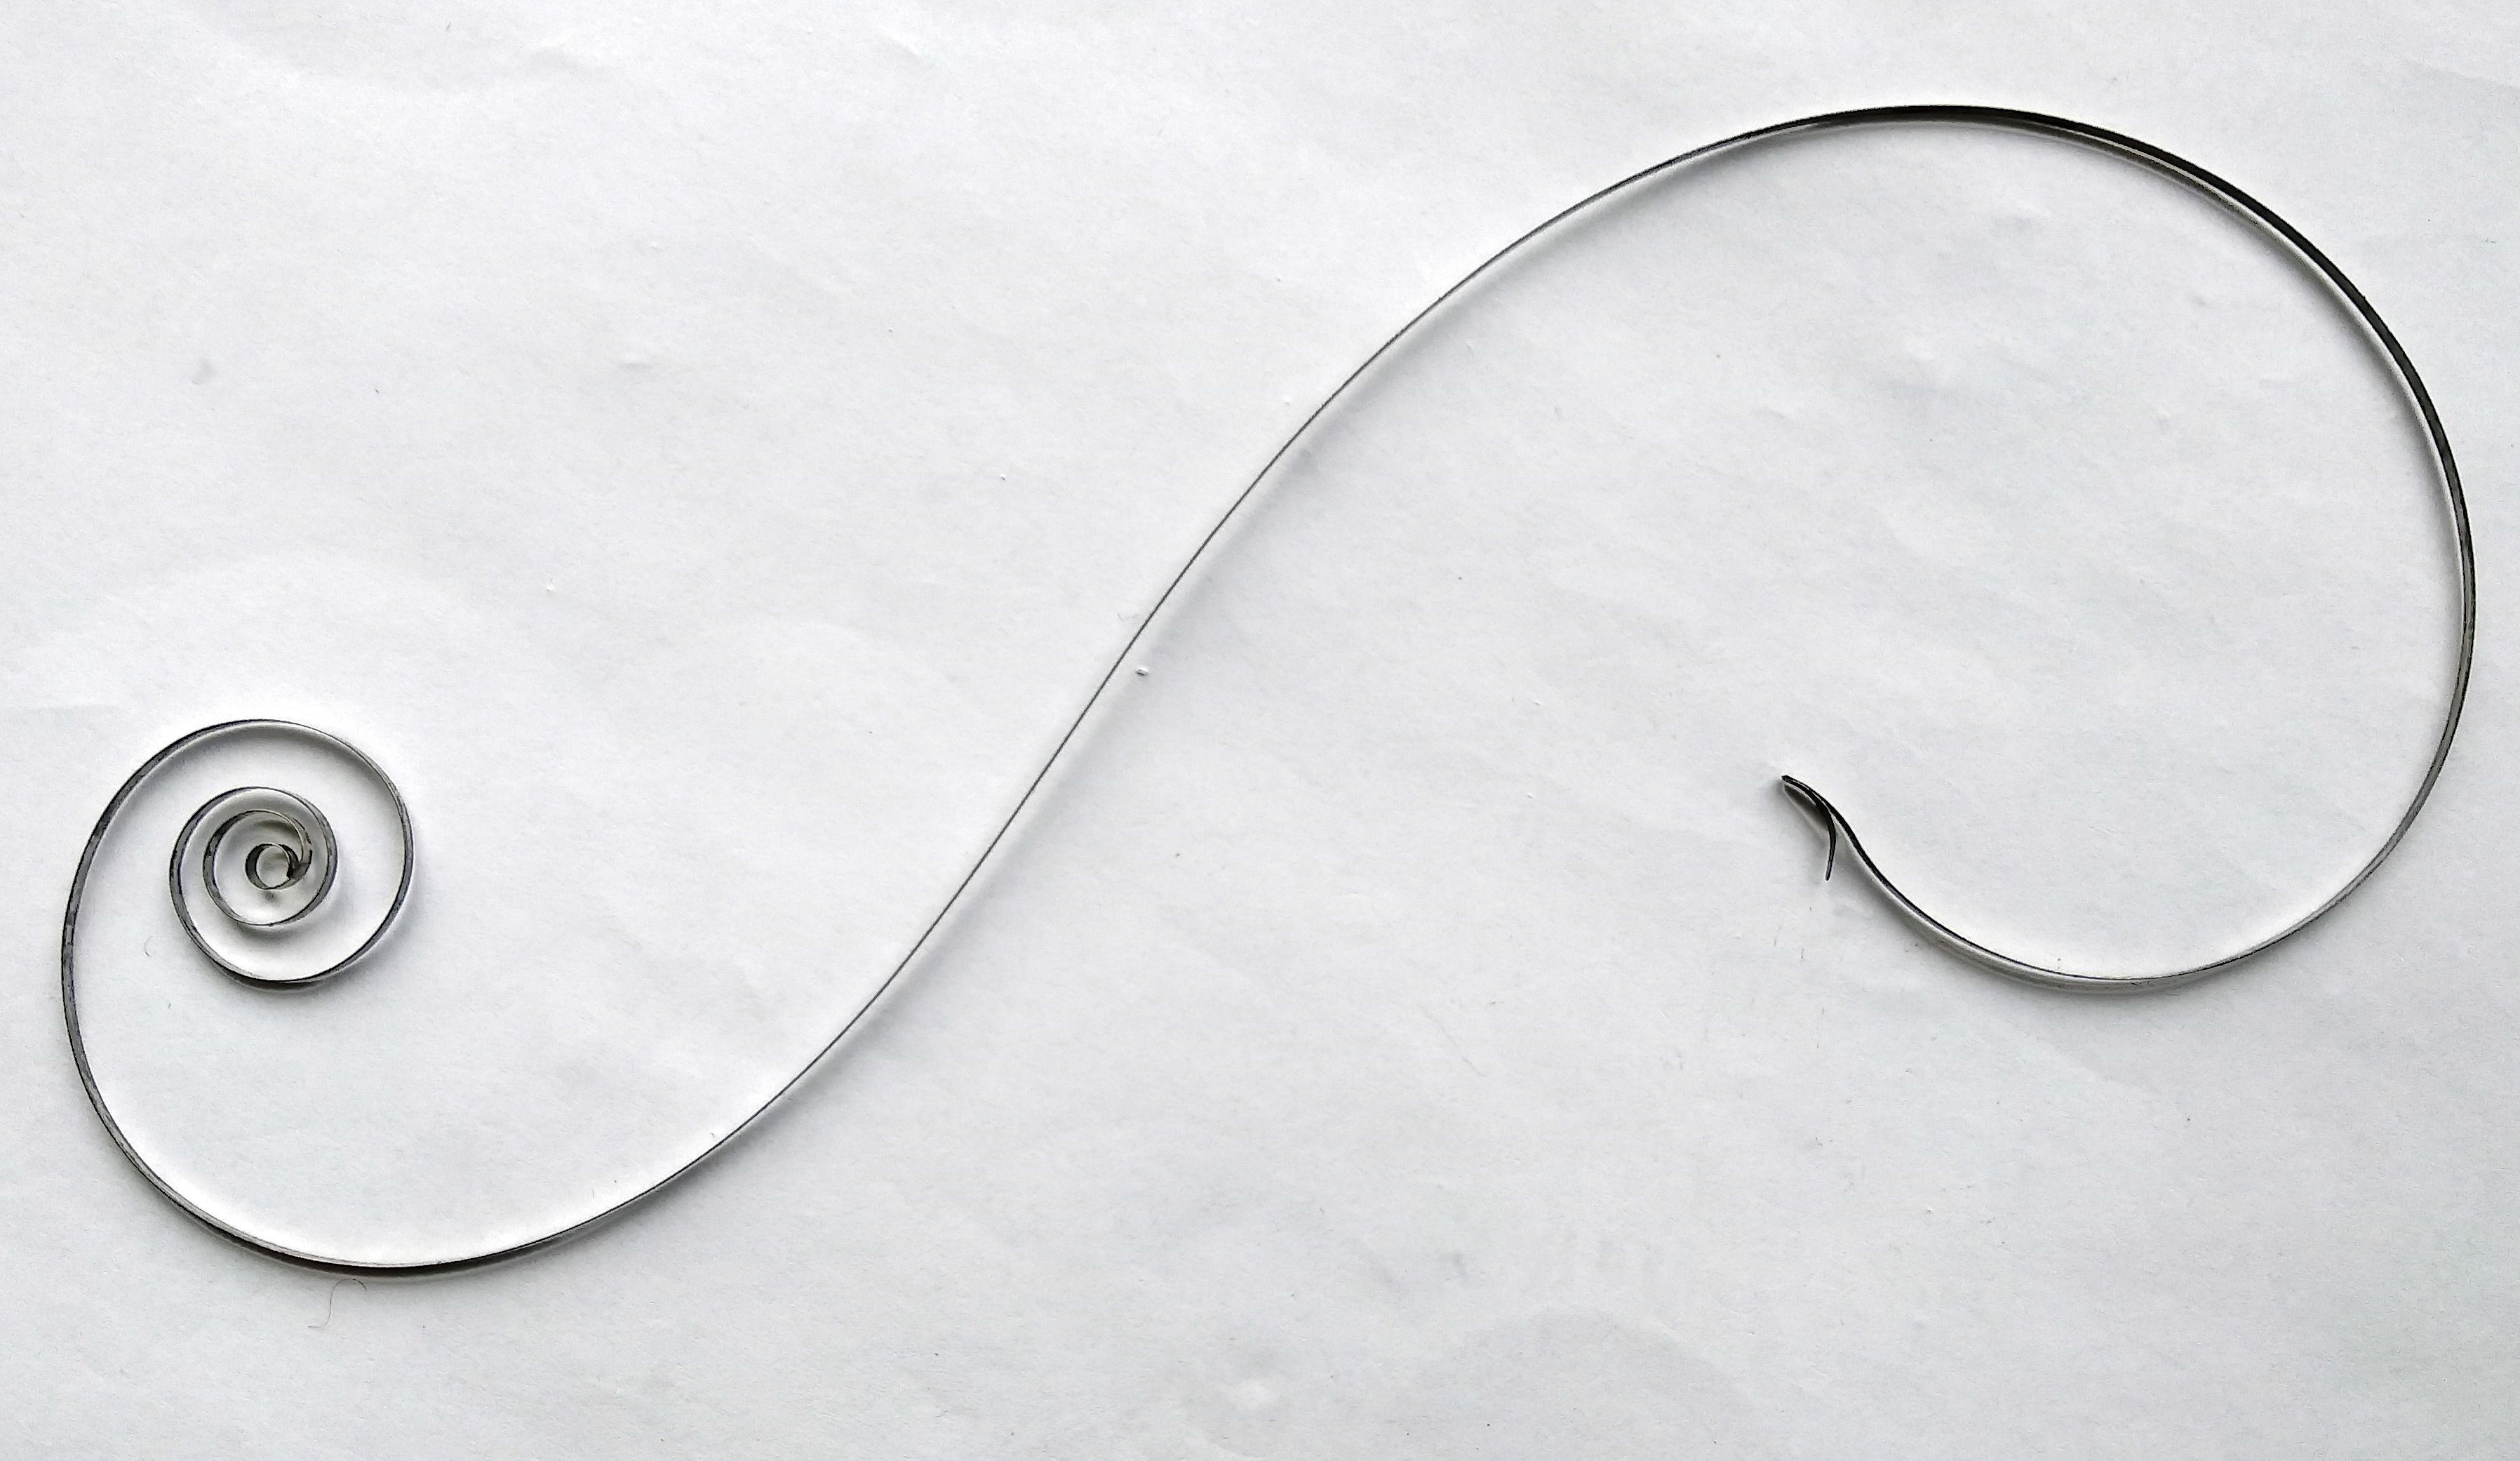
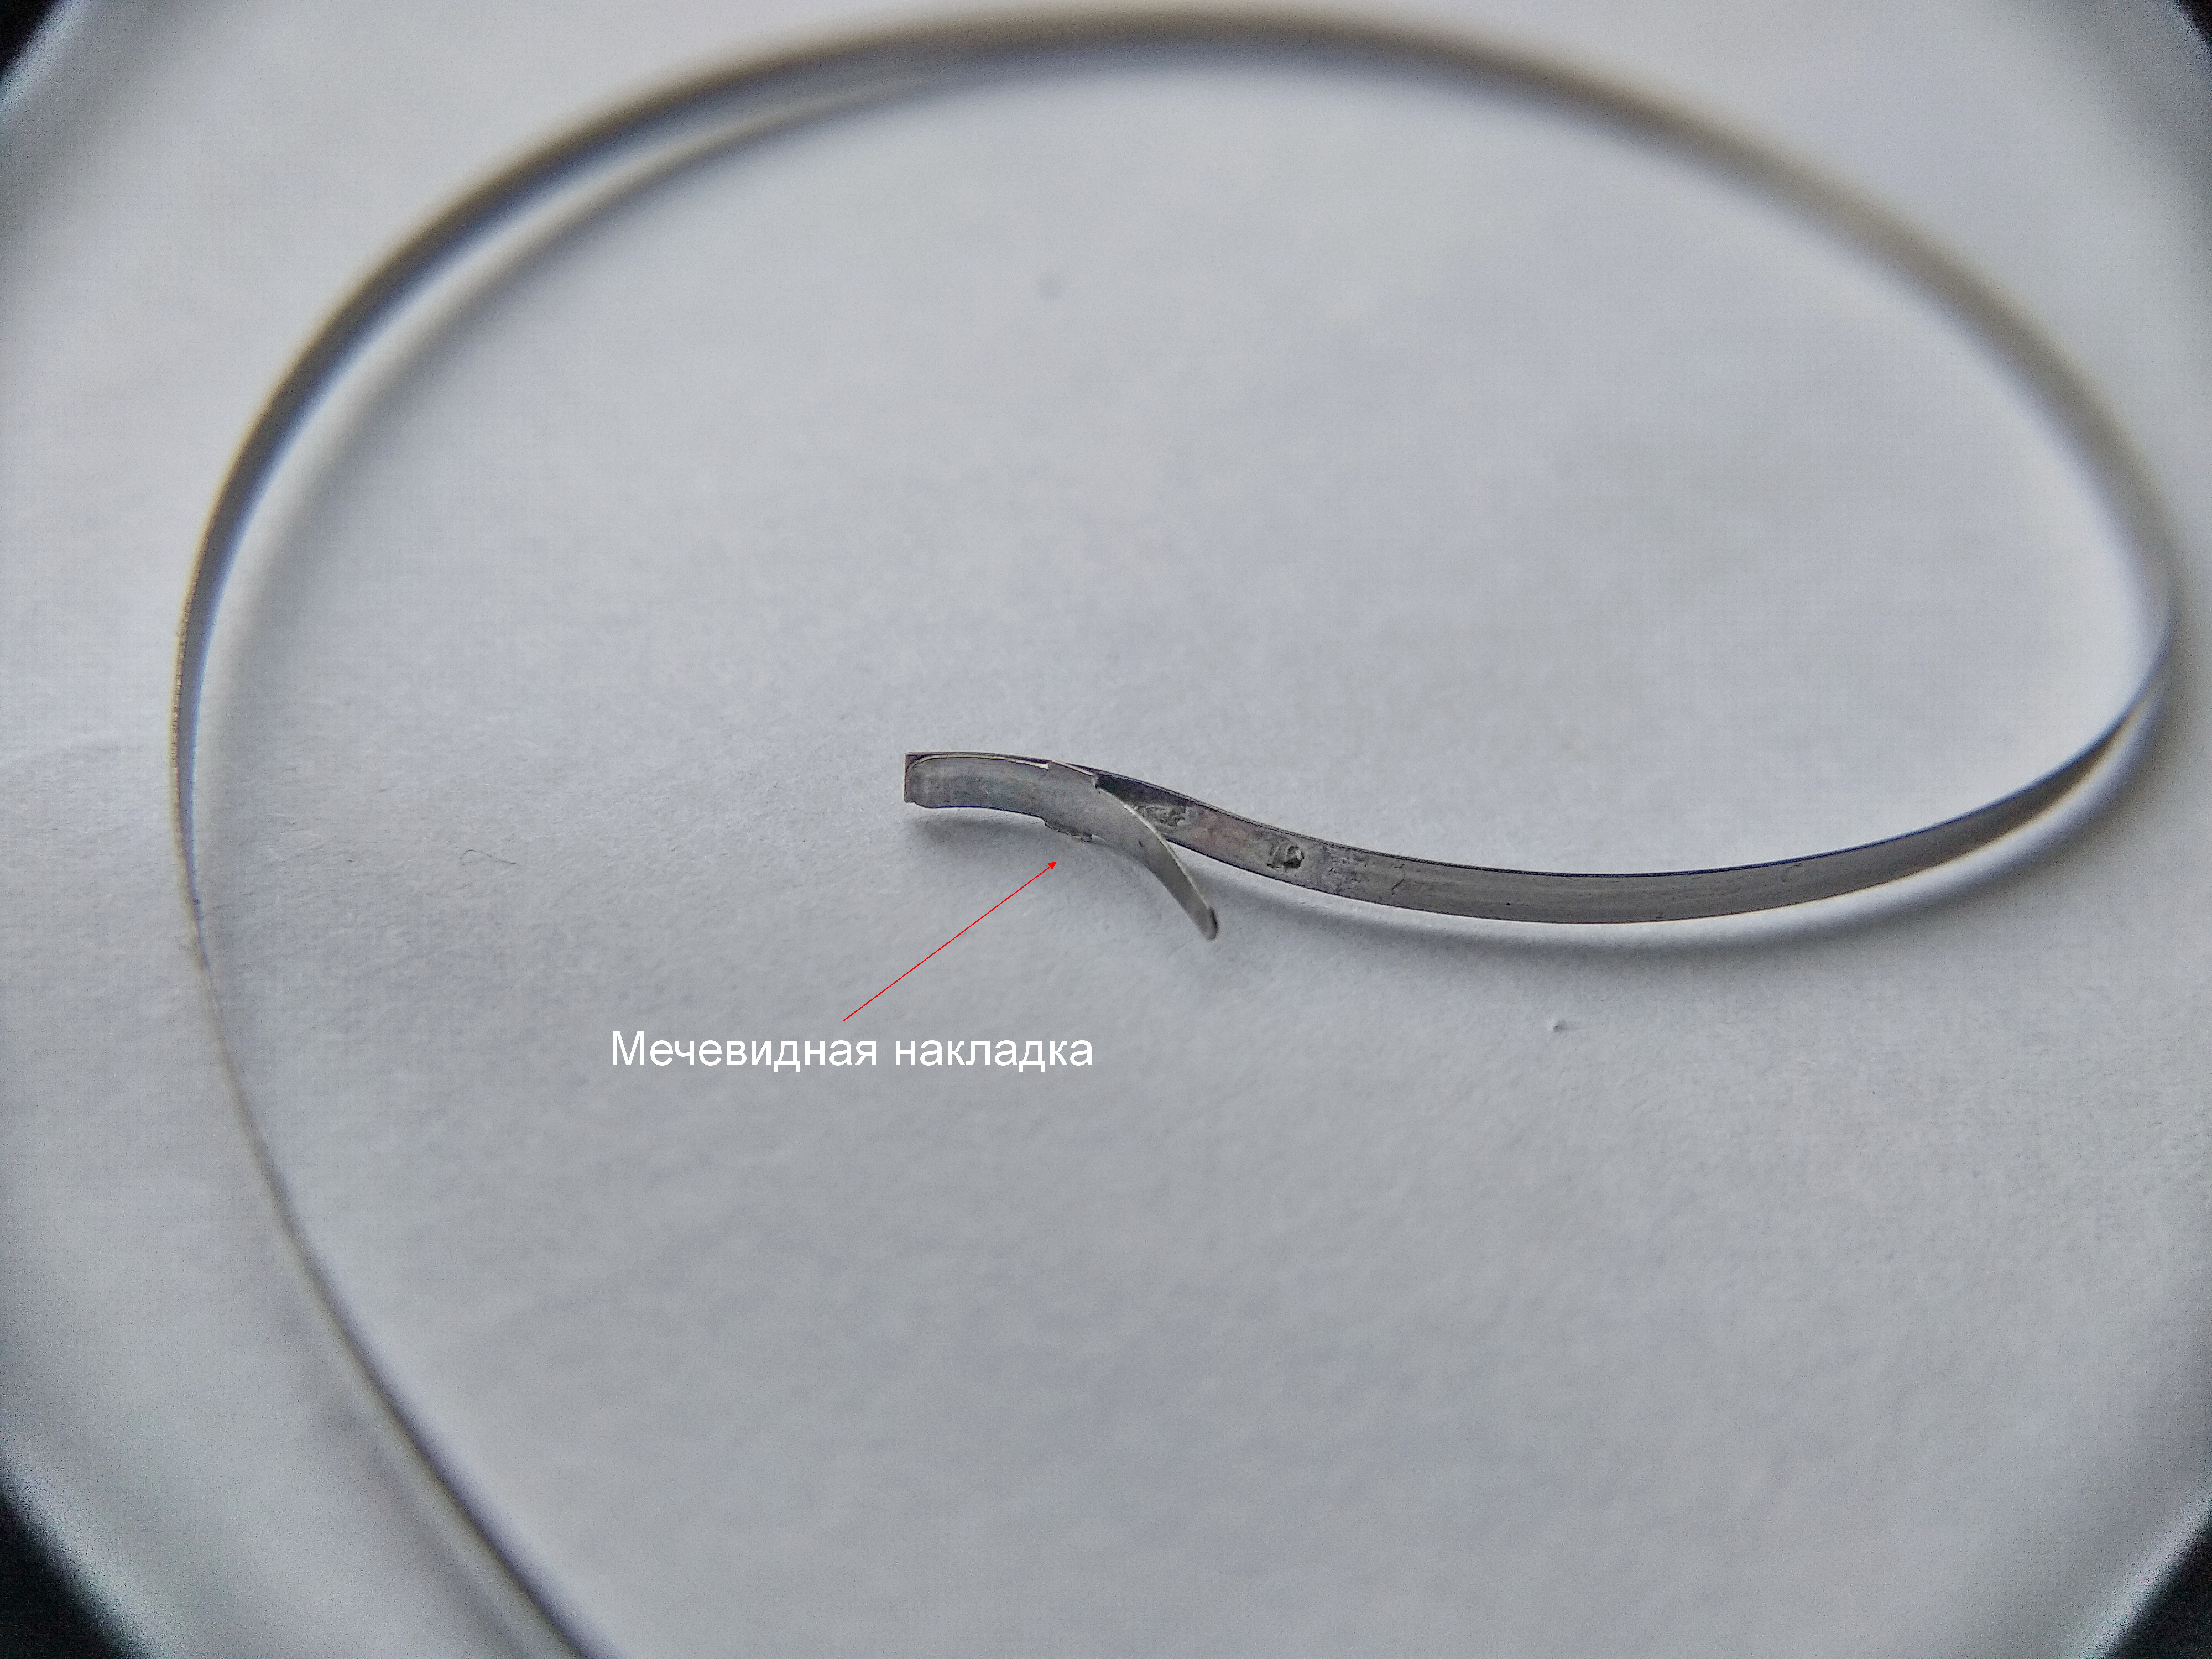
This is how the long, outer end of the spring is made. Before us is the so-called sword-shaped brace. See how it resembles a sword with a blade and a guard. The shoulders of the "guard" engage slots cut in the barrel and its cover. That is how the spring is anchored to the barrel at the long end. In addition, at full wind this fitting prevents us from over-stressing the spring, gently limiting the force — we feel it as a soft stop when winding fully home. Were it otherwise, we would tear the anchorage. This is how the spring is held in a manually wound watch. In automatics the spring slips deliberately along the barrel wall, so the rotor does not bend it endlessly and break it; automatics even have a special lubricant for the spring's outer coil.

Outer end of the mainspring fitted with a sword-shaped bridle that engages the barrel wall
The outer end carries a "sword-shaped" bridle whose shoulders lock into slots in the barrel and cover. In a hand-wound movement this fixed anchorage holds firm yet yields with a soft stop at full wind, protecting the spring from over-stress.

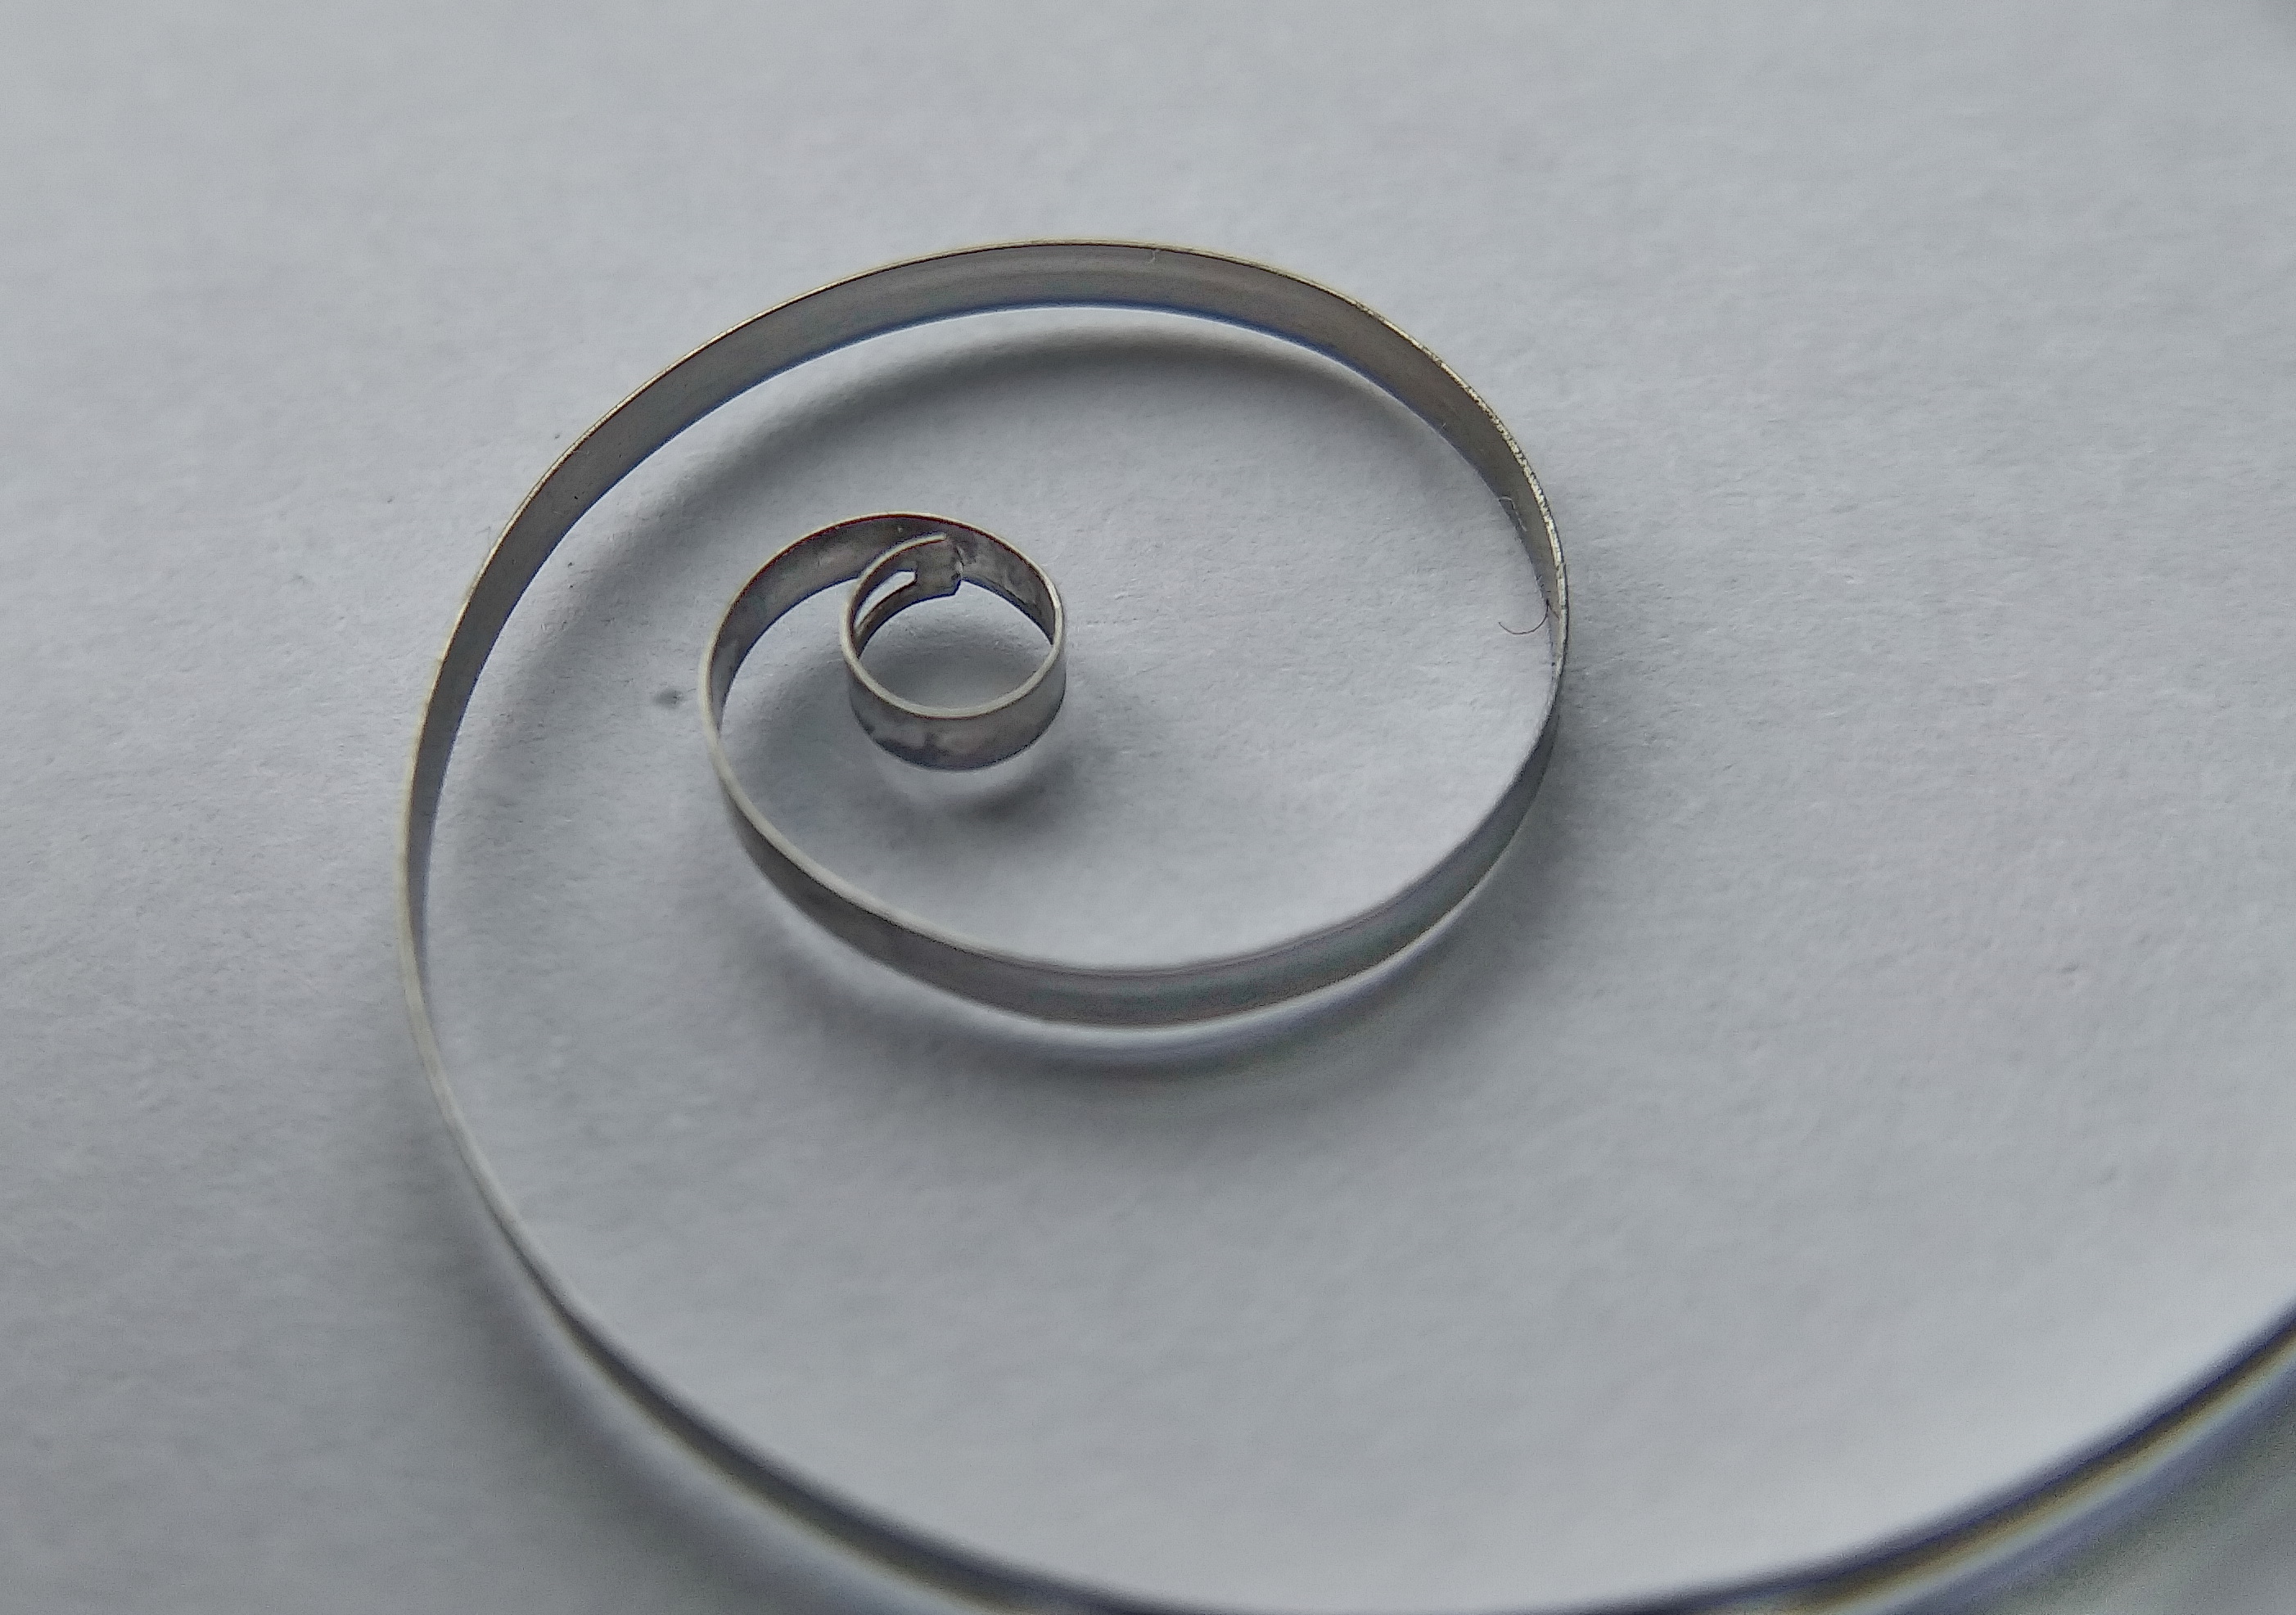
And this is how the spring looks at the short end. You can see the loop that hooks over the tooth of the arbor.

Inner end of the mainspring with the loop that hooks onto the barrel arbor
The inner coil terminates in a loop that catches the arbor's hook — the spring's anchorage at the hub.

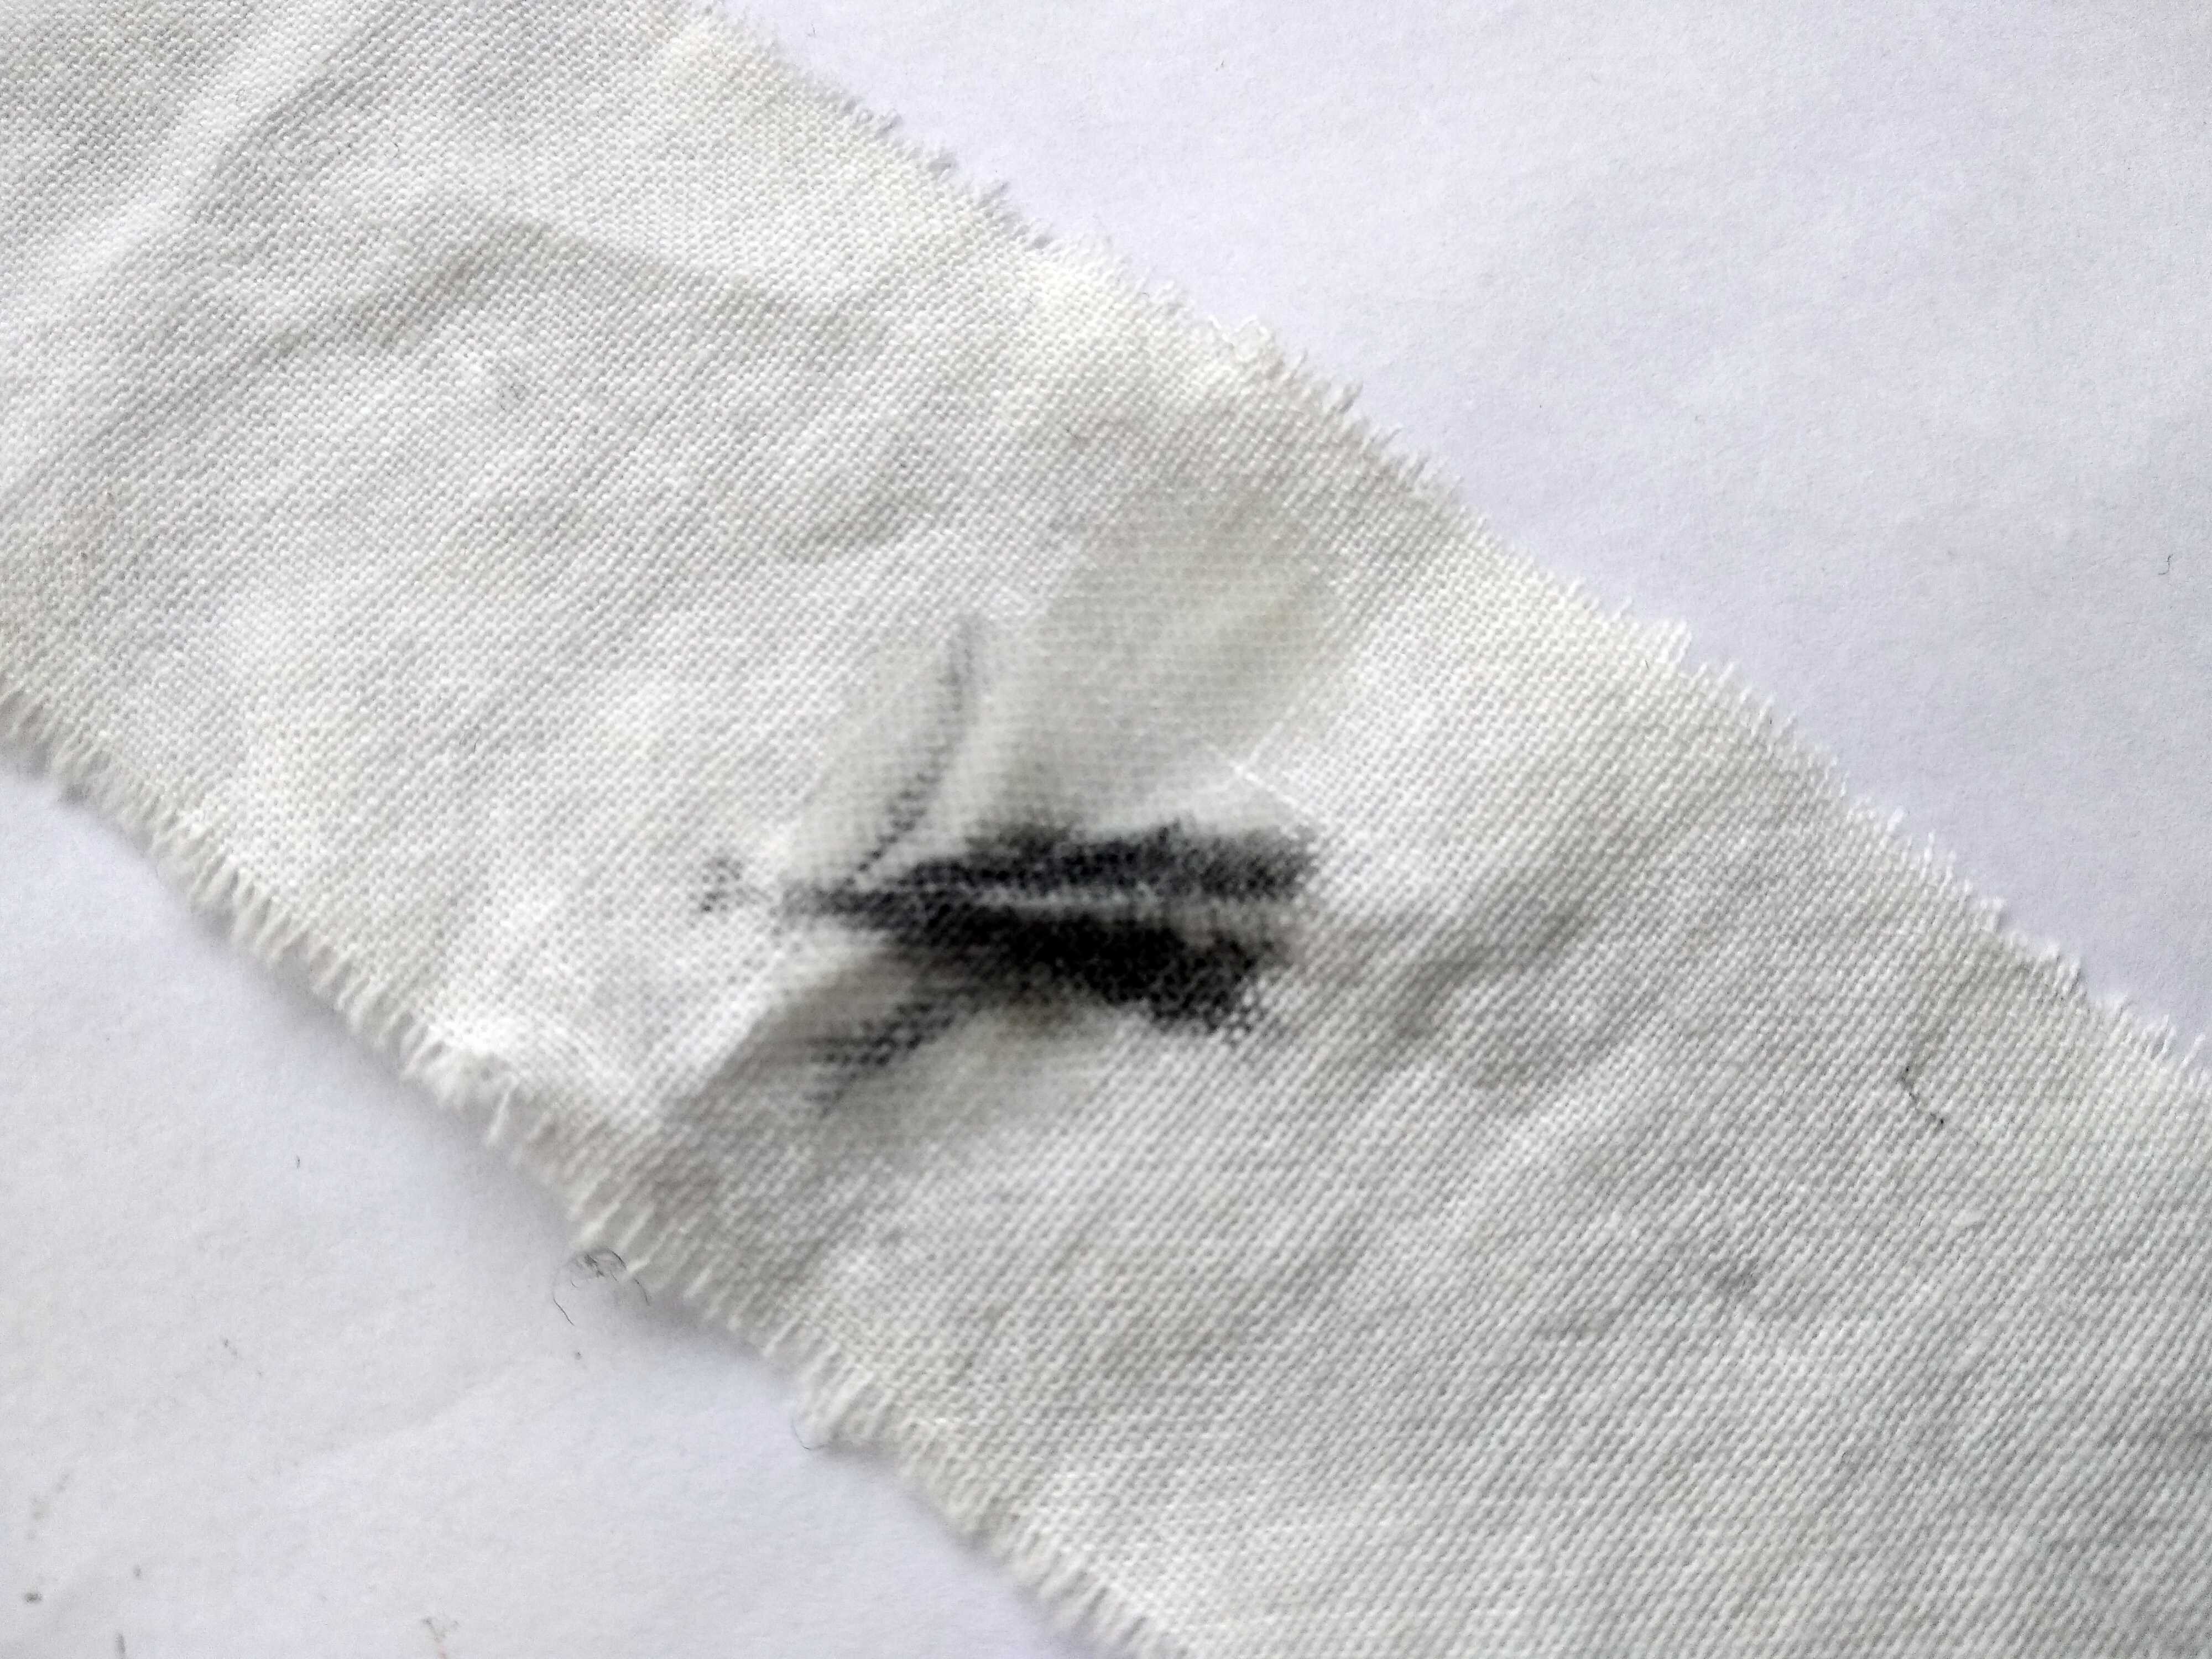
A mainspring removed from its barrel is not washed in benzine. It is wiped with an oiled rag. Here is the result of that wiping. At the same time we carry out a so-called "stress relief": the spring weakens with age, so we bend it gently the other way, restoring its former strength and removing metal fatigue. And one more thing — the spring must never be handled with bare hands. If sweat is left on it, it will rust and snap. So work with a spring either with a special winder or in gloves. At a pinch, simply wash your fingers in benzine and oil them lightly — but only when there is truly no other option. And be sure to protect your eyes before opening the barrel. Put on glasses. Otherwise, sooner or later… these springs do leap out, and for some reason they seem to like eyes best of all.

Mainspring being wiped clean with an oiled cloth rather than washed
The spring is cleaned by wiping with an oiled cloth — never bathed in benzine — and gently reverse-bent to relieve fatigue. Bare-handed contact invites rust, so gloves or a winder are mandatory, as is eye protection.

Well then. What next? "We scrub and scrub the chimney-sweep until the sweep is clean!" Exactly like the parts on this napkin.

Cleaned movement parts drying on a white napkin
The cleaned components, drying on a tissue — the strip-down complete and every part ready for inspection and reassembly.

Reassembly: The Barrel First

We begin reassembly of the movement with the barrel. Before us is the clean spring. Before fitting it we will straighten it once more and relieve its stress. Here are the cleaned barrel and arbor. Gentlemen, that black you see on the parts is not dirt — for some reason the camera renders polishing marks that way against a bright background. So: we put on gloves, lead the lug of the sword-brace into the slot of the barrel, and wind the spring into the barrel clockwise. And that is all — the Queen is in her castle!

Cleaned S-shaped mainspring being wound by hand into the barrel with gloves on
Reassembly starts at the motor: gloved hands lead the bridle into its slot and wind the spring home clockwise. What looks like grime is only the camera reading polish marks against the bright barrel.

We close the barrel cover, again taking care to align the cover's slot with the lug of the sword-brace.

Barrel cover being fitted, with its slot aligned to the mainspring bridle
The cover is seated with its slot indexed to the bridle's shoulder, completing the spring's outer anchorage between barrel and lid.
The fully assembled and closed mainspring barrel
The barrel closed and complete, the serviced spring sealed inside and ready to drive the train.

Rebuilding the Keyless Works

And we move on to assembling the keyless works. Here everything goes quickly. We slip the castle clutch onto the transmission stem.

Castle clutch being fitted onto the setting stem during keyless reassembly
Keyless reassembly begins with the castle (sliding) clutch placed onto the stem — the part that toggles between winding and hand-setting.

We set the parts in place…

Keyless-works levers and springs being installed onto the plate
The remaining keyless components — levers and detent spring — are laid into position.

…and cover the mechanism with a brand-new cover-spring.

New keyless cover spring fitted in place of the rusted original
A fresh cover-spring replaces the rust-eaten original, securing the keyless works under a clean, sound retainer.

The Fast Side Goes Back Together

We set about assembling the fast side, beginning with the installation of the center wheel. We oil the center jewel with MBP-12.

Center jewel being lubricated with MBP-12 oil before the center wheel is fitted
The fast-side rebuild opens with the center wheel. Its jewel receives a measured dose of MBP-12 — the watch oil reserved for the most critical bearings.

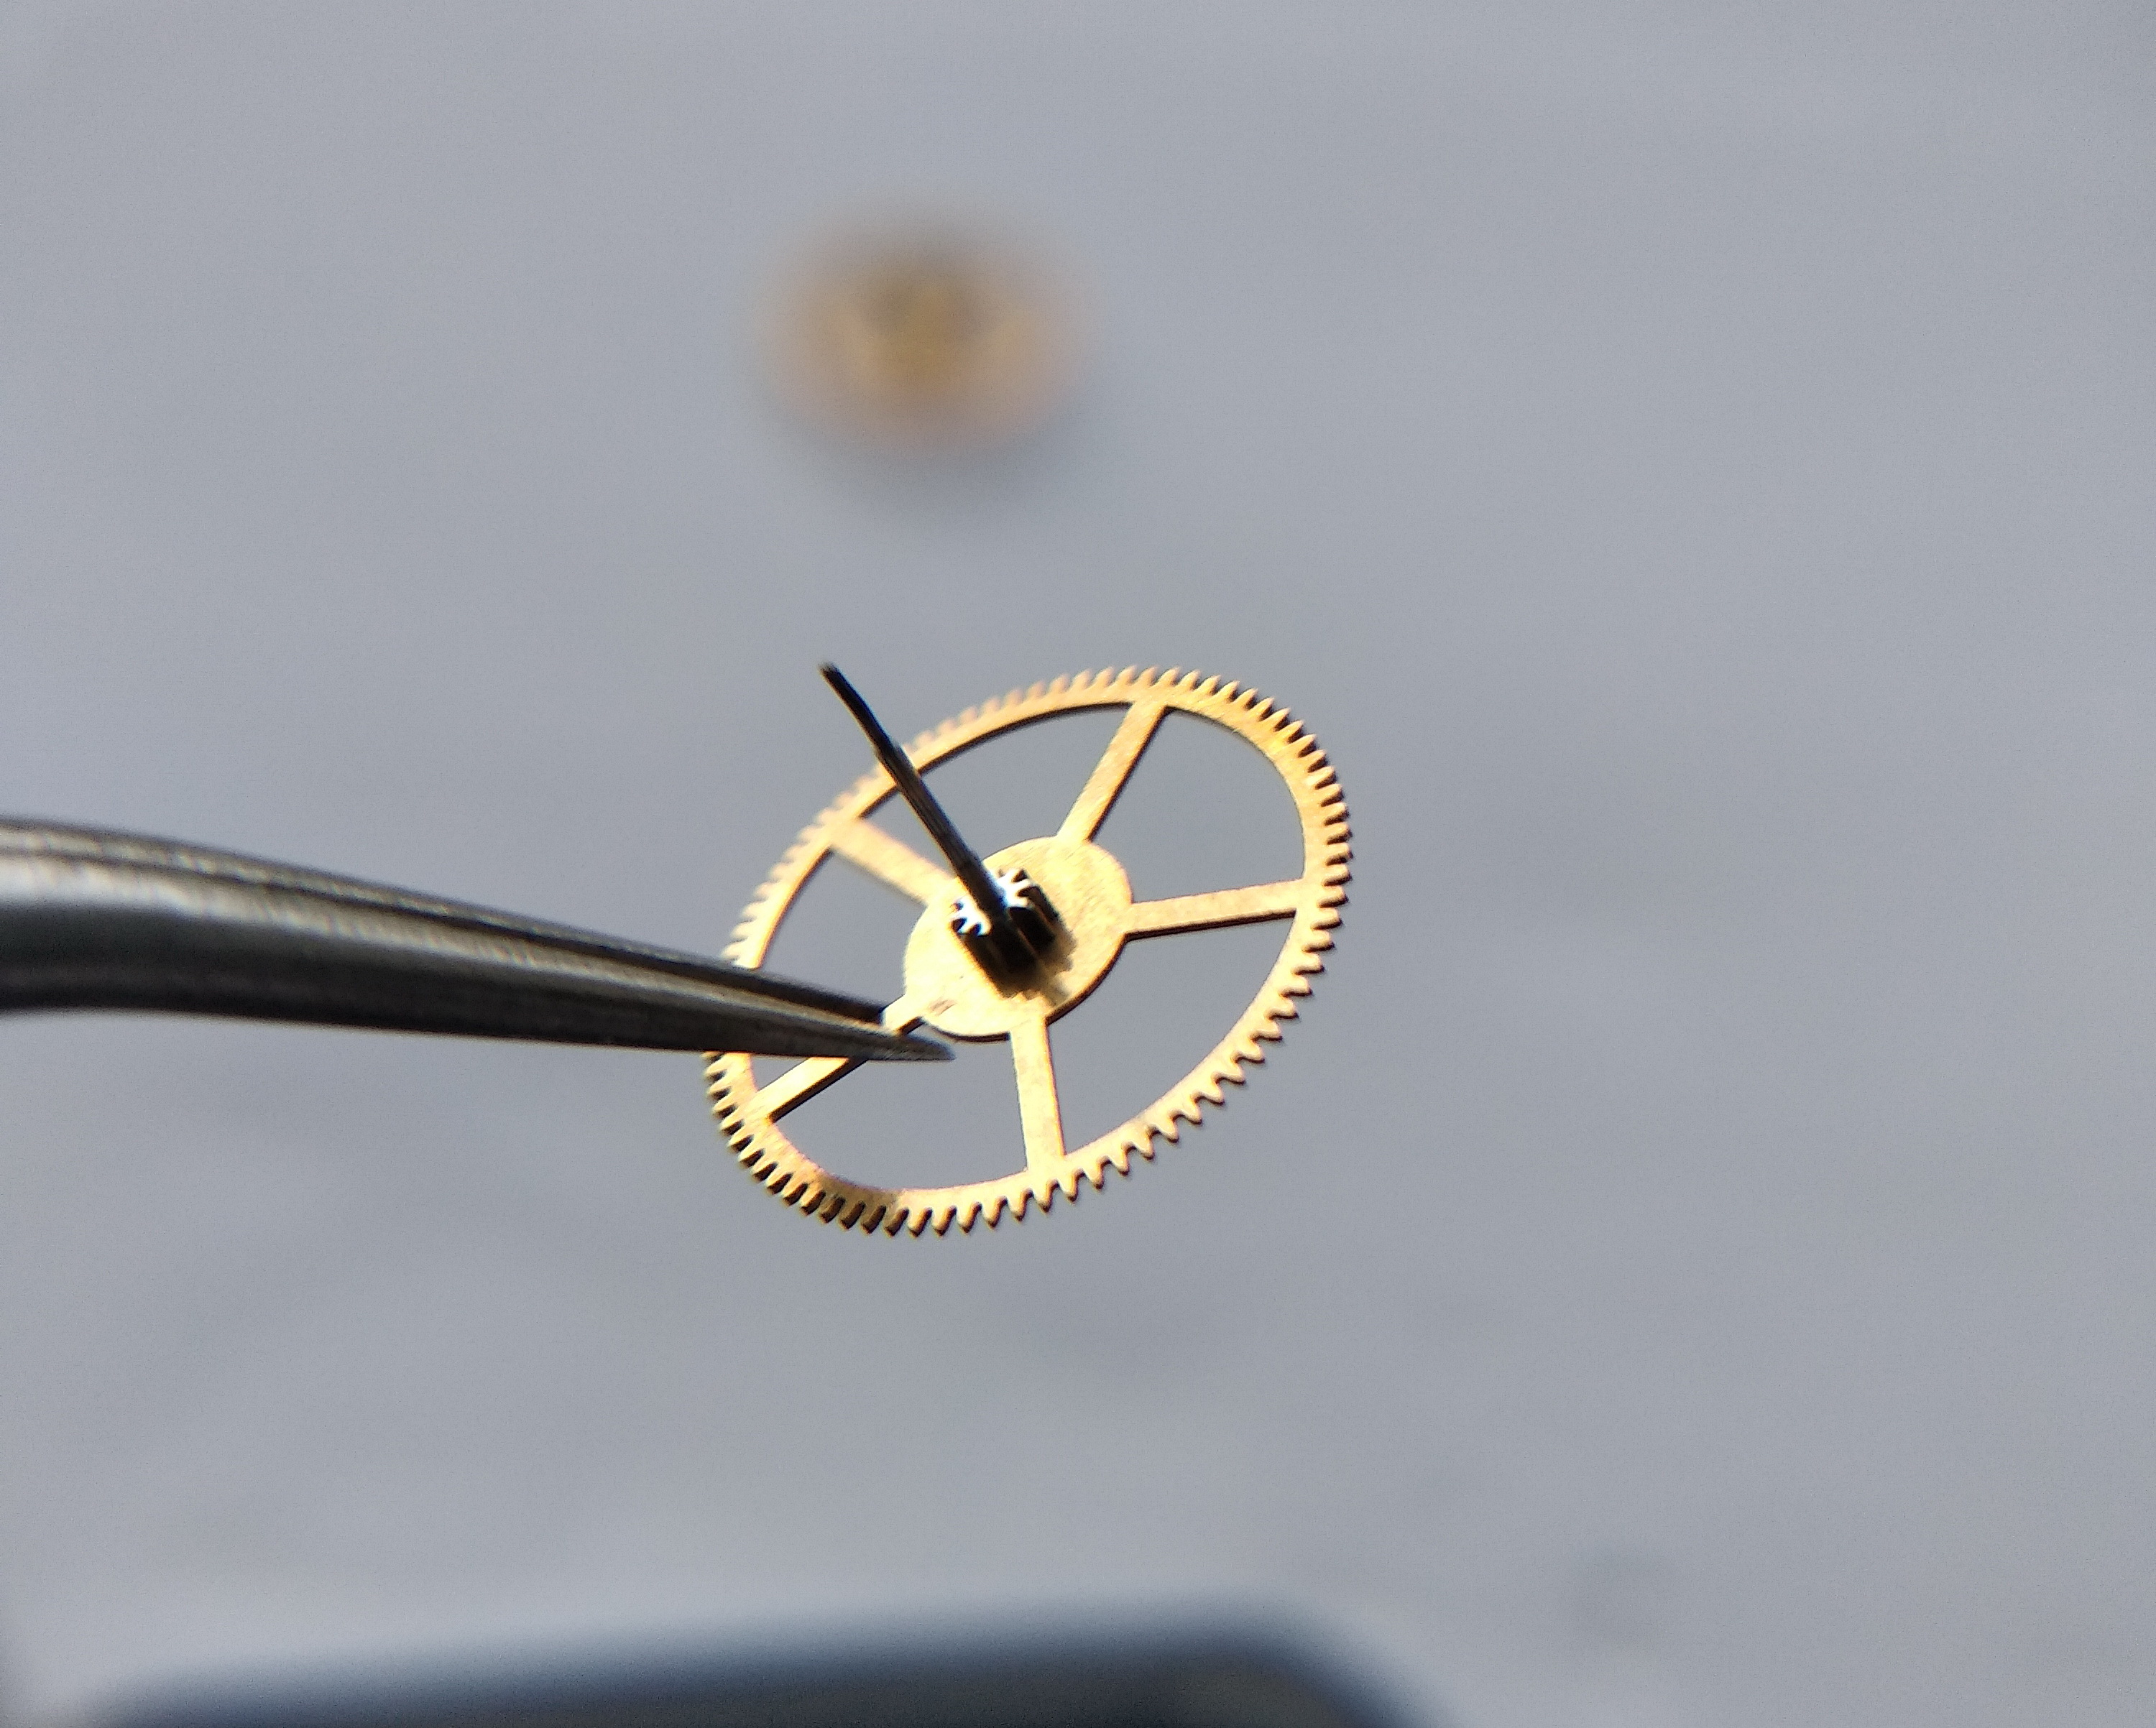
We take the center wheel by a spoke with tweezers…

Center wheel held by a spoke with tweezers before placement
Gripping the wheel by a spoke keeps the pivots and teeth untouched as it is maneuvered into place.

…and, by the way, a jewel is set into the boss of this wheel. The pivot of the seconds wheel turns in that jewel.

Jewel set into the boss of the center wheel, bearing the seconds-wheel pivot
A jewel is fitted into the center wheel's boss; it carries the seconds-wheel pivot — part of how this caliber supports a central seconds hand.

We set the center wheel in place, oil the jewel in the bridge, and cover the center wheel with the bridge. We check its freedom. Sometimes it has play in the jewels, or runs tight because the jewels have spread apart or closed up in the bridge or plate. Then we move the jewels in the required direction. Here there is no need for that. All in order.

Center wheel covered by its bridge and checked for free rotation
The center bridge goes back on and the wheel's end-shake and freedom are verified. No jewel adjustment was needed — the bearing ran true straight away.

We install the barrel with its serviced spring. Before fitting it, we oil the seat of the arbor in the main plate.

Barrel being installed after the arbor seat in the plate is oiled
The reassembled barrel returns to the plate; the arbor's lower seat is oiled first so the motor turns smoothly from the outset.

Here is the clean barrel bridge with its hard-alloy insert.

Cleaned barrel bridge showing the hard-alloy insert for the arbor
The barrel bridge after cleaning, the hard-alloy arbor insert clearly visible — the wear-resistant substitute for a jewel that has lasted half a century.

We install it, oil the arbor and the insert, and fix the bridge with the two outer screws.

Barrel bridge fitted and secured with the two outer screws after oiling the arbor
The bridge is set down, the arbor and its hard-alloy bushing oiled, and the two short outer screws driven home — the long screw is left for the click.

We fit the click spring of the barrel ratchet…

Click spring being installed at the barrel ratchet
The tiny click spring goes in first — the part most easily lost, so it is handled with deliberate care.

…and then the click itself, securing the assembly with the long screw.

Ratchet click fitted and locked down with the long screw
The click follows, fixed by the long screw that also helps retain the bridge — winding security restored in a single fastening.

Setting the Train and Checking the Run

After this we can install the going-train wheels. Here they are, shown from every angle, ready to be covered by the bridge. The movement is so convenient to assemble that fitting the train takes no time at all. It is enough to lay the bridge in place and nudge the wheels slightly — the pivots find their way into the jewels by themselves. A genuine pleasure. The seconds wheel.

Seconds wheel of the going train shown ready for installation
The seconds wheel, first of the train wheels to go back. Its long, slender pinion is what carries the central seconds hand.
Seconds wheel viewed from a different angle showing its pinion and pivot
The same seconds wheel from another view, its pinion and fine pivot on display before seating.
Seconds wheel shown edge-on, highlighting its arbor length
A further angle on the seconds wheel — the elongated arbor is characteristic of a movement built around a sweep seconds hand.

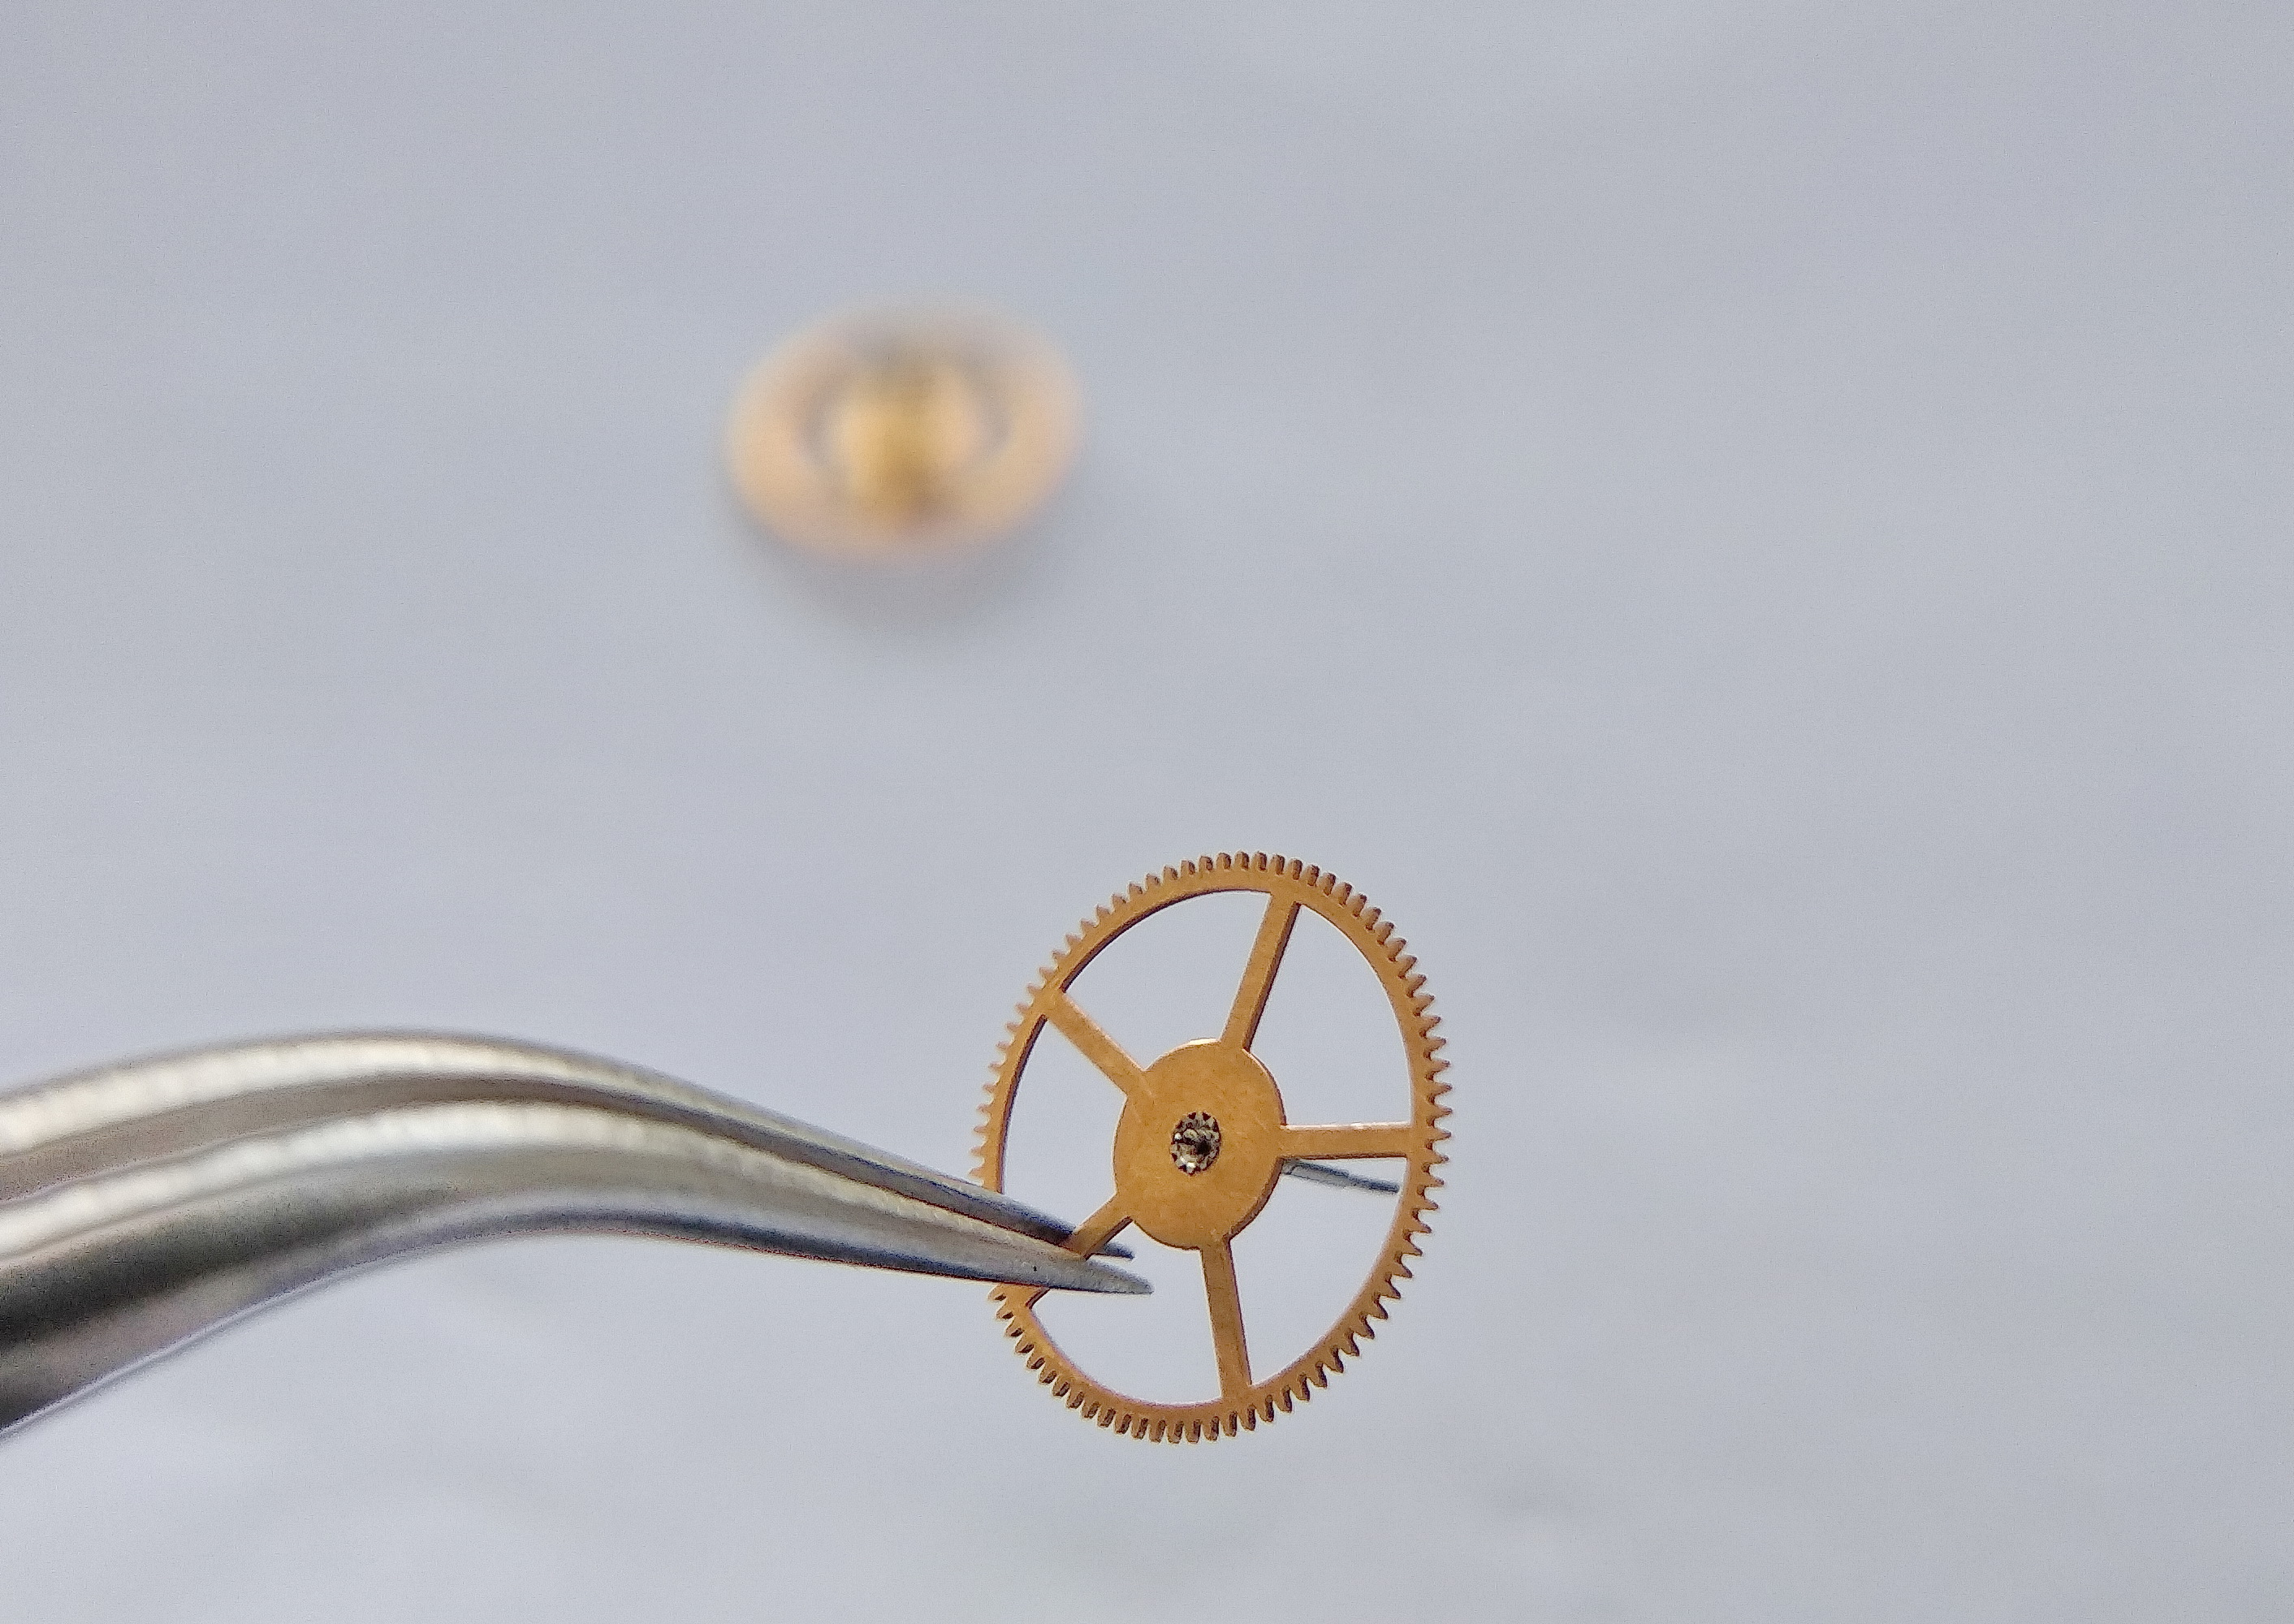
The intermediate wheel.
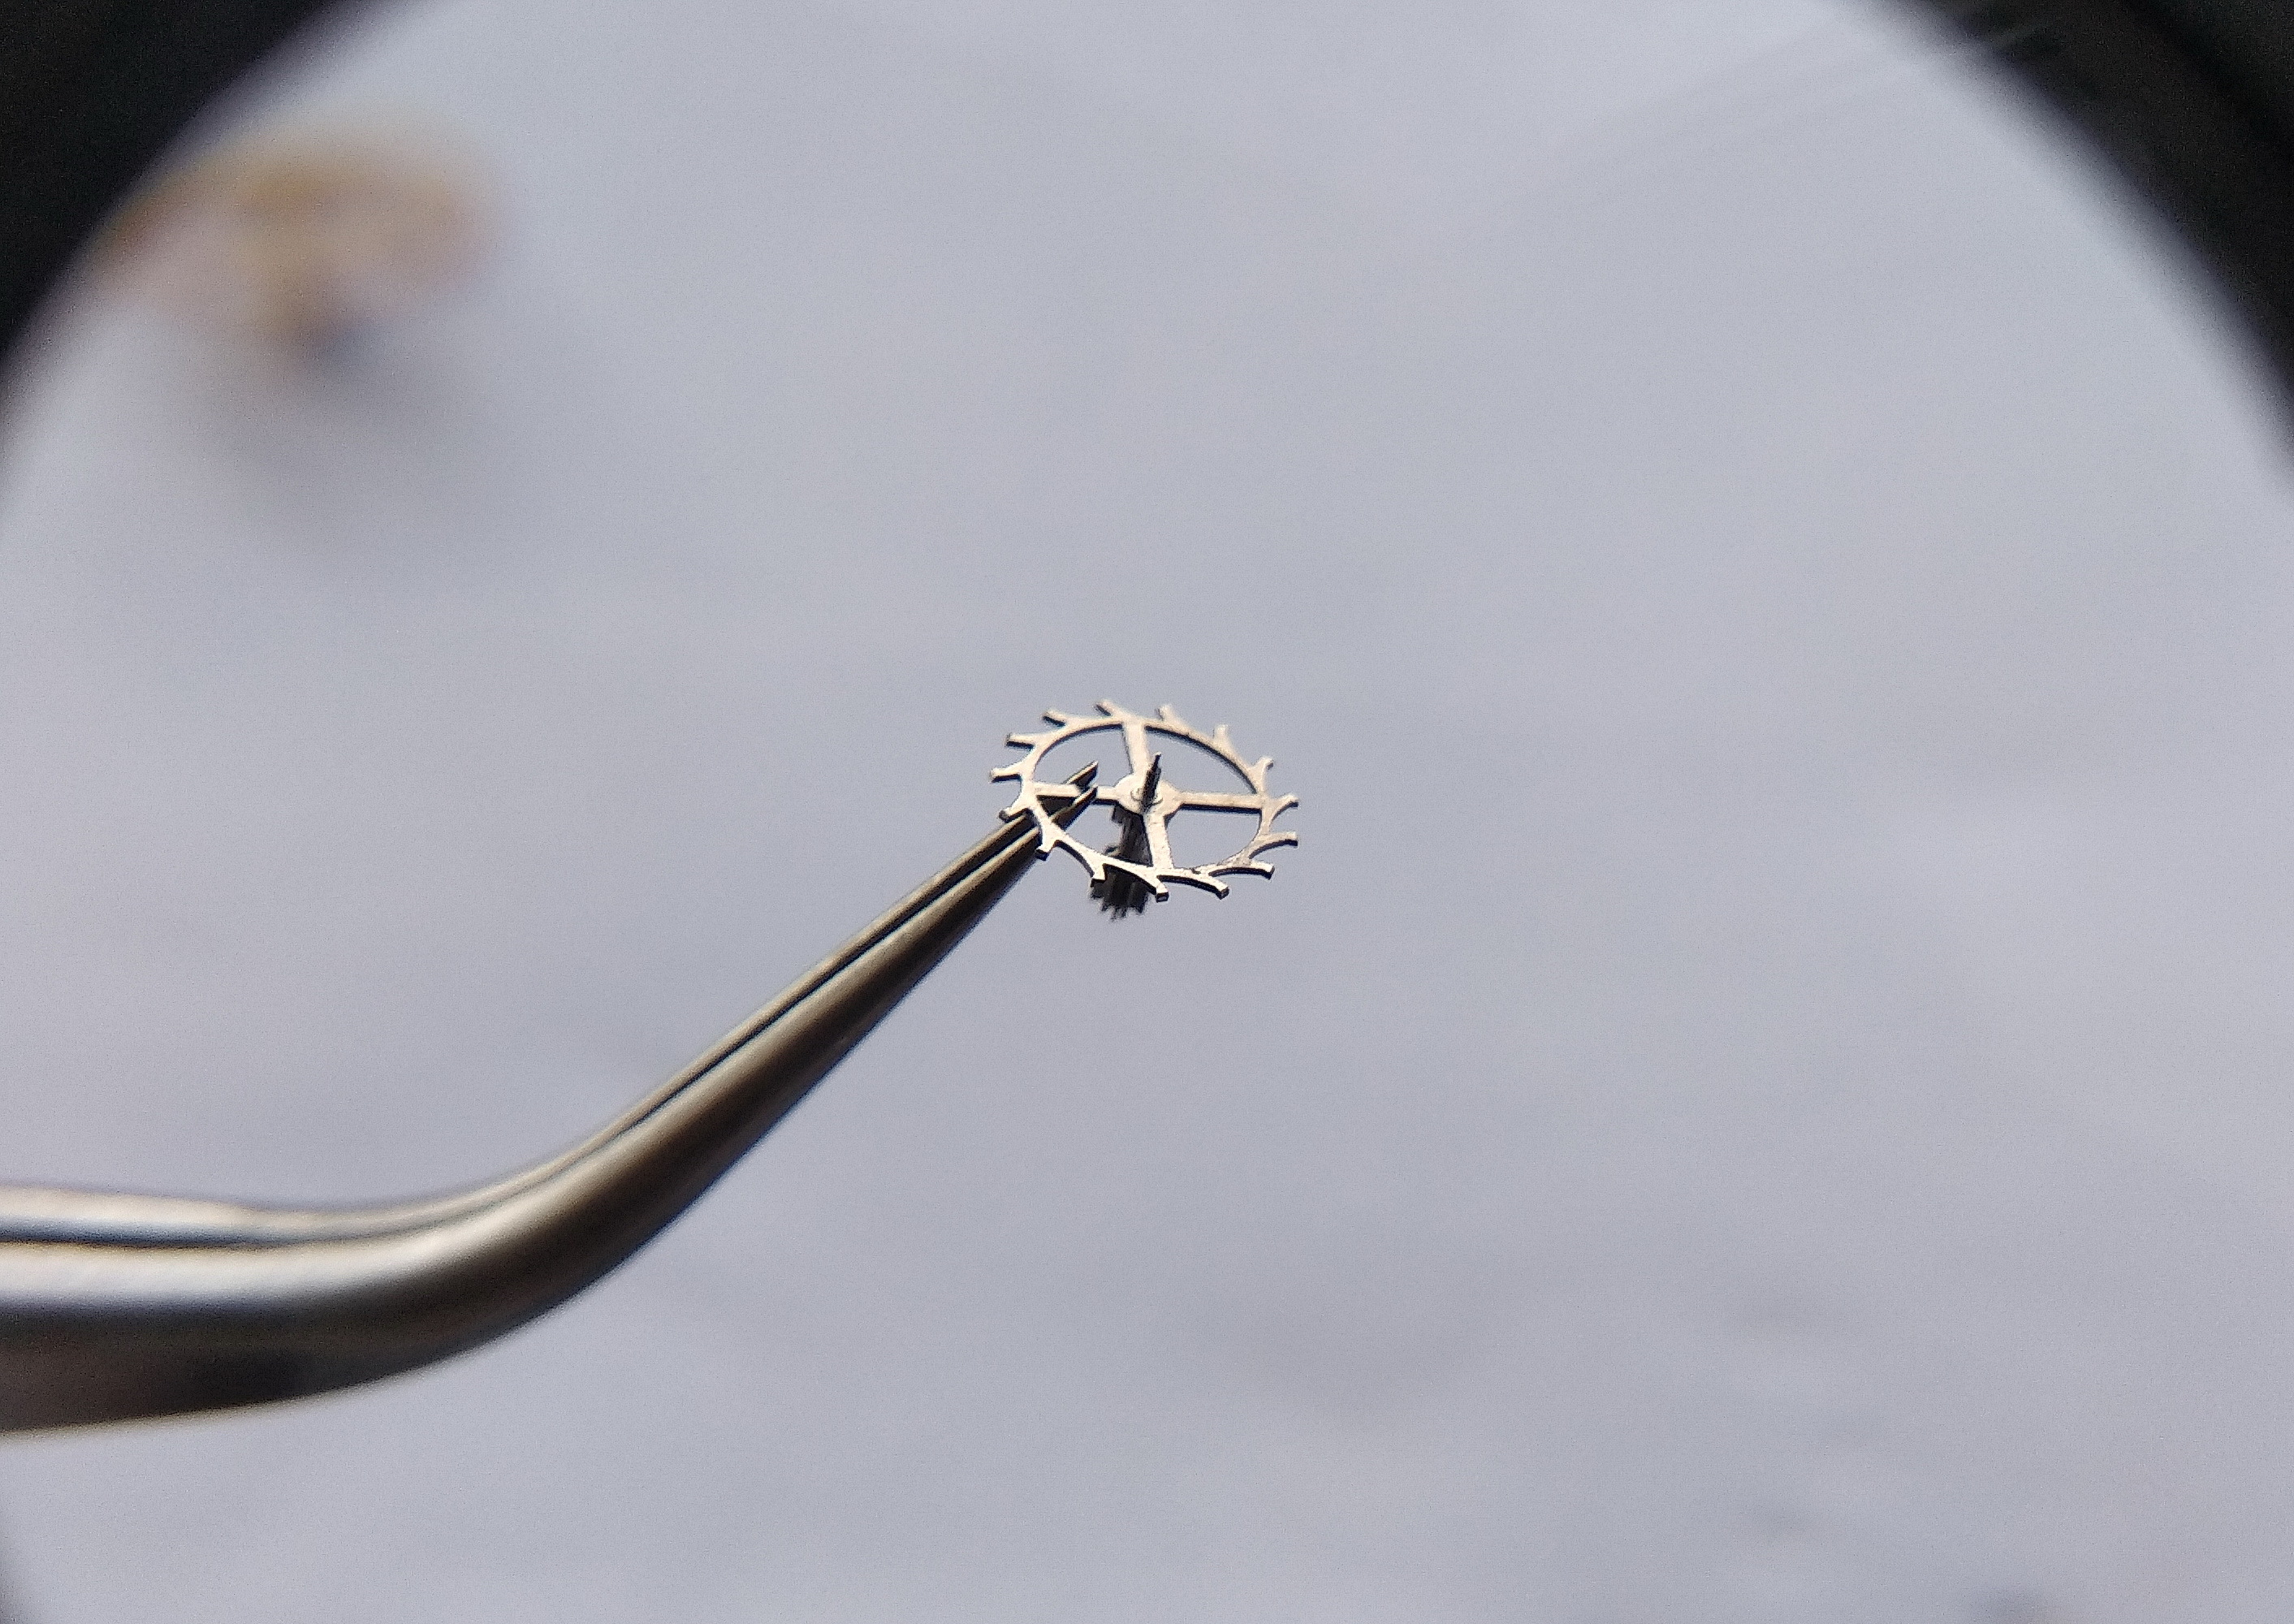
Intermediate wheel of the going train ready to be placed
The intermediate wheel, which couples the barrel's drive into the rest of the train.

The escape wheel.

Escape wheel of the going train shown before installation
The escape wheel — last in the train and the one running in its own shock-protected jewel setting, a rarity at this price point.

The train is assembled. We check the spin-down. On this example it runs nearly ten turns! Excellent. We savour our good fortune and…

Assembled going train under its bridge, spinning freely during a spin-down test
Train and bridge back together, the spin-down test gives nearly ten free rotations — an excellent indicator of clean pivots and correctly seated jewels.

The Motion Works Reassembled

…we set off to assemble the slow side. Here everything is quick and simple.

Movement turned back to the dial side to rebuild the motion works
Back to the dial side for the motion works — a fast, untroubled stage of the rebuild.

We install the cannon pinion.

Cannon pinion being refitted onto the center post
The cannon pinion is pressed back onto the center arbor, setting the friction coupling that drives the minute train.

We assemble the wheel work…

Motion-works wheels being fitted on the dial side
The minute and setting wheels are laid back into the dial-side works.

…and cover it with its plate.

Cover plate fitted over the reassembled motion works
The retaining plate caps the motion works, completing the dial side.

Pallet Fork, Balance Bouchons, and the Troublesome Lyre

We return to the fast side and install the pallet fork. We do not oil it!

Pallet fork being refitted to the fast side, left unlubricated
The pallet fork goes back deliberately dry — oil on the stones would soften the impulse and rob the balance of amplitude.

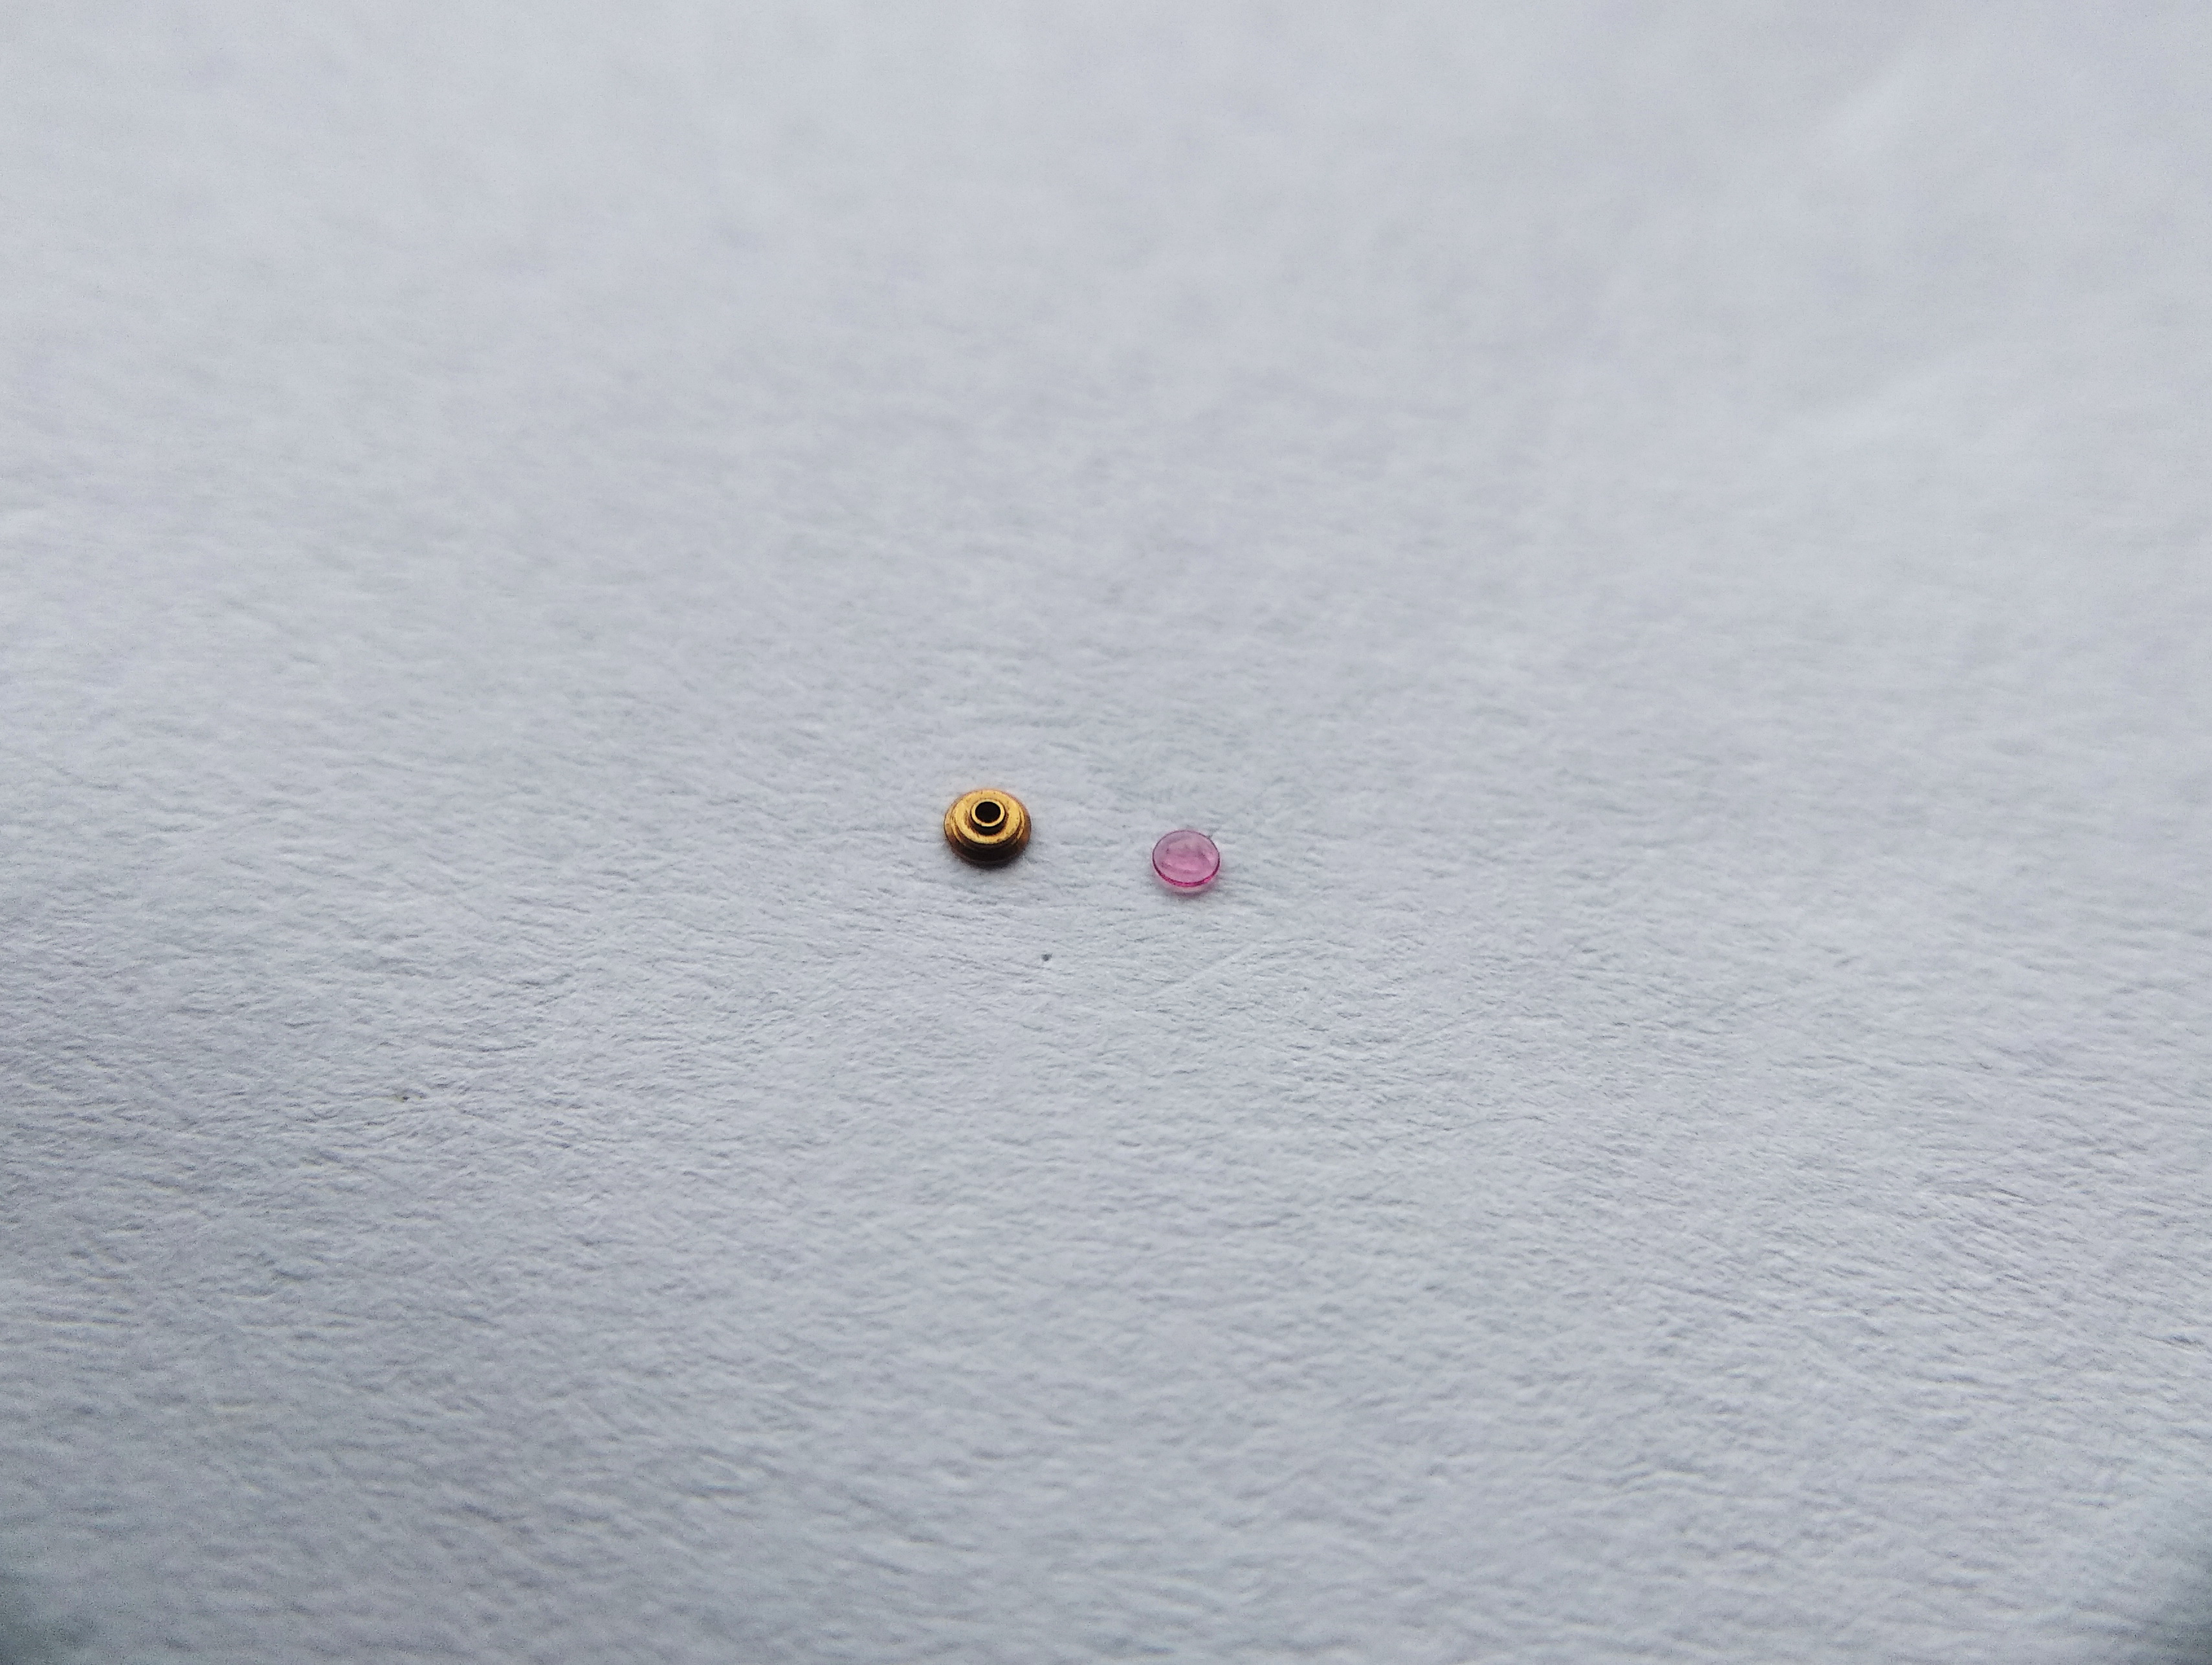
The balance bouchons, however, should be serviced — washed and oiled with a small drop of MBP-12. A drop just this size, no more.

Balance shock-setting bouchon being oiled with a tiny drop of MBP-12
The balance bouchons are cleaned and charged with a single small drop of MBP-12 — restraint matters, as an over-filled cap-jewel does more harm than good.

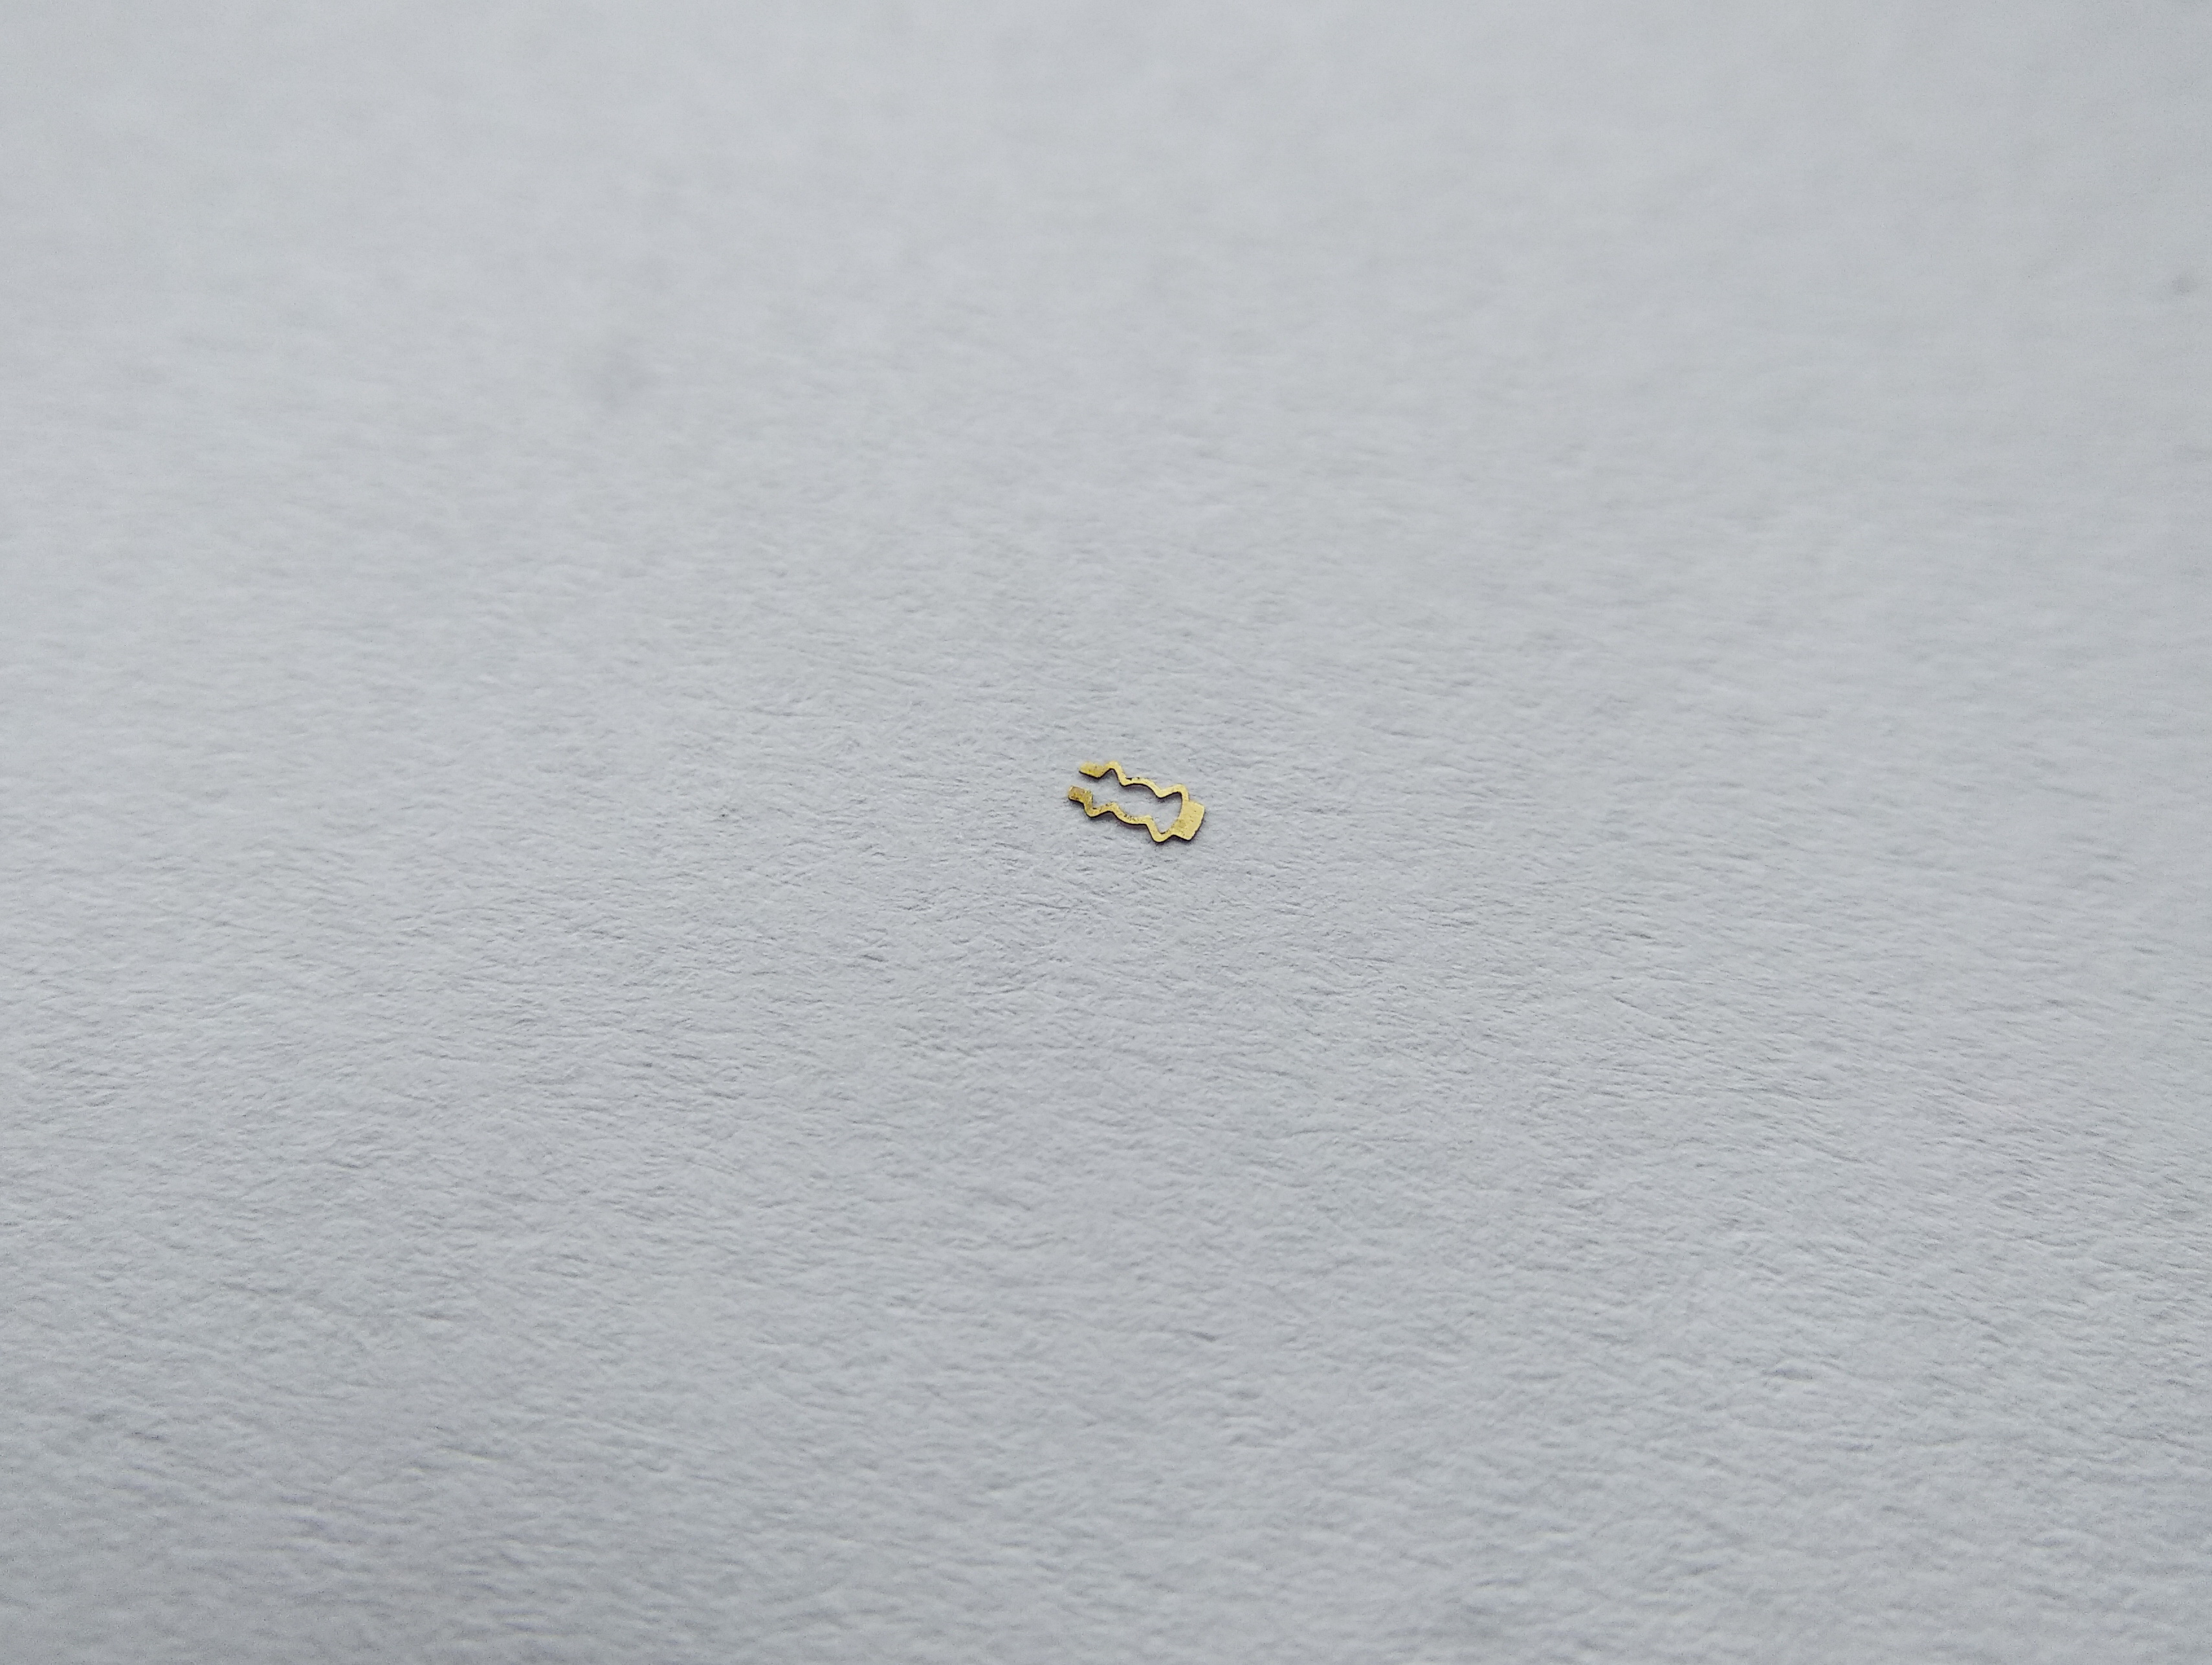
And this is the lyre. If the design of the barrel click can be tolerated — nothing terrible there — then the fact that the lyre springs of the incablocs are in no way captive, and require complete removal when servicing the bouchons, is a clear and vexing oversight by the designers. How many of these little lyre springs have been lost by watchmakers! So: attention, care, and attention again.

Loose lyre-shaped shock spring from the incabloc setting, not captive to the bridge
The lyre spring of the shock setting — entirely loose, not captive. Removing it to service the bouchon is the one genuine design fault of the caliber, and the cause of countless lost springs at the bench.

The bouchon is set in place…

Shock-setting bouchon seated back into the balance jewel housing
The cleaned and oiled bouchon is dropped back into its setting, ready to be locked down.

…and secured with the lyre. Yes, fitting the lyre in this caliber is painstaking work. That must be admitted. But never mind — the caliber is running.

Lyre spring refitted to retain the bouchon, the movement now running
The lyre is coaxed back into its slots to retain the bouchon — fiddly but final. With it in place, the caliber ticks once more.

Hands, Dial, Case, and Crystal

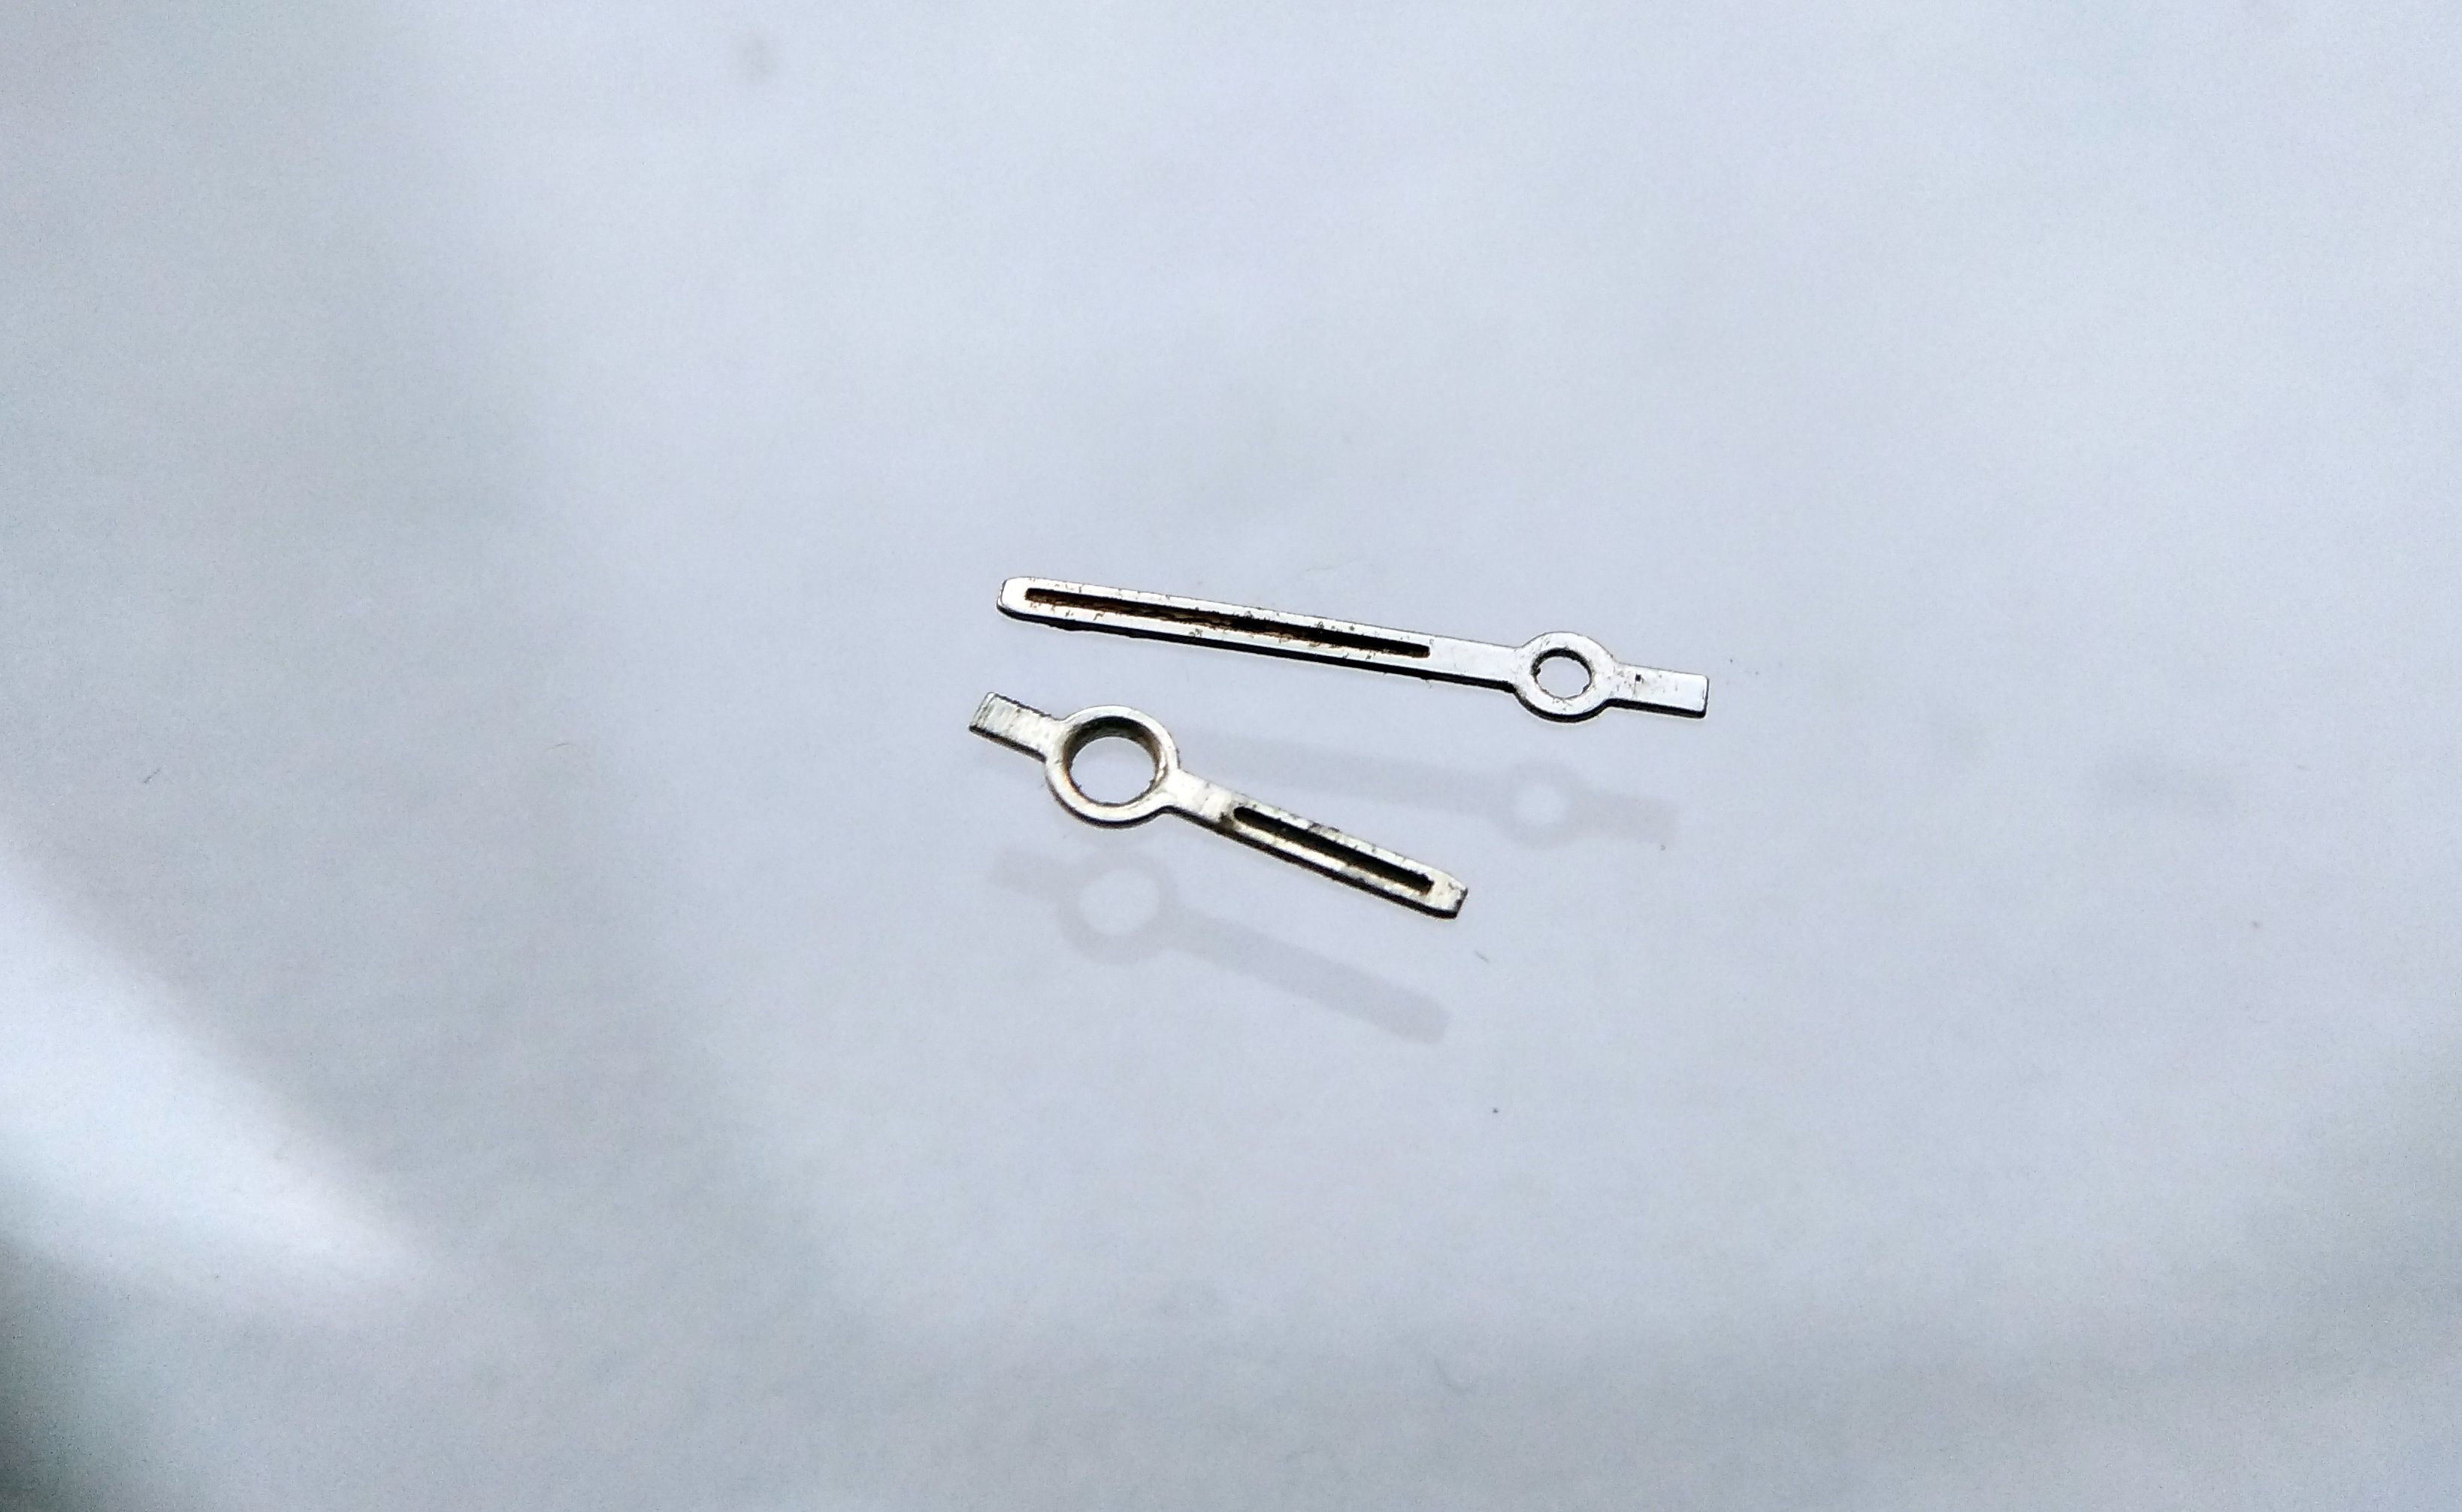
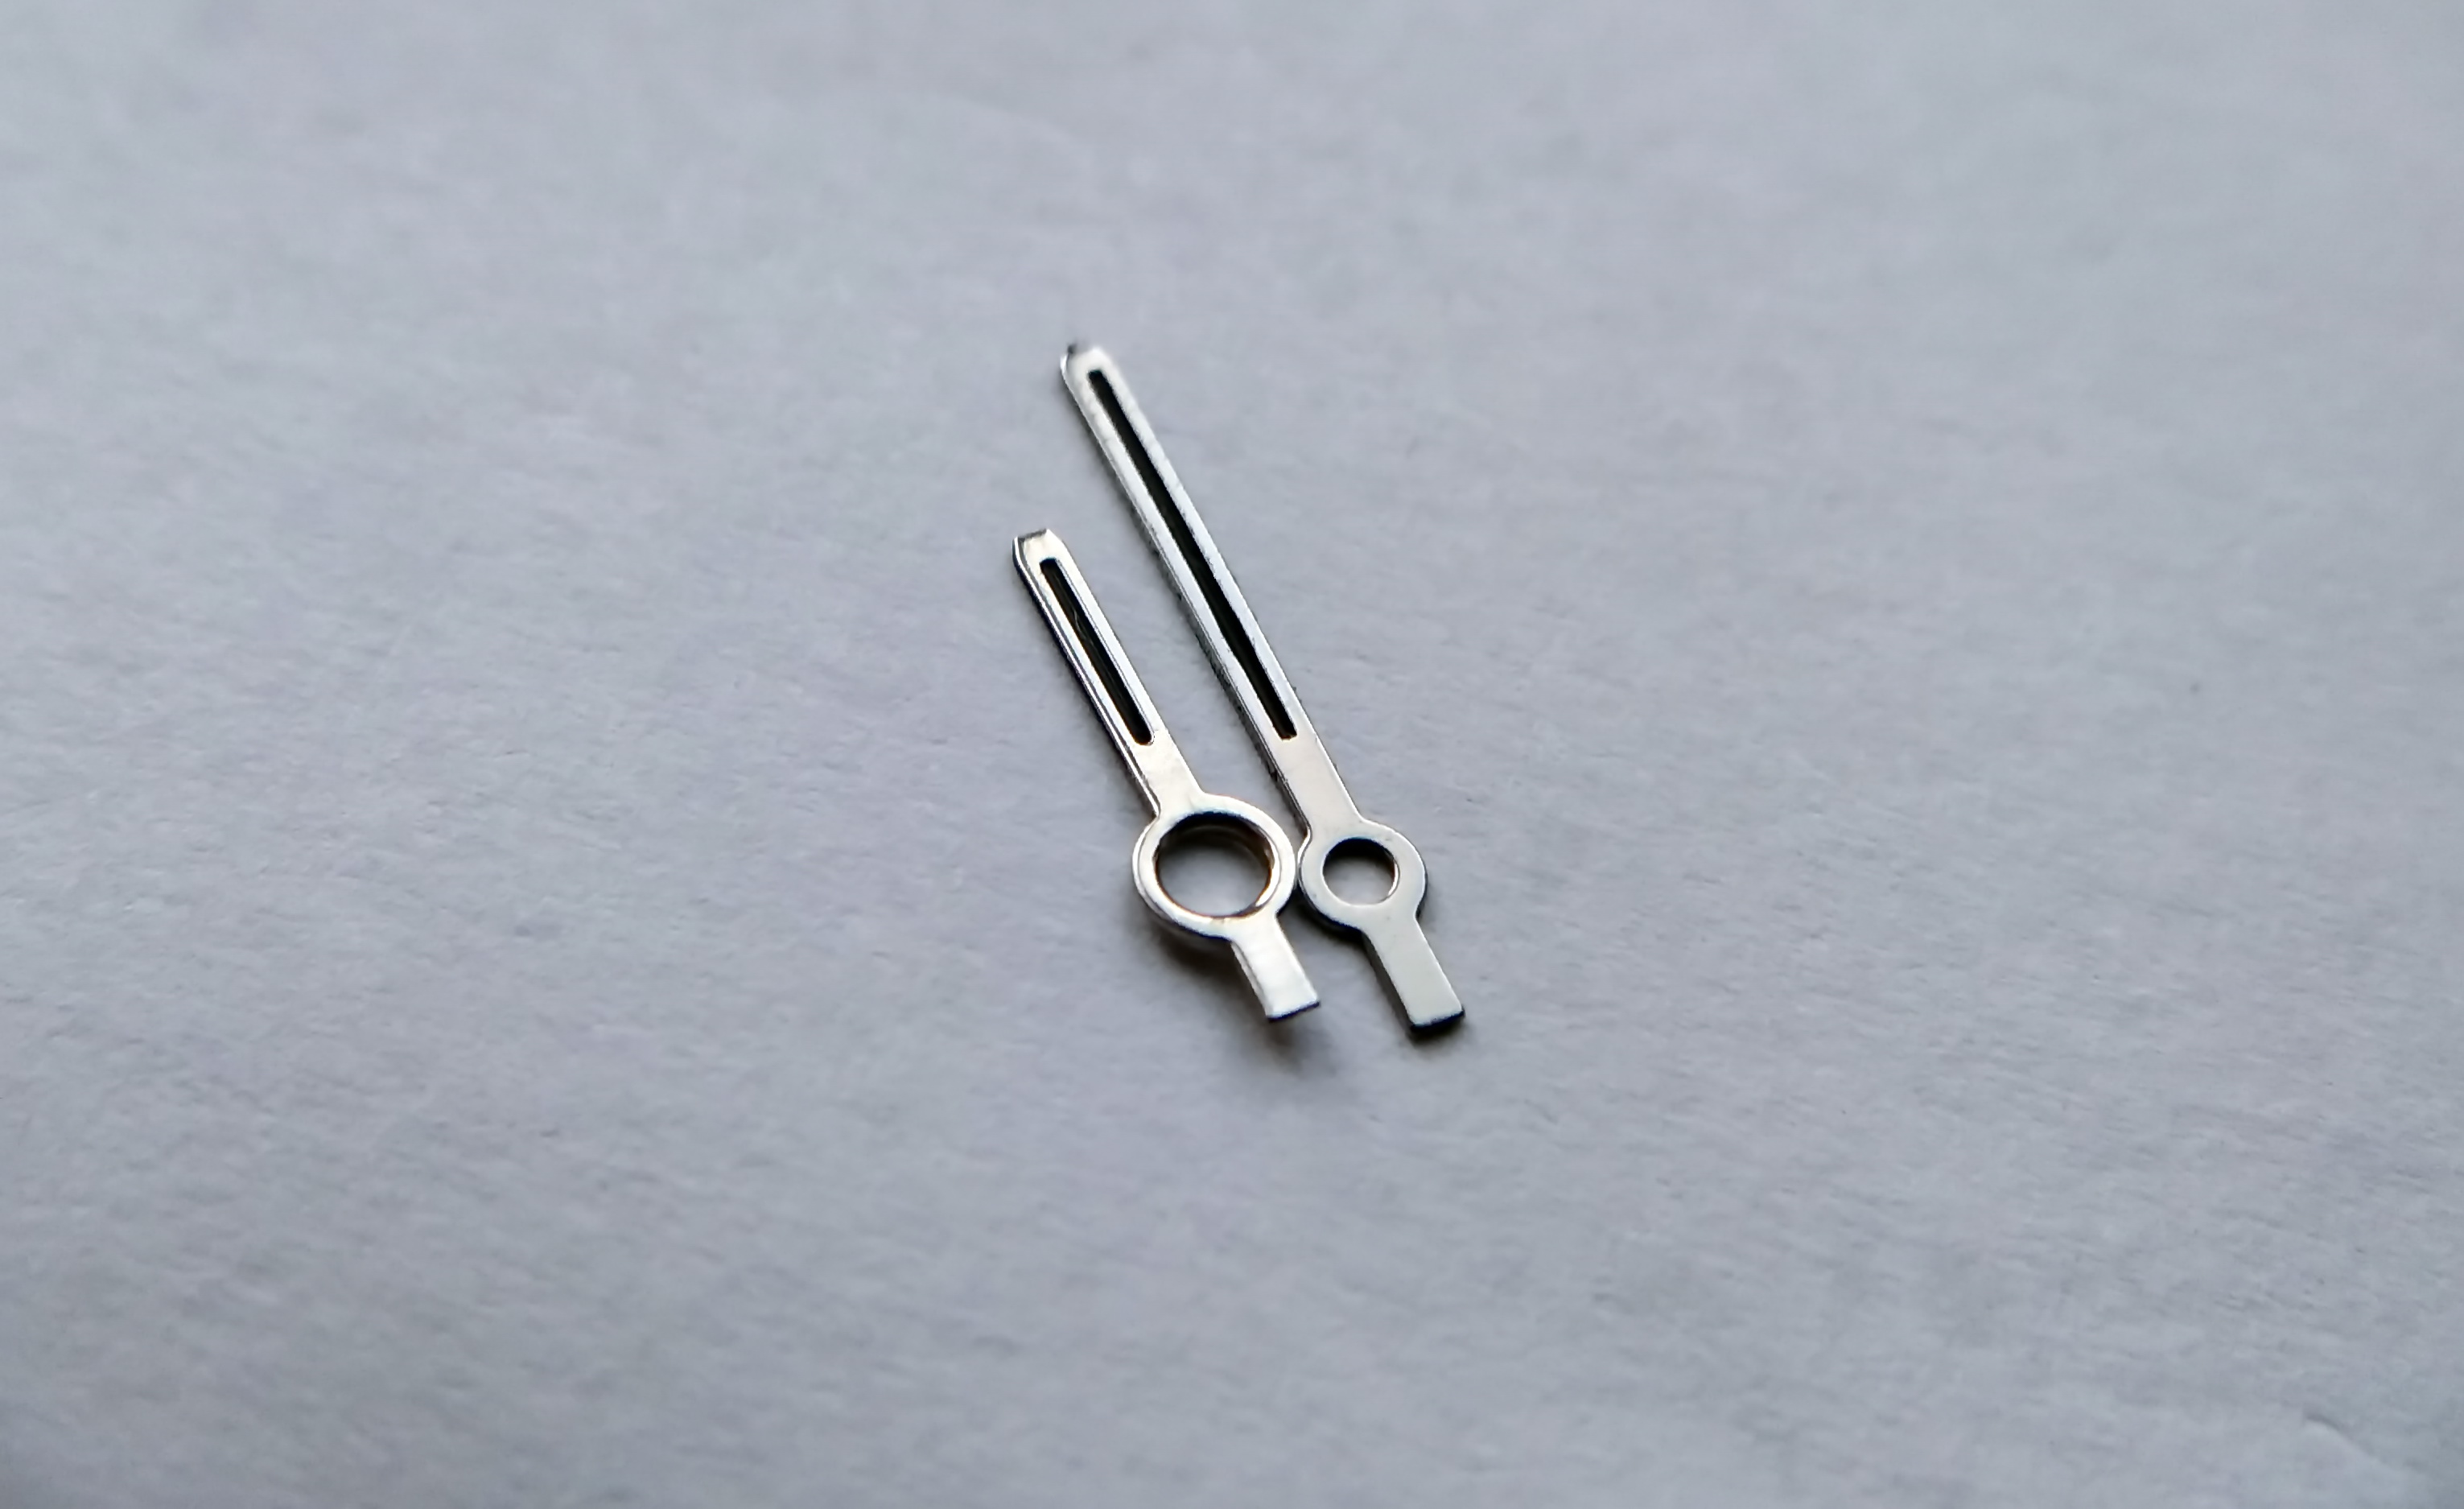
The hands. The rust is gone now, lifted with a converter. We clean off the old lacquer and polish them.

Watch hands de-rusted and stripped of old lacquer, polished bare
The hands after rust conversion and stripping — cleaned back to bare, polished metal in preparation for re-lacquering.

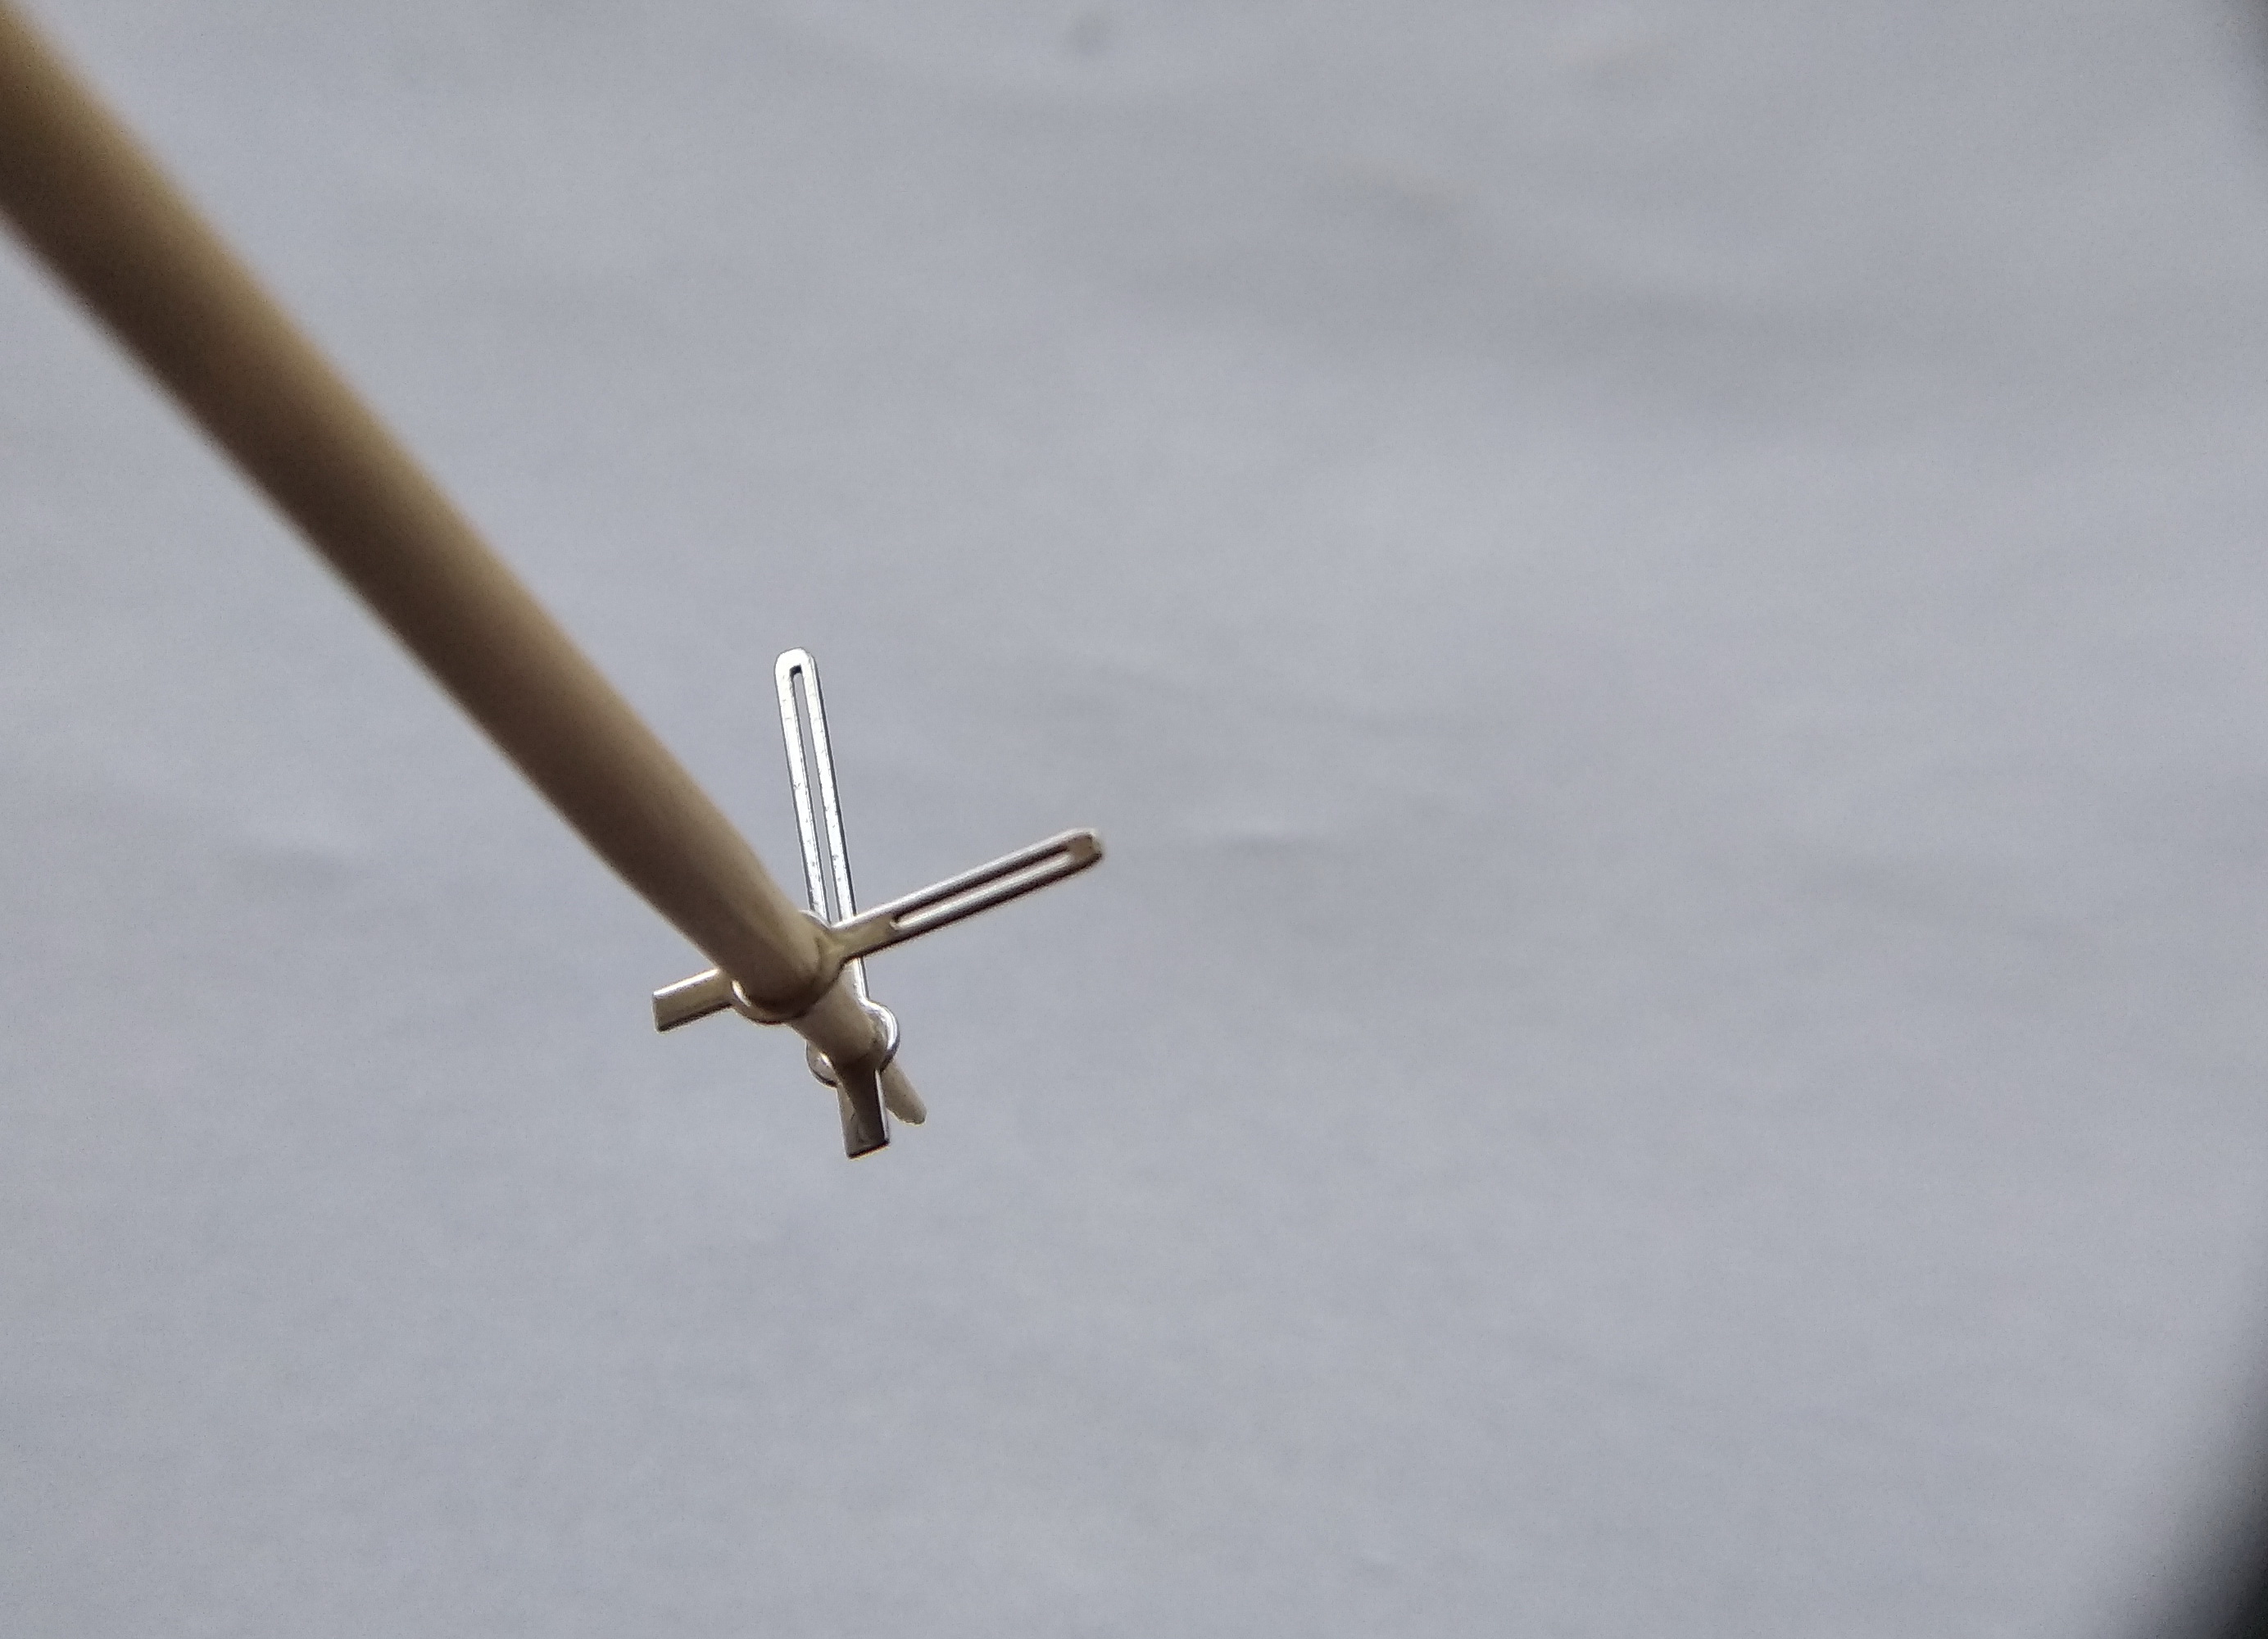
Then we mount them like this, on a piece of pegwood — an ordinary toothpick — and apply fresh black lacquer to the reverse of the hands.

Hands mounted on a toothpick while fresh black lacquer is applied to their backs
Held on pegwood, each hand has new black lacquer laid into the channel on its underside — the recess that reads as a crisp pointer line against the dial.

Here is the result — as good as new.

Restored hands with fresh black lacquer, looking like new
The refinished hands, rust-free and freshly lacquered — restored rather than replaced.

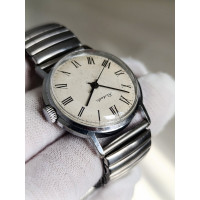
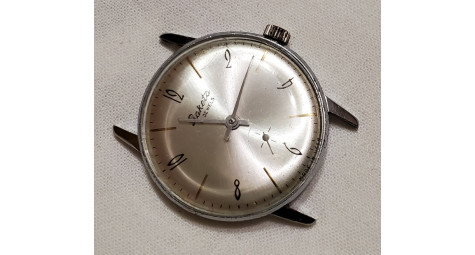
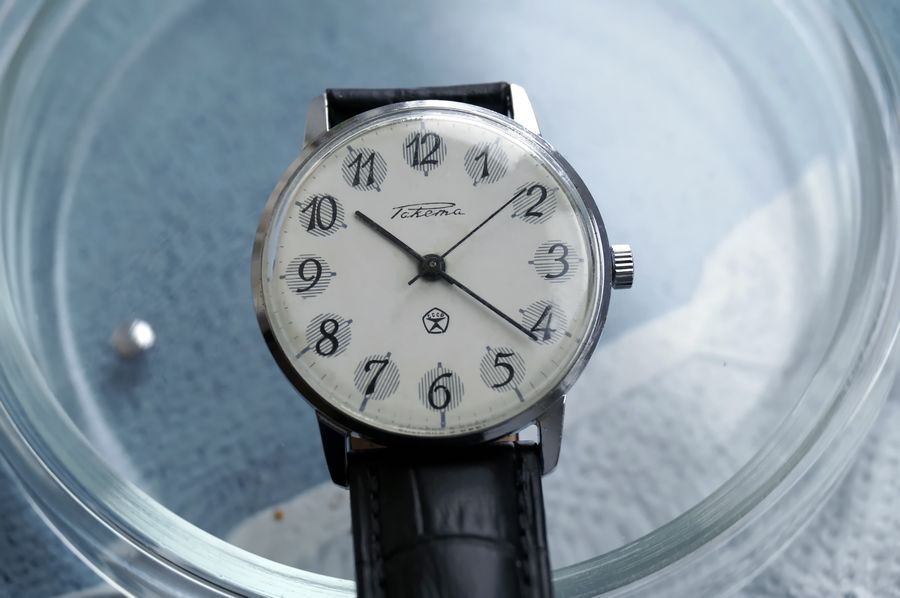
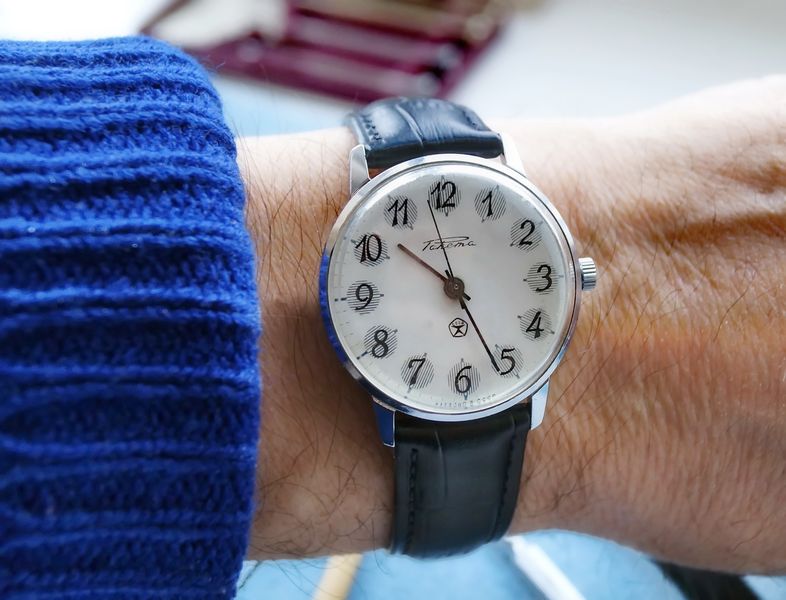
Well — the case has been washed free of dirt and lightly polished, the dial has also been put in order. We assemble the watch. This is how it looks after repair and restoration.

Reassembled Raketa watch after cleaning, with restored dial and hands fitted
The watch reassembled after service: clean case, tidied dial, and the refurbished hands back in place.

A Second Thought: Authentic Hands and a New Crown

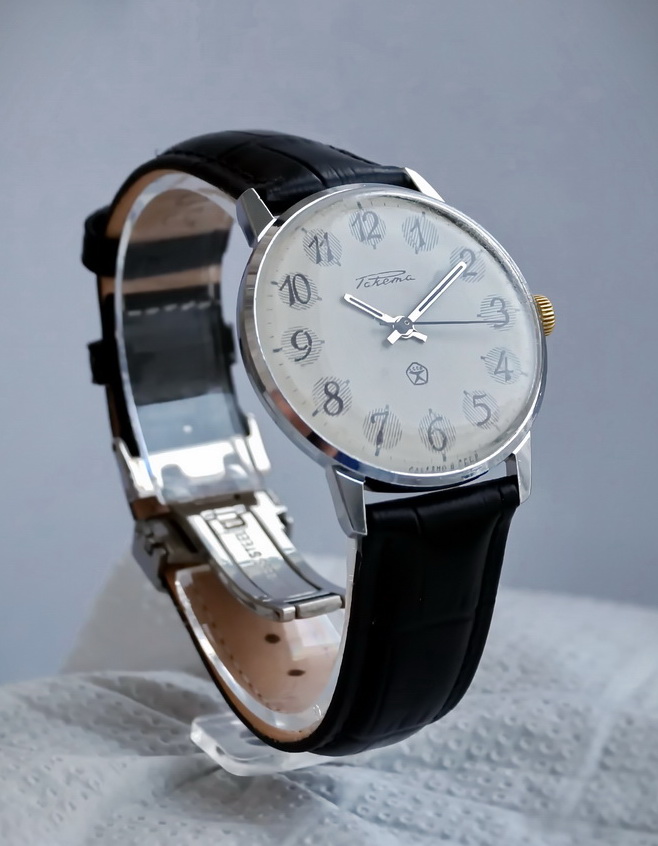
To be honest, I thought to stop here. But having put the watch on my wrist and worn it a while, I concluded that the hands, though new, were somehow "not from here." And so it proved. The crown, too, was worn and needed replacing. Rummaging through my boxes, I found something suitable. So we swap the hands for the "native," slim black ones, and the crown — well, that one is certainly new. The watch became more austere, but its authenticity, in the main, has been preserved.

Raketa fitted with slim black period-correct hands and a new crown for a more authentic look
Reconsidered: the bolder hands give way to slim, period-correct black ones, and the worn crown is replaced. The watch looks more sober — and more faithful to its original design.

The new crown makes the watch easy to wind; it has a good, grippable feel.

Close view of the new winding crown fitted to the watch
The replacement crown is comfortably proportioned and easy to grip — a small but daily-felt improvement over the worn original.

And I never did show the crystal after polishing. Here it is — transparent, not a scratch on it.

Polished acrylic crystal restored to full clarity, free of scratches
The acrylic crystal after progressive polishing — clear and unmarked, recovered rather than replaced.

The crystal's bezel ring, too, looks quite acceptable.

Cleaned bezel ring that retains the crystal, in acceptable condition
The bezel that frames the crystal cleaned up well, completing the front of the case.

The case has been brought fully into order. A chrome-cleaning compound, a stiff brush, and a rotary tool with GOI paste did their work. Here, mind you, one must work carefully and without excess zeal, or a result the opposite of what was hoped for is guaranteed.

Chrome-plated case fully cleaned and polished after treatment with brush and GOI paste
The chrome case fully restored with cleaning compound, brush, and GOI polishing paste on the rotary tool — applied sparingly, since over-polishing plated cases cuts straight through the chrome.

Final Assembly and Regulation

There. We will consider this the finish.

The fully restored Raketa watch shown complete
The finished watch — case, crystal, dial, hands, and movement all returned to honest working order.

And finally, before we close the back, let us admire this beautiful, ageless mechanism, this true work of the watchmaker's art.

Open caseback view of the clean, serviced 2609.NA movement before closing
One last look at the serviced 2609.NA before the lid goes down — clean, lively, and good for many more years.

A final snap of the hinged back, and the watch goes onto the wrist. Not bad at all, is it?

Restored Raketa worn on the wrist after the caseback is snapped shut
The snap back clicks home and the Raketa returns to the wrist — a discarded watch given a second working life.

Perhaps the "Quality Mark" was sometimes awarded undeservedly in the USSR. But not in this case — not in the case of the Raketa, made by the Petrodvorets Watch Factory, the oldest watch enterprise in Russia. For the record, the technical data of the movement:

  • watch movement 2609.NA — caliber 26 mm;
  • height 3.9 mm at the level of the seconds-hand axis;
  • thickness 2.7 mm at the level of the main plate;
  • 19 ruby jewels;
  • three hands;
  • central seconds hand;
  • shock protection of both the balance staff and the escape wheel;
  • screwless balance with an oscillation period of 0.4 s, 18,000 bph;
  • flat hairspring, movable stud carrier;
  • running duration from a single wind of no less than 42 hours;
  • mean daily rate +10 … −50 s.

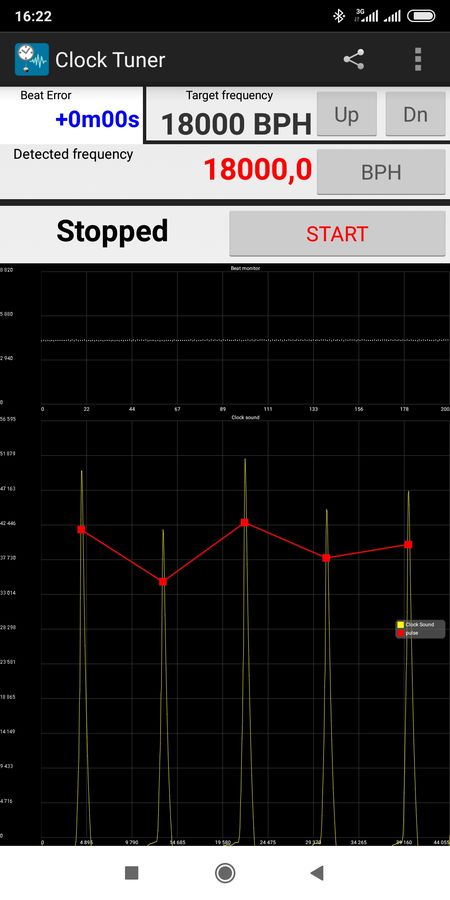
And about that "mean daily rate of +10 … −50 s" — let us now see what we can do with that figure.

Timing-machine reading of the regulated movement showing an improved daily rate
On the timing machine after adjustment: the rate is pulled well within useful limits. A quick correction once a week or so, and that is that — a fitting end for a caliber that earned its Quality Mark honestly.
0
70
1 June, 2026
New
Vintage Raketa Soviet Watch Cal. 2609 16  Jewels Made in USSR 1970s
Model: SWR009
In stock
$67.00
New
Vintage Russian Raketa Star Wars Watch Day Date Mechanical Wristwatch
Model: SWR008
Out Of Stock
$120.00
Hit
New
Raketa Black Prince USSR Watch 1980s Gold Plated Crosshair Dial Serviced Vintage
New
Vintage Soviet Watch Svet Cal. 2603 16 Jewels Cream Dial USSR Serviced 2026
Comments0

Write a review

Note: HTML is not translated!
icon_whatsapp icon_mes icon_teleg icon_email icon_viber icon_callback