Cart
Your shopping cart is empty!
It's never too late to make things right :)
"A good movement asks only for a clean home. Give it the right case and the right spring in the right slot, and it will keep faith with you for another lifetime."
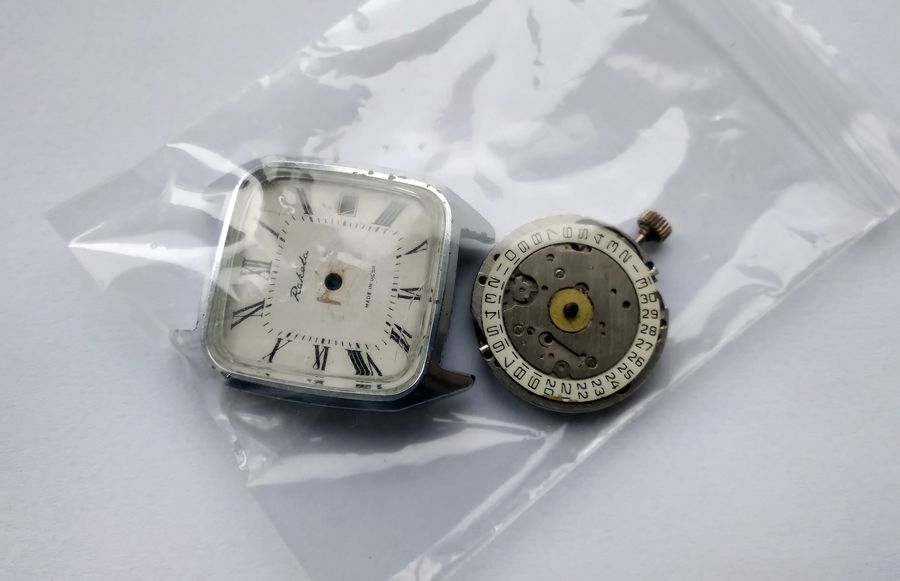
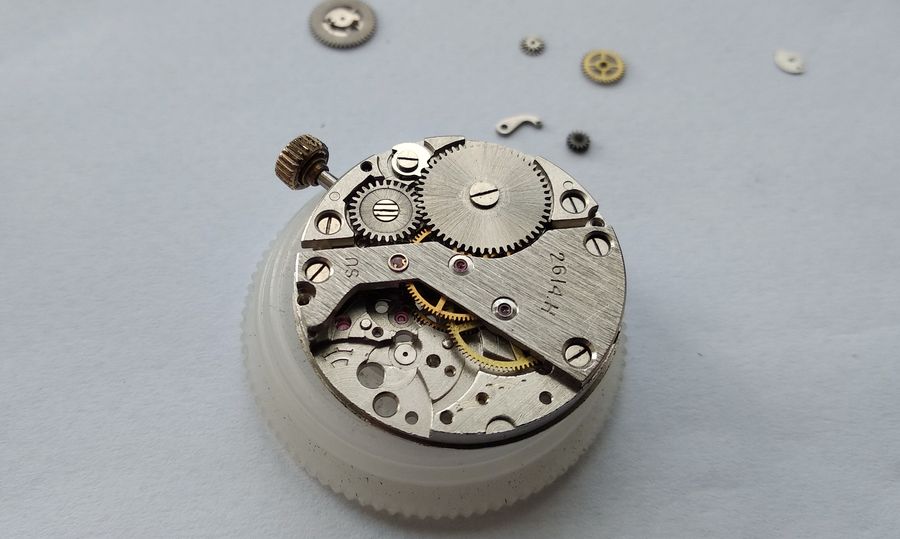
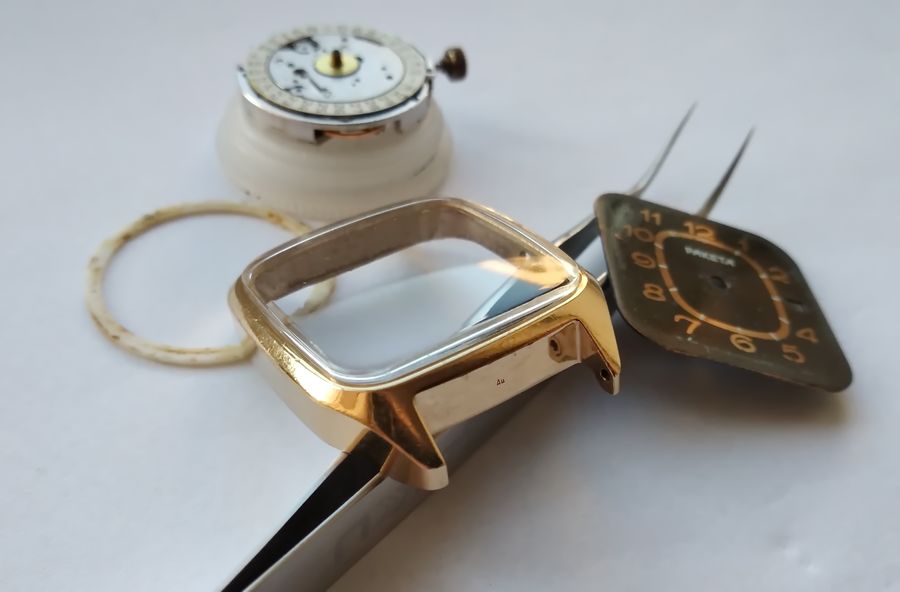
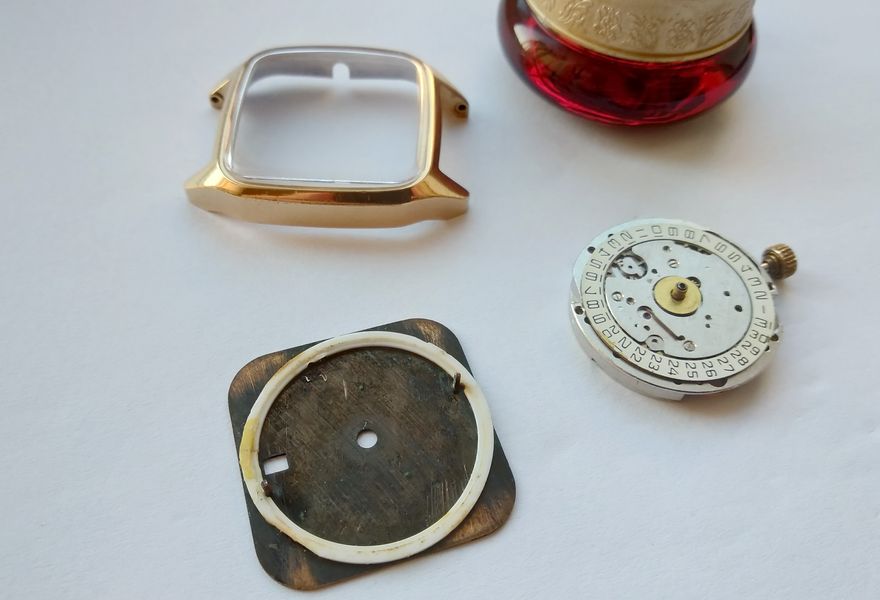
This story began at the bottom of a drawer. Tucked into a small plastic bag, beneath an assortment of watch sundries, lay a disassembled Raketa built on the 2614.Н caliber. It had been set aside for better times — specifically, for the day a decent replacement case turned up to take the place of the original, which had long since lost any claim to dignity. Those better times finally arrived, and not by halves. As an old family saying goes, you wait forever without a single coin and then a whole handful lands at once: two cases were suddenly on hand for exactly this movement. One was respectably gold-plated; the other an entirely new old-stock service kit, a white chrome case with a matching dial. What came of them we will see at the end. First, the caliber needs putting right.
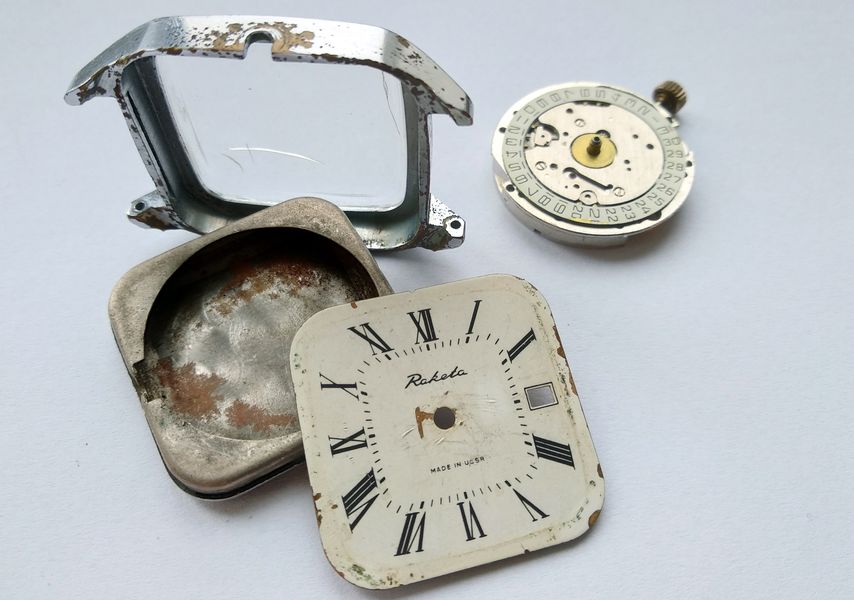
One look explains the long wait. Corrosion had done thorough work, attacking everything from the case to the dial itself. With chrome-plating supplies one could, in principle, have rescued the housing — but there was no need. Because I have written about Raketas many times before, I will not linger over the steps shared with the rest of the family. The interest here lies elsewhere: in the calendar, which is where this variant keeps most of its individuality. That mechanism deserves a close, unhurried look. It is genuinely clever, well considered, and worth the attention.
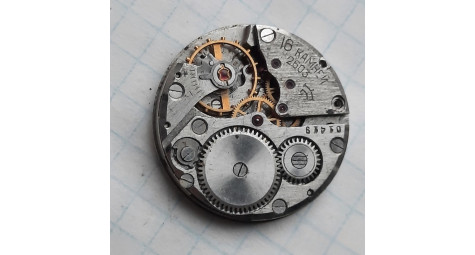
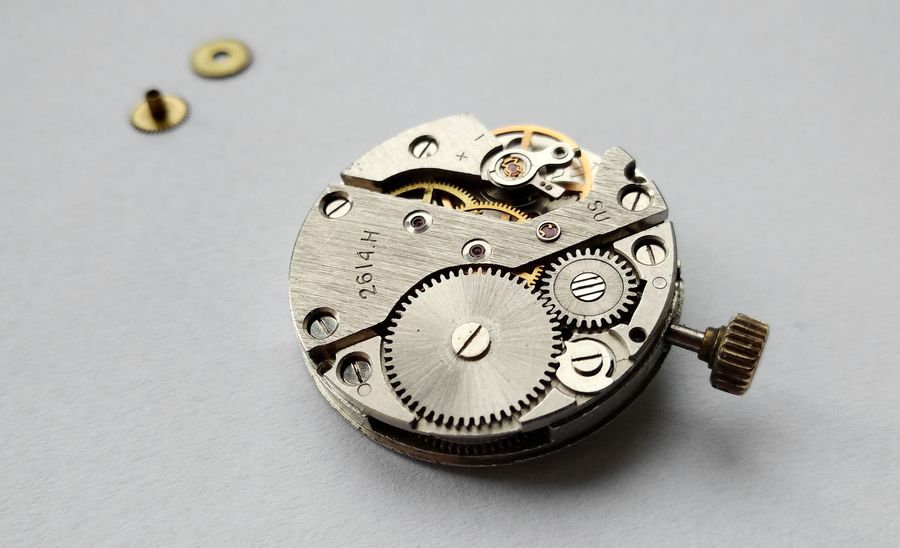
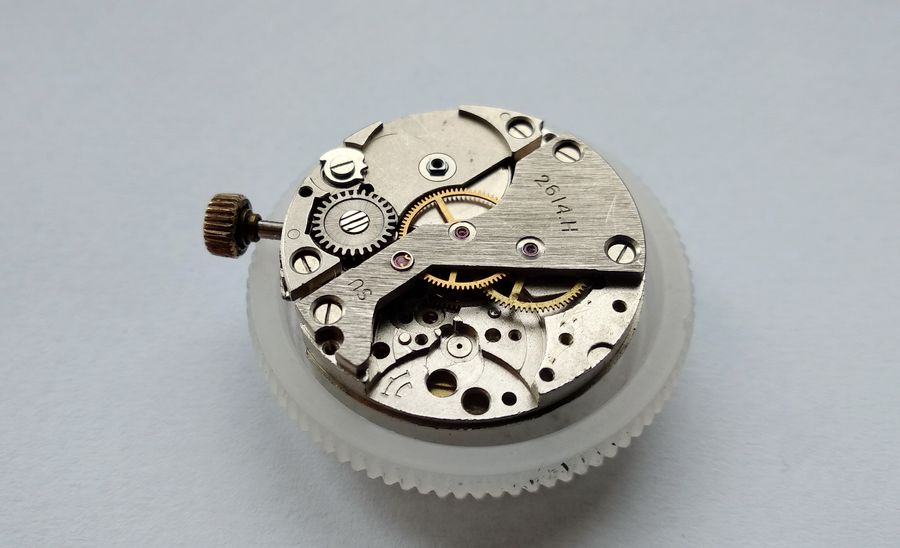
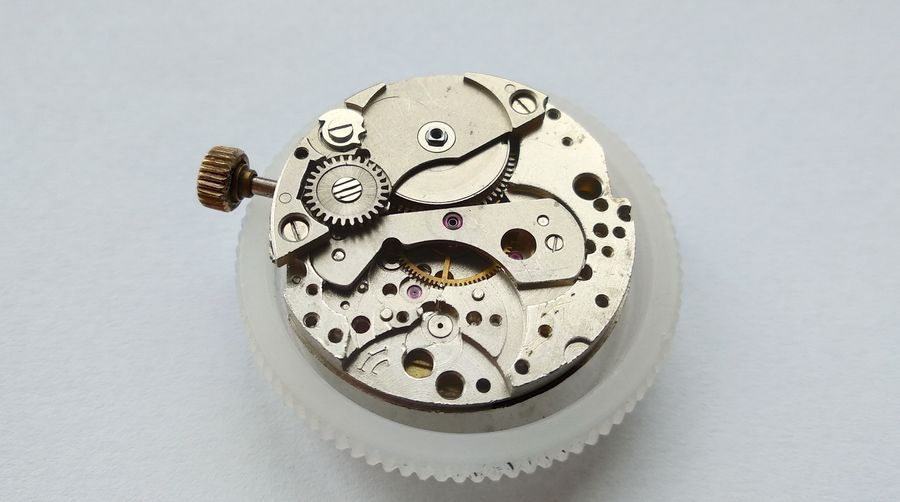
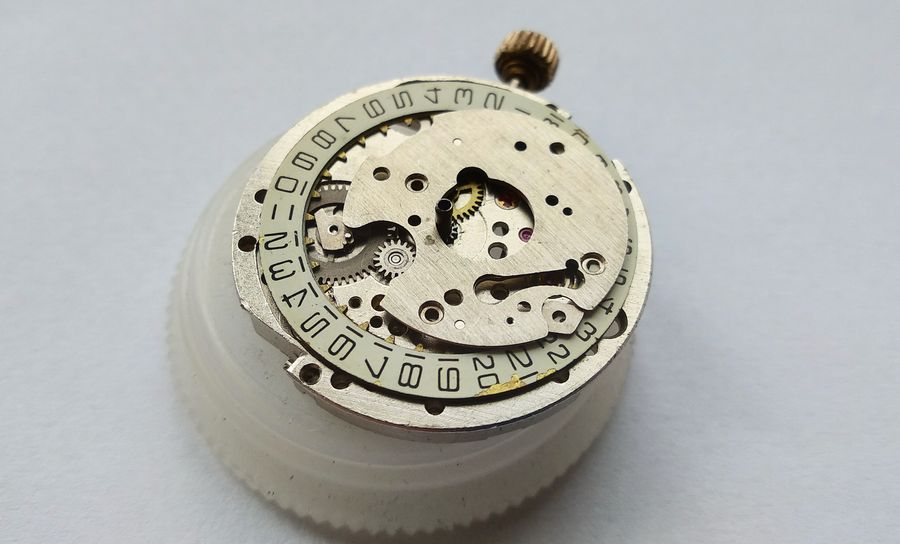
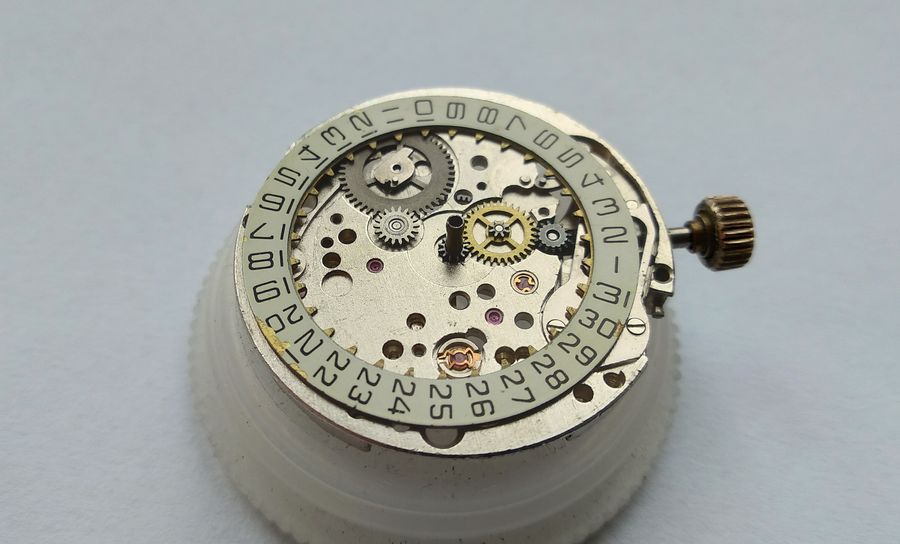
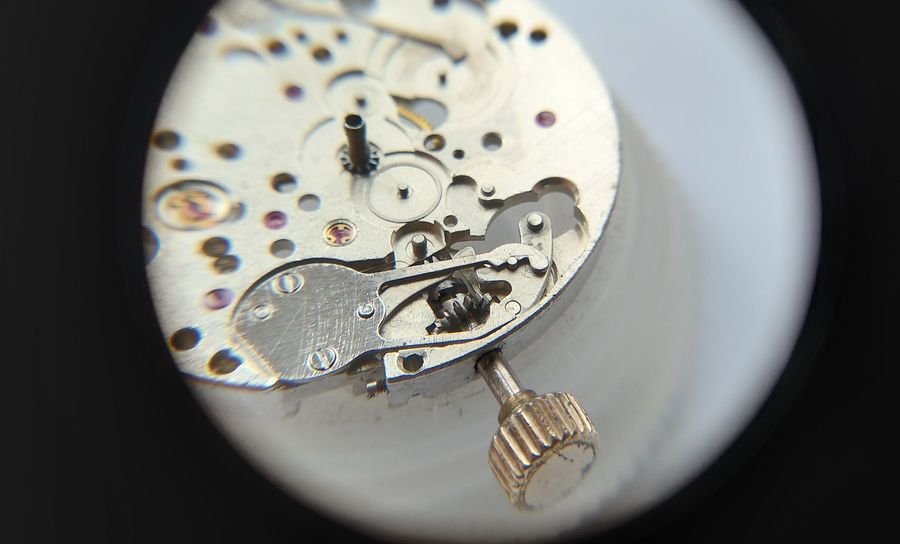
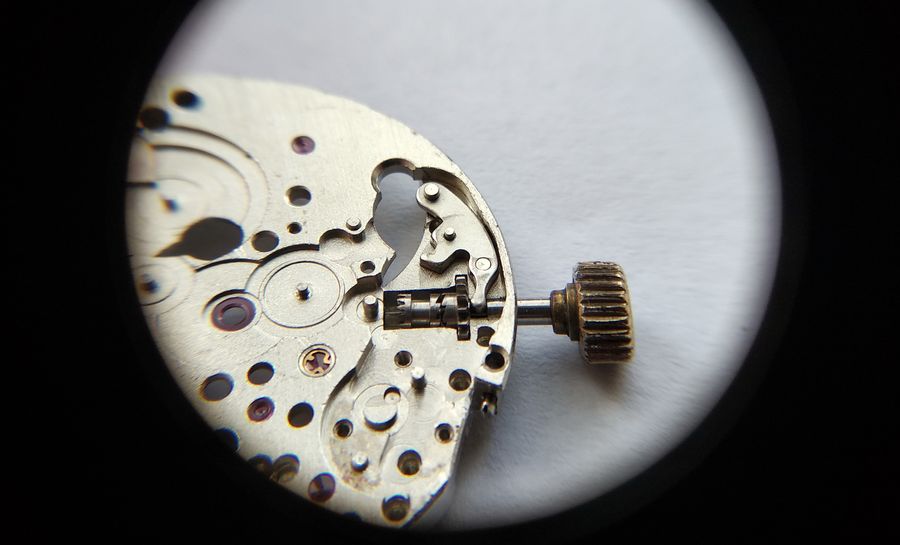
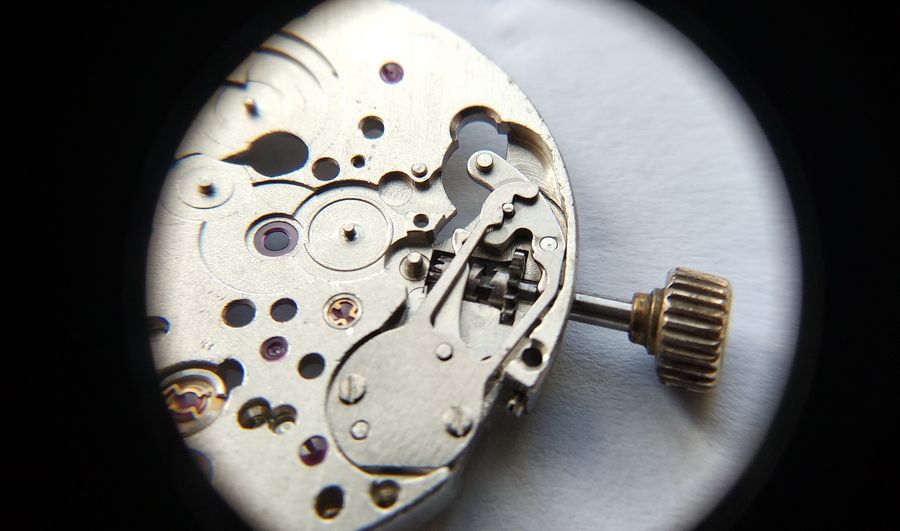
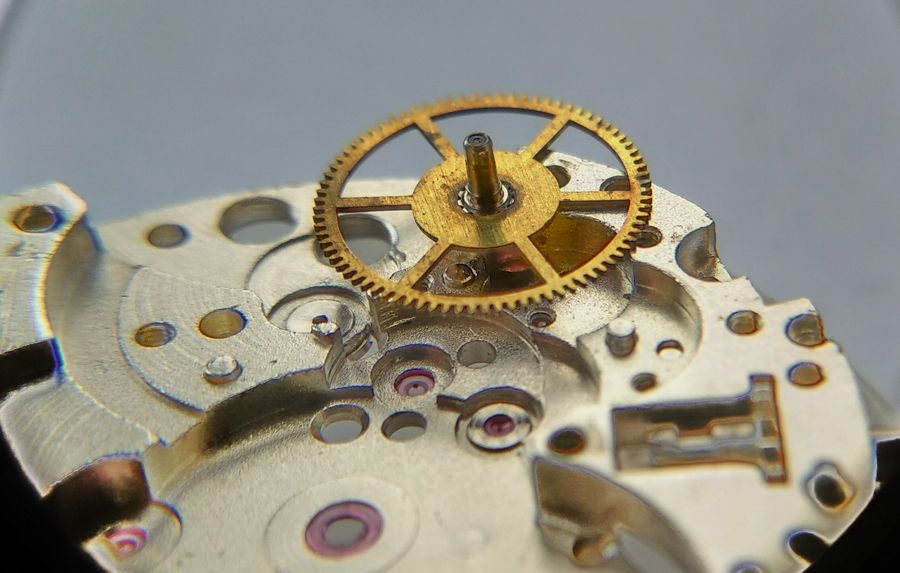
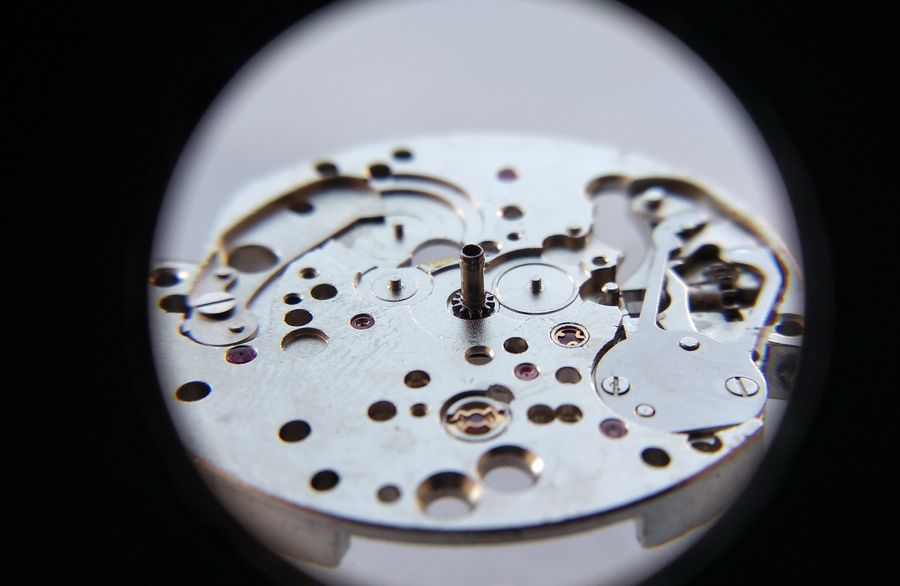
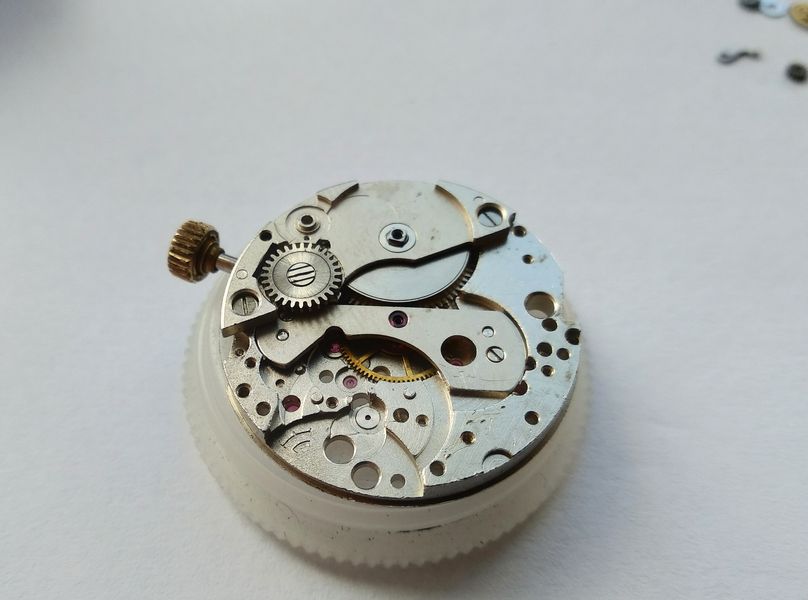
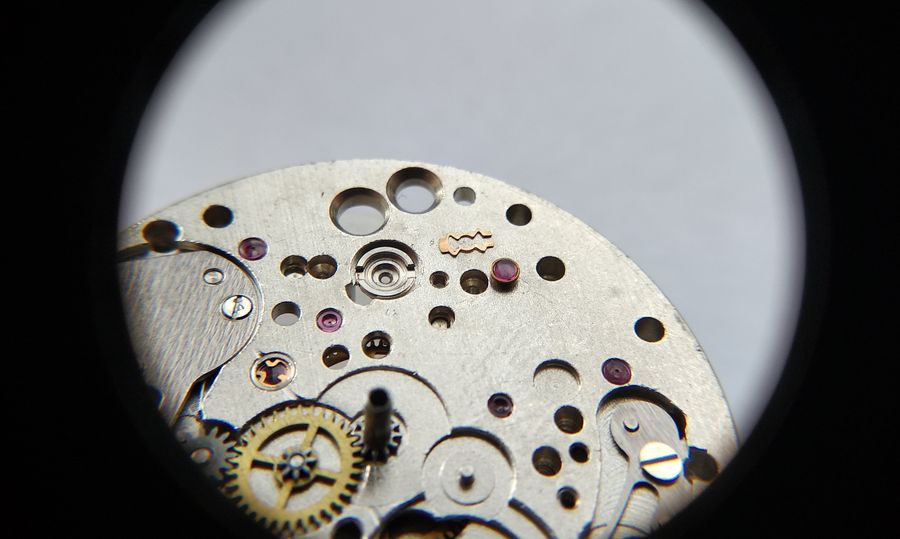
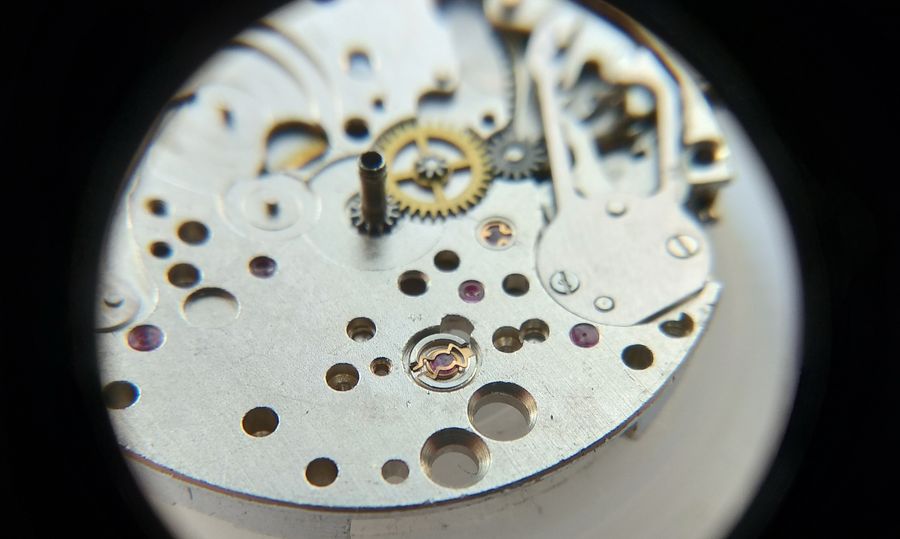
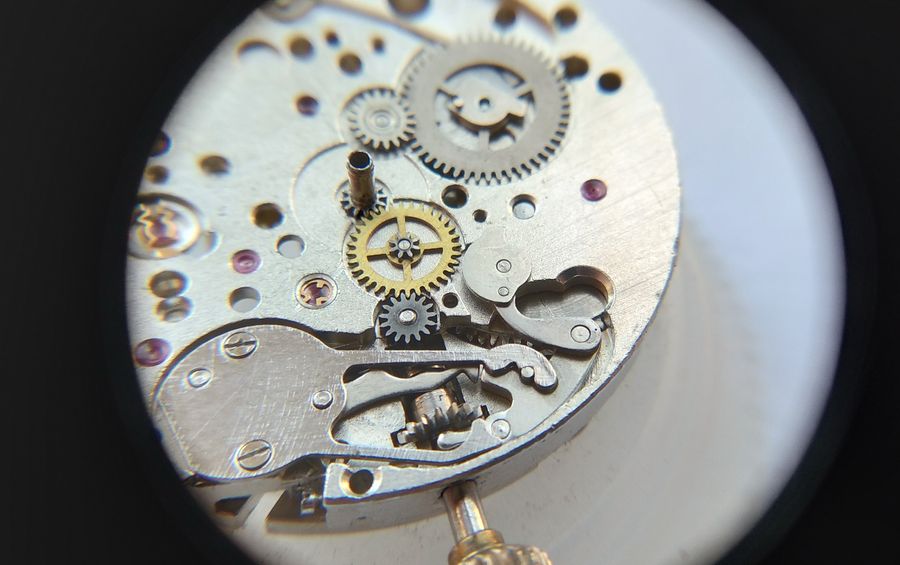
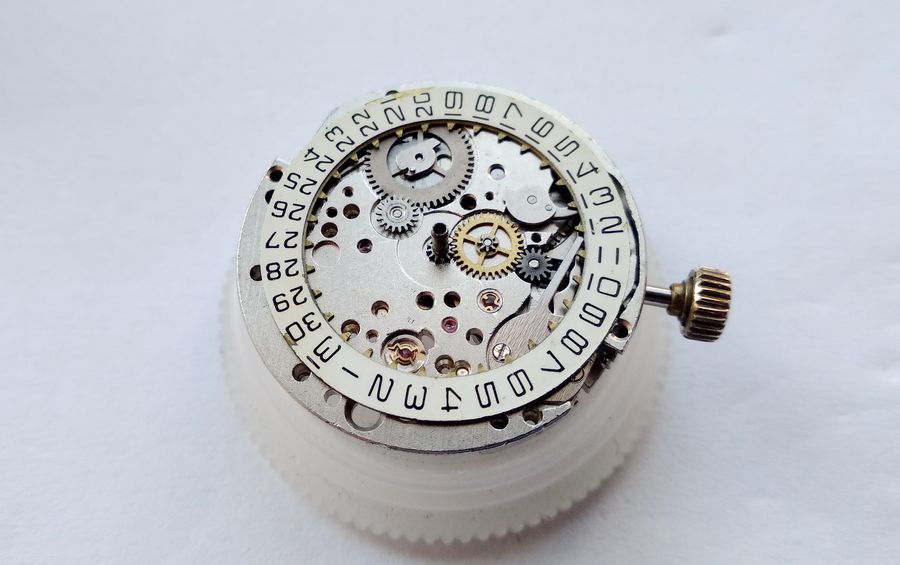
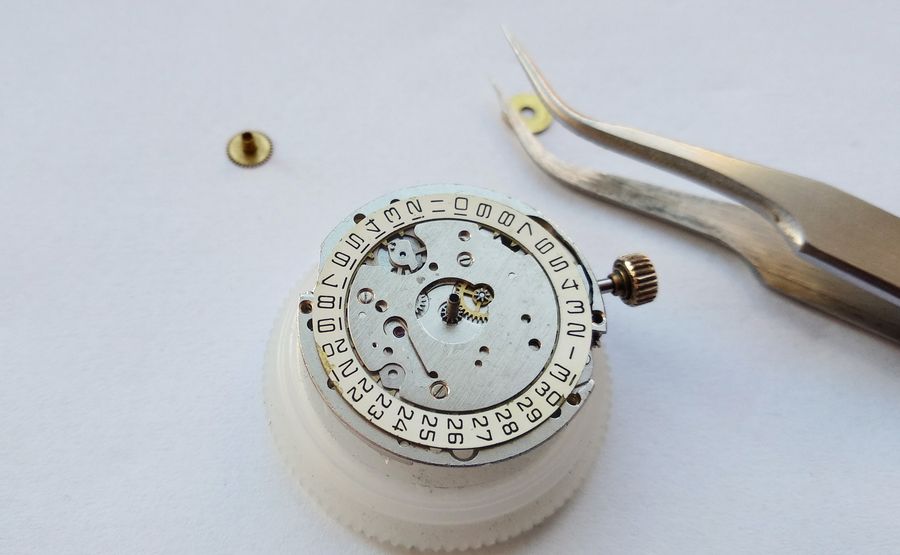
So: the Raketa 2614.Н. It is a popular and well-regarded movement, valued for its simplicity in use, its reliability, its serviceability, and a calendar that switches the date instantly — and, crucially, can be corrected by hand through an ingenious arrangement that needs none of the bulky extra works seen in, say, the Slava 24xx calibers. Here is that calendar, still assembled for now. Before long we will look inside it.

Viewed from the balance, this movement is no different from its 26xx.Н relatives, so we will take it down quickly — without dwelling on ground already covered, though never forgetting that repetition is the mother of learning.
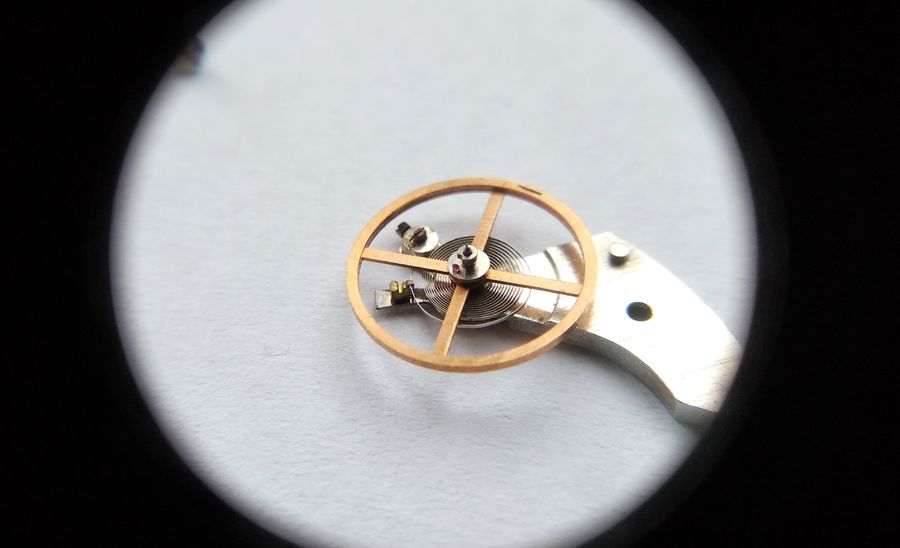
With the mainspring let down, the balance comes off. Raketa balances are good. The hairspring stud-carrier is movable, the assembly is shock-protected and screwless. The hairspring is not overcoiled, but that omission keeps the balance — and therefore the whole movement — low in height. Note, too, that there is no shim beneath the balance cock. The fit is exact, machined rather than packed.
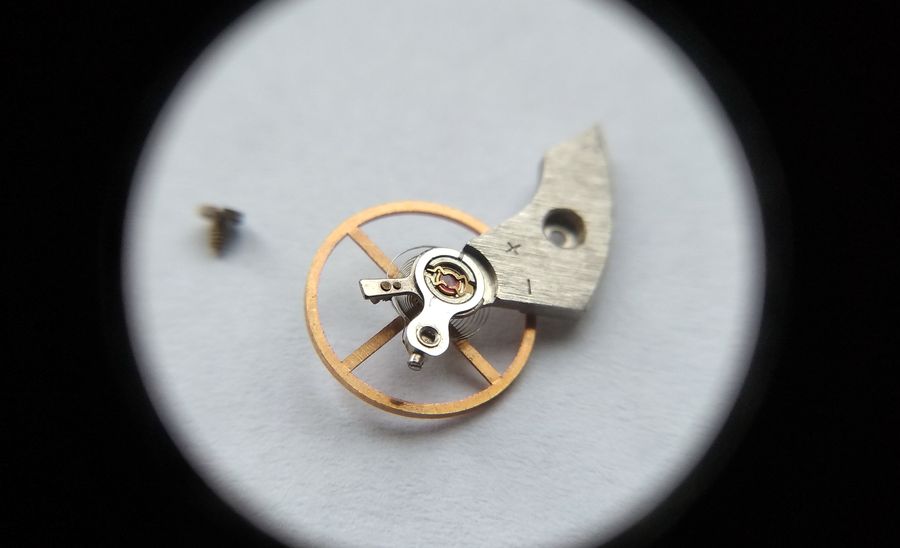
A closer look at the regulator: the curb pins are closed on the hairspring. One caution worth repeating — the hairspring is cemented to its stud, so cleaning must be careful. Soak it carelessly and the spring may let go of the stud, and then it has to be re-glued.
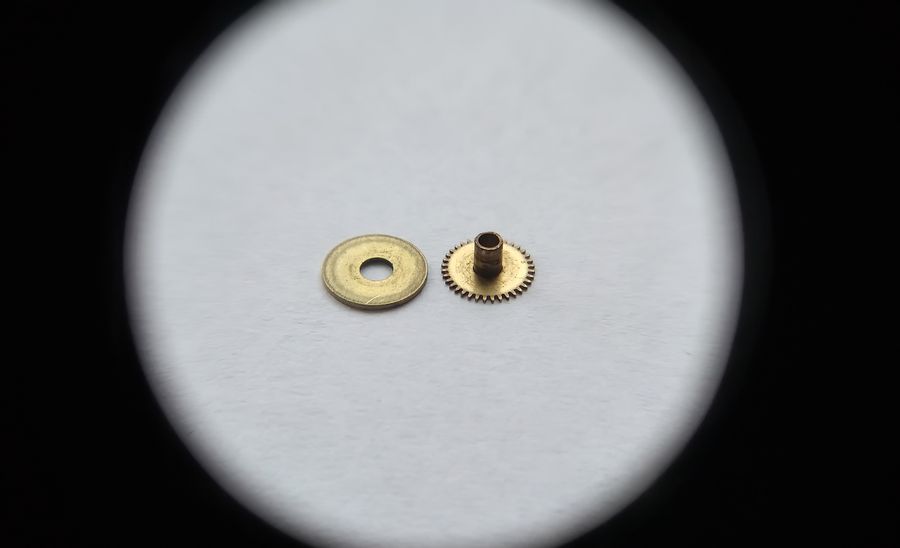
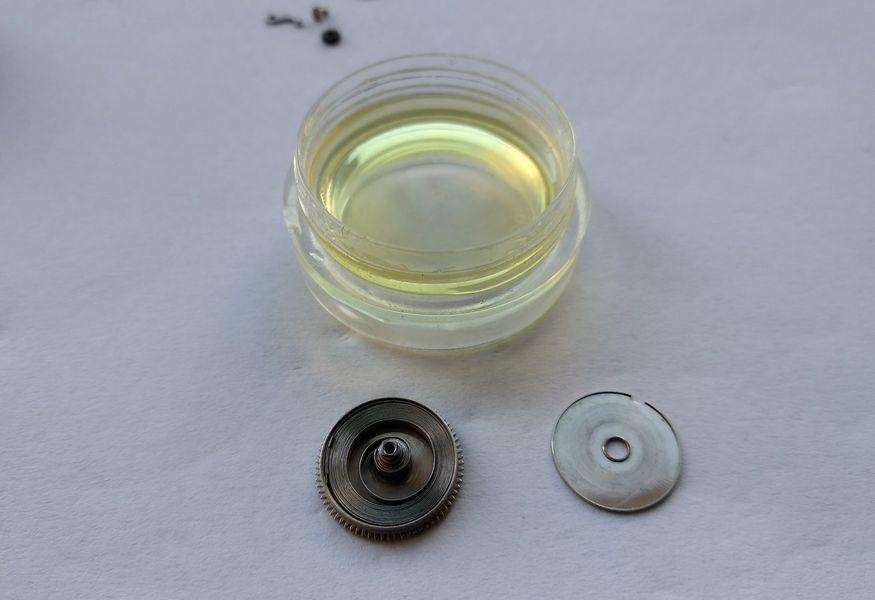
This is the hour wheel and its washer. Notice that the hour-wheel pipe is tall: the hands must be raised clear of the calendar works below. The seconds-wheel arbor, however, is of standard length. How was that reconciled? The engineers solved it head-on. Rather than introduce a new line of seconds wheels, they specified seconds hands with pipes of differing length — far cheaper and simpler to produce. The washer is different too. This is no thin spring leaf but a substantial shim, chosen by exact thickness to take up the space between the hour wheel and the dial. Its purpose is to keep the hour wheel and the two-tier calendar-drive wheel from accidentally slipping out of correct mesh, which would make the date switch improperly. That solution, in turn, demanded a sturdy metal dial and a locating ring beneath it — something we will see at dial fitting.
The escapement is off — that is, the balance and the pallet fork — and with it the barrel wheel, so as to reach the wheel train straight away.
And here is the seconds hand with its long pipe. Hands like this were fitted to the 2614.Н, the 2628.Н, and the recently discussed 2601.Н — and also to the 2610, the so-called antimagnetic movement, which I happen to own. Its peculiarity is a pair of permalloy membranes, one under the dial and one under the caseback; because that shield occupied the space between mainplate and dial, its hands and hour wheel likewise had to be raised. Such hands are scarce now. Short-piped ones can still be found, but the long-piped variety is another matter — so whatever was hoarded in the special reserve had to serve.

Well, the wheel train has been scattered out.
Now we will take down what remains on the fast side and move on to the calendar.
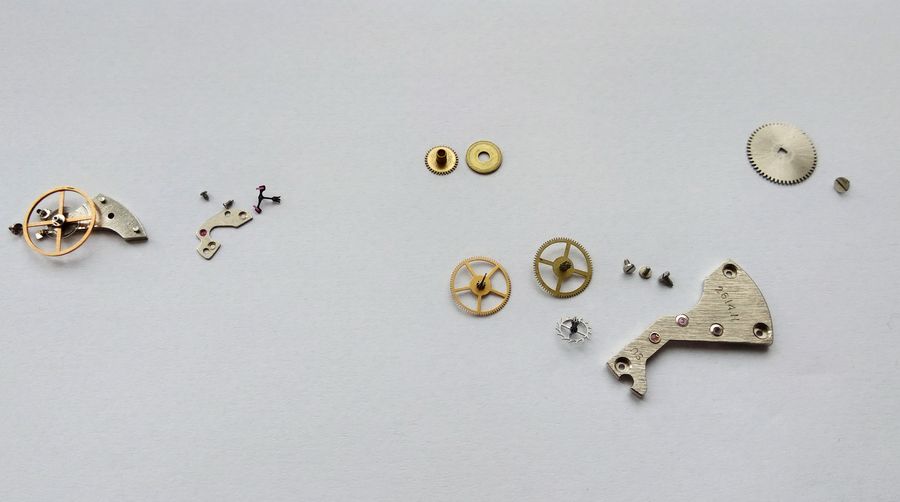
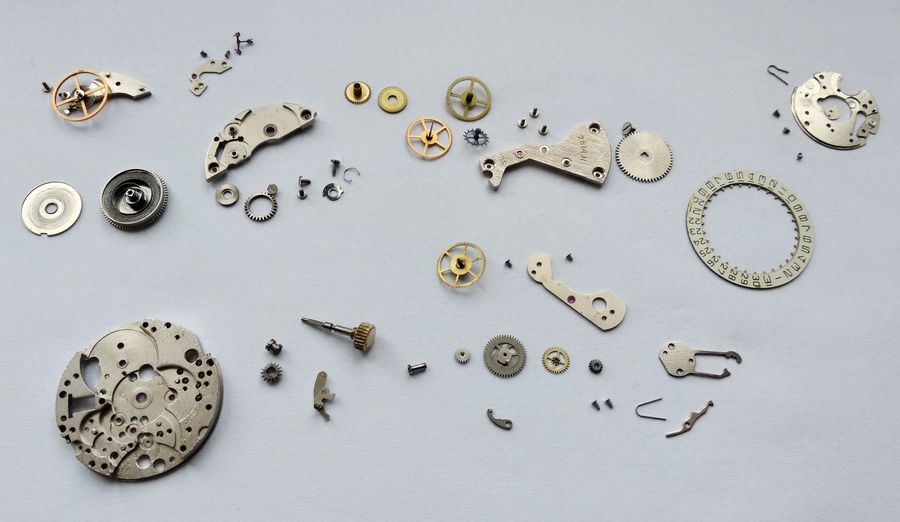
There — done. All the components are before us. Or rather, almost all: the center-wheel bridge and the center wheel itself are left untouched for the moment. Why? Because the cannon pinion still has to come off, and for that the center wheel must stay anchored so its pipe is not damaged. Inside that pipe sits a tiny through-jewel in which the seconds-wheel arbor turns.
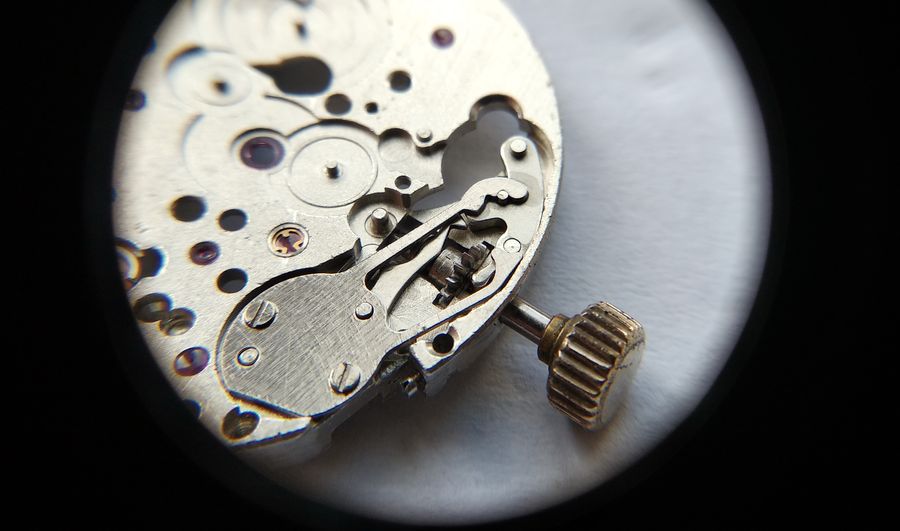
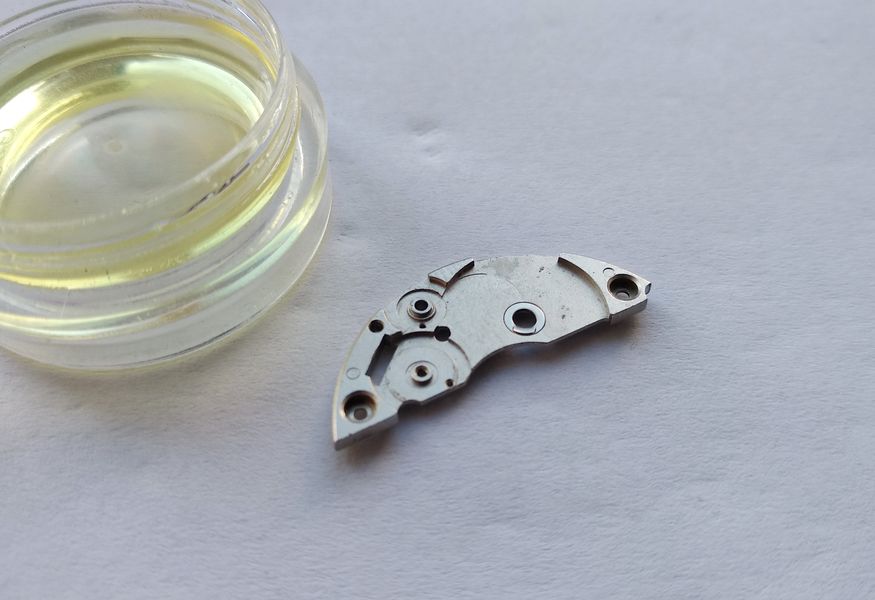
And now the long-awaited moment — the calendar. First the calendar bridge has to be freed and removed by backing out its three retaining screws. They are small; take care not to lose them.
We lift the calendar bridge…
… and take it off the plate.
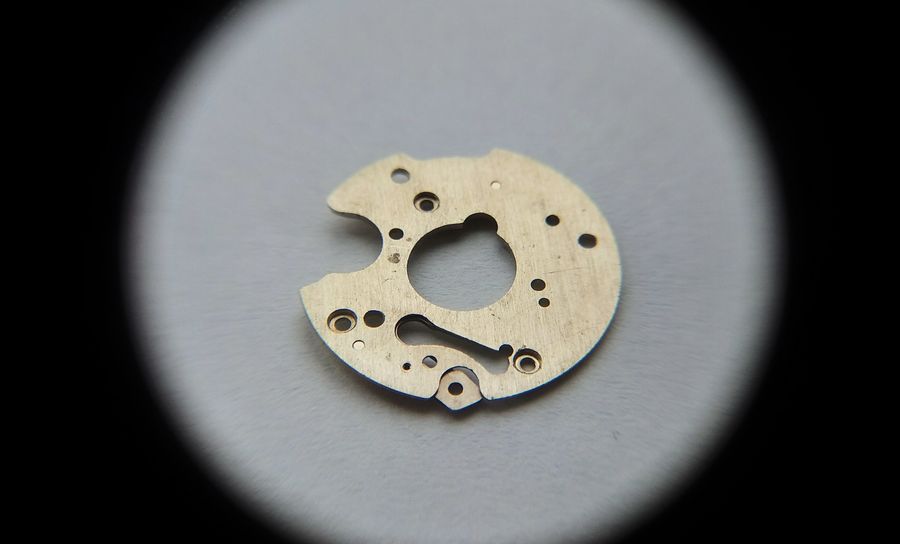
The fine thing about Raketa movements is that the principal parts stay captive. Even the detent-lever spring does not simply fly off, and the lever itself rides on a post pressed into the calendar bridge. The one unsecured part is the manual date-correction sector — and that had stuck fast on thickened, gummy oil. We will lift it off now.
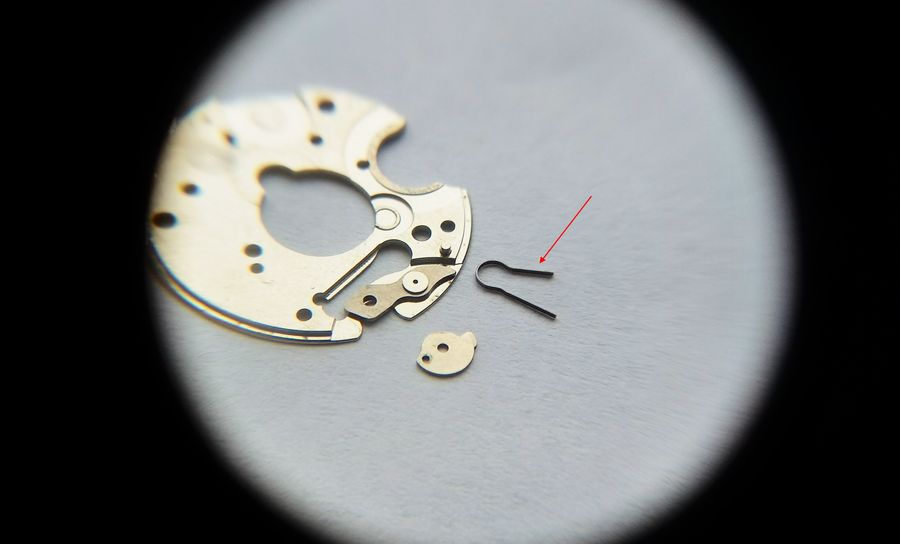
And there we are. The bridge is apart. The correction sector is off, the spring is out, and… that spring. Look at it. Whoever serviced this caliber before me had, for some reason, fitted an R-shaped spring from the keyless works where a soft U-shaped spring belongs in the calendar. Well done indeed. The calendar was plainly working only by fits and starts. I would not be surprised to find the missing U-spring sitting in the keyless works, on the setting lever. When we get to the keyless works, we will see whether I am right.
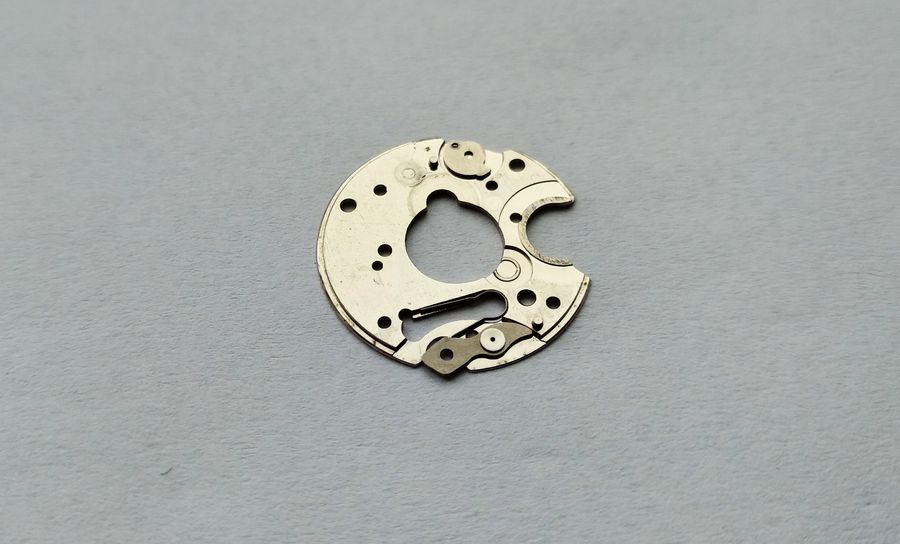
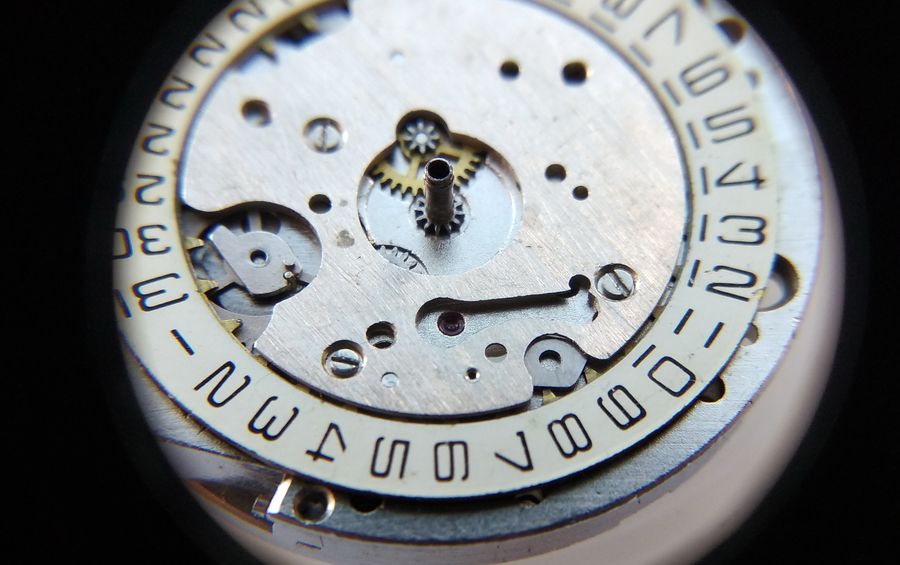
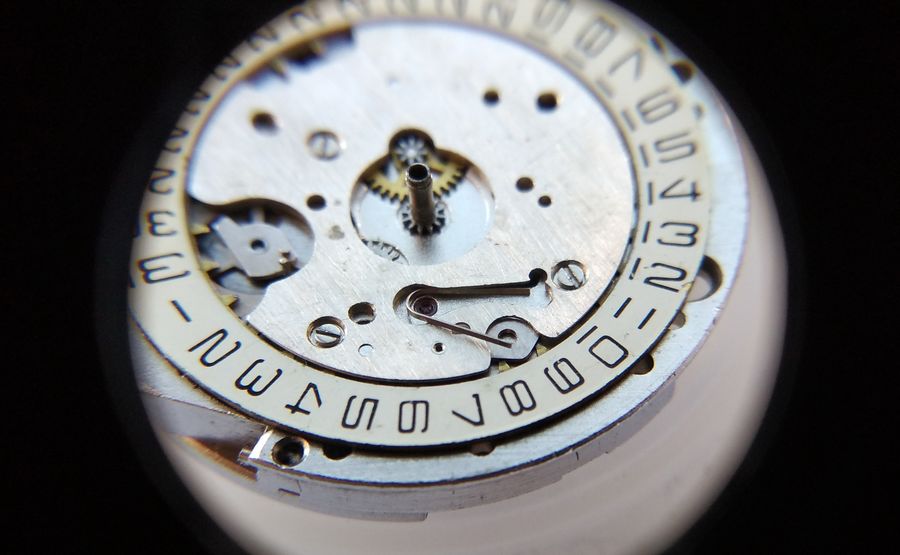
The calendar mechanism is now before us. We will lift off the number disc and…
… the calendar opens up in all its technical beauty and detail.
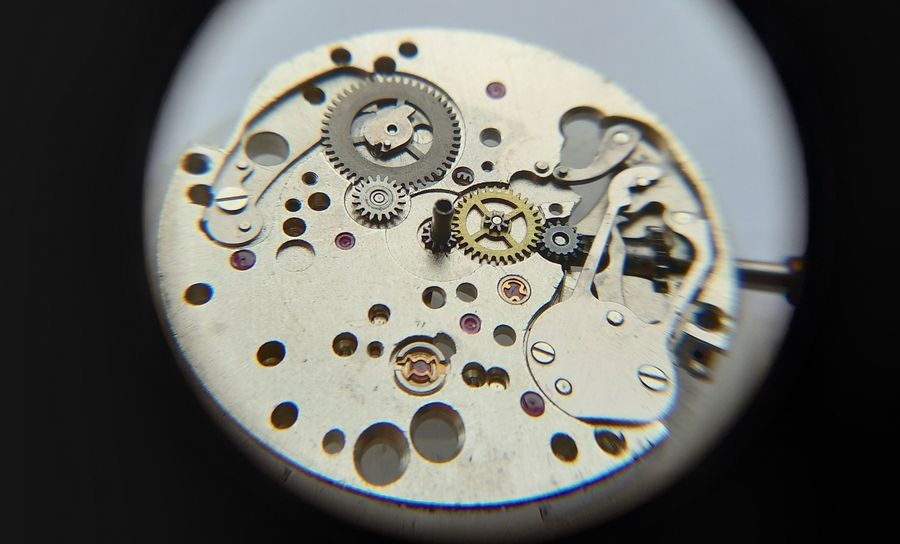
For now we will simply remove the parts and save every nuance for the description of reassembly. One warning only: the calendar command wheel must be taken off with care, so as not to damage the accumulating spring. It is brittle, and a bent one is all but impossible to true again.
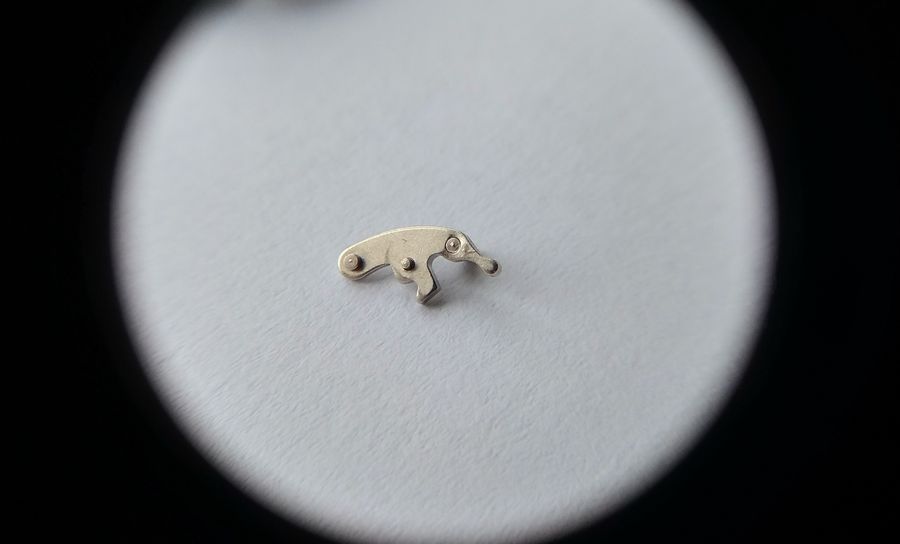
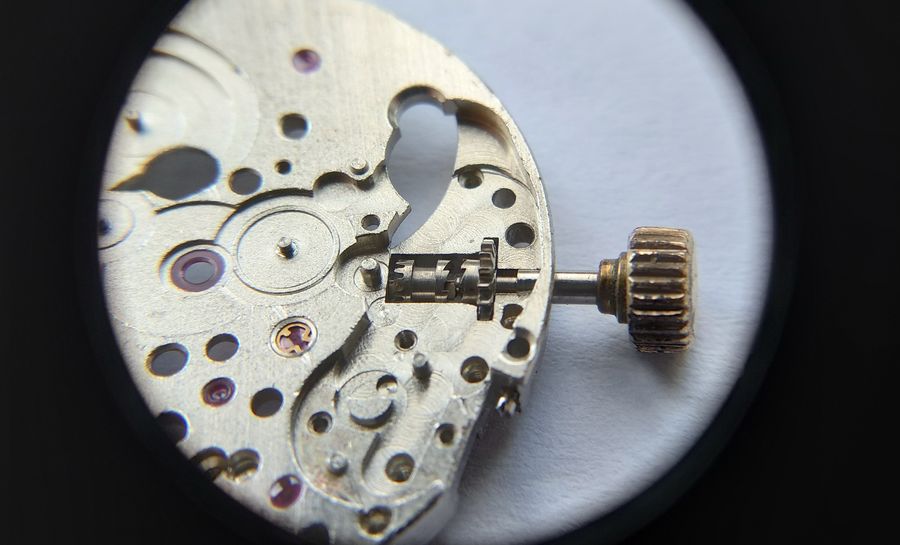
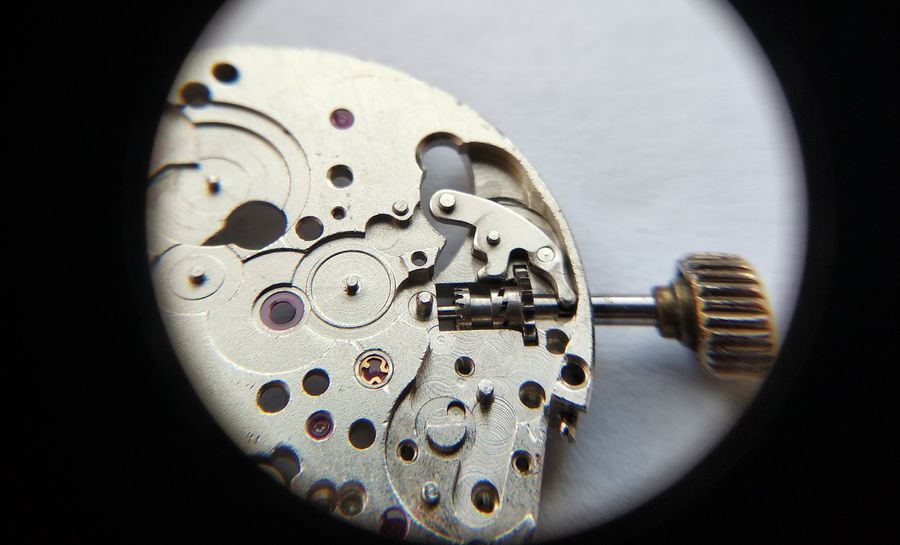
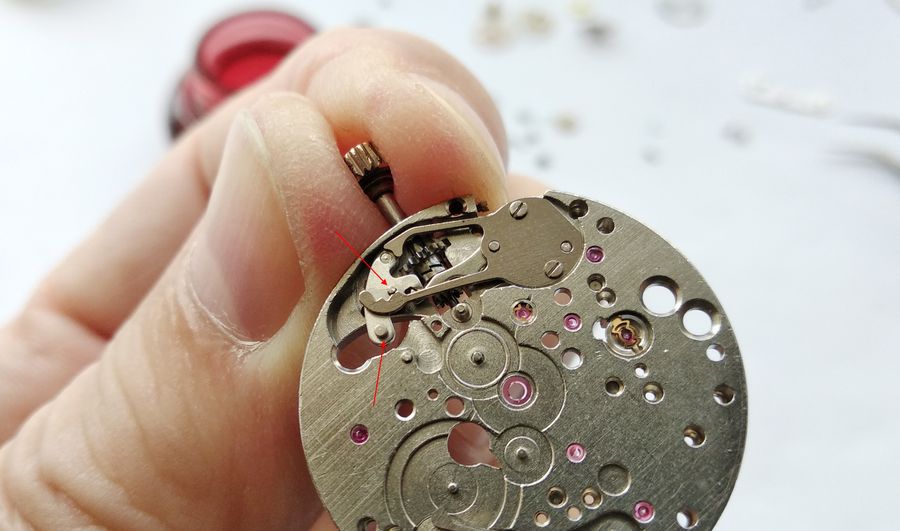
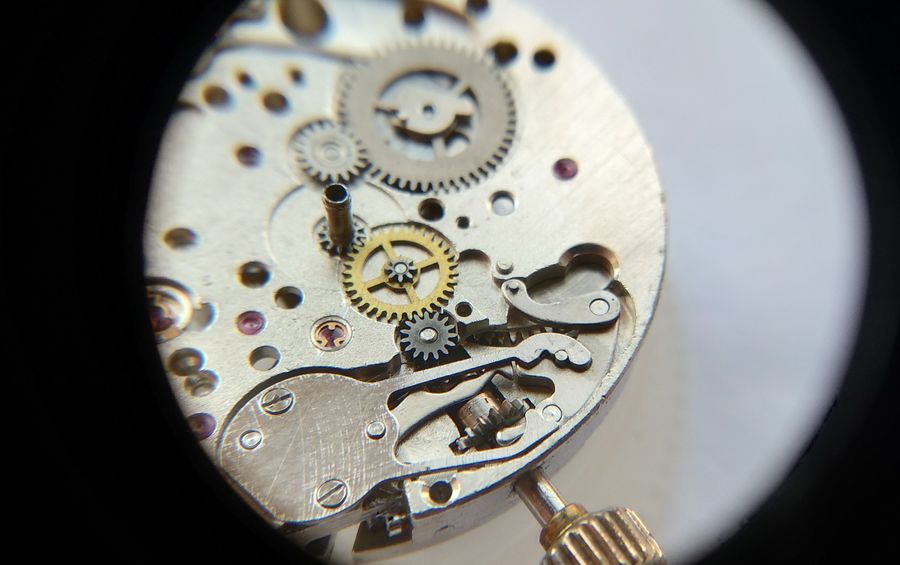
Now to the keyless works. Here the design departs from the standard arrangement, because the winding stem has not two but three switchable positions. The first two — winding the mainspring and setting the hands — are the usual detented stops. The third — date correction — is not detented: the stem is drawn further outward, advancing the date, and on release it returns automatically to the second position. Introducing that function meant reworking the intermediate setting lever, and adding a dedicated date-correction lever, which is visible here.
We remove the date-correction lever. Watch how the intermediate lever shifts into the second position.
Now we take off the keyless cover spring and look at how far the stem can travel. And — remember that fateful spring fitted in the calendar? Here, behold: the U-shaped spring, sitting in the keyless works. Simply marvelous. No matter; we will put it right.
Let us examine the intermediate lever more closely. You can see that the part has gained a boss carrying a finger, on which the date-correction lever seats. I will try to show the action later, at assembly; for now we simply study the parts in detail.
The intermediate lever from the reverse side. Here there is only the push-button pin, which we press to disengage the stem from the lever when drawing the stem out of the movement.
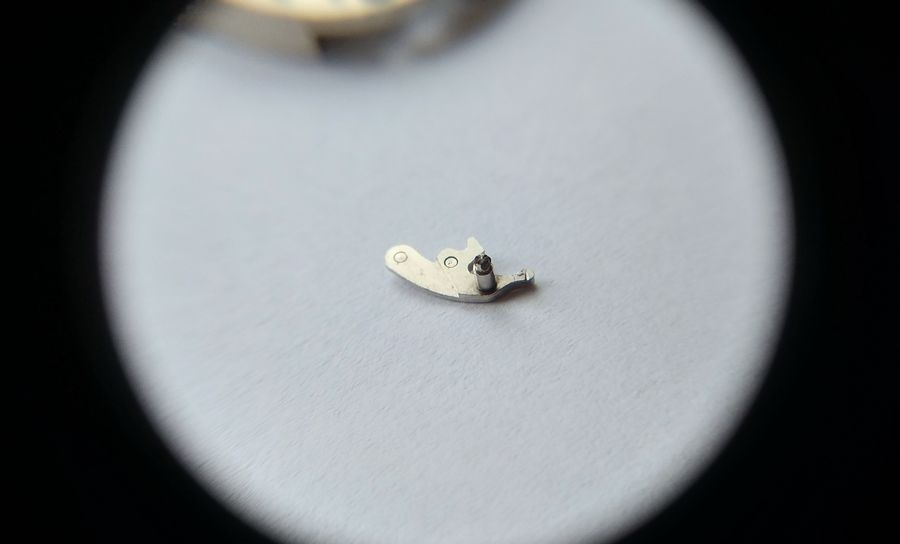
And this is the accumulating spring. As we know, the calendar switches instantly, and the energy for that snap is stored precisely by this spring. Its tip ends in a beak that rides along a specially profiled cam on the calendar command wheel. We will look at this part in more detail during reassembly.
That leaves only the center-wheel bridge to remove, the cannon pinion already being off. I took the cannon pinion off after all the calendar and hand-setting parts had been cleared.

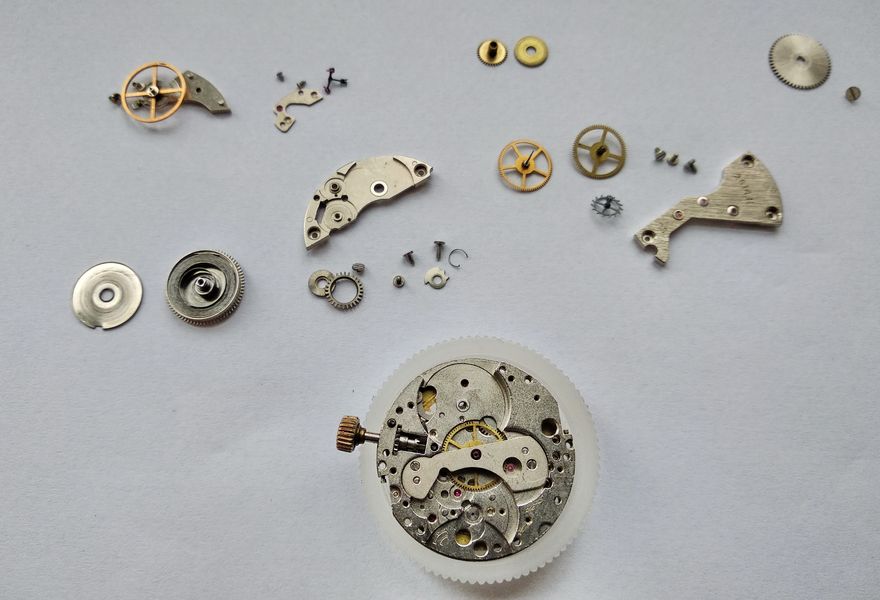
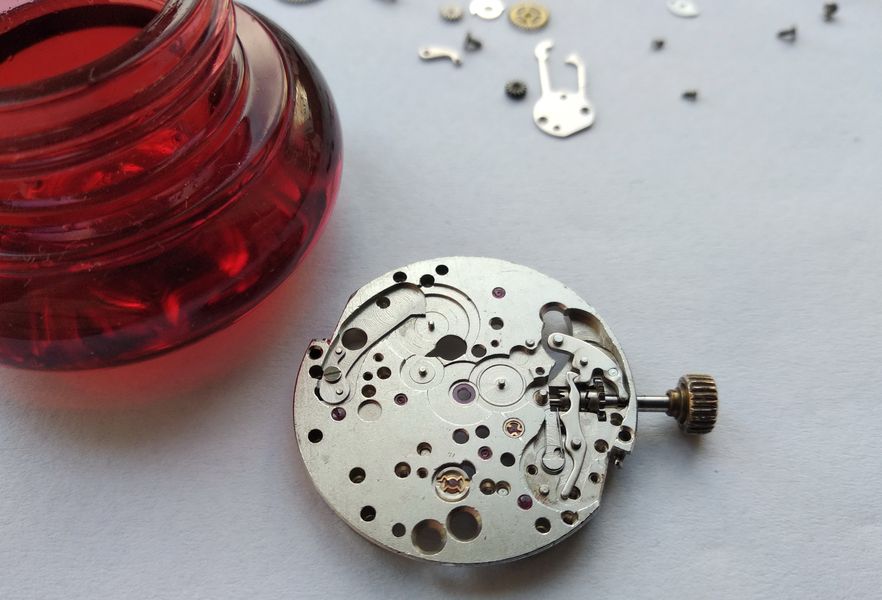
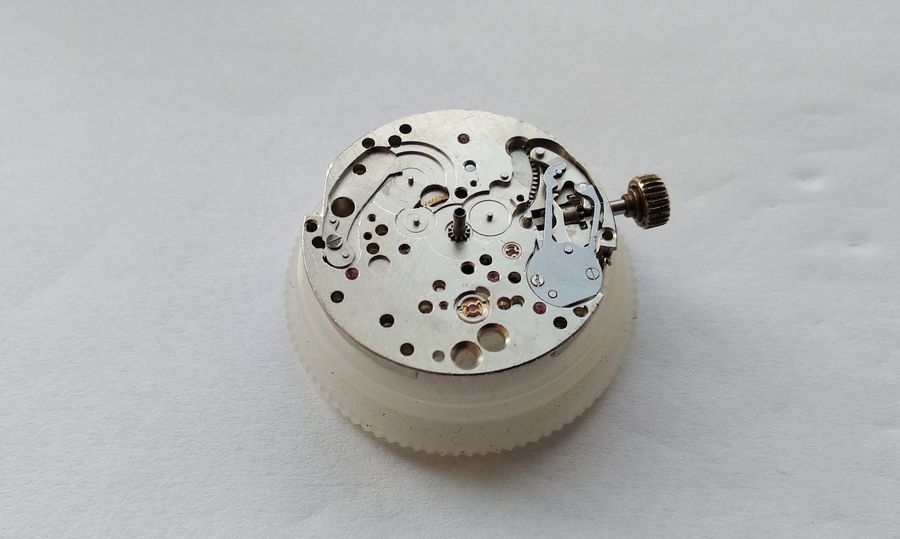
The watch is now fully stripped and ready for cleaning.
There seemed to be little visible grime on the movement, yet after the parts went through it the benzine had taken on the color of the leaves outside the window, with debris drifting in it. Better there than on the components. With that, we can gradually begin reassembly.

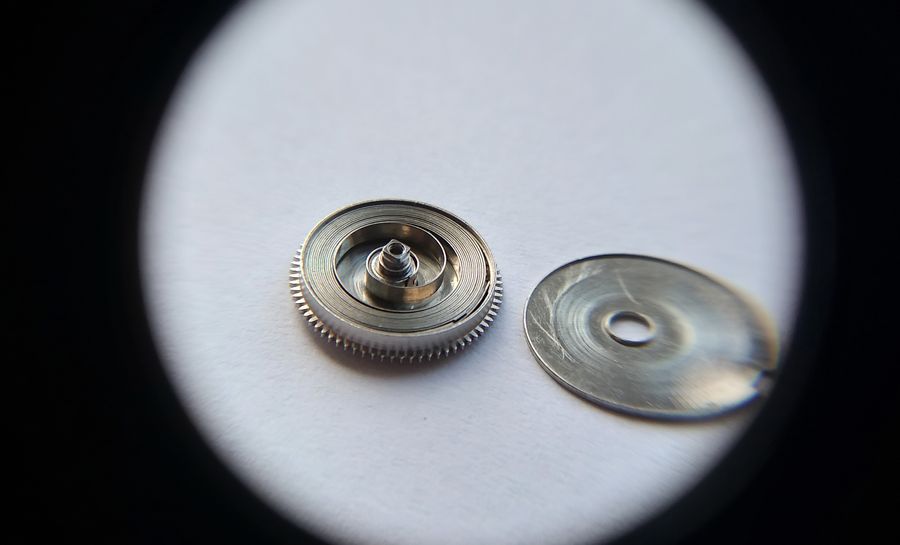
Ah, yes — how could we say nothing of the mainspring? Here it is, clean and tidy. Otherwise it might take offense at being passed over and snap out of sheer spite. And we would not want that — it has happened before.
Now reassembly can begin. First we put together the sliding (castle) clutch.
We install the intermediate lever.
We lubricate and check the action.
We install the setting lever and the correct R-shaped spring, and lubricate.
Before fitting the keyless cover spring, note a feature of its design. It differs from the cover in the 2609 and other non-calendar movements in this seemingly trivial protrusion. A little further on we will see just how important that small addition is.

So, the cover is fitted, and the stem is in the winding position — the primary, first position.
We switch the keyless works into hand-setting mode. This is the second detented position.
And now the manual date-correction position. See where the finger of the intermediate lever has moved — it now rests on that very extra protrusion. Release the stem and ease off the pressure, and the spring's tab pushes against the intermediate lever's finger and returns it to position two. That is all there is to it. The keyless works are finished.
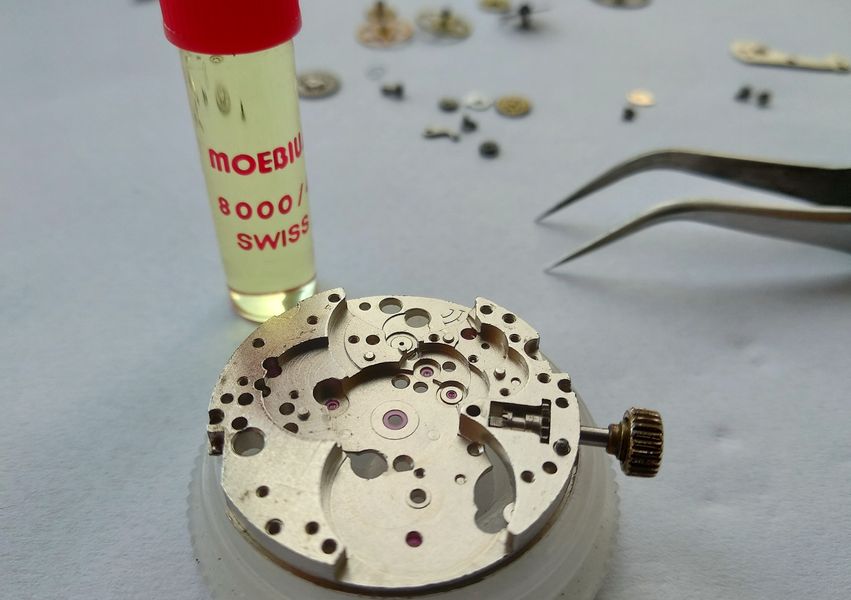
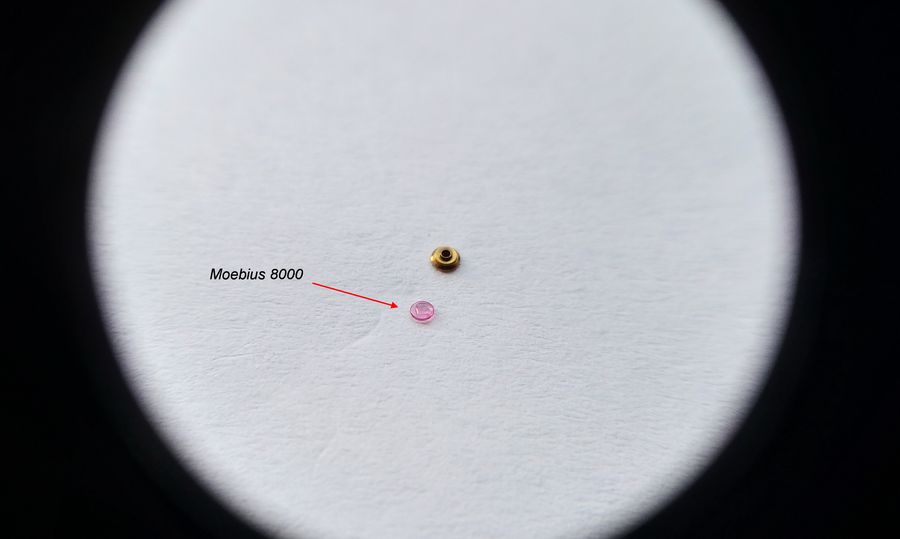
Now we will quickly assemble the wheel train and the motor. The jewels get Moebius 8000. For a Raketa it is no extravagance — we mean to turn Cinderella into a princess.
A little oil on the center-wheel jewel.
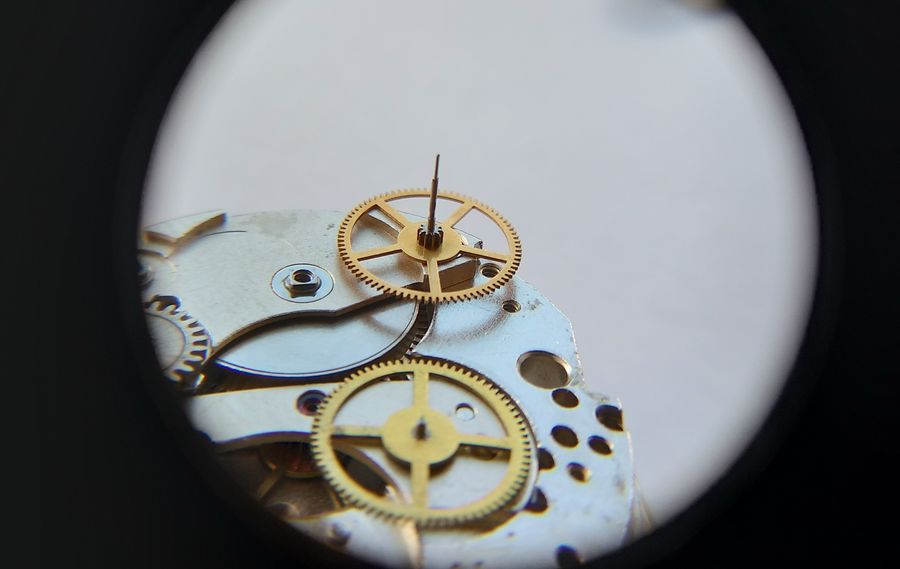
Here is the center wheel. Time has left a few marks on it, but that is of no consequence. What matters is that the pivot surfaces are in perfect condition.
We install the center wheel.
We install the center-wheel bridge.
Next comes the cannon pinion.
The pinion is in place.
We grease the mainspring with B-1.
We assemble and install the barrel.

A drop of oil on the carbide bushing of the barrel arbor.
We install the barrel bridge. Notice that the bridge has a recess giving access to the center-wheel-bridge screw. A small thing, but it pleases a watchmaker — it lets you do something even without a full teardown.
We fit the crown wheel…
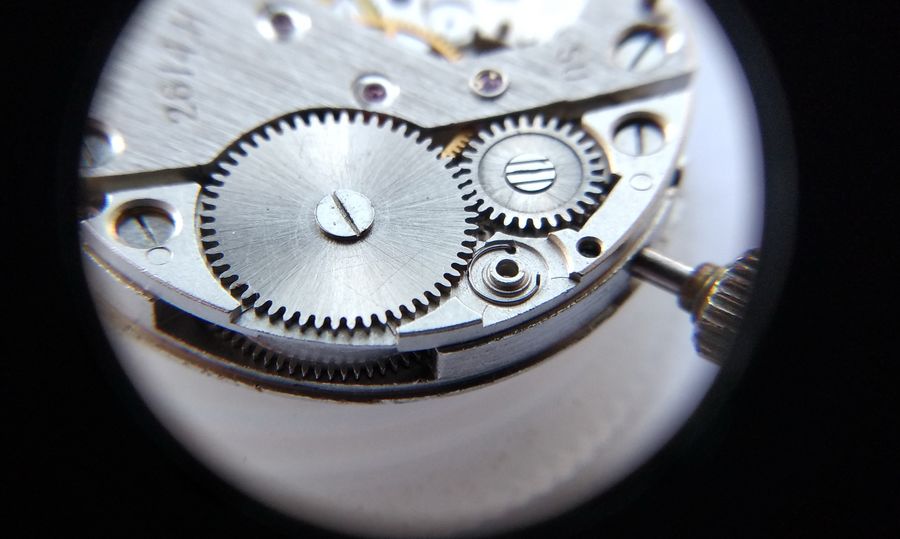
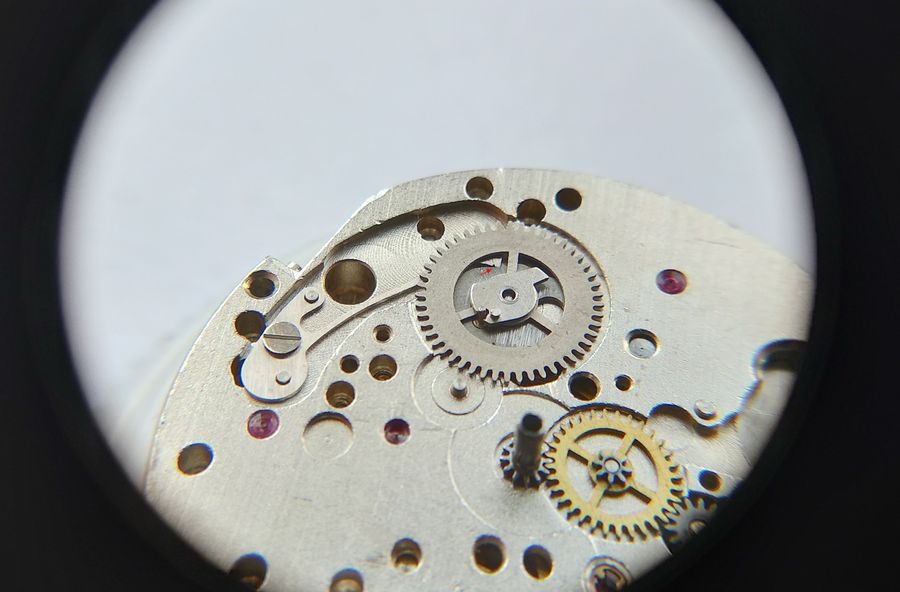
… and move on to the train. First we install the intermediate wheel.

Then the seconds wheel. Its arbor receives Moebius 8000 — recall that it turns in the jewel set in the center-wheel pipe. A word aside: the mineral Moebius 8000 is a close equivalent of the Soviet MBP-12. It is used on the pallets, the escape wheel and the balance jewels, and it works very well in the train jewels too. Its one limitation is that it is not recommended for heavily loaded parts — the mainspring, the barrel arbor, the keyless works. And we will not use it there.
And finally the escape wheel.
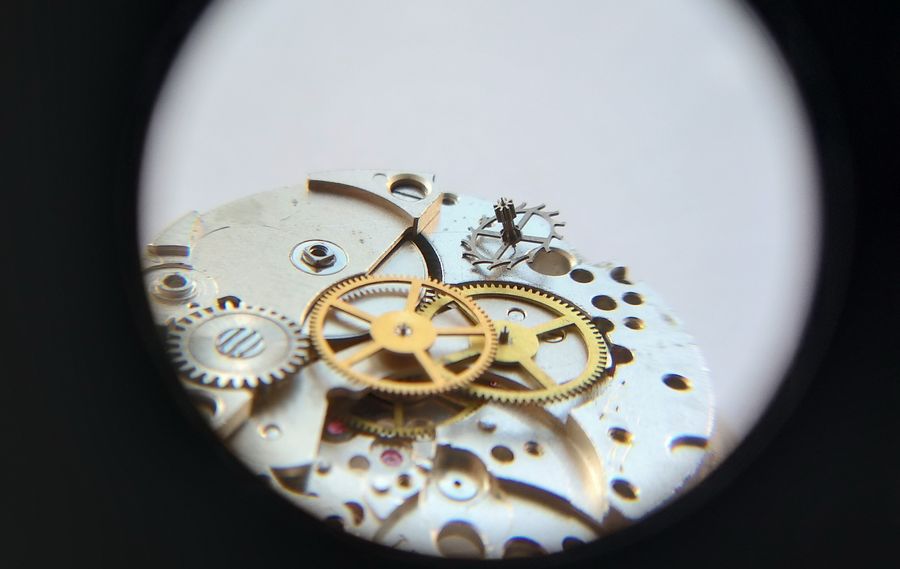
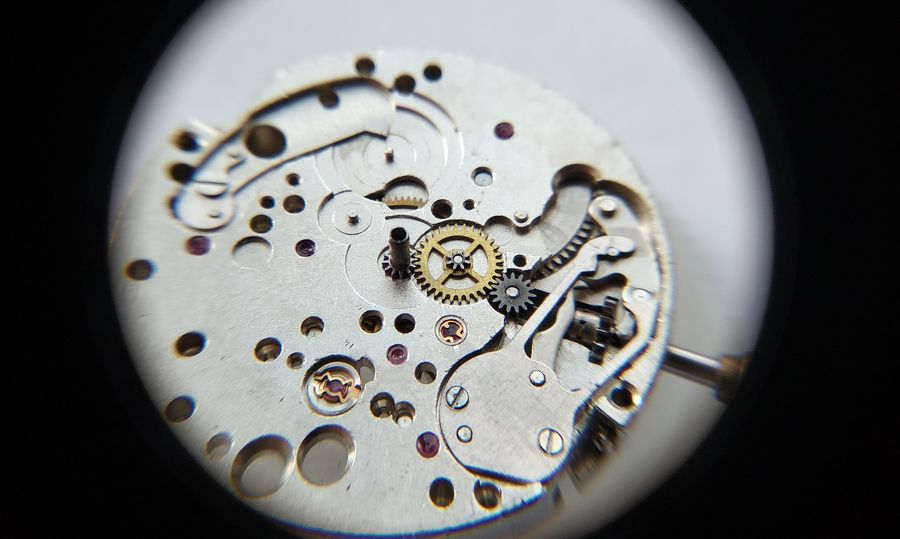
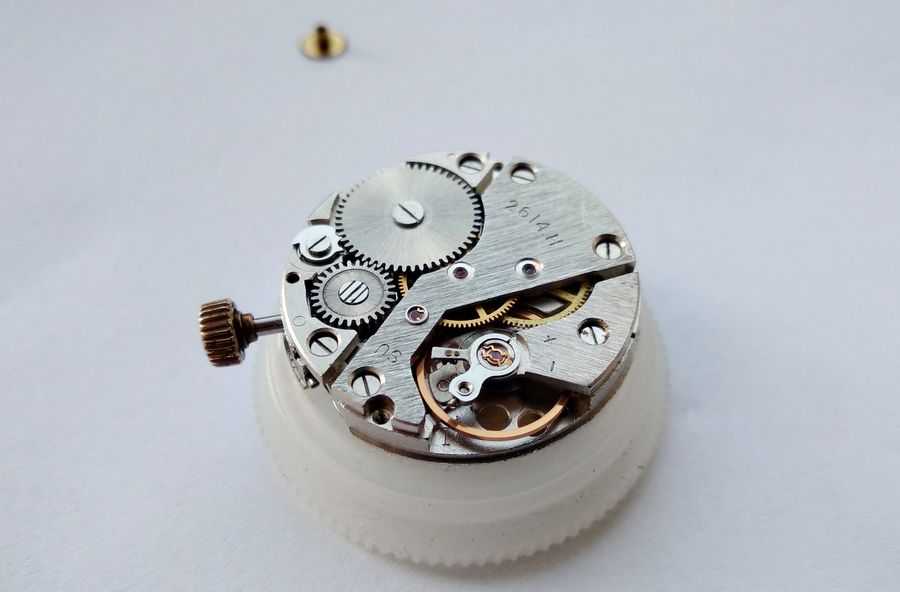
There they are — the three musketeers assembled. I always assemble the train in the 26xx.Н and .НА calibers with pleasure. Trouble never arises. The system is well thought out.

Now the barrel bridge and the barrel-wheel click.
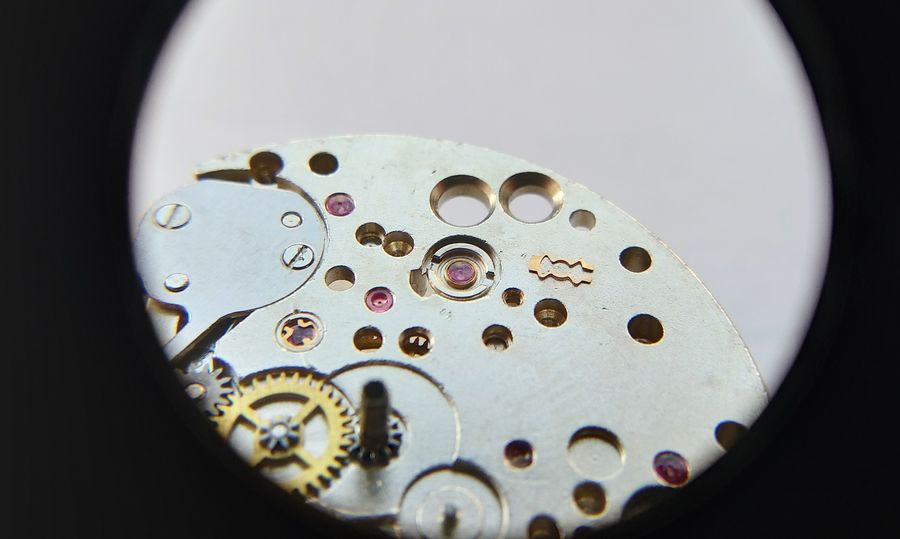
That is all for this side. We oil the train jewels, check the run-down, and turn to the slow side — the calendar. And that is the most interesting section of the story.
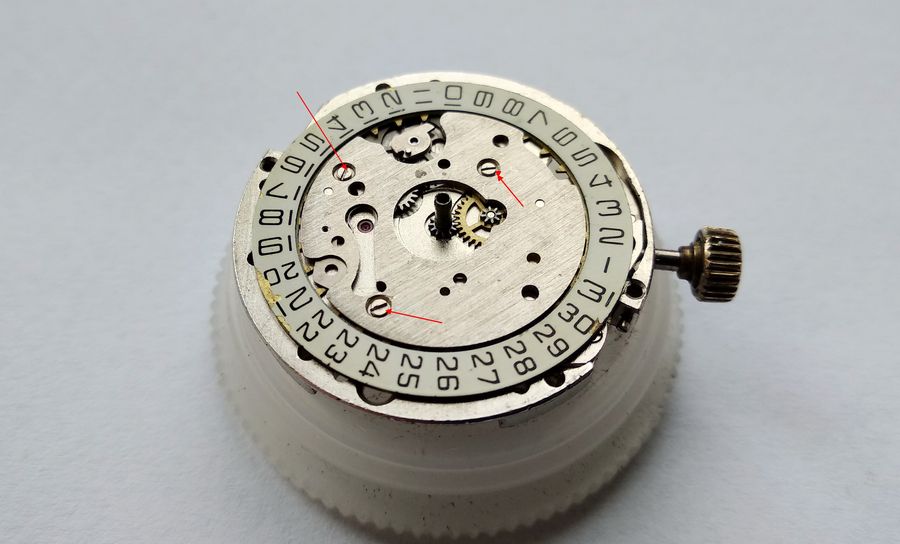
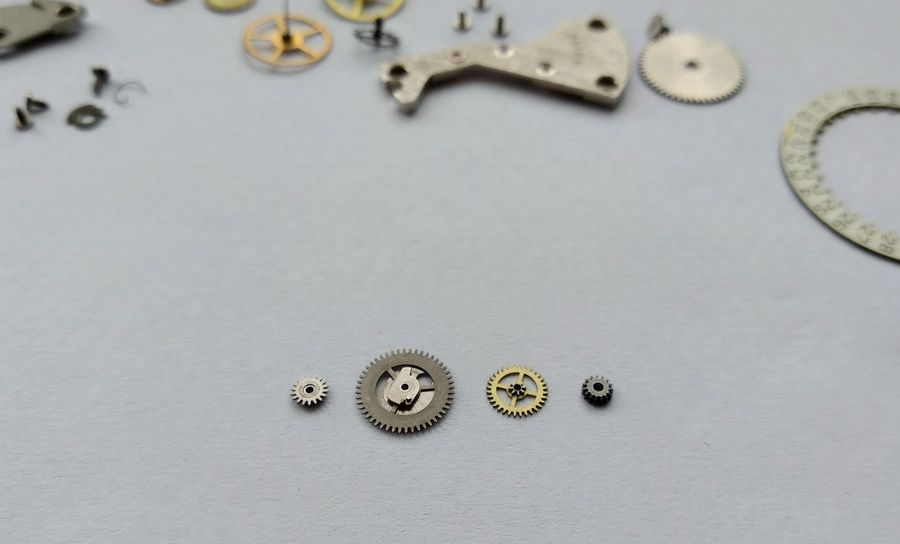
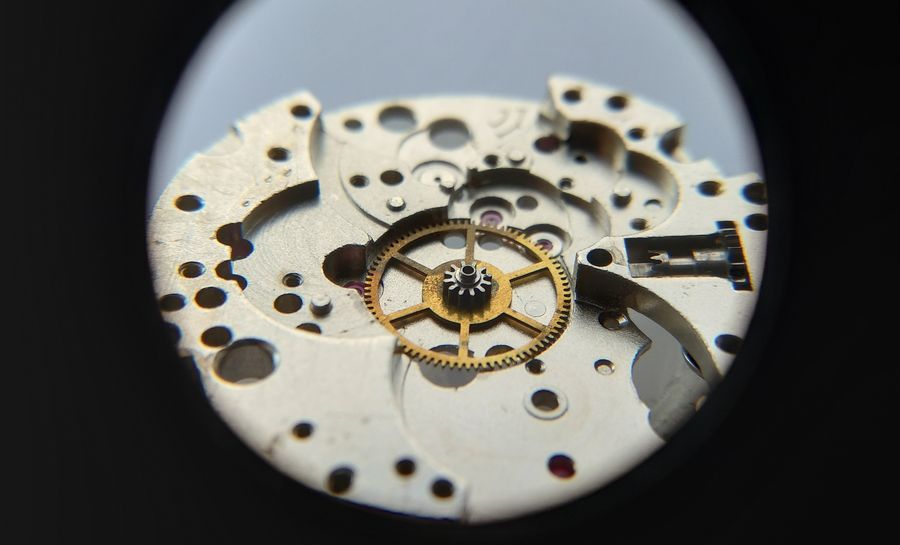
But before assembly begins, look at these jewels. There are three of them. They are the supports for the calendar's number disc — so-called non-functional jewels. They are present, but they are not counted in the caliber's stated jewel total. So the caliber reads as nineteen jewels, while in reality there are twenty-two. As you can see, the disc slides on these support jewels rather than on bare metal. And no, these jewels are not oiled.
The plate is ready to receive its parts. We begin.
We assemble the motion work of the hand-setting mechanism, installing the setting wheel and the minute wheel.
Now, before we start on the calendar, we will break with the usual order a little and service the balance cap-jewel setting. Ordinarily the cap jewels are serviced with the balance in place. But in this particular case, once the calendar is assembled the access to that setting will be blocked by the calendar bridge. One could, in principle, fit the balance now — but working on a movement with the balance already mounted is, as they say, possible yet ill-advised. So we service the cap-jewel setting. We remove the lyre spring and the setting.
We send the oil-stuck unit into benzine, where it duly falls apart into the through-jewel in its chaton and the cap jewel. We rinse the parts in benzine.
We dry them, and place a drop of oil on the cap jewel.
We reassemble the setting and return it to its seat.
And we close the lyre. Done.
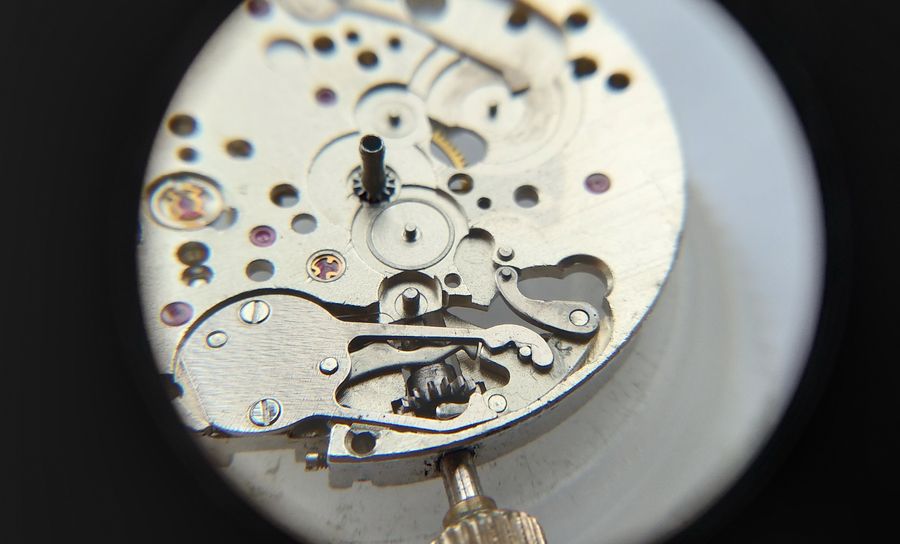
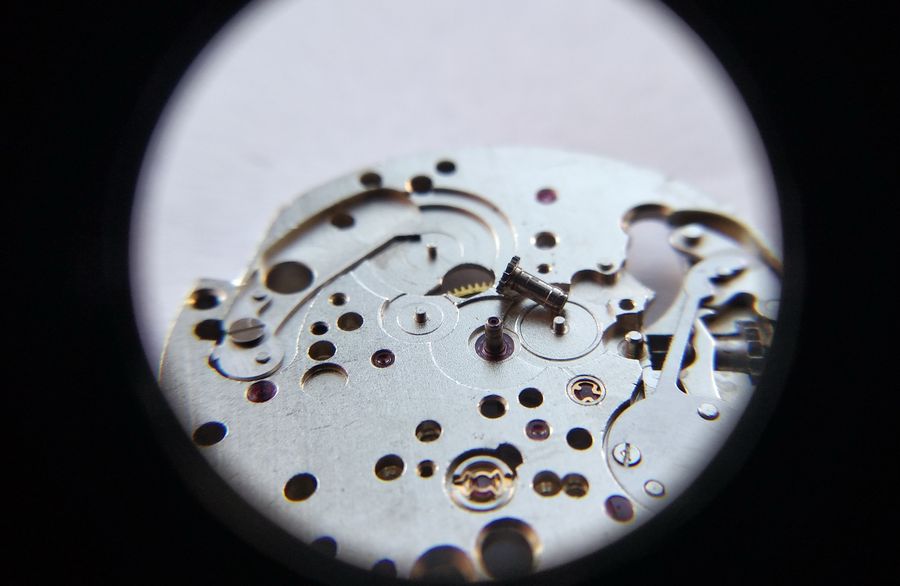
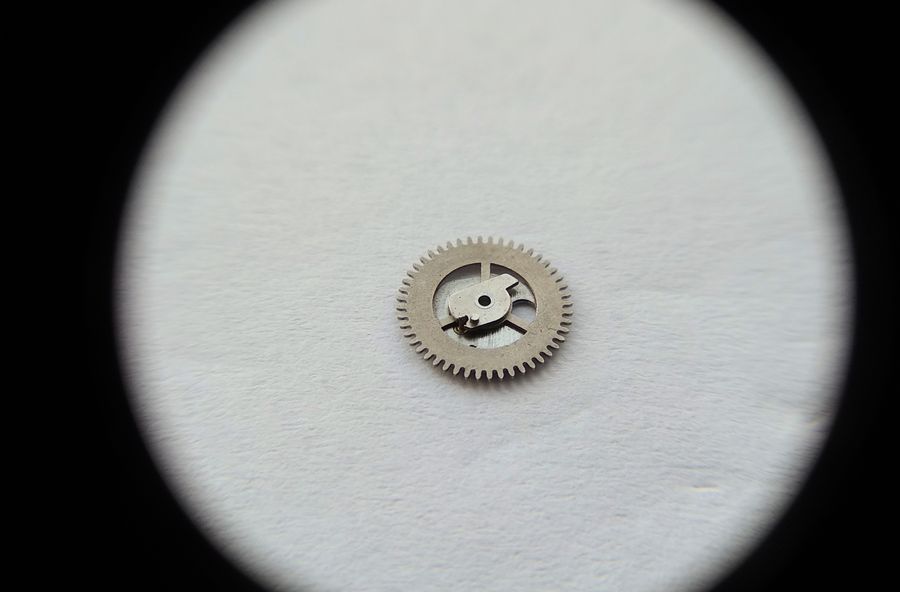
At last we can turn to the calendar proper. This arbor will carry the two-tier calendar wheel. Through it, force is transmitted from the hour wheel to the calendar command wheel at the necessary gear ratio.
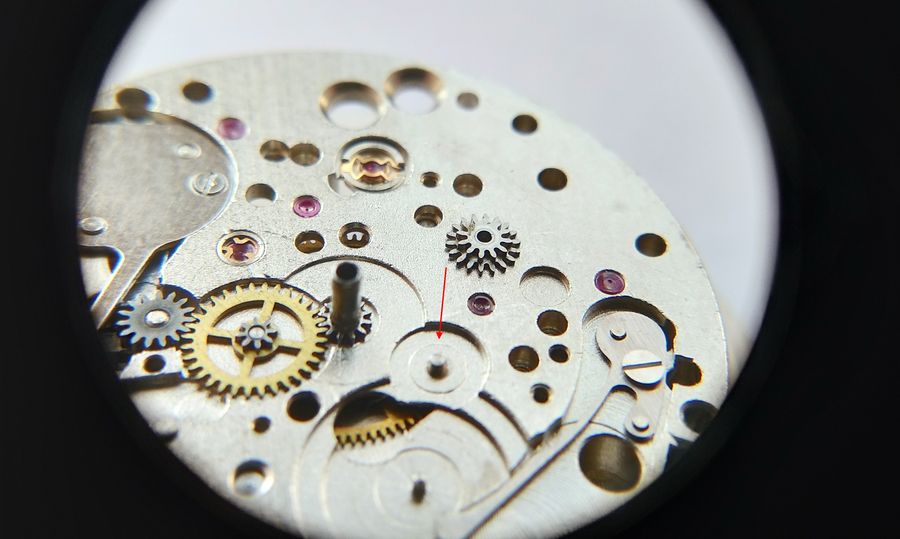
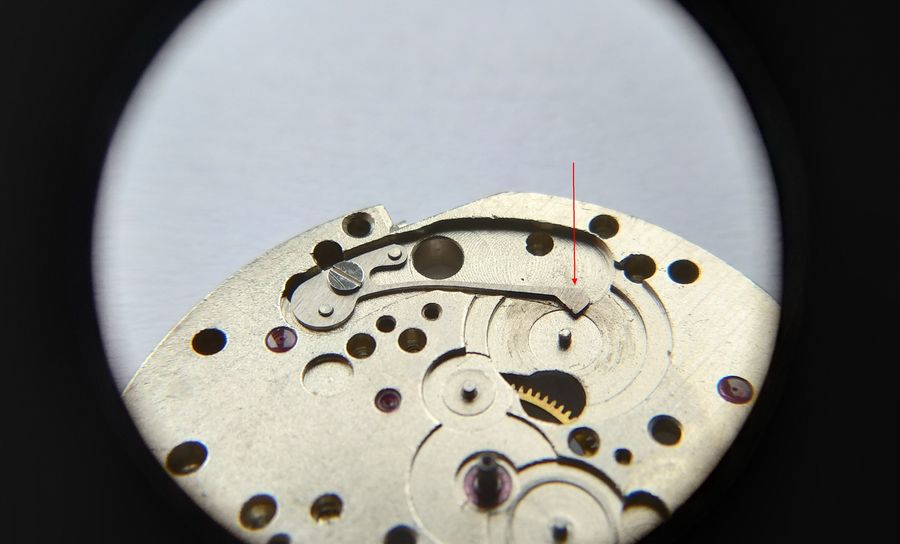
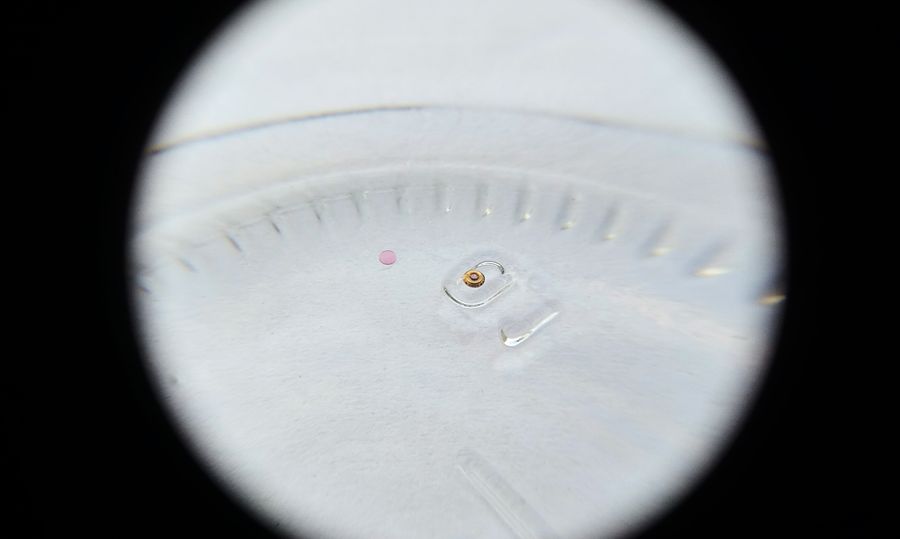
But first we set the command wheel in place. Here it is, seen from the cam side. The beak of the accumulating spring slides along this profiled edge. As it does, the stored force is metered out and the timely release of the jumper tooth — directly linked to the cam — is assured.
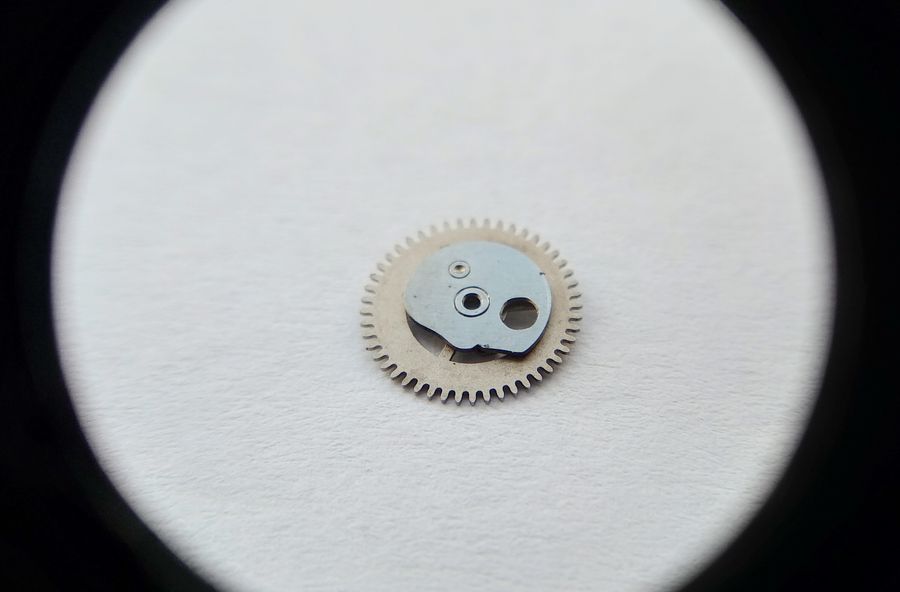
Here the command wheel is shown from the jumper-tooth side. Between the cam sector and the wheel's toothed rim there is free play, which provides for the release of the jumper tooth and the advance of the number disc by one step.
We oil the command-wheel arbor and the beak of the accumulating spring.
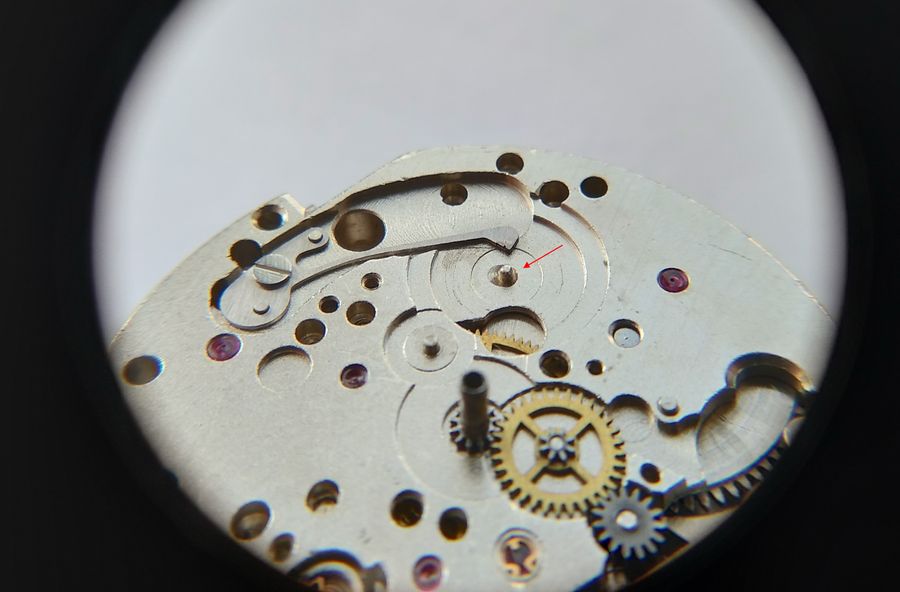
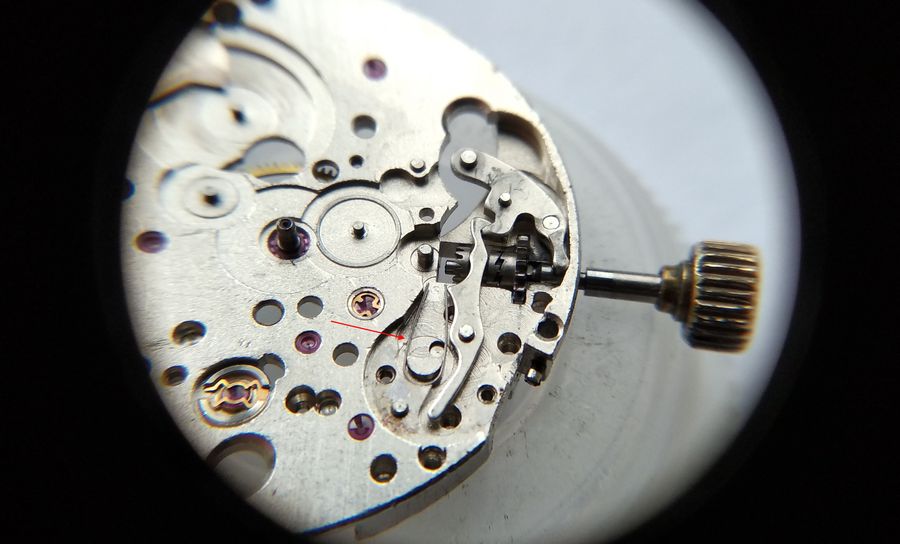
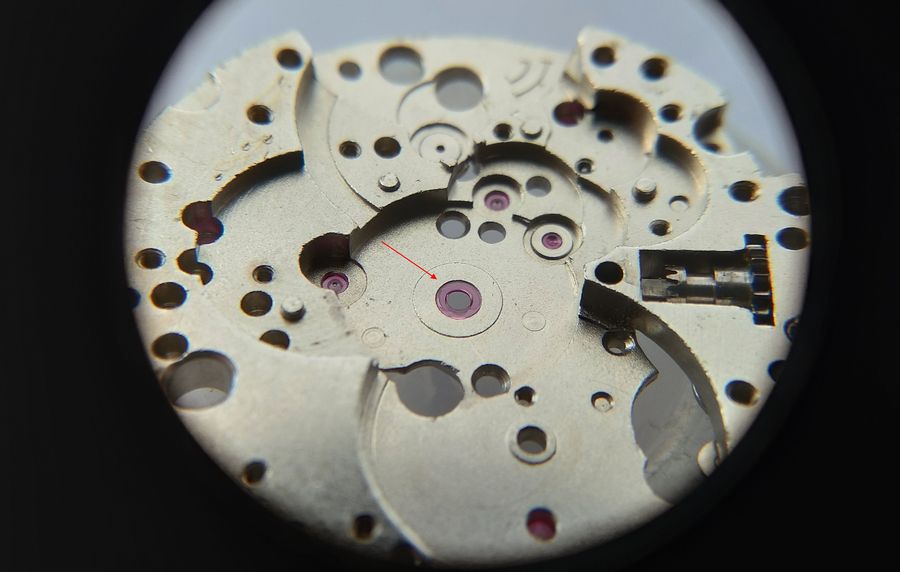
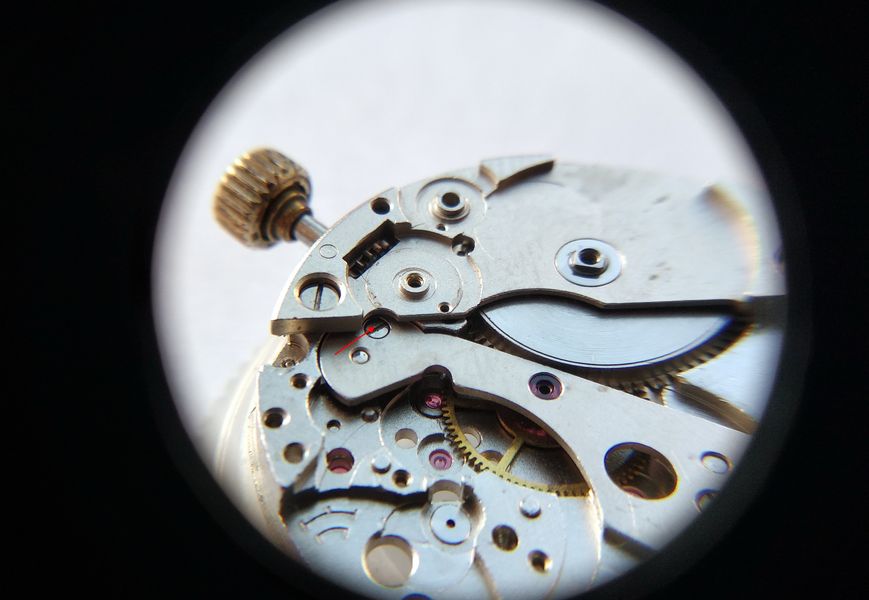
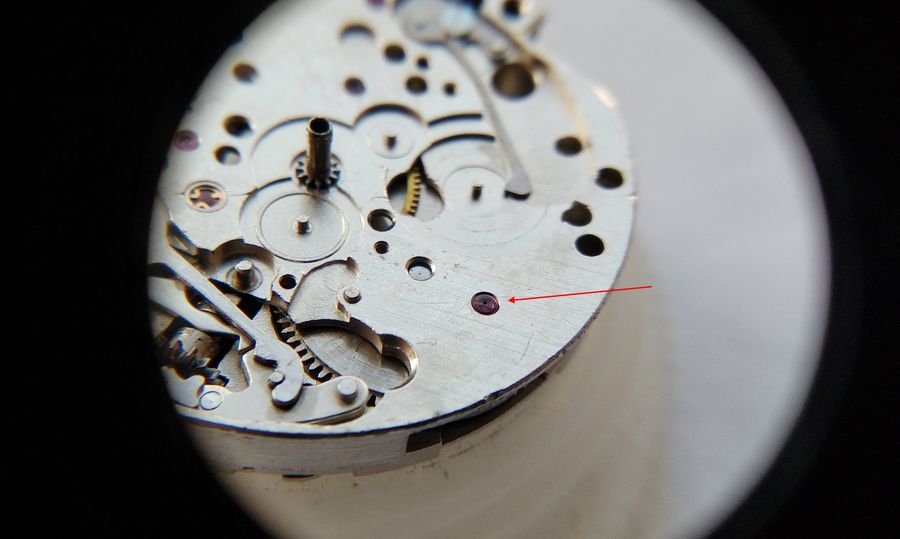
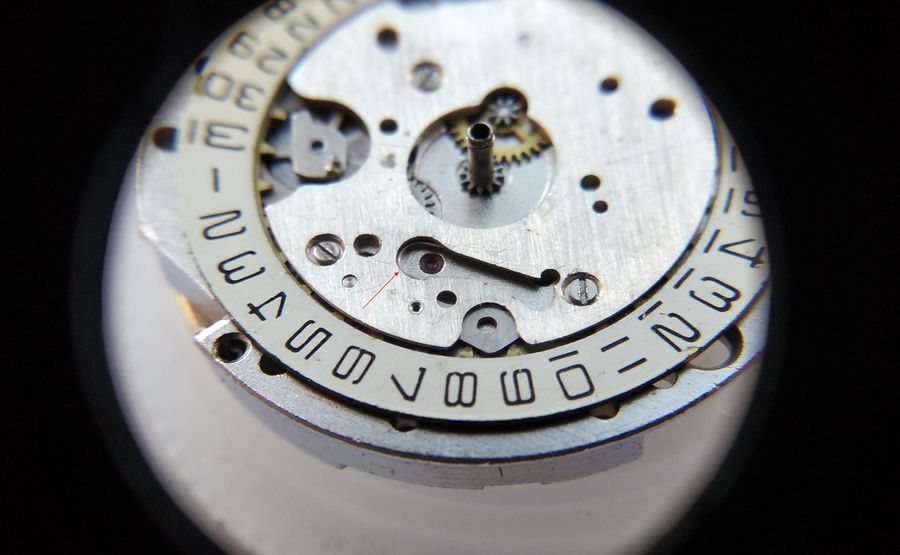
We install the command wheel. Its fitting has its own particulars. The wheel is set so that the cam, relative to the beak of the accumulating spring, sits in the position requiring the least deflection of the spring. Then we ease the spring aside with pegwood, just far enough for the wheel to drop fully onto its arbor and for the beak to come to rest on the cam track. Drawing the spring back any further is dangerous, for fear of breaking it — I spoke earlier of how fragile this part is. The very small red arrow shows how the beak of the accumulating spring and the cam of the command wheel should be positioned. And, incidentally, we put a little oil at the junction of these parts.
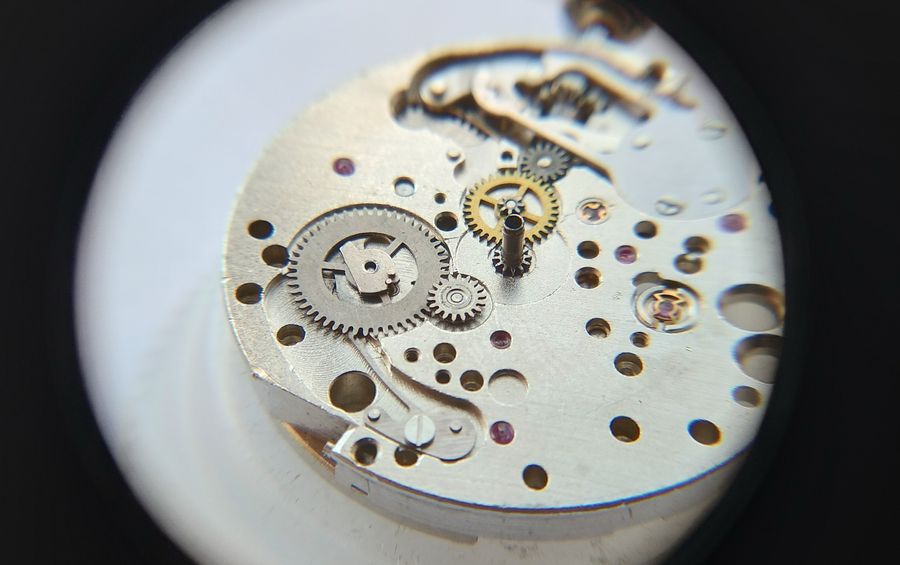
The calendar wheel system is assembled.
Now we install the correction lever that allows the disc to be advanced by hand.
After the lever, we install the disc-correction sector. Before fitting the disc, it is advisable to place a tiny drop of oil on the plate where the sector sits. That fixes it in place so it will not shift when the number disc and the calendar bridge go on.
We lay the calendar number disc into place.
We install the calendar bridge. As the bridge goes on, watch the position of the detent lever carefully, so that its locking tip falls between the teeth of the number disc. Miss that moment and, as the bridge screws are tightened, the disc teeth are easily damaged. Truing them is no easy task, and in some cases impossible.
We check the free play of the disc and fit the U-shaped spring — the correct one, not the R-shaped spring that was there at the start — into its slot. Easy and simple. How can one not recall the perpetually collapsing Slava calendar at a moment like this?
The spring is in place. Only its bend is visible through the window.
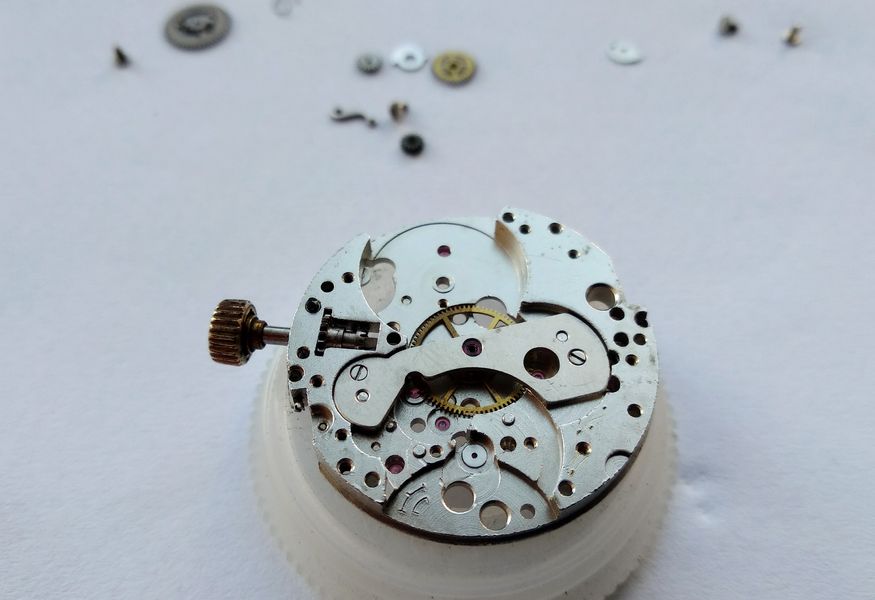
The calendar is assembled and tested. It works both automatically and in manual setting mode. All that remains here is to fit the hour wheel, the washer, the dial, and to dress the movement in a new case. Or cases — which we will do very shortly.
Ah — are the balance and pallet fork fitted? Not yet. But that is quick work. And done. Yes, done it is — though who is going to service the cap-jewel setting? Never mind; I will not photograph it, the reader already knows that procedure.
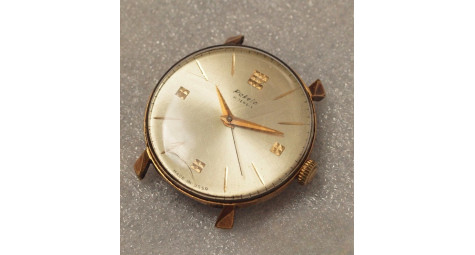
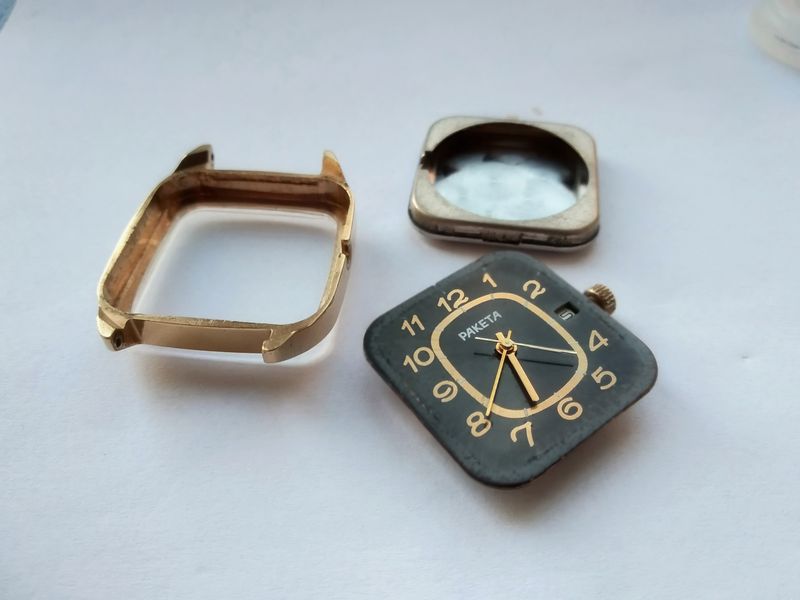
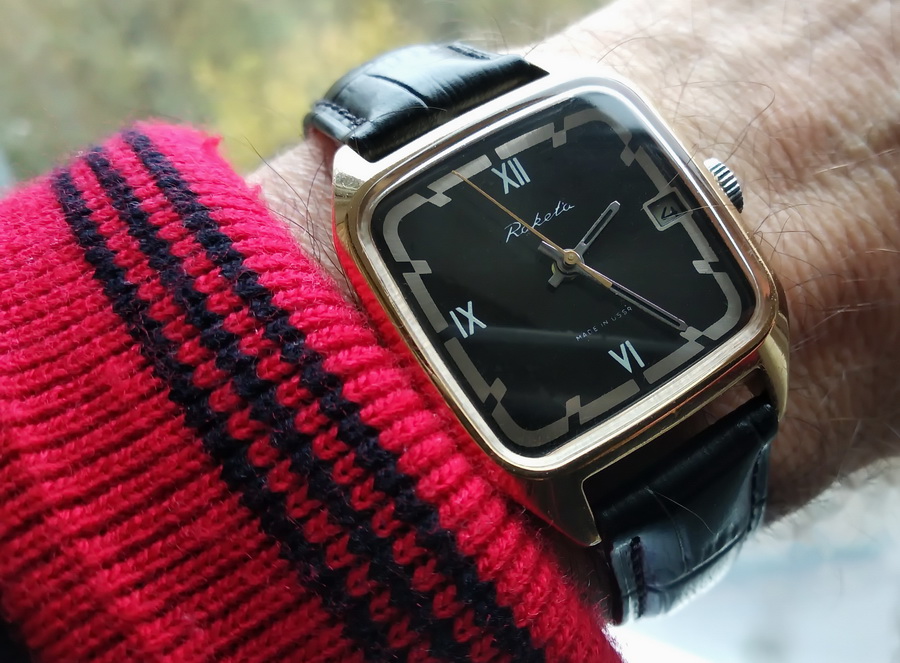
We are finished with the movement. All is well. Time to dress for the ball. Where is the appropriate attire? And what kind of ball would it be without a little gilt?
When fitting the dial, pay particular attention to this little ring. Without it the calendar will not work, because the dial will sit incorrectly. The ring is plastic and very fragile. Mine had to be glued.
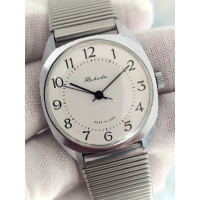
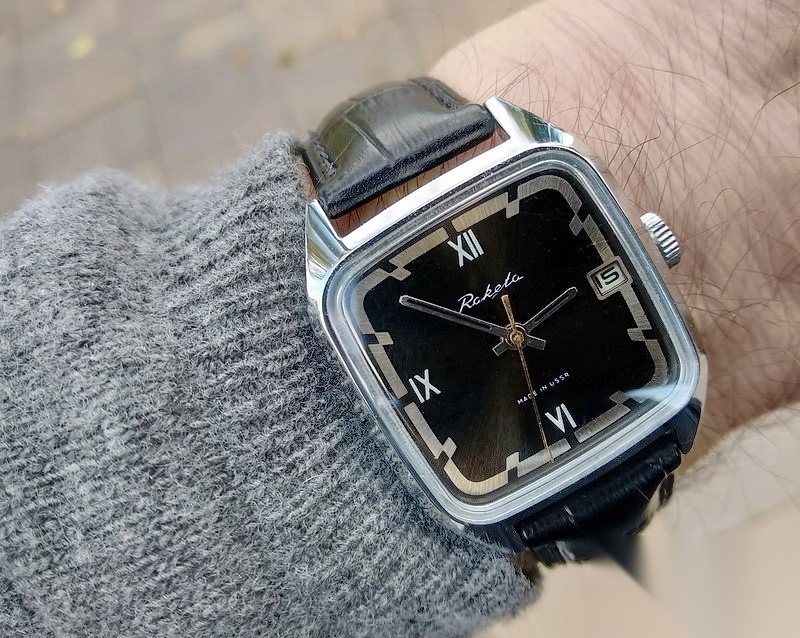
The dial is in place. So are the hands. And moving it into the case is a matter of seconds — the case, after all, is the split, modular type.
There. Now we need only wait for the carriage and be off to the prince's ball.
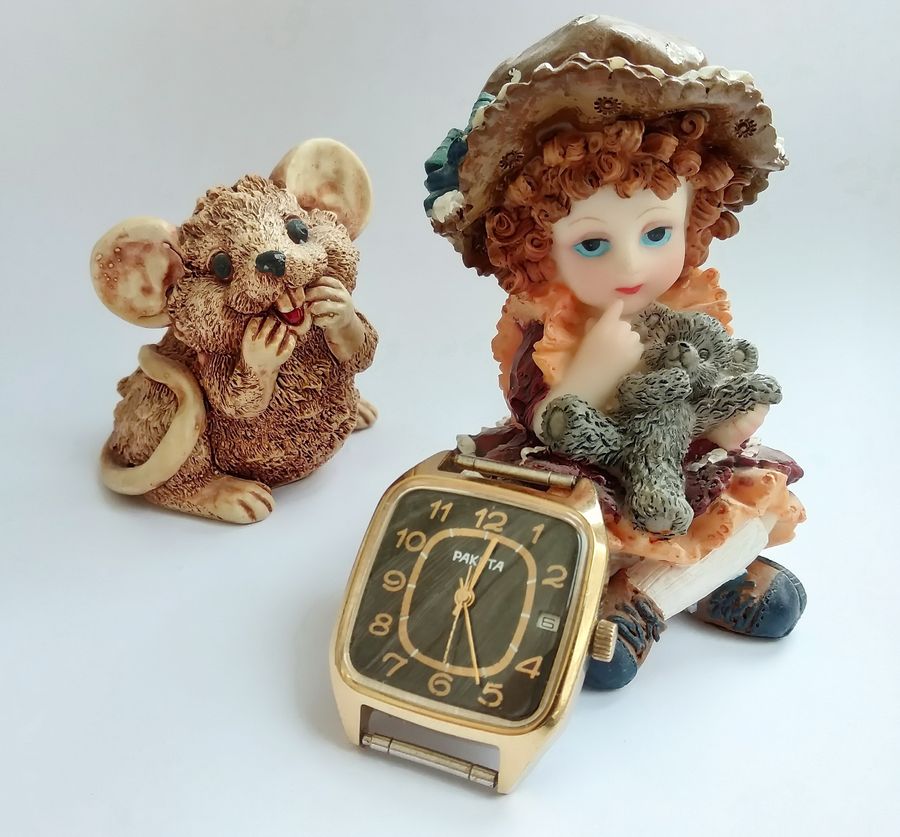
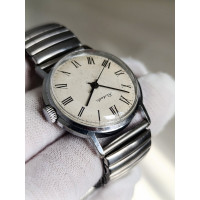
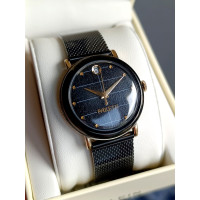
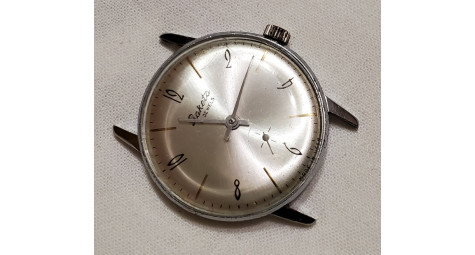
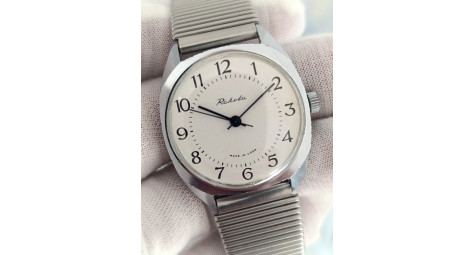
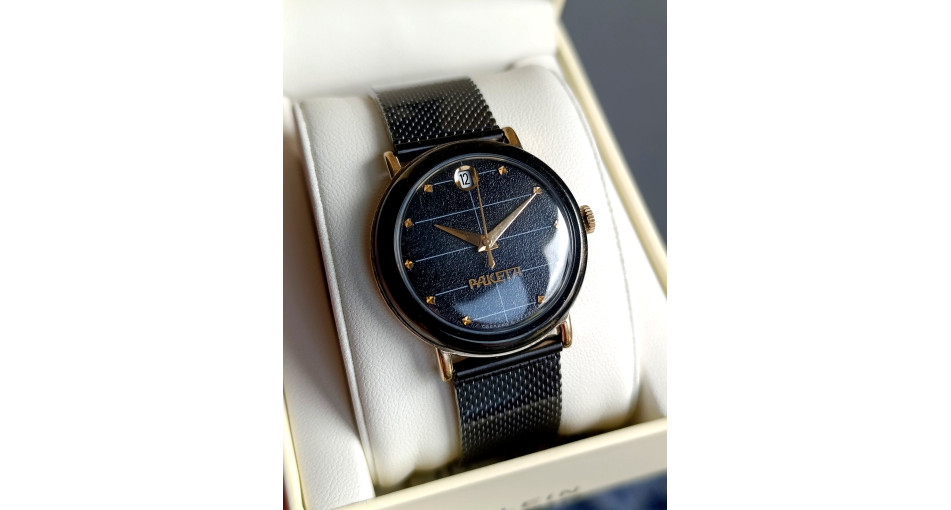
And what comes next in the fairy tale? What is a tale without a bride and a wedding, and what bride is without a white gown? So we will exchange the gold attire for wedding white. That, admittedly, means swapping the dial, the hands and the crown head too — but with a case built like this it takes only minutes. I am no admirer of gold; after a brief experiment I chose to bring the watch to the look I am used to, the one that raises no dissonance. Glamour is all very well, but it is no longer quite my context.
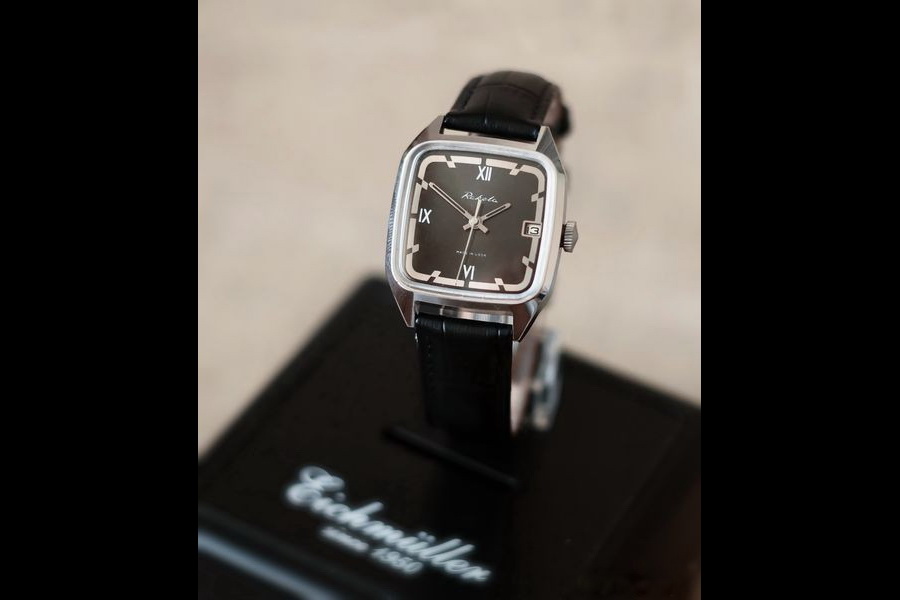
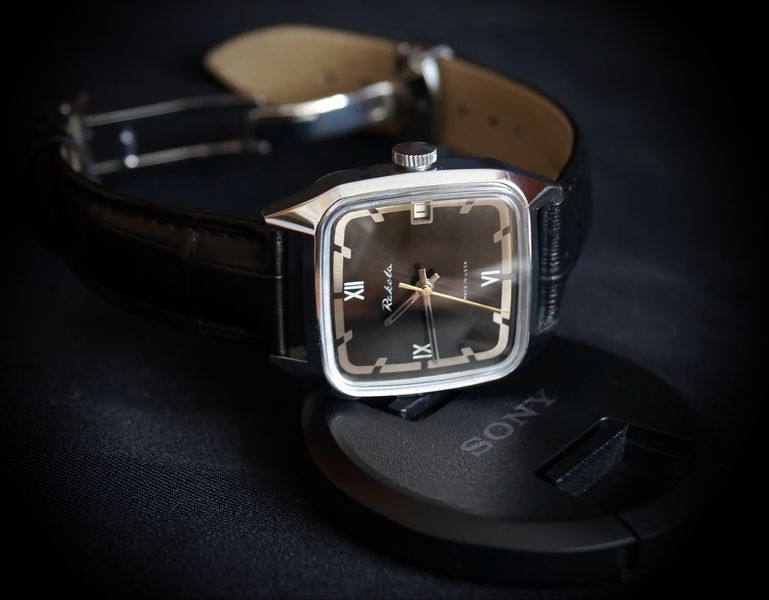
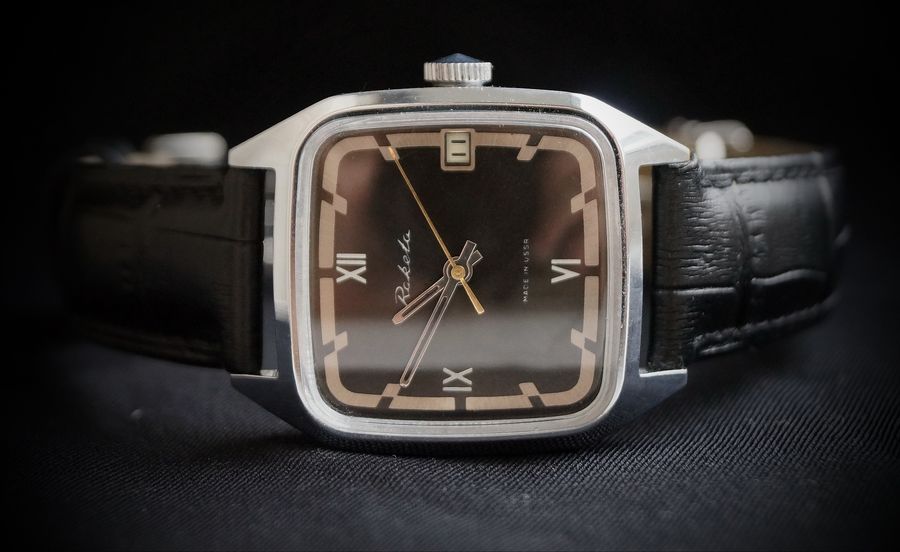

In the end we got a little of the glamour promised at the outset, and even a small costume drama into the bargain. And since the white version is far more to my liking, that is the one we will keep. In this dress the watch suits a lady and a gentleman equally well — unisex. It seems this version is moving into the everyday rotation as a favorite.
And should the mood take you, changing the gown is a minute's work.
A few dry figures from the manufacturer, to close. The 2614 movement is a 26 mm caliber, 4.45 mm in height, with nineteen ruby jewels — twenty-two in truth, counting the uncounted date-disc supports — a central seconds hand, shock protection for the balance staff, and an instant-action calendar showing the date. The balance is screwless, with a 0.4-second period of oscillation; the hairspring is flat, the stud-carrier movable. The power reserve from a full wind is not less than 40 hours, and the mean daily rate runs from +10 to −50 seconds. Modest numbers on paper — but a movement that, given a clean home and the right springs in the right slots, earns its place in the everyday rotation.