Cart
Your shopping cart is empty!
It's never too late to make things right :)
"He who wants to, finds a way; he who does not, finds an excuse."
— Socrates
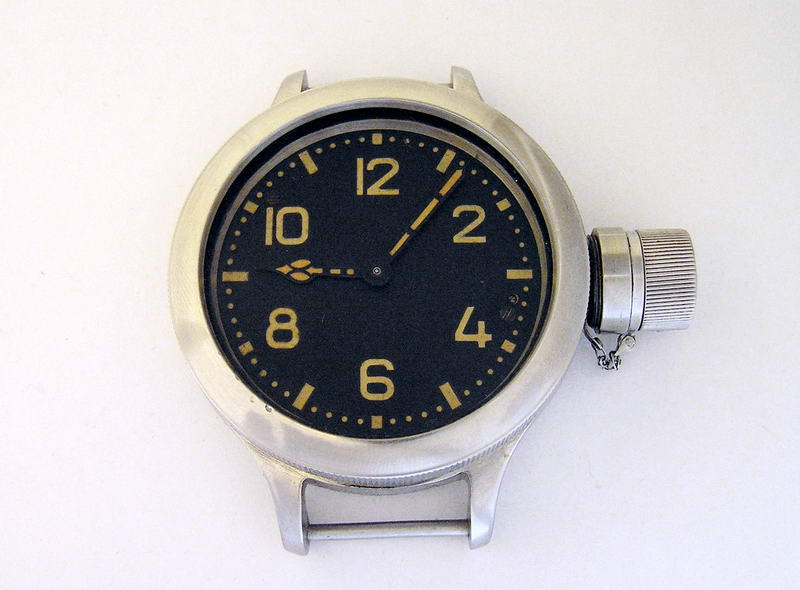
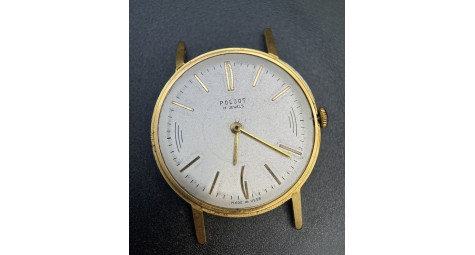
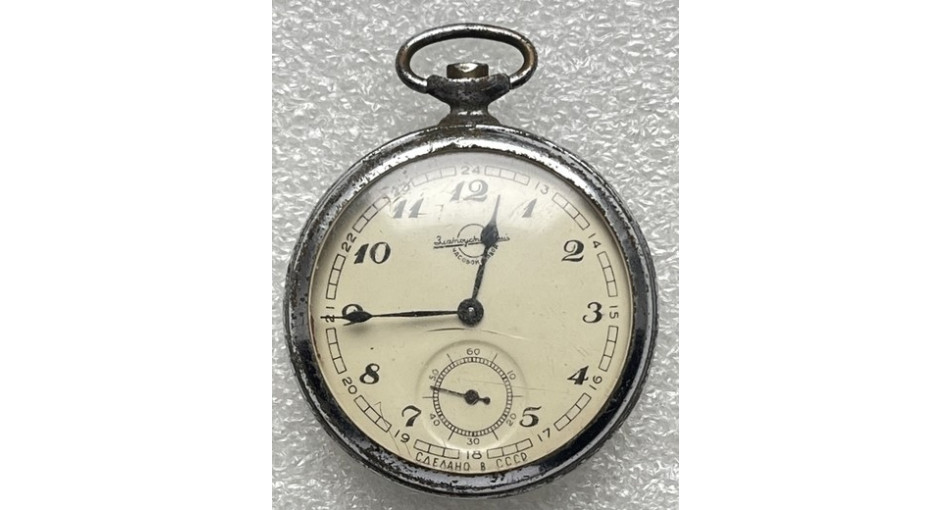
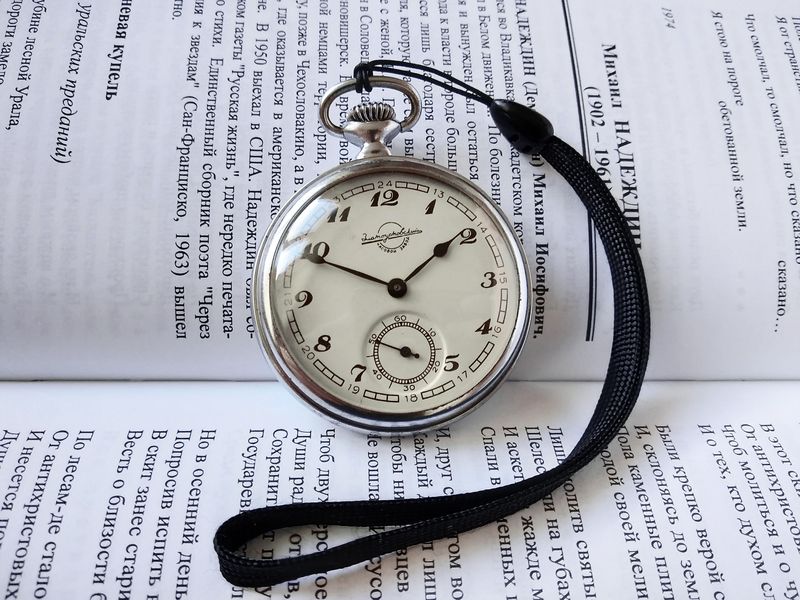
Everyone knows what a "diver's" watch is — a watch for recreational and sport diving. Far fewer people know what a watch for commercial divers is: a watch you can take to a depth of seven hundred metres, intended not for the sport diver but for the professional working in technical and commercial diving. Exotic? Certainly. Yet such watches were once built in the USSR, at the Zlatoust Watch Factory. The movement inside them had to match the task, and it did — the caliber K-43, on fifteen jewels. But this caliber was not fitted only to diving watches. It also powered the splendid "Kirovskie" pocket watches, which in the early 1950s were renamed "Zlatoustovskie." It is those pocket watches we will discuss here. The movement is a fascinating one — though it carries a single flaw, one that did not spare even this example. More on that below. If you would like to see what these and other Soviet watches look like in the metal, the catalogue is a good place to start.
Here is what the factory specification tells us. The Zlatoust Watch Factory caliber K-43 (15-1), 15 jewels, was made to GOST 918—53, with hour, minute, and subsidiary seconds hands. A movement 43 mm in diameter (at the mounting bezel), running on 15 ruby jewels, with a duration from a single full wind of no less than 32 hours and a mean daily rate of ±45 seconds.
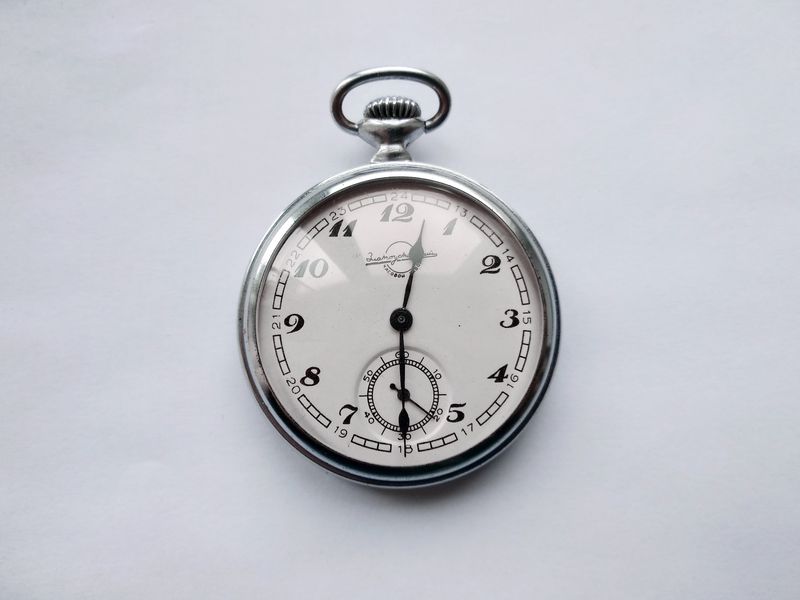
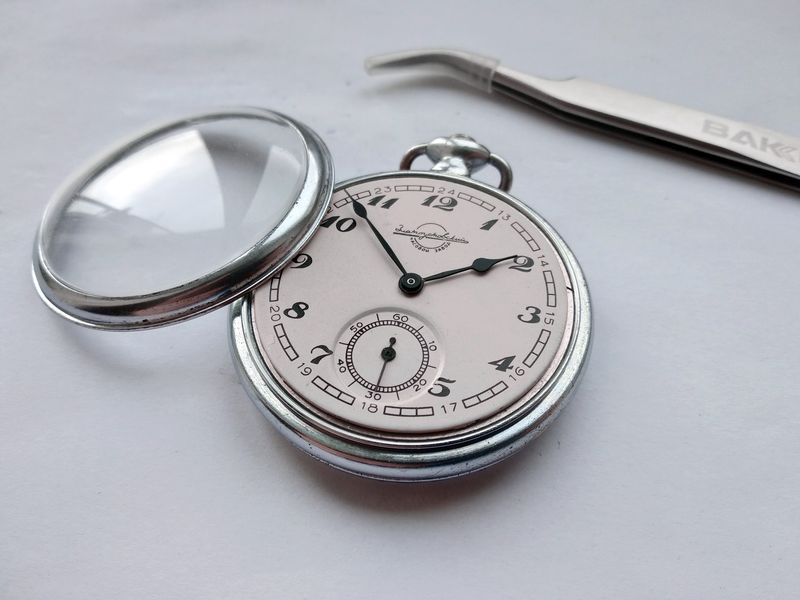
As noted, this gentleman wore different clothes over the years. I have never come across him in his diving dress — and had I done so, I would scarcely have dismantled such a watch: an exposed little "thermonuclear reactor," with its radium dial, is no welcome guest in a city flat. But a K-43 in the perfectly respectable dinner jacket of a pocket-watch case is here on the bench. The movement, like the watch, was produced in the first quarter of 1955. The case is elegantly shaped, two inches — practically 50 mm — across, and 17 mm thick at the highest point of its domed crystal. The dial has survived beautifully, having taken on a faintly noticeable ivory tone; rather distinguished, in fact. This style was designated "Design I": a chromed case 49.8 mm in diameter, silicate crystal, a silvered dial fully numbered 1—12 except for the 6, minute and seconds tracks of sixty divisions each, with every fifth minute division numbered 13—24, the seconds scale marked 10, 20, 30, 40, 50, 60, all figures, scales, and lettering in black, and oxidised hands.
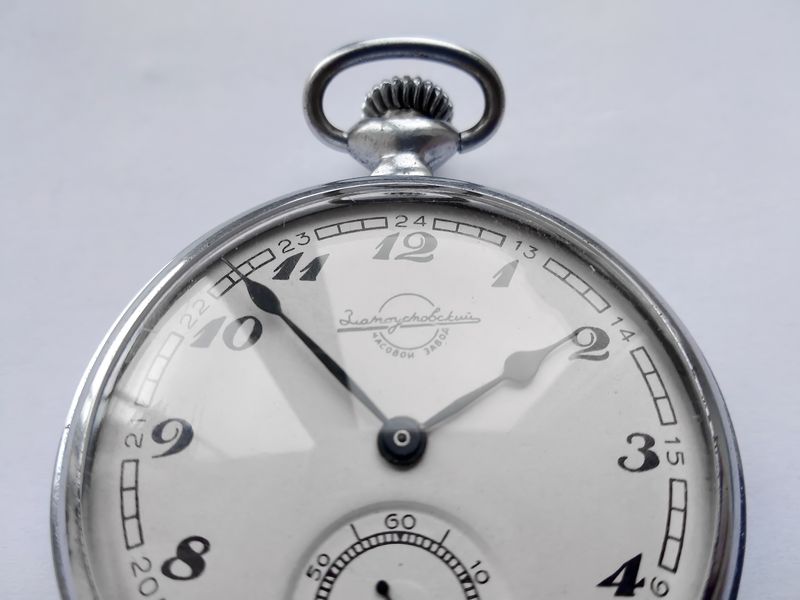
The factory emblem on the dial. Curiously, there is no "Made in USSR" inscription anywhere on it — yet the dial is entirely original. We will examine it more closely later.

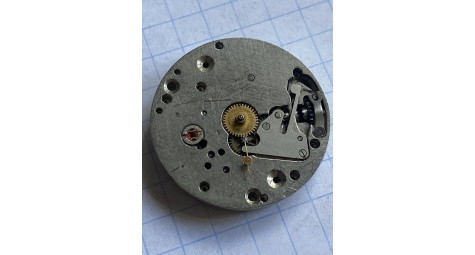
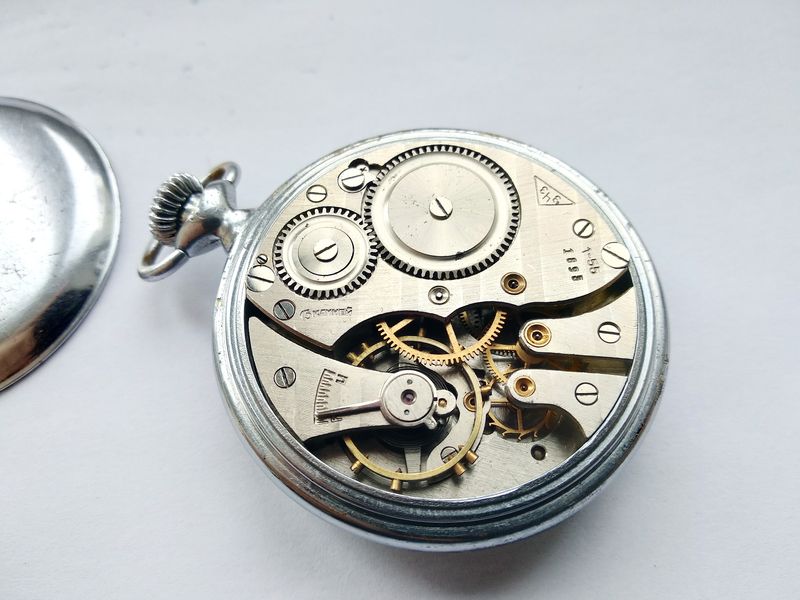
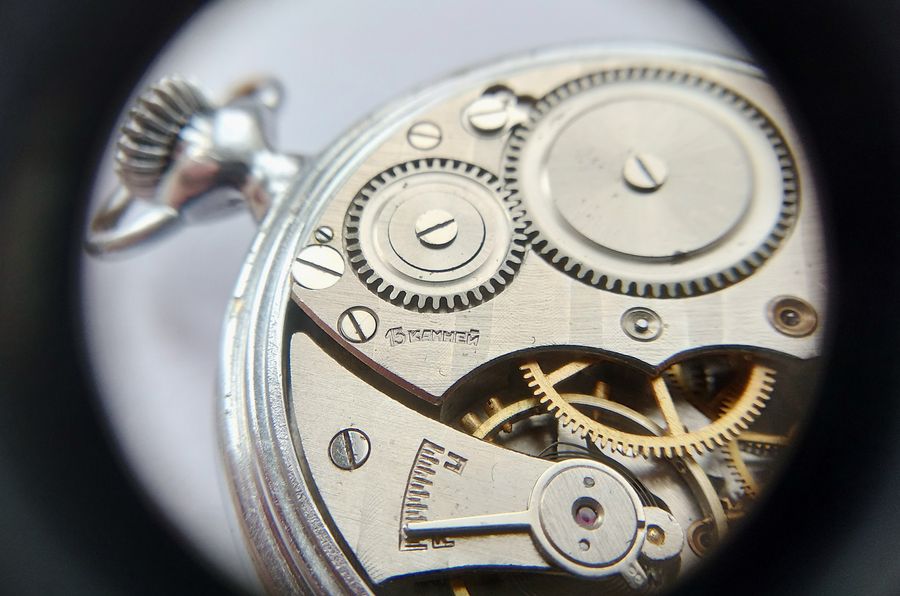
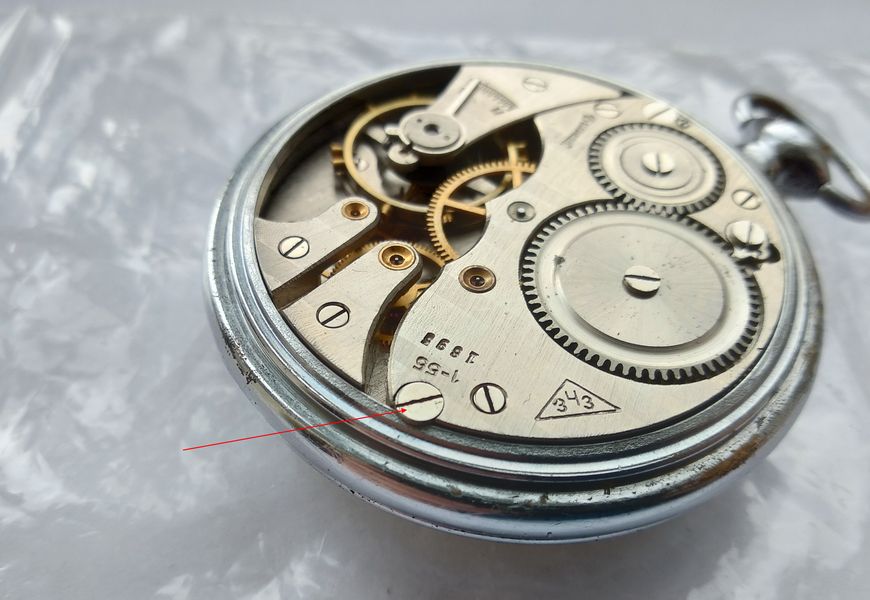
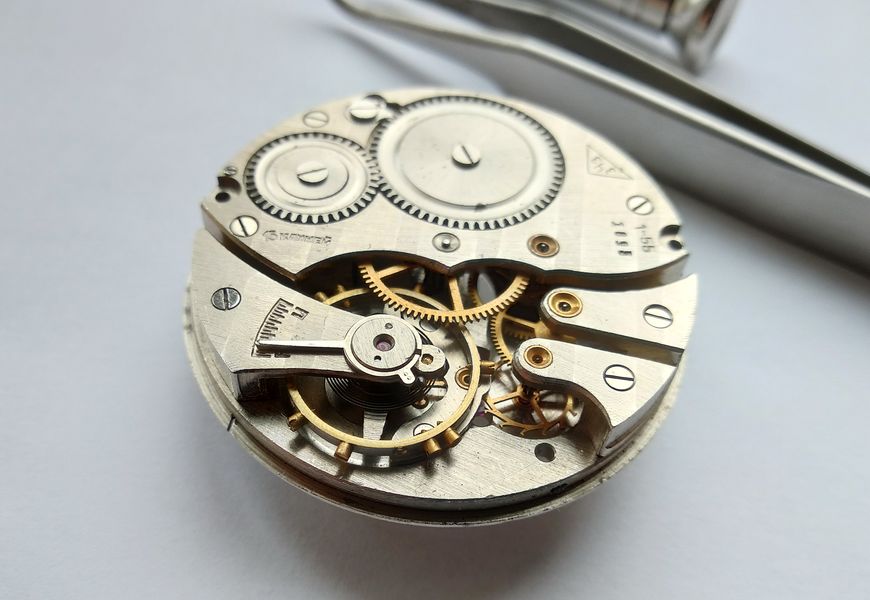
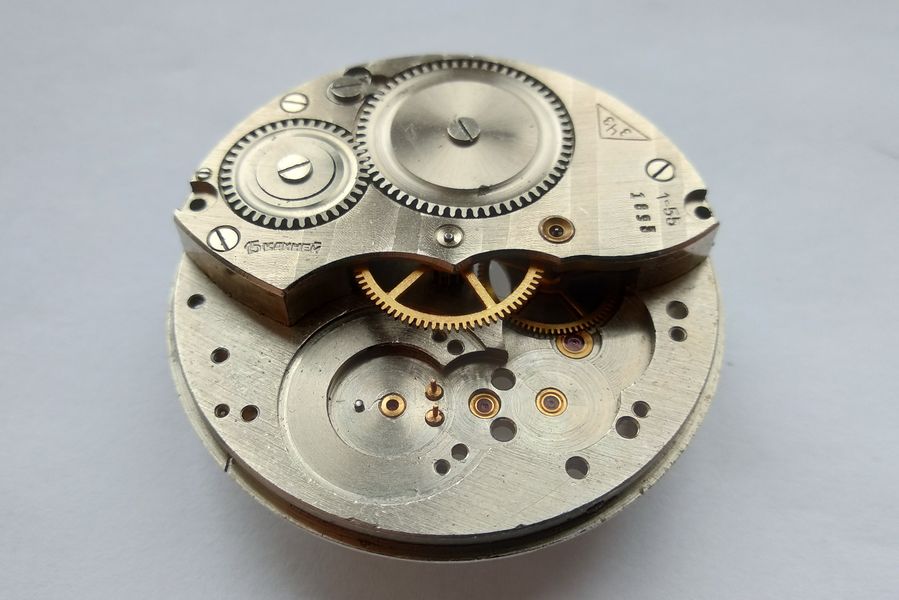
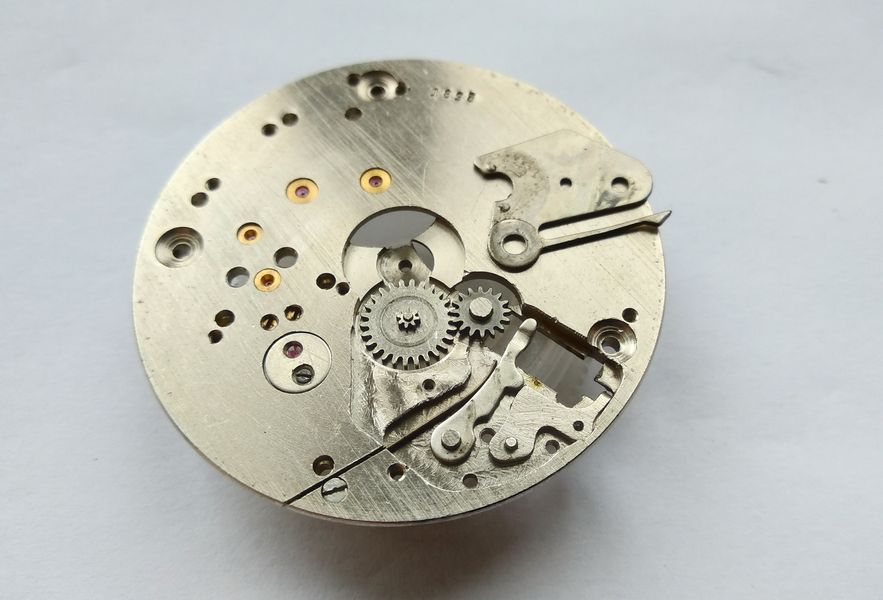
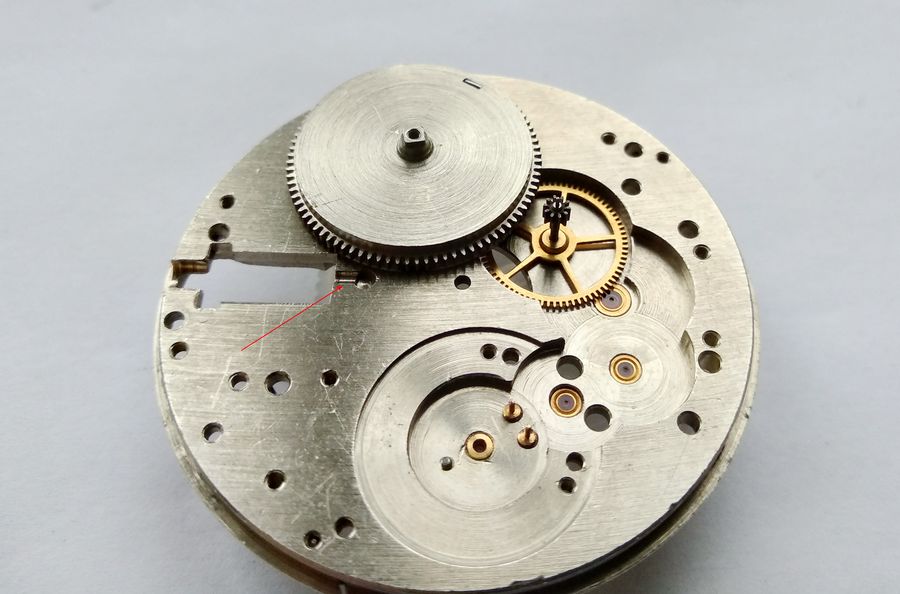
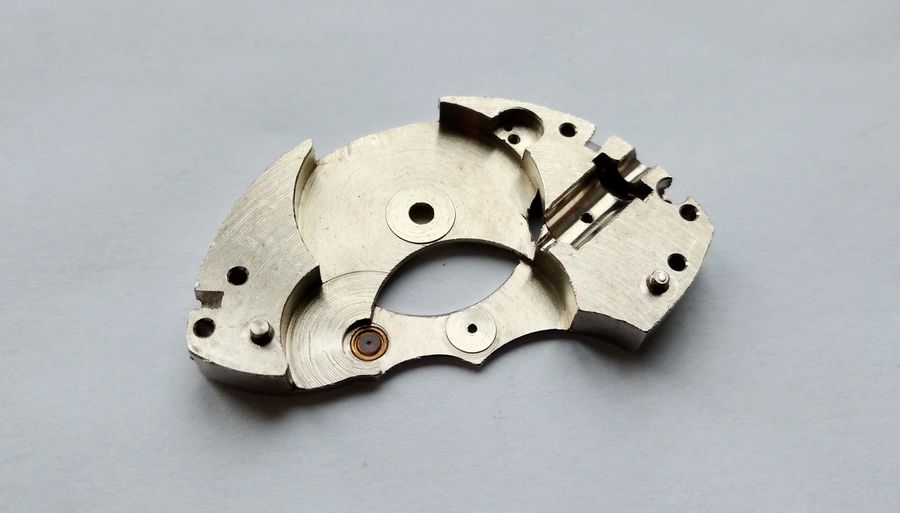
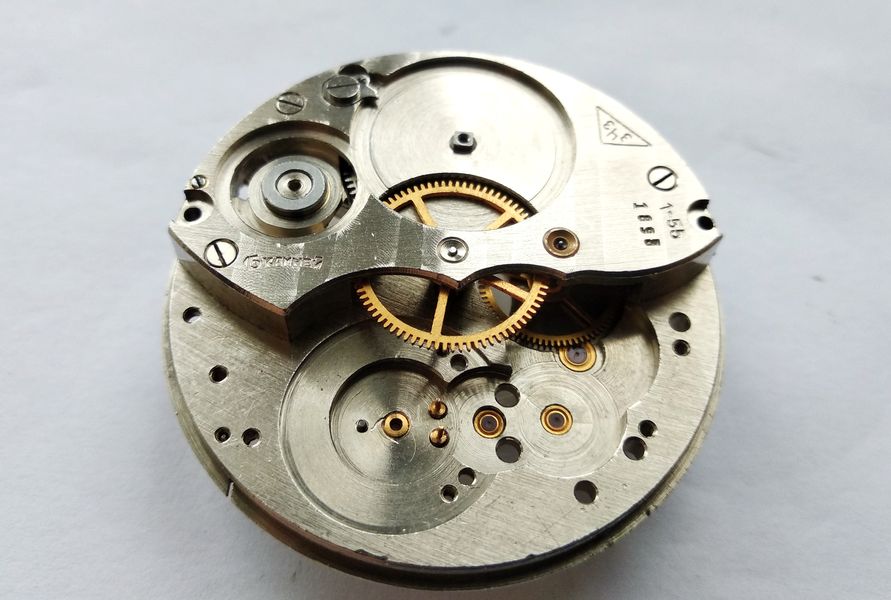
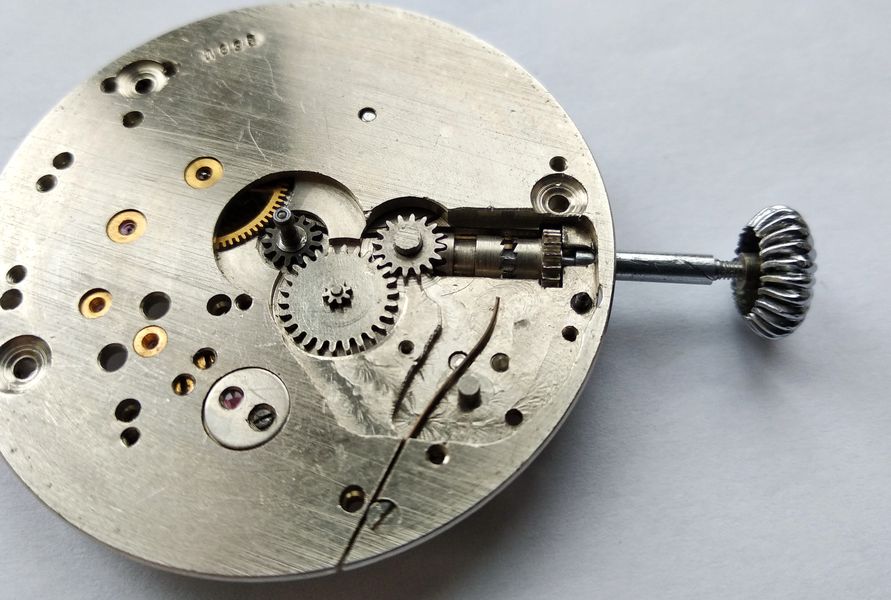
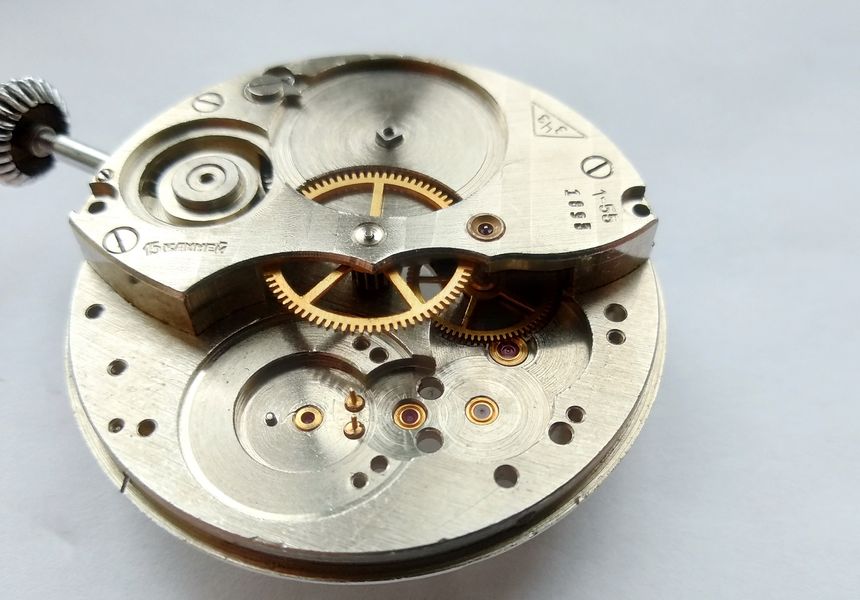
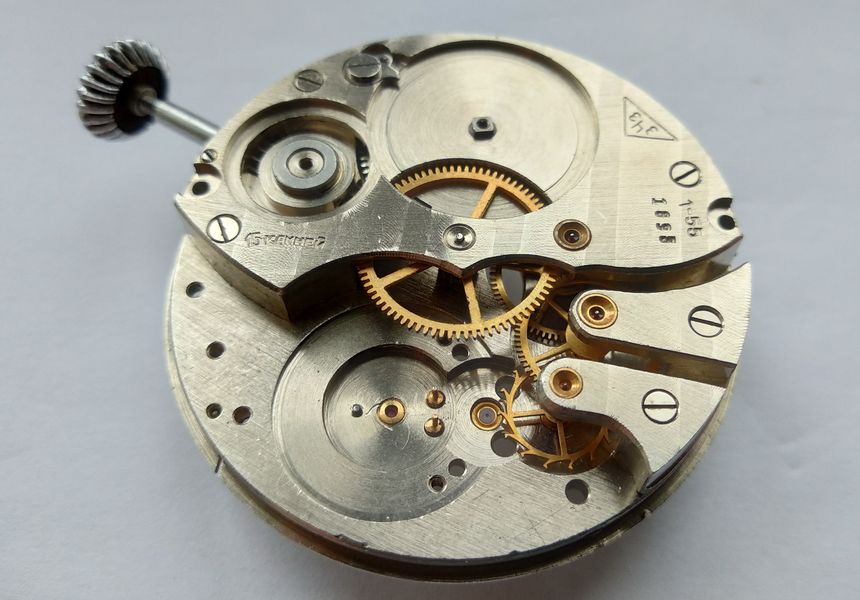
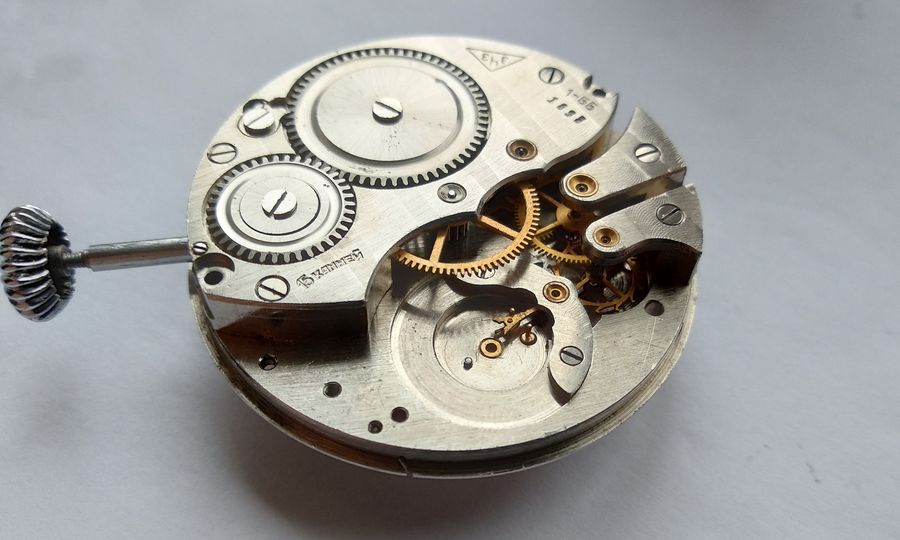
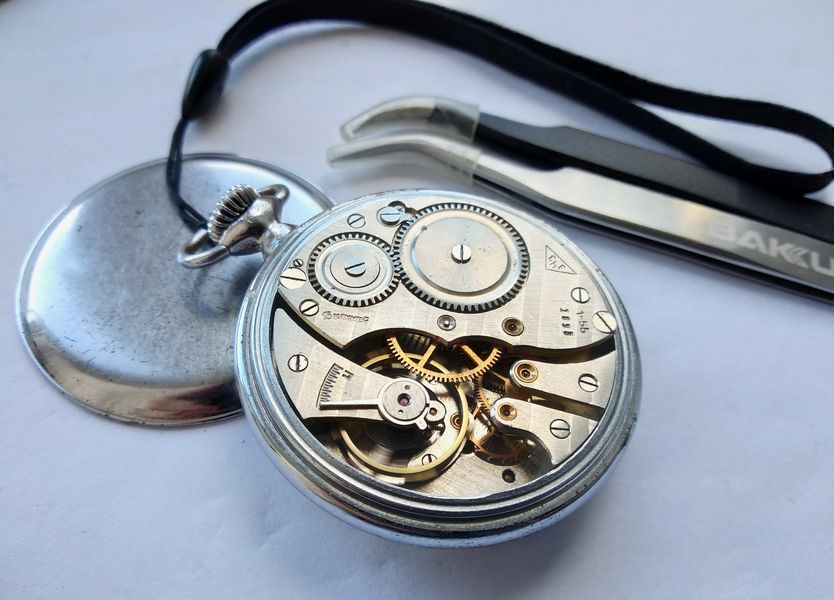
As they say, you are met by your clothes but seen off by your caliber. We open the movement cover. There he is — the beauty! A light, elegant decoration runs across the parts. The movement is 43 mm in diameter, roughly a centimetre tall, with bridges 4 mm thick. There is a sense of indestructibility and monumentality about it, as though one had stepped inside a tank or the gun turret of a battleship — everything solid and dependable. Note first the jewels: they sit in gilded chatons (military-inspection acceptance, perhaps?). Look at the quality of the crown and ratchet wheels. They could have been left flat; instead each carries turning, milling, and polishing. No labour was spared. On the barrel bridge are the factory mark, the date of manufacture (1-55), the jewel count (15 jewels), and the caliber number. Remember that number — it becomes very interesting later.
This is how the winding wheels and the jewel-count marking appear.
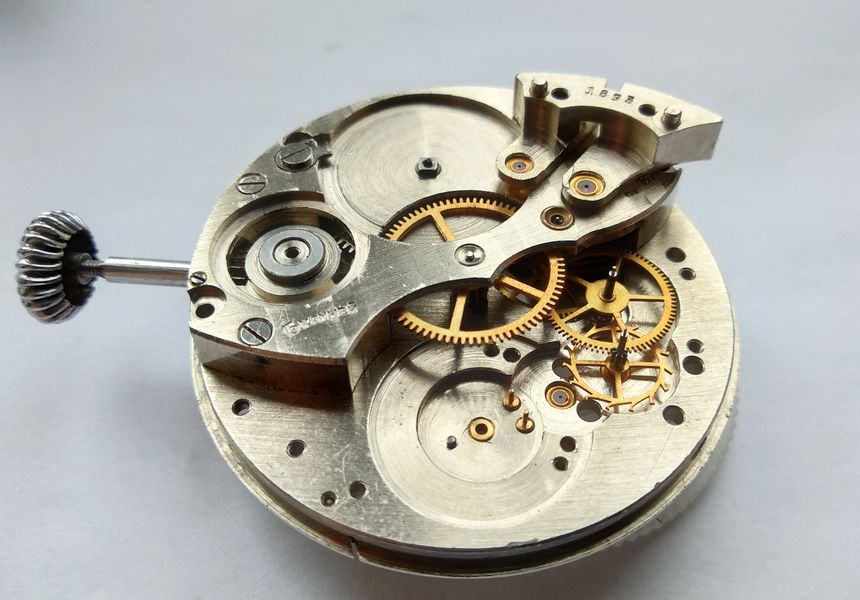
Let us look more closely at the bridge of the pallet and seconds wheels. We will return to it during disassembly, but for now note the construction of the jewel chatons and how the wheels sit in their jewels. See how the wheel pivots are made extra-long, protruding from the tunnels of the through-jewels. Getting ahead of myself: this is done to ease assembly. The bridges seat quite tightly, so they are first slipped onto the pivots by their jewels and only then pressed fully home. There is no need to chase the train into place during reassembly, and capping the wheels with the bridge becomes far easier.
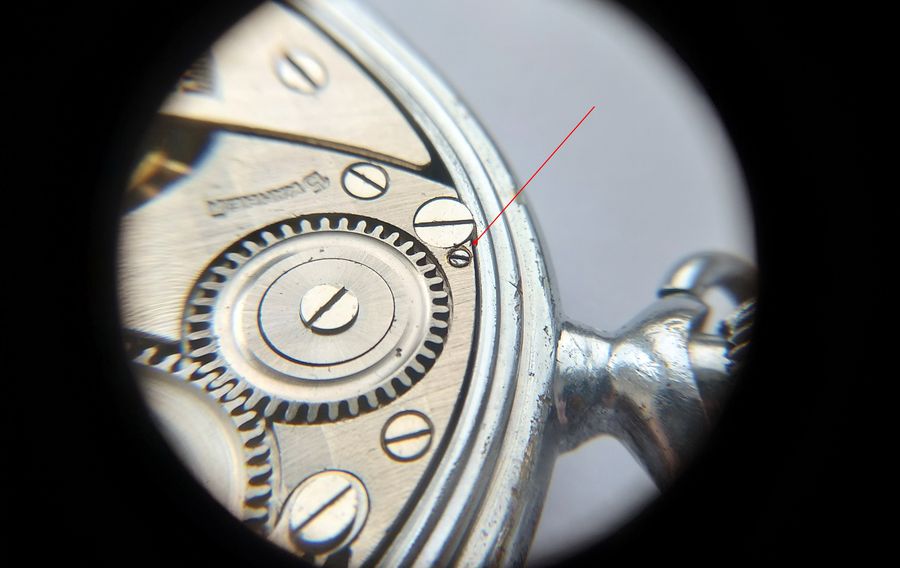
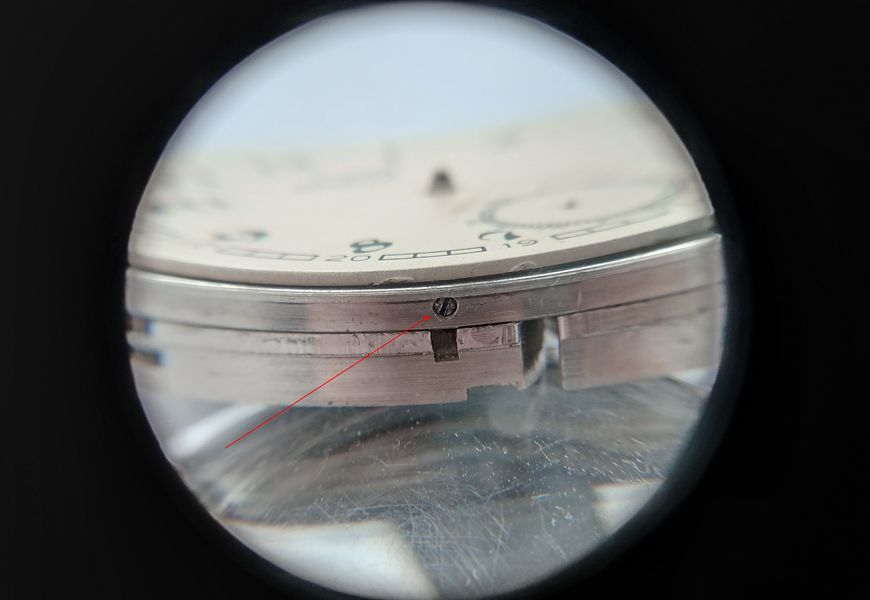
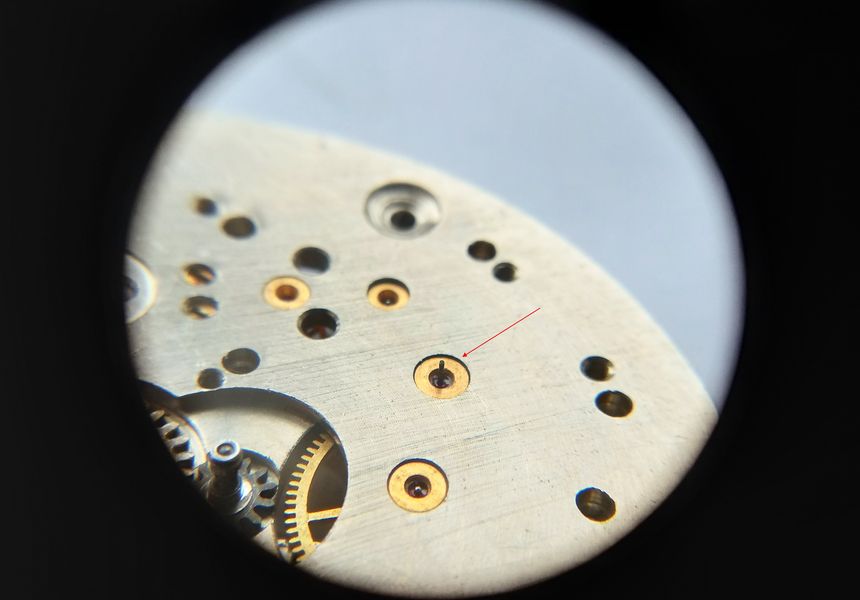
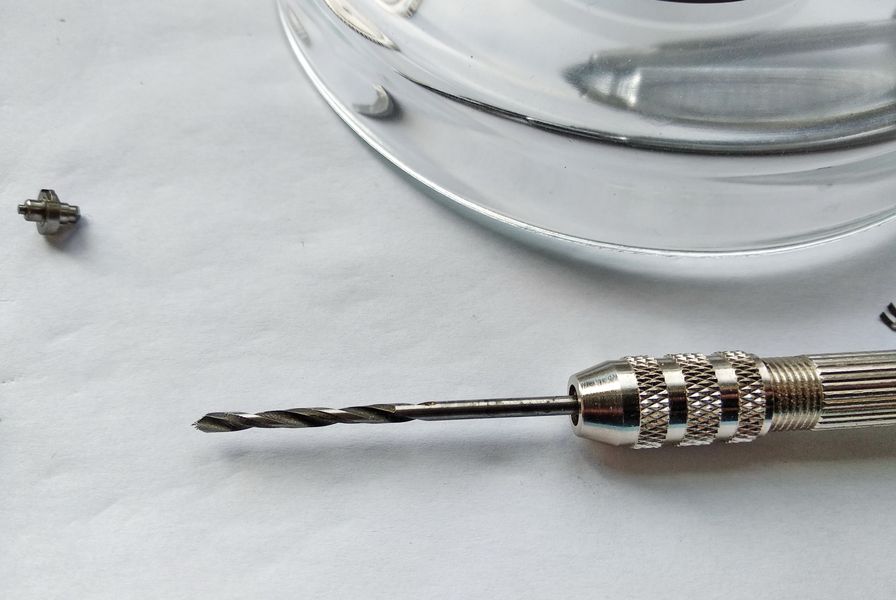
We begin taking the watch apart. Here is that cherished little screw which we "… loosen by a turn or a turn and a half, then withdraw the winding stem."
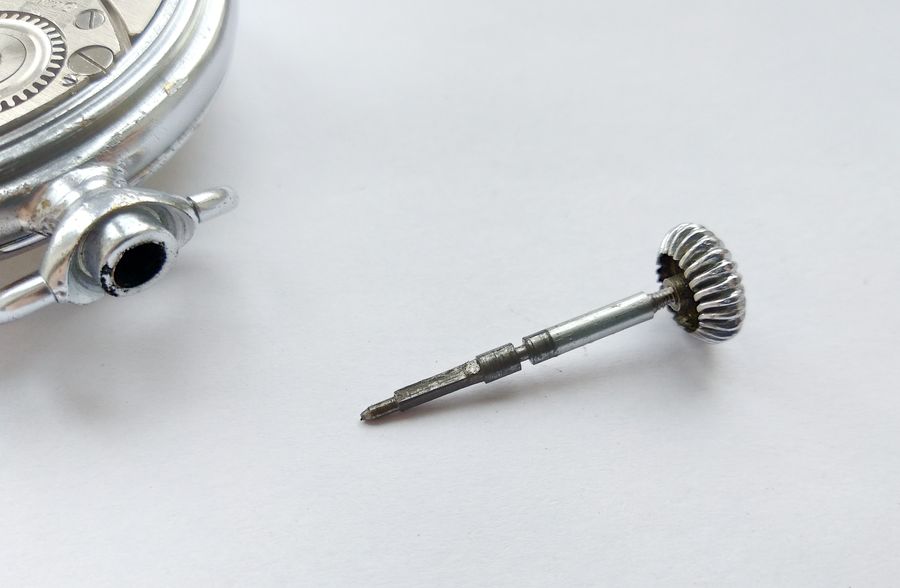
Yes — the stem here is a substantial thing indeed. In keeping with the caliber.
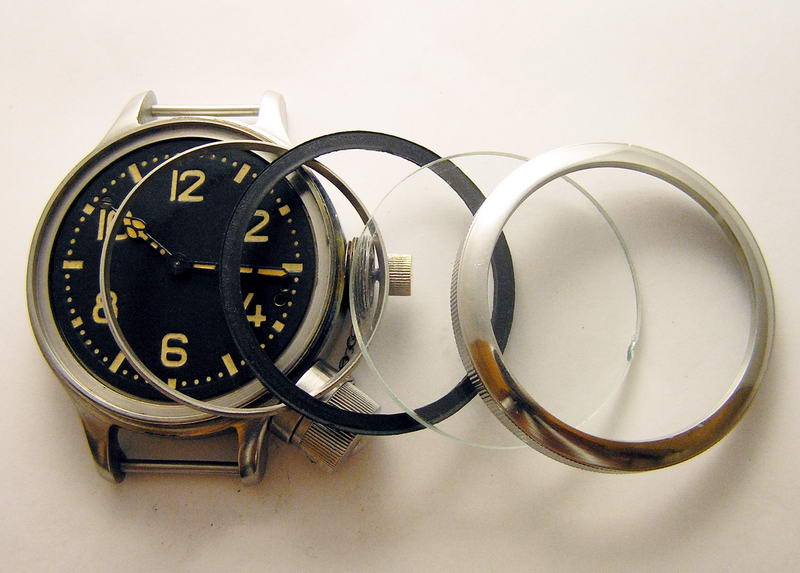
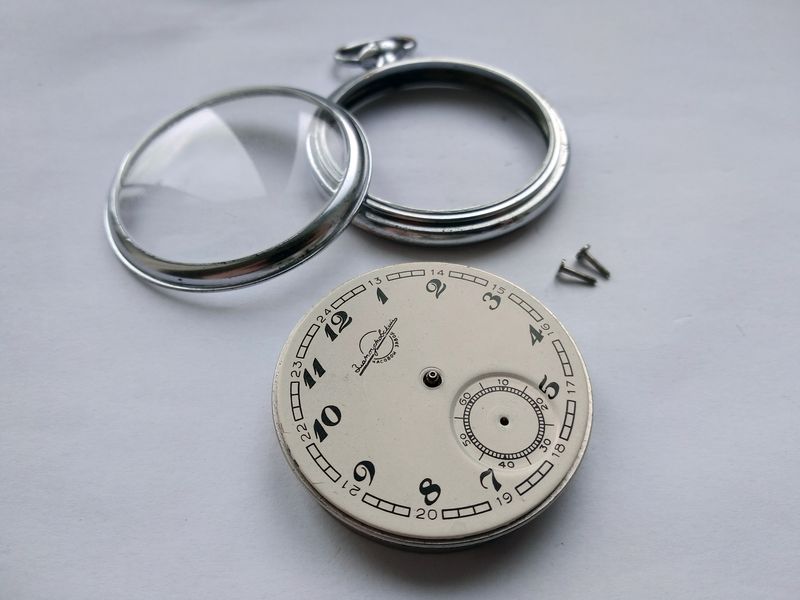
We remove the bezel together with the crystal. The case is a snap-fit "khlopushka," so we simply lever the bezel off at the flat.
Now we cover the dial with film and lift the hands with my favourite curved tweezers. The seconds hand I removed with needle tweezers — there is no other way to reach it, as it sits deep and tight.
Here are our hands. The movement can now be freed.
To free the movement we unscrew two retaining screws. Here they are.
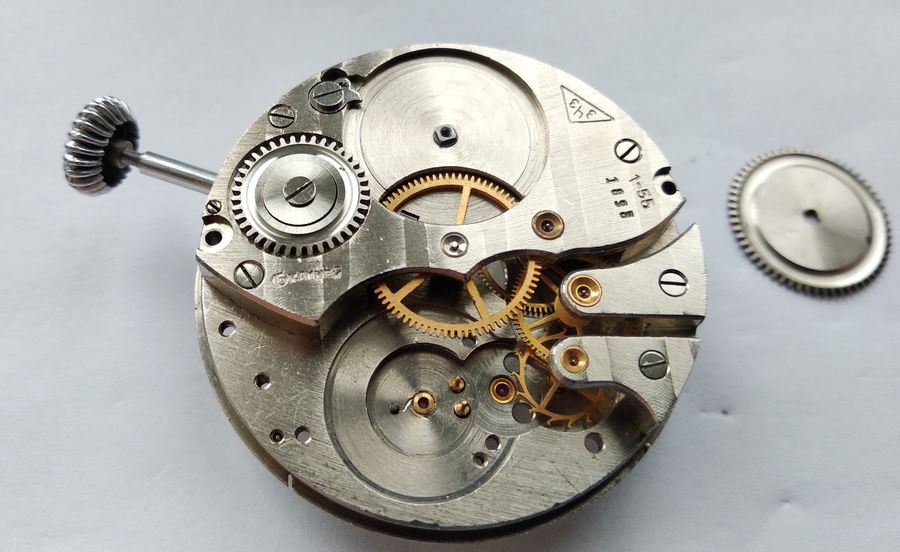
Then we carefully lift the case away, and the movement transfers onto a clean sheet of paper laid over a soft microfibre cloth.
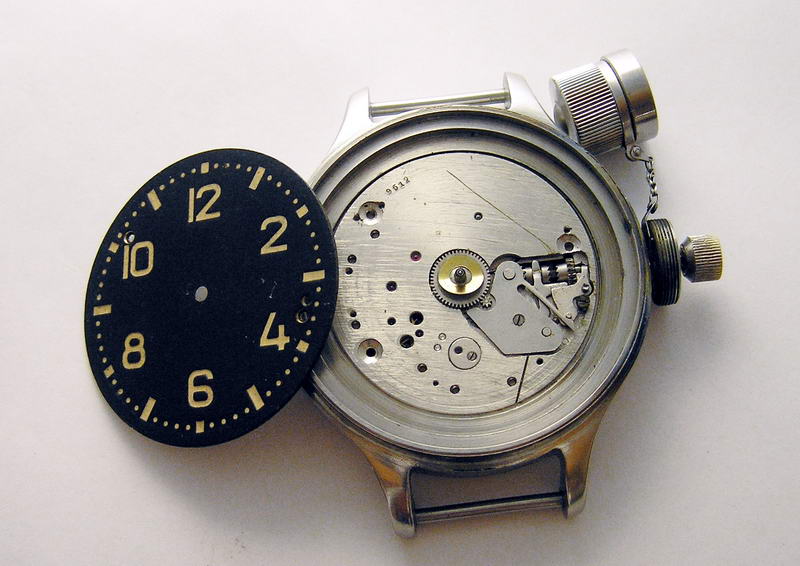
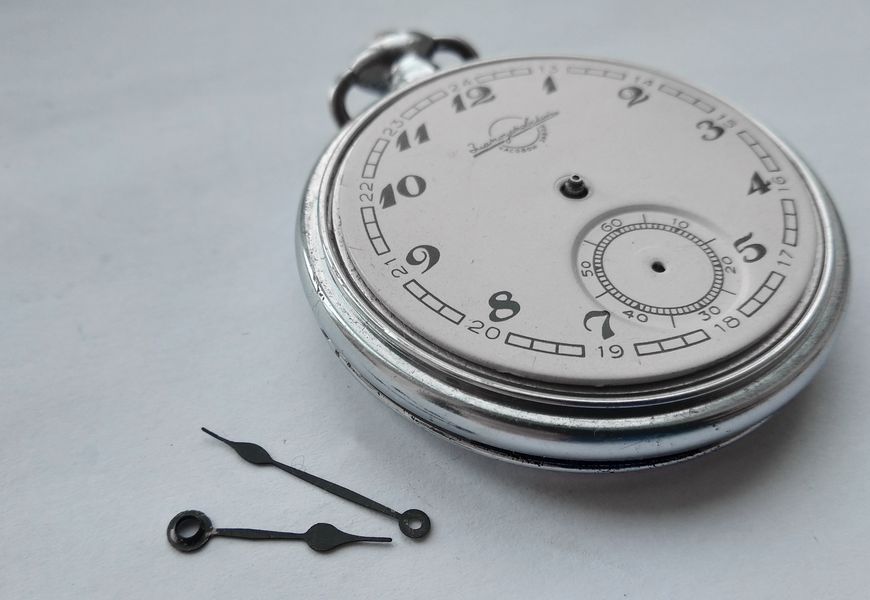
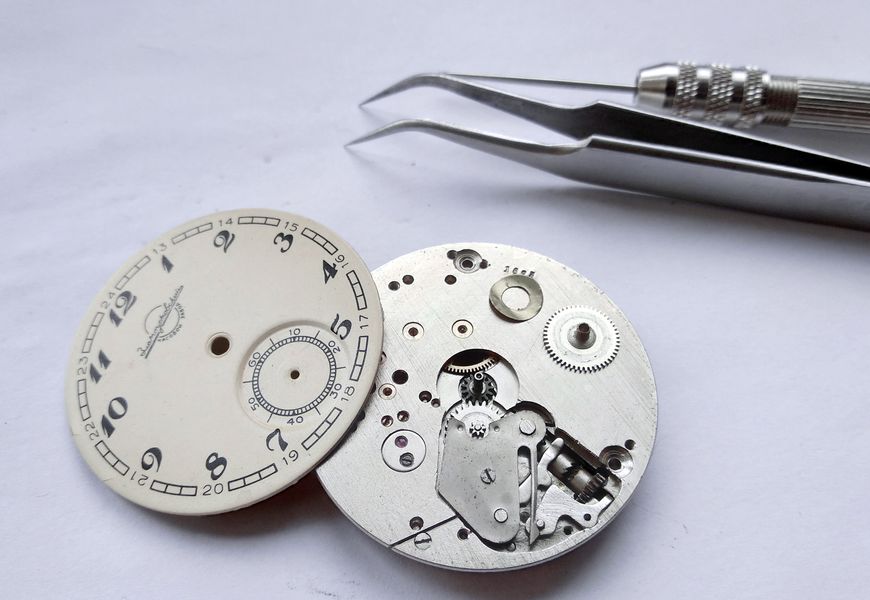
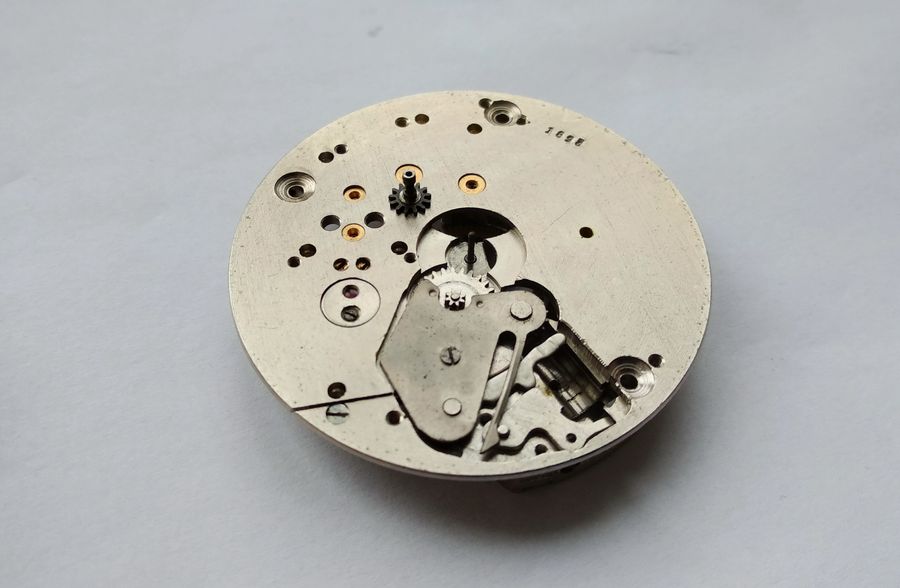
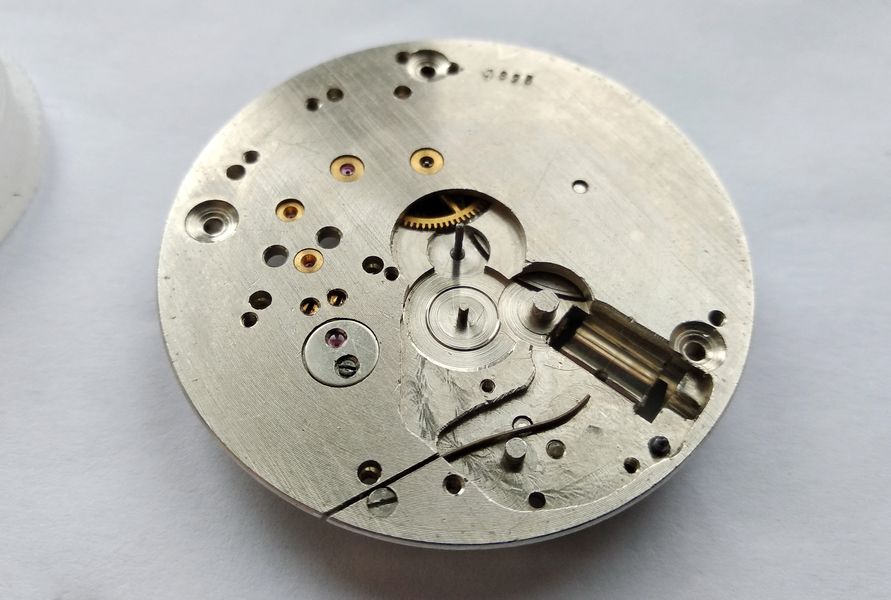
Now we remove the dial. In this watch it is held by three screws, and the dial has three feet. Its thickness is about a millimetre and a half — a millimetre and a half of brass. They did not skimp on good things back then, they did not.
Screws loosened, dial removed — and with it the hour wheel and its washer. The wheel here is a fine piece too, with a boss and a thrust seat for the washer.
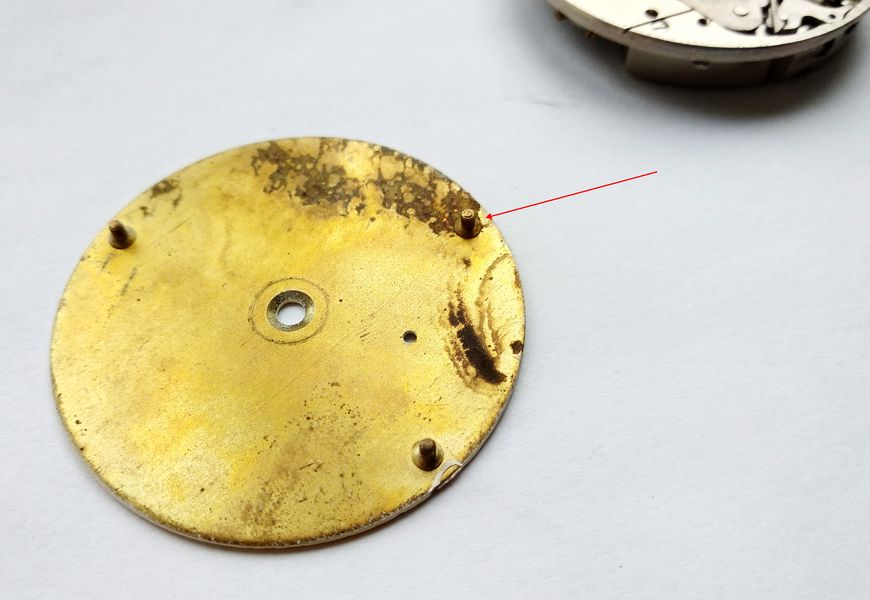
The dial from the reverse. Three millimetre feet. Quite a watch for the professionals of the underwater trade — and for the modest gentleman as well.
So — we set this "disc" on the holder and begin demounting the parts.
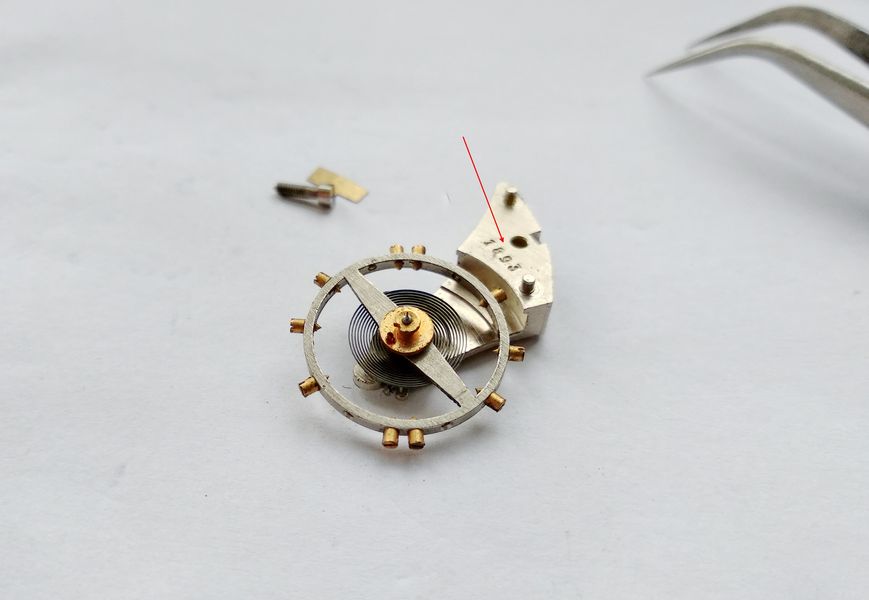
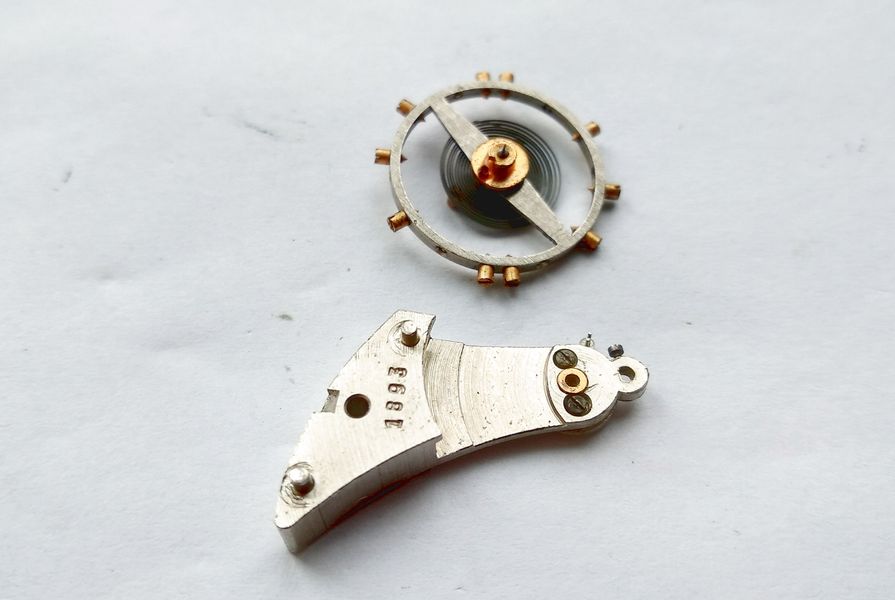
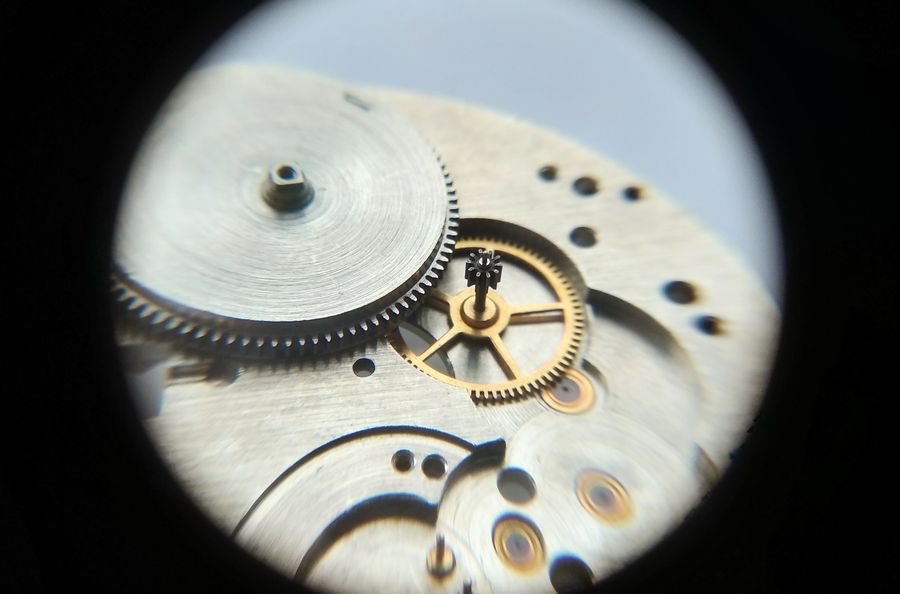
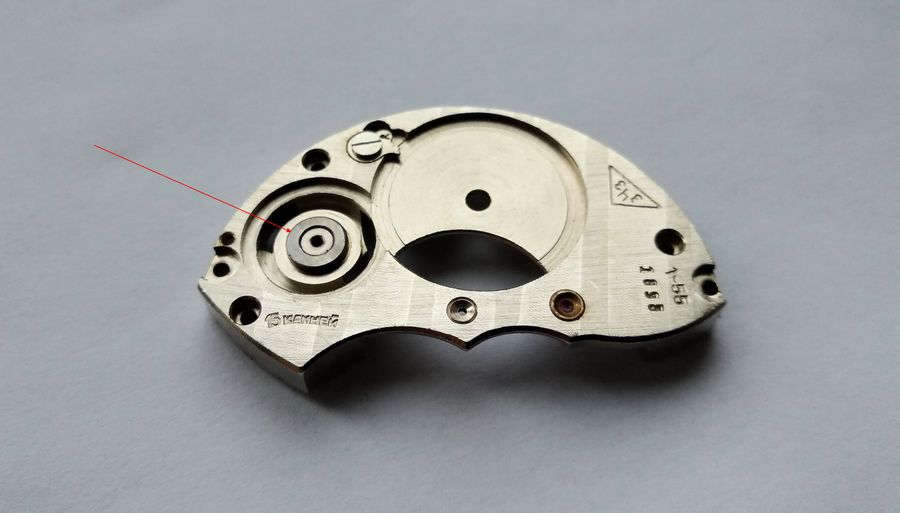
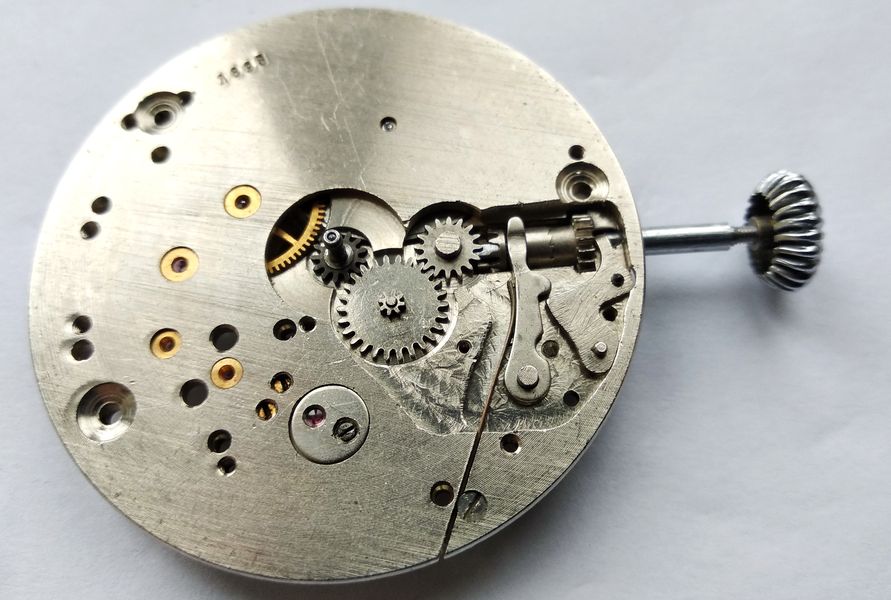
As always, "in the opening lines" we remove the balance. How do you like that cock? Yes, indeed. The balance is a screwed type, not shock-protected, the stud carrier is fixed — but the hairspring is a Breguet overcoil. And here I ask you to look at the figures stamped on the balance cock. Remember I asked you to memorise the movement number? Well — this is that very number! There it is. Every part, as we shall have occasion to confirm, carries the same serial. Yes. Everything here is serious.
And since the balance is off, let us take it apart and lubricate it. Moebius 8000 oil. The assembly is large, and everything is fairly simple.
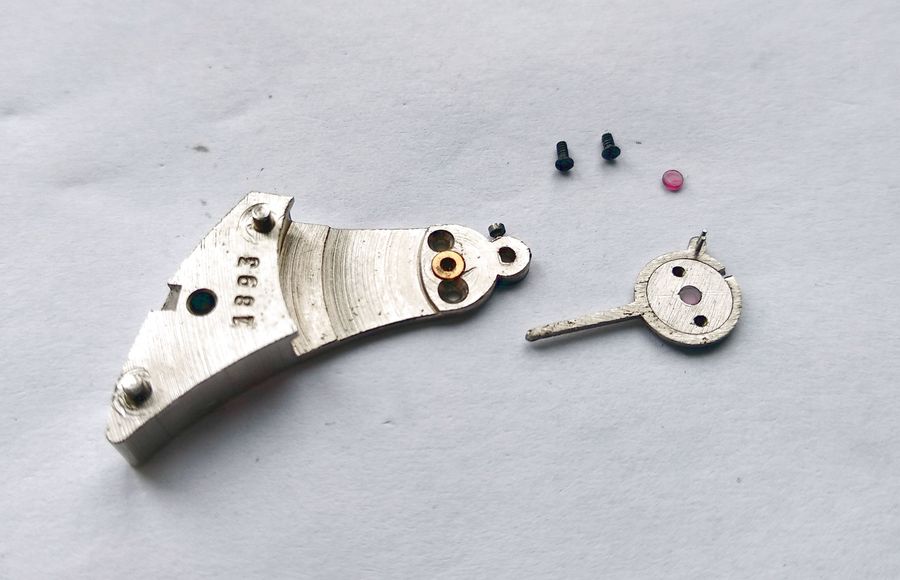
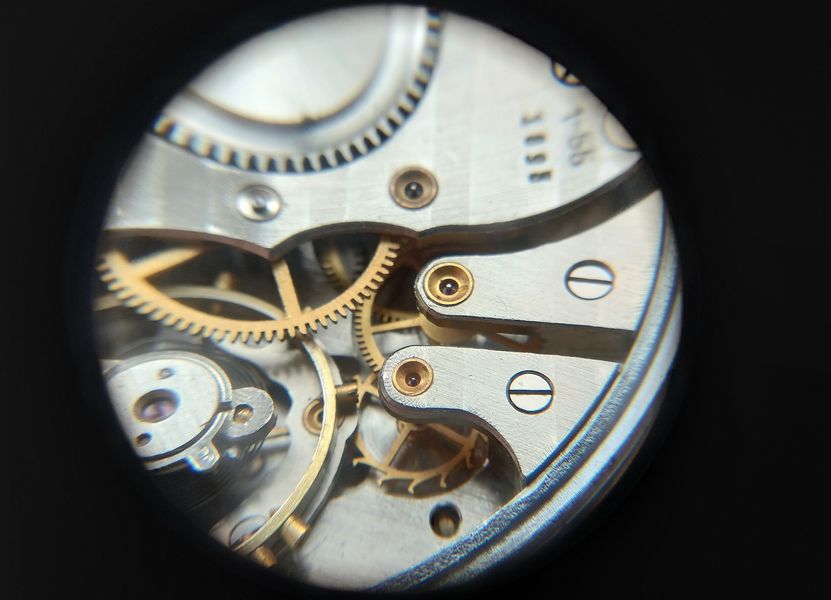
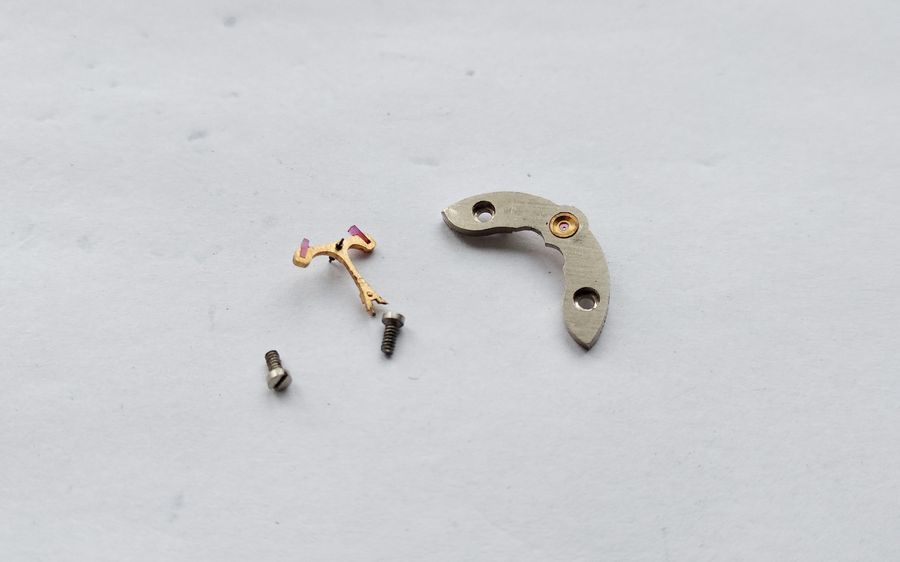
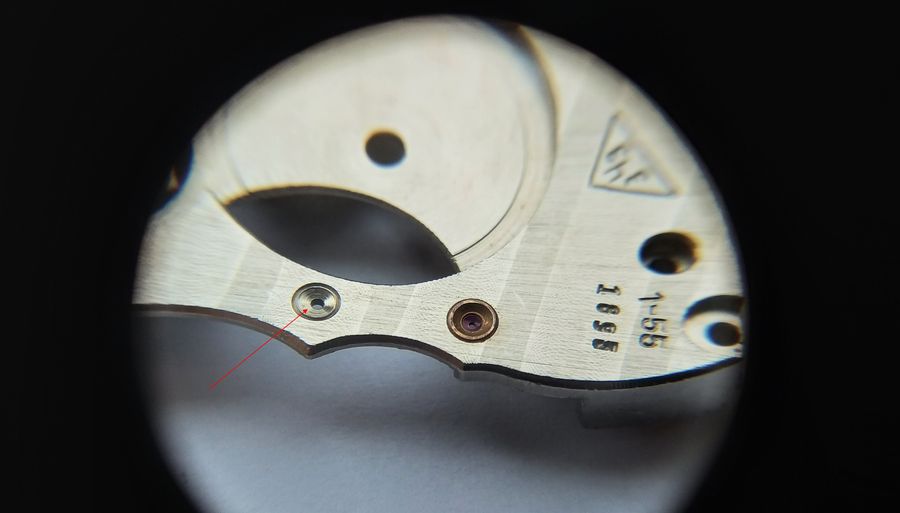
Now the pallet bridge. Yes — a column of tanks could drive across this bridge. And a jewel in a chaton. It too carries the serial, finely stamped on the reverse.

The pallet fork and its bridge are removed. It too is finished with an anti-corrosion coating — and you can imagine which kind. These watches were built for serious people.
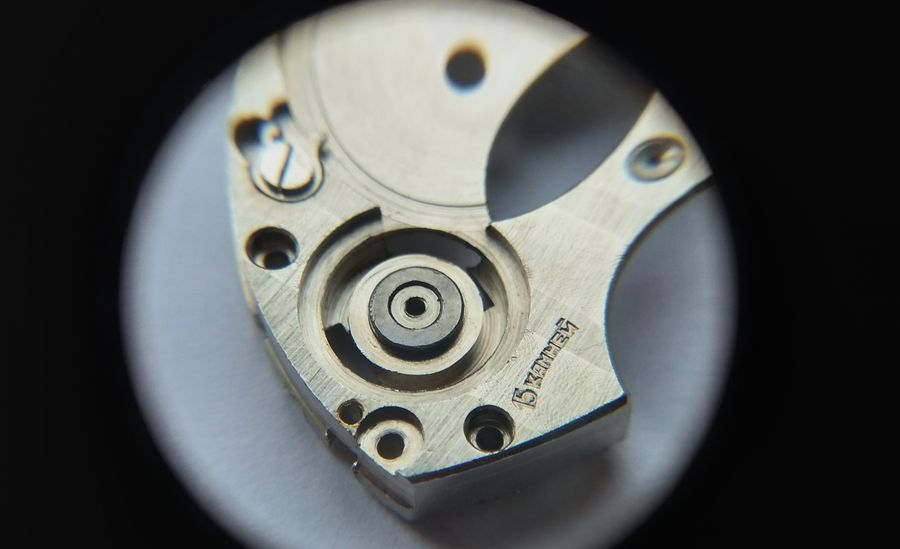
Now the train bridge, the escape wheel, and the seconds wheel. Can you imagine how much material and milling such a part demands? They did not spare it. For a good thing, it is not a pity.
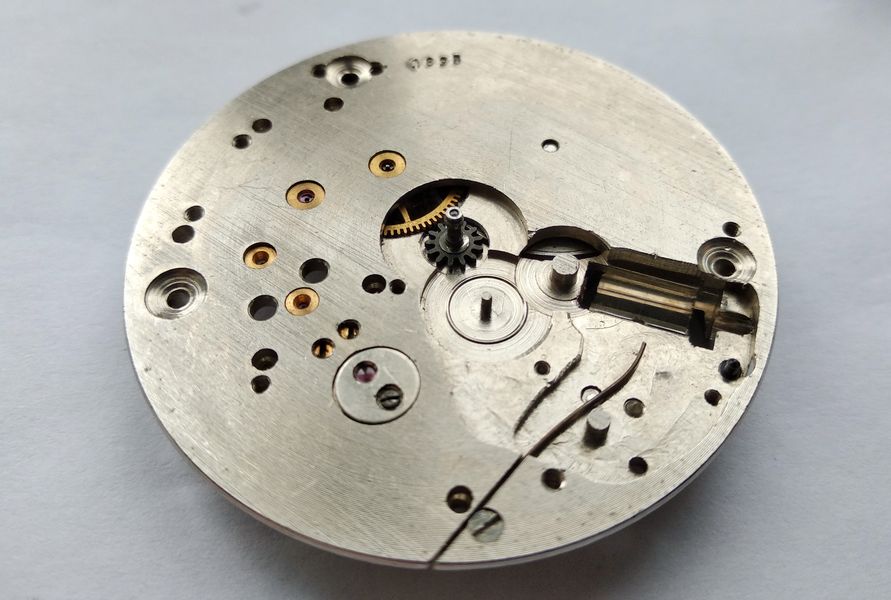
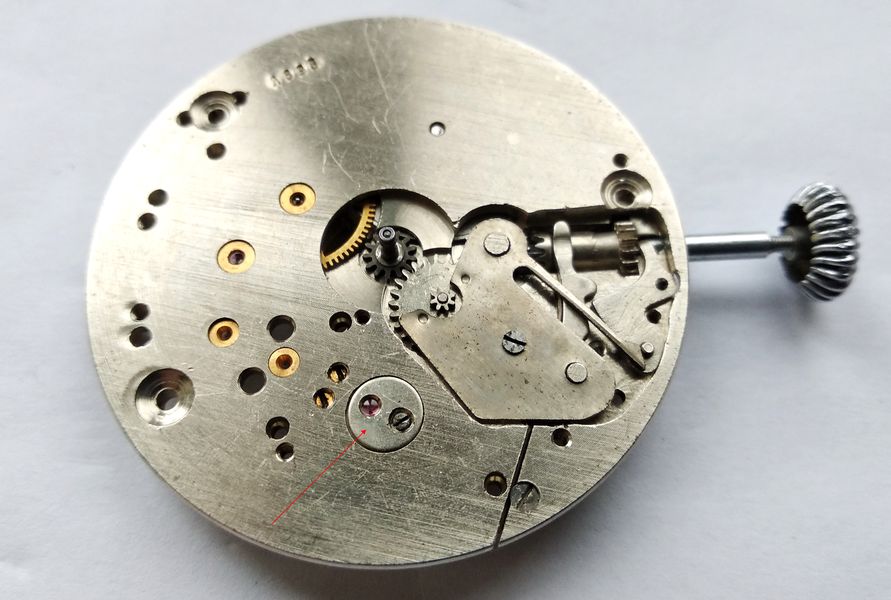
We do not dismantle the motor yet. While the bridge that retains the center wheel is still in place, we remove the cannon pinion on the slow side.
There. The cannon pinion is off. Now we can turn to the mainspring motor.
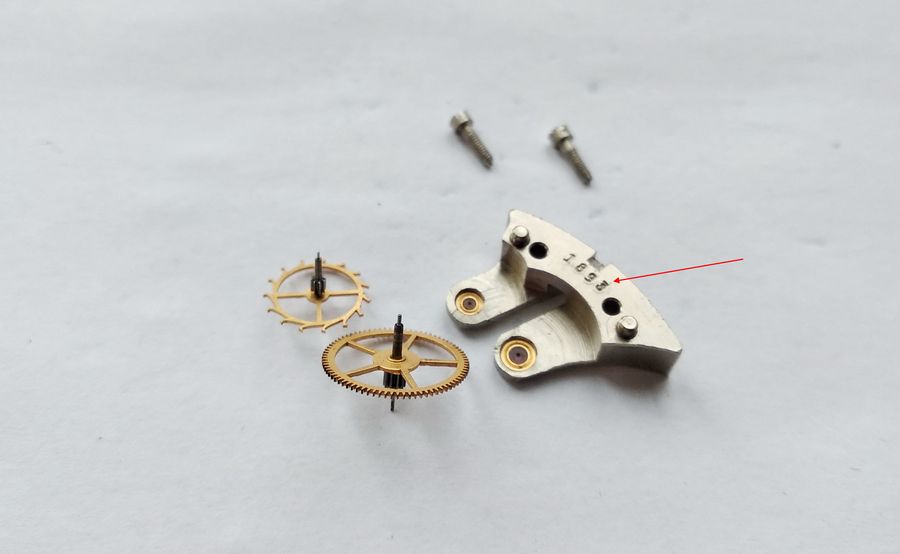
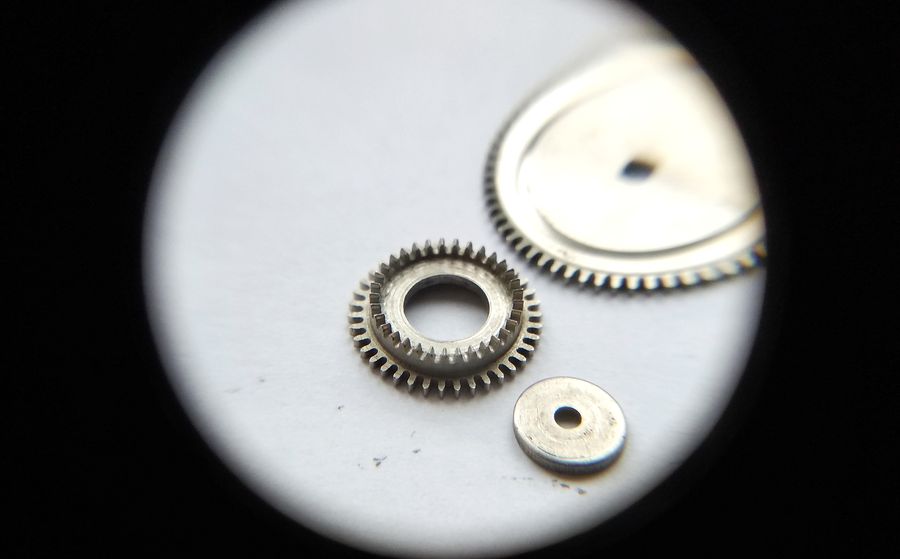
Here are its component parts: the center and intermediate wheels; the crown wheel (a genuinely "crowning" wheel); the barrel wheel; and the parts of the sliding clutch. The mainspring. It looked sound, and I was too lazy to take it apart — for which I would pay dearly later. But let us not get ahead of ourselves. Everything in order.
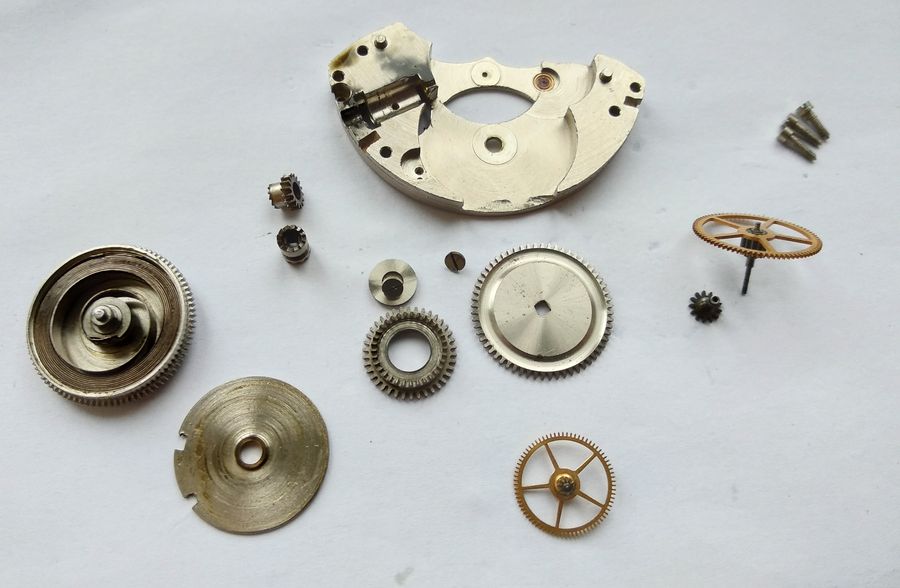
Next in turn comes the keyless works. The system is highly practical and utterly simple: two levers — the intermediate and the setting lever — both made by stamping; the minute wheel and the setting wheel. The setting-lever spring, however, is splendidly done. It is held in a special slot by a screw; it is flat, and impossible to lose during disassembly. For that, a separate thank-you to the caliber's designers. Incidentally, the caliber was designed in 1930 and first appeared in the "Kirovskie" watches in 1935. It was of course refined over time, and what lies before us is one of the examples made at the apogee of production.
We clear the plate of the keyless parts. The spring need not be removed — it will wash clean along with the plate, it is hard to damage, and we are careful. That is all. Into the cleaning bath!
And here is our clean fellow on the holder. The plate is ready for assembly. While everything is open, note the depth of the barrel-arbor bearings — over a millimetre. The watch is 65 years old, yet there is not a trace of wear. This is what happens when you dress a "diver" in a dinner jacket: it simply will not wear out.
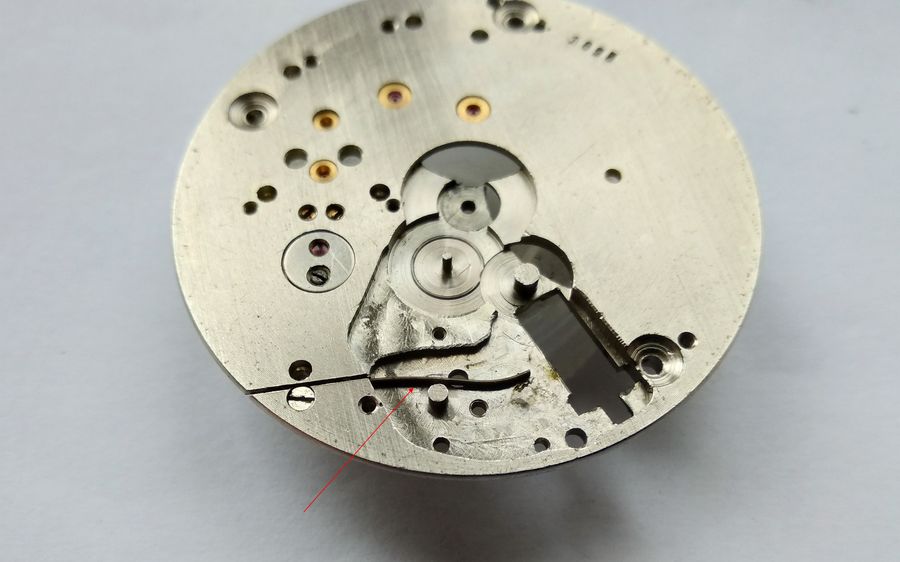
We begin reassembling the movement somewhat unconventionally. One usually starts with the keyless works, but that will not do here. The reason is that the tunnel of the sliding clutch is made in two halves — one in the plate, the other in the barrel bridge. Until those halves come together, the stem and clutch have nowhere to anchor; you can see by the arrow where the half-tunnel for the stem is. So we begin by setting the barrel and the intermediate wheel onto the plate.
Like so.
Then we take the center (minute) wheel — here it is.
We set the center wheel in place, not forgetting to lubricate its bearing seats.
Now the bridge. But before fitting it, one simply must admire this work of engineering art. Look how much labour is in it — and how much metal went to waste in the making. Again one recalls the remark about the Luger. This is the view from below.
From above it is interesting too. The number of processes is, without doubt, considerable. Moreover, a hard-alloy washer is placed under the crown wheel. Here it is worth saying that the mainspring in this caliber is very stiff — it winds hard, with noticeable effort. It is for this reason that so much attention was paid to the winding mechanism: the crown wheel, the powerful stem, the sizeable sliding clutch. But a strong spring has its flip side. Remember the snag I mentioned at the start? Here it is: such a powerful spring tends to destroy itself. The one serious failure in these watches is a broken mainspring. Alas.
The heel of the center wheel — one millimetre. Again, no wear at all over so long a time. Simply a pleasure to look at.
Here is the crown-wheel assembly. A complex milled form, with its hard-alloy washer.
Ah yes — most important of all, before fitting the bridge we must not forget to set this little thing: the screw for the intermediate setting lever of the keyless works.
And so we send the barrel bridge home and secure it with three screws.
Next we move to the slow side…
…and install the cannon pinion. It is always better to do this before fitting the minute wheel, though that is not always possible. Here it is.
After this we can install the minute and setting wheels and assemble the sliding clutch.
Then we set the keyless levers — the intermediate and the setting lever…
…and cover the parts with the keyless cover spring. Along the way we lubricate the assembly with "B-1" oil. That is done. It remains to service the balance bearing.
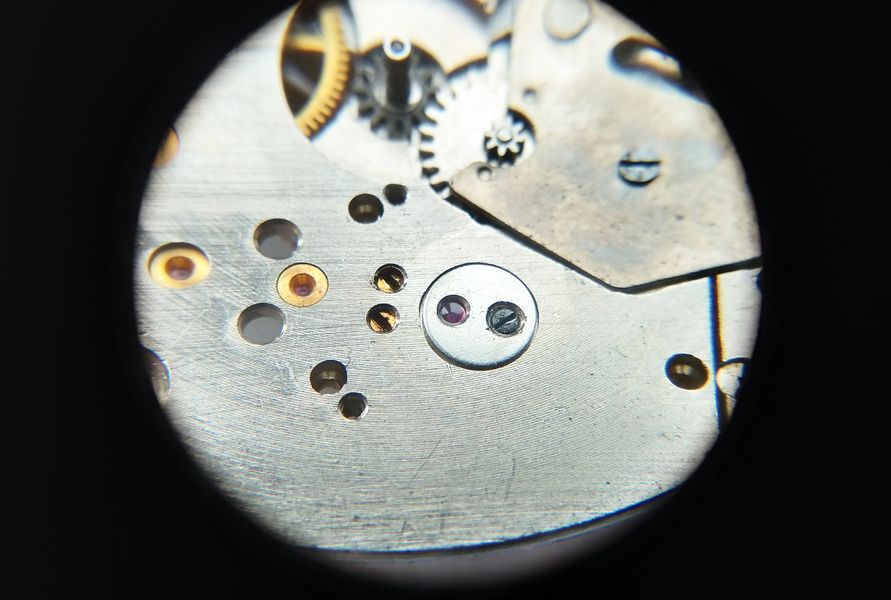
We remove the cap jewel and clean the setting of everything that has no business being there. We wash and clean the cap jewel.
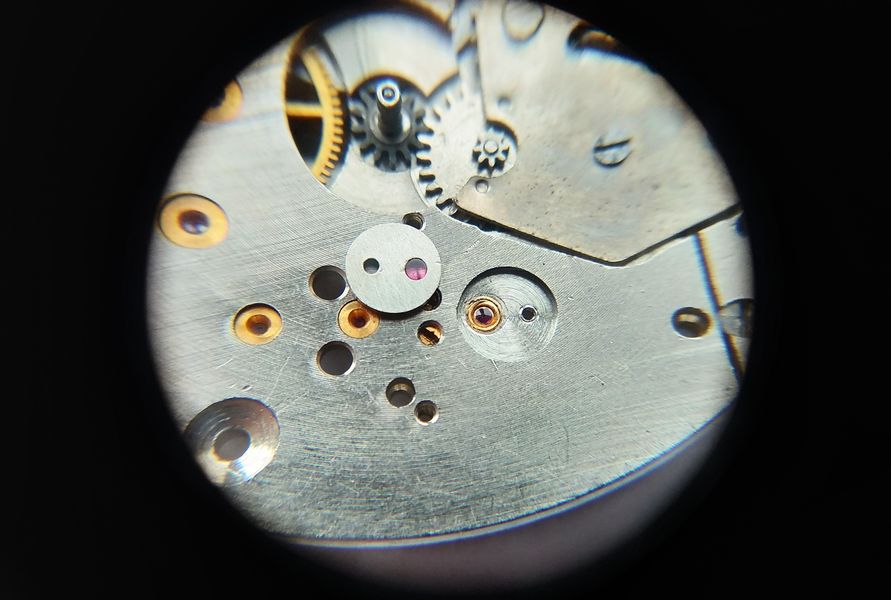
We oil the cap jewel. Moebius 8000 suits here…
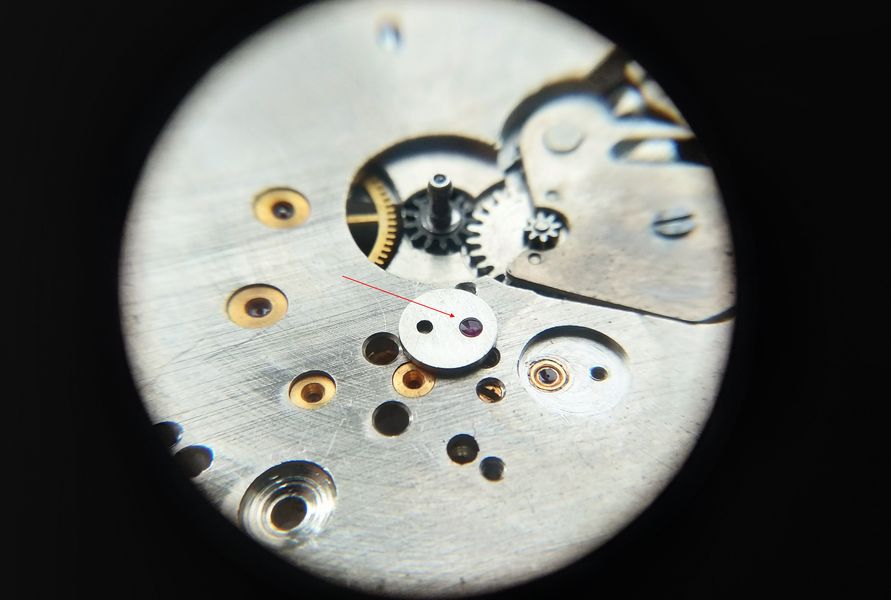
…and set it back in place. Look closely and you can see a little ring of oil through the jewel. By that ring, incidentally, one judges the parallelism of the cap jewel to the hole jewel — which matters — and at the same time whether the quantity of oil is right. With correct oiling the ring should not reach the edges of the cap jewel; it should sit like an inscribed circle. Here all is well.
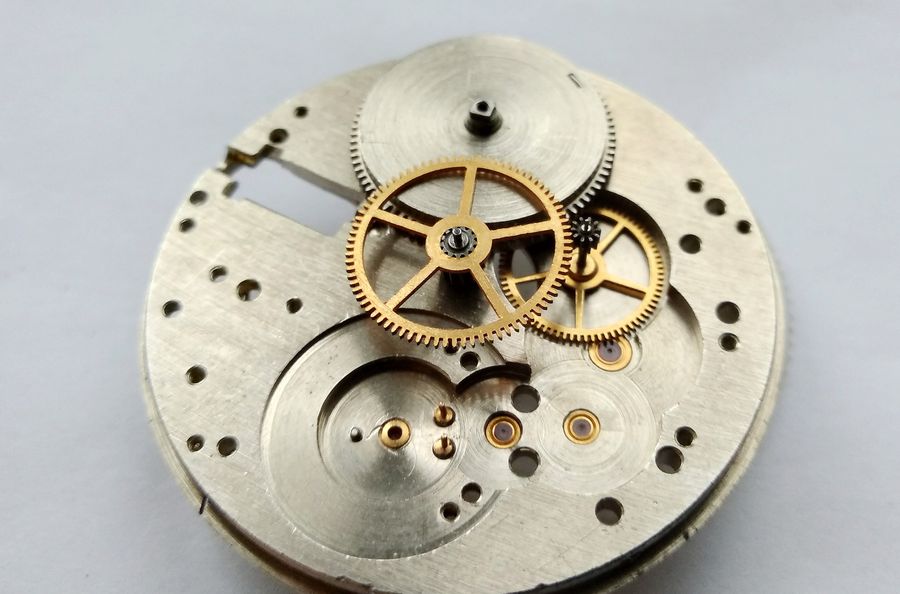
So, we are ready to assemble the train.
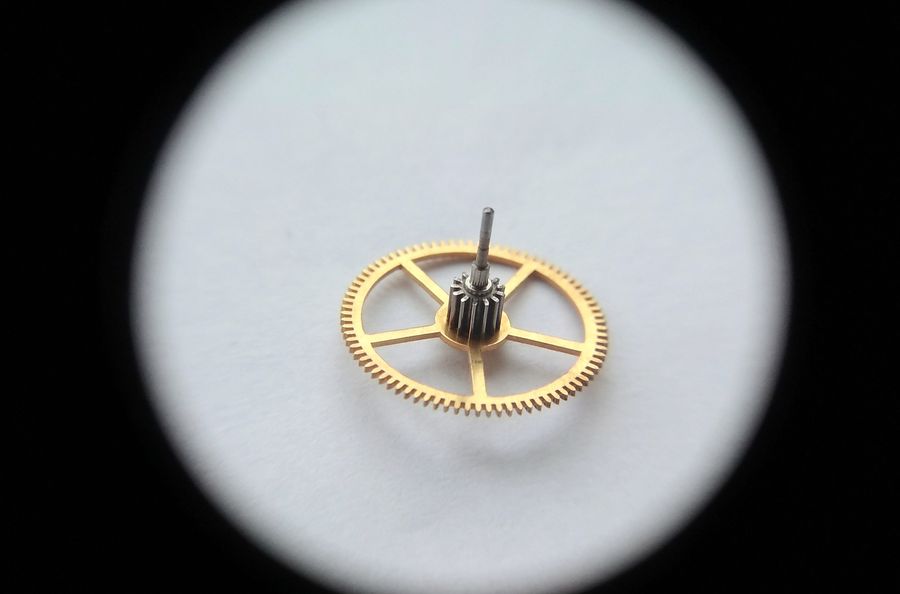
We install first the escape wheel, and after it the seconds wheel.
We fit the train bridge.

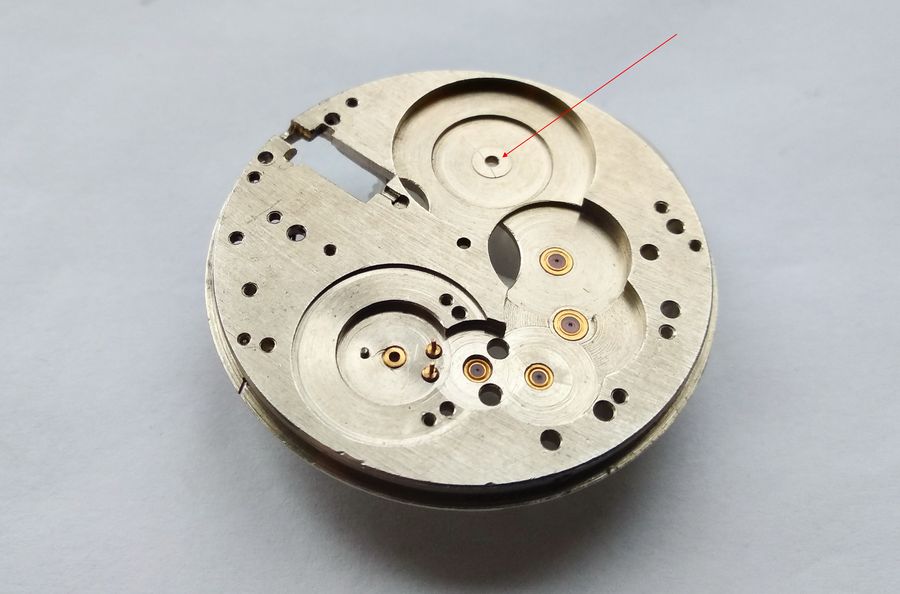
I want to draw attention to the pivot of the seconds wheel. When working with this caliber one must take care not to damage that pivot during handling. For this reason the caliber must, without fail, be set on a stand in such a way as to protect the pivot.
Now the motor can be assembled.
Here it is, the crown wheel. A powerful crown, a powerful rim.
We lubricate the parts, set them in place, and fix them with a left-hand-thread screw. The screw has an ordinary slot, not the triple slot one expects for left-hand threads — worth remembering, so as not to strip it by mistake.
We install the barrel wheel, check the run-down, and return the pallet fork, having first oiled the pallet stones with Moebius 8000. And yes — not only the stones. Unlike the small wristwatch calibers, in this one we also oil the jewels of the pallet-fork arbor. The lever and the pivot diameters here are large, so lubrication improves the working of the assembly. The oil is Moebius 8000. After fitting the fork we check the impulse. For that the spring must be wound. We make one turn of the crown, a second, a third… and suddenly — "click!" An unpleasant, unexpected click, and the crown began to turn freely with no resistance. Well, there we are. Where did it break — at the start, the middle, or the end? This is the price of laziness. I did not strip it, did not check the spring, I trusted to luck. So — "our song is a good one, begin again from the start." We take everything apart anew…
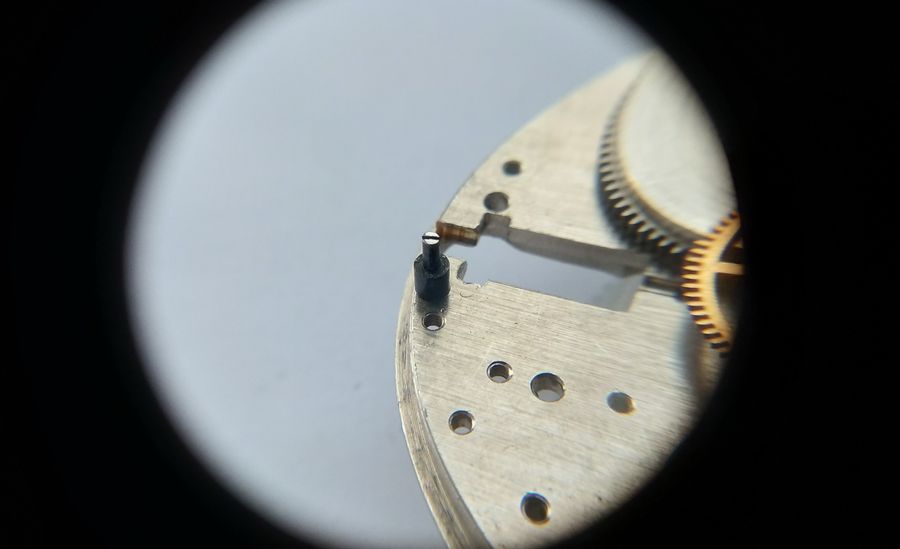
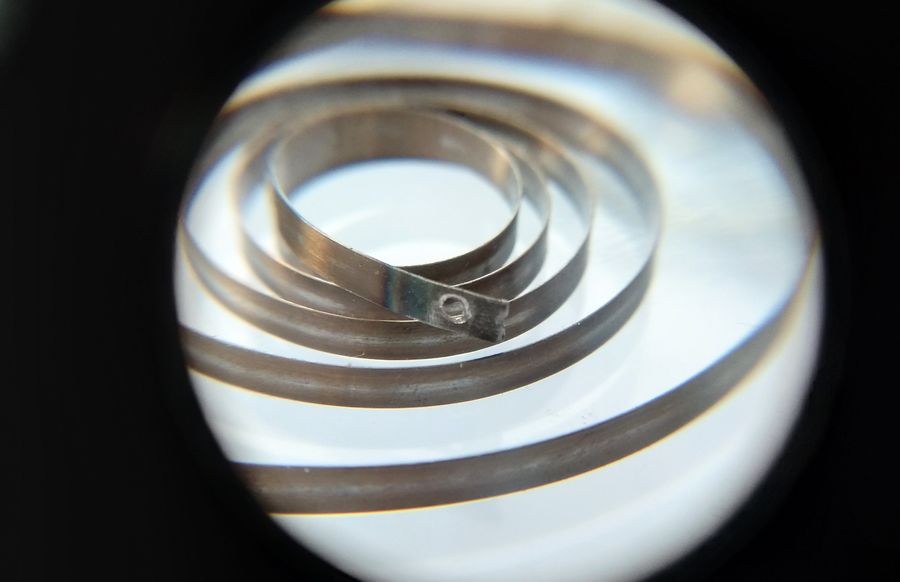
Well — disassembled. What do we have? We have this: the classic K-43 problem — the loop has broken off at the tooth of the kore, the barrel arbor.
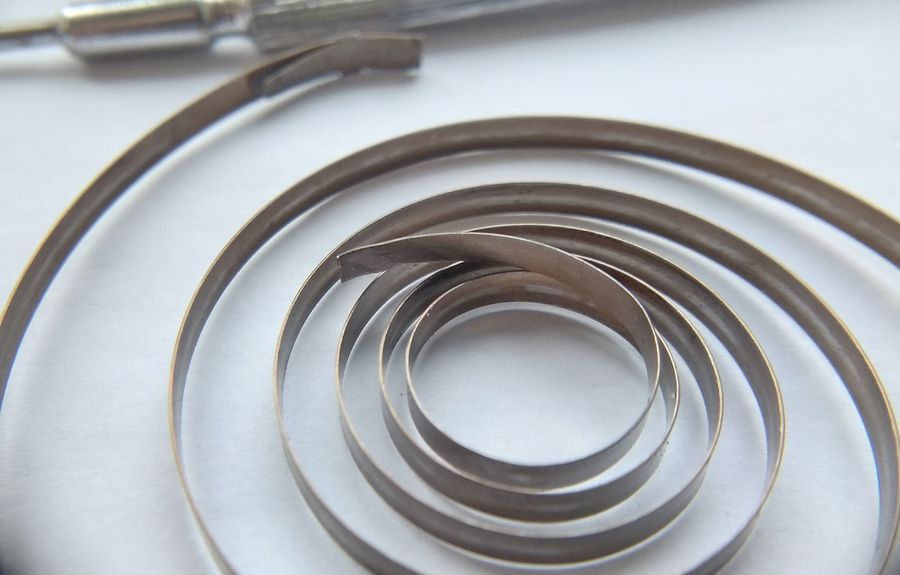
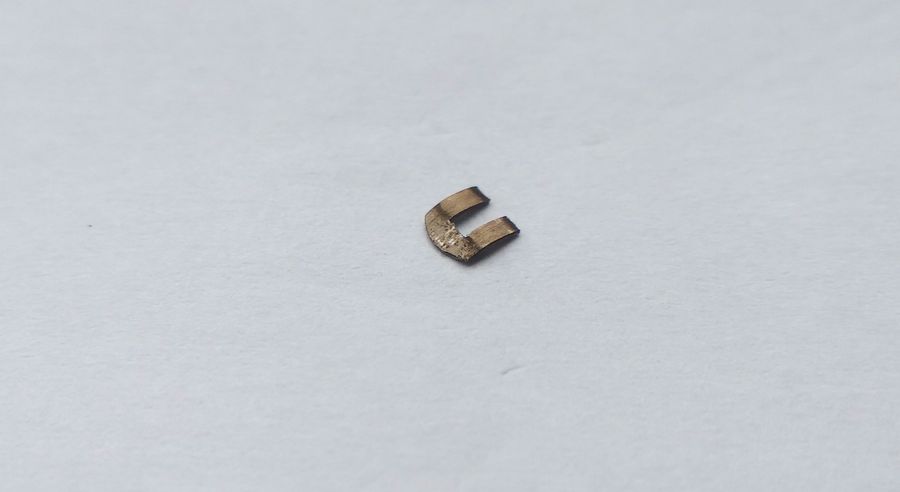
That very little loop.
It is repairable, but a fair amount of fiddling lies ahead. We will try to restore the spring. We bend back the broken end and release its temper. I do this over the flame of burning plexiglass — that is how I was taught. We heat it to a dark-cherry colour and let it cool. Now this part of the spring is soft, pliable, and workable.
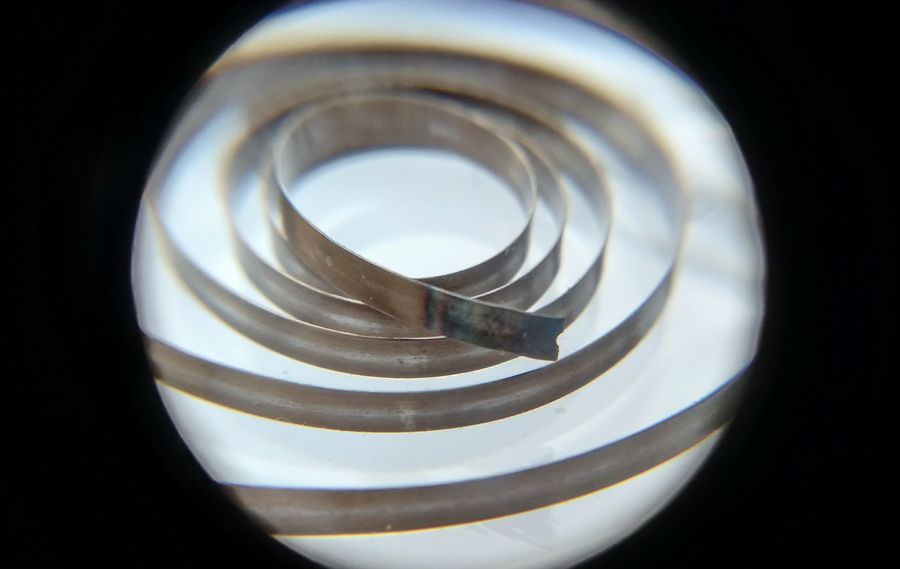
Next, in the softened part of the spring we need to make a loop like the one that was there, to wrap the spring around the arbor. We take a drill of suitable diameter, set it in a universal collet holder that will act as a hand micro-drill. If there is no suitable drill, the hole can be punched with a centre punch or even a nail, laying the spring on a wooden base, and then given the necessary elongated shape with a thin square needle file. Ah — the other day someone asked me, with a touch of mockery, what a watchmaker wants with needle files. Yes, yes. This is exactly what for!
The hole is drilled. Now… now I am cross, do not touch me. It may not come out right the first time, so I set the camera aside — it will only get in my way now — and settle down to the routine work. When I finish (if all goes well), I will show everything assembled. In short, off I went to the grubby fitter's table, for this is not done at the watchmaker's bench — too much mess. The caliber, of course, is superb. But the springs let it down. Yes, I will try to find an unbroken one, but for now I just want to get the watch running.
The next day. On the third attempt I managed to form the loop properly. I washed the watch and rebuilt it again — there was no other way; once the wheels are off, the lubrication is disturbed. But "the old clock is running." And the fact that the spring is now three centimetres shorter… well, never mind, it will certainly be enough for thirty hours. The main thing is not to despair and not to give up. For "he who wants to, finds a way; he who does not, finds an excuse."
And the final stage — admiration.
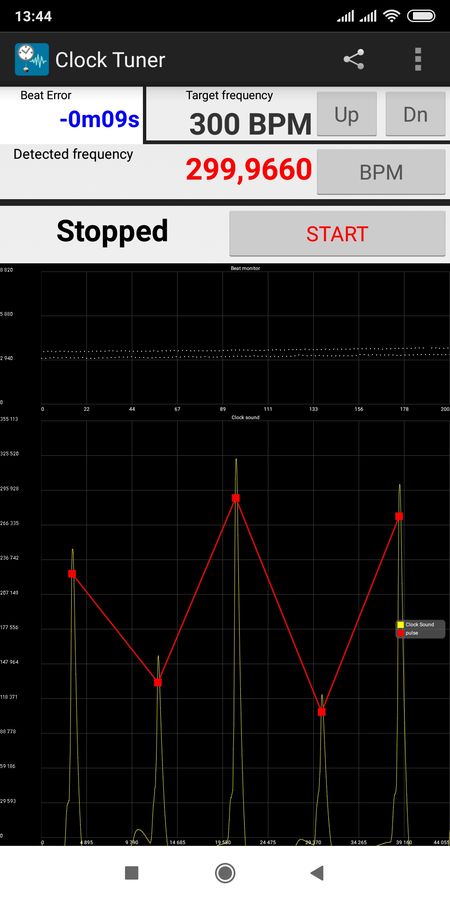
And what does our instrument tell us? Nothing bad at all!
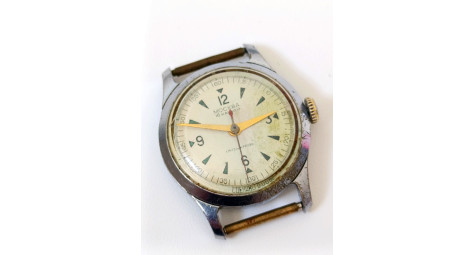
One last thing. I will, after all, show the protagonist of our story in his working clothes — the K-43 in his "diving suit."